One of the many things I disliked about working for a family newspaper was how fragile the editors were to reader criticism. If one person complained about the tiniest thing in a news story I’d written, I’d be dragged into the city editor’s office and raked over the coals about it.
They’d print a correction, clarification or retraction – even if it wasn’t warranted.
The editors’ temerity eventually seeped into my reporting and writing. If I thought someone would complain about the way I wrote a story or the subject matter, I would sanitize it to the maximum degree. Why? I needed the job to eat and stuff.
For the past 13 years I’ve been free of the corporate mamby-pamby poopy-butt stuff. It took awhile for the poison to pass through my system entirely (I’d been gagging on it for 21 years). And the result of this cleansing is my substack “The American Peasant.”
My writing for “The American Peasant” is the way I wrote when I was fresh out of journalism school. I was unafraid of speaking my mind (or perhaps too stupid to not be afraid of speaking my mind). I wrote like I talk and how I think.
Why do I keep that writing sequestered on the substack? Good question.
Recently we started running a few advertisements for “The American Peasant.” The ad (above) is goofy (it looks like I’m trying to sell a tape dispenser). And the reaction has been about what I expected.
Omar P. Bounds III: “Just because you can do some woodworking doesn’t mean you can’t be an ahole.”
Allison Loxsom: “I might have considered buying this. I’ll get something from a craftsman who doesn’t need to be vulgar to be cheeky.”
For me, this means the ad is working. These people wouldn’t like the substack and would be horrified if they subscribed. The language there is direct and unapologetic. The specific words are sometimes crass (and justified). And the topics are not what you’ll find in magazines or books. But they are things I’ve wanted to get off my chest for a long time.
Some readers have asked: Why not put this stuff on the Lost Art Press blog? It’s too personal. And I don’t want this stuff to appear in the same space as writing from our authors. That’s not fair to them.
A free subscription allows you to read about half the posts. It’s a good way to try things out and see if it’s right for you. “The American Peasant” is not for everyone, but it appears to be for a lot of people (“The American Peasant” has just as many subscribers as this blog.)
fig. 2.2.22. The human form resides just beneath the surface.
Below is a short excerpt (a sidebar) from “By Hand & Eye,” the first artisan geometry book by George Walker and Jim Tolpin.
In “By Hand & Eye,” the authors show how much of the world is governed by simple proportions, noting how ratios such as 1:2; 3:5 and 4:5 were ubiquitous in the designs of pre-industrial artisans. And the tool that helps us explore this world, then as now, are dividers.
One key to good design is to master these basic “notes” – much like learning to sing “do, re, mi.” How to do this is the subject of the first three-quarters of the book. It offers exercises, examples and encouragement in opening your inner eye, propping it up with toothpicks and learning the simple geometry that will help you improve your design.
Critics point out that modern builders and architects can fall into a malady called the Greek Temple disease: slapping together classical elements from antiquity to somehow capture a sense of power and integrity. Of course, they do so without a clue about where these qualities came from, and how they came to be imbued in buildings from antiquity. It’s an easy conclusion to make if we focus on the surface without considering there might be something deeper. It’s true that many of our revered civic buildings often were modeled after temples from antiquity. Historical design literature emphasized the perfection found in the Greek and Roman classic orders.
fig. 2.2.23. Because classic orders are anthropomorphized forms, it was even thought that an interior with multiple layers of objects based on the orders was filled with human forms.
Yet the tradition reveals something deeper than a fascination with carved stone columns. To the Greeks, the classic order was the embodiment of the human form, but also of the building itself. Sweep them away and the roof collapses. The Romans extended the idea that the orders embodied the human form, yet applied new materials: concrete and brick. The result was that walls could support a building without requiring the orders for structural integrity. Yet they still used the classic orders to organize the façade, even though columns often had little or no structural role. They began to shadow the orders using shallow representations, sinking pilasters and half-columns into a wall to suggest the order. Later, designers completely eliminated columns or pilasters but continued to weave the proportional sequences to organize a façade. An exterior or interior wall could be divided into beginning, middle and ending using mouldings and paneling to echo an invisible classic order. Not just walls, but just as the order has internal elements that repeat the beginning, middle and ending, other elements in an interior – windows, fireplaces, furniture, candle stands, lamps – all could shadow the classic orders. Because the orders embody the human form, designers were in essence filling their homes with a host of human figures large and small.
p.s. We’re working right now on a new artisan geometry book from George Walker and Jim Tolpin, “Good Eye, Skilled Hands,” that we hope will be out later this year. In it, they explore the practical applications of lessons found in historic furniture forms.
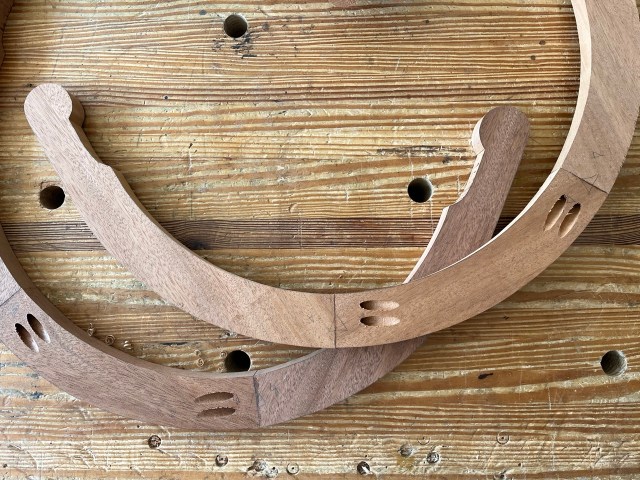
The underside of Chris’s two most recent arm bows.
It’s no secret that ensuring a tight joint between arm and mid-arm can be a challenge. We know this first hand and because readers have reached out in the past asking for advice on the matter. Well readers, wait no longer – Chris has spilled the beans on his method!
We recently created a video highlighting Chris’s match planing method, the technique he uses on all his arm bows. In the video, Chris welcomes all skill levels as he breaks down this approachable technique step-by-step. You can catch the how-to video below and on Youtube.
Enjoying this technique and video content? Take your skills even further and learn how to build a stick chair with Chris in this 18-part video series: Build A Stick Chair. Chris takes you along with him as he builds a chair design not found in ‘The Stick Chair Book’. From selecting lumber to applying wax, each step is explained and demonstrated with the beginner woodworker in mind.
Click here to buy and own the entire video series.
Driving on the comb during a chair class in Bavaria.
I just returned from two weeks (and then some) in Bavaria. For the most part I was teaching classes put on by Dictum GmbH. It’s been more than five years since I’ve taught there, so it was great to catch up with old friends and make some new ones.
Here’s a typical scene at dinner one night with the students. We got our menus and the students were explaining what a “divorce salad” was.
“Is this what you eat when you want a divorce?” I asked.
“Yes, of course,” they said.
“No,” I replied. “You are pulling my chain.”
Eventually we realized they were saying “die wurst,” which means “the sausage.” Not “divorce.”
And yes, they put hot sausages on a green salad here. Don’t knock it until you try it.
I’m returning to Dictum next year for two more weeks of teaching. The plan is to teach two chairmaking classes: A big ole comb-back at the workshop in Niederalteich. And an Irish armchair in the workshop in Munich. When registration opens for these classes, I’ll post the links here.
I made a short video of the Dutch tool chest class. Students came from all over the globe.
In between a few too many beers and Bavarian food, I managed to finish editing Megan’s Dutch tool chest book. It was worth waiting for. Soon we’ll begin designing the book, so it’s definitely coming out this year.
After teaching, I traveled to Nuremberg with Lucy to explore the city and see a lot of folk furniture at the Fränkisches Freilandmuseum. I could have spent three or four days there, but we had only one. I made a video of some of my favorite pieces and interiors. Take a look.
And now I’m back in the States. Happy to be home, but falling asleep at odd times until my body adjusts.
Traditional shop in miniature. This workbench scene, owned by tool collector John Sindelar, shows a complete, functioning shop. But what if you don’t own a bench?
The following is excerpted from “The Anarchist’s Workbench,” by Christopher Schwarz. The book is – on the one hand – a detailed plan for a simple workbench that can be built using construction lumber and basic woodworking tools. But it’s also the story of Schwarz’s 20-year journey researching, building and refining historical workbenches until there was nothing left to improve.
Along the way, Schwarz quits his corporate job, builds a publishing company founded on the principles of mutualism and moves into an 1896 German barroom in a red-light district, where he now builds furniture, publishes books and tries to live as an aesthetic anarchist. Oh – and the PDF of the book is free (see the first sentence at this link.)
There’s only one reason that the cheap-o workbench industry exists. And that’s because people think they need a workbench to build a workbench (or are truly delusional and think it will be fine for furniture making).
So many woodworkers I’ve met have spent $200 to $500 on a bench that isn’t worth the BTUs to burn. The things wobble like a broken finger. The vises hold like the handshake of a creepy vacuum salesman. They are too lightweight for even mild planing tasks.
You don’t need one of these benches to someday construct a “real” bench. In fact, I build benches all the time without the assistance of a workbench. It’s easy. Start with sawhorses. Glue up the benchtop on the sawhorses. Sawhorses + benchtop = ersatz bench. Now build the workbench’s base on top of that ersatz bench. Put the base and the benchtop together. You’re done.
If you want a temporary workbench until you build a “real” workbench, there are ways to get the job done with just a little money and a little frustration. This brief chapter seeks to give you some options. I know that some of you will insist on buying something as soon as you anoint yourself a woodworker. It’s an instinct we’re trained into as consumers. Here are a few things to put in your shopping cart instead of a cheap workbench:
Buy an industrial steel packing table with a hardwood top. You can get these from many, many suppliers (McMaster-Carr is one). These feature a heavy welded steel base and a wooden top that’s maple, if you’re lucky. These metal tables don’t rack like a cheap workbench and cost less (way less if you find a used one). You can screw thin pieces of wood to the top as planing stops so you can plane the faces of boards and legs and the like. And get a large handscrew clamp to stabilize boards when planing them on edge. These packing tables don’t come with any vises, of course, but you can fix that with your credit card.
Buy a couple bar clamps (you’ll need clamps no matter what) that are long enough to span the width of the top of the packing table. Screw a 4×4 below the benchtop right at the front edge of the top – this will allow you to clamp your work to the front edge of the benchtop so you can work on boards’ edges and ends.
That’s one solution. How about a simpler approach?
Use your kitchen cabinets, kitchen table or dining table as the workbench. You can clamp planing stops to the tabletop (you’ll need a couple F-style clamps for this). Don’t forget to buy a large handscrew clamp to help stabilize boards when planing them on edge on the tabletop.
For working on edges and ends of boards, buy a commercial Moxon vise, which you can clamp to any tabletop or countertop. This vise will let you work on the edges and ends of boards. Even after you build a “real” workbench, you’ll continue to use the Moxon and the handscrews.
Is that still too much money? Do you have a public park nearby?
Use a picnic table. Drive nails or screws into the top to serve as planing stops. With a picnic table you get both high and low working surfaces. You can drive some nails into the picnic table’s benches to act as a planing stop and use them like a Roman workbench.
Buy a couple big handscrew clamps (every woodworker needs these anyway). Clamp or screw these handscrews to the picnic table so they work like vises so you can work on boards’ edges or ends.
Here are other time-honored solutions I have observed in the wild.
Take four pieces of 3/4″ x 24″ x 96″ CDX cheap-o plywood and screw them together face to face to make a 3″-thick benchtop. Screw this benchtop to a used metal desk. The old metal desks that populated schools, warehouses and government offices are ugly, cheap and widely available. They are almost all 30″ high. Add a 3″-thick benchtop and you are in the right height range for most Americans. Some of these desks have MDF desktops. Some have sheet metal tops. Either way, you can screw your plywood benchtop to the desk. Bonus: The drawers give you tool storage. Add workholding as above.
Conscript an old dresser/bureau. This is a three- or four-drawer cabinet for storing clothes. One 19th-century book I read showed how to turn this into a workbench. Attach planing stops to the top of the bureau/dresser. For sawing, keep it simple – use 5-gallon buckets as sawbenches (thanks for that tip, Mike Siemsen). You also could clamp a Moxon vise to the top. The lower drawers are for storing tools. The upper drawer can catch sawdust (not my idea – it was mentioned in the book).
The Apocalypse Workbench When I teach or demonstrate woodworking on the road, the venue is occasionally luxurious and other times it’s more like “Lord of the Flies.” I’ve showed up at woodworking clubs where the workbench on offer was a folding table with metal legs and a particleboard top.
After years of encountering this problem, I learned to travel with an emergency kit of things that allowed me to work without bursting into sweat and tears in front of an audience. Here’s the kit:
Two large handscrews
Two 36″ bar clamps
Two F-style clamps (usually with 12″ bars)
Thin strips of plywood, usually 3″ x 24″ and in two thicknesses: 1/4″ and 1/2″
Small clamping pads of scrap plywood, to prevent denting my work when I pinch it
A few softwood shims
A couple simple bench hooks for sawing.
This kit has converted many desks and tables into somewhat-functioning workbenches. The handscrews and bar clamps act as face vises. The plywood scraps can be made into planing stops for planing with the grain or across it. And the F-style clamps can clamp my work – or other clamps – to the tabletop.
To be sure, I’m always happy to return home to my workbench. But until I find a way to fit it in an airplane’s overhead compartment, this kit has become a way that I can work almost anywhere.