Joshua Klein and company are working hard on the second issue of Mortise & Tenon magazine, and from all accounts it looks like it’s going to be another fine issue.
They’ll start taking pre-publication orders on Nov. 1 here, which is also where you can read about the articles that are planned for the issue.
Joshua had asked me to write an article for the issue, and had I proposed a piece on Kentucky-style furniture, a backwoods style that I’ve admired for many years and is on display at the Speed Museum in Louisville, Ky. (If you’d like a woodworker’s view of the museum, check out Mark Firley’s photo collection here and here.)
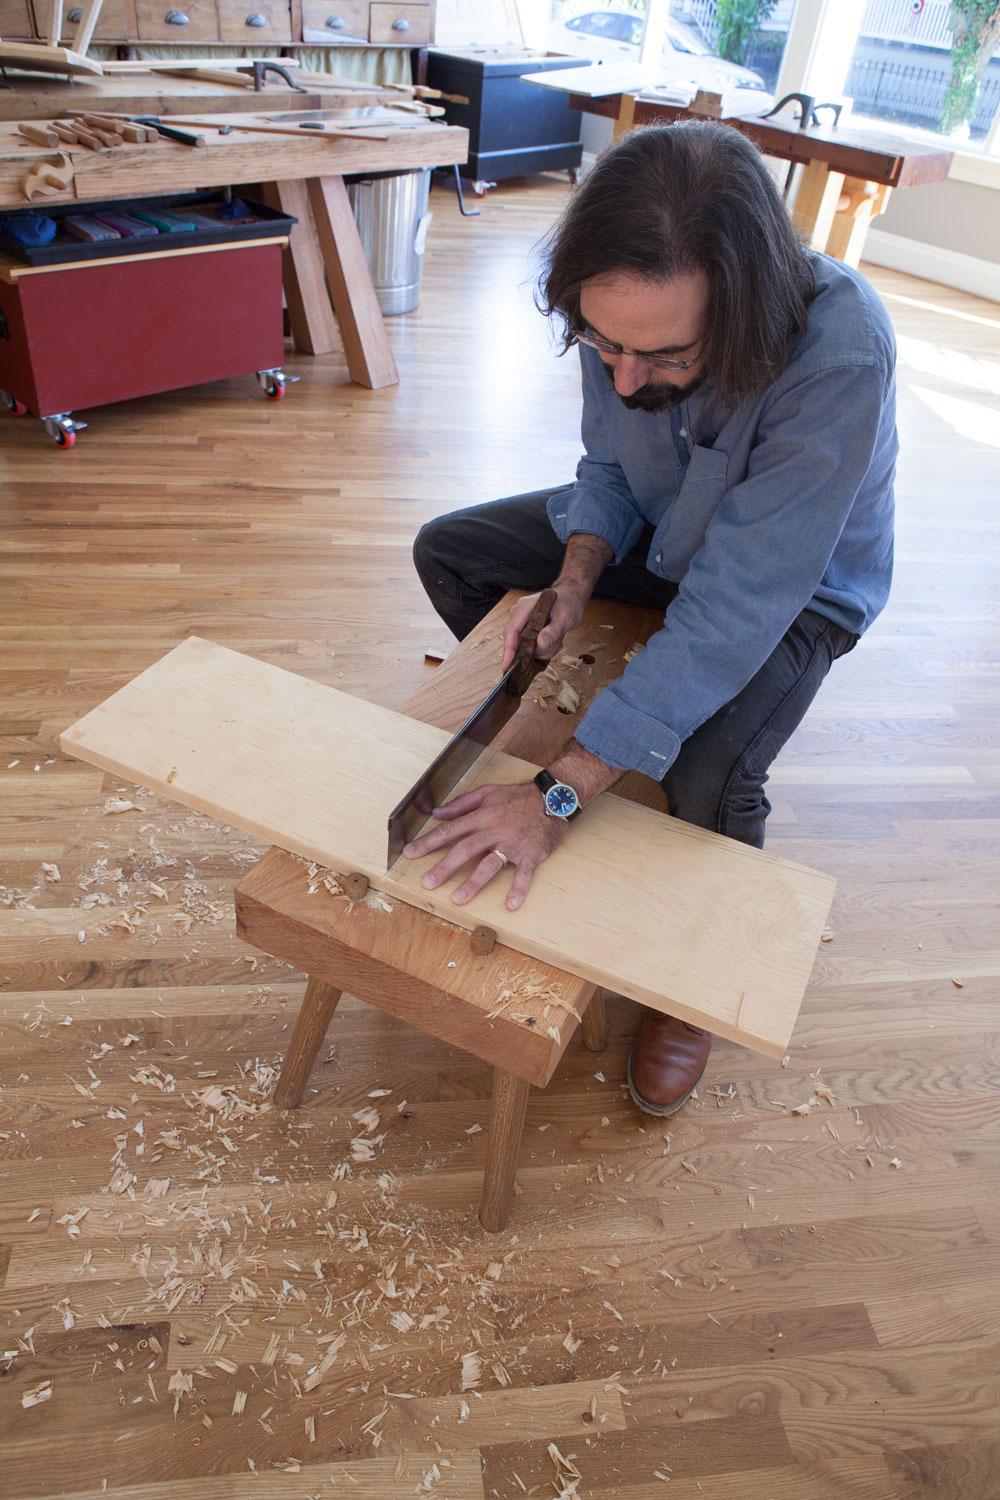
My summer went to crap, however, and so I wasn’t able to do the research and interviews that would make my article worth publishing. Luckily, Joshua was also interested in my Roman workbenches and let me write up an article on the interesting workholding on the low one that I built from Pompeii.
My understanding of the bench has increased greatly since Woodworking in America, and after working on it every day this fall. You might not think that it’s easy to work while sitting down, but you might give it another thought after you read the article. Roy Underhill helped me decode a couple of the important details for the article, and I hope to have a short book on the bench (and a 1505 workbench with a Roman undercarriage) ready for the printer by the end of the year.
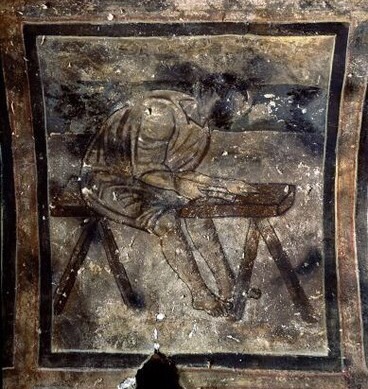
Imagine it is late spring in 1898 and you are a 29-year-old Moravian-born priest traveling with a tribe of bedouins to a desolate spot to look at some wall paintings in an abandoned building. You walk in and see colorful frescoes covering the walls and ceilings. In astonishment you see a whirl of dancing girls, hunting scenes, musicians and more. After 40 minutes you have to rush out and dash off because an enemy tribe is approaching. When you return to Vienna to present your findings no one believes you. The few photos you took are lost. The painted scenes you saw don’t fit with their timelines or their ideas, you have no proof, you must be a liar.
The traveler was Alois Musil, known as Musa Rweili to his bedouin friends. He returned the following year and several years after that to document the bath house, the sole remaining structure of the desert citadel known as Qusayr’Amra. Built in 723-743 and located in present-day Jordan, Qusayr’Amra was one of 18 desert citadels built during the Umayyad period. The bath house is built in the Roman style (this region was previously in the Roman Empire) with a hydraulic water supply, a triple-vaulted caldarium and unique floor-to-ceiling frescoes.
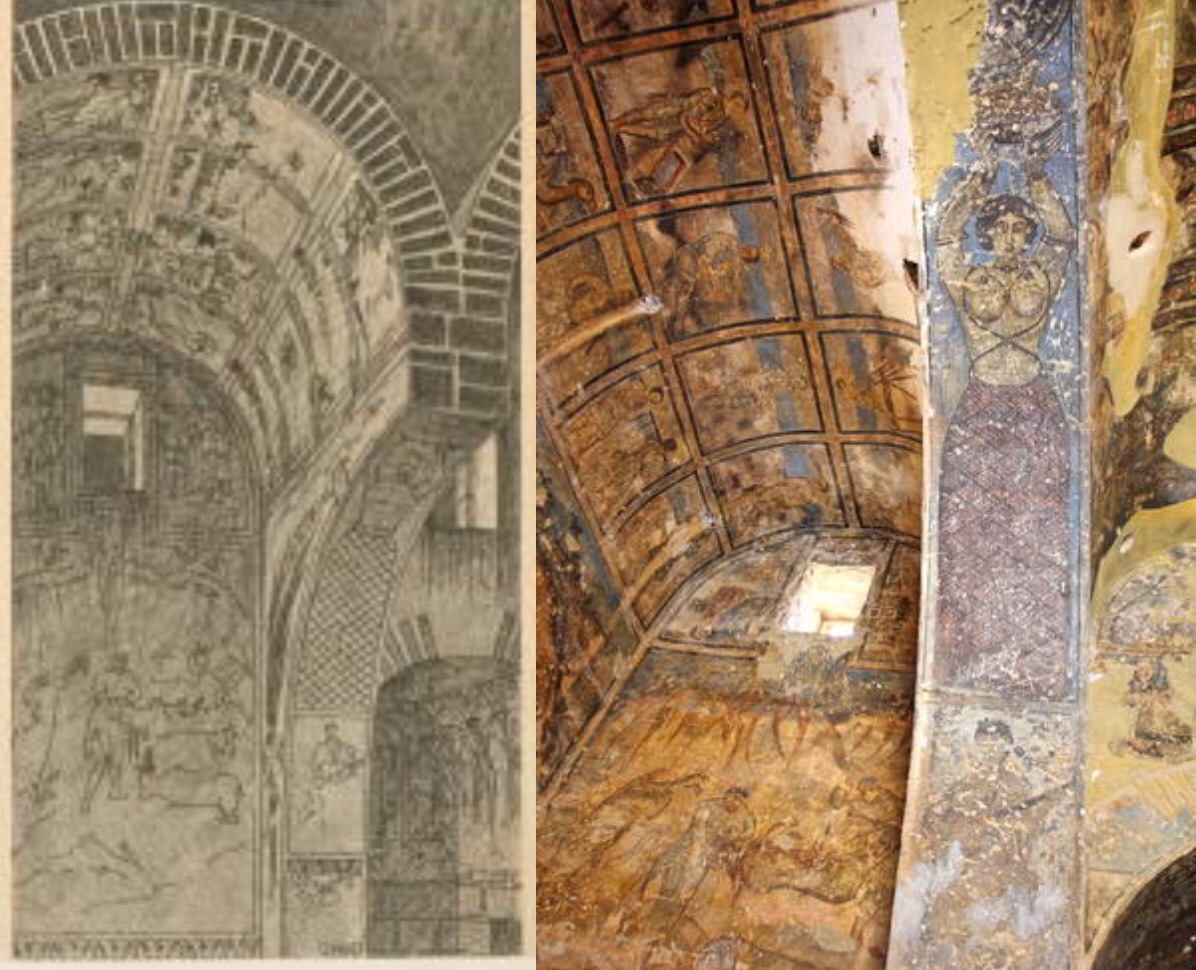
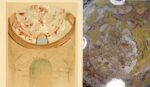
Craftsmen ceiling panels. 1909 drawing (l.) and present day (r.)
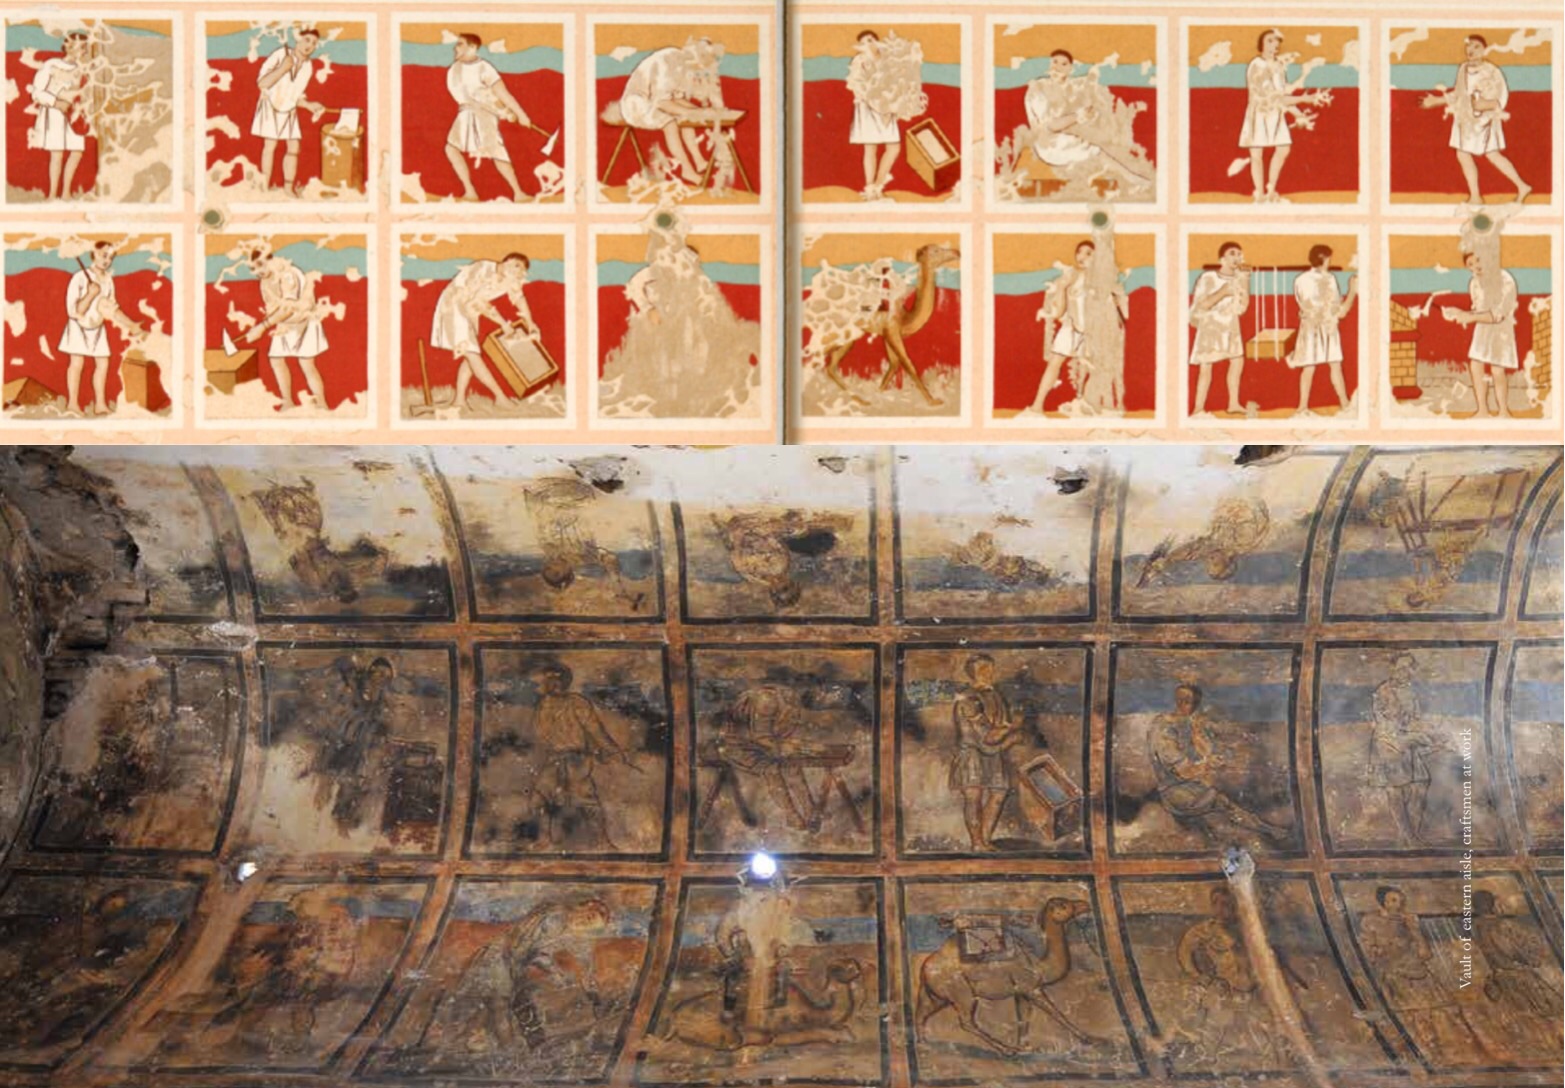
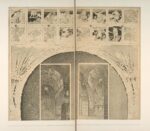
And what frescoes! To put it mildly there are girls, girls and partially clothed girls. And in between there are hunting scenes, flora, cavorting fauna and on one vaulted ceiling 32 panels of carpenters, masons and blacksmiths.
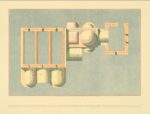
Craftsmen panels. 1909 artist’s reconstruction (top), actual panels below.
Other surviving citadels had hunting scenes, but no girls, and certainly no display of working craftsmen. But if you think about it, why not? While your guests soak in the warm waters of the caldarium surrounded by these fantastic paintings you are impressing them with your power and wealth. Including the panels of craftsmen may seem an anomaly but is another indication of material wealth and resources. The citadel and bath works were built and decorated with the skills of a small army of carpenters, masons, blacksmiths and artists. Thanks to this 8th-century showmanship, and the persistence of Alois Musil, we have more pieces to add to the woodworking record.
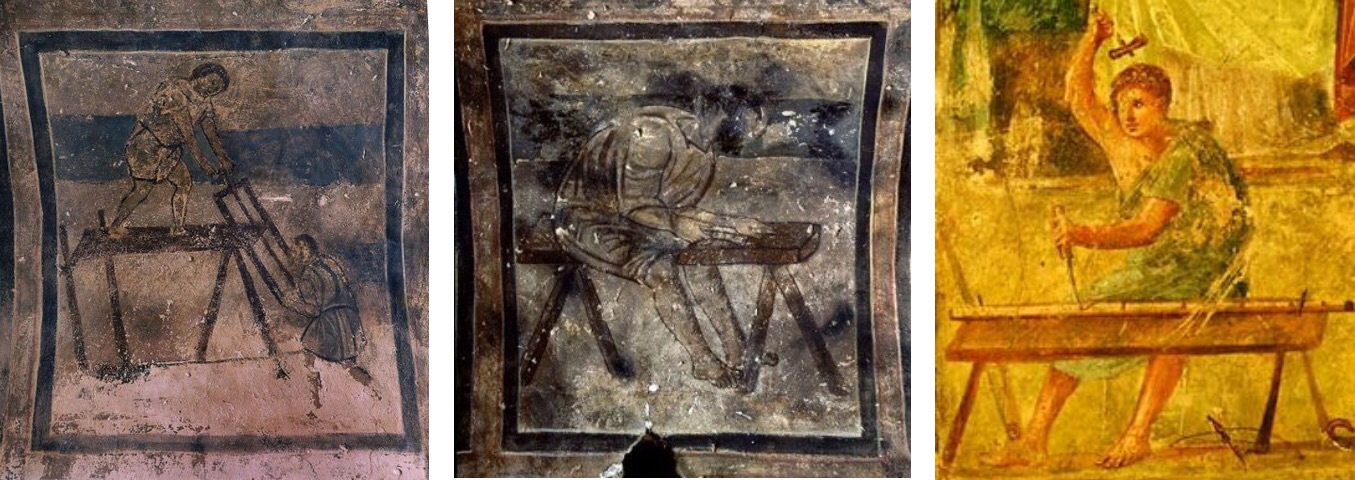
The panels with the sawyers and the worker on the bench are the only woodworking panels still intact enough to discern details (likely due to their locations away from water leaks). Both panels have had some restoration work. The Roman workbench detail from Pompeii (dated about 660 years earlier) is included for comparison. The craftsmen panels don’t show any innovations in tools or techniques, rather a continuation of Roman-era traditions.
The frescoes have sustained damage from almost 1,300 years of exposure to weather, water leaks, camp fires, vandalism and unfortunate efforts at conservation. Musil, accompanied by artist Alphons Leopold Mielich, attempted to treat some the wall frescoes with chemicals causing pigments to fragment and fall off. While attempting to remove sections for transport to Vienna, other portions of frescoes were destroyed. The few sections that did make it to Europe are in museums in Vienna and Berlin. Qusayr’Amra was designated a UNESCO site in 1985 and current conservation efforts are under the direction of the World Monuments Fund.
In 1909 drawings made by Mielich were published in a two-volume folio and included reconstructions of the larger frescoes. The New York Public Library has one volume of the folio and a digital copy is available on line under the title Kusejr’Amra. I was able to match a few of the 1909-era drawings with more recent photographs.
Musa Rweili (Alois Musil).
Alone in the desert.
Contruction details.
Site plan, Kusejr’Amra folio, 1907 (NYPL).
Detail of the Craftsmen panels and entrances, Kusejr’Amra, 1907 (NYPL).
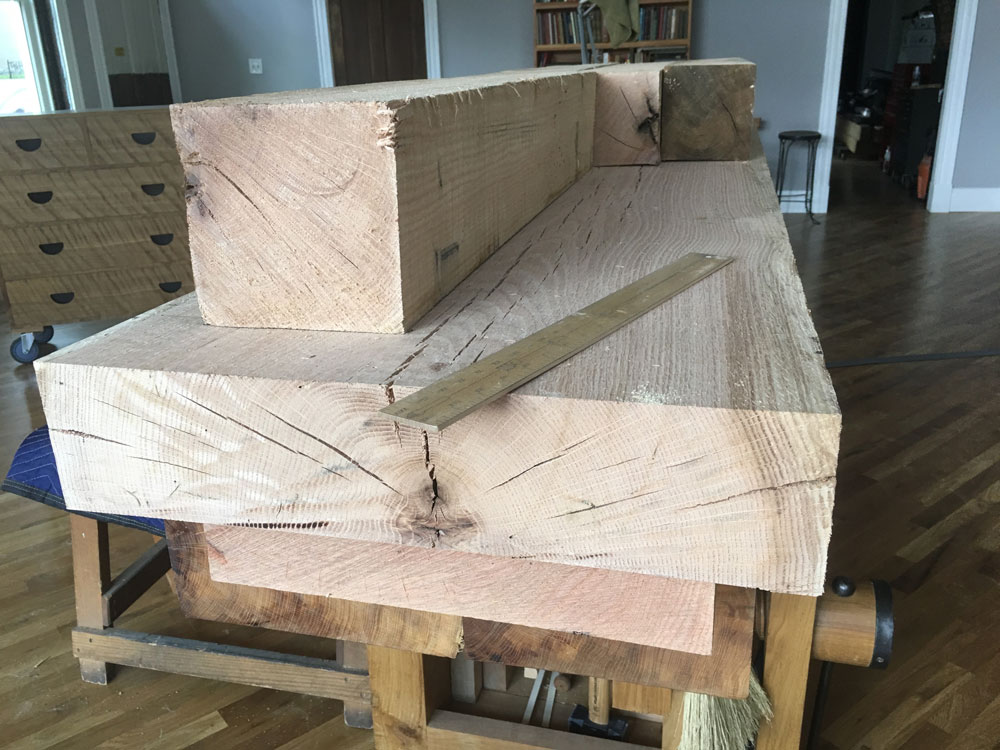
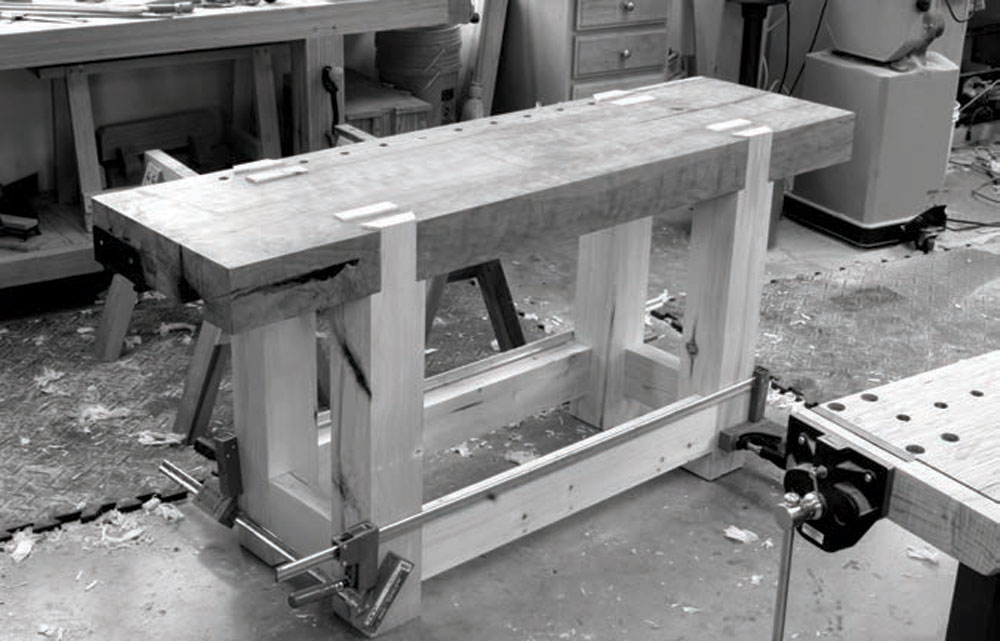
With several hundred pounds of red oak now sitting on my workbench, it’s time to get serious about building the two benches for my next book, “Roman Workbenches.”
The simpler of the two benches has a top that is about 3-1/2” thick, 18” wide and 7’ long. This will be a low bench – somewhere slightly above knee height but below the groin. The height will require some experimentation because the operator needs to sometimes straddle the benchtop for some operations.
As a result, 38” would be too high, even with my ostrich legs.
This bench’s workholding is super-simple: a planing stop (copied from one recovered at the Roman fort at Saalburg) and a Roman holdfast. Both iron bits were made by blacksmith Peter Ross. In the last couple months I have become very fond of the Roman holdfast, which holds like crazy.
This simpler bench will also feature some holdfast holes that occasionally will have some tall wooden stakes in them. More on this later (those of you who have read “Woodworking in Estonia” probably know what I’m tilting at).
The second workbench will be taller and made with a larger slab of oak. It will have a wagon vise (perhaps the first one ever illustrated), a series of forged-iron dogs and a twin-screw vise. Oh, and a ripping notch.
Both benches will be made using staked construction with no stretchers connecting the legs. For a variety of reasons I’ll explain later, the legs’ tenons will be cylindrical instead of tapered. Boring these 3”-diameter compound-angle mortises might seem like it will require a ship’s auger. But I have a plan.
Awhile ago we told you about Mary May, one of our favorite classical woodcarvers, and her forthcoming book: “The Acanthus Leaf: A Rite of Passage for the Classical Carver.” It’s now in-house. And it’s tremendous.
This week I flowed all the text into InDesign, and checked out the images and illustrations. And here’s what struck me: The exhaustive amount of attention and detail Mary put into teaching.
Artists, by nature, often do their best work while in the zone. In her book Mary talks about her first real carving job, which she completed in her modest second-floor apartment in a small Victorian-era house in Minneapolis. (Each chapter begins with short stories like these, allowing us to be privy to her woodcarving life thus far, and they’re a joy to read.) Her workbench was in her bedroom. Her work was to carve a pastoral African scene in an oval-shaped umbrella stand made of butternut. “On most days, I was so engrossed in my work that I became completely lost in the carving world,” she writes. “There were times when I discovered that it was 3 a.m. and I was still pounding away with my mallet and making chips fly across the room.”
And yet, with this book, Mary steps out of that zone again and again and again to write detailed steps, draw detailed illustrations and take detailed pictures. She makes a most impressive art suddenly seem accessible.
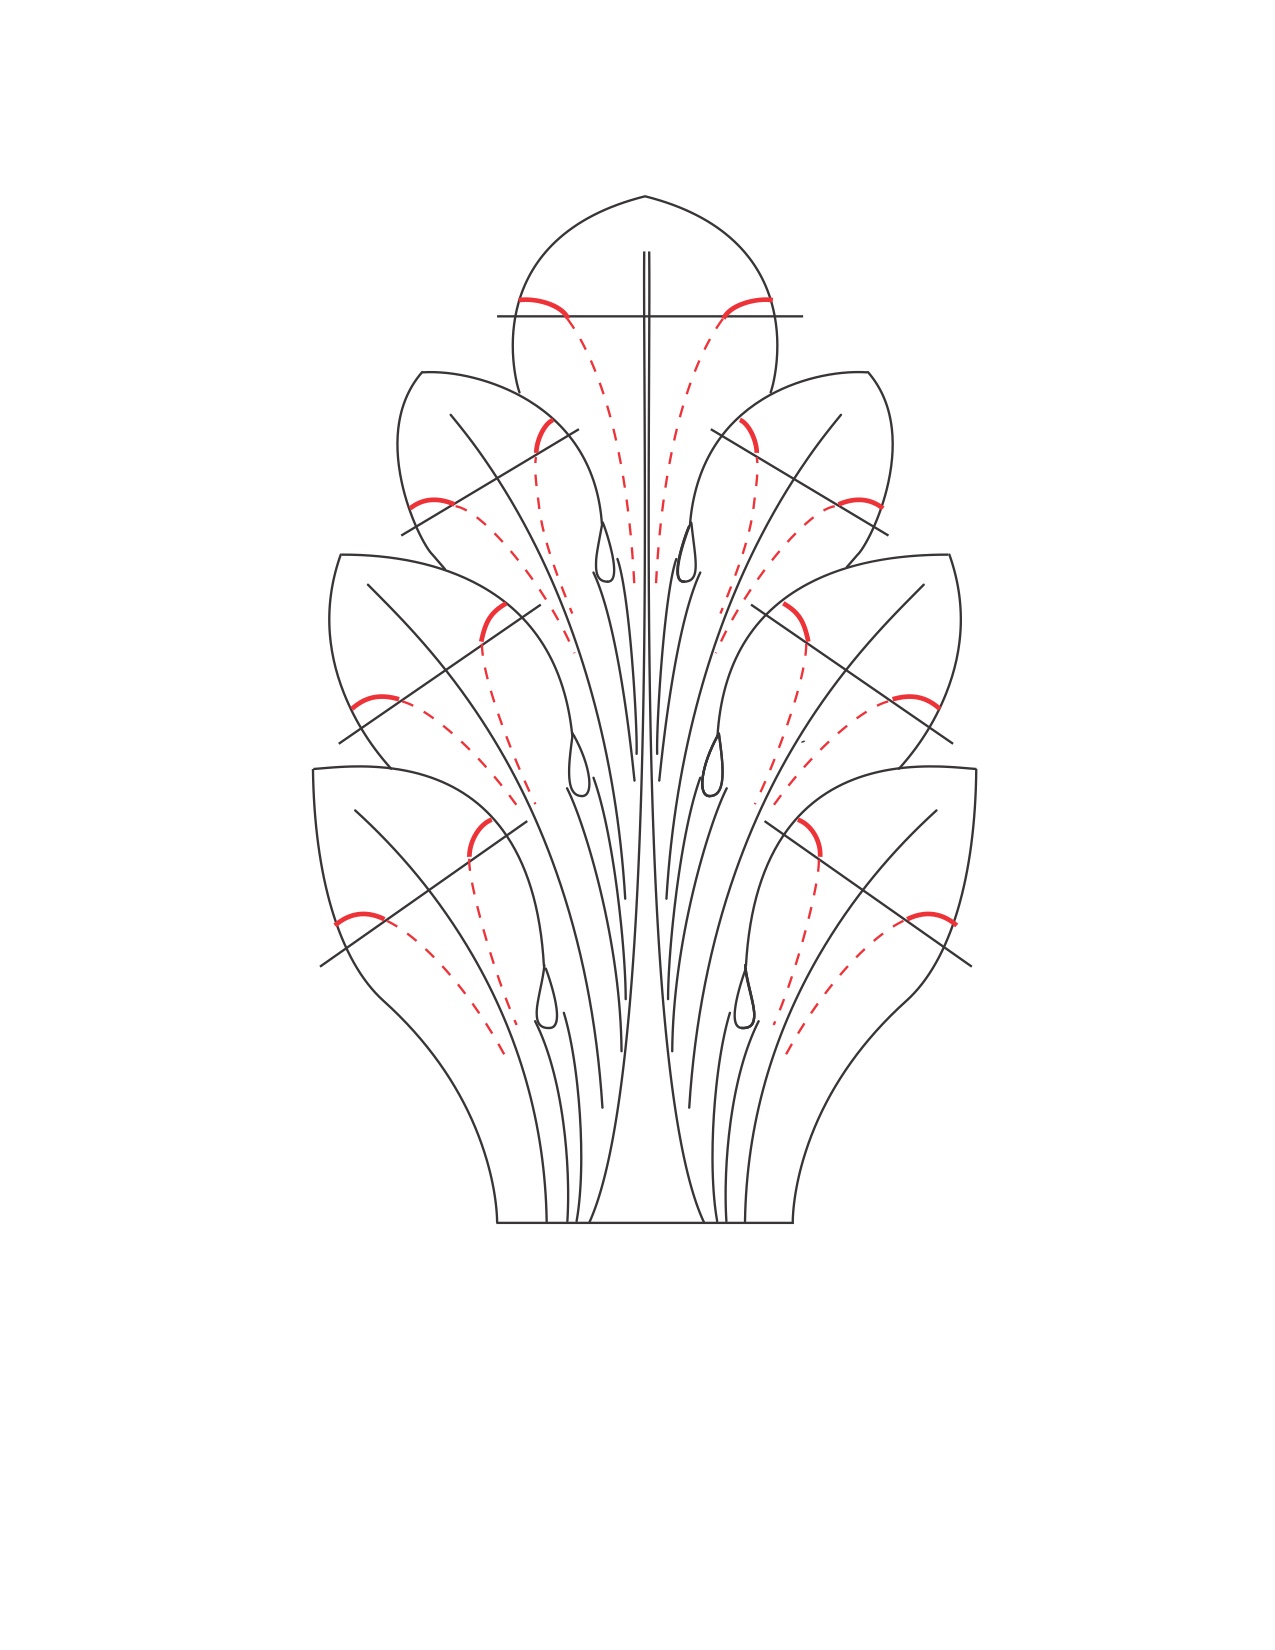
With each new leaf (from basic to Roman to Scandinavian to Greek), she teaches you how to draw the leaf, and then carve, with thoughtful illustrations and photographs. Take, for example, the basic acanthus leaf. She walks you through a simple 12-step drawing process. Here’s the illustration for Step 10:
Then she walks you through the carving process, with carefully written instruction, including proper tool selection, illustrations and photographs.
The book also includes a fair amount of history and photographs of the acanthus leaf as seen on antiques and in architecture around the world.
Now begins the editing and design process, which we’re all looking forward to. To get updates on Mary’s book, consider subscribing to her email newsletter here. We don’t have a release date yet for the book, but when we do we’ll be sure to let you know.
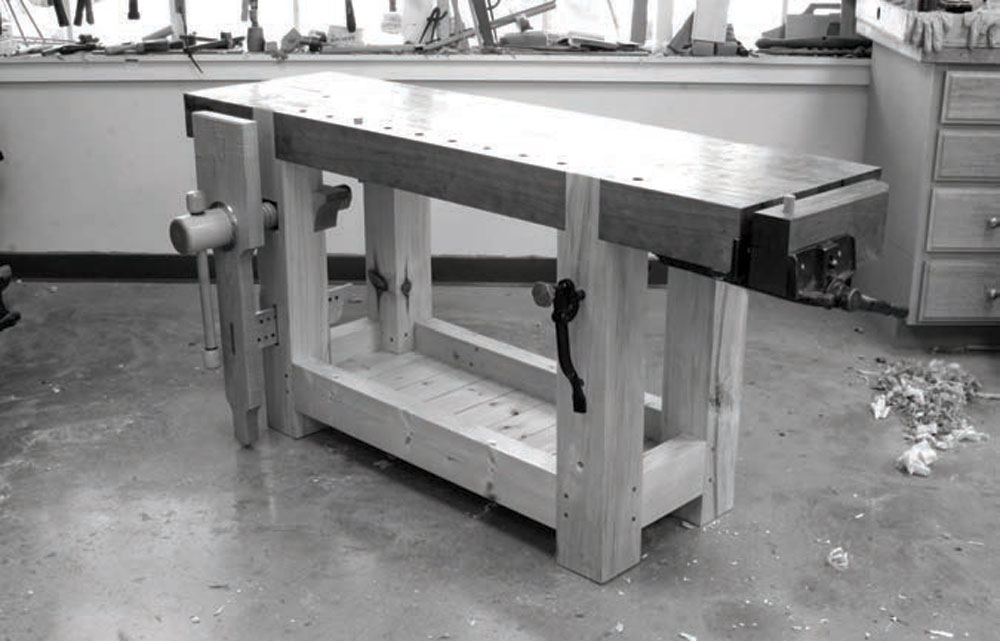
My daughter’s bench. This French-style workbench has yet to fail me. It is sturdy, heavy and easily holds boards when working their faces, edges and ends.
Workbench I have written two books on workbenches that agonize over the details of joinery, wood selection, vises and so on. But if you don’t want to buy those books, here is the down-and-dirty data you need to pick a bench design.
Note: Before you write me an angry letter about this list – you don’t have to have a good bench to be a good woodworker. You can work on the kitchen table and make world-class work. But a good bench will make many operations easier. It’s simply a tool: the biggest clamp in the shop.
Rule No. 1: Always Add Mass
For workbenches, here’s my maxim: If it looks stout, then make it doubly so. Everything about a workbench takes punishment that is akin to a kitchen chair in a house full of 8-year-old boys.
Early Roman workbenches were built like a Windsor chair. Stout legs were tenoned into a massive top and wedged in place. Traditional French workbenches had massive tops (up to 6″ thick), with legs that were big enough to be called tree trunks. Later workbenches relied more on engineering than mass. The classic Continental-style workbench uses a trestle design and dovetails in the aprons and vises to create a bench for the ages. The 19th-century English workbench uses an early torsion-box design to create a stable place to work. And good-quality modern workbenches use threaded rods and bolts to tighten up a design that lacks mass.
Many inexpensive commercial benches are ridiculously rickety. They sway and rack under hand pressure. You can push them across your shop by performing simple operations: routing, sawing, planing. If the bench looks delicate or its components are sized like a modern dining table, I would take a closer look before committing.
A big thick top and stout legs add mass that will help your work. Heavy cabinet saws with lots of cast iron tend to run smoother than plastic ones. The same goes with benches. Once your bench hits about 300 pounds, it won’t move unless you want it to move.
Permanent. The sliding dovetail and through-tenon on this French bench makes a bench where the base and top act as one.
Rule No. 2: Use Stout Joints Overbuild your workbench by using the best joints. These are times to whip out the through-tenon and dovetail. If you followed rule No. 1, then rule No. 2 should be no problem. Your joints will be sized to fit the massive scale of your components. If you cannot rely on mass, then you should beef things up with superior joinery. While dovetails and through-tenons are overkill for a towel rack, they are de rigueur for a bench.
That’s because you are applying wracking force to the workbench with typical operations and your vises will do their best to tear apart your bench. All wooden vises need to be overbuilt or they will self-destruct when you cinch them down hard. I’ve even seen a vise rip a benchtop from its base.
Make your tenons thick and your mortises deep. If you know how to drawbore a mortise-and-tenon joint, this is one good application. Have you ever been in a timber-framed barn? Did you look at the joints? They’re massive and pegged. Imitate that.
I think benches are a good place to practice your skills at cutting these classic joints, but some woodworkers still resist. If that’s you, you should investigate hardware to strengthen your bench. Threaded rods, bed bolts, special bench bolts or even stove bolts can turn a spindly assembly into something rigid that can be snugged up if it loosens. The hardware won’t give you mass, but it will strengthen a rickety assembly.