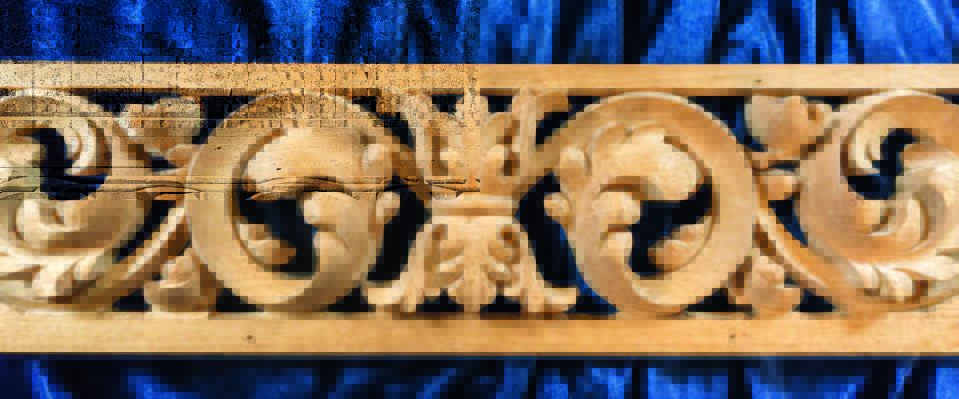
Theofanis Andravidiotis, Athens, Greece.
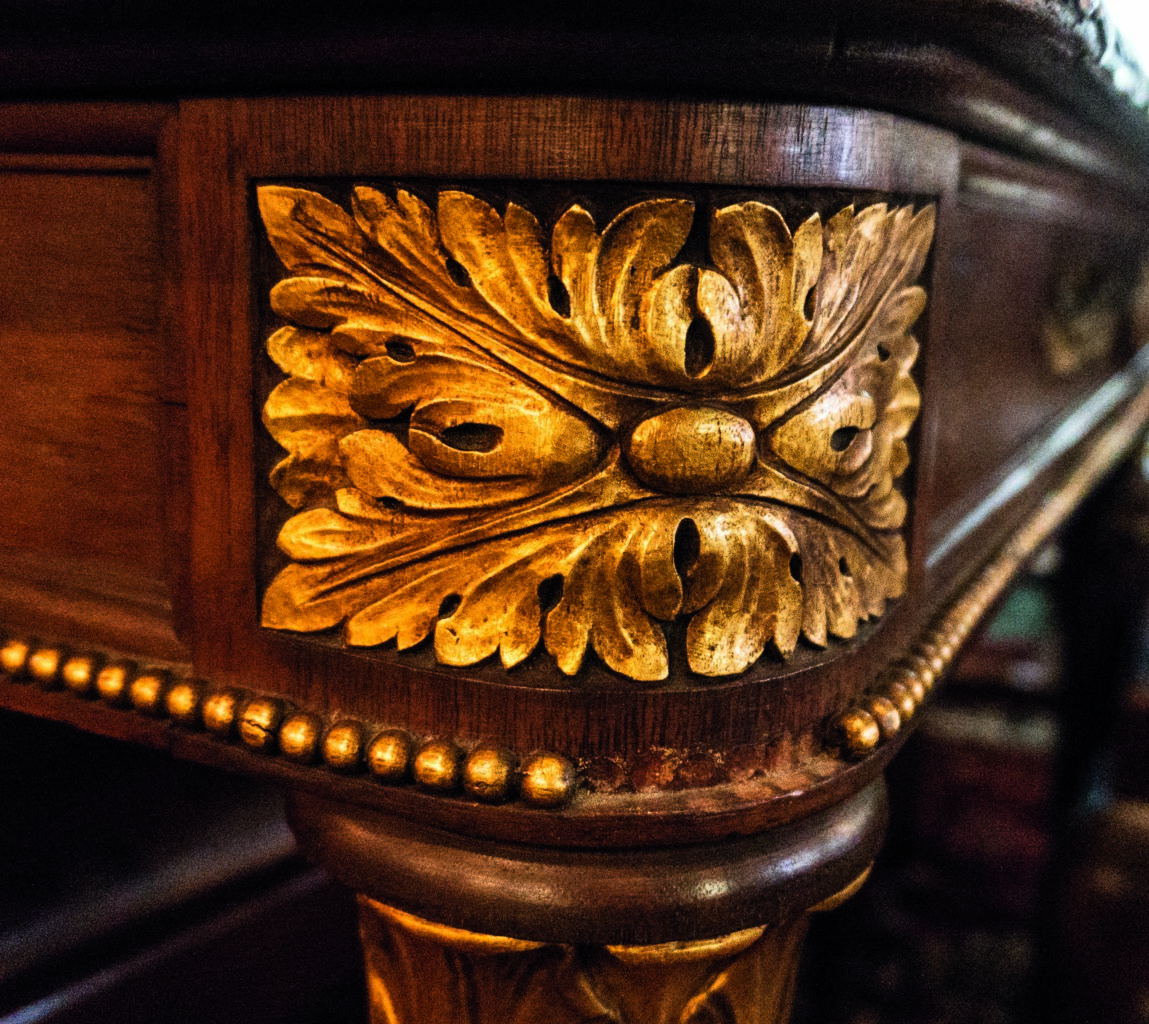
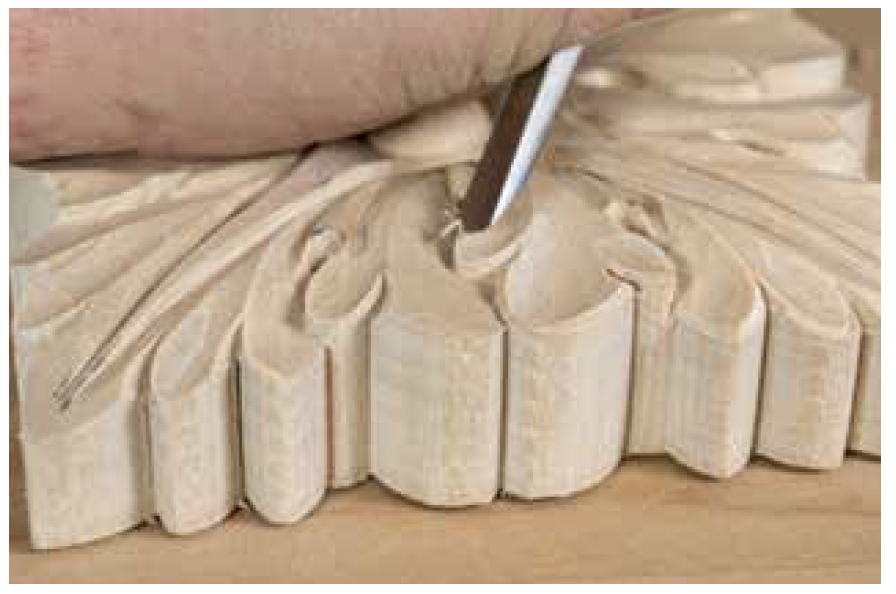
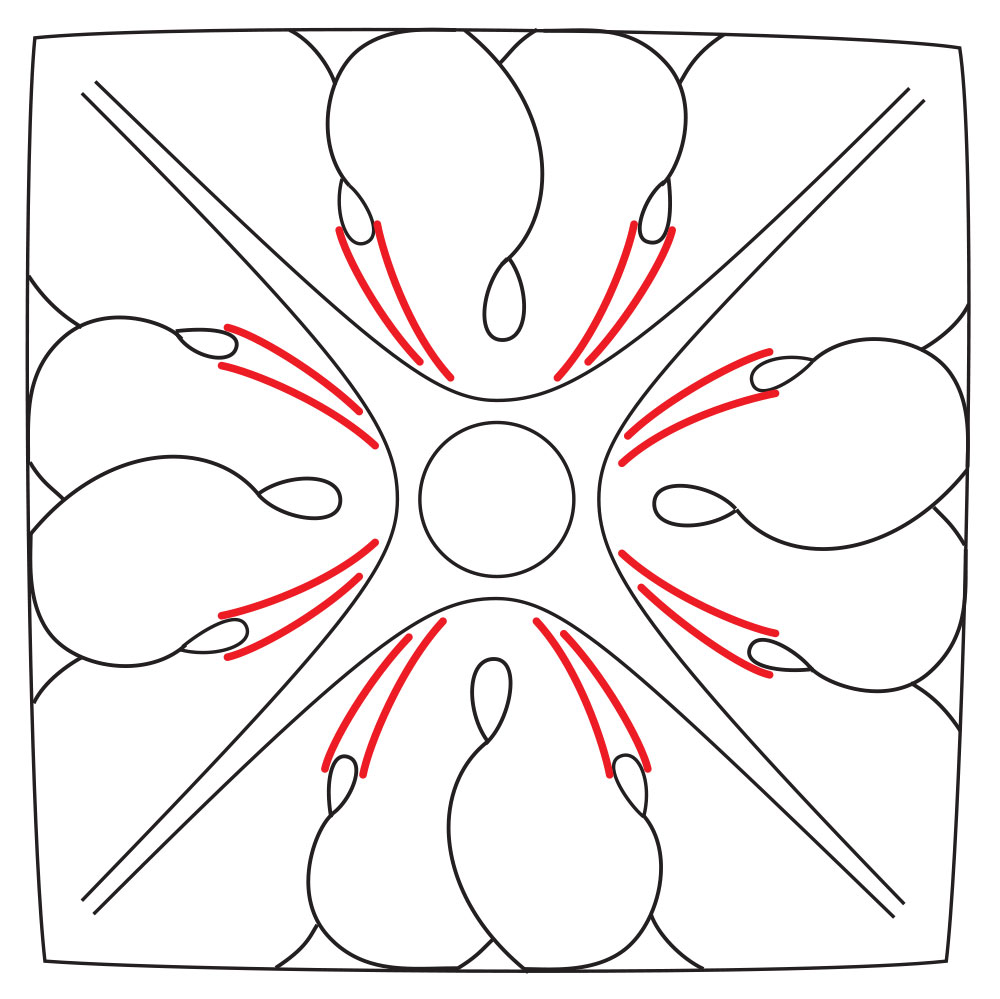
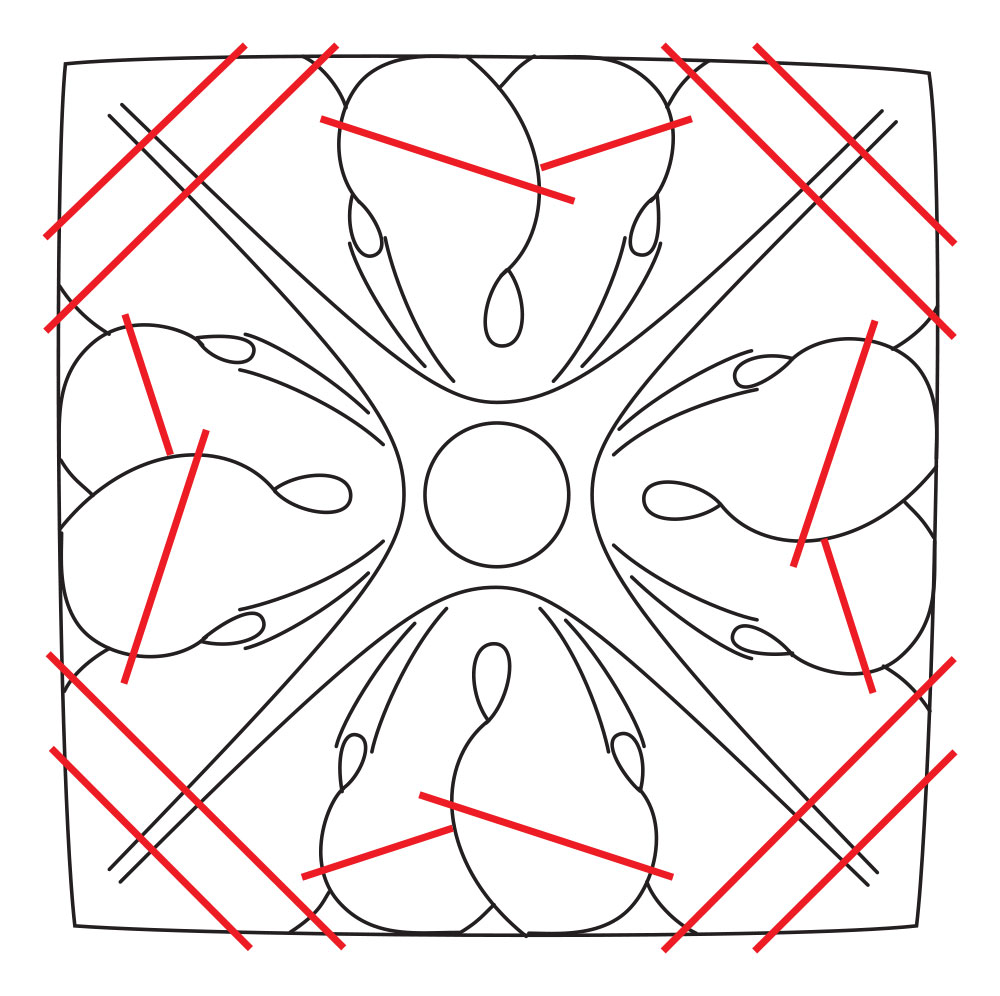
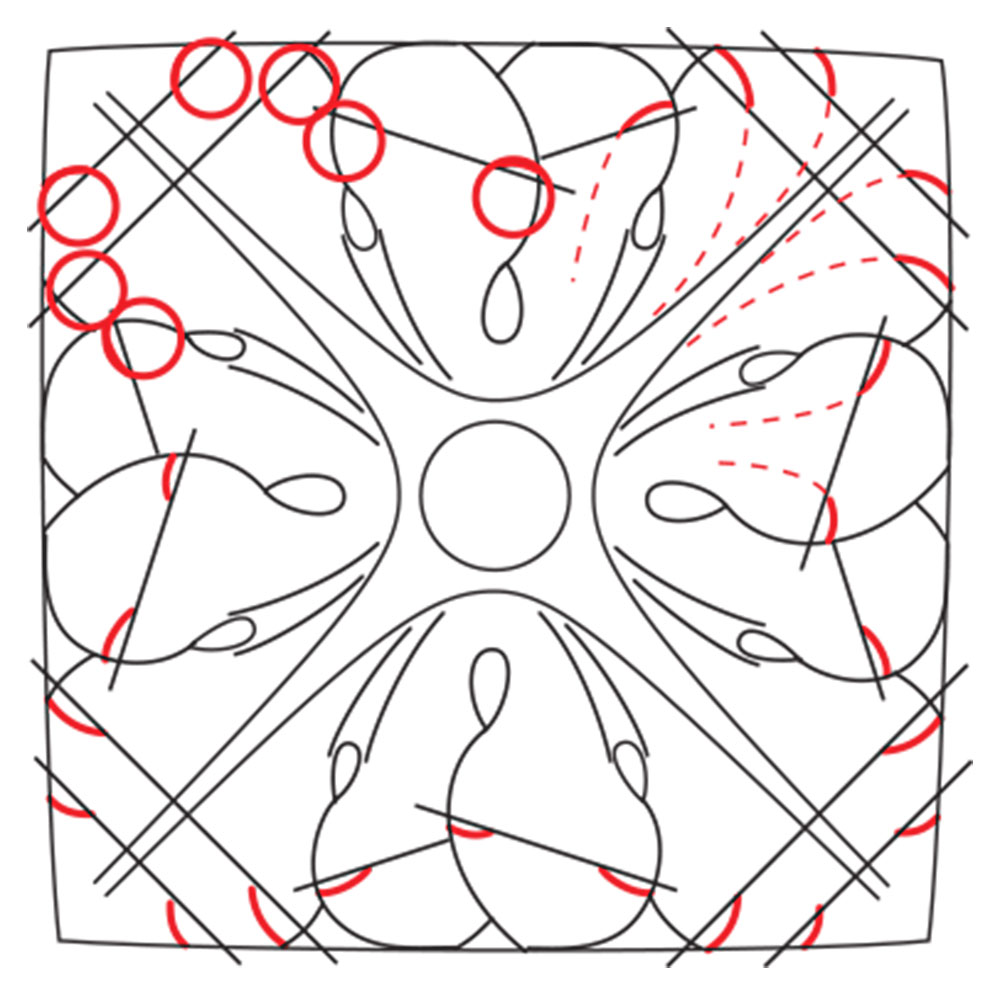
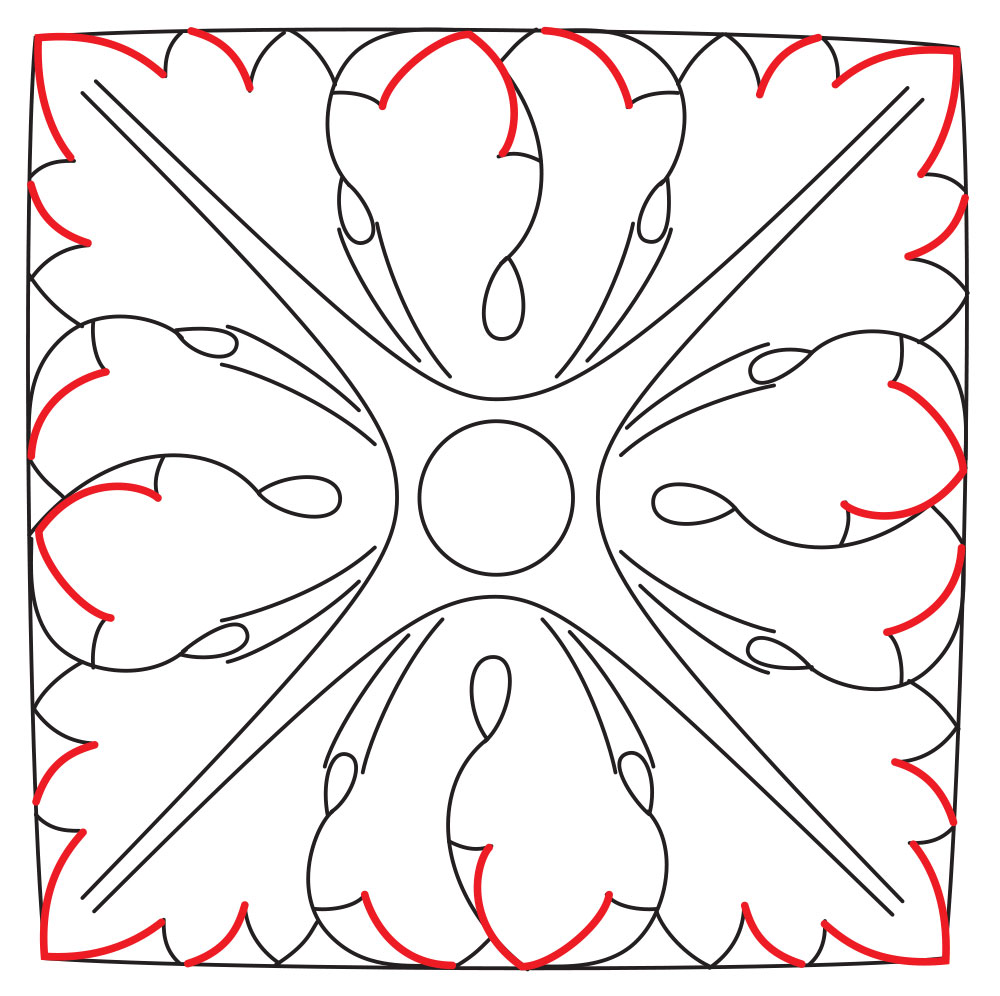
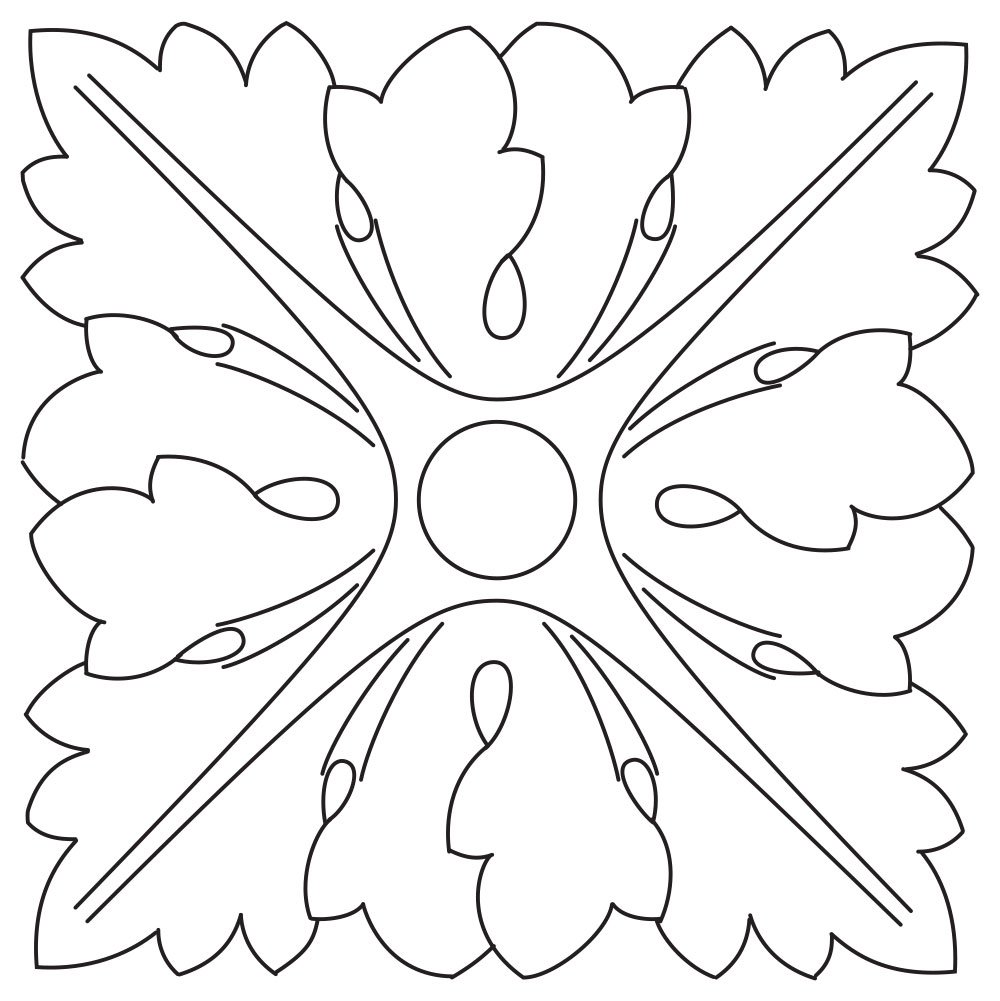
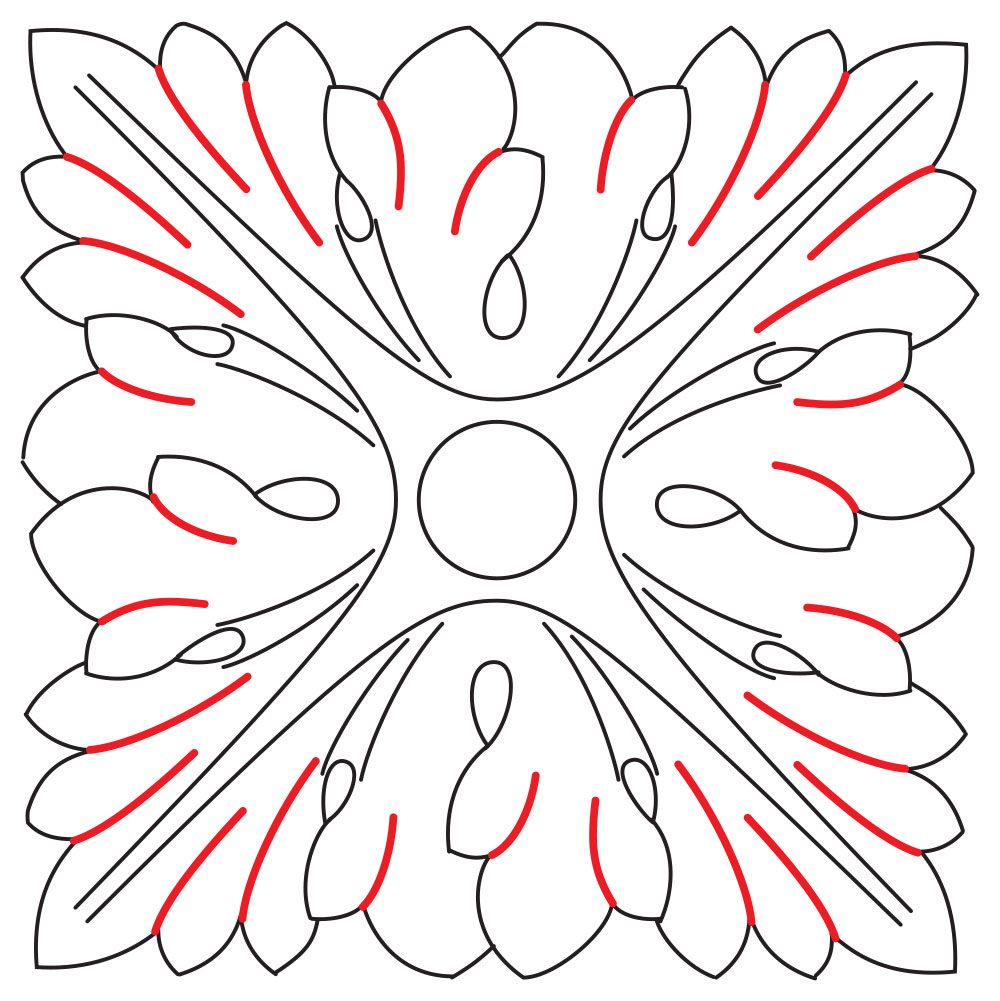
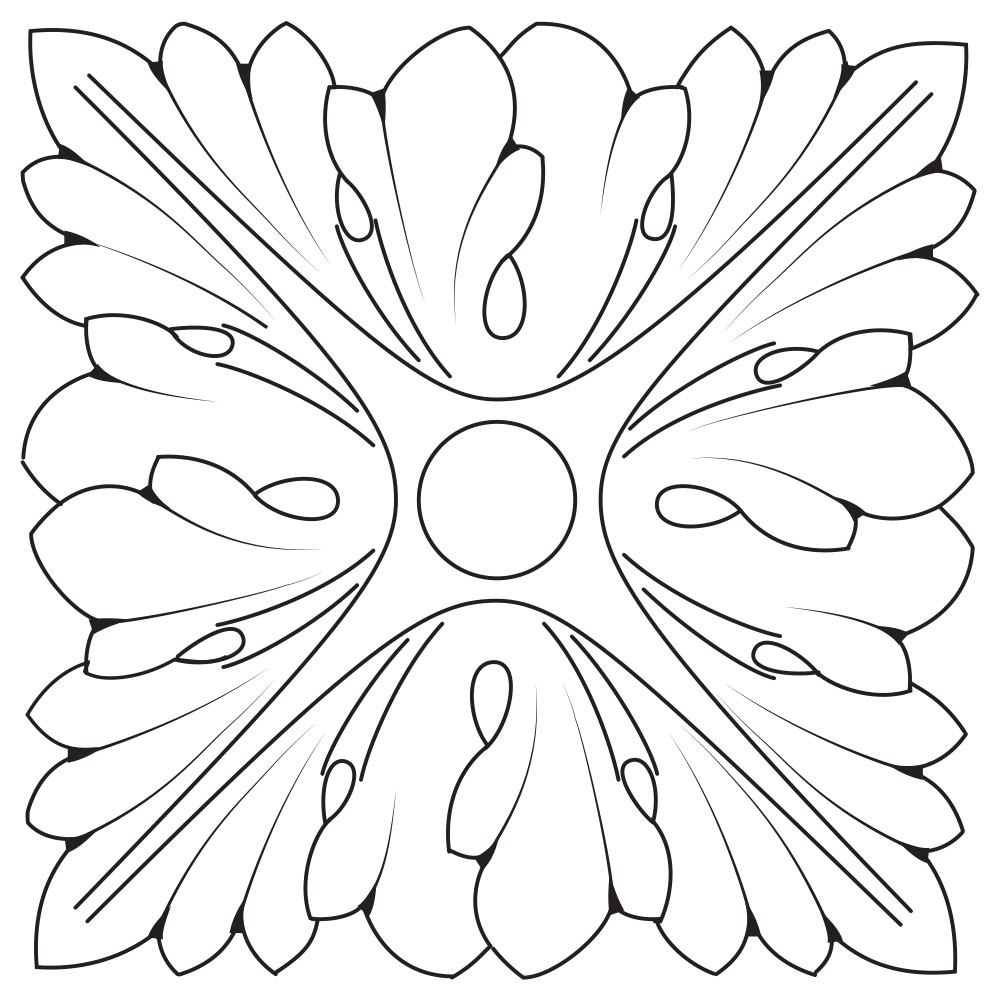
The following is excerpted from Mary May’s “Carving the Acanthus Leaf.” Learning to carve the acanthus leaf is – for carvers – like a pianist learning a Chopin étude, a young oil painter studying the genius of Rembrandt or an aspiring furniture maker learning to cut dovetails by hand.
For carvers, especially those who focus on Classical Western ornament, there comes a time they will inevitably encounter the acanthus leaf, learn it, master it and finally incorporate it into their own designs.
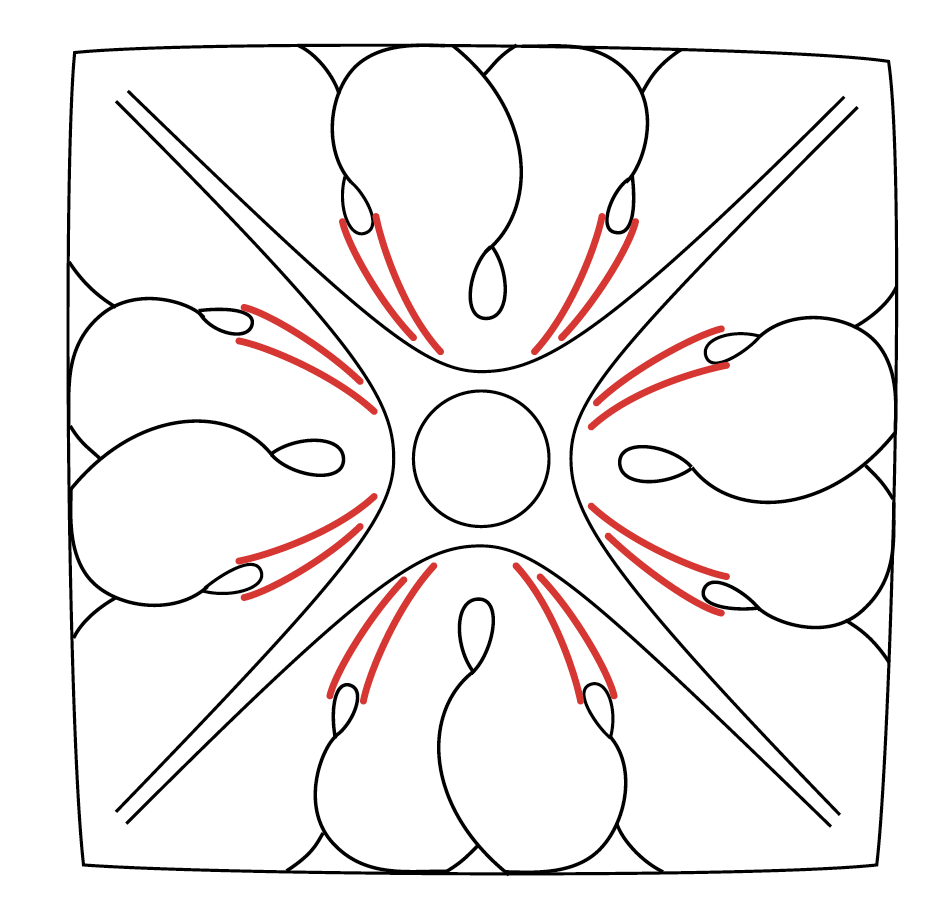
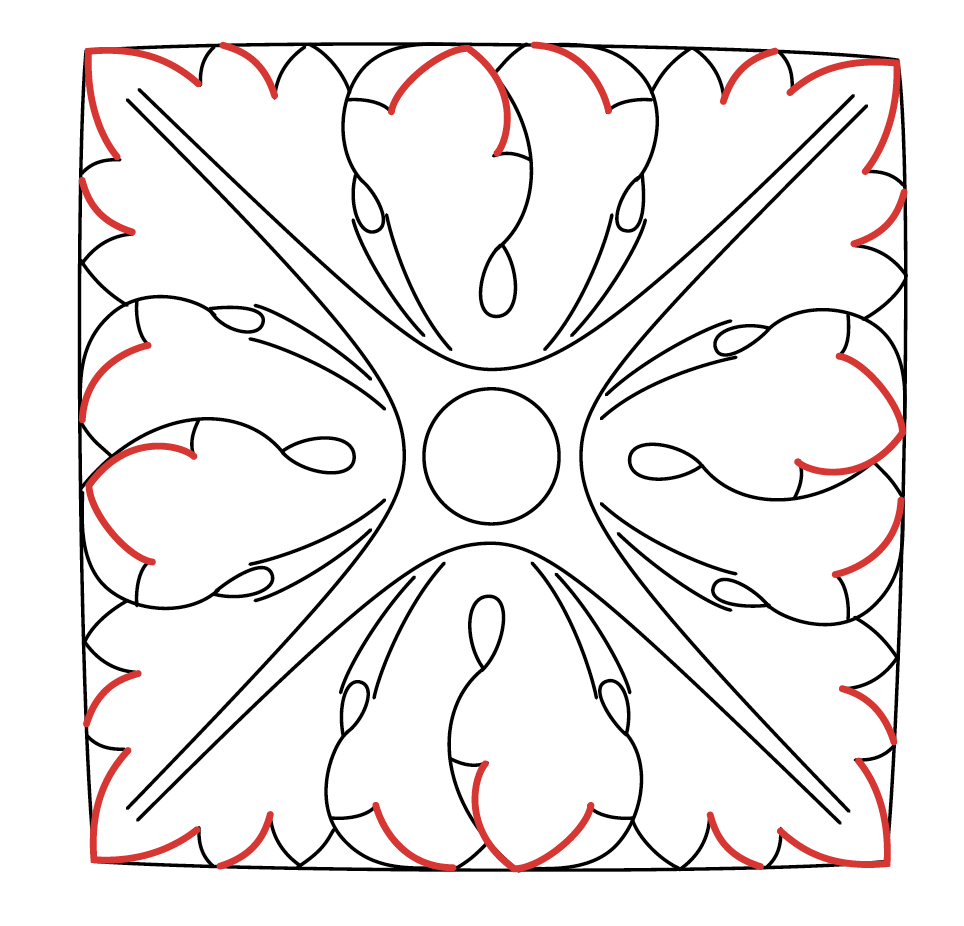
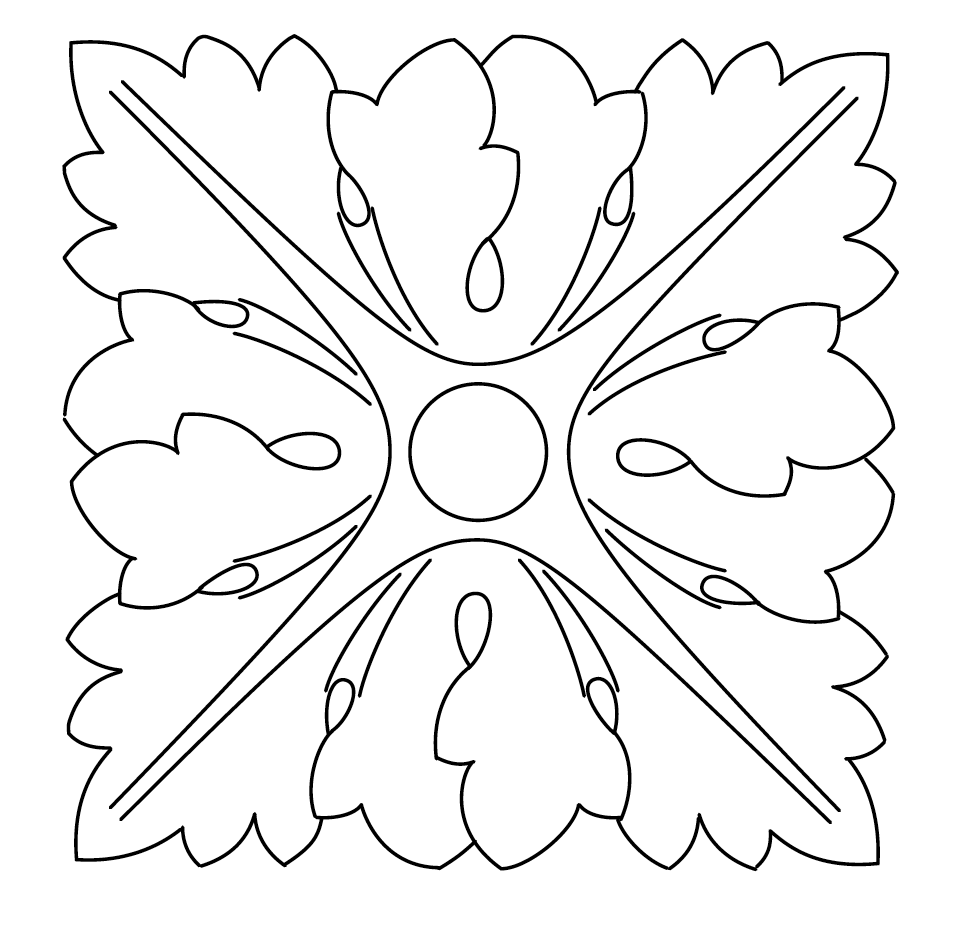
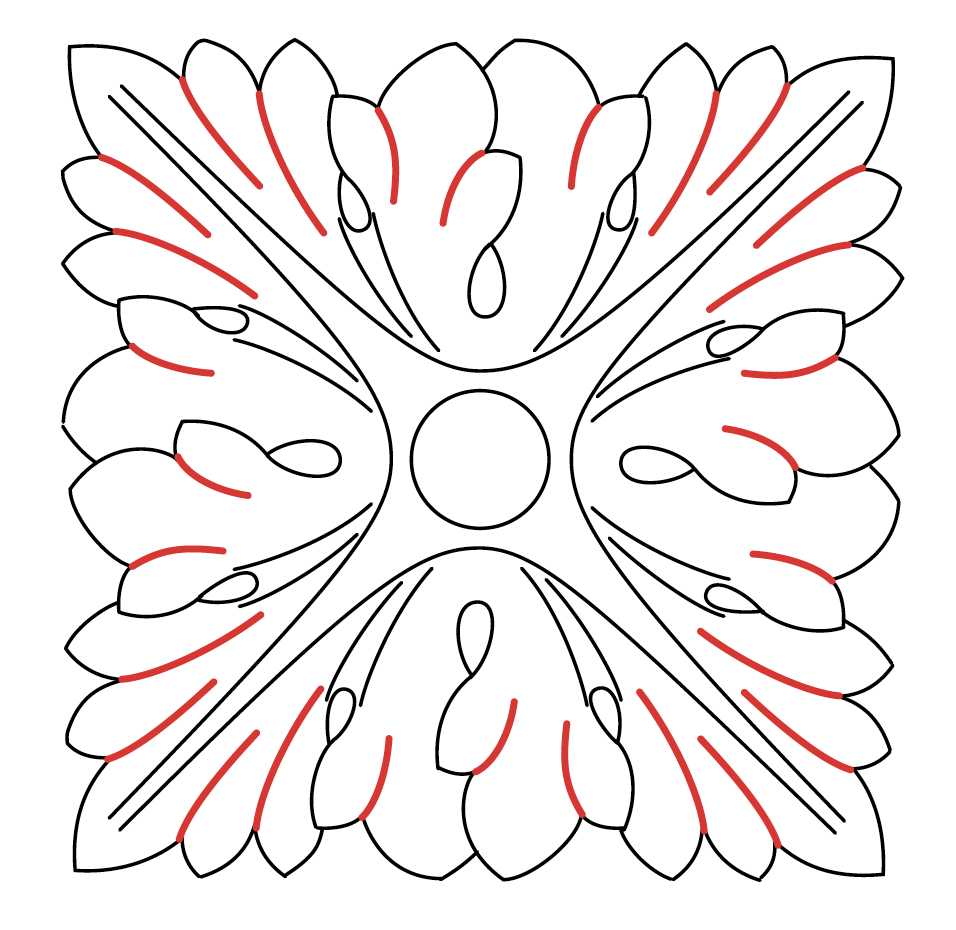
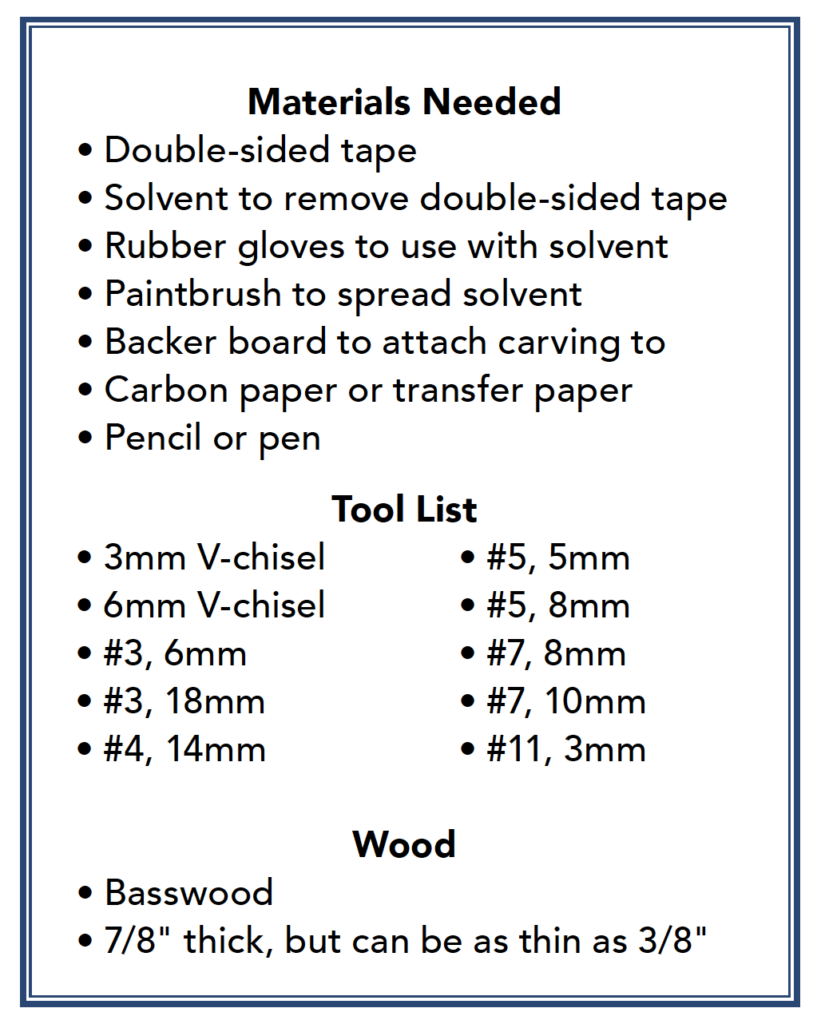
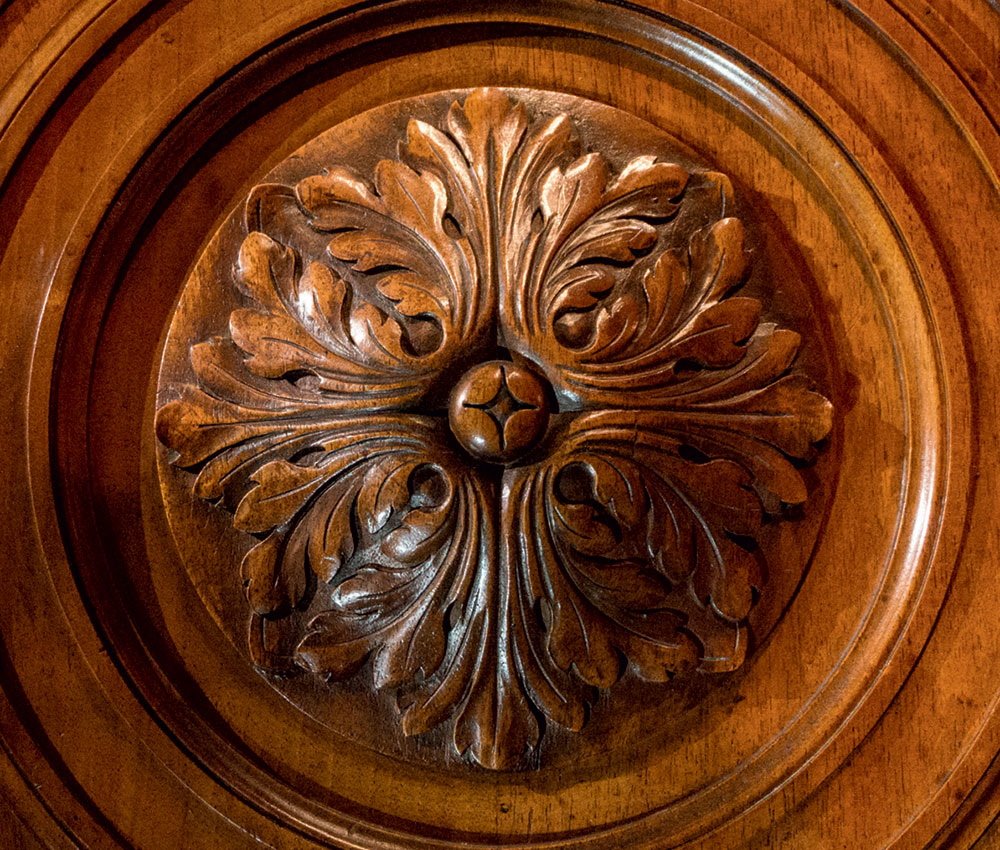
“Carving the Acanthus Leaf” is a deep exploration into this iconic leaf, which has been a cornerstone of Western ornamentation for thousands of years. May, a professional carver and instructor, starts her book at the beginning. She covers carving tools and sharpening with the efficiency of someone who has taught for years. Then she plunges the reader directly into the work.
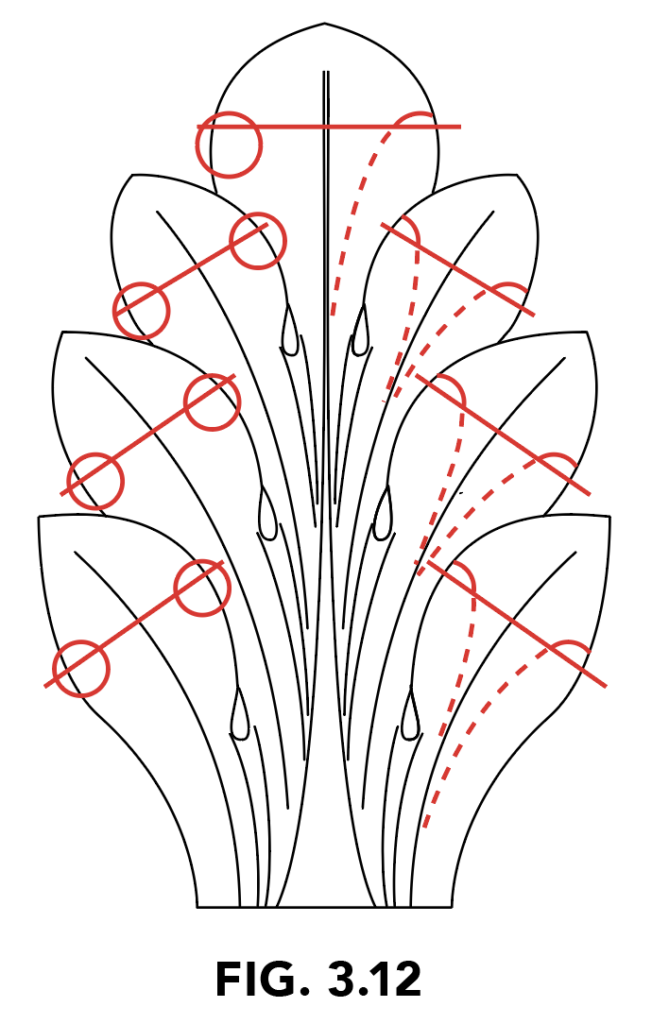
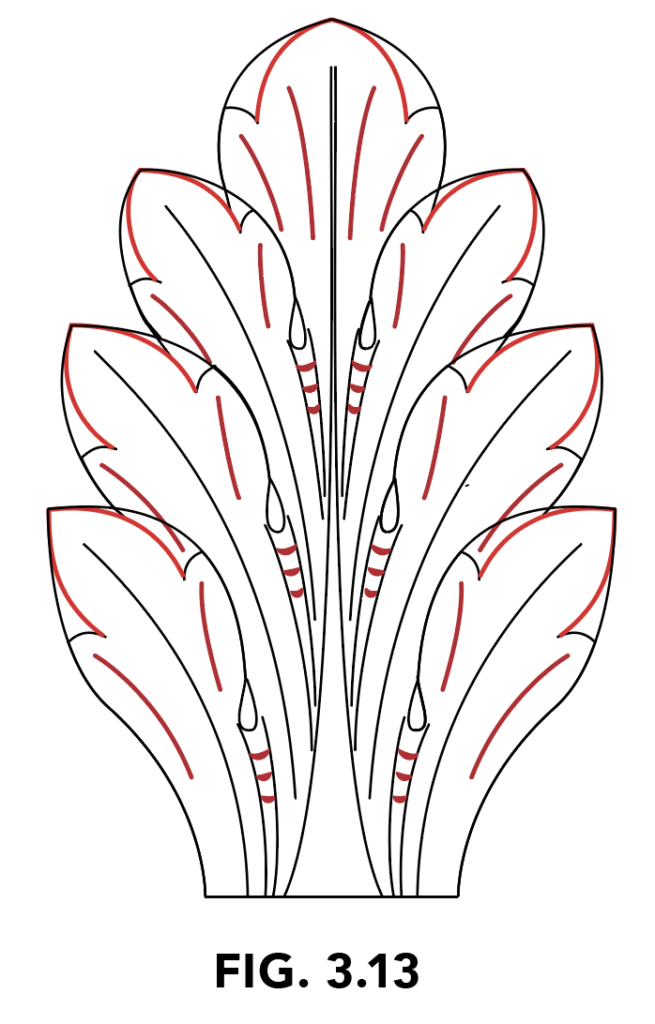
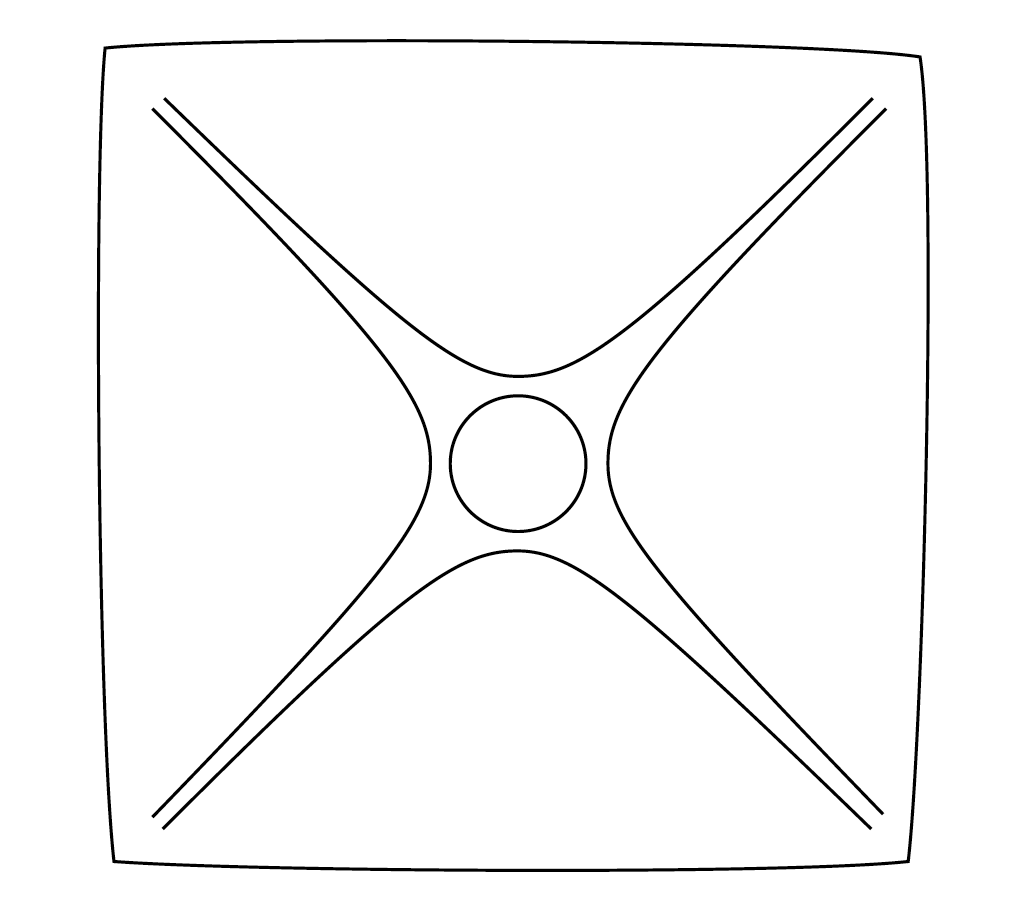
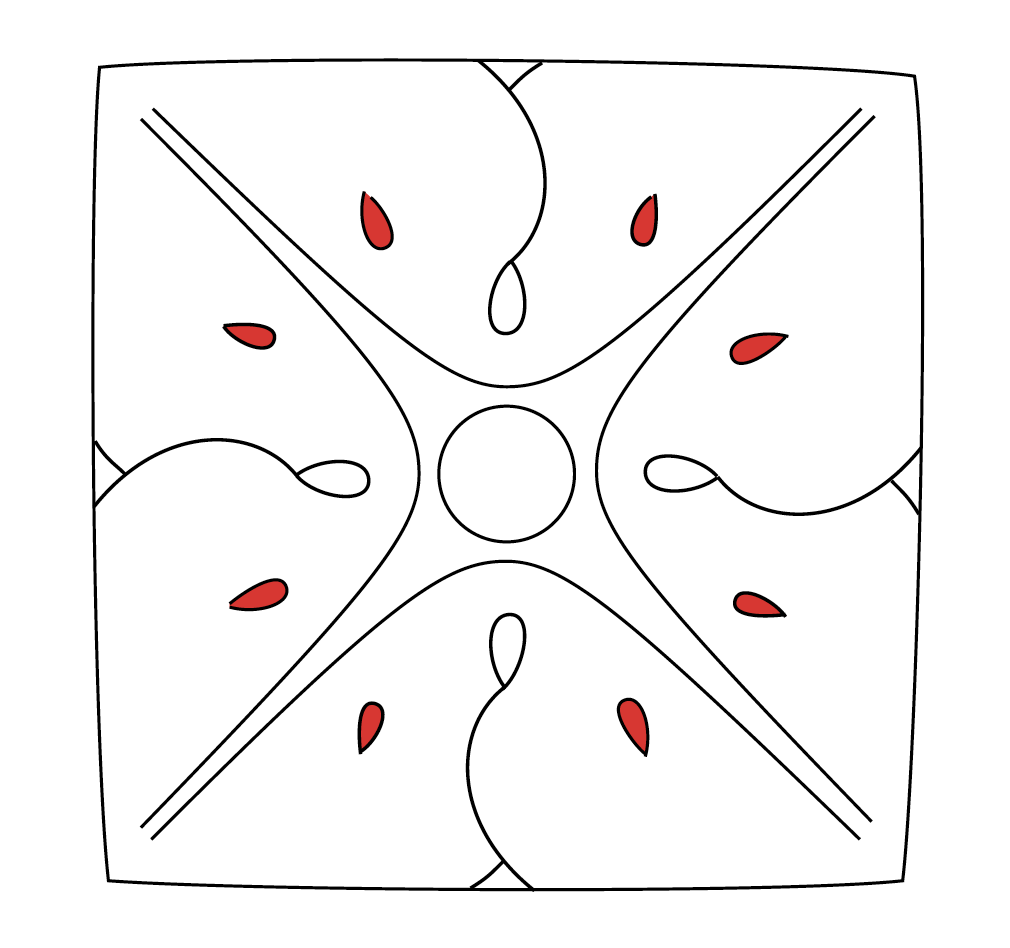
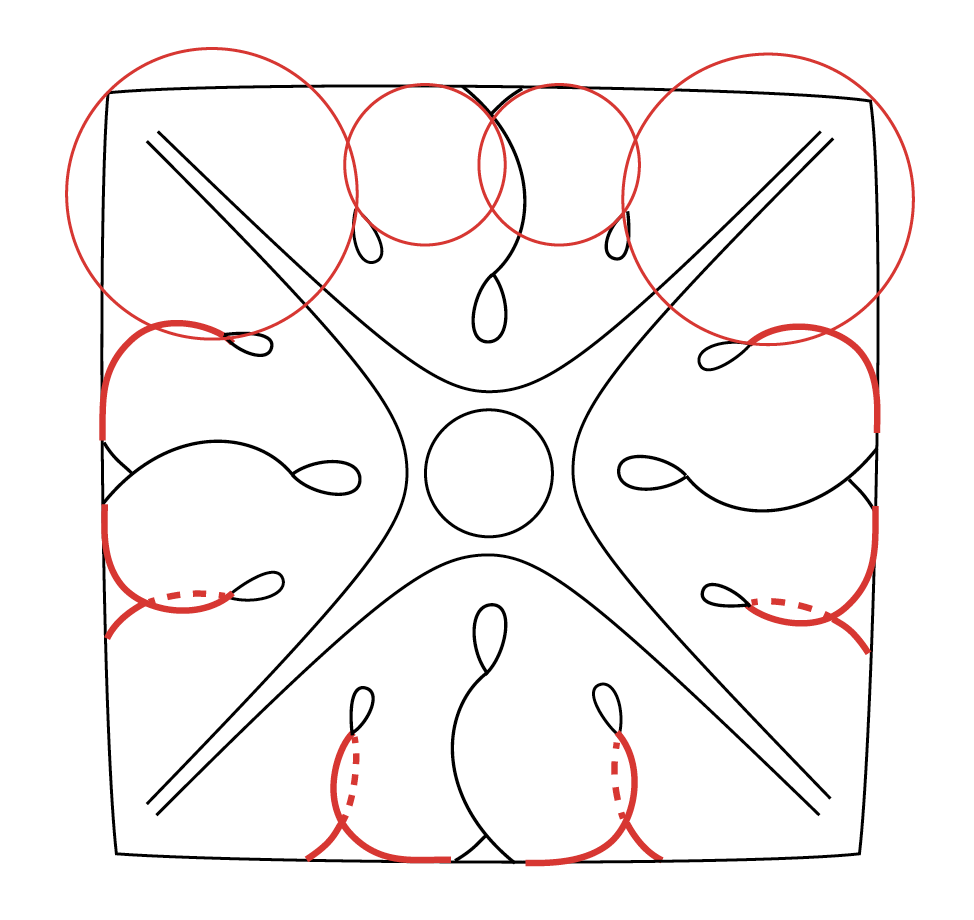
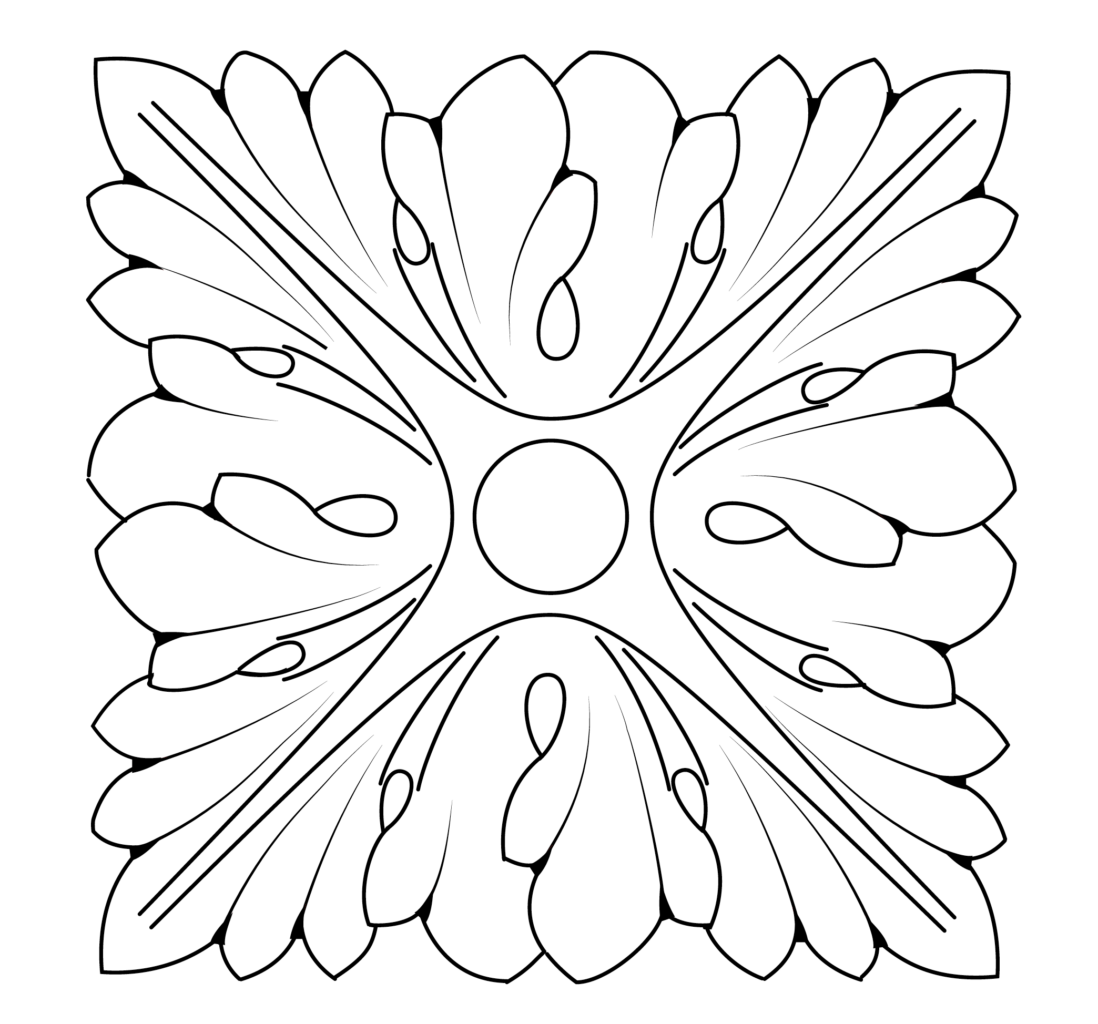
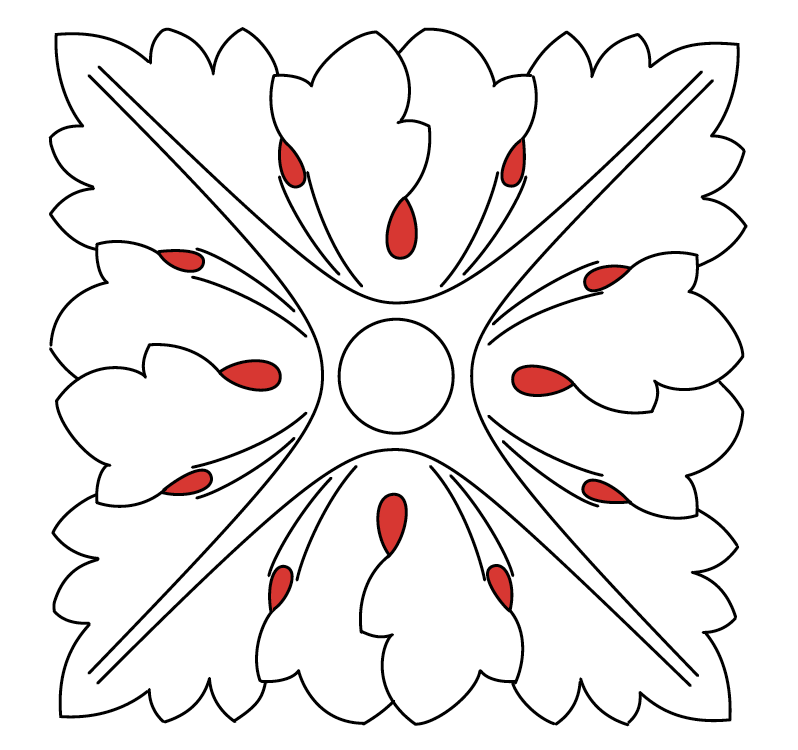
It begins with a simple leaf that requires just a few tools. The book then progresses through 13 variations of leaves up to the highly ornate Renaissance and Rococo forms. Each lesson builds on the earlier ones as the complexity slowly increases.
Experiences in life often grow us and define what we become. But certain attitudes and ways of living create who we are. I can easily pinpoint various times and events throughout my life that steered me toward a somewhat curious life. This is the story of how I went from being a shy but adventurous girl to discovering woodcarving as a way of life.
My mom, the second oldest of seven children, was born to a conservative Calvinistic minister with a small church in Denver, Co. My dad was the oldest of 13 in a hardworking Dutch farm family in Iowa. They married just out of college, and within seven years had a brood of five rambunctious children.
Dad, even as a young man, dreamt of building a sailboat and traveling the world. Perhaps he imagined the seafaring adventure stories of his youth, or maybe he just thought it would be an opportunity to see the world. He was a man of few words, so it was often a mystery as to why dad did some of the things he did. But he was going to achieve his dream of building, traveling and living on a boat … and his wife and five children aged 4 to 11 (I was the 4 year old) were going to join him. My parents saved every penny and headed toward their dream. At the time, my dad was working as a systems analyst – a first-generation computer programmer. I remember long lengths of paper tape with multiple holes in it that we had a lot of fun with (as frugal as my parents were, we had to be creative with our toys).
Dad started building our 50′ trimaran in the back yard of our home in West Chicago, Ill., in the evenings and weekends. Trimarans consist of three complete boat hulls joined together, with the largest hull in the center and two smaller hulls on either side. Curious neighbors would ask why my dad was building three boats. Was he expecting a flood? In his quiet, humorous Dutch way, Dad let them guess for a while.
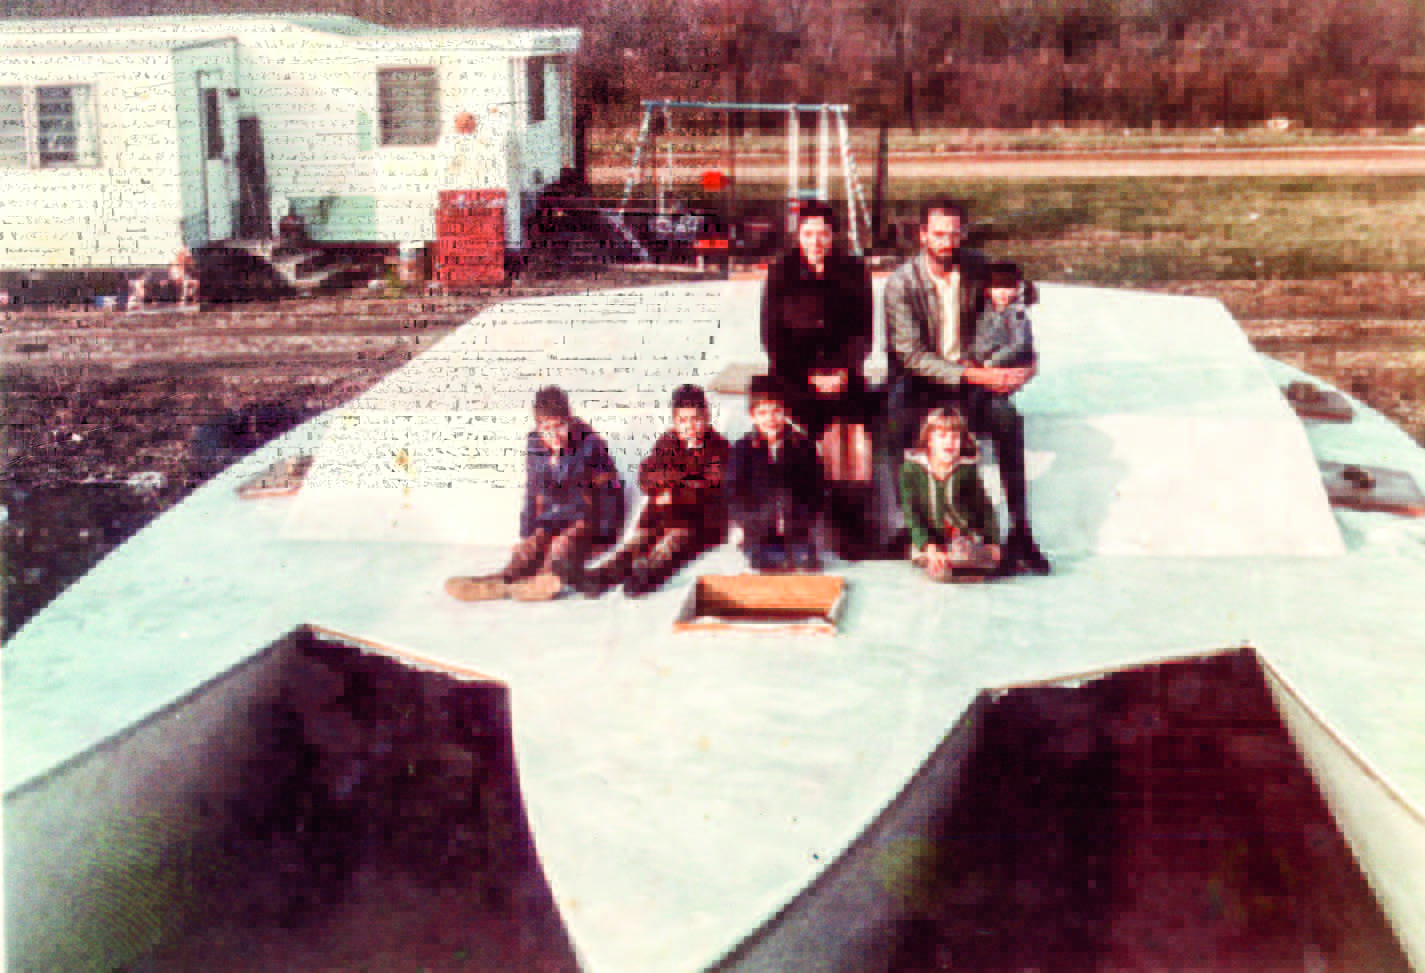
It took three years of hard work, discipline, countless focused hours and all of our family’s resources to build dad’s (and now the family’s) dream. When the boat was finished, dad christened it “Pilgrim,” a name he chose after being touched by a sermon where the minister spoke of life being a day-to-day journey or pilgrimage. The minister expressed that if we live too much in either the past or future, we forget to experience the “pilgrimage” or “now” of life. Dad was deeply moved by that sermon and whether he realized it or not, this pilgrimage of his started all of his children on a course of unique and adventurous lives.
Where some have created a wall in their life that says, “here and no further,” dad taught us that it was OK to step over that wall and see what was on the other side. What touches me deeply to this day is that dad was not trying to prove anything to anyone through this adventure. Dreaming is one thing, but living that dream is so much more. He taught us not so much with words, but by how he lived.
The next year was spent experiencing the “live-aboard” boater’s life, enjoying the scenic river towns while traveling the length of the Mississippi River. Then we sailed to the Bahamas, visiting and exploring both inhabited and uninhabited islands. The early ’70s were a unique time to live on the water as many fellow boaters were hippies who had dropped out of society. From my 4-year-old vantage point, life was very curious. I remember a man with his long hair and a beard, rowing by our boat stark naked. (Is it possible to get this image out of my head?) After a while, nothing in the boating world seemed out of the ordinary. I just hope the man remembered to put sunscreen on.

We returned from this wondrous trip, adjusted to a “normal” life on land and within seven years, dad got the boating bug again. He, along with our uncle Don, built another boat: Pilgrim II, a 54′ motor-sailer. By this time we had reached the wonderful teenage years. How my parents survived on a boat filled with five smelly teenagers for an entire year escapes comprehension.
On our second boat trip I was older and remember much more. We spent another year living aboard, and I cherish memories of exploring more islands, snorkeling in crystal blue waters, catching fresh fish and throwing my brattiest brother overboard when my sister and I thought he deserved it. Some islands we visited were uninhabited, and our five young imaginative minds lived our own “Gilligan’s Island”… I mean “Van Abbema’s Island.”
Because the boater’s life was our day-to-day existence, it became normal. We were not immune to the typical problems that arise in family life – teenage woes, the stress of living closely together and the Spam-inspired doldrums of eating it and canned corned beef day after day. We may not have recognized it or appreciated it as teenagers, but our boating adventures taught us that life is to be experienced, and dreams are to be lived.

And that story leads to how my hands learned to think.
With the wandering spirit instilled in me as a young child, my head was filled with dreams of travel and adventure. During my second year in college I spent an amazing semester studying in London. Much of my time was spent exploring its museums, grand cathedrals and glorious architecture. My mediocre grades proved I was not a great book student, but London’s sidewalks became my school, and my textbooks were its historic buildings. After completing my semester of study in London, I spent an adventurous month backpacking across Europe and becoming even more enchanted with the carved details found in the historic art and architecture. The seed of desire to learn carving was solidly planted.
When I returned to Minneapolis, I began to search ways to learn woodcarving. I did not want to learn just any woodcarving; I wanted to learn how to carve the beauty I had been captivated by throughout Europe.
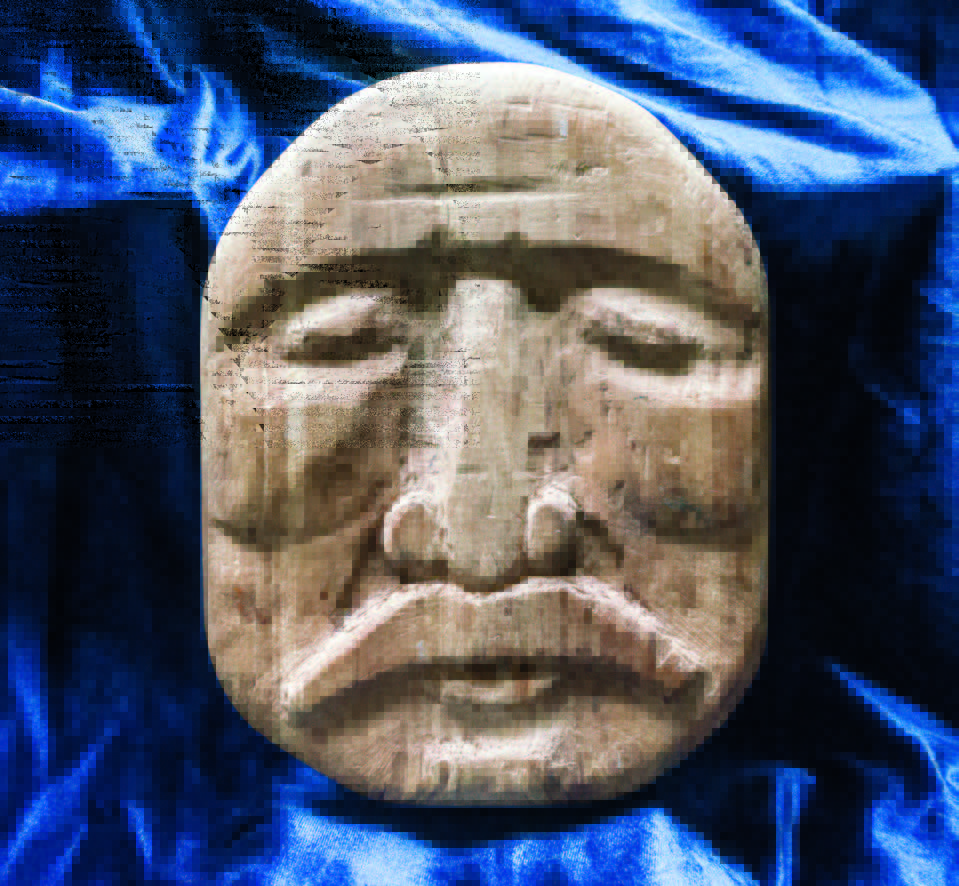
For $5 at a garage sale, I bought a beginning woodcarving and whittling book, plus a large curved gouge and a heavy rubber mallet. I picked out a project from the book and dove in, teaching myself woodcarving using a salvaged piece of wood from a pile of my neighbor’s construction debris. The project I chose was to carve a mask of a man’s face. Despite that my carving gouge was dull, the wood was dense and splintery, and that I didn’t have a clue what I was doing, I completed my first carving project and it looked somewhat like a man’s face. The only reason I was able to achieve what I did was that my mallet was massive and my determination equal to it. Perhaps a butter knife would have been a better tool. My first attempt at carving taught me that if I wanted to carve anything close to what I saw in Europe, I would need to find a teacher. Where to start? I looked in the Yellow Pages under “Woodcarving” and discovered “Artistic Woodcarving Studio.” “Art” and “woodcarving” sounded exactly like what I was looking for. I called and spoke with Greek master carver Konstantinos Papadakis. After explaining my desire to carve, he invited me to his workshop, and from the moment I walked in I was in awe. I tried not to blink for fear of missing some amazing detail. I was consumed by the wood smell, the carving tools lying amongst the workbenches, the half-finished carvings hanging on the walls or sitting in corners or clamped to benches. I knew this was my world.
Mr. Papadakis began his training in Greece as a boy of 12. Like many young European men learning a trade, he spent years studying as an apprentice, then progressed to a journeyman, after which he was respected as a highly skilled master carver. I wonder if I would have made the best career choice if I were required to make a life-long decision at the age of 12. I doubt it, as I seem to remember wanting to be an Olympic gymnast at that age.
Within months of studying with Mr. Papadakis two nights a week, it seemed that every moment of my day was consumed with thoughts of woodcarving. I was happily obsessed with this new art, as an amazing and exciting new world opened to me. I discovered something that I truly loved to do. Every aspect of this work – from designing it, to learning its tools, to exploring forms and shapes in wood – I loved it all.
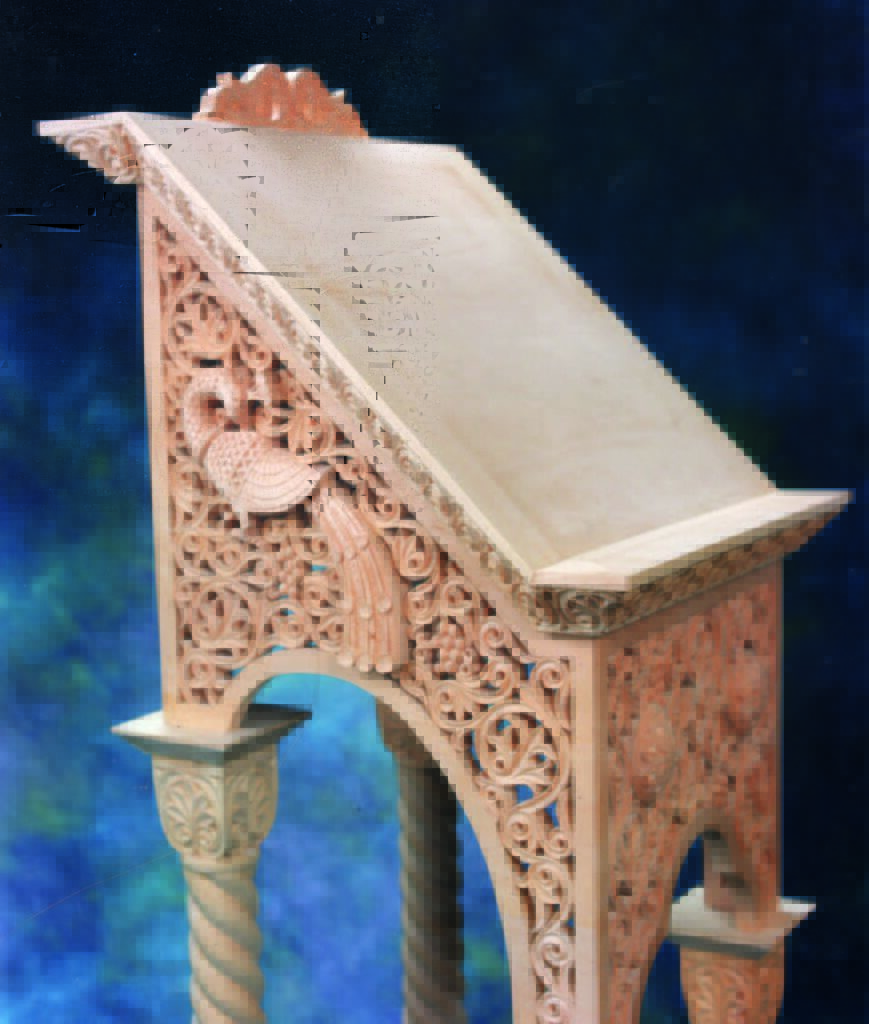
As Mr. Papadakis learned the “old world” ways of carving as a young man in Greece, these were the techniques and styles he graciously shared with me. I learned to carve various styles of classical European carving, but focused primarily on the Byzantine style that is often seen adorning the interiors of Greek Orthodox churches.
In an attempt to be a responsible citizen and have a “real” job, I spent several years studying graphic arts and design. This paid the bills and put food on the table while I became engrossed in my new love of woodcarving.
While working as a graphic artist, I focused every minute of my extra time to learn carving. As time went on, my day job became less interesting as I found myself drifting off, daydreaming of the carving designs I had waiting for me when I got home. There were clear signs that I was becoming obsessed. Sometimes when I was having conversations with people, I would catch myself studying the details and shapes of their faces and taking note of what tools I would use to carve that particular feature. I knew I was going down a path of no return.
Restless and eager to carve full time, I tried to discover a way to make that a reality. The sensible side of me said, “That is so irresponsible to give up a lucrative, secure job and to jump into an unknown dream.” But my not-so-sensible (and more influential side) said, “Why not?” As I was pondering when and how to make this major change in my life, the decision was made for me. I was laid off from my job. I even got severance pay.
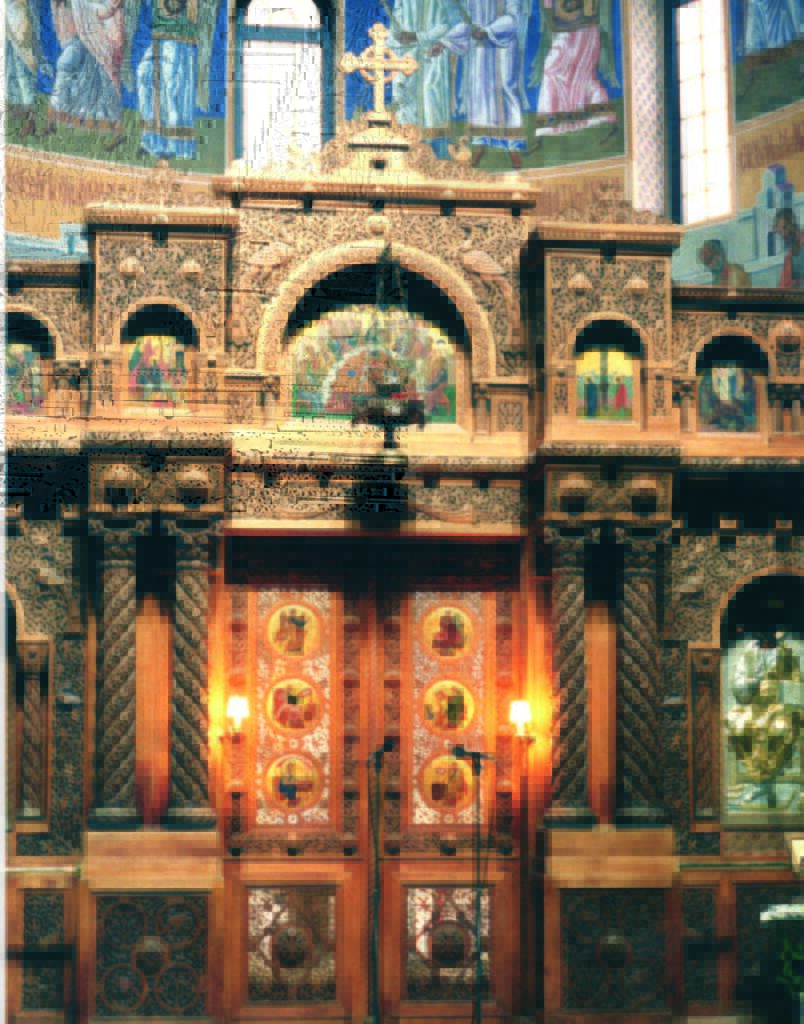
Church, Athens, Greece.
After Mr. Papadakis generously shared and passed on his carving skills to me for three years, I thought it time to venture out and learn more and different techniques from other masters. To give me his blessing on this new venture, Mr. Papadakis connected me with a third-generation carving shop in Athens, Greece. It was a workshop where he first worked when starting his carving career. I traveled overseas again to the studio of Theofanis Andravidiotis and learned and worked alongside several Greek master carvers and their apprentices for three months. The workshop was famous for its carved interiors of Greek Orthodox churches in two classical styles: the Byzantine and Cretan (a style similar to Rococo and Baroque, also called Barocco). I spoke just enough Greek to lose an argument with a taxi driver and to recognize when I was sworn at by others in the workshop, which fortunately was not frequently. The other carvers must have thought it peculiar for a young American female to work in a traditional all-male workshop in a foreign country. I enjoyed the unique learning experience, so the environment was all part of the adventure. The workday consisted of starting precisely at 8 a.m., taking a break for thick, Greek coffee and tasty pastries around 10 a.m. and stopping for lunch at 1 p.m. After lunch we rested, started up again at 3 p.m. and continued until 7 or 8 p.m. They were long days, but it was fascinating to work as carvers have done for countless generations.
After my Greek adventure, I returned to London with a desire to study with more and varied master carvers. I attended City & Guilds of London Art College, focusing again on traditional classical carving designs and techniques. For three months I studied with several highly talented woodcarving instructors. During this period, I continued to spend time studying and absorbing the multitude of carved details of historic buildings throughout London. I also drank a lot of tea and feasted on deep-fried fish and chips wrapped in newspaper. I love England.
While I was studying in England, I jumped at an opportunity to work as a stone carver in Malaysia. You can read the full story of this in Chapter 10.
After so much traveling, learning and studying, it was time for me to settle down, stay in one place and focus on what I hoped would become my career: that of a professional woodcarver. I settled in an area that I thought would appreciate and recognize the type of work I do because of the historic nature of the city: Charleston, S.C. That was where I met my wonderful and patient husband, Stephen, who built a cozy carving studio for me. It is my sanctuary, and I spend countless hours joyfully lost in my carving world. The fateful story of how Stephen and I met is shared in Chapter 5.
The early part of my career was spent happily sequestered in my workshop to carve commissions for architects, furniture makers and designers. This time was spent fine-tuning the techniques and skills I had learned from the European master carvers. I was content to continue working in this secluded and isolated way, but life had other plans.
The next stage of my carving journey brought me out of my quiet workshop and dragged me kicking and screaming to once again socialize with my fellow man. Several members from the Society of American Period Furniture Makers (sapfm.org), a wonderful organization focusing on all aspects of traditional period American furniture, discovered that I carved furniture details in this style and asked if I would be willing to teach a class on carving the ball-and-claw foot. I reluctantly agreed, but I’m so glad I did. Since that time, the exciting world of teaching and sharing woodcarving has opened wide and has been yet another amazing journey for me. It was time for me to step out, get past being a wallflower and share what others had taught me. I had been perfectly happy making chips in the solitude of my workshop, but now it was time to share.
I was pleasantly surprised to discover that sharing this art was fun. As I began to teach at woodworking clubs and schools around the country, my “shyness” quickly disappeared as I discovered how many people had a desire to learn. It’s exciting to see the look on students’ faces as they grasp difficult concepts such as “carving with the grain.” When they share their completed carvings, it is rewarding to have been a part in their carving success.
Traveling and taking classes at different locations can be challenging for many people for any number of reasons. My ultimate desire is to make this art available to all, and as I recognized the difficulty for some to attend in-person classes, I started “Mary May’s Online School of Traditional Woodcarving.” Students with access to the Internet are now able to learn carving from their home and workshop. Starting with a single standard-definition video camera, we have grown to three high-definition camera angles, and my son, Caleb, is now my video editor (so I have time to do other things, such as write books). The carving topics range from simple beginner lessons to highly detailed ornamental carving, and a new video is added each week. The video lessons are virtually “real time” without much of the process removed. I even leave the mistakes in so that students can learn from me before making their own “oops.” I have been asked whether I will ever run out of carving topics to teach, and the answer is a definite “no.” I am eager to discover the new directions my school will lead.
With my parents introducing me to such an adventurous life at a young age, I recognize now how those experiences prepared me. They taught me to be unafraid of living my dreams and that seeking a dream is a way to a fulfilled life. Some people have commented, “You’re so lucky to have a hobby that has turned into your career.” I feel fortunate, but I believe it is far more than luck, as I see the hand of God in every opportunity that came my way. I am excited to see what my next adventure is.
Mary May
August 2017
www.marymaycarving.com/carvingschool