The following is an excerpt from Chris’ newest book, “American Peasant.” The book is an introduction to a style of peasant furniture and decoration that is almost unheard of in the Americas. Built primarily with tongues, grooves and pegs, the furniture is frequently engraved with geometric symbols that beautify the piece and protect its owner.
With this book, you will learn to build 10 simple pieces using common tools and whatever lumber is on hand. And you’ll learn to engrave the pieces using nothing more than a cheap craft knife and a vinyl flooring cutter. (We were so thrilled with this tool that we now make a commercial version of it.)
In addition to furniture making, “American Peasant” delves into other areas of the craft that will make you a more independent woodworker. Learn to make your own commercial-grade glue using only three ingredients (food-grade gelatin, salt and water), all of which you can find at the grocery store. The glue is strong, reversible and non-toxic (it’s edible, though we don’t recommend eating it).
You can make your own finish using beeswax, linseed oil and citrus solvent. This non-toxic finish is easy to apply and to repair. Plus, it looks better with age and use.
Finally, you’ll learn the language of the engravings, which come from Scandinavia, Eastern Europe and the U.K. These geometric engravings can protect a loved one from sickness, guard your valuables and grant good fortune to others (there are no negative engravings or spells in this book).
Many projects in this book use a tongue-and-groove joint to create the wide panels that make up the fronts, sides, backs, lids and bottoms of the pieces.
On many original pieces in Eastern Europe, this joint was created using rived stock, as discussed in the previous chapter. The tongue was at the tip of the board. The groove was plowed with a T-shaped grooving tool that is unavailable in the West. It’s a clever and effective way to build furniture – if you have rived stock.
Sawn stock from the lumberyard or mill is rectangular in cross section. And the grain is rarely dead straight through the board. So the approach to making these pieces requires a different tool.
For centuries, planemakers have made wooden-bodied tongue-and-groove planes, sometimes called “match planes.” One plane makes the tongue; a second makes the matching groove. These tools are effective, if you can find them in working order and they haven’t lost their mate.
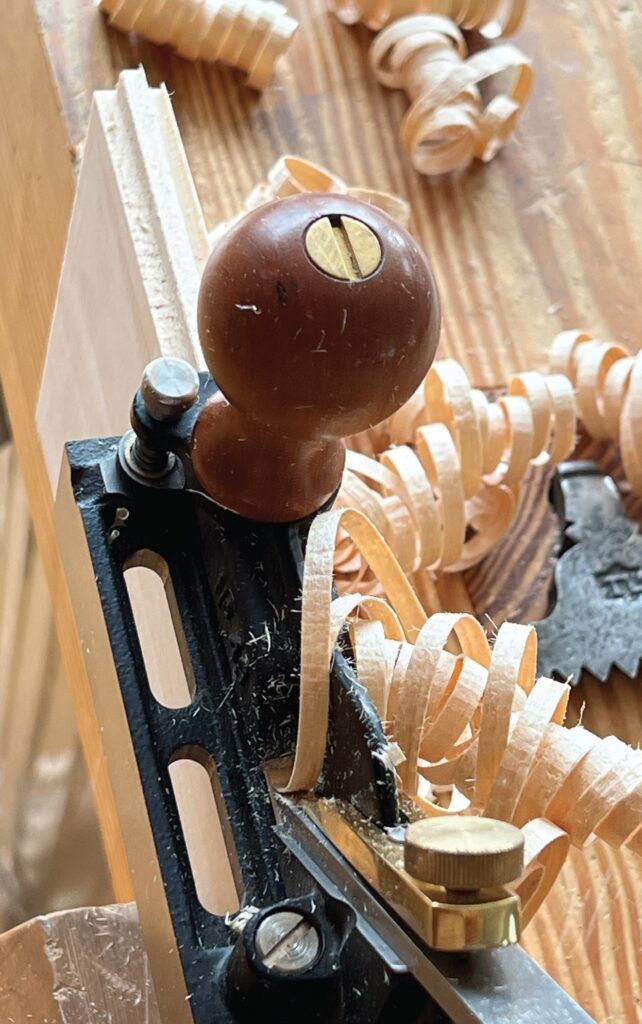
Stanley Works had a clever solution. In 1875, Stanley started making the No. 48 Tonguing and Grooving Plane. It is one plane that makes both parts of the joint. The position of the tool’s rotating fence determines which part of the joint the plane cuts.
In one position, the fence exposes only one of the plane’s two cutters to the wood. So it makes a groove. Spin the fence 180 degrees, and it exposes two cutters, which makes the tongue.
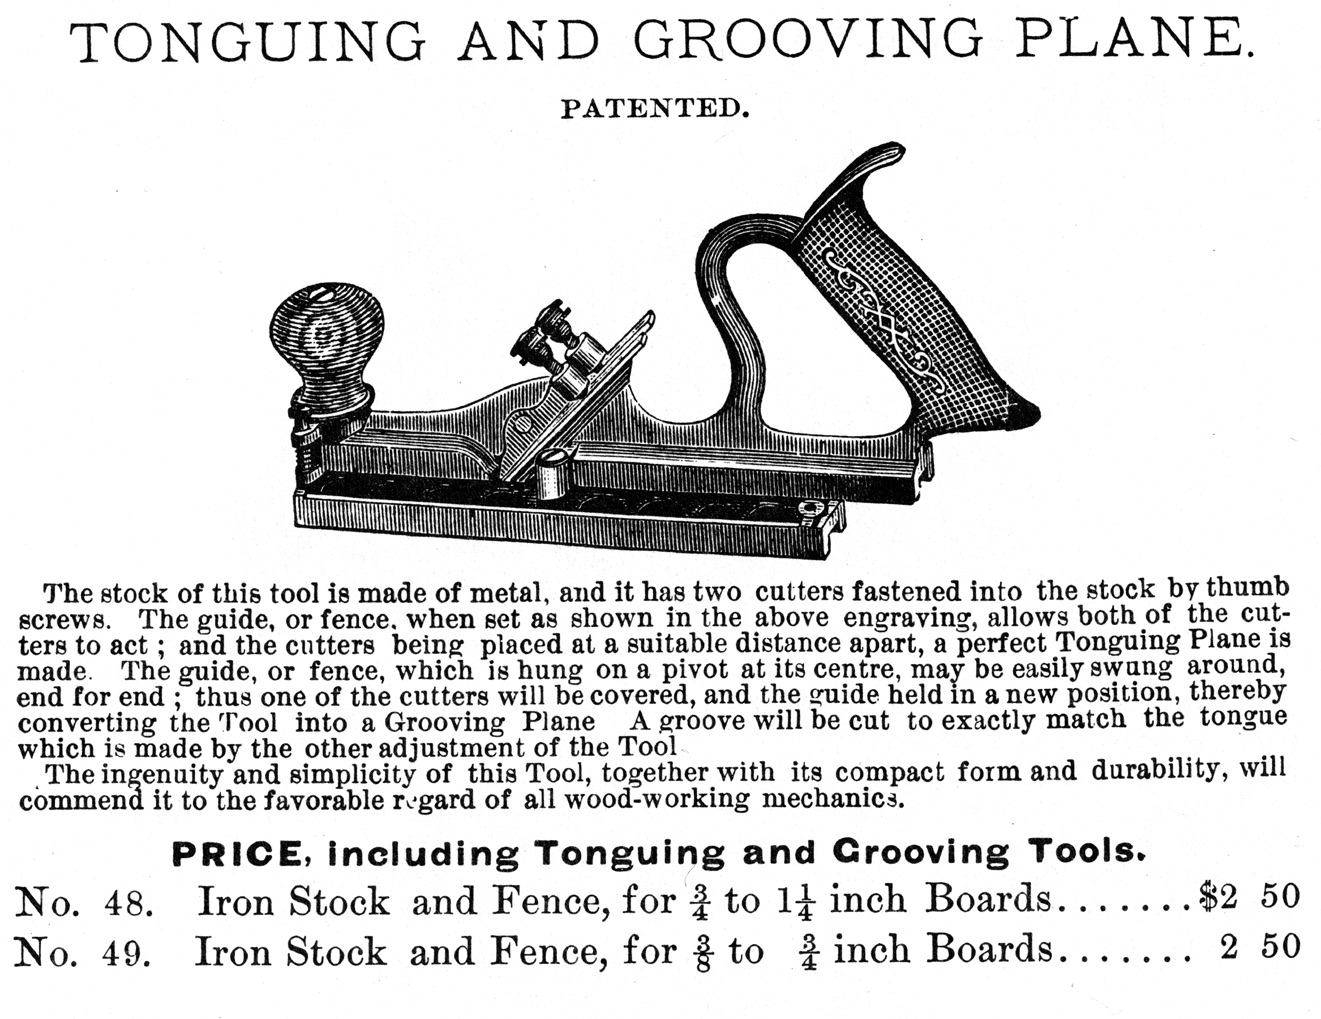

The No. 48 was designed to be used on stock from 3/4″ to 1-1/4″ in thickness, with the tongue centered on 7/8″-thick stock. Later, Stanley made a smaller plane, the No. 49, which joins boards that are 1/2″ thick (though it could handle boards that were slightly thinner and thicker).
The Nos. 48 and 49 are remarkable tools, and Stanley made many of them. So you can find them (and copies of them) on the used market. Sometimes their irons go missing, but replacements are out there or can be made easily.


Lie-Nielsen Toolworks makes heavy-duty versions of the Nos. 48 and 49, which have some improvements, especially the tools’ wooden handles and the use of a single iron, instead of two irons. These are the tools I use throughout this book, and I recommend them. (Note: There are other modern manufacturers who make planes that can do the same task, but you must swap out some tooling to make both parts of the joint.)
Both the Stanley and Lie-Nielsen tools have some peculiarities in setting them up and using them. Here are some tips to get you started.
Sharpening
I sharpen almost all my plane blades at 35 degrees. This keeps my life simple, and it doesn’t hurt how the tools perform. Argue the minutiae with me over a beer sometime, but the simple fact is that this is how I have worked for many years.
To ensure my edges are dead-square and at 35 degrees, I use a side-clamping honing guide when possible.
To sharpen the two blades for the Stanley versions of these planes, you clamp them in the honing guide and sharpen them like a bench chisel.
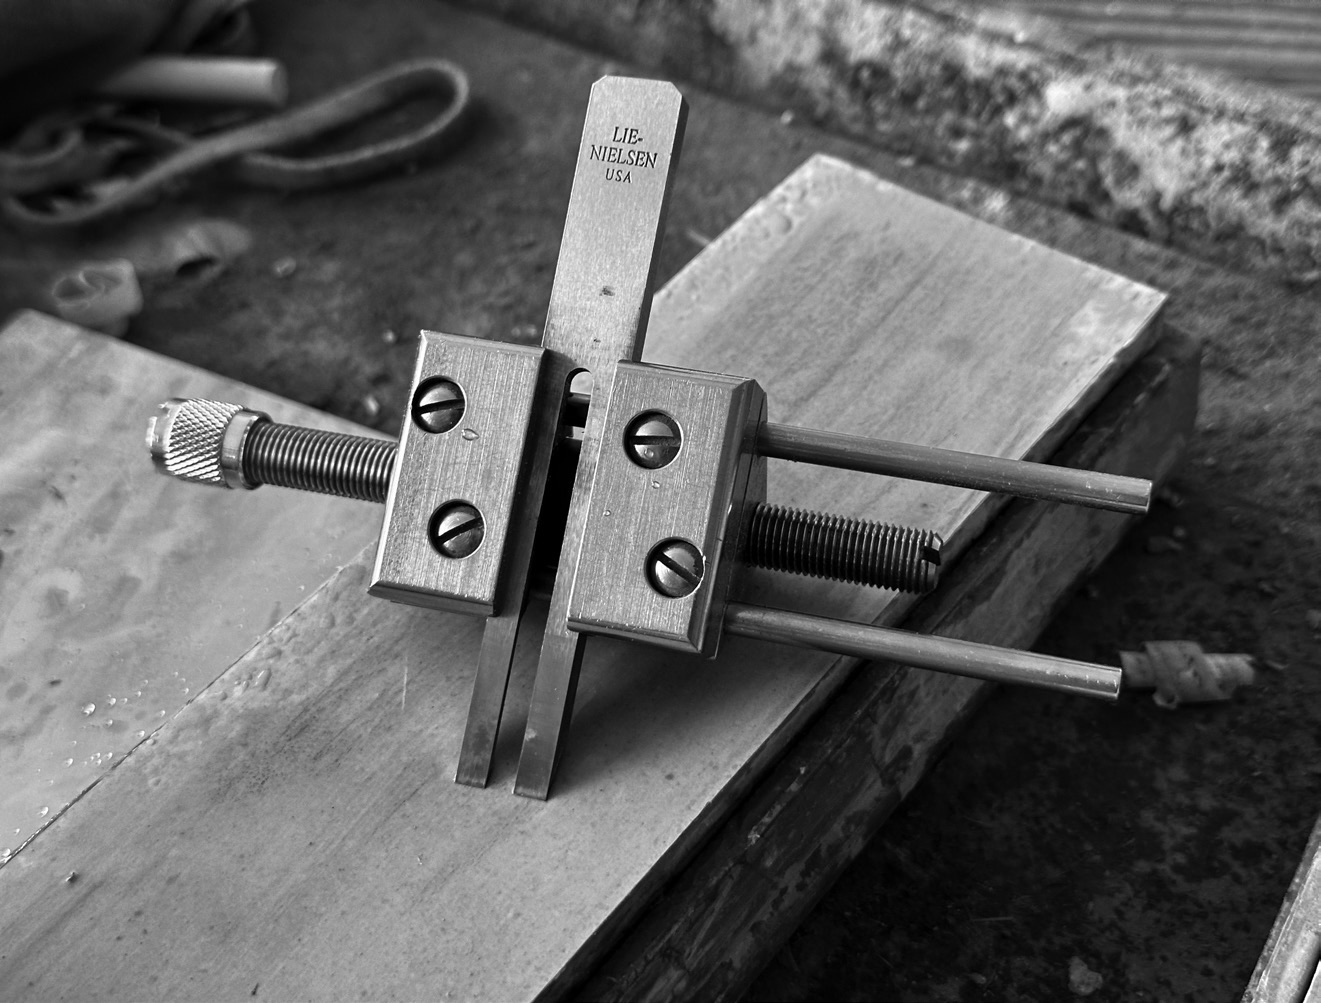
If you own a Lie-Nielsen version of this tool, you have only one iron to sharpen, which looks like a forked tongue. You can sharpen this iron in a honing guide, but you need to be careful when cinching down the guide on the blade. With some honing guides, you can bend the forks of this blade. So take care and cinch the guide down to where the blade is held firm, but isn’t bending.
Setup
Setting up the Lie-Nielsen tools is simple. Put the forked blade in the tool, secure the lever cap and set the blade projection. Set it for as heavy a cut as your muscles can manage.
Setting the blades for the original Stanleys takes more fiddling, but that is a positive aspect of this plane. I set the blade that is farthest from the fence a little deeper than the blade near the fence. These slightly offset cutters ensure tight-fitting joints. Here’s how:
First thing to know: The fence of the tool should always run against the “true surface” of every board. This is true for both the tongue and the groove.
If the term “true surface” boggles you, here’s a quick explanation. In handwork, we call a surface “true” if it has been flattened so it can join other surfaces. On a dining table, for example, the underside of the tabletop needs to be true so it sits flat on the table’s base. The top surface just has to look flat. So when you are tonguing and grooving backboards for a cabinet, the fence needs to ride against the faces of the boards that will face toward the inside of the cabinet.

of a tabletop is the underside because it has to mate with the base.
So, when the single cutter is exposed to make the groove, the groove is a little deeper than normal because the blade is set deeper.
When set to make the tongue, the deeper cutter overcuts a little compared to its shy cousin. The net result: The show surface of the joint is always tight. The non-show surface has a small gap between the boards.
than the other – ensuring a gap on the back and a tight joint facing the user.
Use
The main difficulty with these tools is that the fence becomes wobbly. This is almost always caused by the user “unscrewing” the fence as they switch back and forth between the tonguing and grooving settings. If the fence becomes too loose, the boards won’t mate flush.
I keep a screwdriver on the bench when I use these planes. And I make sure the tip of the screwdriver fits the head of the screw on which the fence pivots (this prevents the screw’s slot from getting chewed up). After I adjust the fence, I snug up the screw, which prevents the fence from wiggling.
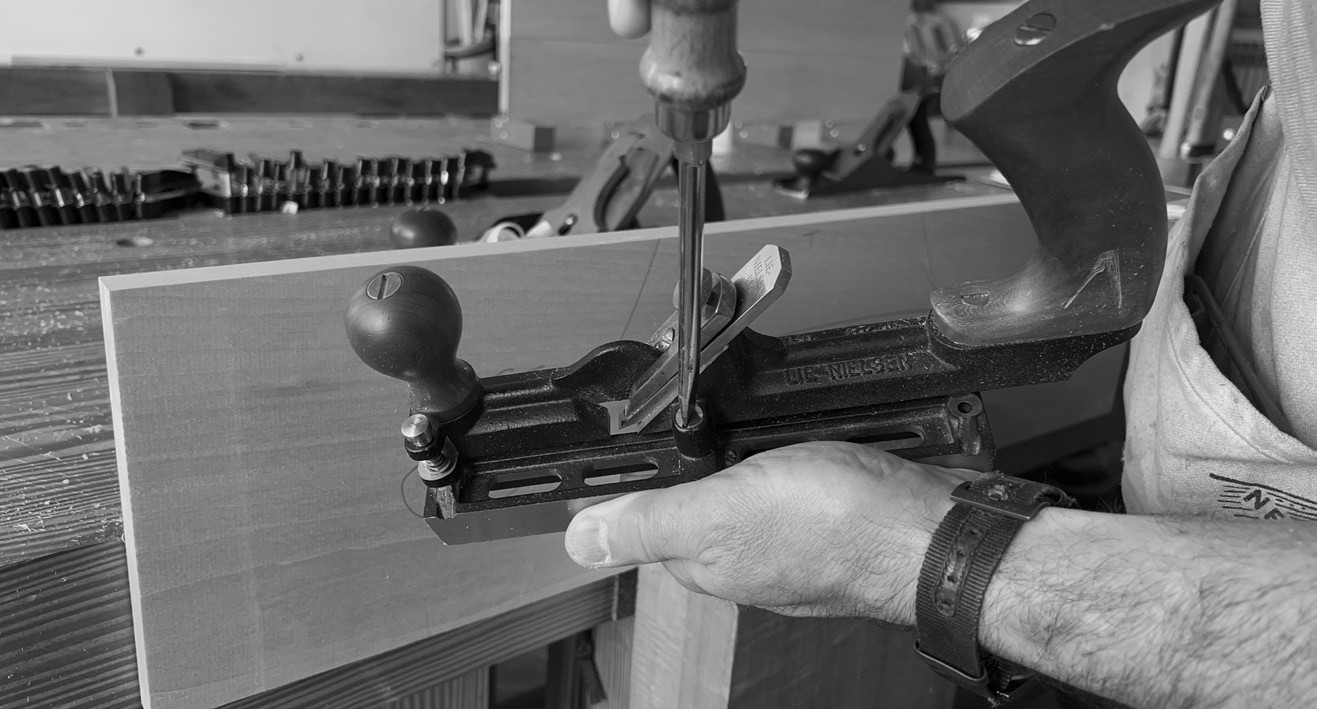
I cinch the center screw to keep everything tight.