Paul Murrett, working on a seven-stick stick chair during an early 2023 class.
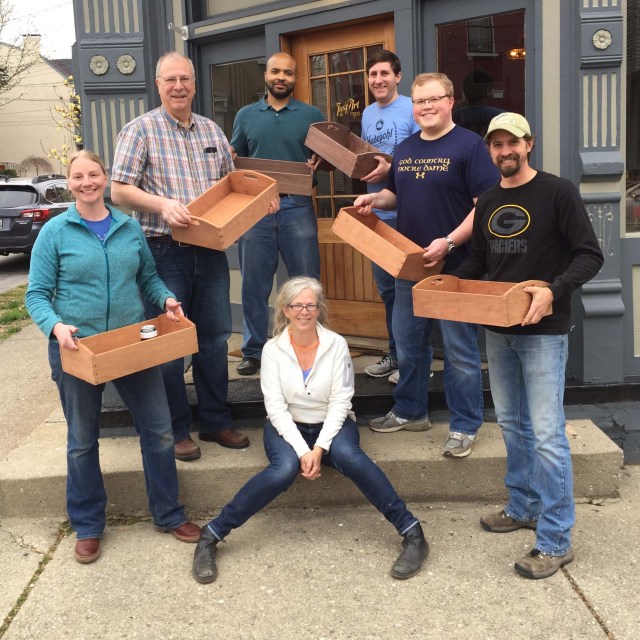
Next Monday, Sept. 25, 2023, at 10 a.m. Eastern, bench spaces go on sale for January-June 2024 Covington Mechanicals classes at the Lost Art Press storefront. (And we’re excited to announce that both Roy Underhill and Matt Cianci we be once again make the trek to Kentucky to teach!)
We have only eight benches, so classes are – with rare exceptions – limited to six students (which leaves the not-teaching editors here at LAP one bench on which to work). Thanks in part to the small class size, most classes sell out in nanoseconds – for which we are grateful; thank you. But it does mean that it’s best to be ready to hit “register” the split second classes go live on the Covington Mechanicals Ticket Tailor page (and it helps to have a pinch of luck). If a class is sold out, I recommend registering for the waitlist; we end up filling a slot or two from the waitlists for almost every class.
Dovetailed Shaker Tray class, February 2018 (I wish my knees still bent like that, sans pain).
Upcoming classes are: • Build a Comb-back Stick Chair with Christopher Schwarz, Jan. 15-19, 2024 • Make a Dovetailed Shaker Tray with Megan Fitzpatrick, March 9-10, 2024 • Window Joinery with Roy Underhill, March 23-24, 2024 • Build & Engrave a Shepherd’s Coffer with Christopher Schwarz, April 5-7, 2024 • Build a Traditional Sawbench with Megan Fitzpatrick, April 20-21, 2024 • Saw Sharpening 101 with Matt Cianci, May 18-19, 2024 • Build & Engrave a Shepherd’s Coffer with Christopher Schwarz, June 7-9, 2024
Classes for the second half of 2024 will be posted in February.
Click here to go to our registration site. From there, you can click on each class for more details about it. NOTE: There will be a button on each class page that says “Register Now.” You can click that, but you won’t actually be able to register until 10 a.m. Eastern on Sept. 25.
Check out FAQs about classes here. If, after reading the FAQs you still have questions, please post a comment here, or email covingtonmechanicals@gmail.com. (These classes are independent of Lost Art Press/Crucible Tool, so please do not email the LAP help desk.)
– Fitz
p.s. There are still 2 spots available in my Shaker Tray class in beautiful Berea, Ky., Oct. 14-15, 2023. Come cut some dovetails with me; I promise to pay more attention to my students than to Woodsy, the new Pine Croft shop cat.(Or I at least promise to try.)
The following is excerpted from Christian Becksvoort’s “Shaker Inspiration.”
Opinionated? Yes. Informative? Absolutely. Interesting and inspiring? You bet.
Not too many woodworkers can claim five decades of business success, but Becksvoort is among them. In “Shaker Inspiration,” he shares not only his woodworking knowledge and some of his best professional techniques for producing top-quality work, but also the business advice that helped him establish and sustain his long career in a one-man shop.
Plus, he shares measured drawings for 13 of his own well-known furniture designs and seven Shaker pieces that he’s reproduced.
One of the most difficult tasks when starting a business is pricing your work or product. Many woodworkers, especially those just beginning, seriously underprice their work. Hobbyists, especially, have no idea. Let me tell you, it’s really tough to be at a show next to Joe Basement, who is selling his very nice coffee table. He has no concept of the actual hours he spent, but his $140 worth of wood has turned into a $200 table. Wow, a $60 profit…wrong. The most basic pricing involves the cost of materials + overhead + profit. Lets take a look at these one at a time.
Materials are your wood, hardware, glue and finishes – anything that ends up in the customer’s possession. When working with a variety of woods, you’ll have to refigure the price for each species. That can run the gamut from a couple of bucks for No. 3 pine or poplar to $60 per board foot for exotics, to more than $100 per sheet for top-grade plywood with fancy veneers (in 2017 dollars, as are all prices in this book).
Working almost exclusively in cherry, and paying roughly the same amount for the past 20 years, makes pricing for me much easier. Not only that, but I get to use leftovers and offcuts for the next project. At this point in my career, I know the exact board footage for all pieces in my catalog. When starting out, you’ll have to do a bit more math. When you come up with the board footage, add 10-20 percent for waste, depending on how fussy or frugal you are regarding knots, defects, sapwood and general waste. Besides the wood, also include screws, hinges, locks, knobs, glides, glass, hangers and your glue and finish of choice. Speaking of hardware, I always buy the top grade. It takes just as long to install a cheap hinge as an expensive one. Cheap hardware will come back to haunt you, and result in unhappy customers.
Overhead is an all-encompassing term that includes the expenses you pay as the cost of doing business, but of which the customer does not take possession. Here is a partial list: your shop building or rent or mortgage, insurance, vehicle, electricity, heat, office supplies, telephone, internet, tools, advertising, freight charges, accounting, postage, licenses and taxes, and a few others that I may have overlooked. The bigger items, such as the mortgage, vehicle and large power tools can be amortized over a long period of time. Don’t, however, forget to include small tools such as routers that need to be replaced, specialty bits and tooling for a specific project, etc. Again, it will be difficult to estimate these costs when first starting, but after a year or more of good bookkeeping, you’ll have a pretty good handle on what it takes to run your shop. Divide the yearly total expenses by 12 to give you a monthly figure, divide that by 30 to give you a daily figure, and divide the last by eight to give you an hourly overhead cost.
Buy the best-quality hardware you can get your hands on – including extruded hinges and cast locks. It takes just as long to install cheap hardware as that of highest quality. These are by Whitechapel, Horton Brasses and Ball & Ball.
Finally, your profit. Yes, we’d all like to make $100 per hour take-home pay, but let’s be reasonable, especially when you’re just starting out. My profit, or hourly wage, when I opened my shop in the mid ’80s was $20 – which I thought was pretty good. It has since gone up considerably, but only after a few years. You can’t start out with astronomical prices when you have no track record, no reputation and no customer base. That comes with time, working efficiently, keeping your nose clean and keeping your customers happy.
A few random thoughts on prices and shop finances in general. First, if you give a customer a price quote, stick with it. You’re only as good as your word, and your word is your reputation. I’ve eaten my fair share of underpriced projects. It’s all part of the learning curve. Customers don’t want to hear “This took a lot longer than I thought….” They want results, not excuses. On the other hand, if a customer requests changes for alterations to the original design, then a change in price is warranted. Keep track of any additions or alterations made after the original quote.
I don’t dicker, and I try to be fair. I don’t gouge customers because they drive up in a Mercedes. The same hourly rate applies to everyone. Once that price is established, it’s fixed, unless times and circumstances change. My shop rate is based not just on time, materials, overhead and profit, but also on my experience, craftsmanship and reputation as a craftsperson. When potential customers try to talk my prices down, I tactfully end the conversation. Now they are messing with my self-worth. Remember, once a customer asks for and receives a discount, they will expect one from then on. And word spreads.
I have a policy in my business that once a customer leaves a deposit, that price is firm, no matter what the delivery time. That can be due to my backlog, or the customer’s circumstances. I’ve had a few instances where the customers’ houses took far longer than anticipated, or their financial situation changed, and the piece was not actually delivered for three years. Even though my prices had gone up, their deposit locked in their price until they were ready to take delivery.
Which brings me to yet another important point: a business escrow account. You need to have one for customer deposits. Remember that a deposit is not your money until the piece is actually finished and delivered. I check with my customers before I start to build, both to see if there are any changes needed and that they are ready to take delivery on a given date. If they’ve changed their minds after a nine-month wait, then I return their deposit. I keep the interest. It’s only happened twice in my career, but you need to be prepared, just in case.
A few thoughts on scheduling. Again, your word is your bond. Nobody likes to be put off, especially when they’ve been expecting a handcrafted creation for which they’ve been waiting almost a year. I used to schedule very tightly but soon discovered that was not a good idea. There are always circumstances beyond your control that affect your schedule and work output: supply hang ups, illness or subcontractors who don’t deliver on time. For the past few years, I’ve arbitrarily added a few months to my anticipated delivery schedule. For a desk that should be done in June if all goes well, I tell the customer July or August. That gives me a nice time cushion. Then if the piece is really done in June, the customer is thrilled and it makes me look good. It’s way better to deliver before the anticipated due date rather than after.
This is a love story about Tim and Betsan Bowen, authors of “The Welsh Stick Chair: A Visual Record” and owners of Tim Bowen Antiques. Their courtship is, in part, how their business and marriage, both of 20 years, came to be (and also, their book!). But it’s also a story of the love they have for Welsh country furniture, folk art, textiles, cottages and history, items and places and periods and people, which they refuse to overlook, instead seeking out, sensitively caring for and passing along.
Discovering a Love for Antiques and Each Other
Tim and Betsan’s childhoods were quite different. Tim was brought up in West Wales in an English-speaking home that didn’t have many antiques but with a father who was interested in the past and tradition. Tim fished a lot as a child, and spent quite a lot of time on neighboring farms, helping friends with haymaking, milking and the like.
“I was the complete opposite,” says Betsan, who was brought up in the suburbs of London in a Welsh-speaking family. They had a few antiques but her grandfather, who lived in Wales, was a big collector.
“Although he didn’t collect the type of furniture and the type of things that we like now, he had a house that was jam-packed full of pottery and bits of furniture, and he was always off at auctions buying things,” Betsan says. “And so it was sort of somehow indoctrinated into me, this kind of Welsh culture and history that was really important. And so it carried on. I can’t stop now.”
As a teenager, Tim left school and found work as a decorator and painter, as well as doing farm work and building things. One day he received a phone call from Terry Thomas, an auctioneer, who needed help clearing out a house for an auction he was holding in town that Saturday. Tim agreed to the job.
“I turned up to basically just help load and the first thing somebody brought in was a chair that I just thought was rubbish because it was falling apart,” he says. “Every time I picked it up a leg would drop off and the arm was wobbling and then I remember carrying it and Mr. Thomas said to put a note on it that said, ‘handle with care.’ And I thought that was a bit of a joke because I was the new guy. And then it came up for sale and I remember it going for a £1,000, which I just couldn’t believe. I think was earning £25, £30 a week. And here was a pile of wood that just made a £1,000. That was the moment I thought, ‘There’s something going on here that I don’t really know much about.’”
Tim ended up working for Mr. Thomas for a few years. During that time Tim started buying books, reading articles, visiting museums and befriending many of the local antique dealers, picking their brains.
“It became the thing I wanted to do, I suppose, or be involved in,” he says. “I tried to learn about everything from silver to claret jugs to Art Deco but it was always Welsh furniture that interested me. But I gained a bit of knowledge about the antique world.”
Betsan also left school as a teenager and ended up working in the property business in London. By the time Betsan met Tim she was pretty high up in the organization, a large public limited company, and she was one of the few senior women who worked there.
“I was quite keen on buying things for my flat in London,” she says. “And I went down to Wales and went into the antique shop that Tim was working in and bought a chair from him, which was kind of vernacular, not a stick chair, but it was quite nice, an interesting thing with a drawer in the seat, which we still have in the house.”
This would have been in the late 1990s, when Tim was working as general manager at Country Antiques Kidwelly.
“And then I started going back and buying bits and pieces,” Betsan says. “And you know what it’s like – you buy a bigger apartment and then you buy a bigger house … one day he came up to deliver two or three pieces of furniture for me. And he was at the door at 7 o’clock in the morning, which I thought, ‘To come all this way from West Wales at 7 o’clock in the morning! I think this guy likes me!‘ Then Tim said he wanted to go to this British exhibition at the Victoria & Albert Museum in Kensington. And so we went, he came to stay, and we went together and that was it! We’ve never looked back, have we?”
Their courtship began in 2000. Tim was immersed in the antiques world but Betsan says she was still immersed in the property business, although as time went on, she realized that she wasn’t enjoying it as much and she wanted to be with Tim. And they both recognized their shared passion for Welsh country furniture and art, something they had never shared so intimately with anyone else.
“We realized, when we got together, how many of the same books we owned,” Tim says. “Books on quilts, furniture and folk art.”
They both knew they wanted to have children – a family.
“And so we decided to get married and start the business,” Tim says.
They bought a house in West Wales together, and married in 2003.
“He gradually weaned me away from London,” Betsan says, laughing. “I’m joking, actually, because I wanted to leave London. I was actually quite happy to go.”
They both use the word “derelict” when describing their first house.
“It was what we were looking for,” Tim says. “We wanted something that hadn’t been too modernized, which happens to a lot of properties in West Wales. They just get updated. I think all our family thought we were a bit mad. They don’t quite get it. But it was a lovely house.”
The official start of their business, Tim Bowen Antiques, is the same date as their wedding anniversary – they celebrate the 20th anniversary of both this year.
“We went to an antique fair on our honeymoon,” Betsan says. “It wasn’t really much, but we enjoyed it.”
Early on, Tim spotted a skip on the street (akin to renting a dumpster in the U.S.) and took a look through it. In it, he found an old Art Deco rug and he asked the owner if he could have it. The owner said yes.
“It turned out to be quite a valuable rug,” Betsan says. “He sold it in Christie’s in London and made quite a bit of money.”
Soon after, the same thing happened again. Tim found an Art Nouveau cupboard literally in the trash, which he was able to sell, again, for quite a bit of money
“I thought, ‘Gosh this is fantastic!’” Betsan says. “We started the business with that money. Which wasn’t much, we started small, didn’t we?”
“We did, yeah,” Tim says.
“We’re still pretty small, really,” Betsan adds. “I don’t want to give you the idea that we’re big.”
“But we always wanted to sell the things that we liked,” Tim says. “I didn’t really like the Art Deco rug but I recognized it as something that we could make money on. But we almost always choose Welsh furniture, folk art, the vernacular country style of things.”
It’s simply what they both love, as indicated by their 18th-century bed and 19th-century kitchen table.
“We’re surrounded by very old things,” Betsan says.
Hiraeth
Looking through their online collection, it’s clear that Betsan and Tim have keen eyes.
“I think it evolves over lots of looking,” Tim says. “We spent a lot of time looking in galleries and museums and over time you learn to sort of be in tune with what you like.”
A similar effect occurs when Tim takes photos for their regularly emailed Stock Updates (you can sign up to receive it here).
“I take thousands of photos and I think some of them I don’t hate and every now and then I think, ‘That one works,’” he says. “You just end up knowing a lot of stuff by looking.”
Betsan jumps in at this point and tells Tim that she does believe he has an innate skill here though, especially with how Tim now plays with natural light.
Here, Tim recalls a conversation he recently had with a friend.
“Over the last 30 years I don’t think that a day has gone past when I haven’t thought about furniture,” Tim says. “It’s not something where you think, ‘Well, I won’t do that today,’ because it’s just who you are. Even when you get away on holiday we tend to visit old places, National Trust houses – the poor kids get dragged down to every museum.”
“We build whole holidays around the delivery of a piece of furniture or the picking up of a piece of furniture and all the museums that are near,” Betsan says. “But only the older children are sympathetic. Our youngest, in particular, near the end of the holiday is saying, ‘No museums! No old churches! No artifacts! And definitely, no antique shops!’” She laughs.
The Bowens have become good friends with many of their customers.
“You end up becoming quite friendly with them because you share similar interests,” Tim says. He talks about good friends in Suffolk, a six-hour journey from their home in Ferryside, a small village in Carmarthenshire, West Wales. They bought a cottage, took pictures and videos, and asked the Bowens to furnish it.
“That was a great project,” Tim says. “We’re often involved in projects where people buy an old house, move to Wales, restore an 18th-century, 19th-century house and then they want to furnish it with the appropriate things I suppose. But you become friends with people. It can take a long time to find everything, projects can take ages to do. But it’s great. You end up helping furnish some amazing houses.”
Betsan notes that she often hears Tim talking on the phone to clients from around the world, including Australia and the United States.
“I have quite a large number of Welsh people dotted around the world who want – there’s a Welsh term called hiraeth, which is longing for something,” Tim says. “They don’t live here, but they want a piece of Welsh furniture or a bit of Welsh folk art.”
“So many people, they long for this thing which is ethereal, I suppose, this hiraeth thing,” Betsan says. “It’s a longing for something that is home, really.”
‘It’s a Privilege’
The Bowens eventually moved to “another lovely house in the village,” they say, not far from their first house in Ferryside.
The Bowen’s home in Ferryside.
Ferryside
“It has a view of the estuary, and out to sea, so it’s a really magical place to be actually,” Betsan says. “And we never tire of it. Well, I never tire of it.”
“No, I never,” Tim says.
“Just looking out the windows, I’m talking to you, looking straight out to sea,” Betsan says. “And you see all the weather happen and the wind – it’s actually a grey day today, not particularly beautiful, but it kind of is though, isn’t it?”
“Yeah,” Tim says.
“Even when it’s grey,” Betsan says.
View from across the estuary.
From their home they also have a view of Llansteffan Castle, built in the 12th century and located across the Tywi Estuary.
Betsan with Megan, Morwenna and Tomi, and their two sausage dogs – Selsig and Sglodion (Welsh for Sausage & Chips)
When asked about a typical day they laugh as most parents of three children do and say their entire lives are dominated by their kids, ages 16, 13 and 12. They have a gallery, also located in Ferryside, but almost all of their sales are done online, and Tim and Betsan work from home.
“It’s an online business, really,” Tim says. “So it’s quite a sensible working day.”
It’s a model that allows both of them to be available to get their kids off to school on the bus, pick them up after school and manage after-school activities. Any given day might involve updating things on the website, delivering furniture, visiting with a client or picking things up from a restorer.
“So I wouldn’t say there is a typical day, which is part of what we like,” Tim says.
“We’re sitting now at the kitchen table,” Betsan says. “And the kitchen table is where we work. We’ve tried having offices but it just didn’t work. We always gravitate back to the kitchen table.”
“And the tea,” Tim says.
“The kettle, yeah,” Betsan says. “And it’s nice and warm in here. We put a stove in here.”
Betsan’s day is also not complete without walking her dogs, Selsig and Sglodion, Welsh for Sausage and Chips.
“We’ve got two dachshunds, and they’re very naughty,” she says. “They’re at my feet right now.”
Betsan and Tim keep busy with other projects as well, and their book, “The Welsh Stick Chair – A Visual Record,” which they published in 2020, is a good example. During the coronavirus pandemic lockdown, they took on a new project.
The Bowen’s Grade II listed 19th-century Welsh clom (mud) cottage
“We bought a quite rare, tiny Welsh, Grade II cottage,” Tim says. “It has to be sensitively conserved, so we spend time when we can up at the cottage.”
Tim has already been taking pieces up to the cottage and photographing them, which has worked out quite wonderfully, he says, and it’s been exciting to see how they look in an original setting. In addition to serving as a photo studio, the plan is to rent out the cottage for holidays.
“But it will be quite a particular person who is prepared to stay there because in the cottage itself, there is no running water and no loo,” Betsan says.
A kitchen and bathroom will exist in a building they’ve built alongside the cottage.
“They’re so rare, these cottages,” Tim says. “They’re basically made of mud walls, two tiny rooms downstairs and a loft. They were dotted around Wales but they just didn’t survive. Once they deteriorate, they can disappear very quickly.”
“It was a heart rules the head kind of moment,” Betsan says. “But we don’t regret it for one minute.”
“Oh no, it was an amazing thing to do,” Tim says.
“It is,” Betsan says.
“It’s a privilege to look after it.” Tim says.
Championing Humble Furniture
Tim talks about a recent chair they bought which had been stored in the loft of a barn in a farm.
“It had such a hard life,” he says. “It’s missing components, it’s been broken, but it’s just the most amazing thing.”
“Hang on, you haven’t said the most important part,” Betsan says. “That it’s got at least one, if not 10, layers of thick gray paint all over it. You know, not nice paint, it is, isn’t it?”
“It’s tractor paint,” Tim says.
“And you can see it’s exactly that color,” Betsan says. “It used to be on a Massey Ferguson.”
“I think a lot of people would think it’s not worth saving but it’s such an amazing thing,” Tim says. “We’re still pondering what to do. You have to be so sensitive to the restoration, conservation of these things. We’re giving this some thought to see how far we go with it or do we just try to stabilize it and leave it as an object as it is now, which I think is what we’re trying to do. It might stay with us forever.”
“You can read that as he wants it to stay here forever,” Betsan says, laughing. “I am just thinking of another chair that we bought, which had a beautiful seat. The seat was about 4” or 5” thick, one piece of wood, but at some point it had obviously been used for somebody who was an invalid and they cut a hole in it, in the seat. And so it was used as a commode. And I mean, I don’t know what it would have been worth if it hadn’t had this hole cut into it. But actually, we sold it, didn’t we?”
“It’s in our book,” Tim says. “It’s probably one of the most remarkable chairs, really. But when we bought it, it was in such a neglected state. But the idea is being sensitive to it, really, not trying to get it as good as new.”
“Yeah, not trying to hide what happened to it,” Betsan says. “This is what happened to it – you either love it or you don’t love it. What we’re saying is that we love the chairs the way they are.”
“I think we’re always mindful of the things that we pick,” Tim says. “They aren’t fine works of art or antiques. They are very humble, everyday things. It’s always good to remember that they had a life. They’ve been used and sometimes been neglected and put out in the shed because they’re no longer needed. I think that’s in part what we like about them. They’re not perfect in a sense. So we won’t go looking for pristine-looking antiques.”
Tim and Betsan say they always buy things that they really love. But that can come with its own difficulties.
“There is always a little bit of regret when something you’ve never seen before goes,” Tim says. “But you learn to know that a phone call or an email or something will come up where you will say, ‘Oh my God, I’ve got to get that, that’s fantastic!’ It’s full of surprises, the antiques. You have to let them go, I suppose, sometimes. Of course, there are a lot in this house.”
“I’m glad you said that,” Betsan says. “That’s quite an epiphany. He usually says things like, ‘Oh, you can never have enough! Actually, I’m just joking because we really are as bad as each other. There’ll be something where I’ll say, ‘You can’t sell that!’”
“I think in the antique business, you’re only really as good as what you can sell,” Tim says. “You try to find good things and offer good things and so you build a reputation on having good, original things and if you keep everything, well, that’s not going to be the case. How are you going to put food on the table?”
Betsan and Tim regularly seek out what they call “the humbler pieces of furniture,” the things that were used by everyday people and built by everyday people.
“They weren’t works of art in prestigious buildings,” Tim says. “I think sometimes, perhaps, these things have been overlooked in the world of antiques. Often they get sorted as primitive or basic and it’s mostly when people compare a primitive or simple stick chair to a fine Chippendale chair. They’re quite different things but they were also made totally differently by totally different people. I think we champion it a bit more.”
Tim says it’s the same for the little cottage he and Betsan bought.
“It’s very important,” he says. “There are the big houses in West Wales that the National Trust will love over and conserve but sometimes the cottages, they are here one moment and gone the next or they’ve been modernized and there’s no trace of them. So I think I’m right in saying it that way, that that’s what interests us. The things that are made by — not ‘honest’ people because we don’t really know a lot about them — but just the people who lived and worked in West Wales in the 17th, 18th and 19th centuries. We try to champion that, I think.”
Betsan says they’re working on their next book, but progress has been slow, in part because they can’t agree on the title.
“It’s a term for folk art, and it’s a modern term, really, for things that have been made as art but they might be made for a particular purpose,” she says. “Can you call a turned wooden bowl a piece of art? I mean, you do, because we think of it as art, don’t we? Because it’s such a beautiful object. But it wasn’t made for that. It was made to be used.”
“For people, the term ‘folk art’ conjures up a style or an image or a way of art,” Tim says. “It’s a tricky one, that.”
“But it’s really more to do with the fact that we’ve got three children and it’s really busy!” Betsan says, laughing. “We do have a number of books that we’re thinking about.”
“The stick chair one took us a bit by surprise, how many people wanted to know about stick chairs,” Tim says. “It’s a lovely thing to do, to have for people who don’t know about these things. It’s good for business – we’ve got a good archive of photographs. But I think it’s always that way with business. You have to keep thinking, ‘How do you keep it going?’”
“Yeah,” Betsan says.
“Not just rest on your laurels and do what you’ve always done, I suppose,” Tim says.
I can’t imagine the Bowens ever doing that at all.
Krenov plays with a sailboat and one of his Airedale dogs in the Cook Inlet. Photo courtesy of the Krenov family.
The following is excerpted from “James Krenov: Leave Fingerprints,” by Brendan Bernhardt Gaffney. After years of research and more than 150 interviews, Gaffney produced the first and definitive biography of Krenov, featuring historical documents, press clippings and hundreds of historical photographs. Gaffney traces Krenov’s life from his birth in a small village in far-flung Russia, to China, Seattle, Alaska, Sweden and finally to Northern California where he founded the College of the Redwoods Fine Woodworking Program (now The Krenov School).
“I remember my first trip up north,” John began. “In ’24 I took a post as a schoolteacher in a small native village about two hundred miles up the Kuskokwim river. It was a dreary place, and the work was difficult. A teacher in Alaska is a sort of guardian to the natives under his care, being in fact doctor, minister, counsellor and sometimes even policeman. But he must first of all be the natives’ friend. For he can get along only if they trust him, and he in turn tries to understand the strange ways of his charges. There is a peculiar fascination and pride in this sort of work. It grows on one, as does the north itself.”*
*An excerpt from an unpublished short story “The Forgotten Stones,” by James Krenov, written in the late 1940s or early 1950s. Krenov had a habit of interspersing autobiographical details in the short stories he wrote in his 20s and 30s, often switching his name or details for that of his fictional character, as he does here for the character of John.
The Krenovs arrived in Seattle on Oct. 29, 1923, with $100 each, “just enough to be allowed to land,” as Julia notes in her memoir. An immigration document lists their place of residence on arrival as the Commerce Hotel. This inexpensive room in a hotel along First Avenue helped the couple stretch their meager funds. With a short amount of time before their pocketbook would be empty, the two of them set out to find work. Dmitri’s initial job in a factory left him with a finger injury and perhaps a greater wound to his pride; this employment was well below his qualifications as a lawyer. While working or out looking for work, the two left their young son at a daycare; the nurses complained that Krenov refused to nap or eat, and instead “stood on his cot and screamed at the top of his voice.” Julia decided that she had to find employment with a family that would allow her to keep her son with her during the day.
A photograph Julia had taken while the family was in Seattle, early in 1924. La Pine & Rogers was a well-known photography studio, and the photograph would have constituted no small expense for Julia. Photo courtesy of the Krenov family.
At The Young Women’s Christian Association of Seattle, Julia met a young woman who offered her employment as a live-in nanny and housekeeper, taking care of a young boy the same age as her son. Her pay for this work was only $7 a week, with room and board in the family’s home. Julia served their meals and, only after the family was done eating and out of the house, she would clean up then cook for herself and her son. The young woman’s husband was a traveling salesman selling footstools, and while their home and status was above that of the recently arrived Russian immigrants, they didn’t provide Julia with adequate food for her and her young son; Julia remembered spending most of her salary providing for her and her son’s basic necessities. Over the course of a few months, the young woman slowly lessened Julia’s pay until she and her family left Seattle to live with her parents, apparently broke after the failure of her husband’s business. Their house was repossessed by the bank, and Julia was back to looking for work.
Julia found a second job, this time as a live-in caretaker for a seven-room boarding house for factory workers run by a Norwegian woman. She and her son had no room to themselves, instead sleeping on a sofa in the parlor, only after the workers had finished their card games late in the evening. The environment was bad for a child, Julia thought, but her son was enamored with their Norwegian host. Krenov fell ill during his stay in the boarding house, which Julia blamed on the “horrid lavatories with faulty plumbing and obscene scribblings on the walls.” Krenov recovered from this illness, but Julia was desperate to find another option for the family.
Julia, young Jim and the rest of the villagers of Sleetmute that were caught in town piled into boats for the flood in the spring of 1925, caused by a blockage of broken ice downstream. At its worst point, the water rose above the village’s windows, and one of the village’s children was killed by exposure during the 48-hour flood. Photo courtesy of the Krenov family.
While she was working at the lodging house, Julia met a sea captain in Seattle who made regular visits to Alaska. After hearing about their time in Siberia among the Chukchi people, the captain prompted Julia and Dmitri to seek employment with the Bureau of Education in Alaska. At this time in Seattle, work was short, especially for recent émigrés from Russia, who were arriving in droves; an appointment for permanent employment, especially one that capitalized on their experience from Siberia, was a saving grace for the family. After visiting Mr. W. T. Lopp, the chief of the Bureau of Education, Alaska Division, and taking a short class in nursing, the Krenovs received an appointment from Washington to an outpost in Sleetmute, a small settlement in the interior of Alaska several hundred miles up the Kuskokwim River. Dmitri and Julia were hired as representatives of the United States government in the small village, and Julia became the sole schoolteacher of the village. The pay and conditions were marginally better than those they had lived through in Seattle, but the family was together, having been separated during Julia’s work as a nanny and boarding house caretaker, and Dmitri and Julia were able to use some of their advanced education in service of the natives.
In the summer of 1924, Dmitri, Julia and their young son sailed up the Pacific coast to Bethel on the Caroline Frances, an old schooner operated by Captain Worth, who became Jim’s friend during the journey. The Captain entertained the toddler on the bridge, showing him the navigational charts and compasses. Already, Krenov was showing an interest in boats and sailing, one that took root and grew over the course of his childhood.
At Bethel, a large settlement and trading post at the mouth of the Kuskokwim River, the Krenovs switched from the schooner to the “prehistoric flat-bottomed boat ‘Tana’ with an enormous wheel instead of a propeller,” as Krenov notes in his later writings. After a month sailing up the coast, they were now sailing up the river on a delivery boat, which stopped along the way to deliver cargo and trade at the villages on the banks of the river.
“To take Jim to the North from China was a crime,” Julia wrote in her memoir. “But so was life in Seattle in the homes of strangers. We had to survive somehow, seize the opportunity offered, risky as it may be, make the best of it. Adventurers like myself had no right to have children.”
When the family arrived in Sleetmute in 1924, what they found was nothing like Uelen and the Chukchi, with whom Julia had found comfort and camaraderie. Sleetmute had been established as a trading post with the Yupik natives by early Russian settlers in the 1830s to trade for furs and locally mined whetstones and ore. In the century since its founding, the indigenous people in this area had traded much of their traditional homes, clothing and food for that of the traders and settlers, which were ill-suited to the region’s harsh climate.
Jim and his classmates in his mother’s one-room schoolhouse. The chalkboard at the back of the room is a lesson on America’s Independence Day; the irony of a recent Russian émigré teaching indigenous children (whose family histories stretch back far before the purchase of Alaska from Russia decades earlier) is interesting to consider. Photo courtesy of the Krenov family.
“The warm igloos were replaced by poorly-built drafty log cabins,” Julia noted. “Instead of fur parkas and moccasins, they wore imported out-of-fashion coats made of cheap cloth, calico dresses and high-heel shoes.”
With those changes and exposure to the European settlers came tuberculosis. Of the 25 families in the village, Julia remembered only one older man who had never shown signs of the lung hemorrhages associated with the illness. In their first spring in Sleetmute, the entire population also suffered from influenza, and the family’s sole occupations were fetching water, cutting firewood and tending to the sick. Julia also cared for a young boy with meningitis in the same season. The illnesses were a seasonal occurrence, and though she had attended nursing classes in preparation for their assignment in Alaska, Julia was overwhelmed by the work. Her treatments were also subject to some scrutiny by the native people. That same spring, upon the outbreak of influenza and the case of meningitis, a local shaman arrived, but only after Julia had started the boy’s treatment with western medicine. The shaman refused to treat the boy, “once the white woman had been at the boy’s bedside,” and the 5-year-old died of his infection. By Julia’s account, the mournful parents had shown little faith in either the shaman or the Western medicine offered; their unfortunate position between the two cultures had left them without a comfortable place in either.
Sleetmute was not only set upon by the trials of “acculturation” and illness but also by natural disasters. The Kuskokwim river flooded its banks in the Krenovs’ second spring, due to a dam caused by an ice jam downstream from the village. For 48 hours, the villagers who had been in the town when the flood began had to float in an improvised raft. The flood killed one child and devastated the village’s buildings, having risen well above the windows of the poorly built structures; it took months to rebuild and rehabilitate.
The next year, a forest fire sparked by a forager’s careless bonfire upstream threatened the town’s existence. Sleetmute’s residents managed to save the town by digging trenches and using buckets of water to douse the flames that leapt from the pines and firs surrounding the town, but Julia remembers several weeks of uneasy sleep in the wake of the fire.
Julia’s main occupation at the village, when she was not functioning as an impromptu nurse and caretaker, was as a teacher in the one-room log schoolhouse. Though determined at her post, she was discouraged by the listless and inert pupils in her charge. After school, Julia made her rounds to the households of the village, caring for any of the sick and checking in with the families. Her presence was appreciated by the oft-unwell villagers whom she joined for tea, sitting on the floors of their log cabins.
Julia also took to recording and translating the stories of the people of Sleetmute, befriending an older Russian-speaking woman, Palageya Adrianova, whose family had settled in the village when Alaska was still a holding of Russia. It was Palageya who, at a young age, had been given the privilege of lowering the Russian flag at the settlement when Alaska was purchased by the United States from Russian in 1867, nearly 60 years earlier. The old woman spoke an old dialect of Russian alongside the local native language, and was able to share these old stories with Julia, which included creation myths, stories of famed chiefs and shamans, fables and local lore. These legends came to form a significant presence in her young son’s mind; later in his life, Krenov recalled these legends as an important part of his mystic considerations of the natural world around him.
A chairmaker and his cat enjoy the refreshments of an afternoon nap. Photo by Vittorio Pandolfi, Naples, Italy, ca. 1950.
It is Labor Day in America and Labour Day – Fête du Travail in Canada!
Back in 2019 I wrote two pieces for Labor Day describing how the mechanic societies organized to bring about more protections for themselves, their families and their actions to shorten the workday.
Rest for the Weary is about craftsmen’s associations and societies and you can find that post here.
From Six to Six covers the long struggle to reduce the workday from sunrise to sunset to a more humane ten-hour day. You can find that post here.
The Lost Art Pressers will soon be back from Handworks and my short residence is at an end.