Although Roman furniture is well represented in frescoes, mosaics and sculptures few pieces of wooden furniture survive. The pieces we have for study survived in wet environments such as ship wrecks and wells or were carbonized and buried during the eruption of Vesusius in 79 A.D. Most of the carbonized pieces are from Herculaneum and were preserved and sealed in place by meters-deep pyroclastic material. Pompeii was not entombed as deeply as Herculaneum and contemporary records tell us that some residents (and looters) were able to go back and retrieve household valuables. From Pompeii we have a few plaster casts of the impressions left behind by wooden pieces.
Another source of Roman furniture came to light in 1930 in Simpelveld in the Netherlands when a man digging a foundation for a house uncovered a sarcophagus. The outside of the sarcophagus was not decorated, but the inside revealed a furnished villa for the deceased.
The Simpeveld Sarcophagus is in the collection of the Rijiksmuseum van Oudheden in Leiden, is dated between 175-225 A.D., made of sandstone and measures 205 cm (about 81 in) in length. It is presumed the sarcophagus was made to hold the (cremated) remains of a wealthy woman.
Our reclining resident.
The woman is resting on a three-sided paneled couch, or lectus. Each end is angled outwards to facilitate a cushion and aid in the comfort of the recliner. A lectus (with variations to the number of sides) might be used for sleeping or dining, or both. As you can see they had turned legs.
At the end of the lectus is a roofed structure that some researchers think may be a depiction of the deceased’s villa. It may be something else entirely. The last piece is some type of open cupboard.
On the other side of the sarcophagus there is a sturdy stand with three large containers, an ornate round table, another stand with crockery and jugs (one with its neck turned outwards), a cupboard with doors, an open space and a cupboard with five niches.
The round table is a mensadelphica with three legs ornamented with lion heads and claw feet. In the photo above, right, is a similar table from Herculaneum.
The cupboard has frame and panel doors. Here also we have a similar example from Herculaneum with hingles made of a series of wood cylinders, similar to a piano hingle. And a drawer!
At the end, closest to our resting resident, are a curved-back chair and a chest with a keyhole. The chair may be a cathedra, which was known as a woman’s chair. Based on other sculptural evidence a cathedra may have been made of wickerwork.
Every home had a chest for storage of valuables. They were often bound with iron straps and were locked. Above is a chest found in Herculaneum.
I did not find any full photos of the opposite (short) end of the sarcophagus. It looks as though there are two other open pieces.
Without all the missing contents we don’t know which of the pieces would have been the lararium, or household shrine. If I had to guess my choice would be the open cupboard with the the five niches to accomodate a lamp, incense, salt and dishes for offerings.
One thing to consider is each piece of furniture may not be to scale. For instance, if the cupboard with the frame and panel doors were of a larger scale it might be an armarium, for the storage of arms, and would typically be found near the entrance of a home. The armarium is the ancestor of the modern armoire.
The Simpelveld Sarcophagus is unique. Usually the decorative work on the outside of a sarcophagus is what interests us. There are often depictions of heroes from mythology, a bacchanal in progress, or scenes from the life of the deceased. For the Simpelveld Sarcophagus we have to look inside the thing and what do we find? A cosy Roman home packed with household goods and a reclining resident.
As cautionary woodworking tales go, Nancy R. Hiller’s might just be the funniest – and the most sincere.
Standing in contrast to James Krenov’s “The Impractical Cabinetmaker” from 1979, Hiller’s new book, “Making Things Work: Tales from a Cabinetmaker’s Life,” is not about waiting for a particular plank of wood to tell you its true purpose. It is not an exhortation to fuss over each detail, no matter the personal cost. There is not a shop cat.
(Side note: I do love Krenov’s books, but they have not taught me squat about making a living.)
Instead, Hiller’s funny and occasionally ribald story is about a cabinetmaker who was trained to work at the highest level possible and how she has dealt with the personal anxiety that occurs when the desire and drive for excellence collides with paying the monthly bills.
The backdrop for “Making Things Work” is a cast of characters who could populate a Cohen brothers film – a Missouri furniture maker who masquerades as a Brit to impress his customers. A 30-something client and her older husband who seem hell-bent on cheating every trades worker in the Midwest. And Hiller’s British trainers, who through teasing, criticism and mockery finally let her know what “navy cake” really is.
At the center of it all is Hiller. She seeks to run an honest business, make beautiful things and be fairly paid. Doing all three things at once is an immense challenge, and she tells her odyssey in a series of vignettes that read like a modern-day Aesop’s fable. There is a lesson in each chapter about the craft, business or personal relationships. But it’s up to you to decode them. Her indirect approach is one of the great charms of the book.
If you are considering abandoning your cozy corporate job to make furniture, “Making Things Work” is required reading. It will illuminate you as to how difficult the profession can be. If you are undaunted after seeing the quality of Hiller’s furniture and reading about her struggle to make a living, perhaps you have a shot.
For amateur woodworkers, the book is a great read. Hiller is a fine and precise writer who knows exactly when to land a punch line (sometimes with a sledgehammer).
For those of you who appreciate the manufacturing quality of Lost Art Press books, “Making Things Work” will please you. Hiller used one of our printing vendors here in the United States. This is a book designed to last.
Most of all, kudos to Hiller for taking on this book like a piece of fine furniture. She managed most of it herself, from the writing to the production to the distribution.
“Making Things Work” is available from Hiller’s website here. Highly recommended.
The accurate sawing of tenons (Fig 119) is a vital skill. They should be sawn with confidence and should fit from the saw. To saw clear of the lines, for safety, is not recommended since whittling an overthick tenon to size is both more difficult and less accurate than sawing correctly in the first place. A 250mm (10in.) tenon or backsaw is the most commonly used for this purpose. Frame saws are used in Europe and by some workers in the USA, but they have never been popular in Britain since the manufacture of good-quality backsaws, and beginners usually find them rather clumsy.
Fig. 105
Before starting, check over the names of the parts on Fig 95 and shade in the waste. While there is little chance of throwing away the wrong piece, it is essential that the sawdust should be removed from the waste and not from the tenon. That is, the ‘kerf’ (the sawcut) should be in the waste and just up to the line. Beginners using the thick pencil aid in Fig 105 should saw away one pencil line and leave the other intact. The technique is not difficult if the following guidelines are followed: do not saw down two gauge lines at a time; do not saw to a line which is out of sight. (A modification to the saw is described in Appendix B.)
Start sawing always at the farther corner not the nearer one. Beginners may find it useful to chisel a triangular nick there to start the saw accurately (Fig 120). With the rail held vertically in the vice, start to saw at that far corner, slowly lowering the handle until a slot is cut about 3mm (1/8in.) deep (Fig 121). Now tilt the workpiece (Fig 122) and, keeping the saw in the slot, saw from corner to corner. Then turn the work round, or stand on the other side, and saw again from corner to corner, leaving an uncut triangle in the centre (Fig 123). Now grip the work vertically and, running down the two existing sawcuts, remove this last triangle, sawing down to the knife line, but no farther. Keep the saw horizontal (Fig 124).
Fig. 120
If there is a set-in or haunch, saw this next. Repeat these stages on all the other tenons (Fig 125). The haunch may be sawn right off now or later.
Sawing the shoulder is most important as this is the piece left exposed. Except on wide rails, which may be planed, the shoulder should go up from the saw. Cramp to the bench, deepen the knife cut and chisel a shallow groove (Fig 126). Lay a very sharp saw in the groove and draw it back a few times to make a kerf, then saw off the cheek. Take the greatest care not to saw into the tenon (Fig 127), which would then be severely weakened. Should the waste not fall off, the cheek has probably been sawn with an arc-like motion, leaving some waste in the centre (Fig 128). Do not saw the shoulder deeper. Prise off the waste with a chisel, then gently and carefully pare away the obstruction. Saw off the haunch if not sawn previously.
Fig. 129
Saw off the set-in with a little to spare, and trim this back to the knife line with a chisel only just wider than the tenon size. This avoids damage to the corner of the shoulder. Finally saw the mitre (Fig 129). The tenons should be lettered or numbered to identify them with their mortices.
In early March 2017, Jim Tolpin woke up in the middle of the night with a revelation: He finally understood where trigonometry comes from. “I was actually just working on that when you called,” he says. “And I actually think I just figured it out.”
He approached it the way an artisan would, hands-on, intuitive. “It hurts my head to keep doing this,” he says. “Why am I doing this? Why am I waking up in the middle of the night thinking about math? I literally got up early and just started taking notes, looking up Latin and root words.”
Jim is, above all else, a teacher. But he’s the best kind of teacher. The kind who never believes he knows it all, the kind who never stops learning. In some ways, he can’t help it. It’s in his blood.
Jim grew up on the East coast, specifically Springfield, Mass., with his parents and his sister. His family is East European and came over several generations before. Most of them were in the sciences, but his highly educated grandfather was a craftsperson, who found work in America as a grocer and cabinetmaker.
As a young boy Jim spent the weekends with his grandfather, tagging along to lumberyards, helping him pick out material and working on small projects with him at home. “He definitely was a very early inspiration to the pleasures of making something with your hands and seeing it come to life,” Jim says. “I attribute that to him.”
Jim’s parents were not craftspeople. “My dad was basically a bean counter and a court reporter, and my mom was an at-home mom,” he says. “I related quite a bit more to my grandparents than I did to my own parents.”
Most everyone else in Jim’s family? Teachers.
In high school Jim fell in love with studying the sciences. “I had some super-nerd friends and we got together and built ham radios and went up to the mountains with our radios and set up antennas and did all that kind of fun stuff,” he says.
Jim attended University of Massachusetts Amherst, first majoring in physics and then switching to geology with a minor in journalism. He enjoyed field work, especially mapping, and working with his hands.
“At this point I really enjoyed learning about science and understanding the basic concepts of it, and I wanted to do what Carl Sagan ended up doing, which was bringing science to the public and being able to explain it to the public,” he says. One of Jim’s favorite professors taught both geology and journalism. Jim’s future career, science writing, seemed obvious. He was accepted into Stanford to pursue a doctorate. in just that. But then came the Vietnam War. Jim got a deferment and entered the Teachers Corps in Worcester, Mass., for one year.
After the Teachers Corps, Jim got a job teaching geology at the University of New Hampshire in 1970. There he met some students who had studied under Tage Frid at the Rhode Island School of Design. They were taking on various cabinetmaking and installation jobs, and Jim devoted himself to them, helping them and learning from them. “Within just a year or so I think I learned more about woodworking than I did about geology in four years of college,” he says. “Because of that total immersion, that total engagement.” At this point, “science writer” began to fade. “I had an inherent compulsion to want to work with my hands,” he said.
Enter Bud McIntosh, an old-school boat builder. Bud turned out to be a huge influence on Jim, convincing him that he wouldn’t be throwing away his education by going into woodworking. “He also had a degree in classic literature, actually, but he devoted his whole life to boat building, and found it a challenge from start to finish.”
Something clicked. Jim realized there could be challenge, joy and the chance to always learn new things in the field of woodworking. “My mind and my hands would be fully engaged,” he says.
Jim Tolpin timberframing in the early 1970s. Photo by Ken Kellman.
Jim continued cabinetmaking and then got a job with another boat builder in Rockport, Maine, fitting out interiors of workboat-type yachts. It was a crash course in complicated woodworking (think slopes and curves) that improved his work.
In 1978 Jim moved out to the West coast, Washington state, specifically, with his young family for opportunities in boatbuilding. He heard the pay was better — and it was. He found work right away doing interior finishes on boats, but soon transitioned to cabinetmaking for a couple reasons: he could make even more money and he realized he was a more efficient cabinetmaker than he was a boatbuilder.
Jim building a tinker’s wagon in the early 1980s.Jim with his son and traveling model cabinet in the early 1990s. Photo by Pat Cudahy.
Jim learned how to make a (good) living out of a small cabinetmaking shop. He experimented with setups, and figured out the best way to design his workflow. And from that came his first book: “Jim Tolpin’s Guide to Becoming a Professional Cabinetmaker.”
So he wasn’t his own version of Carl Sagan. And he wasn’t teaching anyone about science. But he was teaching woodworking. And so, his college dream began to come true in another way. (Spoiler alert: He’s now written more than a dozen books and has sold more than three-quarters of a million copies.)
Jim’s cabinet shop in the early 1990s. Photo by Pat Cudahy.
During these years Jim says he thoroughly enjoyed cabinetmaking, and not just the making. He enjoyed figuring out, and writing about, how to run a successful cabinet shop. “Really the goal, in cabinetry, is to design a system where you can hire some kid off the street and in one or two days you can teach him the entire process,” he says. “When I realized that I was that kid off the street, it wasn’t challenging anymore.”
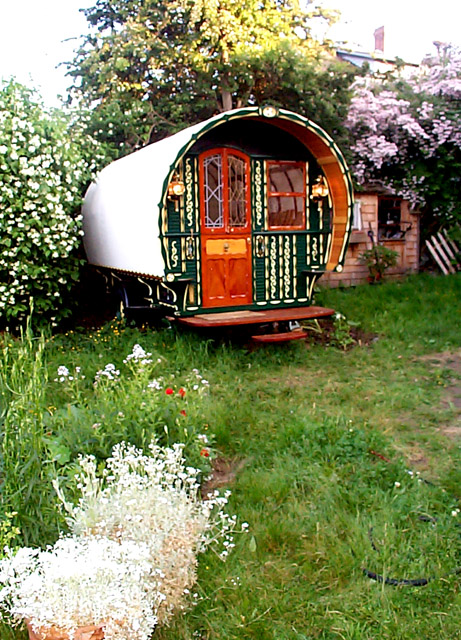
So he explored new avenues of woodworking. This included green woodworking, and building pitchforks and chairs with his friend, Dave Sawyer. “And then I got into this whole notion of building small boats,” he says. “I did a couple small boats and then I got into gypsy wagons.”
Yes. Gypsy wagons.
“That was a real challenge,” Jim says. “I didn’t have plans for building gypsy wagons. I did have some museum drawings but they didn’t show joinery. And I needed to do joinery for something that could travel on the highway. So I kind of did a lot of seat-of-the-pants engineering to build these things.” He built six.
It was during these years that Jim became a prolific writer. “I’m writing stuff down as I’m learning it,” he says. “So after I learned something and felt like I really had a handle on it I’d write a book about it. There’s a whole series of books that happened one after another and I slowly migrated from making a living woodworking to making a living writing about woodworking. I was really getting into a balance of journalism and doing the craft itself.”
And Jim loved that balance. He was living out Bud’s wisdom, engaging both his hands and his mind while also doing what he loved — woodworking along with constant learning.
“Most afternoons and evenings I’d be in the shop making stuff, testing things out, testing out some theories about the process,” he says. His mornings, when he says he was “freshest and not antsy,” were devoted to writing. “I was constantly discovering a different way of looking at all these processes and trying to really understand what’s really happening when we use a tool on wood in a certain way. What’s really going on from a physics point of view? And I’d do some analysis about that and experiment with that. I’m not a fast learner, by any means. I had to really experience it. I find that I have to work from my hands to understand something.”
With his books, Jim became a household name among woodworkers. With this fame came the reputation that he was, as he says, an absolutely fantastic woodworker. “I’m an OK woodworker,” Jim says. “I do pretty good woodworking.” But, he says, he’d never consider himself a fine woodworker, one who builds studio furniture. “I just basically became a good woodworker that does good stuff.” (I tell him he’s being humble.)
He admits to being a good teacher — it’s his passion. But he finds it interesting that people confuse the prolific writing he does with this idea that he’s an exceptional woodworker. “I’m much more interested in the process, in teaching the process than I am the product.”
He has no attachment to the things he makes, which likely stems from 25 years of cabinetmaking and spending a month on a project only to sell it to a client and never see it again. His joy, he says, came from the process of making them.
With a number of books under his belt Jim was approached by Tim Lawson at a neighborhood party. Tim thought Port Townsend was the perfect location for a woodworking school. “It’s a very rich learning environment here and there are so many masters of different trades here,” Jim says. “He just approached me and asked me if I’d think about it and I thought about it for about 30 seconds and said, ‘Yeah. Let’s see what we can do.’”
But Jim had one condition. “If I did teach I would only teach the hand tools because I was done with routers and tables saws,” he says. “Well, not exactly table saws but I was absolutely done with routers and power sanders. I gave them all away. I’d be happy to never see one for the rest of my life.”
For Jim this was a circling back to his time as a boat builder, which required lots of hand fitting with planes and chisels. This also meant a return to another love: learning. “I returned myself to studying and practicing and really developing my hand tool skills,” he says. And he now firmly believes that machines aren’t able to teach the same things as hand tools — an intimate connection with the wood is essential. “And for selfish reasons I just didn’t want to be around students and power tools,” he says. “They scare me, the tools scare me to death.”
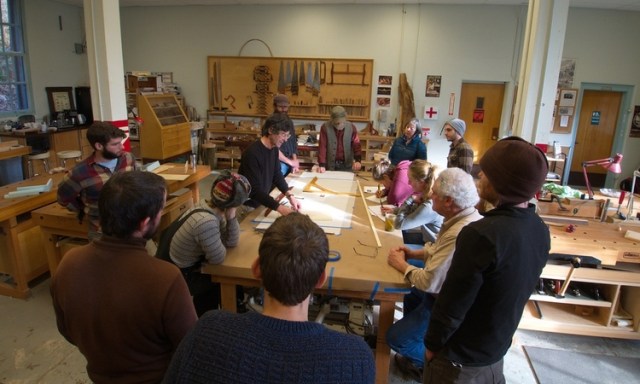
Jim and Tim teamed up with John Marckworth, and the three founded the Port Townsend School of Woodworking. It officially opened its doors March 8, 2008. Today the school is considered to be one of the finest in the country.
In many ways, Jim has lived several lifetimes but his story, of course, doesn’t end here. About five years ago he attended a lecture about proportional systems and the influence of Grecian architecture in furniture at a Woodworking in America conference given by George Walker, a man he’d never met. And George attended Jim’s lecture on how our bodies inform the form and function of furniture, having never met. At the end of each lecture, Jim and George were asking each other questions the other had never considered. “And basically, we’ve been talking ever since,” Jim says. “He can’t shut up about it. Neither can I. We find there’s always something to learn about the ancient systems that have been in place for thousands of years about designing furniture and building.”
It was after those lectures, at a bar in Chicago, when Jim said to George, “You’ve got to write a book about this stuff.” George said, “I don’t know how to write a book.” But Jim, of course, did. “We just ended up in full collaboration mode,” Jim says.
The duo has formed their own company, By Hand & Eye, LLC, and occasionally meet up to give talks. Recently they both traveled to Los Angeles to give a 90-minute talk to Google’s design team. (And if you haven’t watched the “By Hand & Eye” animation made by Andrea Love, who also was the illustrator of “By Hound & Eye,” you must. You can see it here.)
These days a typical week in Jim’s life includes continuing program development for the Port Townsend School of Woodworking, working on projects for Lost Art Press, woodworking (the day we spoke he said he was headed over to a friend’s house that afternoon to help plank an 18-foot-long rowboat) as well as what he calls “reality maintenance chores.” He also goes to the school two to three times a week, visiting classes.
Since moving to Port Townsend Jim has remarried. His wife, recently retired, worked as a physician for more than 30 years. He has two grown children from his first marriage and now also has a grown son and a 15-year-old who lives at home.
Home is in uptown Port Townsend, an old Victorian town and one of the only Victorian seaports left in the United States. His house is one of the oldest in town. The design of his shop, which was completed a couple years ago, was informed by the existing house. Jim designed the shop and one of the school’s main instructors, a third-generation carpenter named Abel Isaac Dances, took the lead on it. Several graduates from the school’s foundation course spent a summer working as paid apprentices, and together they built 90 percent of the shop using only hand tools.
The town of Port Townsend is small and fairly quiet, except in the touristy summer months. And, it’s walkable. Jim and his wife can walk to the movie theater or down to the water in about 7 minutes. They visit farmers’ market and grow their own herbs and berries — lots of raspberries. “I feel like I’m living this charmed existence,” he says.
Jim says he can’t imagine ever leaving Port Townsend. It’s home. In the years ahead he expects growth in the woodworking school, with expanded programming. “And I always think that the book I’m working on now is the last book I’m ever going to write, and that was six books ago,” he says, laughing. “If I know I have something worthwhile to say I will probably keep writing.”
And ever the life-long learner, Jim plans to continue the role of student. “There are college courses I want to take online,” he says. “I may go back to college for all I know.” He tells the story of his uncle who, at 100 years old, went back to college to major in American history. “I talked to him when he went back to college, and he said, ‘I’m really cheating, actually.’ And I asked him, ‘Why are you cheating?’ And he said, ‘Well, I’m majoring in American history and I lived through half of that.’ He was a very funny guy. He was an inspiration to me. He had this love of learning his whole life.”
Jim’s love of learning shows up every day in his shop. “This is what happens to me: I’ll be doing something and I’ll just question, Why am I doing that? I was one of those really annoying students that always asked that question. I even asked why one and one equals two, because that made no sense to me. It turns out it’s a good question, by the way, in mathematics.”
Jim says he loves going back and revisiting things he had been taught, but this time with deeper meaning and explanation. “I want to know the intuitive reason why all these things work,” he says. “I mean, how long did it take me to realize why a plane is called a plane? It’s because it makes a plane. I should have known that. I should have known that 35 years ago. As soon as you say that to someone they whack their foreheads. It’s fun. It’s just really fun and that’s why I keep doing it.”
This constant questioning, thinking, experimenting and processing requires intense focus, which is why Jim enjoys working alone. His shop music is lyric-less: classical, Gaelic or electronica.
This intense focus also requires breaks. For fun, Jim enjoys making gliders. “I make wood that flies, basically,” he says. Made out of balsa, most without motors, Jim says they’re simply hand-launched things that play with the wind. It’s a passion that stems from his childhood, when he would make stick-and-tissue model airplanes.
He’s also keen on keeping himself physically fit, which means walking every day with his wife and rowing solo or with one person most every day in the warmer months. He goes to the gym almost every other day for basic conditioning, in order to continue rowing and working with hand tools as he is now. “When I do that stuff I’m not thinking about all the other stuff,” he says. “I’m just enjoying being outside, getting into nature and getting into the physical exertion of my body.”
The paths in Jim’s life have led him to unexpected places, and yet, the destination has always been the same: figuring out a process with his hands, and knowing and understanding it so deeply he can explain it, simply, to others. “I love being in the position of not knowing but maybe going to find out,” he says. He hopes to keep his eyes as wide open as possible, while not taking things personally and observing slowly. He encourages others, particularly longtime woodworkers, to do the same.
“Pass on what you know while you still can,” he says. “There are a lot of people out there who want to know this stuff. If you have an inclination to teach, do it. You’re not more than you think you know, so pass it on.”
Editor’s Note: One of the many exciting books in the works at Lost Art Press is Joshua Klein’s book on Jonathan Fisher (more on Fisher here). Fisher was an ingenious American colonial polymath and woodworker who could fashion almost anything out of wood – a clock, a lathe turned by a windmill, his own tools, furniture for his town, convertible beds and on and on.
This project will be in our hands for editing soon and you’re going to hear a lot more about Fisher and Klein’s personal journey of discovery in researching Fisher. In the meantime, here’s a crazy story about the lengths Joshua is going to for the book.
— Christopher Schwarz
I remember talking with Don Williams about his struggles working on the H.O. Studley book, “Virtuoso: The Tool Cabinet and Workbench of Henry O. Studley.” He said the challenge was unearthing information about who H.O. Studley was. Don searched far and wide to understand the story of this man and his legendary tool cabinet. Studley left no paper trail of letters describing his work, little if any of his other woodwork has been identified and much of the research required extensive traveling. Talk about a complicated project!
When Don visited my wife and me in Maine a few years ago, I took him through the Jonathan Fisher house. As we walked around the house looking at artifacts, we discussed the fact that the Fisher story has the opposite problem. Fisher’s house (five minutes from my own) is full of furniture, tools, paintings, journals, letters, etc. The archives are brimming with tiny little notebooks full of 18th- and 19th-century script, most of which was written in a shorthand he developed at Harvard. There are boxes of drawings, historic photographs and archaeological findings. Digesting this enormous body of information in order to discern a cogent furniture-making narrative would be an enormous task. If Studley was about accumulation, Fisher is about distillation.
As I was writing the chapter about Jonathan Fisher’s barn workshop, I was presented with the task of bringing together all of these artifacts into one scene. I know them all so well and am so immersed in the journals that I could picture it in my mind. His “tool closet” of planes, his lathe in the background, the sheep in the corner, his bald head and the “grave” demeanor on his face. It was almost like I was there. The problem was to describe it to the reader. Although I explained the setting as best as I could, I realized that looking at photographs of objects was not going to be enough. I wanted the reader to see things in context.
To my knowledge, no one writing a historic monograph on a pre-industrial furniture maker has ever commissioned an artist to recreate a workshop scene. Usually, there just isn’t enough information to create such a thing. But because almost everything from Fisher’s shop is either extant or we have paintings or photographs of it, I knew it was possible.
Is it necessary? No. Is it awesome? YES!
Fortunately, I’m working with Chris and John on this book so, of course, they were game. I contacted my first-choice artist, Jessica Roux, from Brooklyn, N.Y. I’ve admired Jessica’s work since seeing it on the covers of Taproot magazine. It struck me right away because it reminded me of Fisher’s own balance of academic training and folk whimsy. Also, the way she uses color and texture reminded of the many 18th/19th-century workshop paintings we all drool over. Her aesthetic vision seemed just right for this.
When I explained the project to Jessica, she was interested. I expressed how important historical accuracy was and she assured me she was used to several rounds of back and forth with authors to make sure things were conveyed correctly.
With the green light, I assembled images of the tools, historic paintings and Fisher himself and sent them along with a rough compositional sketch as a starting point. Then the back and forth began. During the last three weeks, Jessica has been refining a sketch that Chris and I will approve before she creates the final image. The color will happen in a magical digital process I look forward to learning more about.
We hope this artwork will bring Jonathan Fisher to life for you as you read this book. His life was one full of beauty, drama and lots of wood shavings — I can’t wait to share this unbelievable story.
The manuscript will be in Chris’ hands in a matter of weeks. Stay tuned.


 As cautionary woodworking tales go, Nancy R. Hiller’s might just be the funniest – and the most sincere.