At the time I stopped teaching in 2015 I was booking 18 class a year. It was a stupid schedule. I quite enjoyed the travel and learning from the students. But my personal work – my writing, designing and building – suffered.
Starting in November I’m returning to a limited teaching schedule – four classes in a year and no more. I am extremely excited (yes, I used an adverb there) to share the techniques and designs I’ve developed during this hiatus.
These classes will be different as I’ll be teaching little or no casework or workbenches (unless the French Oak Roubo Project III comes calling). It will be all staked furniture and chairs.
My first class will be Nov. 3-4, 2018, at our storefront in Covington, Ky., where I will teach the Staked High Stool. This project is a great introduction to chairmaking and working with compound angles. And everyone leaves with a finished stool. You’ll be able to finish your stool with “shou sugi ban,” though we’ll also teach spray finishing of shellac and some hand-applied finishes.
Registration for this class will open next week. We’ll have full details on all the storefront classes for the remainder of 2018 posted on Monday.
I hope you’ll consider joining us. The classes are small – six students maximum. The workshop is a great place to work with excellent benches and loads of natural light. And Covington, Ky., is a fun place to stay and eat.
Here’s the problem: I gave my low, eight-legged workbench (based on a fresco at Herculaneum) to Brendan Gaffney. That bench is (I think) somewhere in New York state. Then I loaned the low bench I built that’s based on the world’s earliest extant workbench at Saalburg, Germany, to Dan Raber at the Artisans Guild in Millersburg, Ohio.
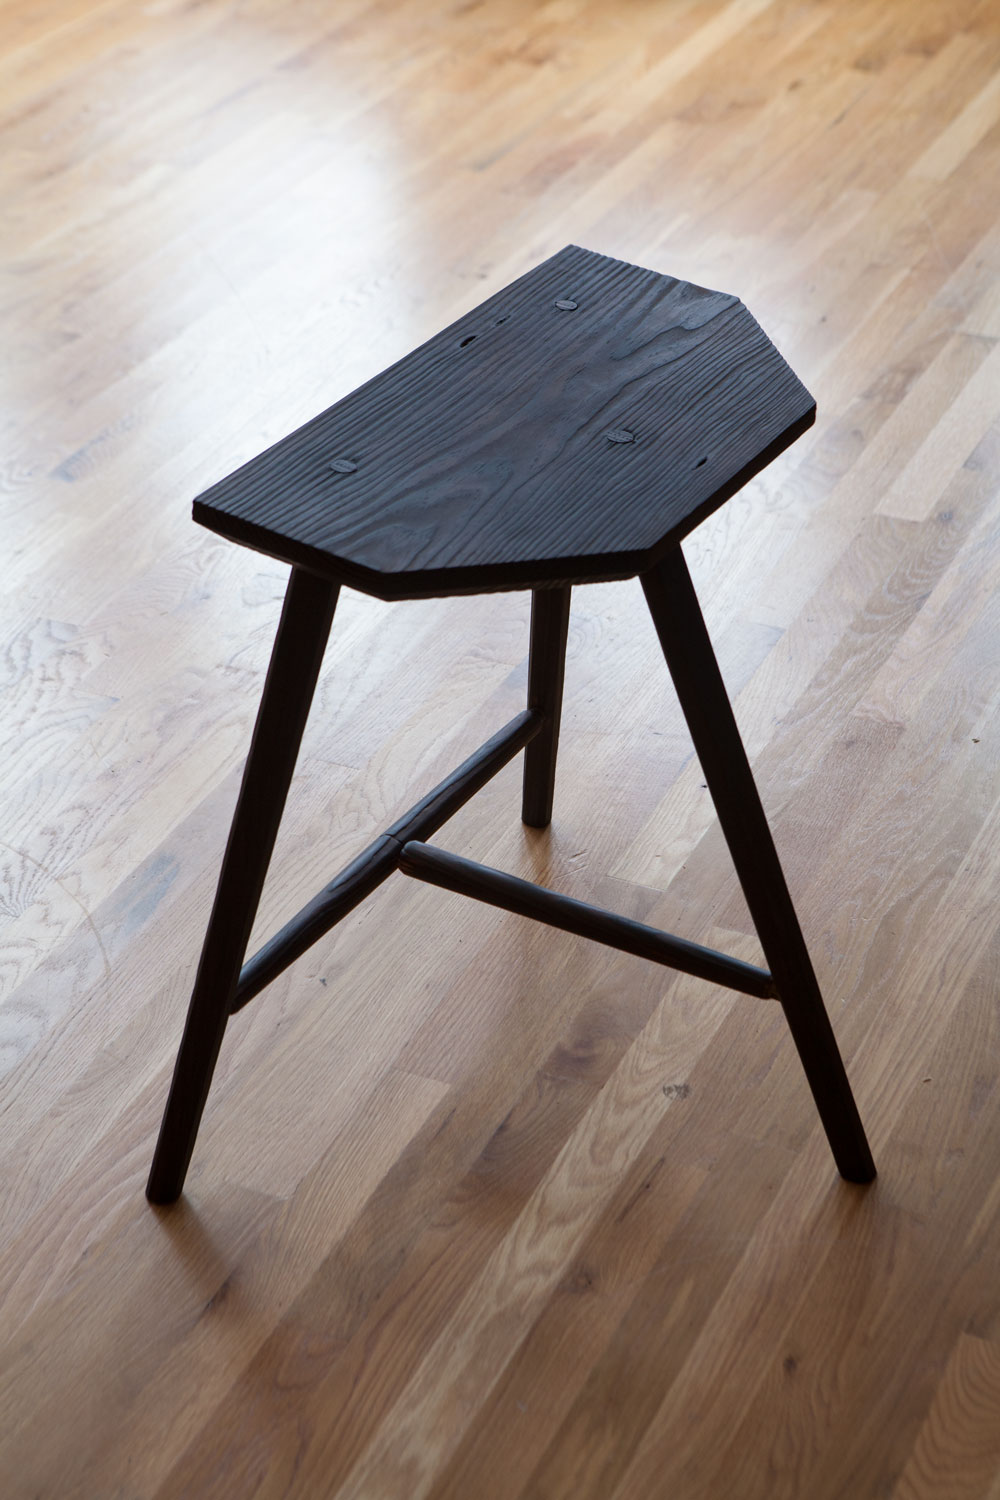
Then, while dishing out our family supper on my Loffelholz workbench in our dining room (which is too high for the Colonial Williamsburg demonstrations) I barked my shins against something. A Swedish sitting bench I’d built in 2010 for Popular Woodworking Magazine. The bench is from the Älvros Farmstead, a group of buildings from the 16th and 17th centuries that were moved to Skansen, Sweden, which is a living history museum.
The Skansen bench’s top is 11” wide, more than 2-1/2” thick and 72” long. The bench’s seat is about 19” off the floor.
Hmm. I guess I do have a Roman workbench here.
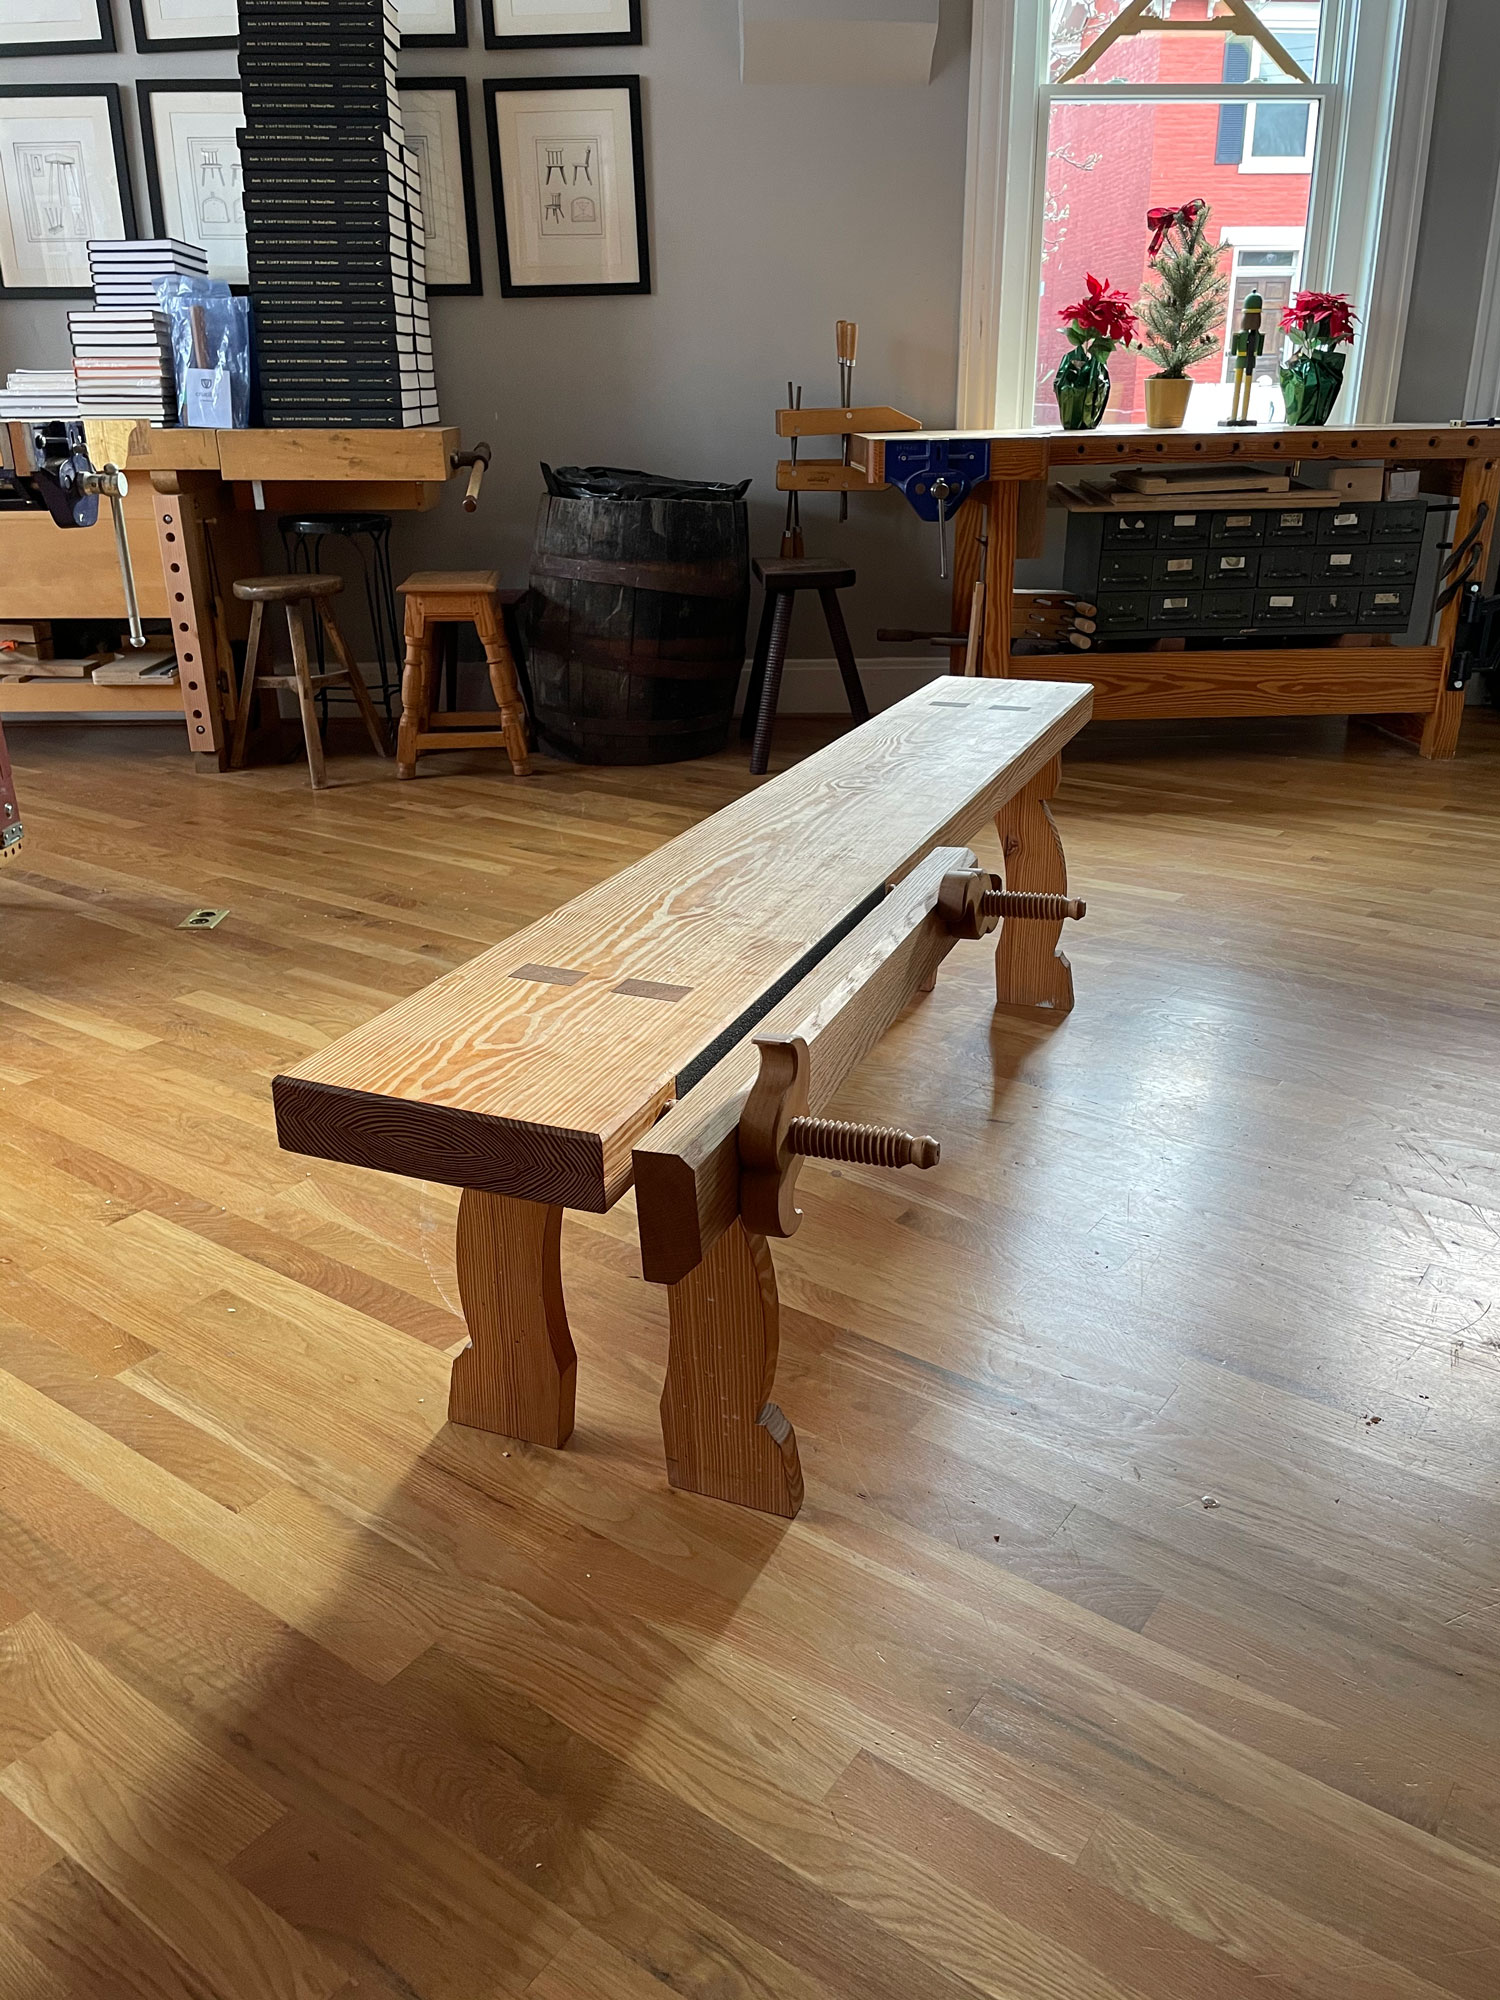
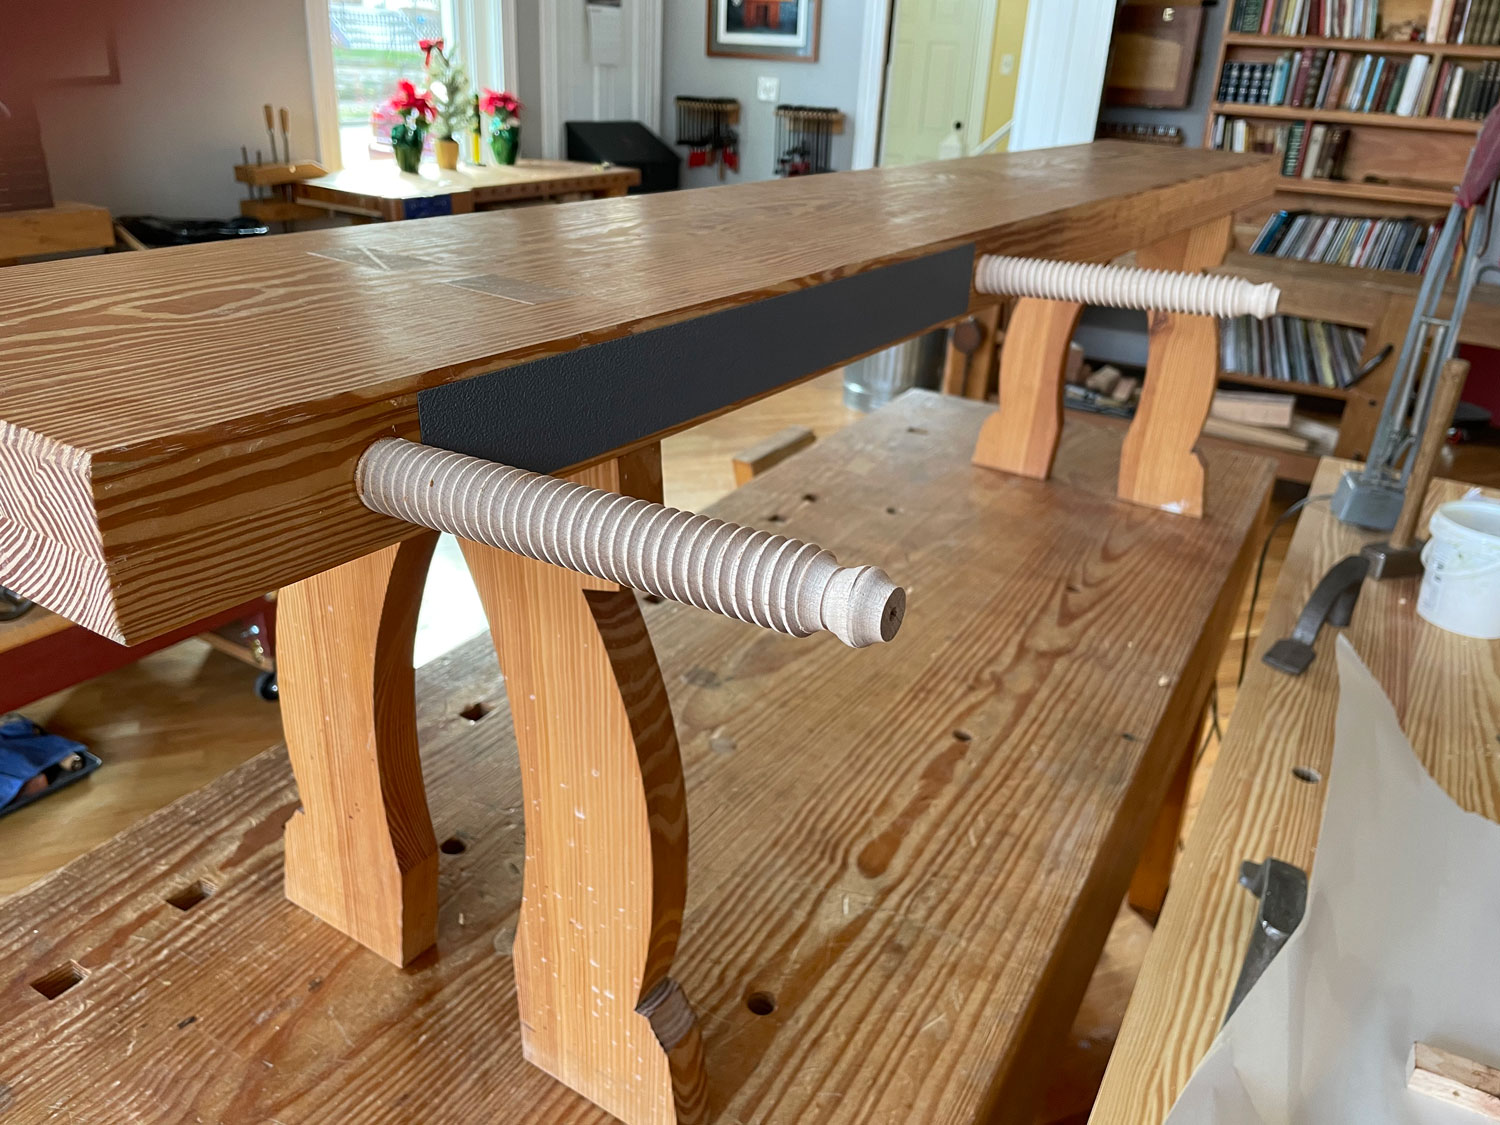
Today I started to add workholding to the bench. First up: A twin-screw vise based on 14th-century French benches. I made a couple screws from maple and threaded them with my 28mm threadbox from Dieter Schmid. The tool works brilliantly, is expensive and never gets loaned out. The threads are about 7” long, and have a 1”-diameter x 5”-long tenon on the other end.
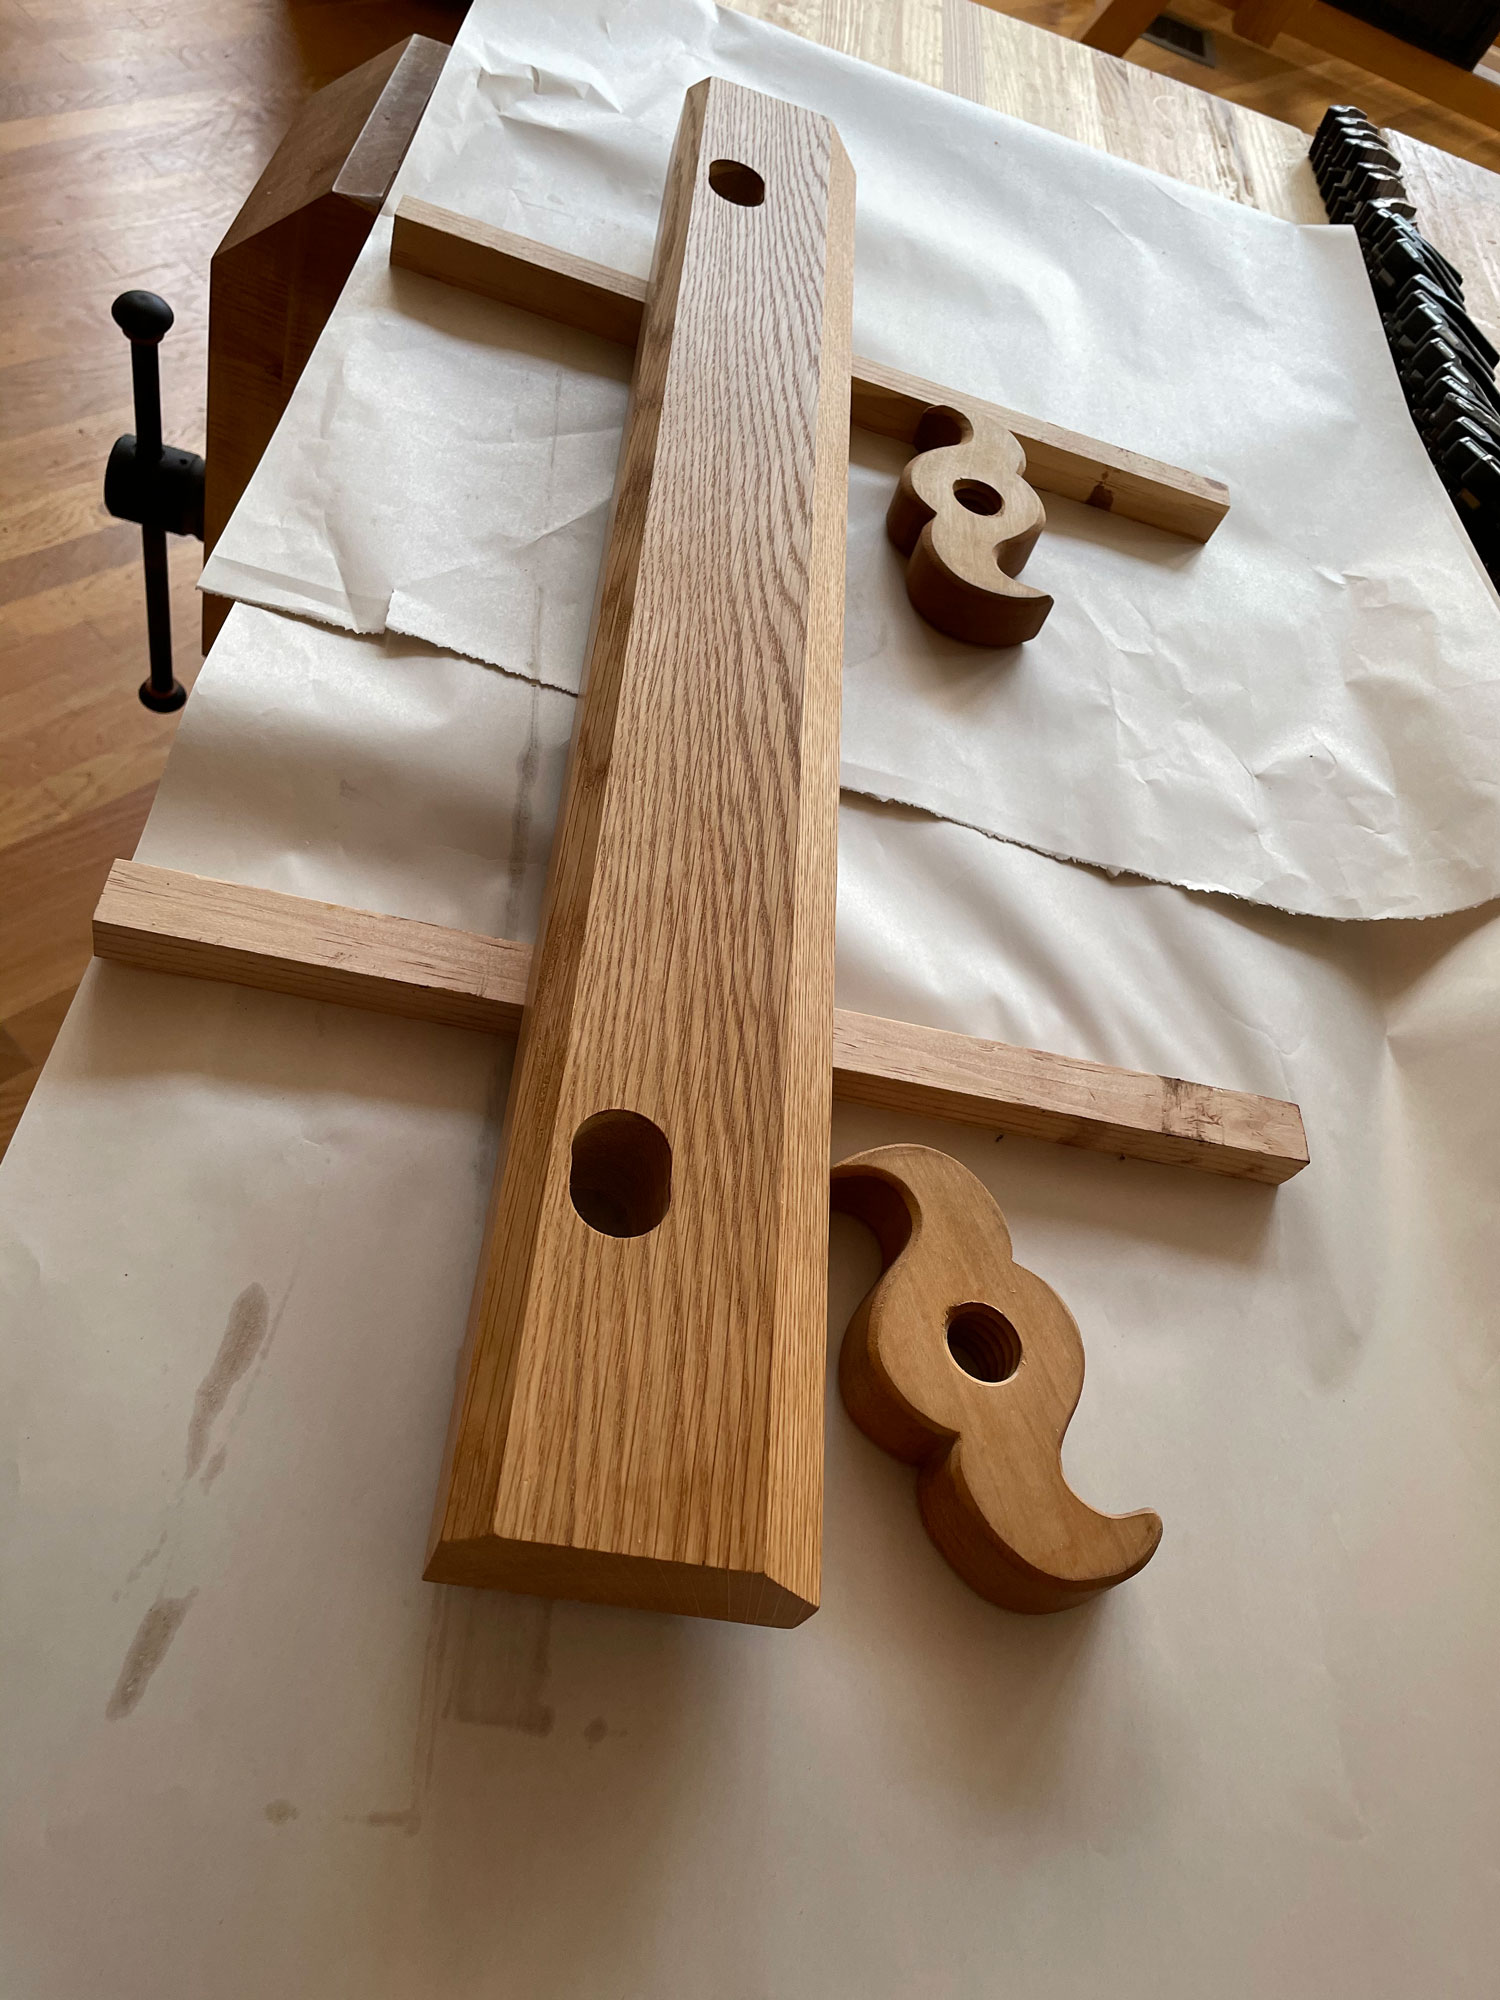
I drilled a couple quick holes on 22” centers in the side of the Skansen bench to receive the tenons. This spacing allows me to hold and shape a chair seat. The vise chop is made from 2” x 4” x 30” red oak. The chamfers reduce the weight of the chop without reducing its grip (thanks vector forces). The vise nuts are maple.
To make the vise grip better, I looked around for coarse leather to glue to the bench and the chop. I am presently bovine-free. So I took a tip from the late Jennie Alexander and lined the vise with Safety Walk anti-slip tape. You can buy it at any good hardware store. It’s designed to stick on ladders and such to improve your footing. I use it on handscrews and the like. It’s not period-correct (the French used sturgeon swimbladders to line their vise jaws, JK), but I just forgave myself for the lapse.
All the parts are finished with linseed oil and beeswax.
Tomorrow I’ll add an adjustable planing stop, a “palm” and a chairmaker’s shaving stop.
Finally, I’ll chain this Roman workbench to a heavy object in the library so it doesn’t escape.
— Christopher Schwarz
If you are wondering what the hell I’m talking about in this post with low workbenches and “palms” and swimbladders, you haven’t read my book “Ingenious Mechanicks.” It’s all about early ways to work wood without a complex bench.
I can’t bring myself to write a post about completing a job and welcoming our clients home without expressing heartfelt sympathy to all those who have lost their homes, and more, over the past few days to fire or financial devastation. Making things – whether furniture, books or buildings – is a source of joy. Seeing them happily used is an honor. Seeing them destroyed is heart breaking.
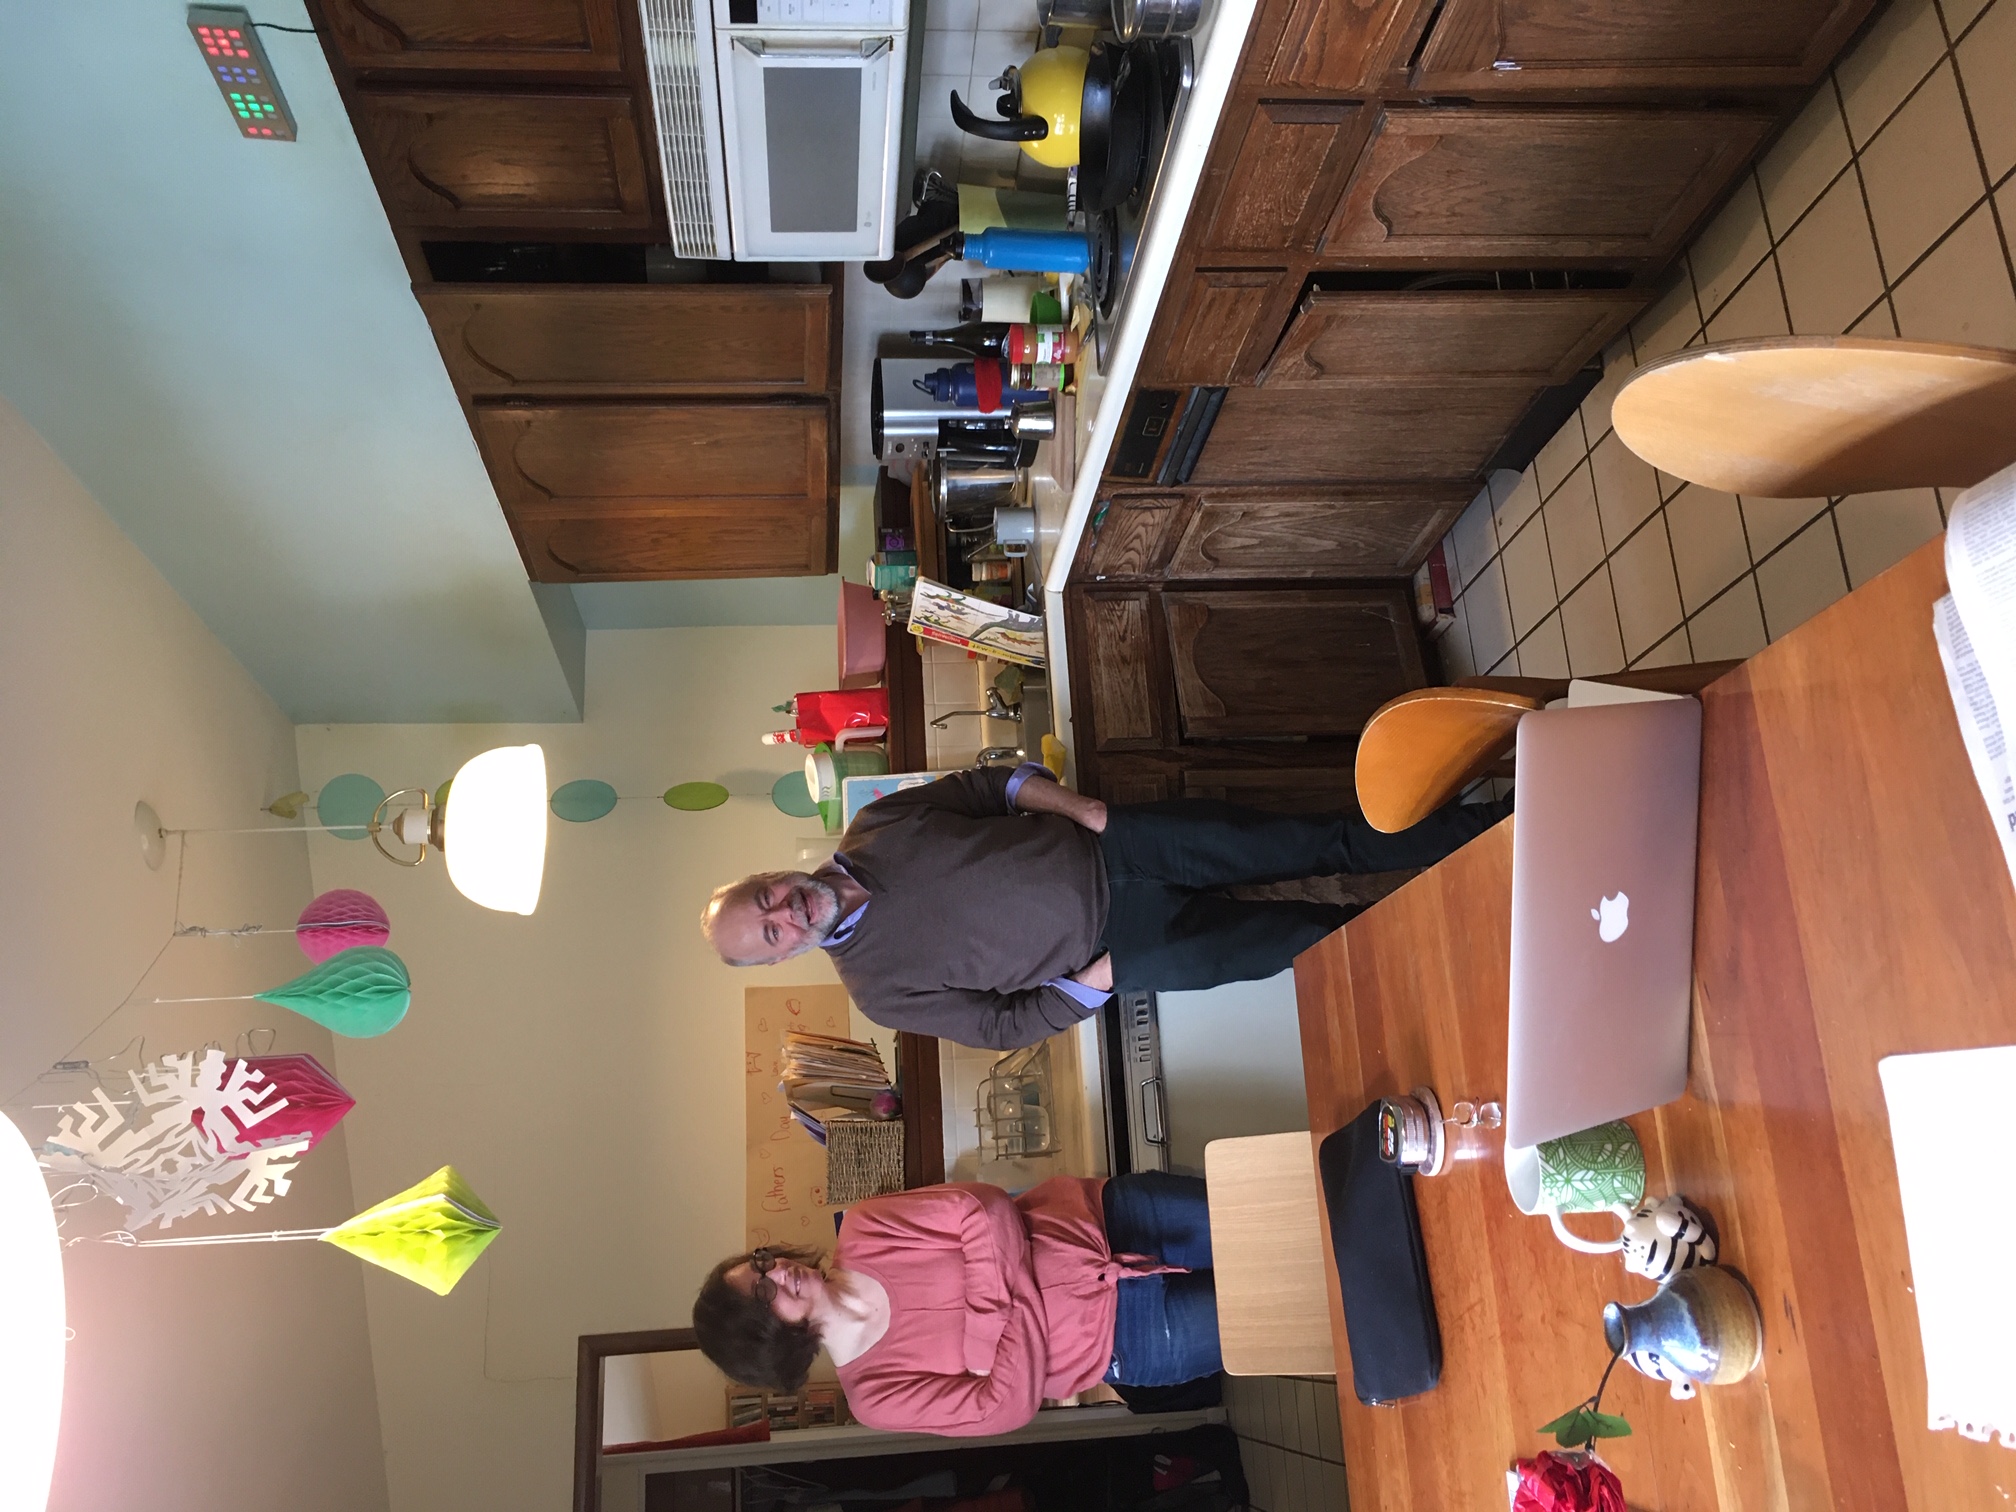
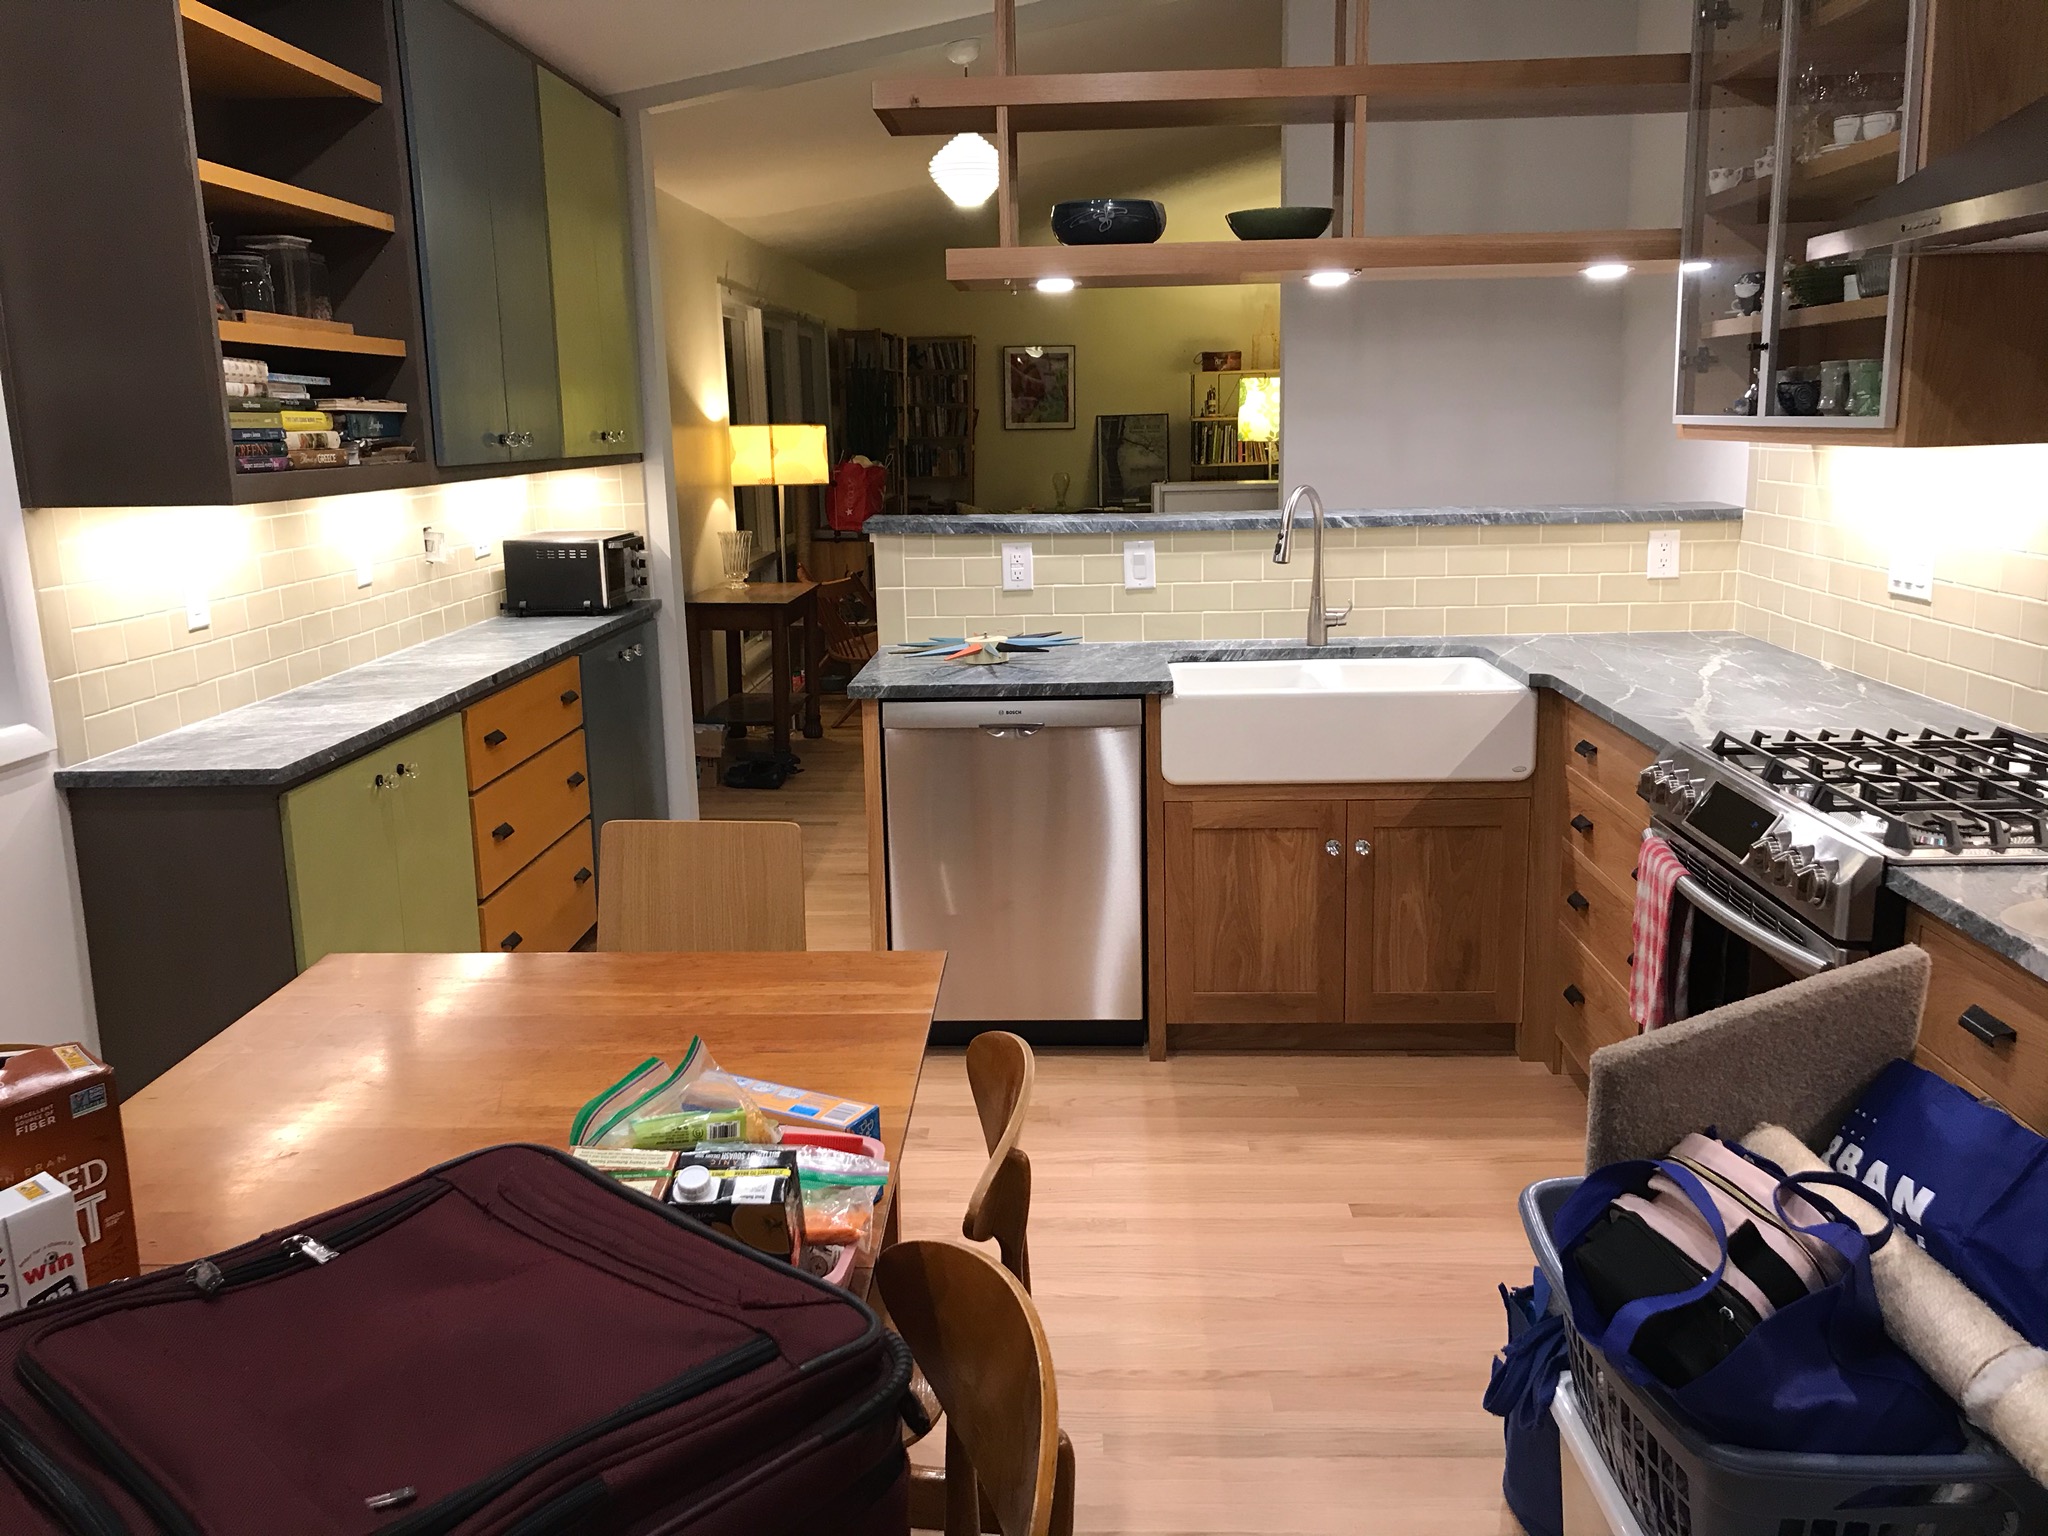
Yesterday we finished the kitchen I’ve been tracking here in occasional posts, and the Robinson family moved home. The job took much longer than usual, thanks to the pandemic. We’d planned to do the bulk of the work while the homeowners were in Europe, where Ben Robinson was scheduled to spend a good chunk of the summer with students. When reality put the kibosh on Plan A, we discussed Plan B: the family could live at home, cooking on an outdoor grill, and we’d seal off the kitchen workspace to keep construction dust (and droplets) to ourselves. Then we realized that wouldn’t work, either – the project included reworking the full staircase to the finished basement, as well as the steps to the upper level, and replacing the front and kitchen doors. In the end, Ben and Jenny took their three children, two cats and much of their kitchen’s contents to a rental, and then another. (There was more than the usual rental property available for sublet this summer, as many students at Indiana University-Bloomington had left town due to the pandemic.)
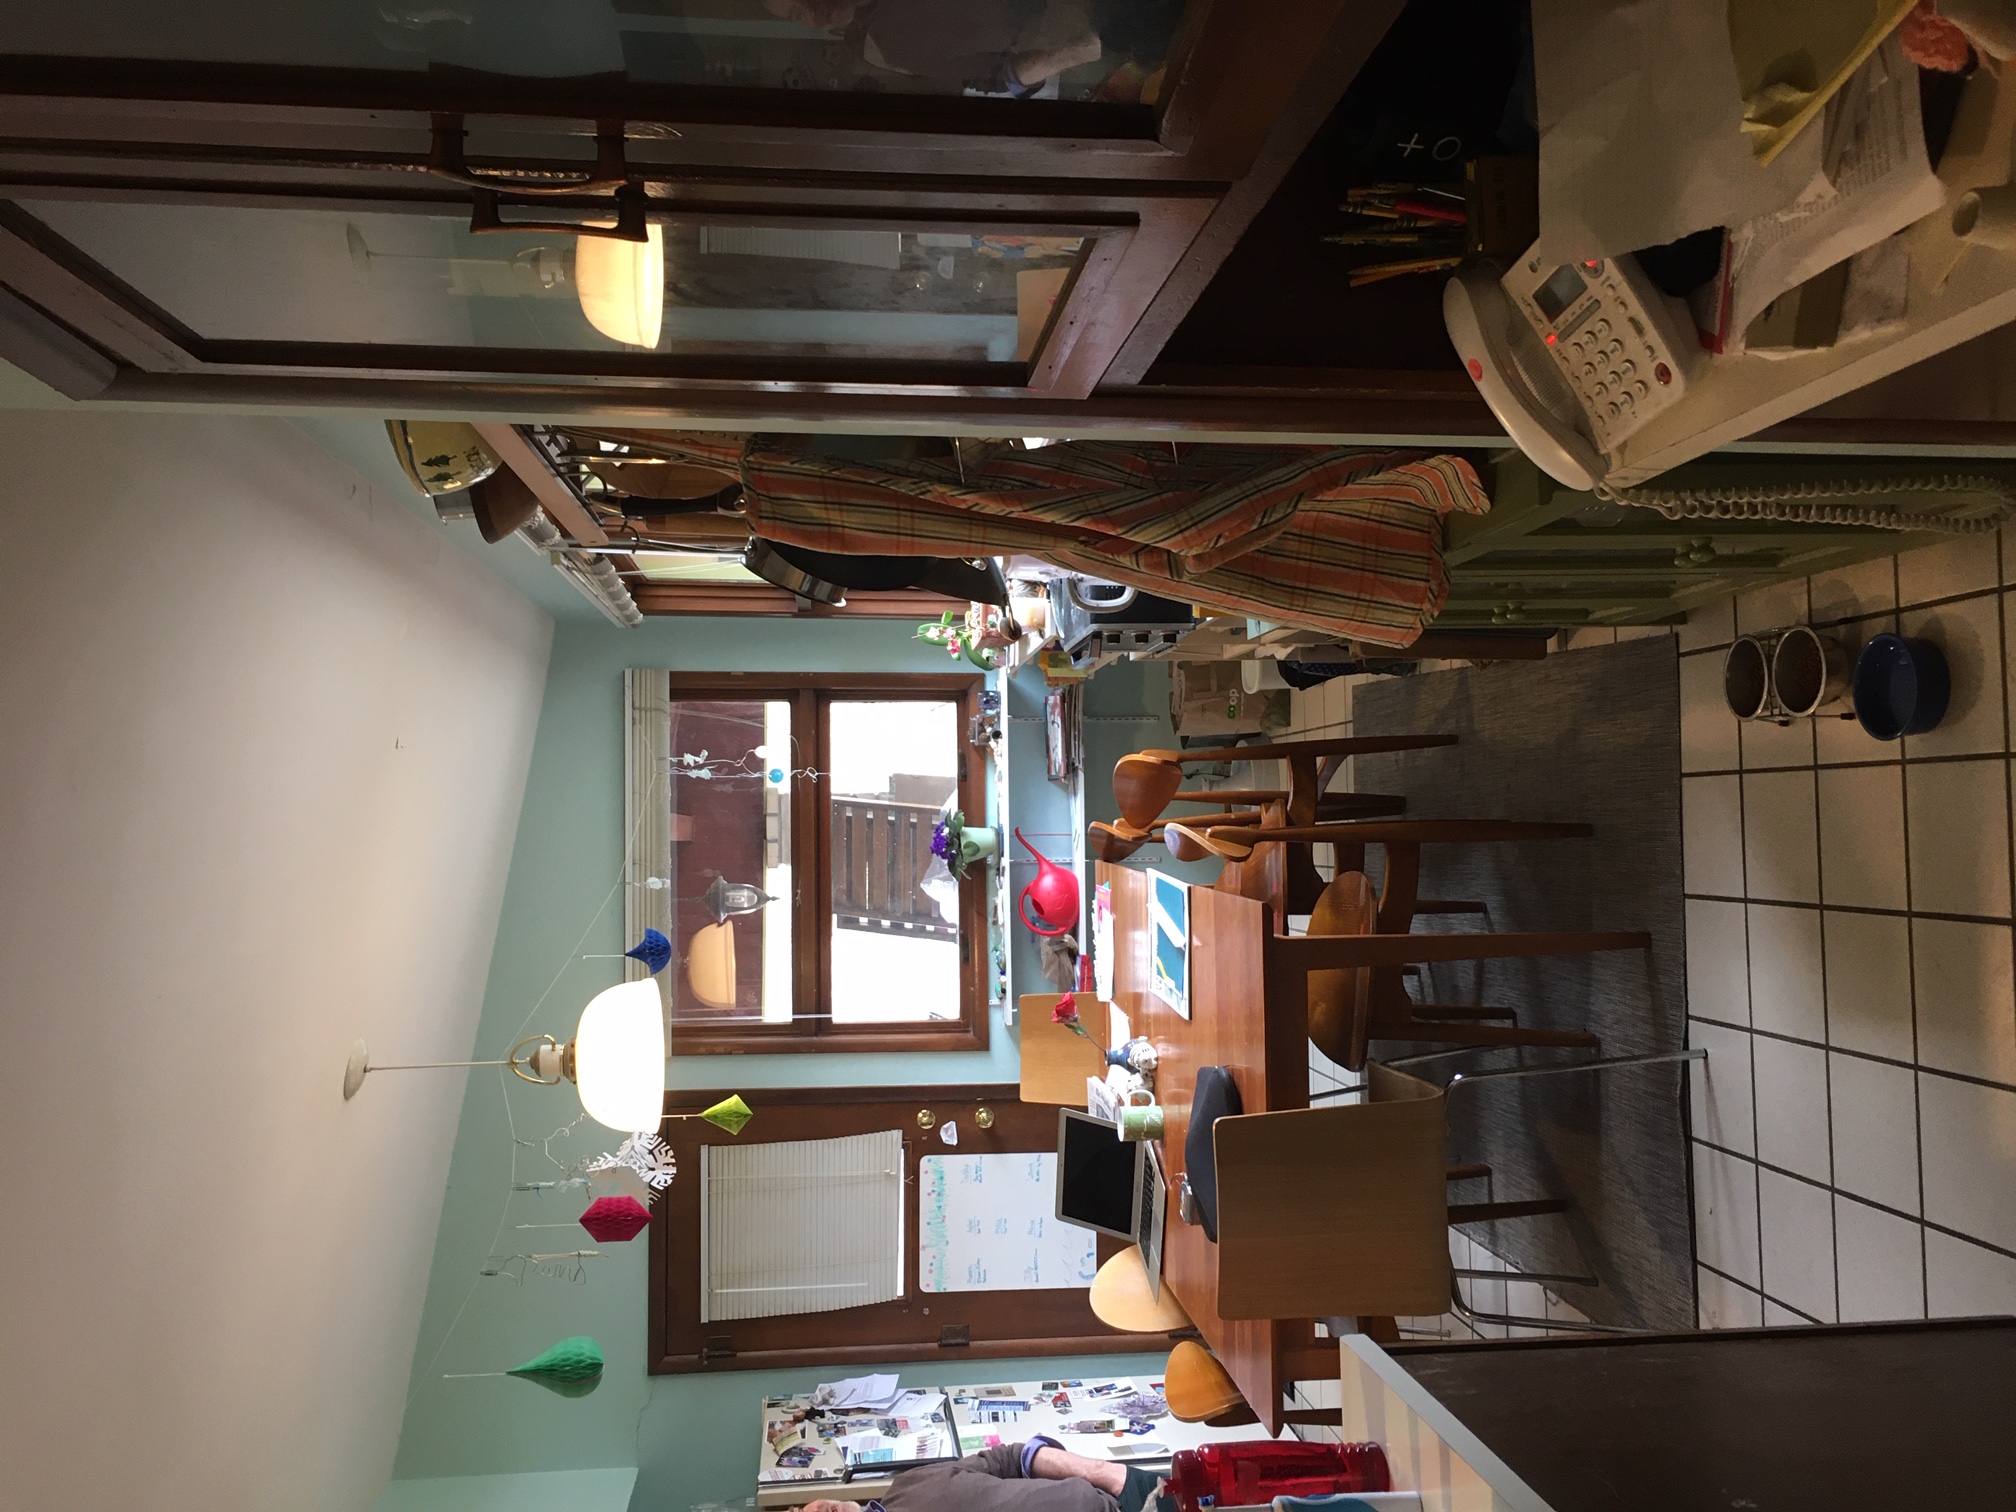
The same view, before: tile floor, falling-apart cabinets, non-functioning appliances, useless bulkheads and a wall that blocked the kitchen from the living room.
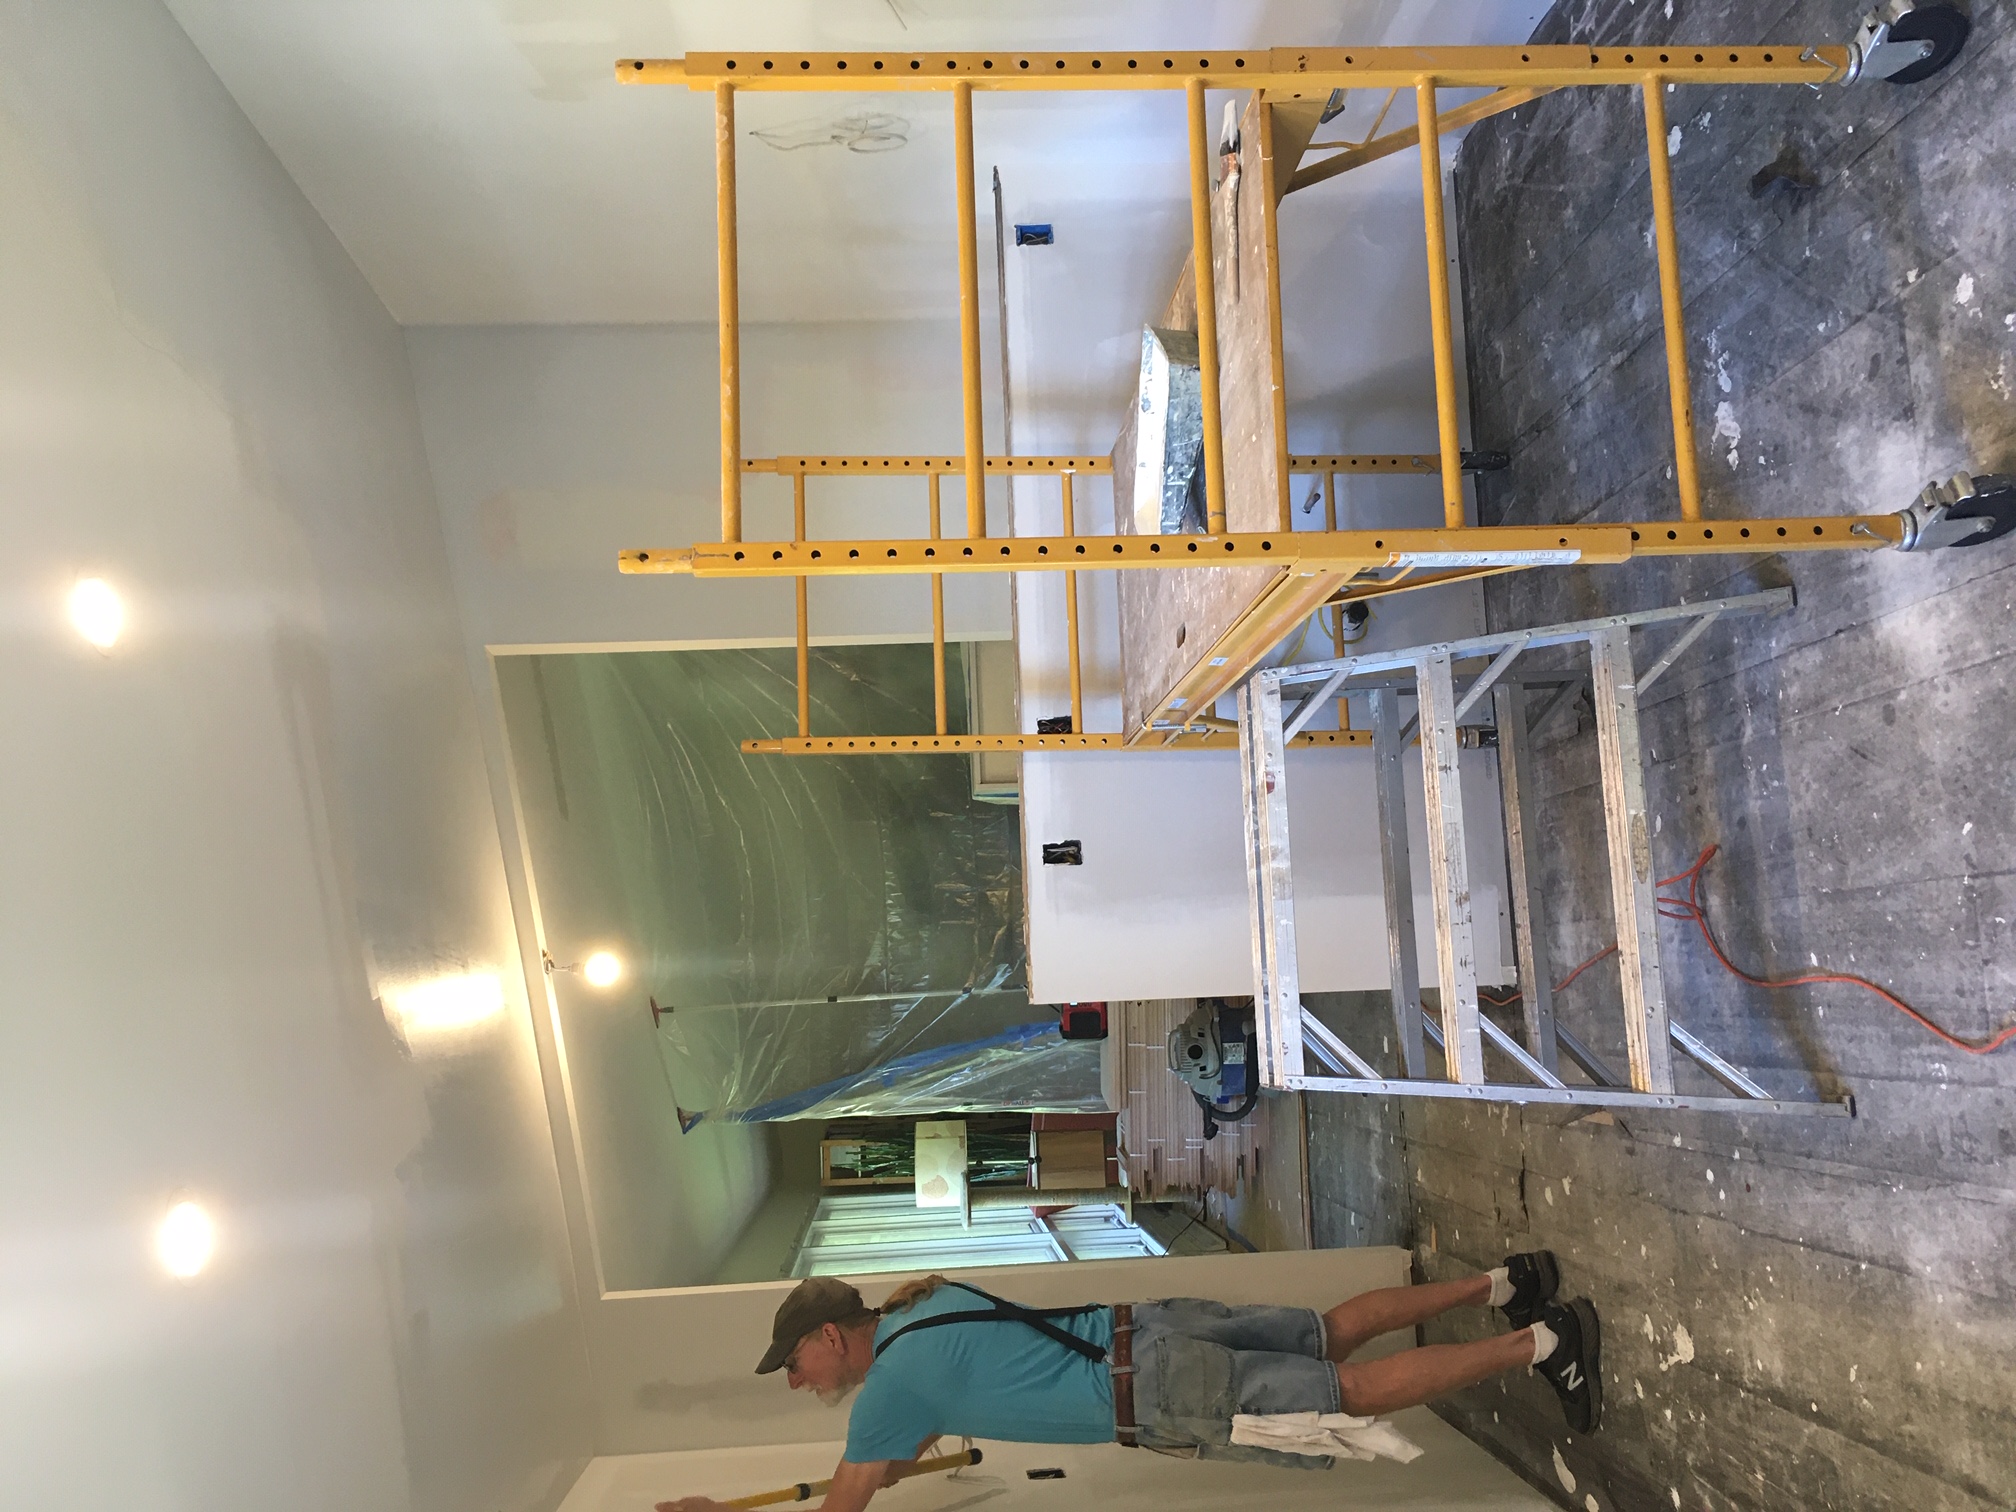
Same view, early on, with mobile scaffold for painting the ceiling.
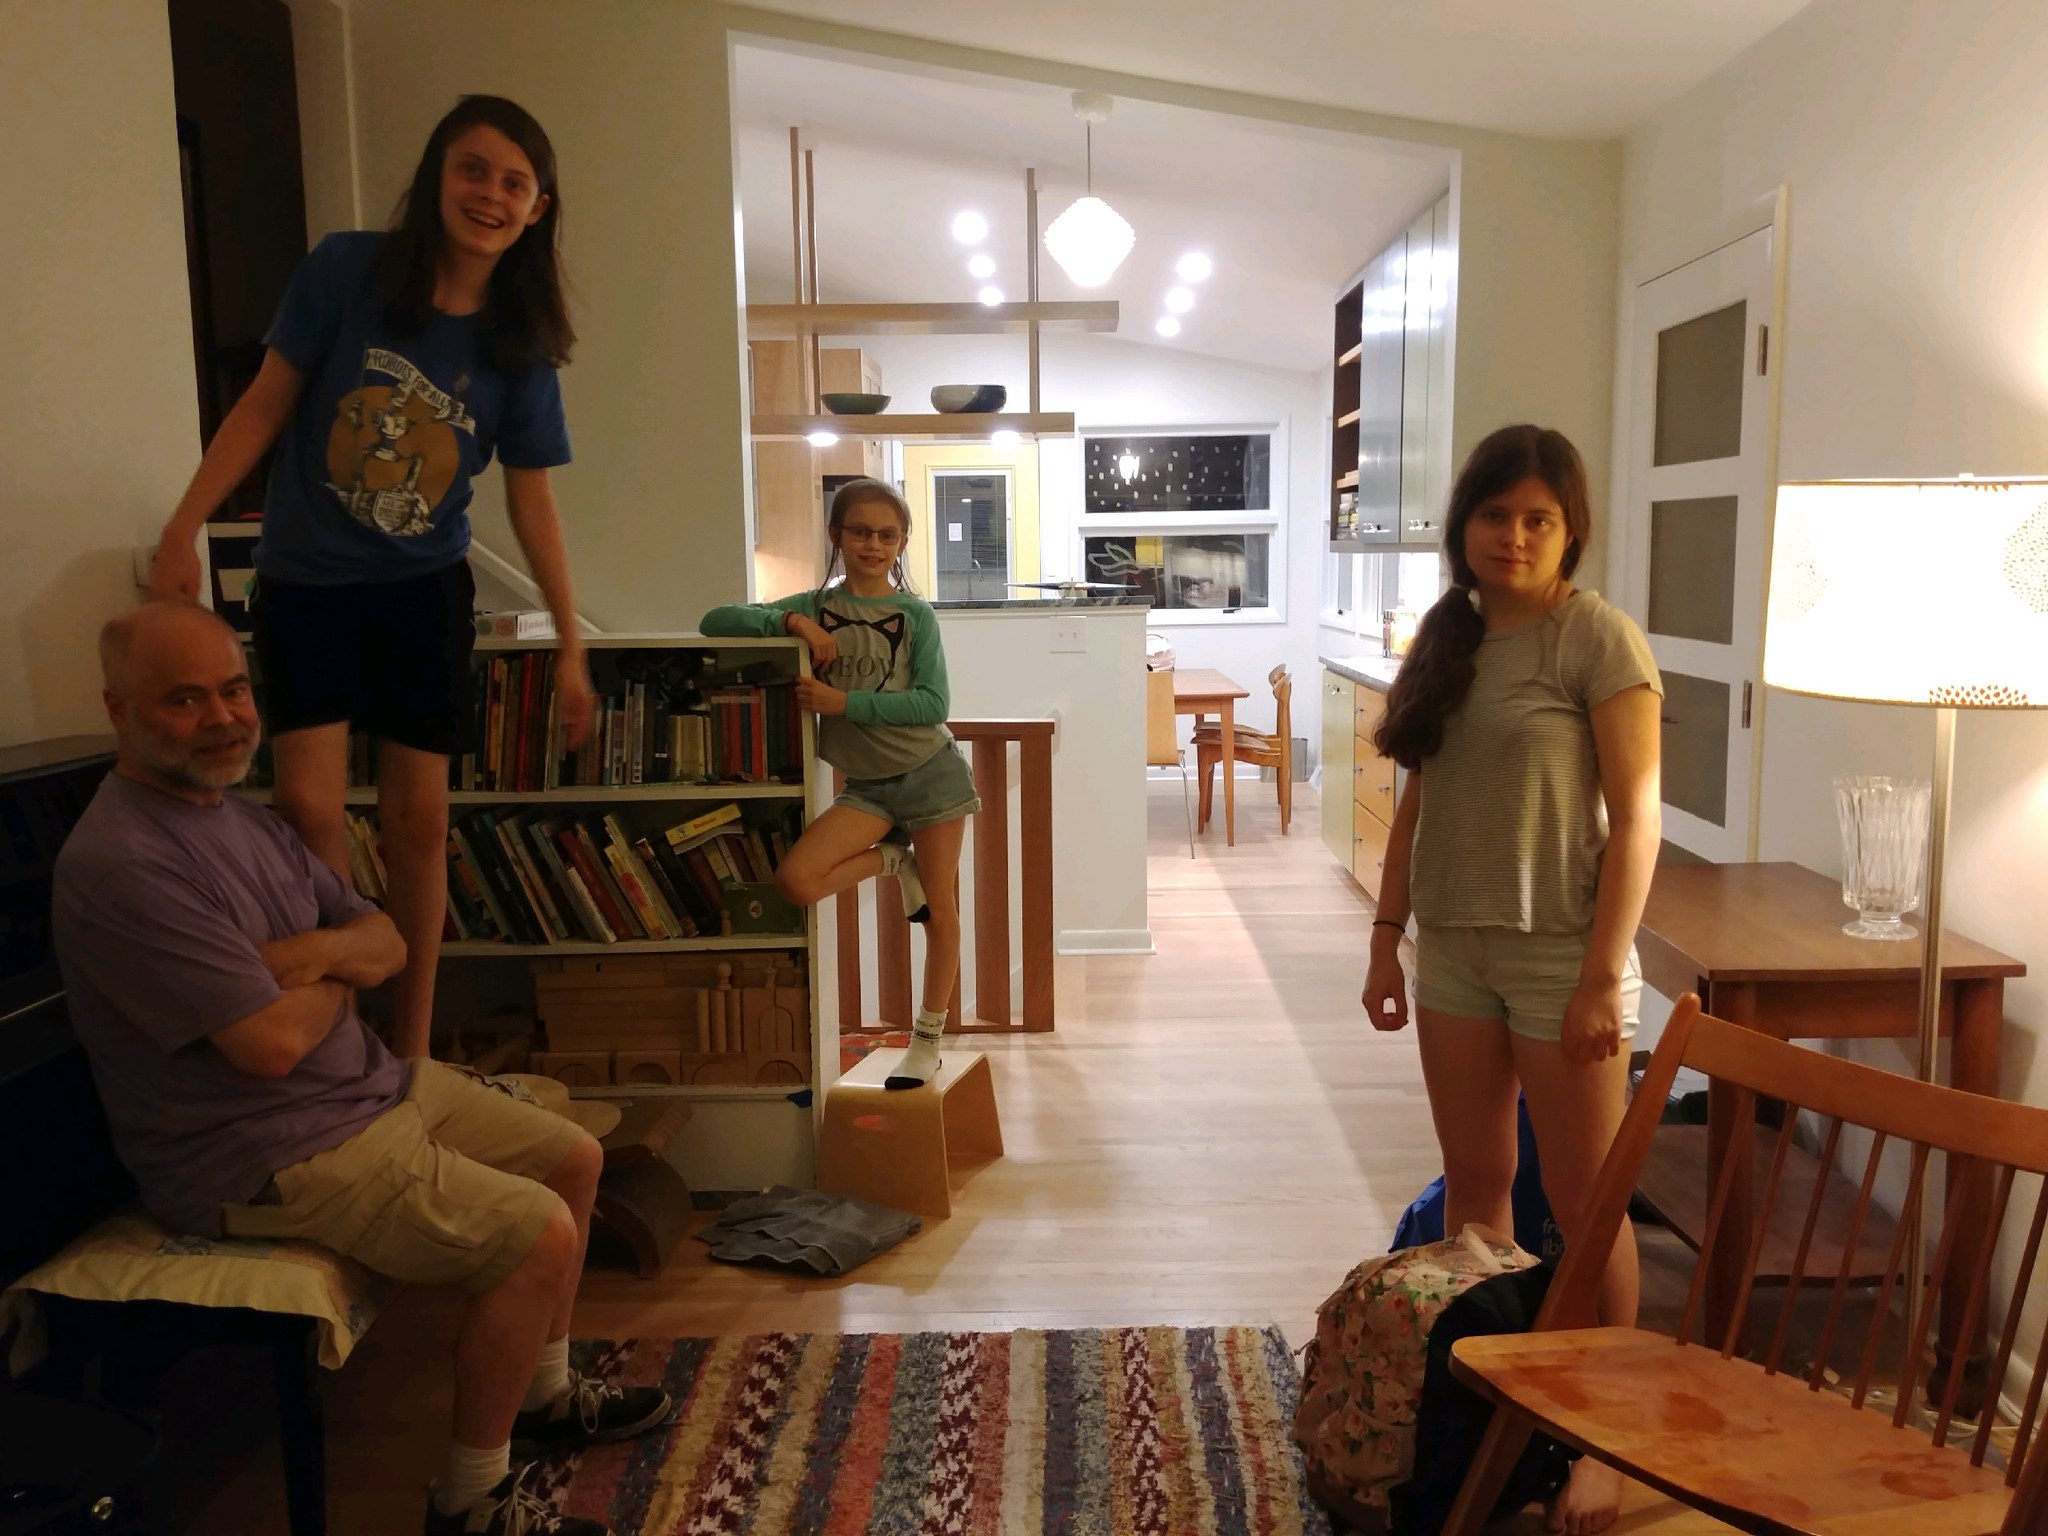
Home! Jenny sent this picture last night.
Here are a few more pictures from before, during and after, followed by a list of sources and suppliers.
A pair of shelves with integrated lighting defines the kitchen from the living room now that part of the wall between them is gone, while offering storage and display space. (I’ve written two posts about how I built these and how we installed them at the Fine Woodworking blog. The first is here. The second will be published there soon.)
We based the design of the white oak baluster and railing on an original screen at the mid-century home of some good friends; the angled slats are spaced for code compliance. The small white oak door on the wall opens into a cavity at the inside corner, replacing a blind corner unit that previously occupied the space.
A set of 15″-deep cabinets spans the transition between living room and kitchen, providing secondary prep space and generous storage. The base color is Real Milk Paint Co.’s Boardwalk, with Granny Smith, Dijon and French Gray colors.I topcoated the milk paint with Minwax satin oil-based polyurethane.
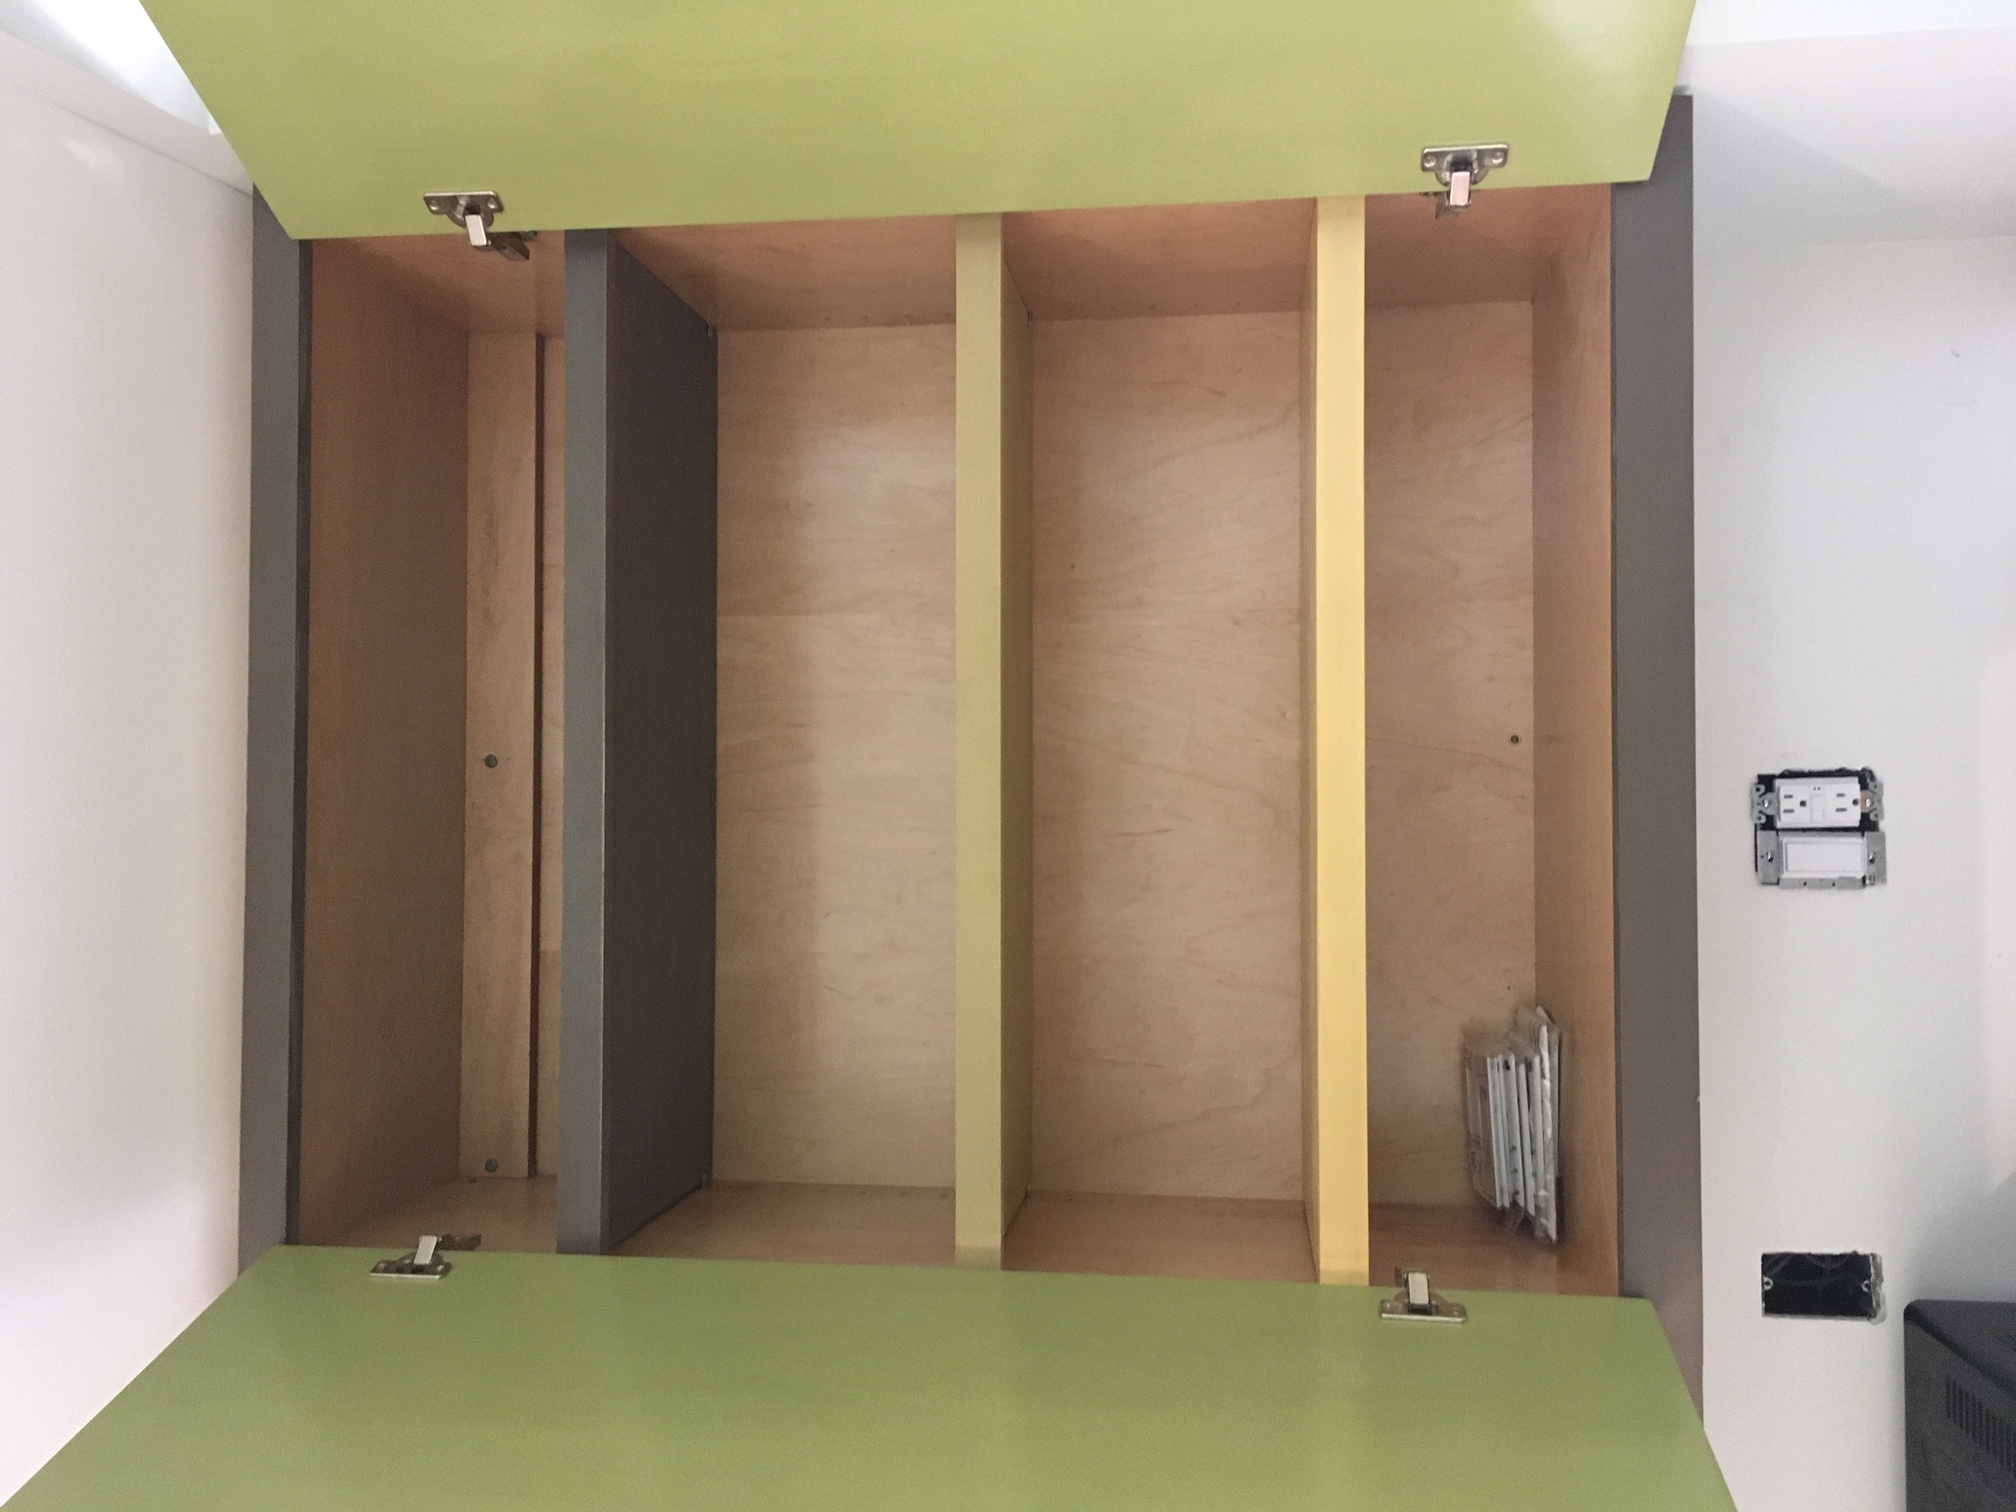
I painted the upper shelves for this set of cabinetry in colors related to other parts of the house, tinting some basic colors (Tree Bark or Willow, Boardwalk and Sunflower, if I recall correctly) with white.
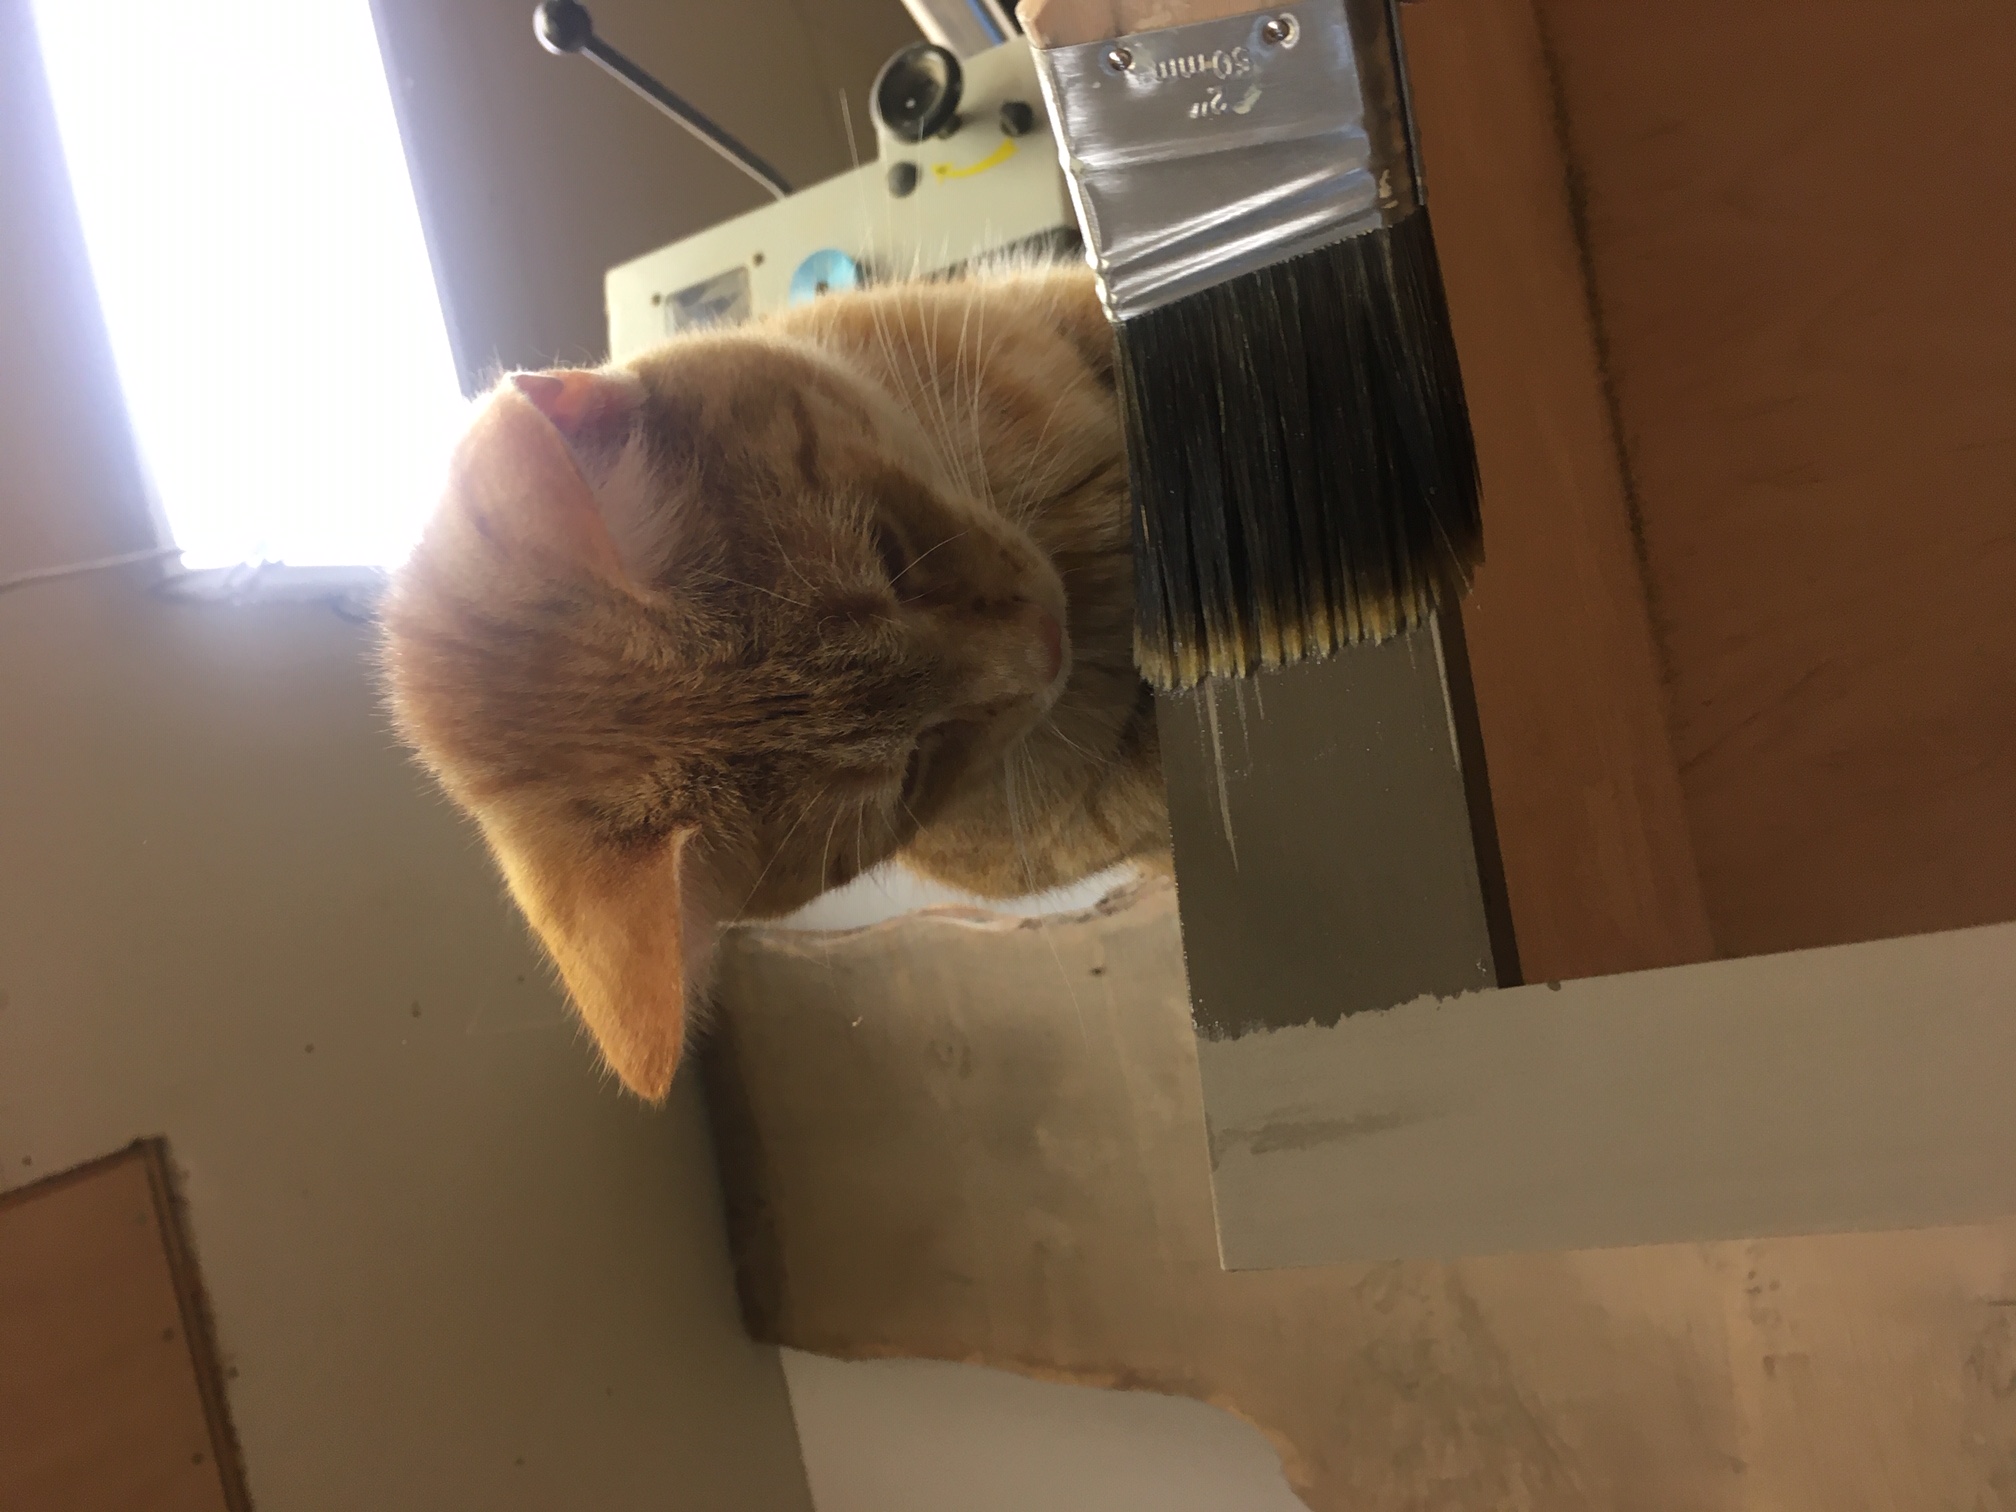
It should go without saying that Tony supervised all my work in the shop.
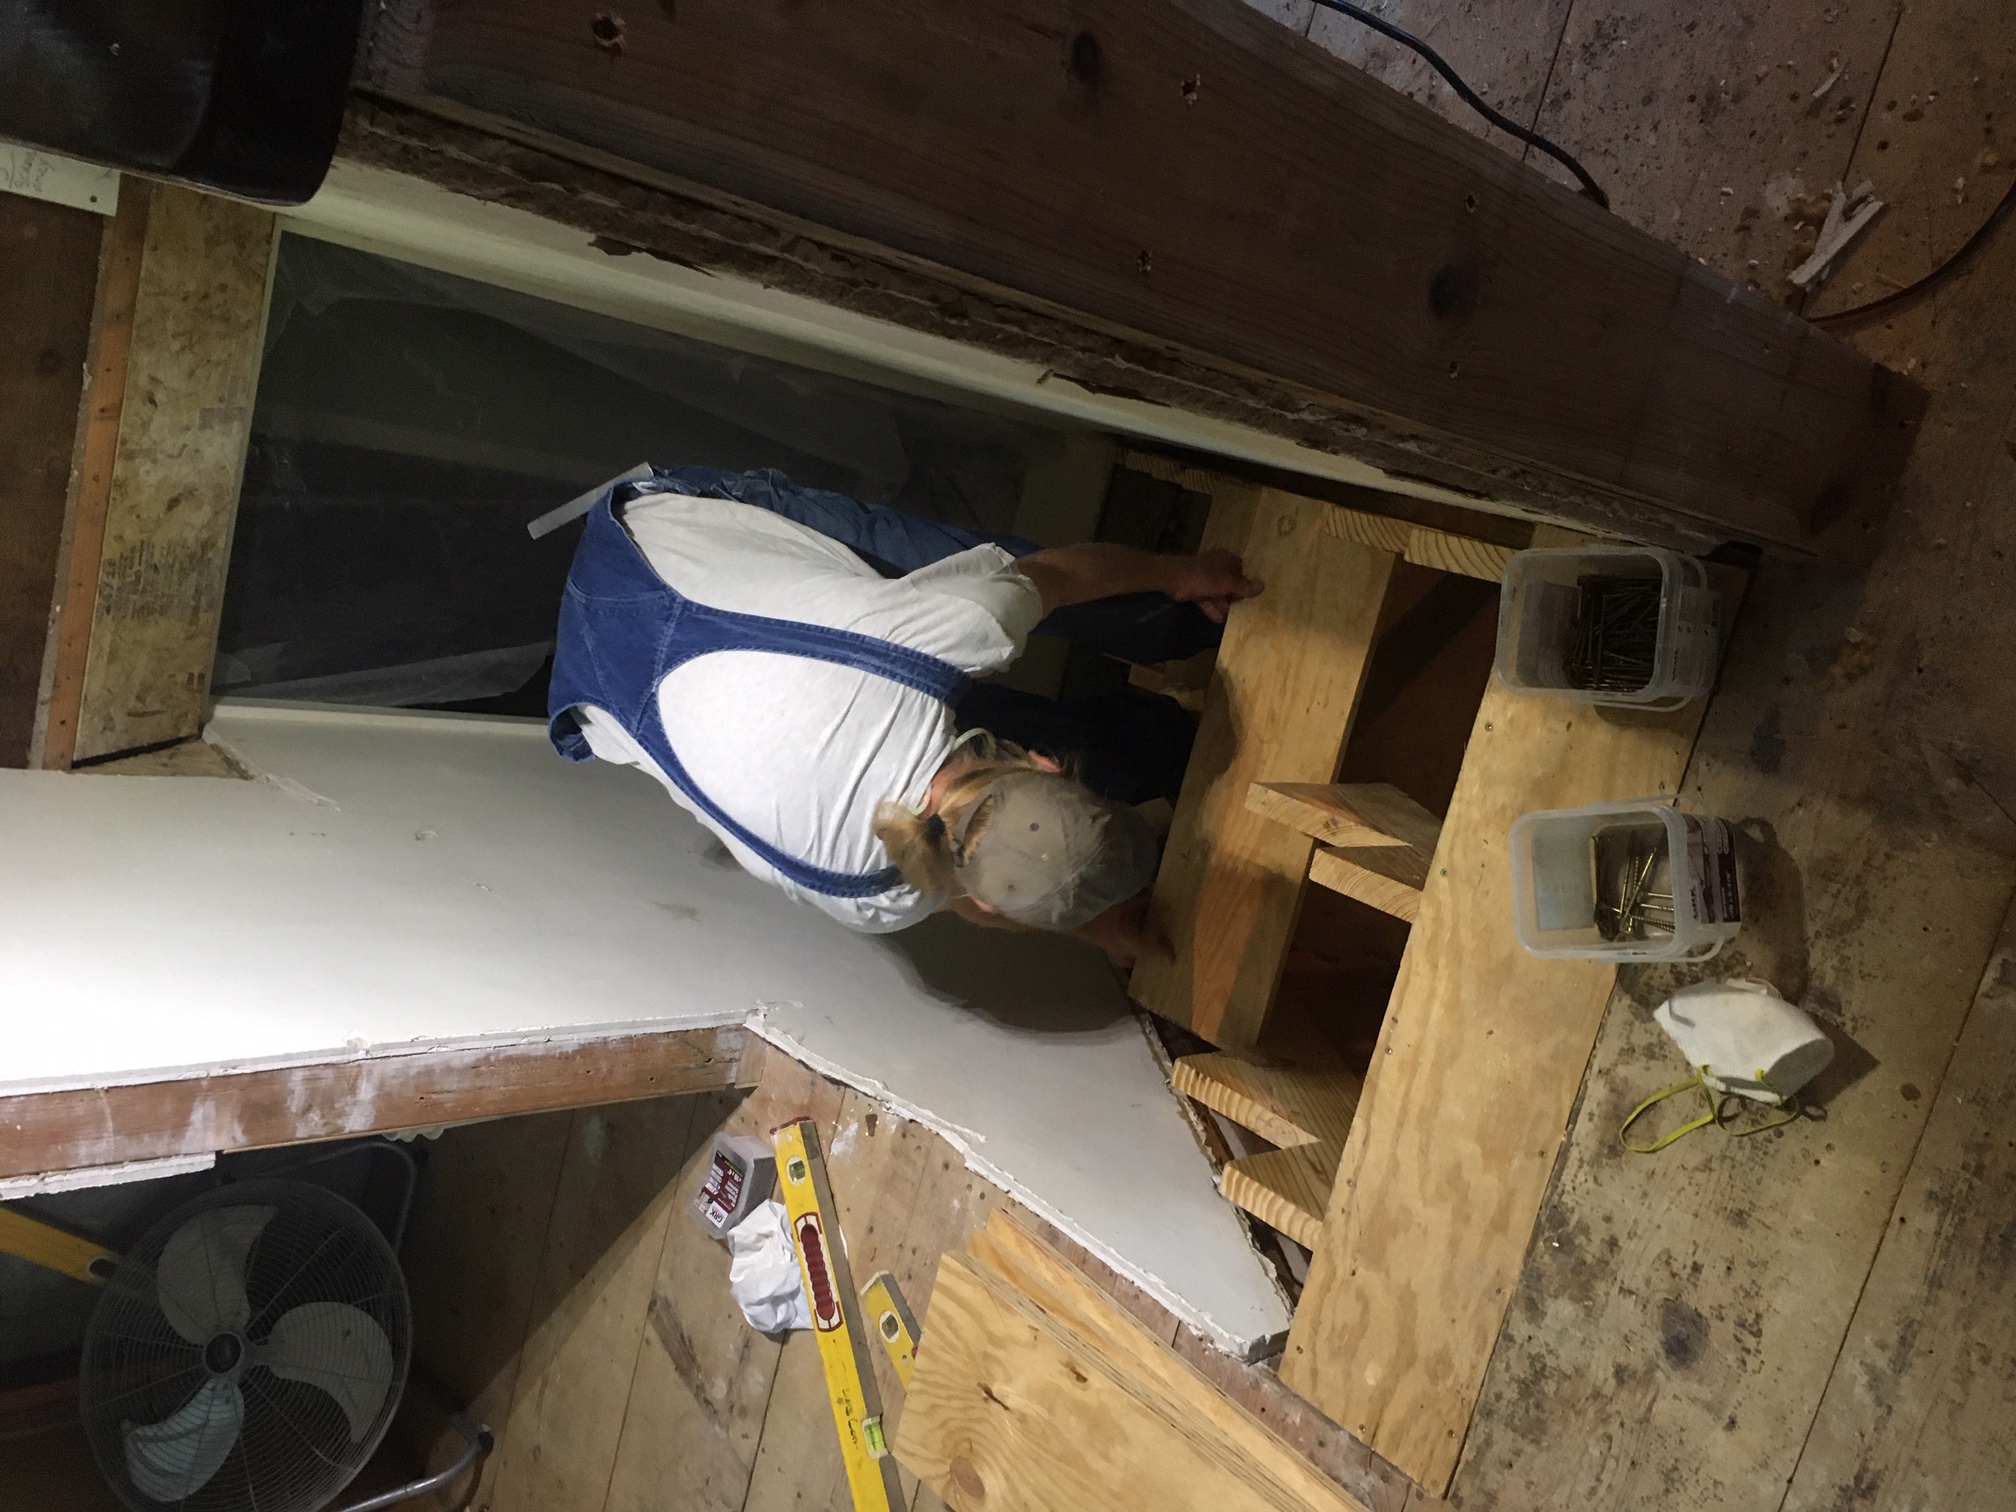
Mark rebuilds the stairs to the basement.
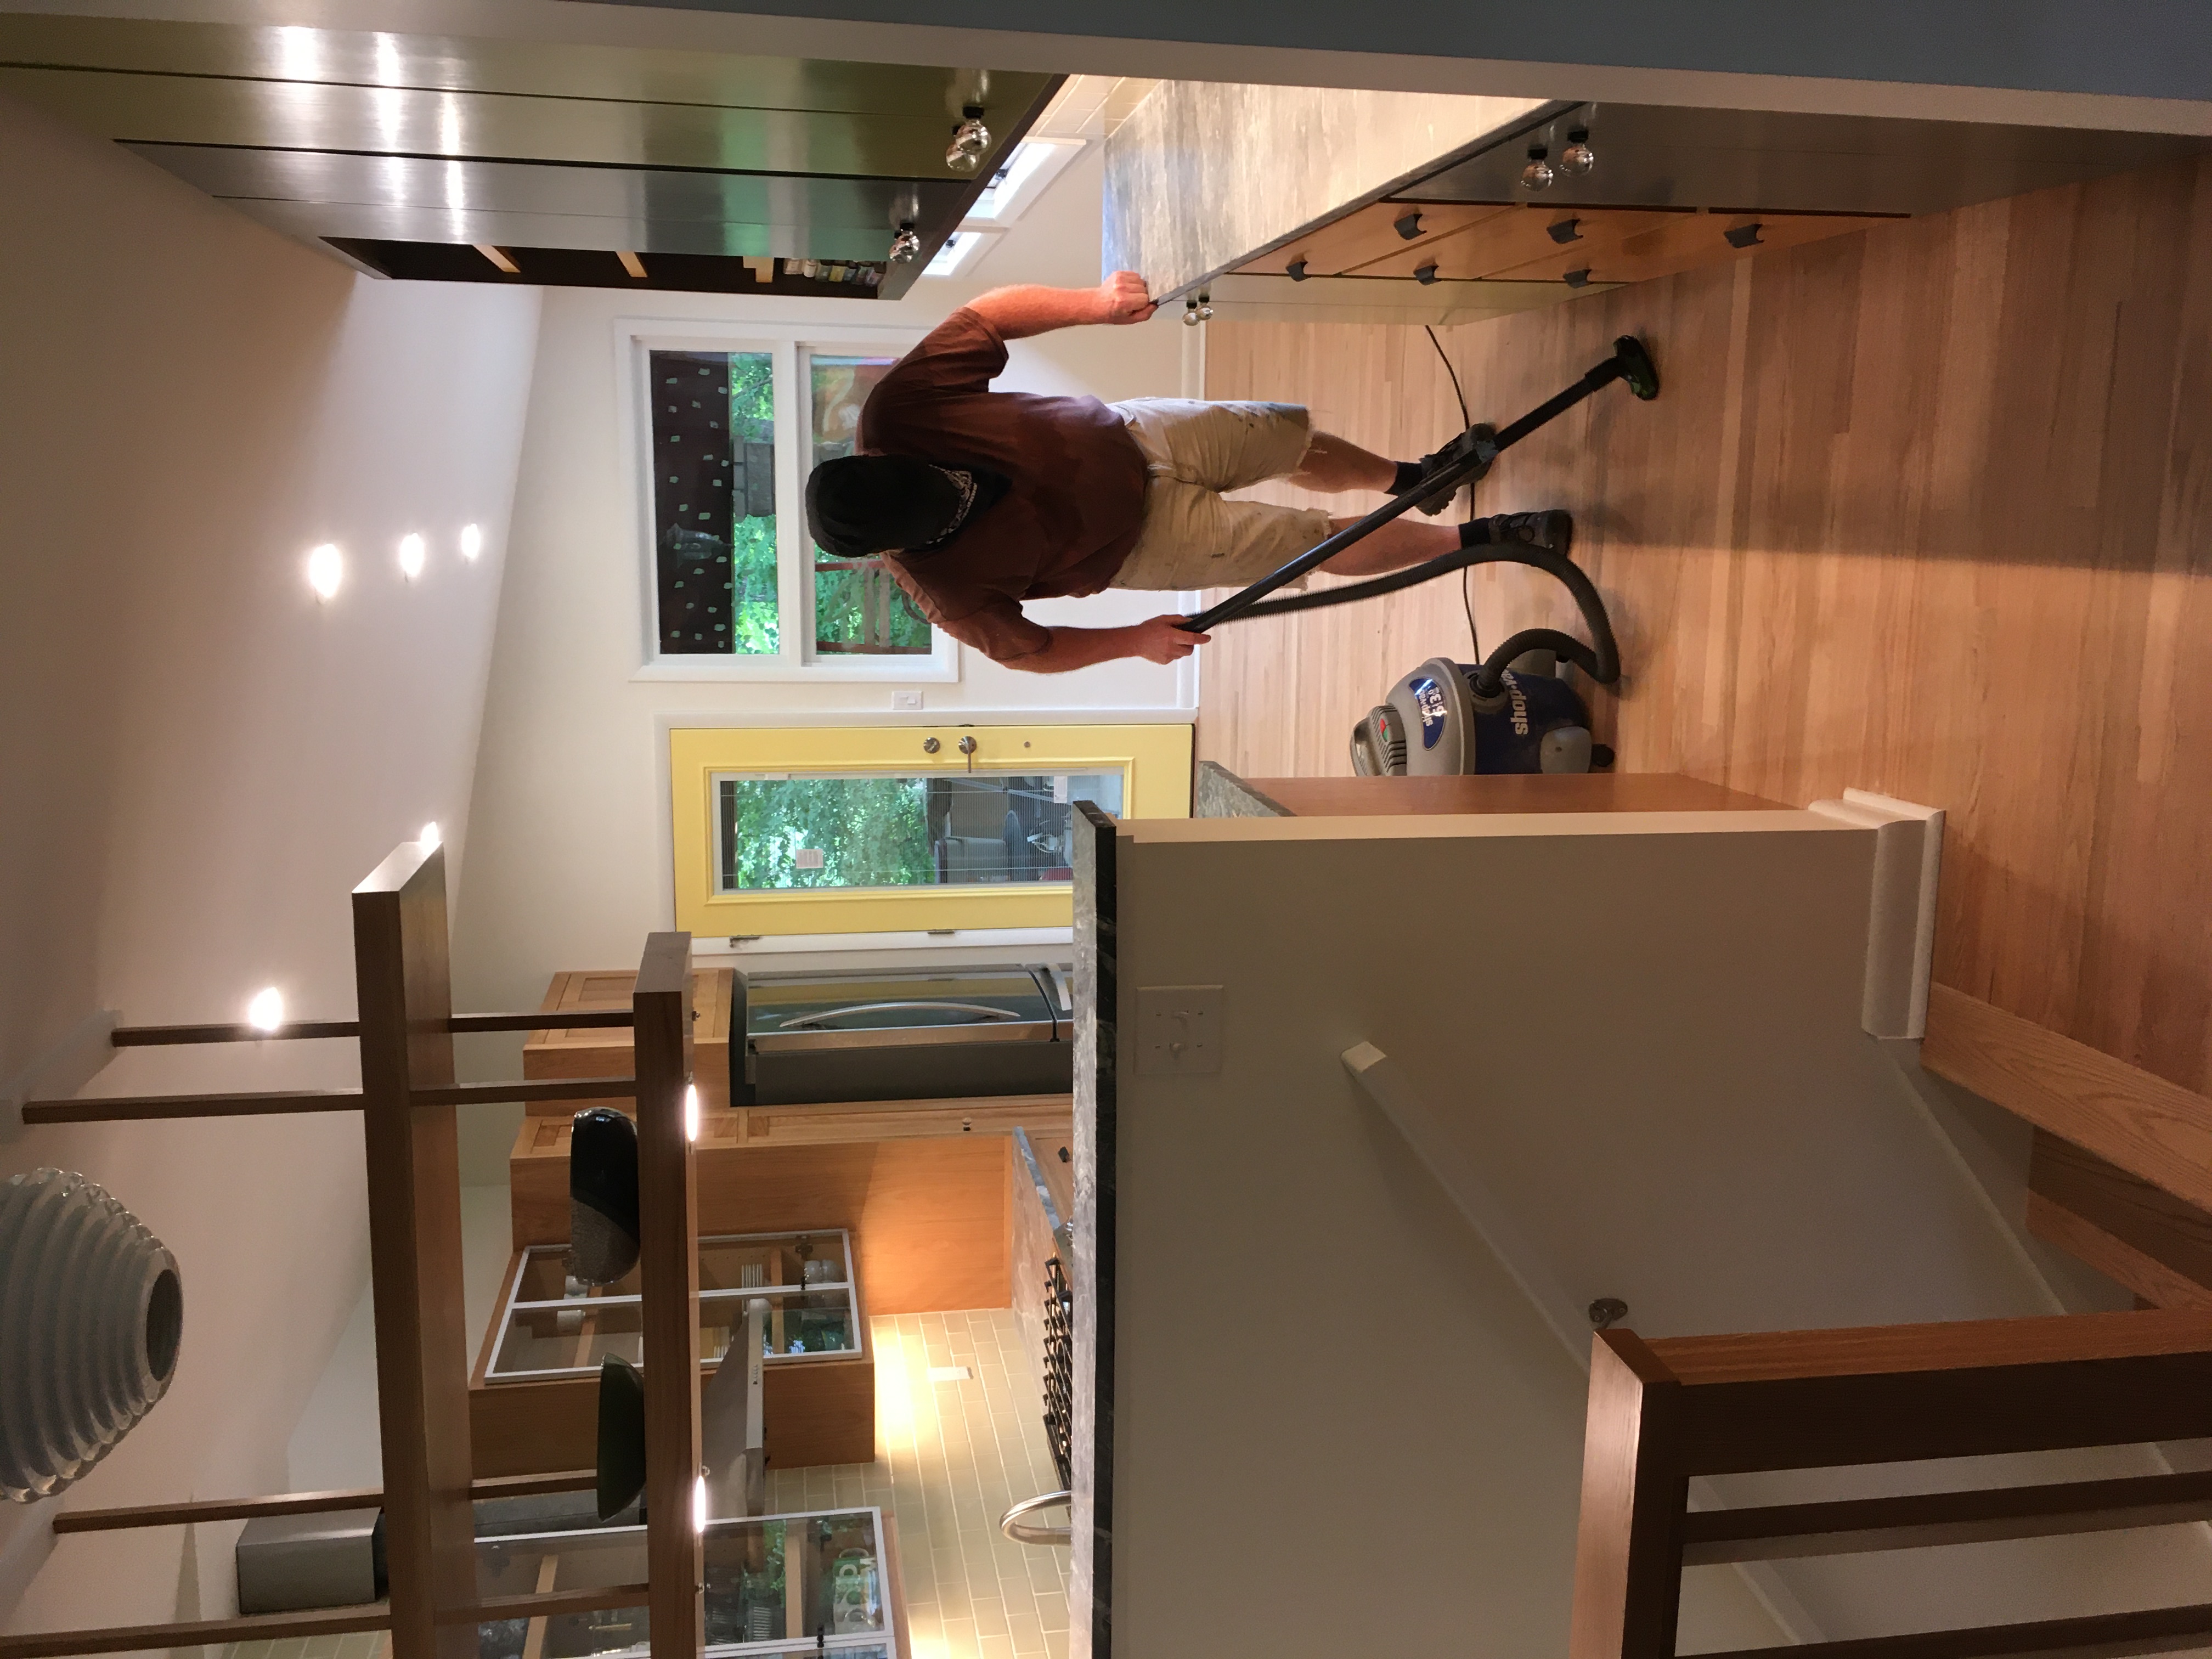
John Dehner does the last clean-up while Mark loads tools in the truck.
The passageway between the living room and kitchen is now about 1′ wider than previously, which makes moving from one space to the other far more comfortable – you no longer have the sensation of passing gingerly alongside a mountain crevasse. To get the extra floor space, Mark reworked the stairs to the finished basement, moving them forward (toward the basement). He rebuilt the stairs with white oak treads and risers.
A glazed door to the carport brings more light into the room.
Before: The original built-in at right wasted a lot of space. Ben and Jenny used a shallow cabinet (almost invisible here, but you can see a little of its face just to the left of the original built-in) for additional storage. Needing yet more storage space, they had an assortment of shelves along the south and east walls, which made the room feel cluttered.
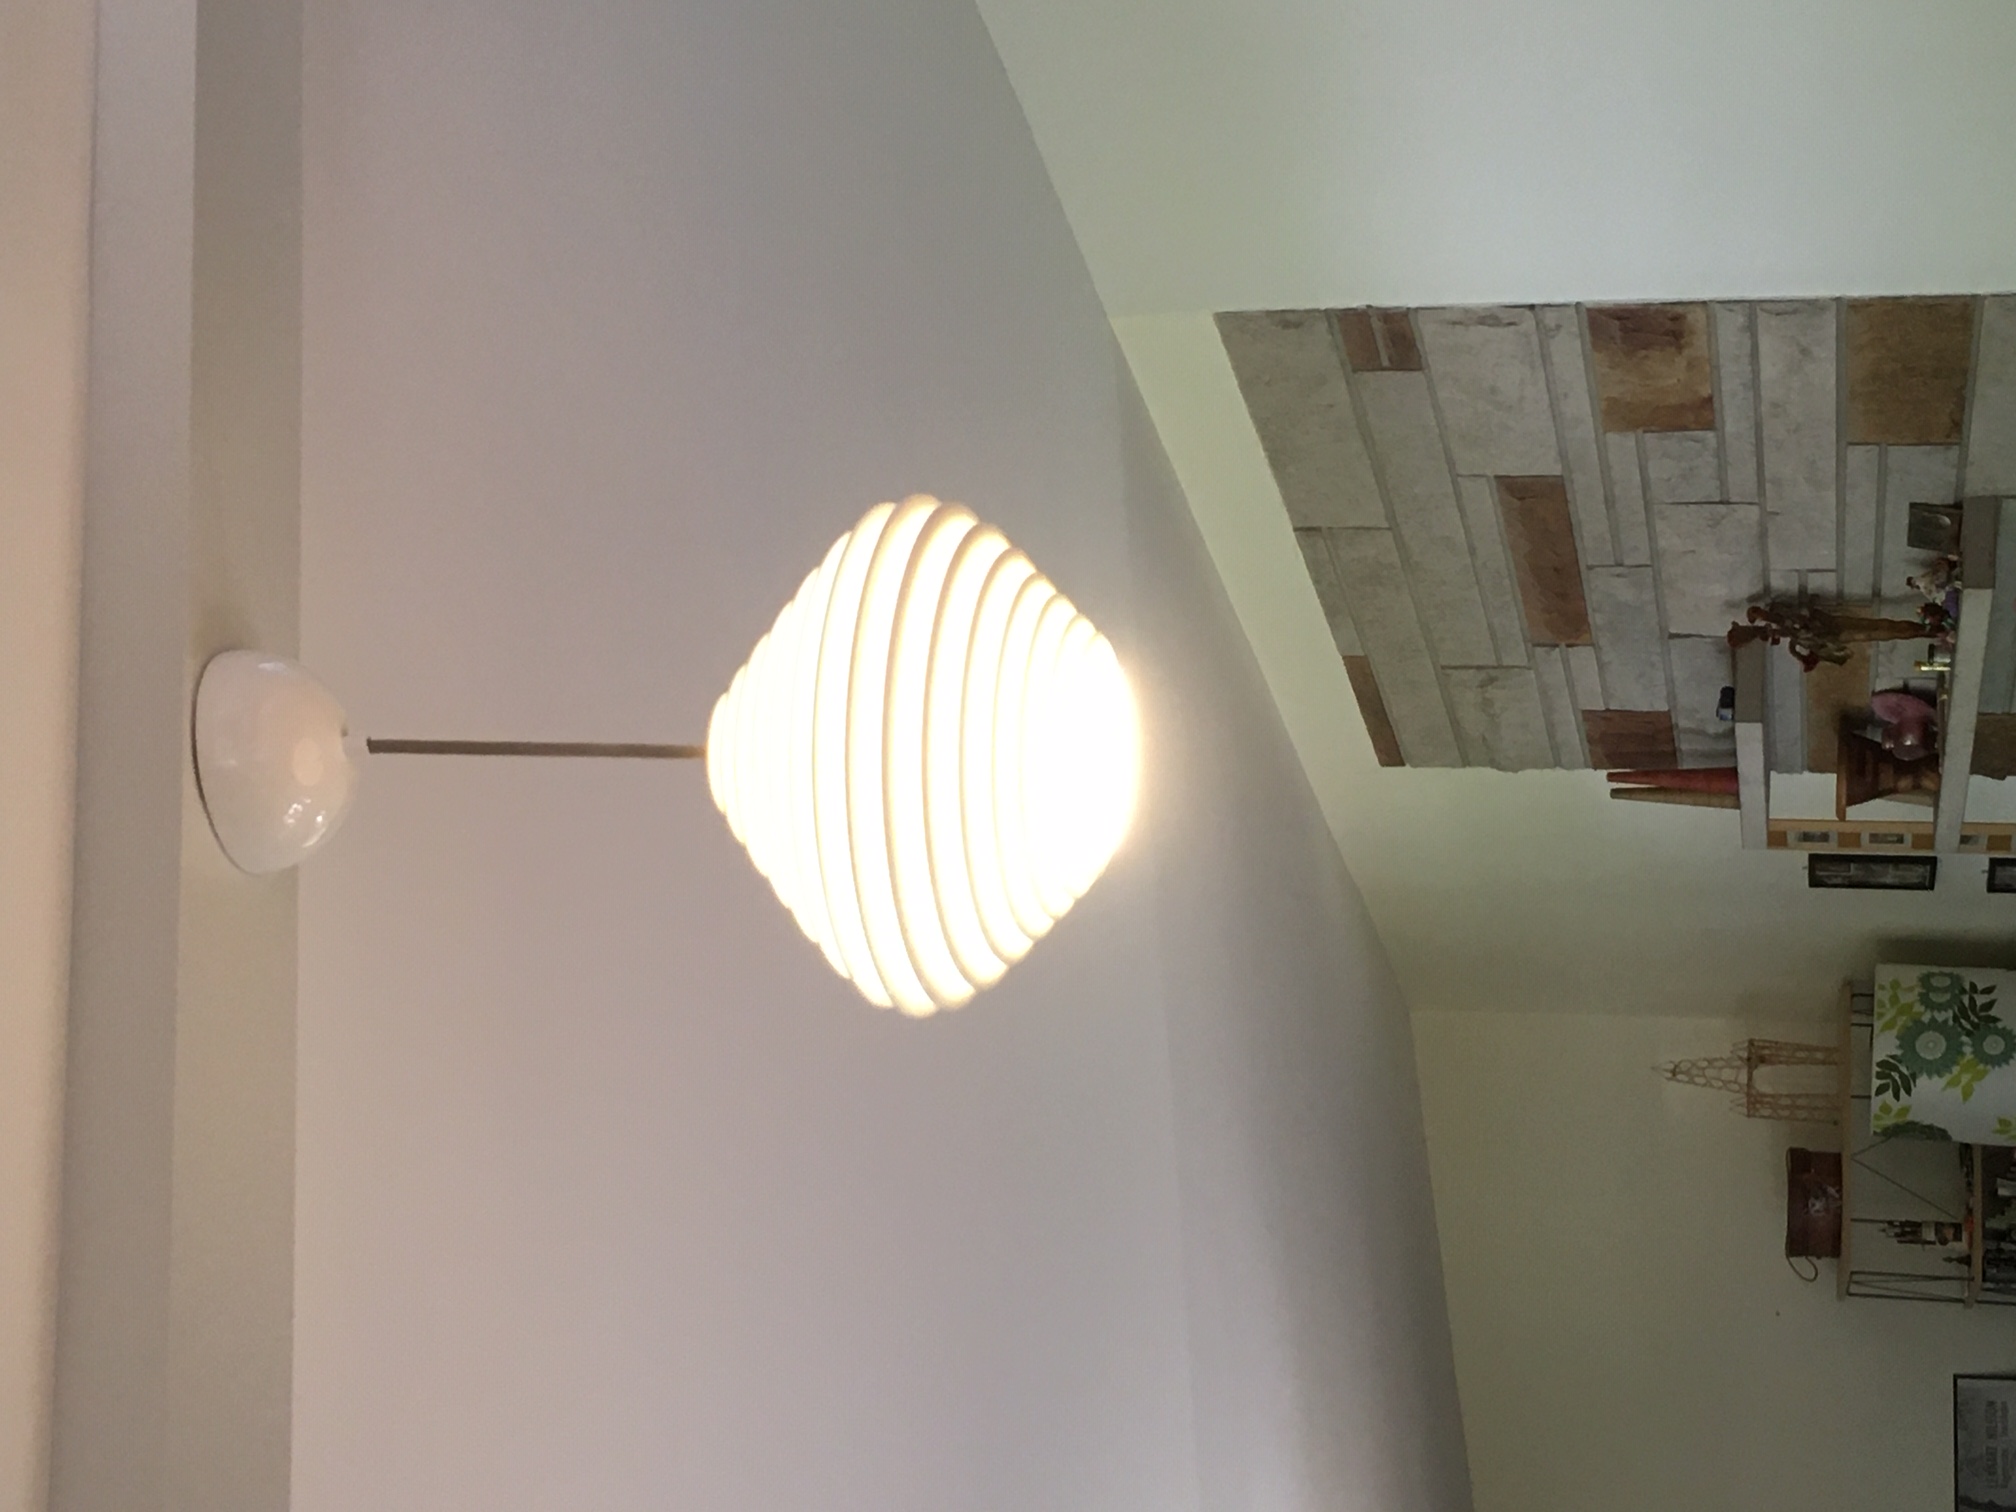
Detail of the BTC light fixture with the house’s original limestone fireplace surround.
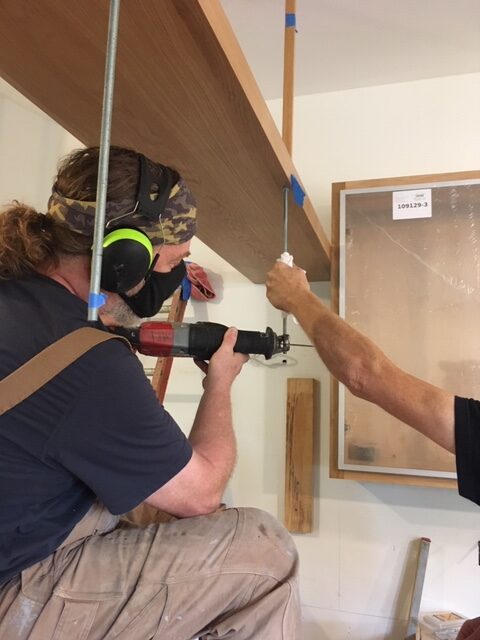
John Dehner trimmed the threaded rod with a reciprocating saw while Mark held the rod steady. The rod is concealed in shop-made white oak tubes.
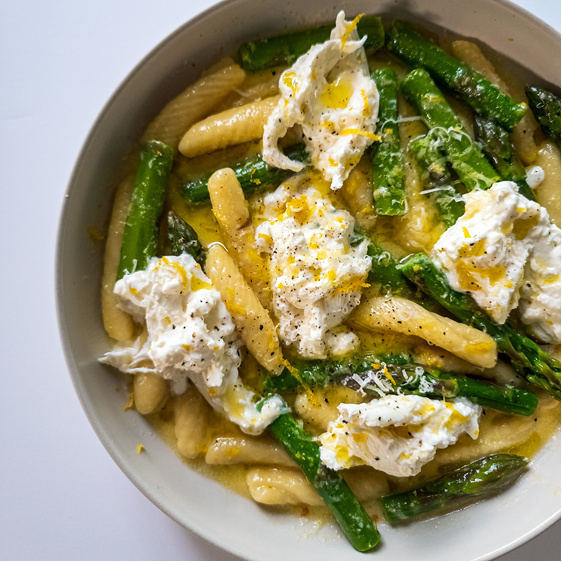
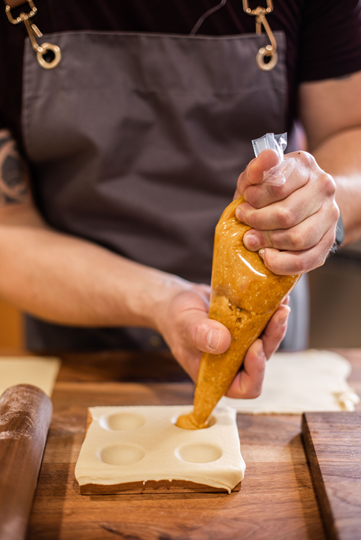
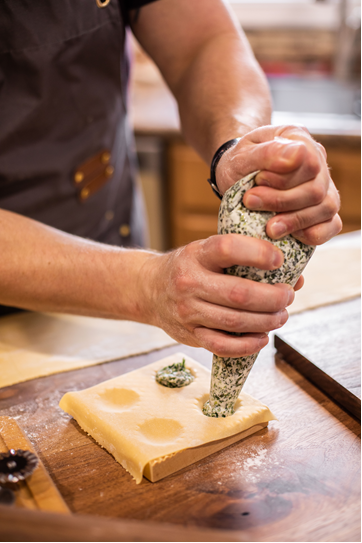
“This past weekend, I knew I needed to test a new pasta board design…but hadn’t had time to sort out what I’d do with the pasta. Then when I’m out running errands, I spot some beautiful in-season asparagus at the local farm, which was nice and thick, just about the diameter of the cavatelli I was going to be making! Quick blanch and ice water bath on the asparagus, simple butter sauce with lemon juice and splash of white wine, finished with burrata, lemon zest, and of course an olive oil drizzle. Late spring on a plate!”
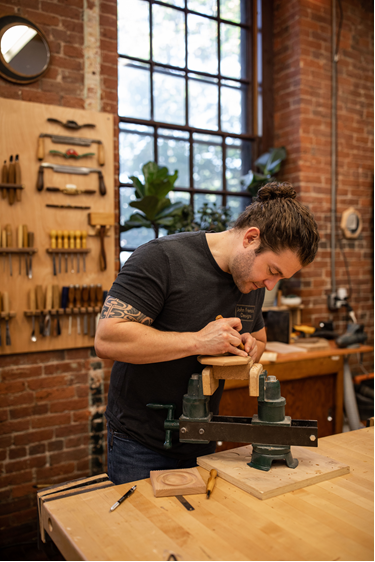
This paragraph from a recent Instagram post pretty much explains why I wanted to interview John Welch for the blog. John is a guy who primarily makes beautiful things out of wood for the preparation and serving of food. He’s not a furniture maker (though he certainly could be); his posts are not about dovetails, or techniques for finishing. Rather, he is motivated by a desire to “take something ordinary and make it special.”
The photo that accompanied the quotation at the head of this post.
The love of food has always been there.
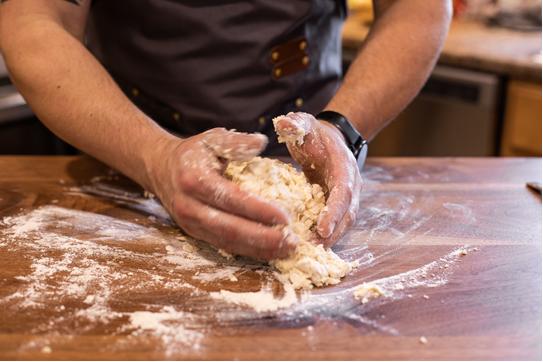
When asked what brought him to the world of pasta molds and boards, he answered simply “I love food. I love cooking food, eating, all kinds of food.” Add to this his observation that “too many people have beautiful things that are too precious [to use],” and you’re on your way to understanding what drives this man to finish most days at the office with several hours of work in his shop. What could be simpler than pasta – a basic dough of flour, salt and water? But roll a pinch of that mix across a board carved with decorative patterns, and you’ve elevated the plainest of pastas to an art form – as pleasing to the eye as it is effective at capturing a spoonful of saucy goodness and conveying it to the mouth.
Texture aplenty in pasta made with parsley and saffron, respectively.
Evidence that food and woodworking belong together: A third-year birthday cake in the shape of a handsaw.
The origin of his interest was basically curiosity, John said in reply to my question about what got him started.
“I wanted to know if pasta could take and hold an impression. I assumed it would but had never seen a textured ravioli. I made my own mold first, then I did some Googling to see if anyone already made something like that.” John could have ordered a mold to use as an example but decided against doing so for a few reasons. “I am always very afraid of inadvertently ‘borrowing’ someone else’s idea, so I thought that the less I looked at them, the less likely I would happen upon a similar pattern or idea. Also, the motivation to make them was…a curiosity [as to whether] it’d work, then how to make it work; if I had one in hand, it’d be easier for me to reverse-engineer and that would have taken all the fun out of it! I didn’t make them with the intention to sell. It was just a fun project.” It took John a few attempts to figure out how deep the carving would have to be to show up on the pasta and remain sharp after cooking.
The first one he was happy with featured a wheat pattern loosely based on an example of Art Deco ironwork. Made in walnut, it had leaves in the corners; he put stars between them.
Early pasta mold.
A savory pumpkin ravioli. To see how John served it, go to the end of the post.Food preparation images by Jenn Bakos Photo.
The filling is pumpkin-based.
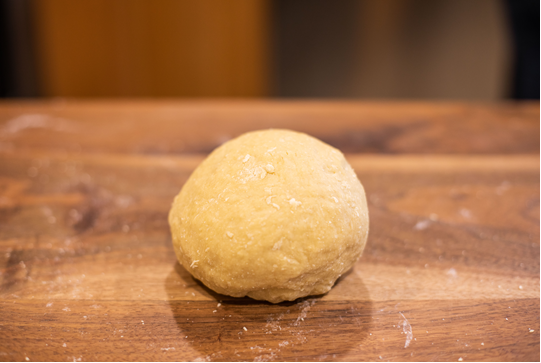
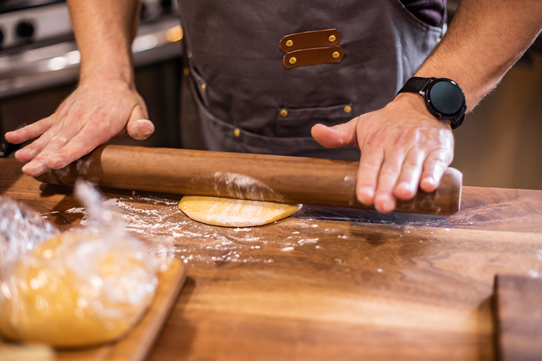
Flattening a small piece of dough with an old-fashioned rolling pin before running it through the pasta mangle.
Woodworking This is not a story about someone born into a family of woodworkers or generations who have made their own pasta from scratch. John’s forebears are not Italian; most are Irish mixed with French-Canadian. The “Francis” in his business name is his middle name; he’s John Francis Welch V.
The first spoon John carved, in process. The bowls for his ravioli molds are done with a router and jig.
John, the eldest of three siblings, grew up in a late-1800s house where his father always seemed to be engaged in repairs and maintenance. Although his dad didn’t compel or even expect John’s help, he exposed his older son to many aspects of home repair and restoration simply by carrying out household repairs and improvements.
As a woodworker, John is self-taught. When he was a kid his family didn’t have cable, but John could watch PBS, where he became a regular viewer of “The Woodwright’s Shop” and “The New Yankee Workshop.” He found the content interesting but had no intention of ever applying what he learned in real life. Even so, some of it sank in.
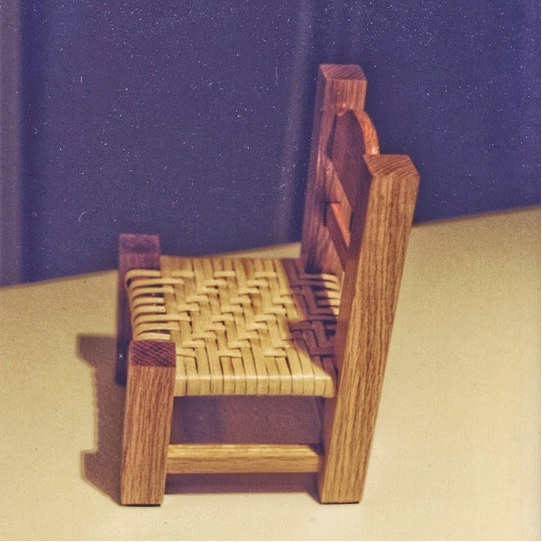
Teddy bear chair.
His parents loved handmade gifts, things from the heart. John dabbled in woodworking during high school; he was going to give his girlfriend a teddy bear and had decided to make an oak chair for it. His dad helped him cut the parts to size; then John built the chair with mortise-and-tenon joints. His mother had woven some baskets, so based on her example, he decided to weave a seat.
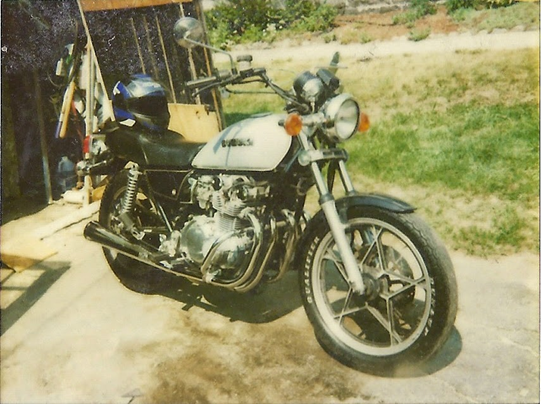
After that, woodworking went on the back burner as his interests shifted to motorcycles, fast cars and weight lifting, which led him to certification as a personal trainer. On his website you’ll find a portrait of John with bulging biceps that might lead you to wonder whether he’s more interested in appearances than substance. Not a bit of it. In middle school, other students had pushed him around, grabbing his books. His dad encouraged him to develop his muscles saying, “If you were strong enough to hold onto those books, they wouldn’t be able to rip them out of your hands.” So, as with most things that piqued his interest, John picked up that ball and ran with it.
The obligatory motorcycle.
He worked as a personal trainer in college, then, in his late 20s, he got into competitive power lifting. “I tend to be very goal oriented,” he explains. “I was losing focus – ‘Why am I going to the gym at 5 a.m?’ I’ve always been a very curious person, both [in terms of] ‘how does that work’ and ‘can I do that?’ Power lifting was very different from anything I’d done before.” The goal of competition provided just the oomph he needed, not just to keep going, but to excel. He won his first competition.
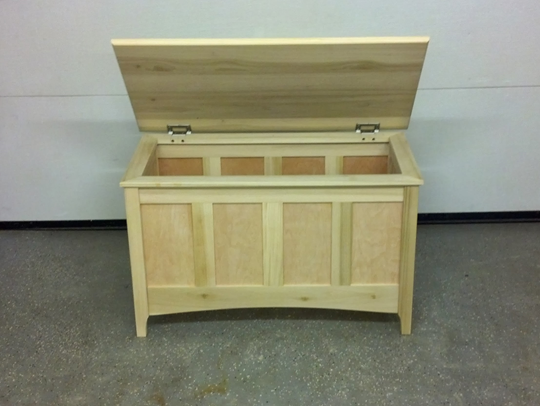
When John bought a townhouse in 2009, he had some home improvement projects in mind. He bought a miter saw and put up crown moulding, then replaced some doors. After the first few projects, he ran out of things to do. John was godfather to the daughter of a good friend; for her first birthday, her mother put in a request for a toy box. “I think she was expecting me to throw something together with plywood,” he remembers. “But if I’m going to do something, I’m going to do it well.” The toy box became his focus that summer. John had bought some handplanes on eBay; his brother deals in antiques, and John had tagged along on some of his adventures, which exposed him to more tools. He learned to sharpen. He bought some rough-sawn lumber and got started, building the toy box with stub tenons and solid wood panels. If it lasted, he figured, someday it could be used as a chest to store things other than toys. He worked in the garage, with a pair of sawhorses, a router, miter saw, circular saw and set of Kobalt chisels from Lowe’s.
A toy chest John made for his goddaughter.
The toy chest with finish.
In his day job, John designs extrusion dies for pasta at De Mari Pasta Dies. He was the first employee in the business who was not related to the founding family. Most of their products are in large chain grocery stores around the United States. “Every cartoon [mac and cheese made by one of the nation’s largest food corporations] for the last 15 years, I have personally designed all of those.”
While he appreciates his work and gives it his level best, he says, “I work my 8 hours and leave. With woodworking I can make what I want to make. It gives me the freedom to do what I want to do.”
For a time, he used his garage as a woodshop. He had to come up with some items to make that would need little space and very few tools. Spoons were one candidate, a handmade item that would “add a lot of love and care” in the preparation of a meal. His business took off from there.
As part of his day job for a time, John oversaw the installation of major pasta-making machinery at facilities around the North American continent, mostly in the Midwest, but with a few trips to Washington State and Canada. The travel for work underscored that his decision to buy a townhouse with his wife, Kara, a training specialist for a property management company, had been sound; their home required far less work than would have been required by a house with multiple rooms and a yard to maintain. While traveling for work, he had to use the garage for his car, not woodworking.
When the travel for work slowed down and John again had time for woodworking, he needed a studio space to rent – either that, or he and Kara would have to move to another house. The first studio he rented and the couple he rented after that were at Western Avenue in Lowell, Mass.; in June of 2021 he moved to his current space, 240 square feet in a repurposed textile mill that had been turned into artist studios. As he later learned, the building is the same one where his great-grandfather had worked decades before as a “grease monkey,” maintaining machinery for one of the mills that made Lowell, Mass., such a late-19th-century economic powerhouse that many still think of it as “the birthplace of the Industrial Revolution” (at least in North America). John’s great-grandfather also did some woodworking on the side. He built the house where John’s paternal grandmother grew up, followed by his own father, and where John’s parents continue to live. His great-grandfather had made a grandmother clock as a gift for John’s parents; today John keeps it in his studio.
The grandmother clock.
At this point, he says, “My goal was to pay the rent for my studio. If money was no object, I would make mirrors, wall sculptures, hand-carved tabletops. But the ravioli molds caught on.” When he started, charcuterie boards were a transition after the toy box for his goddaughter.
John is constantly looking for ways to improve his processes – to carve the ravioli molds, he’s upgraded his tool chest with some chisels from Japan, and he now makes some of the decorative patterns with a router. “As much as I love carving,” he acknowledges, “it gets to a point where it’s not financially feasible. I don’t really make spoons anymore; it’s partly because I can’t charge enough to make it worth it.”
This concern with workflow is a holdover from his day job, where he’s required to maximize efficiency. “I’ve always been more Type A,” John remarks. “The other artists at my former studio would tell me ‘You’re not a real artist,’ because my studio was so clean. I’ve always been like that: If something could be better, why not make it [so]?”
Some might have burned out after 300 ravioli molds, the number he sold in 2021. Not John. He plans to keep making them. “Part of what’s kept me going is that with the internet, a lot of people who buy them make these incredible dishes. I can’t tell you the rewarding feeling it gives me to see people feeding their friends and family with molds I’ve made.” He hopes to do more carving – art pieces, textured mirrors and more – but acknowledges the struggle involved in “going from ‘practical’ things to things that are meant [primarily] to be looked at. I blame it on my Yankee upbringing not to engage in ‘frivolous’ things.’”
He also continues to make a smaller number of other wares, such as charcuterie trays and pasta boards.
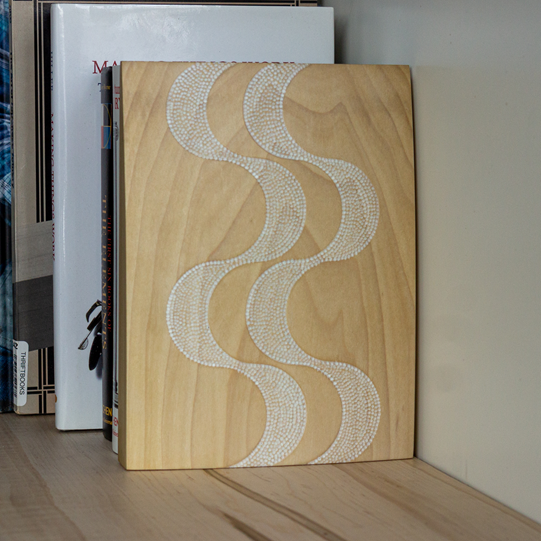
Carved bookend.
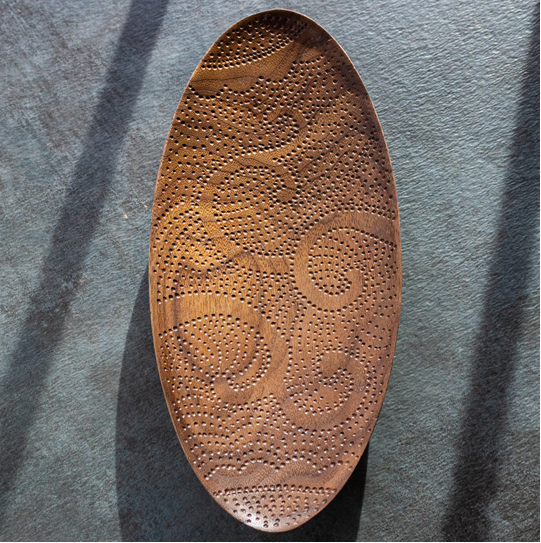
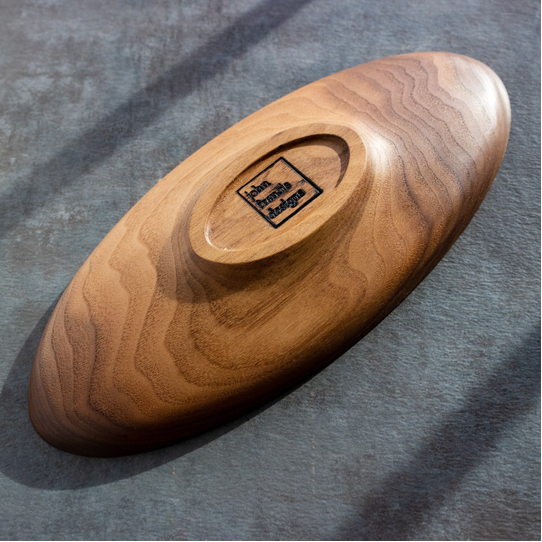
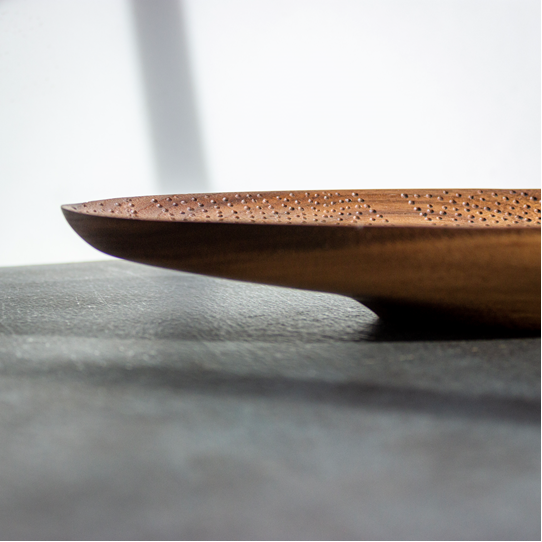
Carved platter.
Carved platter, underside.
Carved platter, detail.
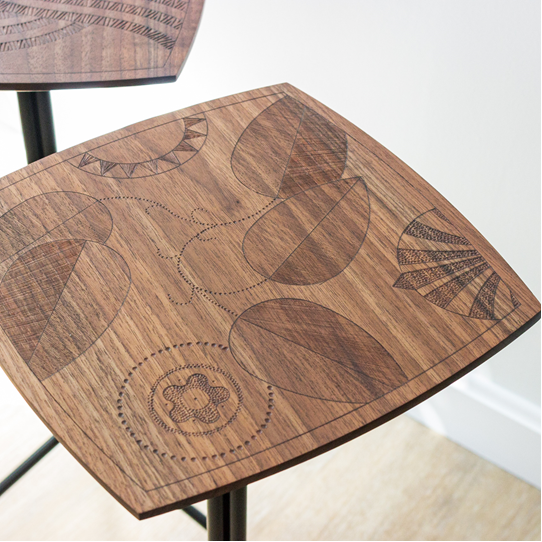
Side table with carved top.
“I mentioned that I like to cook, but I LOVE to cook, and most of all explore with food. I love that the possibilities are endless, there is so much to learn, so much freedom of expression allowed. I love that you can travel to distant lands that you may never otherwise get to experience, all through flavors,” says John. “So with that said, my kitchen adventures have been pretty thorough: sausage making, curing meats, smoking, bread baking, pasta making (obviously), pâté and terrines, sous vide cooking, etc… About the only thing I don’t dabble in are baked sweets!”
Selfishly, I’d like to think it’s just a matter of time.
Spinach-ricotta filling.
Crispy prosciutto tops the pumpkin ravioli with brown butter sauce.
I have one of these stools, and use it every year at my neighborhood’s storied Fourth of July Parade and other community events. And it’s seen almost weekly use at outdoor gatherings during the last 18 months or so – the addition of a carrying strap made it particularly comfortable and convenient to sling over my shoulder as I walked to various neighbor’s houses for socially distanced gatherings; the strap left my hands free for carrying bourbon.)
— Fitz
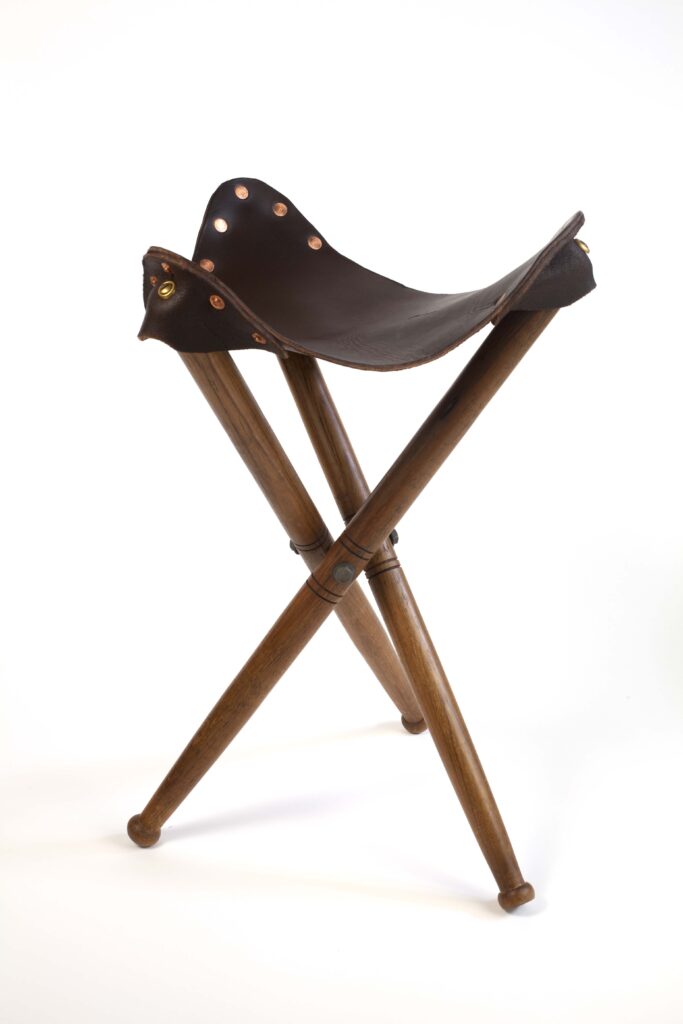
Three-legged folding stools appear in many Western cultures, including the French, English and American. They have been popular with soldiers, sportsmen, campers and artists for at least two centuries.
This stool is a great introductory project to campaign furniture, especially if you are new to turning or working with leather. There are only three pieces of wood, four pieces of leather and some metal hardware. You can easily build one in a day.
Choosing Materials I have seen some of these camp stools built using dowels, and they are strong enough to hold most people. However, I like to build them from mahogany, teak or ash that has dead-straight grain. I’ve had nightmares about getting a stick stuck in my backside from a stool disaster.
If you can build the stool with riven stock (oak or ash are good choices), it will be quite strong. Many original stools used 1″-diameter legs. However, my recommendation is to use stouter stock. I have built reproductions with 1″-diameter legs, and they felt too springy under my 185-pound frame.
You don’t need to make the legs baseball bats, but try for something between 1-1/8″ diameter to 1-1/4″ diameter. The leather can be almost anything 7 ounces (just shy of 1/8″ thick) or heavier. Vegetable-tanned leather that you dye yourself is a particularly strong choice.
You also will need rivets to join the leather pieces – unless you are skilled at hand-stitching. While hollow rivets (sometimes called rapid rivets) are inexpensive, easy to find and strong enough, I prefer the look and unerring permanence of solid copper rivets. I used No. 9 rivets with posts that are 1/2″ long.
To attach the leather to the wooden legs, you’ll need three No. 10 x 1-1/2″-long brass screws plus matching finishing washers.
Finally, you’ll need the hardware that allows the legs to open and shut. Traditionally, this was a three-headed bolt that once was easy to find. Now, that hardware is rare in North America. If you are a blacksmith or have access to a good welder, making a three-way bolt is straightforward. I have seen a couple of these bolts for sale in England, but the price with shipping to the United States was more than the cost of the bolt itself.
So I looked for a different way. Luckily, the Internet is good for something other than photos of cats playing keyboards. One maker of custom stools uses some off-the rack hardware to make an effective three-way bolt and shares that information freely on his web site.
Here’s what you need for legs that are up to 1-1/4″ in diameter:
• A hex-headed bolt with a 5/16″ shank that is long enough to pass through two of the legs and protrude out the other side by 1/2″. A 3″-long hex-head bolt will work with 1-3/16″-diameter legs. • An eyebolt with a 1/4″ or 5/16″ shank that is long enough to pass through one of the legs and protrude out the other side by 1/4″. (Note: You can hacksaw any of this threaded hardware to length. An eyebolt that has a total length of 2-1/2″ should be sufficient.) • Two acorn-headed nuts. • Three washers. • 15 No. 9 copper rivets.
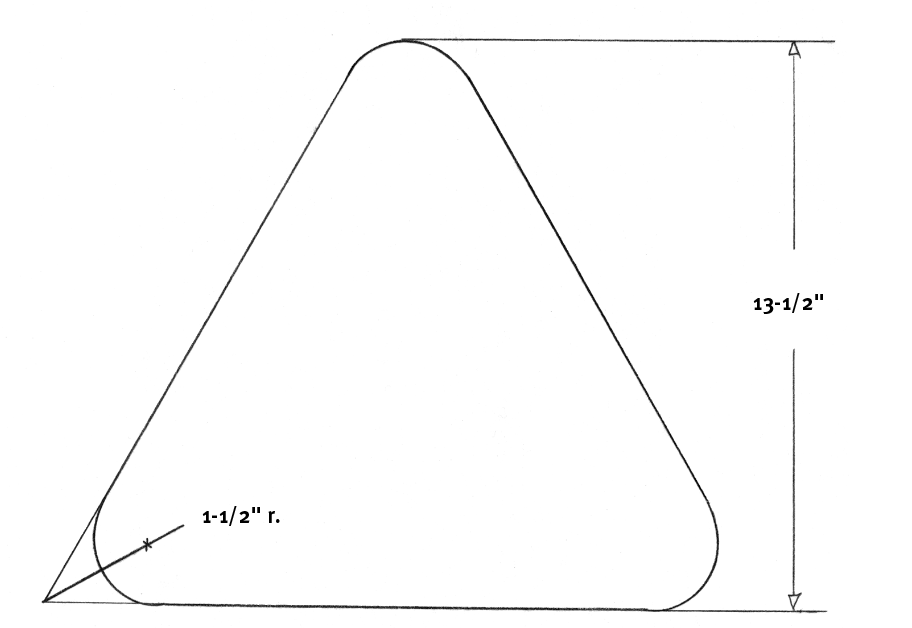
Parts • 2 Legs, 1-1/4″ dia. x 23-3/4″ l • 1 Seat, 7 oz., 13-1/2″ w x 13-1/2″ l • 3 Lips, 7 oz., 3″ w x 8″ l
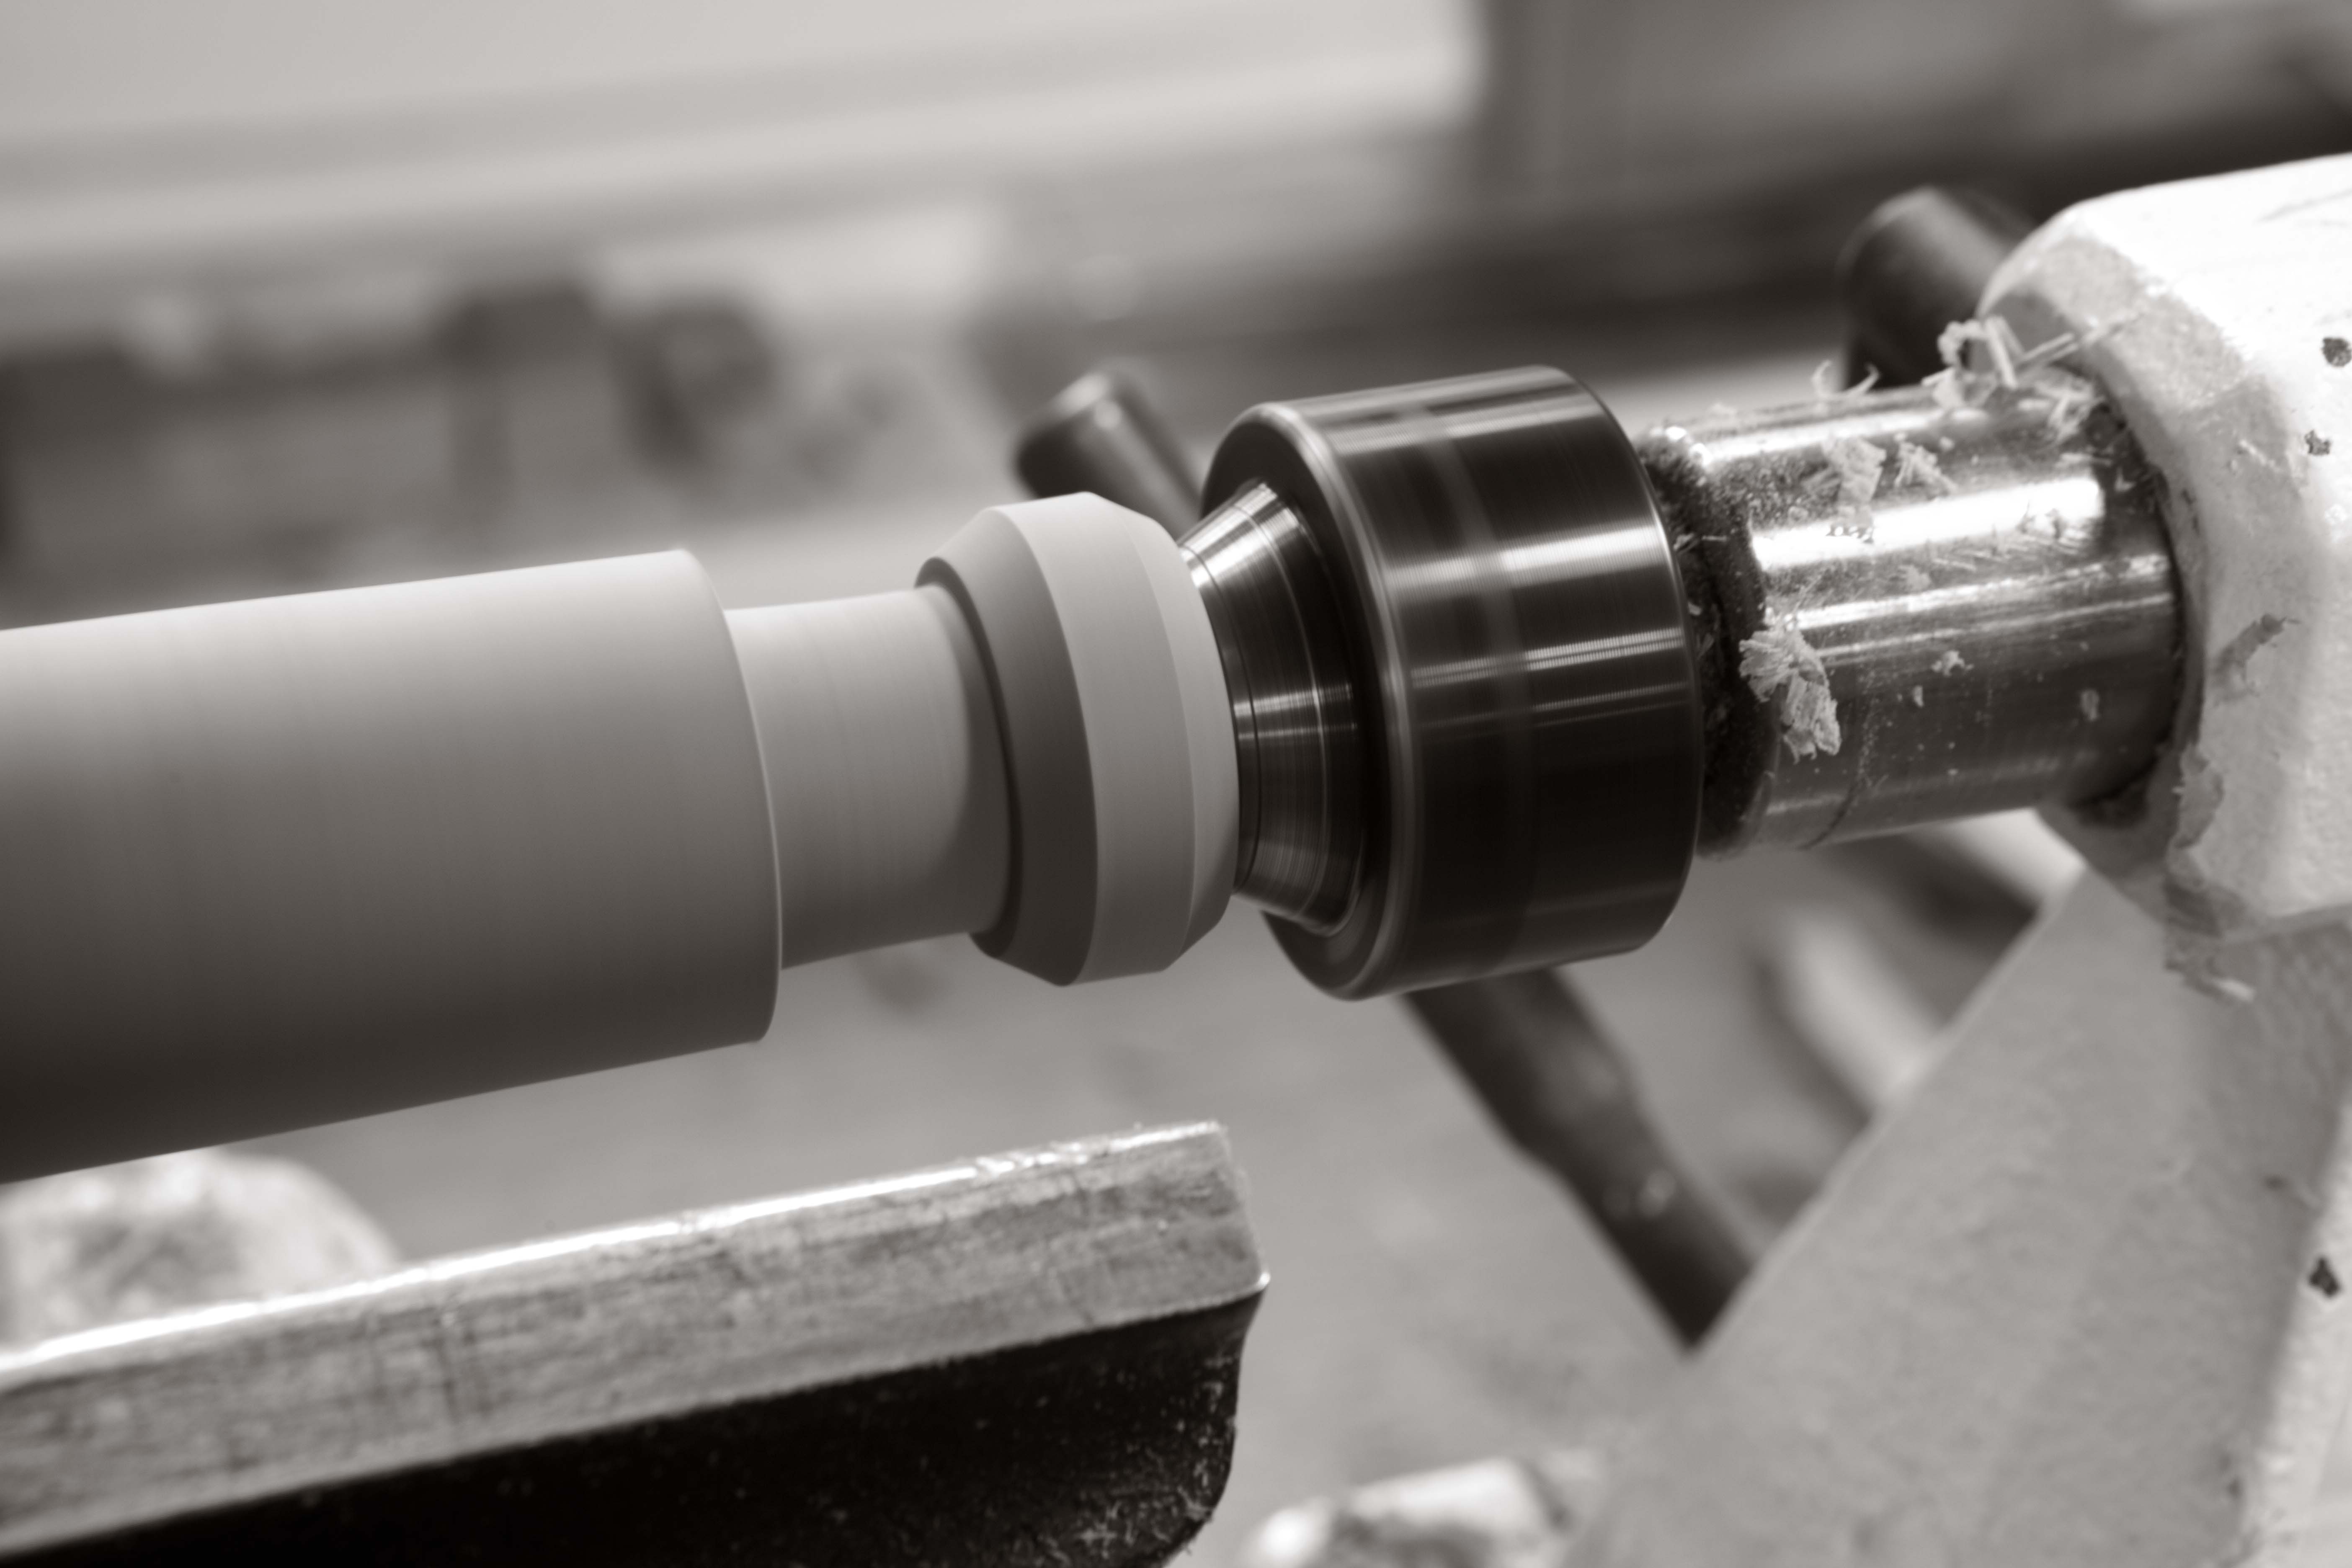
Turn the Legs The three legs are easy to turn, even if your favorite turning tool is #80-grit sandpaper. Turn the legs to round using a roughing gouge or carbide-tipped roughing tool. Create a smooth, clean cylinder of about 1-1/4″ in diameter with a skew or other finishing tool.
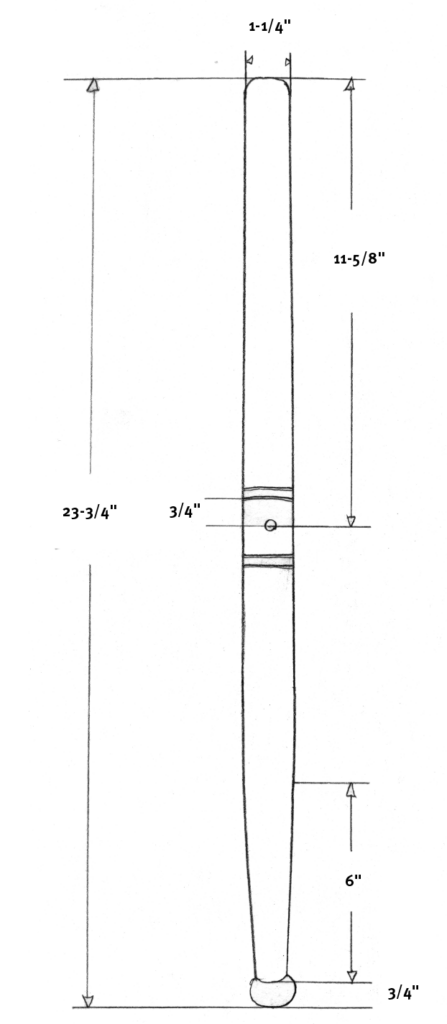
The feet shown are 1-3/16″ in diameter and 5/8″ tall. Make the feet by turning down the foot. Then turn the ankle to 7/8″ in diameter. Round the foot, then taper the rest of the leg down to the ankle. The taper should begin 6″ from the bottom of the leg.
A bulbous foot. The foot can be almost any shape, from a bead similar to the foot of the Roorkee to this teardrop.
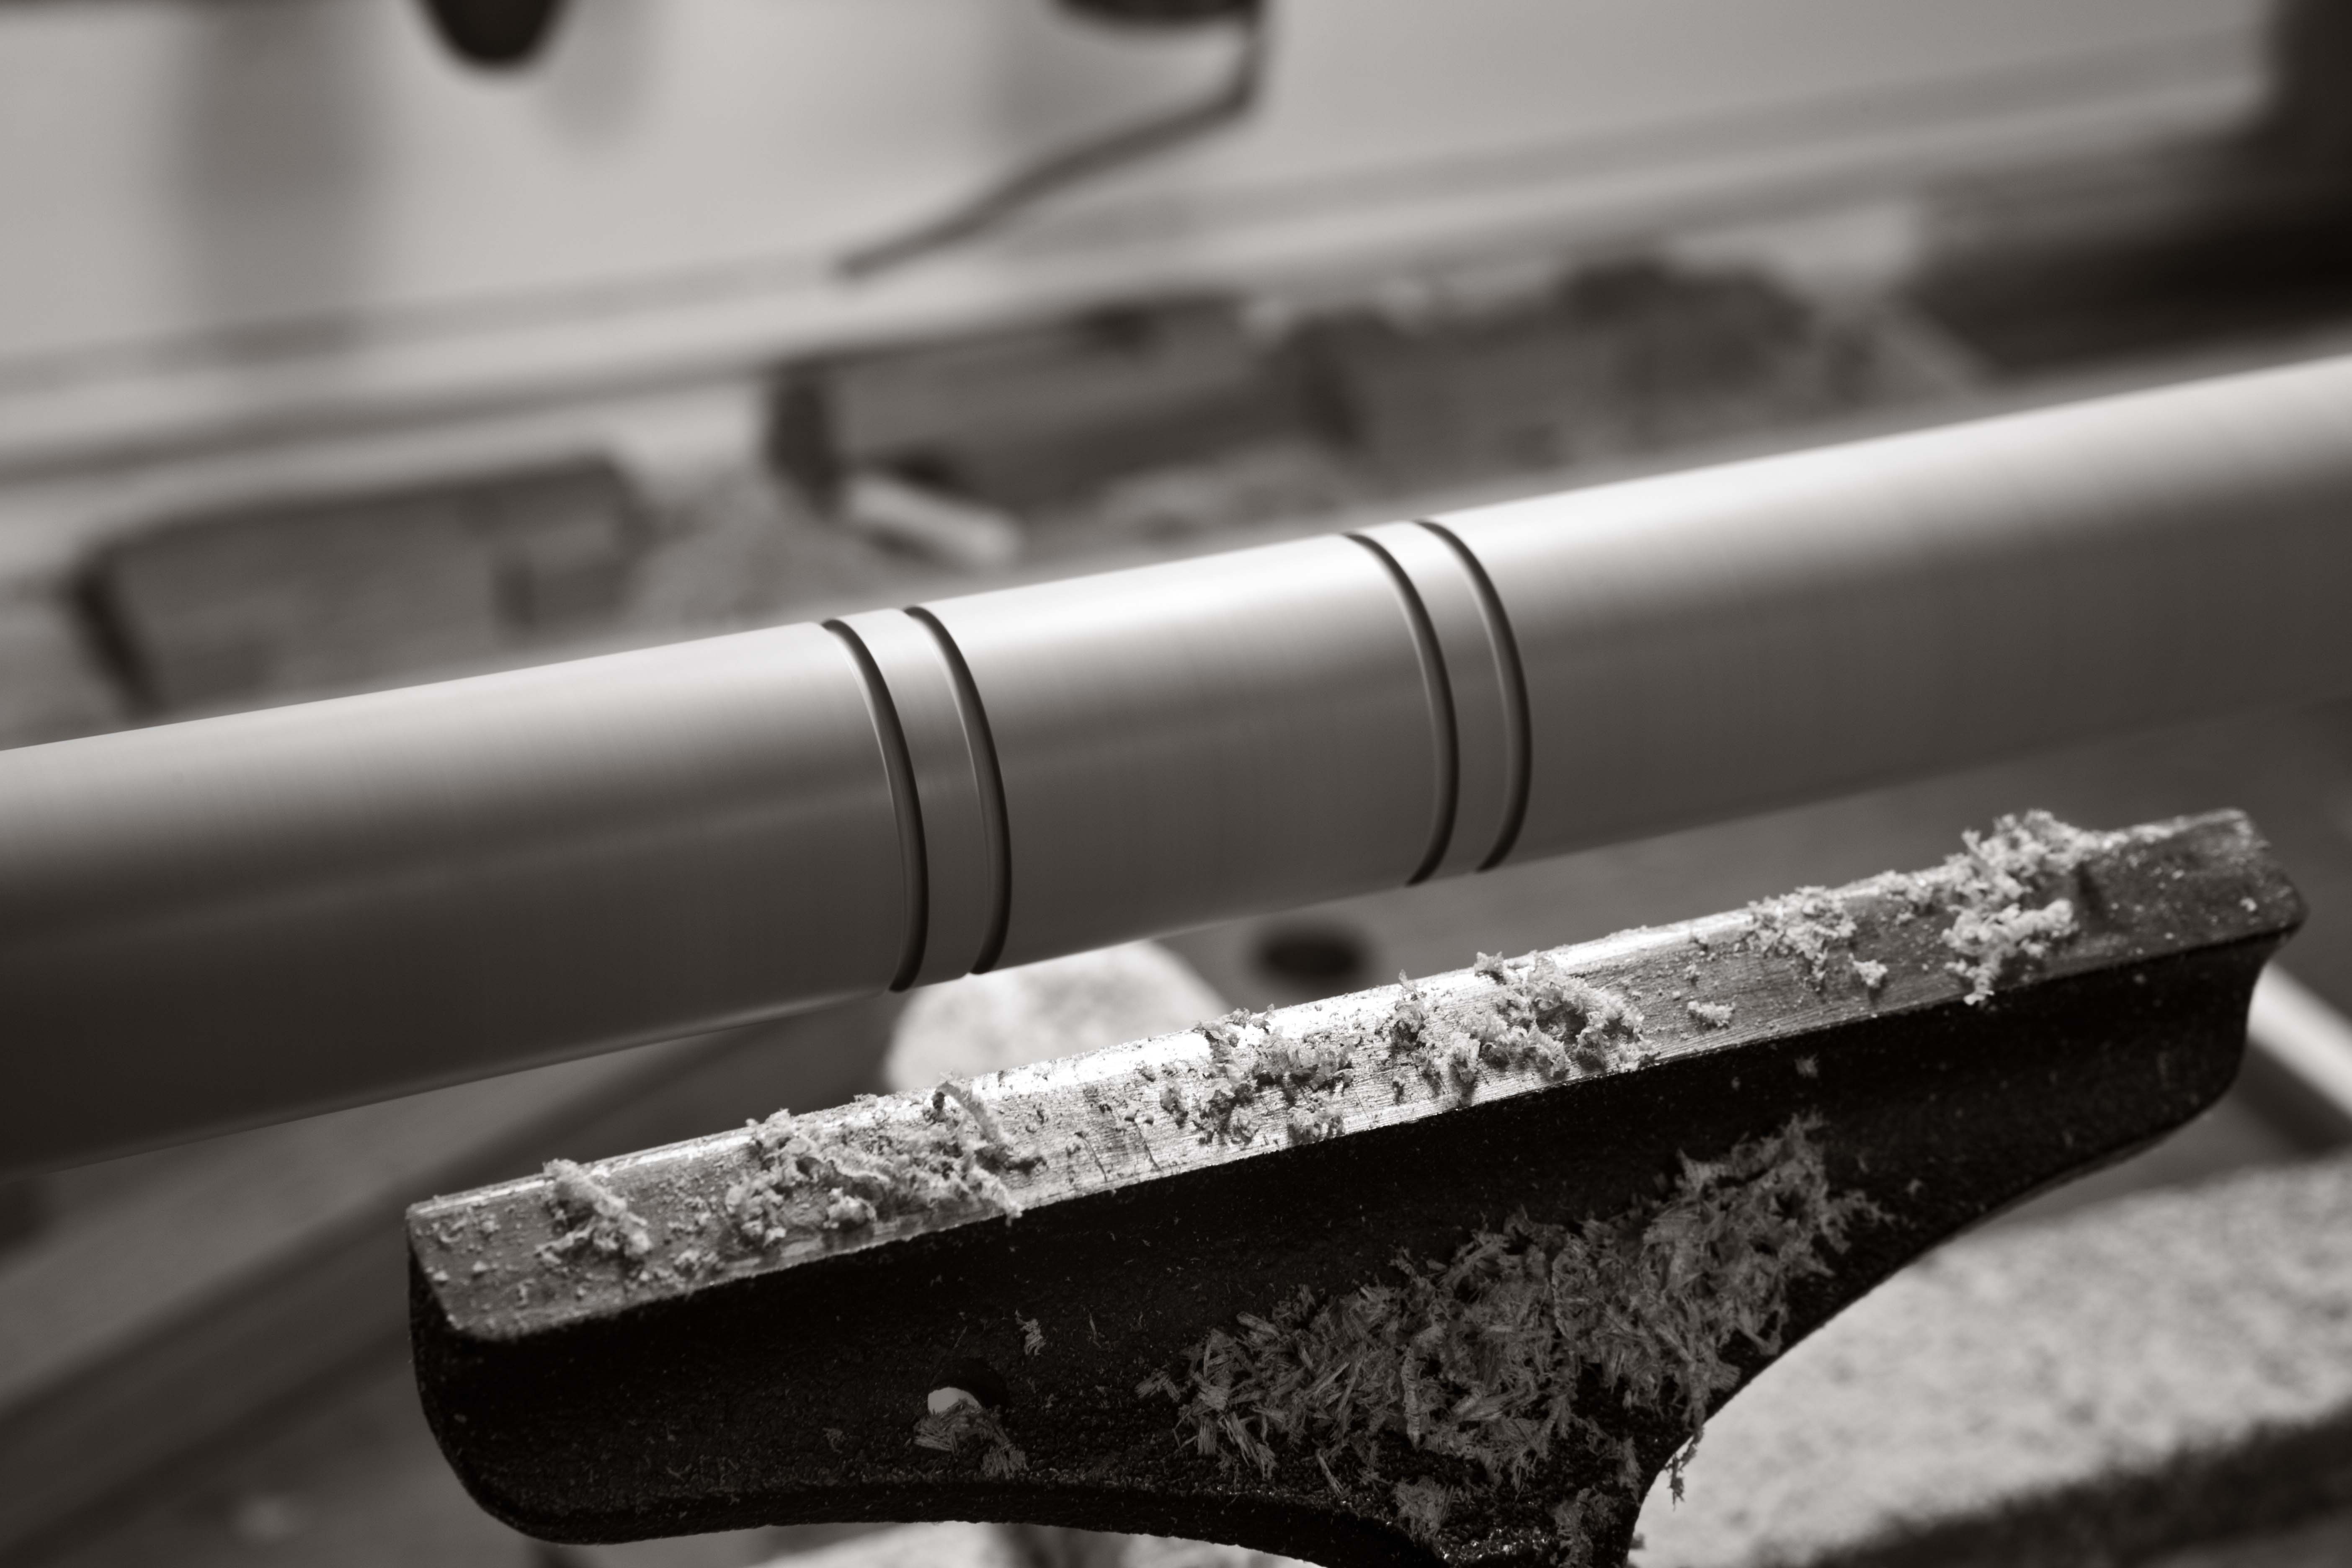
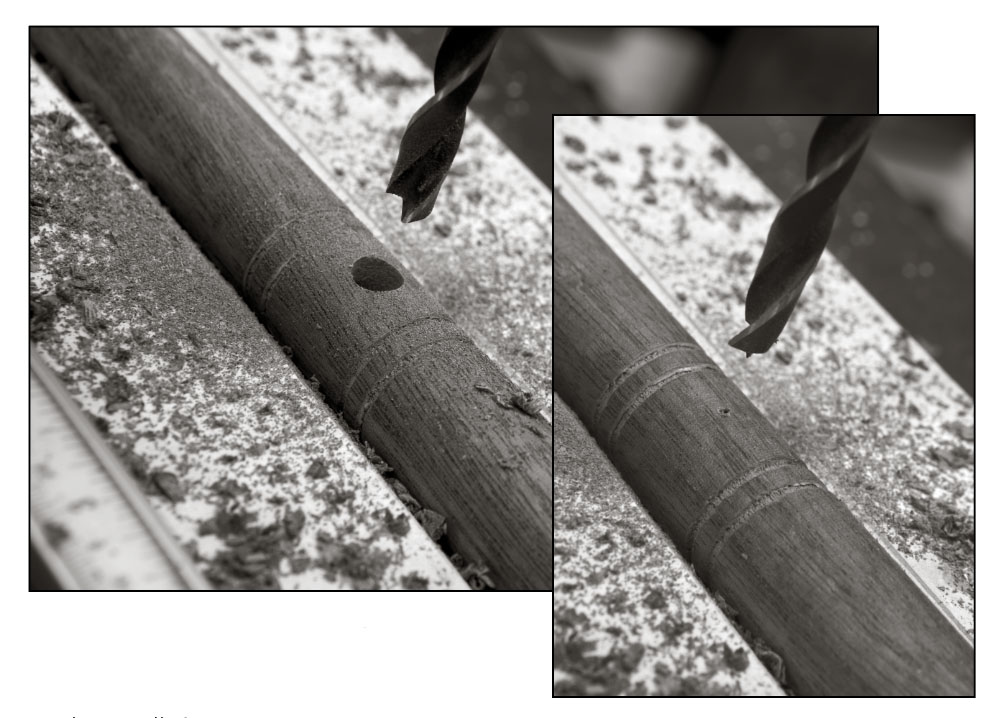
I added four small grooves where the hardware holes will go – two above the hardware and two below. Little details such as these grooves and beads make the legs look like something fancier than three store-bought dowels.
Not original. These little grooves add some visual interest to the joint. However, they’re not a detail I found on any original stool. So skip them if you are going for authenticity.
Sand the legs to remove any rough tool marks. I finished the legs on the lathe. First I burnished the surface with a “polissoir” (a French polishing tool made from tightly bound broom corn). Then I applied beeswax to the legs with the workpiece spinning. I used the polissoir to drive the beeswax into the pores of the wood (again, while the lathe was spinning). Then I used a rough cotton cloth (I’d like to be fancy and say it was muslin, but it was an old bag that held corn grits) to buff the wax. Then I applied another coat of wax and buffed that.
If you want to add a little age to the wood, apply a coat of black wax and push it into the grooves and pores. Let the wax set up then buff it.
Wax is not a permanent finish, but it is easily renewed or repaired if your stool is for the drawing room instead of the campsite.
Leg Elevation
Seat Plan
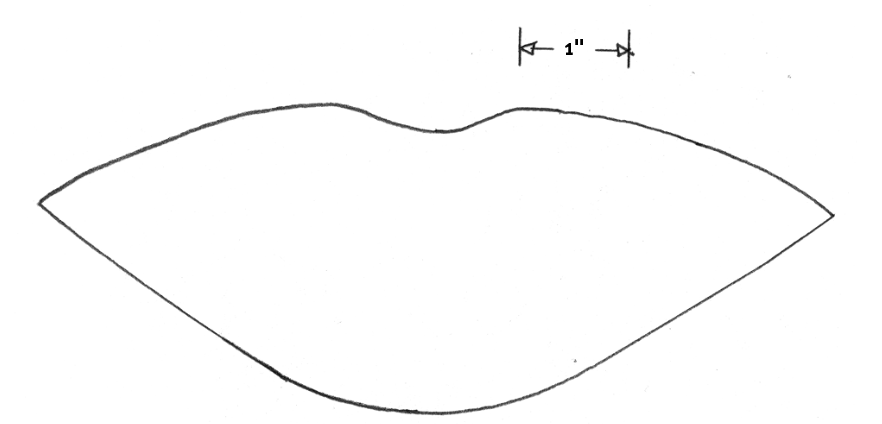
Lips Plan
Bore Three Holes All three holes are located in the same spot on each of the three legs and should be the same diameter – just big enough to allow the hardware to pass through. The holes are located 11-5/8″ down from the top of the legs.
The best way to bore these holes is with a drill press or hand-powered post drill. You want the hole to be dead straight and pass through the middle of the leg. If you are a whiz with a hand drill or cordless drill then go for it.
Dead center. The holes for the hardware need to be bored through the middle so the leg isn’t weak. A cradle helps hold the legs for drilling, no matter how you make the hole. Drill the hole so the brad point of the bit barely pokes through the leg (right). Rotate the leg so the tiny hole left from the brad point is facing up. Finish the hole.
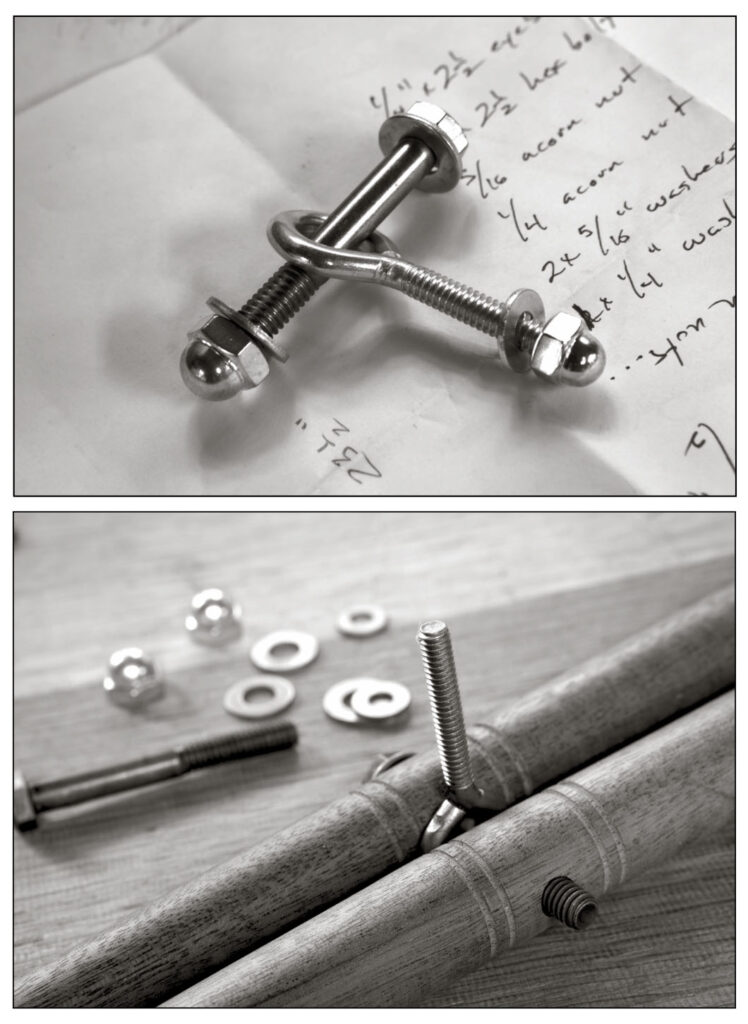
Install the Hardware Strip the hardware of its zinc if you like – I use a citric acid solution for this. Here’s how the hardware goes together:
• Put a washer on the bolt. Push the bolt through one leg. • Place the eyebolt on the post of the bolt. Put the other leg on the bolt. • Add a washer to the end of the bolt, then drive on the acorn nut. • Push the post of the eyebolt through the third leg. Add a washer and acorn nut.
Drill pilot holes that are deep enough to receive the No. 10 screws into the top ends of the legs.
Common hardware. The bolt, eyebolt, washers and nuts are all items found easily at a half-decent hardware store.
Leather Seat The seat is four pieces of material: a triangular seat and three pockets that look a bit like lips when you cut them out. When I cut out leather, I make patterns for my pieces from thin MDF or hardboard – usually 1/4″-thick material.
Knife work. You will probably make more than one stool, so make plywood patterns of the seat parts and cut them out using a sharp utility knife.
Put the patterns on the leather and cut out the seat and three lips using a sharp utility knife.
You can hand-stitch the lips to the seat. If you aren’t up for stitching, rivets work well and give the project a military flair.
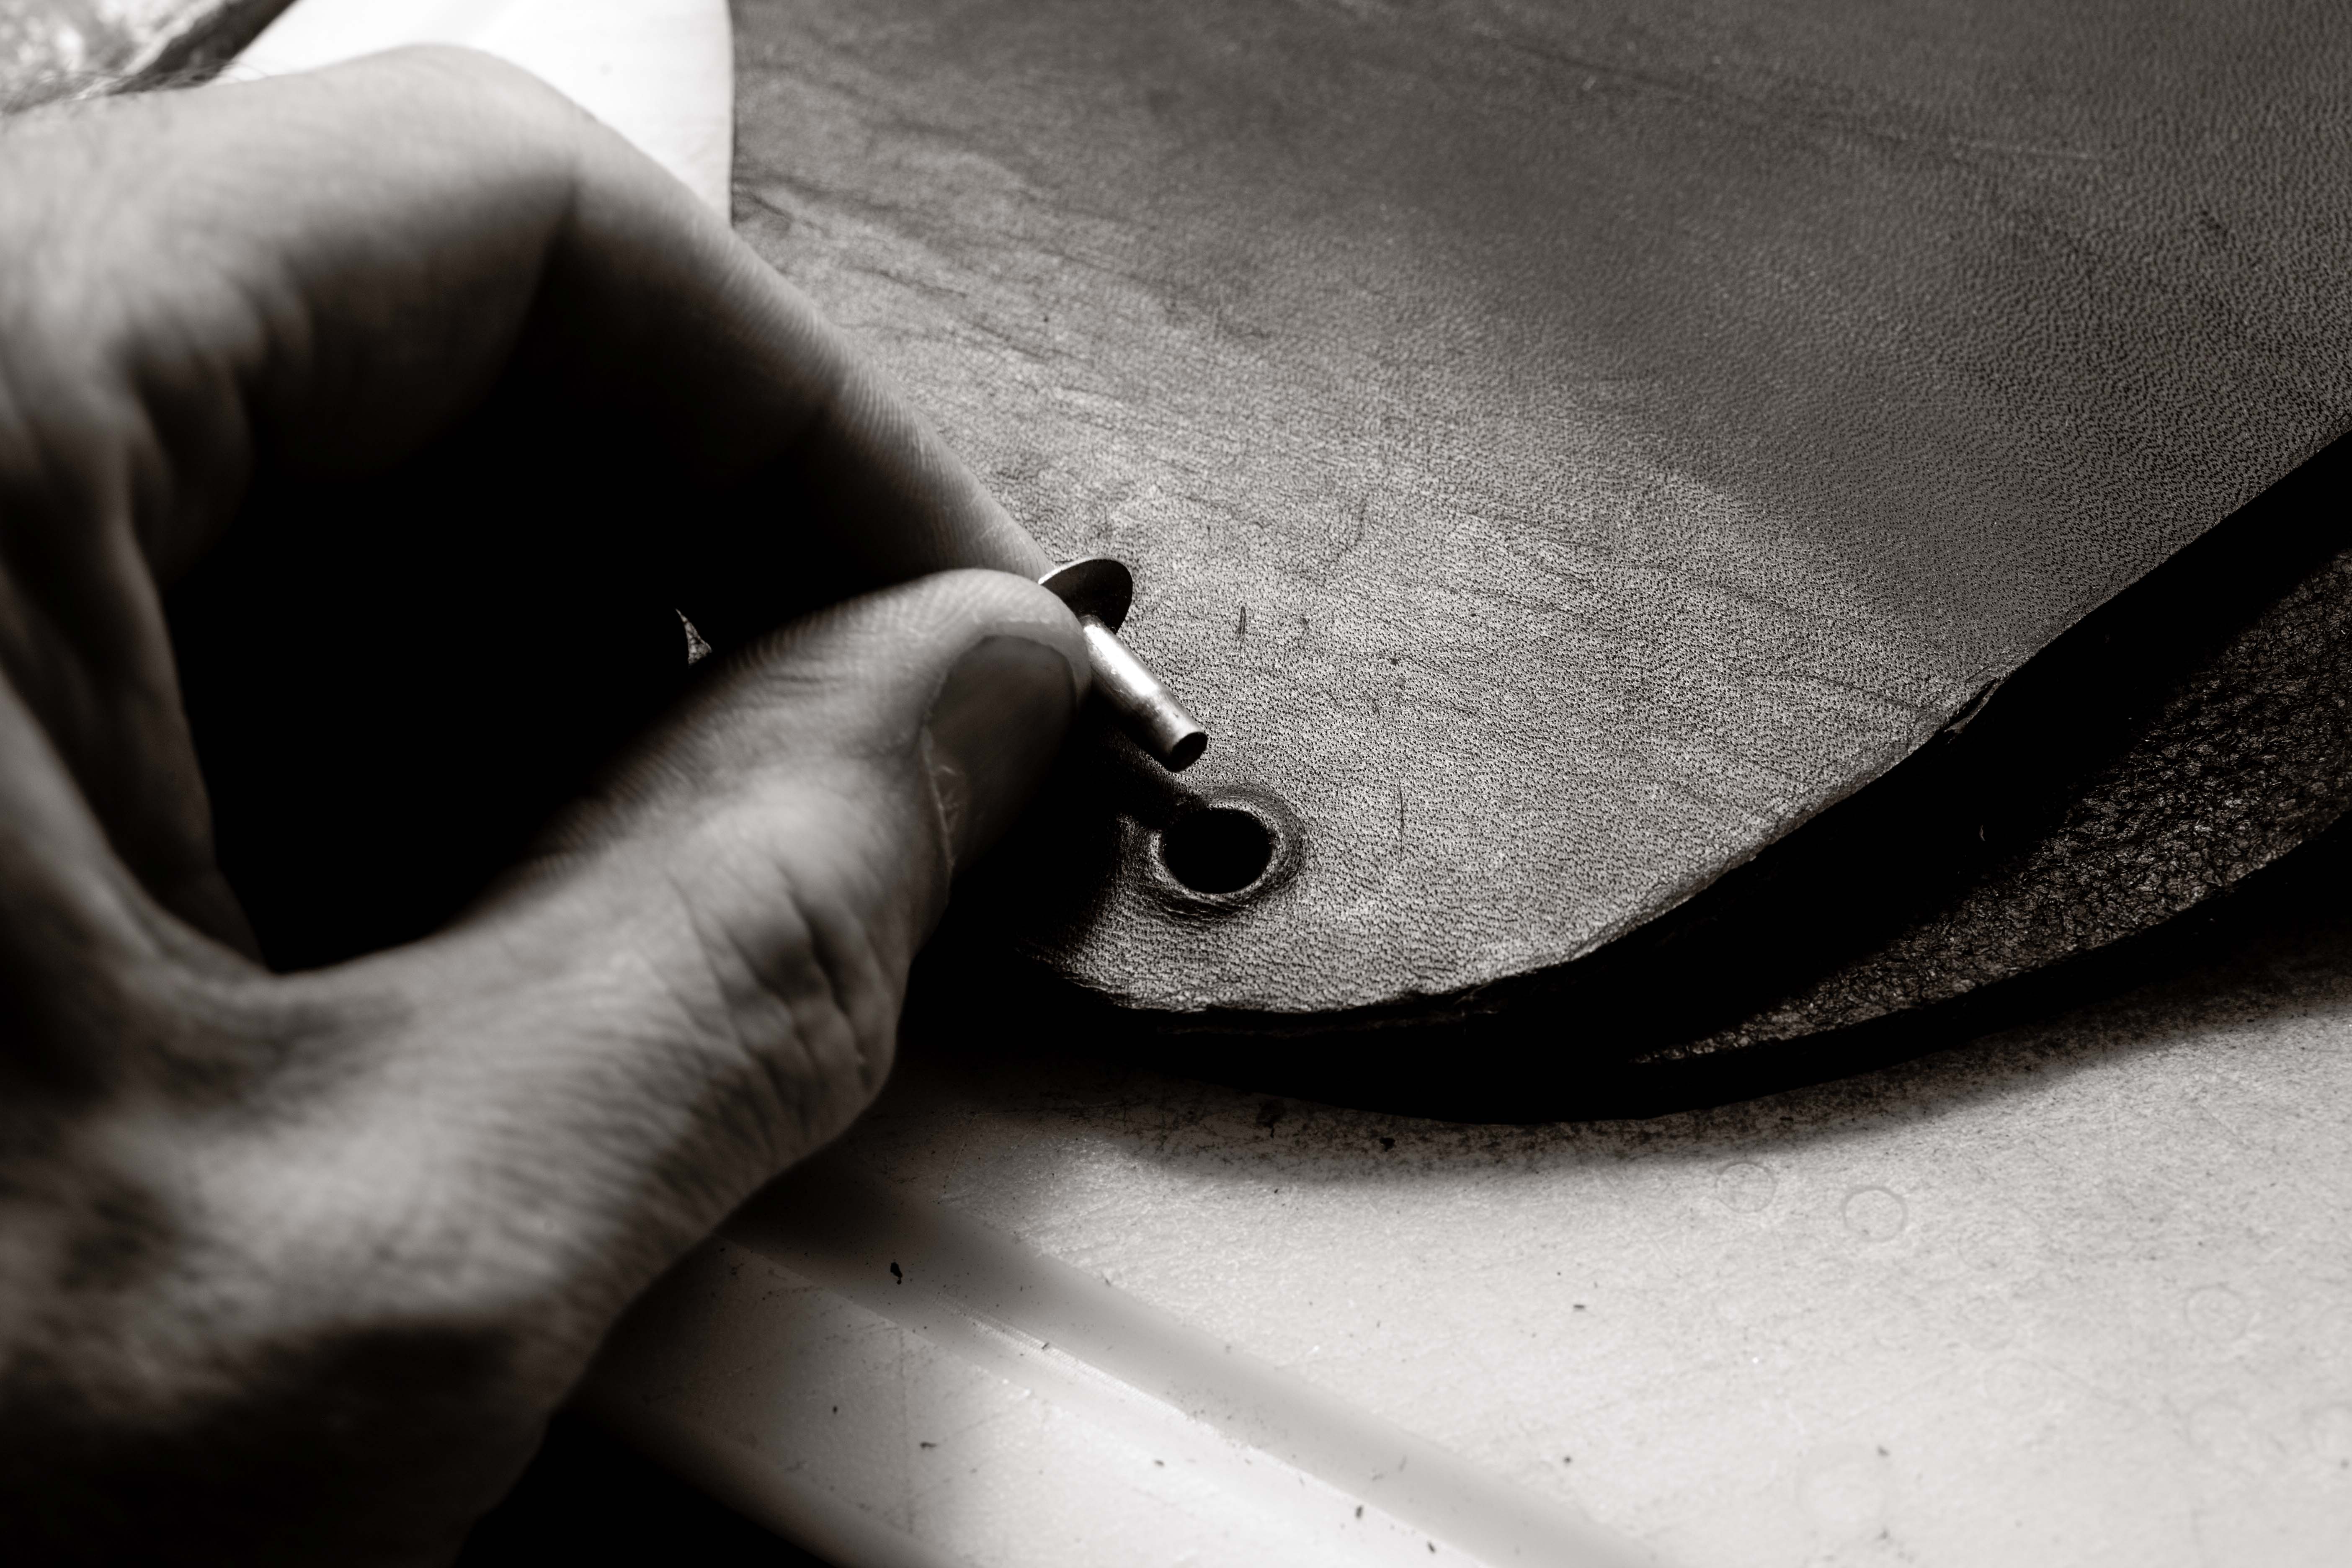
First punch. Using a leather punch, make a hole through the seat and pocket piece. I’m using a kitchen cutting board as a backer.
Secure each lip to the seat first with one rivet at one of the tips of the seat. Punch a snug hole for the rivet through both pieces of leather, drive on the washer or “burr,” snip off the excess and peen the post over the burr.
Insert the rivet. Put the rivet through the holes. The flat face of the rivet should be on the top surface of the seat.
Now bend one end of the lip up and rivet the end to the seat about 1/4″ from the end of the lip. Repeat for the other end of the lip. Finally, add two more rivets between the three existing rivets. Repeat the whole process for the other two corners.
Like a washer. The “burr” part of a traditional rivet is what pinches the leather. Place it over the post. Then drive it on the post with a rivet setter.
One quick note on neatness: Be sure to put the burr so it faces the floor for all these joints.
After the pockets are riveted, use a sharp utility knife to trim any little bits of the pocket that aren’t flush to the seat.
If you purchased undyed leather, finish the leather with a dye, oil and wax. Burnish the edges with a piece of wood and a little spit (water will do nicely as well).
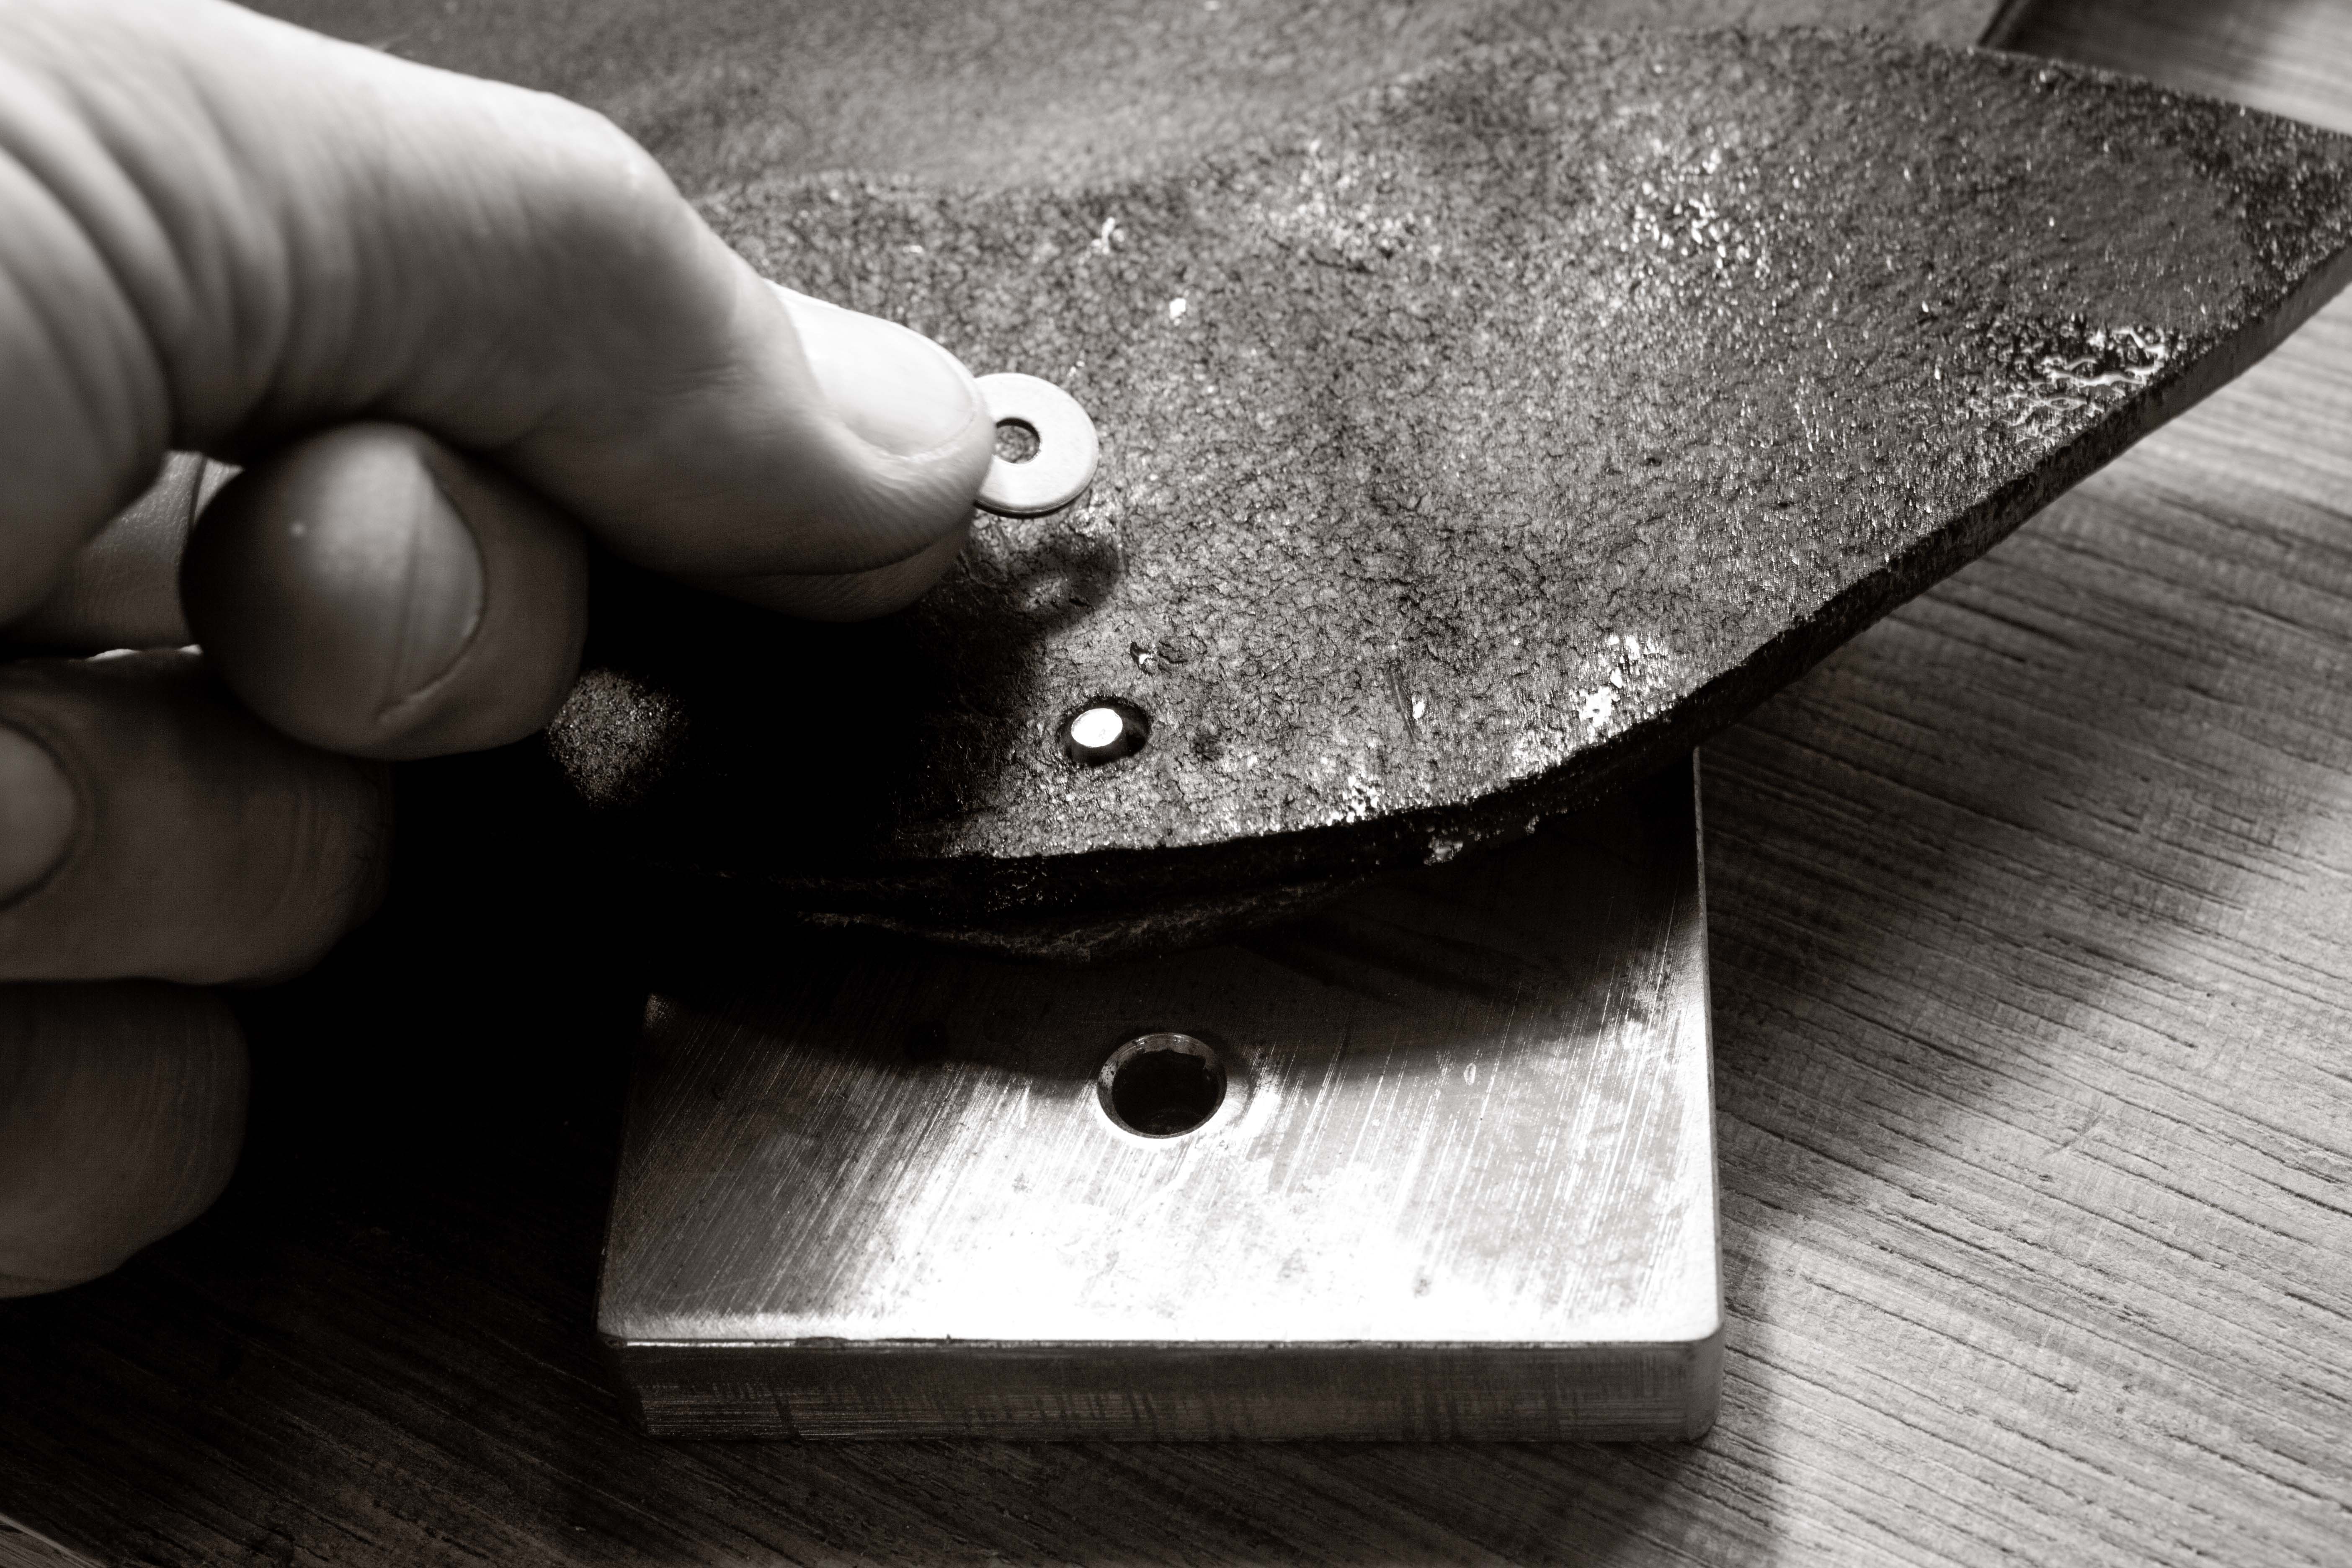
Attach the seat to the legs. Punch a clearance hole through each lip that will allow a No. 10 screw to pass. Screw the leather to the legs with a finishing washer under the head of each screw.
That’s all there is to it. You can make the tool easy to transport by making a belt that will go around the girth of the closed stool and screwing that belt to one leg. Or you could make a canvas bag embroidered with your football team’s logo. After all, when going into battle, it’s always best to fly your colors.