Leonard Lee, December 2014. Photograph by Narayan Nayar.
One of the long-term projects I’m involved with is a chronicle of modern toolmakers, which Konrad Sauer, Narayan Nayar and I are hoping to publish one day. While that chronicle is still off in the future, the first thing we did after hatching the idea was to arrange a meeting with Leonard Lee, the founder of Lee Valley Tools.
And so, in December 2014 the three of us traveled to Ottawa, where his son Robin Lee graciously arranged time for us to sit and speak with his father.
I don’t mean to tease anyone hungry – and you should be hungry – to hear about the history and stories we recorded that day. I do want to explain, though, why I was so moved today to hear that a man I’d met only briefly, in the twilight of his life, had passed from this mortal coil.
And I was moved.
I do not think I’m easily impressed, or overly free with my admiration. But while Mr. Lee had earned my admiration long before I met him, it increased exponentially after a few hours in a room with him.
I found him inspiring (and I do not use that word lightly – if ever) not just for his accomplishments and his legacy – impressive though both are. What I was most struck by was his way of being – even as his mental and physical health were showing concessions to age.
He was obviously, and visibly, quite proud of his company and his family. But somehow he exuded that pride while at the same time was absolutely and unceremoniously humble about both – as though he’d simply been the man who was standing in the right place when the doors to the treasure chamber happened to open up.
In an era when it seems everyone yearns for celebrity and attention for mundane reasons, he seemed unconcerned with credit or attention. He was proud of Lee Valley, but not proud for it. And that distinction, it seems, is in short supply these days.
Every Lee Valley employee, every Lee family member and friend that we met were universal in their absolute respect and affection for Mr. Lee. Every one of them referred to him as “Mr.” Lee, and on every person’s lips that title seemed to convey an almost sacred respect.
Mr. Lee left behind a company, a family – a legacy – that is noteworthy, impressive and historic. But more than that, he left behind an indelible and obvious trail of influence on the people he interacted with – even if they met him only for a brief time, and even if (like me) they tend too much toward cynicism and disdain for much of humanity.
The Lee family – and the Lee Valley family – both have my most sincere and heartfelt condolences on their loss.
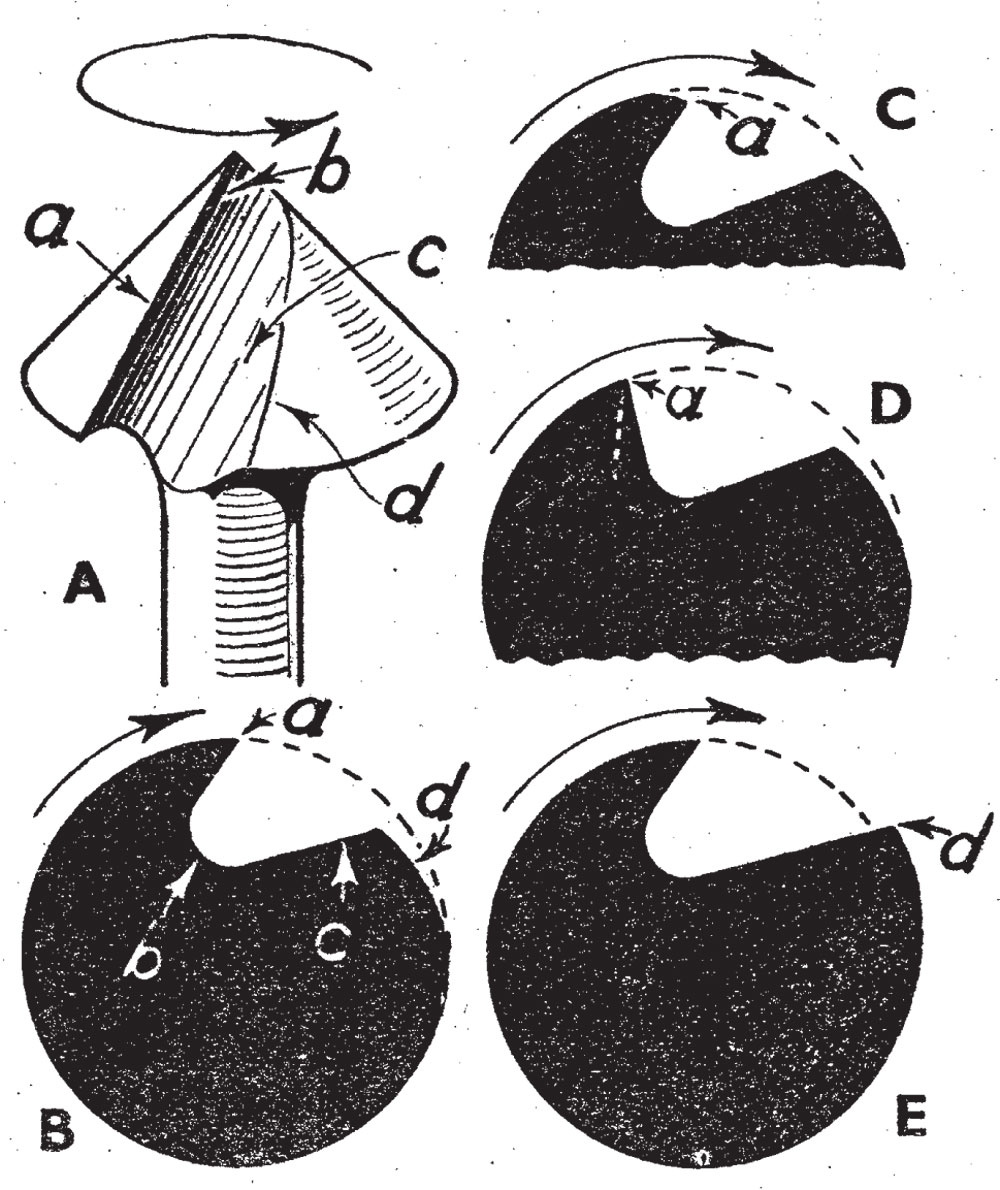
FIG 1. THE SNAIL COUNTERSINK. A shows the appearance of the bit, and B the correct shape. At C the cutting edge is dubbed over. The cutting edge needs undercutting at D (see dotted line). At E the part d is too high.
Bits often come in for a good deal of neglect. A man will keep his chisels and planes keen and have his saws sharpened, but just won’t be bothered to touch his bits when they become dull. It is a pity because you can’t expect to bore clean, accurate holes if your bits are dull or out of order. Not that a bit should be sharpened too often. Remember that there is a limit to the number of times any bit can be rubbed up, especially those having threads. The secret is never to allow a bit to become really dull, and to avoid running across hidden nails. The last-named do a lot of damage and necessitate a lot of filing—in bad cases the bit may be made entirely useless.
The Snail Countersink. This is for wood cutting only. If the cutting edge of this becomes dull it means that you have to apply considerable pressure to make it cut at all. Furthermore it is liable to form an uneven recess. Fig. 1 shows at A and B the correct shape and makes clear the features to be noted in the sharpening. Note first that the cutting edge, a, is undercut and is sharpened only at the inside. If dubbed over as at C it will fail to cut at all because the actual edge does not touch the wood to be removed. What has happened is that someone, not understanding the principle of the cutting, has filed the outside instead of the inside.
Another cause of bad cutting is shown at D, a fault less easily detected. The edge may be apparently sharp, and the sharpening may have been on the inside as it should be, yet the bit cuts poorly. The fault is that the edge is not undercut sufficiently. In all probability a flat file has been used so often that the undercutting has been almost completely removed owing to the angle having been gradually changed. There is no harm in giving a final rub with a flat file or oilstone slip—in fact it helps to keep the edge straight—but the gullet, b, should be deepened occasionally by using a rattail file. The dotted line in D shows how the metal should be filed.
The last fault at E is not likely to happen in a bit of reliable make, but may be found in a cheap one. It is clear that the surface of the cone at d is higher than the cutting edge, and the latter cannot therefore touch the wood. The remedy is to file down the part at d.
Most wood bits have a fairly low temper to avoid being brittle, and they can therefore be filed. Use only a fine file to finish off, and follow if possible with an oilstone slip.
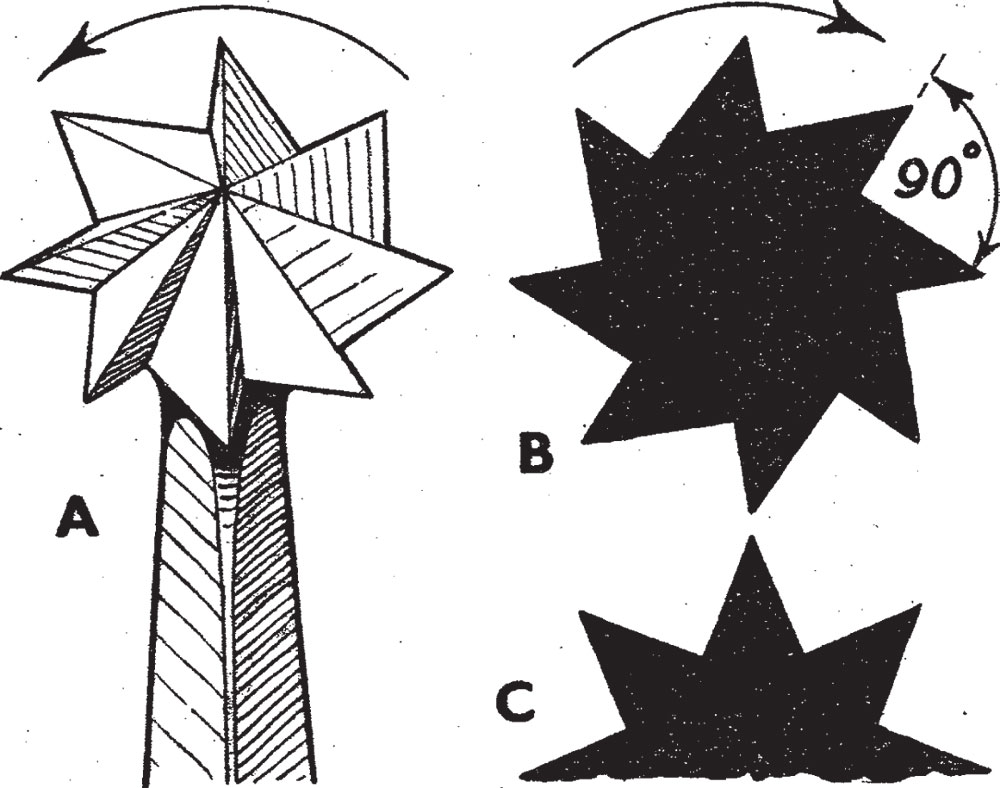
FIG. 2. THE ROSE COUNTERSINK. Sketch of bit is given at A. Correct shape appears at B. At C the angle is wrong so that the bit merely scrapes.
Metal Countersinks. Two bits fall under this heading, the rose bit for brass and the iron countersink. They have a common feature in that both are too hard to be sharpened with the file. The oilstone slip or grindstone must be used. Fig. 2 shows the rose countersink and it will be seen that the grooves must be treated with a 90 deg. slip. Note, however, that the latter must be held over at an angle so that the edge cuts rather than merely scrapes (B). If sharpened as at C in which the angles are equal the bit would have poor cutting qualities.
Sharpen each groove the same amount so that all the edges are level and keep the edges pointing to the common point.
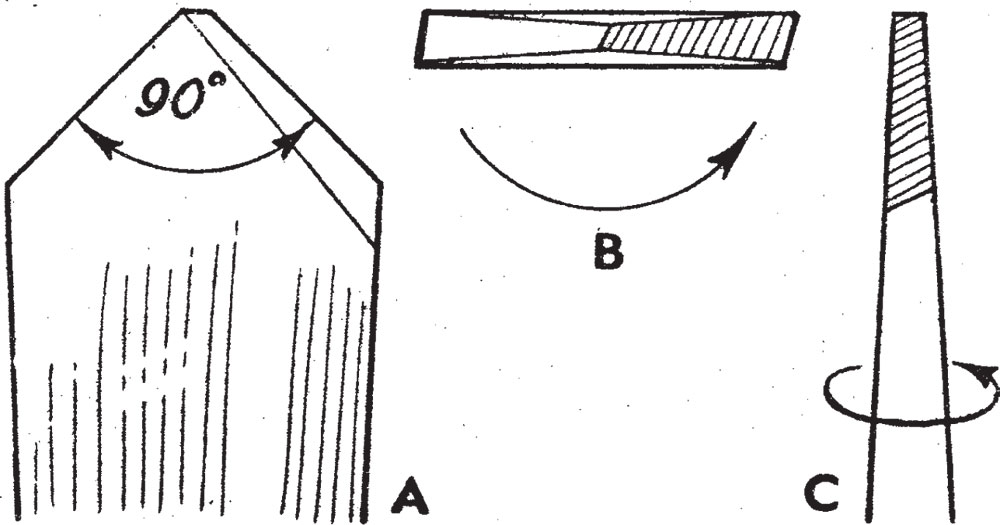
FIG. 3. DETAILS OF IRON COUNTERSINK. A is side view, B, plan, and C edge view.
In the iron countersink in Fig. 3 the edges are ground back at an angle of about 60 to 70 deg. so that a fairly acute edge is presented to the metal. Keep both sides equal, and note that the slope is 45 deg., thus making the over-all angle 90 deg., the correct slope for countersunk screws.
Recently John and I examined our inventory numbers and reviewed our plans for reprints in the coming year. After much thought, we decided not to reprint “The Book of Plates” when we run out of copies. It is simply too expensive to print again and takes up too much space in the warehouse.
The good news is that we still have plenty on hand, probably enough for another 12 months or so. So please consider this fair warning. When this book is gone, it’s gone forever.
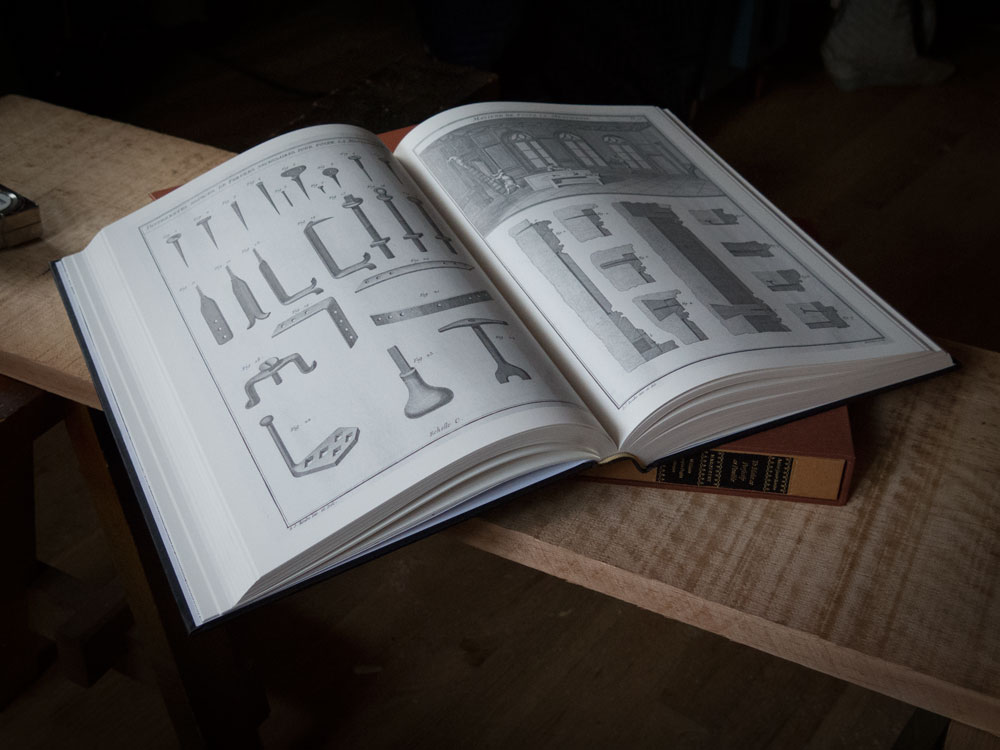
To soften the blow, we also decided to give away a small bonus to people who purchase “The Book of Plates” – a small token that will show them the immediate value of what they’ve purchased. It’s the first complete English translation of plate 11.
This translation covers the workbench, of course, but it also covers setting up a workshop. It discusses how to make a drying chamber and a place for the pitsaw.
Most of the discussion in the text concerns the different tools used by woodworkers and how the bench is constructed. I have not seen a complete translation of this plate anywhere.
So if you buy “The Book of Plates” you will receive a free download of the plate 11 translation immediately.
And what about customers who already purchased “The Book of Plates” from us? Check your email (and your trash, and your junk mail folder). We sent you a copy of the translation this evening. If for some reason you didn’t receive it, send an email to help@lostartpress.com.
“The Book of Plates” is available in our store for $120 (shipping included) and ships to both the United States and Canada.
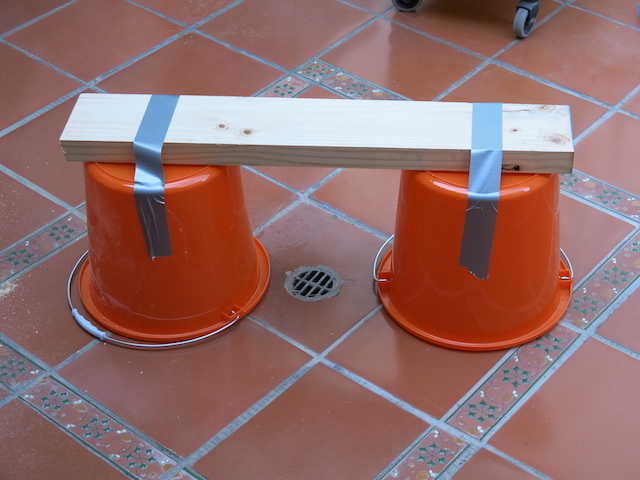
How do you build a saw bench…without a saw bench? In The Naked Woodworker, Mike Siemsen shows how to begin with a length of 2 × 6 and a pair of 5-gallon buckets. It would appear that 5-gallon buckets aren’t really a thing in Ecuador, as I haven’t been able to find any. I did manage to purchase a couple of reasonably sturdy buckets, but they’re shorter than I would like.
Mark 0 saw bench
While it may be feasible to build a saw bench without a saw bench, I think even Mike Siemsen would have trouble building one without a saw. The only saws that I brought with me were joinery saws, and so aren’t suitable for rough cutting lumber to size. As I mentioned in my previous installment, the saw that I bought at the Mega Kywi looked passable but not that great. As it turns out, I was being optimistic. After a few cuts (in pine), I decided that I wasn’t going to get anywhere unless I sharpened the saw. As delivered, the saw was filed punched straight across (no fleam), with a rather aggressive rake angle. So it actually rips softwood decently well, albeit with so much set in the teeth that the cut wanders like an Amazon tributary.
There are plenty of instructions and videos available online (and also in The Naked Woodworker) that show how to file a saw, but they all involve two things that I don’t have: (1) a saw vise, purpose-built or makeshift, to hold the saw during filing, and (2) a bench upon which to mount said vise.
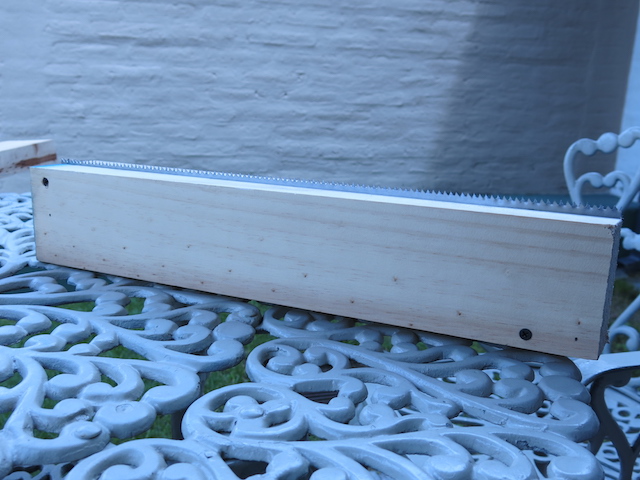
I spent a full two days pondering the question of how I was going to file this saw without these two crucial tools, but finally hit upon a solution: I removed the handle from the saw and sandwiched the blade between two 2 × 4’s held together with a pair of screws, passing through two holes in the blade. I didn’t yet have anything to mount this “vise” onto, but at least it was substantial enough that I could hold it down on a table top with one hand while I filed with the other.
Mark 0 saw vise
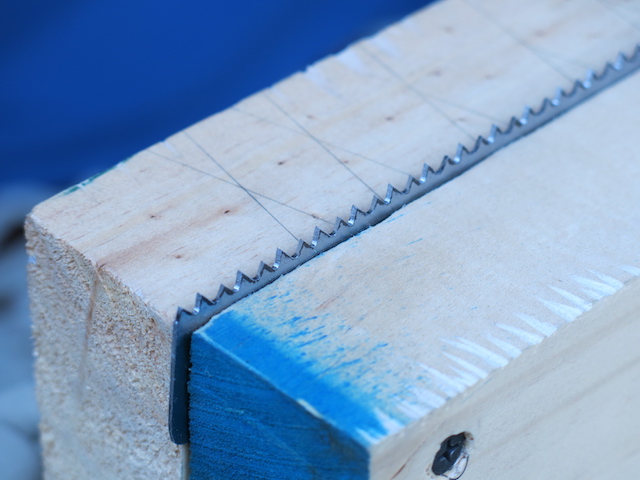
The vise ended up working pretty well, if not the most comfortable way to file a saw. It took me three passes of jointing and shaping the teeth until I was reasonably happy. These passes were straight across; I then took one more pass to add some fleam. The goal was to end up with a hybrid rip/crosscut saw, having a negative rake angle of about 1:4 (14°) and a fleam angle of about 1:5 (11°).
Four passes later…
The saw crosscuts decently now, and the steel is hard (maybe a little too hard for easy filing), so I think it will work. It still has far too much set, but I don’t think there’s much I can do about that without risking damage.
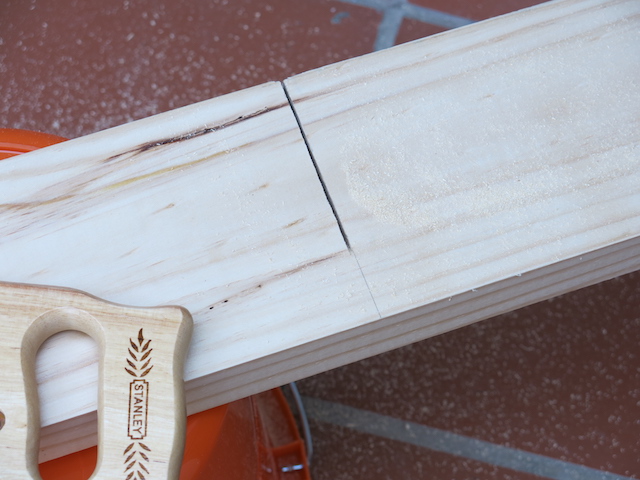
The proof is in the cutting.
Ripping is still a chore, but the saw was cheap enough that I might buy another and set the pair up as dedicated rip and crosscut saws, which should help. I’m expecting some visitors from the U.S. in about a week and a half, and I’ve arranged for them to bring down a couple of good saw files, which should ease the pain.
This particular saw had an interesting little feature that I hadn’t noticed when I bought it: a specialized bloodletting tooth at the heel of the blade. As I already donate more than enough blood while woodworking, I decided to defang my saw and remove the tooth.
The bloodletting tooth. Normally an extra-cost option, I got this one for free.
In related news, my first trip to Aserradero San Morita (aserradero = sawmill) was productive. I neglected to take any photos while I was there, but I will try to do so next time. The place is pretty big, and I only saw a small part of it, but there were piles and piles of boards in all shapes and sizes. It was in many ways a scaled-down version of Midwest Woodworking in Cincinnati, and I got the impression that they do similar kinds of things that Midwest used to do, selling some lumber, doing custom millwork, etc.
Even though walk-in customers are clearly not their main focus, the guy I spoke with was patient enough with my meager Spanish to help me out. It was there that I learned that my interpretation of colorado as being synonymous with quebracho (“axe breaker”) was incorrect, and that in Ecuador, at least, colorado is Eucalyptus grandis x urophylla, better known in the U.S. as Lyptus®.
Lyptus has a mixed reputation. Some people claim that it is unstable and therefore unsuitable for furniture and the like, while others say that it is great to work with. The difference in opinion may at least in part be due to differences in origin, as it is known that Lyptus from different plantations can have significantly different appearance and working characteristics. (You can even buy single-origin Lyptus from Uruguay, if you’re willing to pay the premium.)
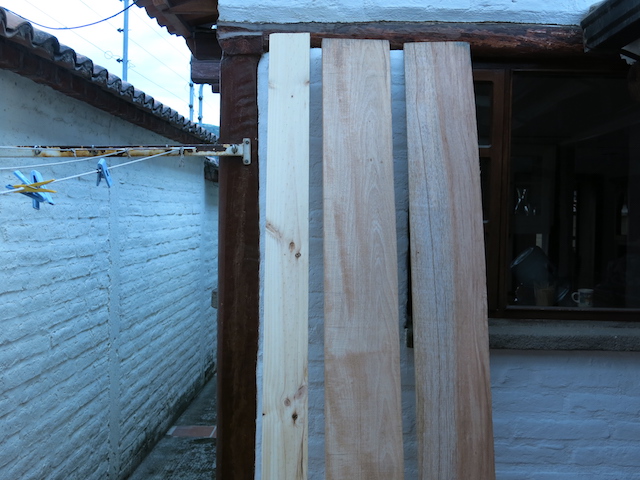
Two Lyptus boards (plus one non-Lyptus board—can you spot it?)
I bought two boards, about 1 1/8″ thick by 9″ wide, and just under 8′ long. Both boards have some end checks and the like, but they’re straight, clear and show no signs of warp or twist. The price worked out to $2.50 per board foot, about a third of the cost in the U.S. In addition to the Lyptus, which seems to be the favored wood for furniture and cabinetry in Ecuador, I saw some seique (known as tornillo in the U.S.) and some pine that did not look like P. radiata. They clearly had other kinds of wood in stock, but I didn’t want to take up more of their time than I had to; I’ll do some exploring later.
After years of work, I am pleased to announce that we now ship our books throughout Canada. You can order them through our regular store and they will ship to you from our Canadian warehouse via Canada Post.
And yes, the price includes shipping in Canada.
Note that we are currently able to ship books only. We are not yet able to ship DVDs or posters to Canada.
Here’s how it works: Canadian customers can now purchase books through our store. They will be charged in U.S. dollars plus the Canadian goods and services tax (GST). The customer’s bank will convert the charge to Canadian dollars, which costs the customers a small fee levied by his or her bank.
Then their books will be shipped via Canada Post from a warehouse in Kingston, Ontario. Customers will not encounter duty charges or any other international transaction fees.
As mentioned earlier, the cost shown on the website includes shipping. And any books that are written by me will also include a signed letterpress signature plate, just like in the United States.
We have just launched this service and we are sure there will be a few bumps in the road. If you have problems, please don’t post them in the comments section. Instead, send a note to help@lostartpress.com and we will take care of it immediately.
And now for a personal note: This huge step forward is due entirely to John. He has worked tirelessly for the last six months to make this work. Anyone who says that it’s easy to ship goods to Canada has never really attempted to do business on even a small scale. John has encountered mountains of paperwork, interviews by Canadian officials and has had to become an expert on Canadian tax collection.
Those of you who have followed our company for the last nine years know that this day has been a long time coming.
Right now I am raising a glass to John (but it’s not a Molson; sorry I can only go so far. That stuff is nasty).