It was a grueling week at the Appalachian Shangri-la as Michele and I spent more than 40 hours reviewing the page proofs of “Roubo on Furniture Making;” me reading aloud every jot and tittle (including punctuation and typography), while she followed along in my replica of the original French volume. It was a paradoxical sprint and marathon as we raced to review in minute detail each word, number and illustration of the new almost-450-page book. We stopped frequently to clarify the meaning or context of a word, phrase, or sometimes even a whole paragraph, leaving approximately a bazillion notations on the pages, mostly about capitalization and italics.
One thing is certain – it does reinforce the assertion that “l’Art du menuisier” was a work for the Ages and can serve as a vital part of any contemporary woodworker’s tutelage, now and for the conceivable future.
Consuming the entire manuscript in one stretch gave us, for the first time, the so-called “view from 40,000 feet.” And what a magnificent view it is! Not only did our appreciation grow through this high-altitude panorama, but we also began to notice subtle and not-so-subtle themes emerging, concepts and phrases we had not noticed before when we were focusing on much smaller units of the whole. This new appreciation was so affecting it provided us with the impetus to actually change the name of the book.
For our first volume, “Roubo on Marquetry,” I chose the lead portion of the title, “To Make As Perfectly As Possible,” from a phrase that Roubo used as exhortation throughout those sections of his original masterpiece. Never mind that it brought about perhaps the most unwieldy title of any woodworking book anywhere, ever. “To Make As Perfectly As Possible: Roubo on Marquetry” does not roll effortlessly off the tongue or the keyboard. Our expectation was that this lead phrase would serve equally well in the title for “Roubo on Furniture Making” and any subsequent volumes, which it would have done admirably, but after this week we are heading in a new rhetorical direction.
Throughout the often lengthy, detailed passages – and “Roubo on Furniture Making” is almost twice as long as “Roubo on Marquetry” – the Master invoked the sentiment and phrase, “with all the precision possible,” and we are eagerly purloining it as our own for this book.
So, I will be hand-delivering our marked-up copy of the proofs of “With All The Precision Possible: Roubo on Furniture Making” to Lost Art Press this coming Thursday at the Crucible Tool premier.
It still isn’t mellifluous but we like it.
— Don Williams, donsbarn.com
Like this:
Like Loading...

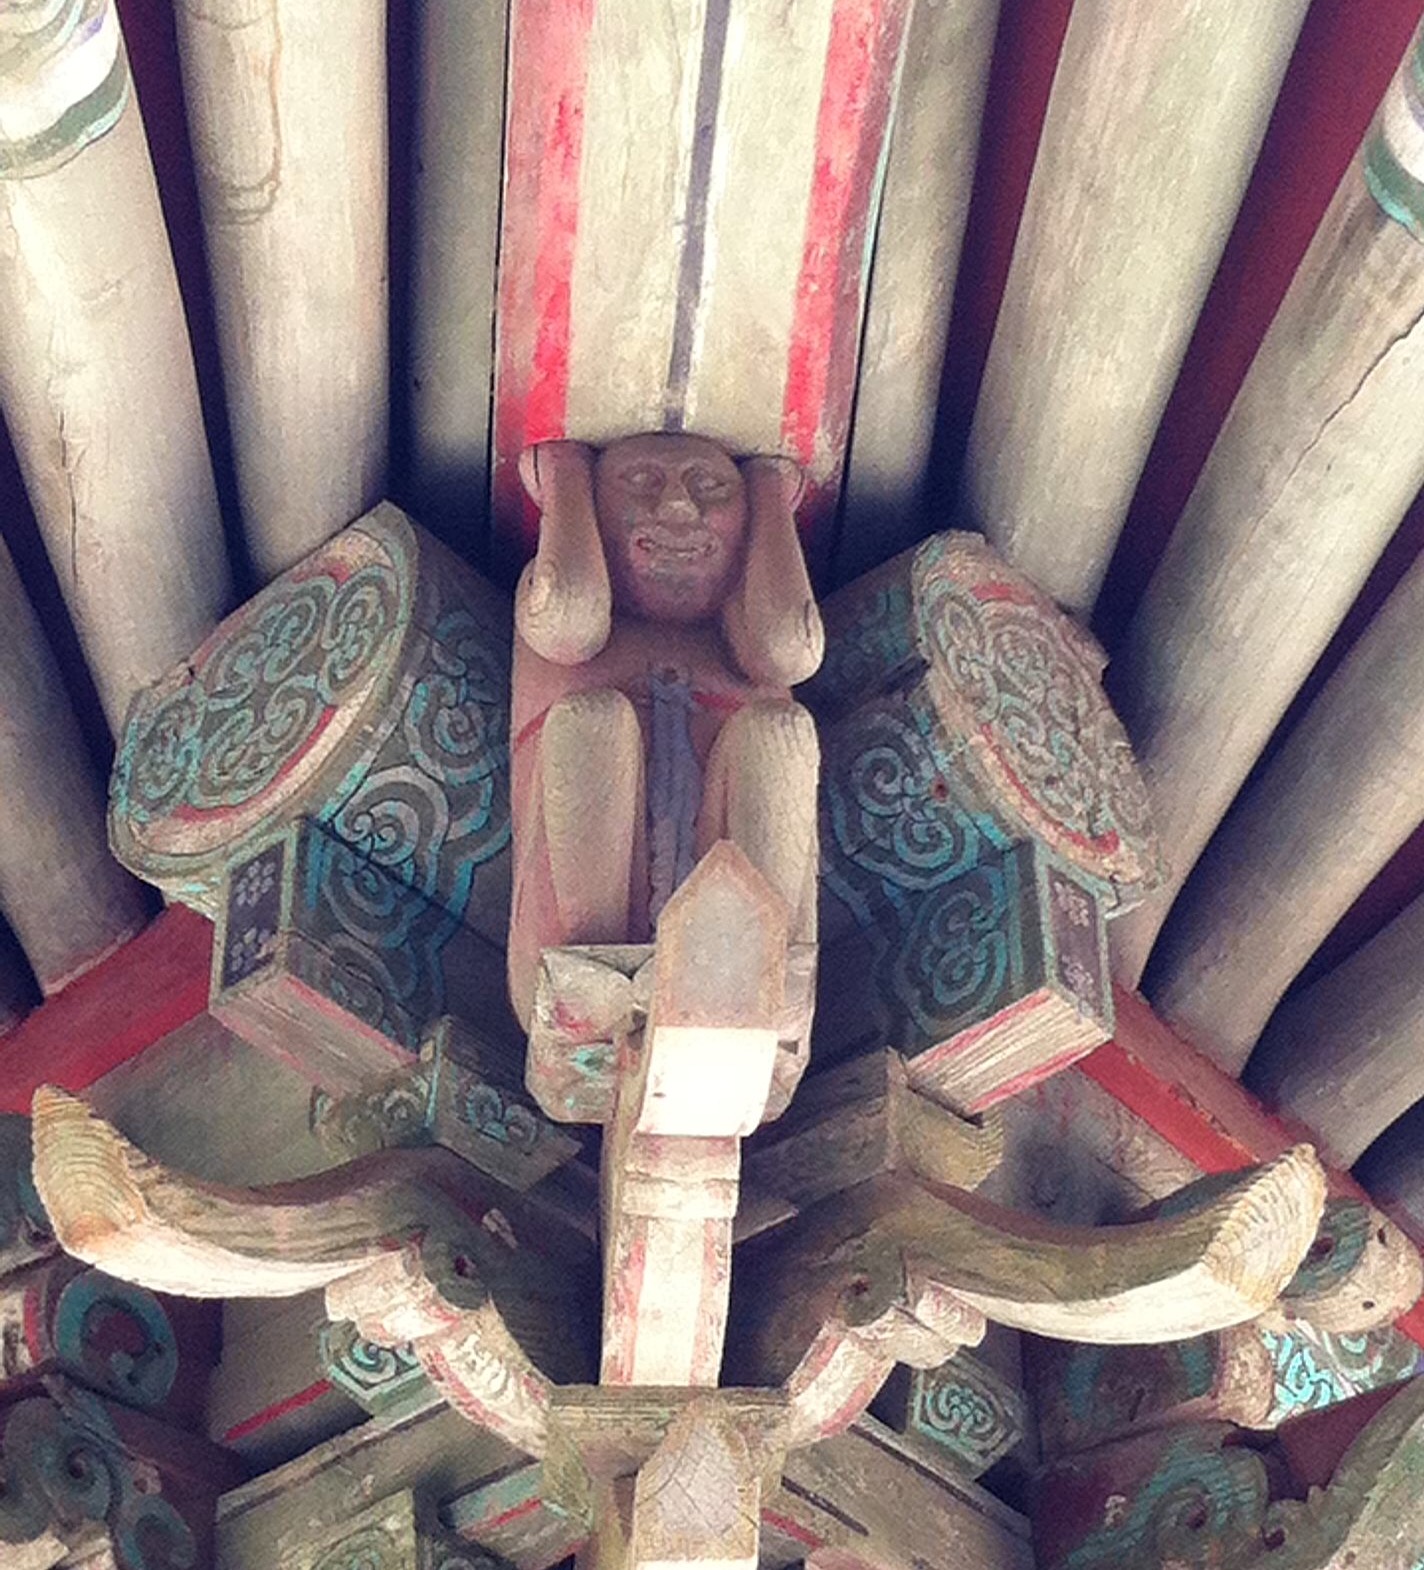
 There are variations to the legend as one would expect after 1,635 years. Some say the head carpenter met and fell in love with a local woman who scorned him and stole his money. Heartbroken and miserable he carved four figures of women and placed each one under the eaves of the temple roof. The small crouched figures are easy to spot under the lovely wood and faded paint of the eaves.
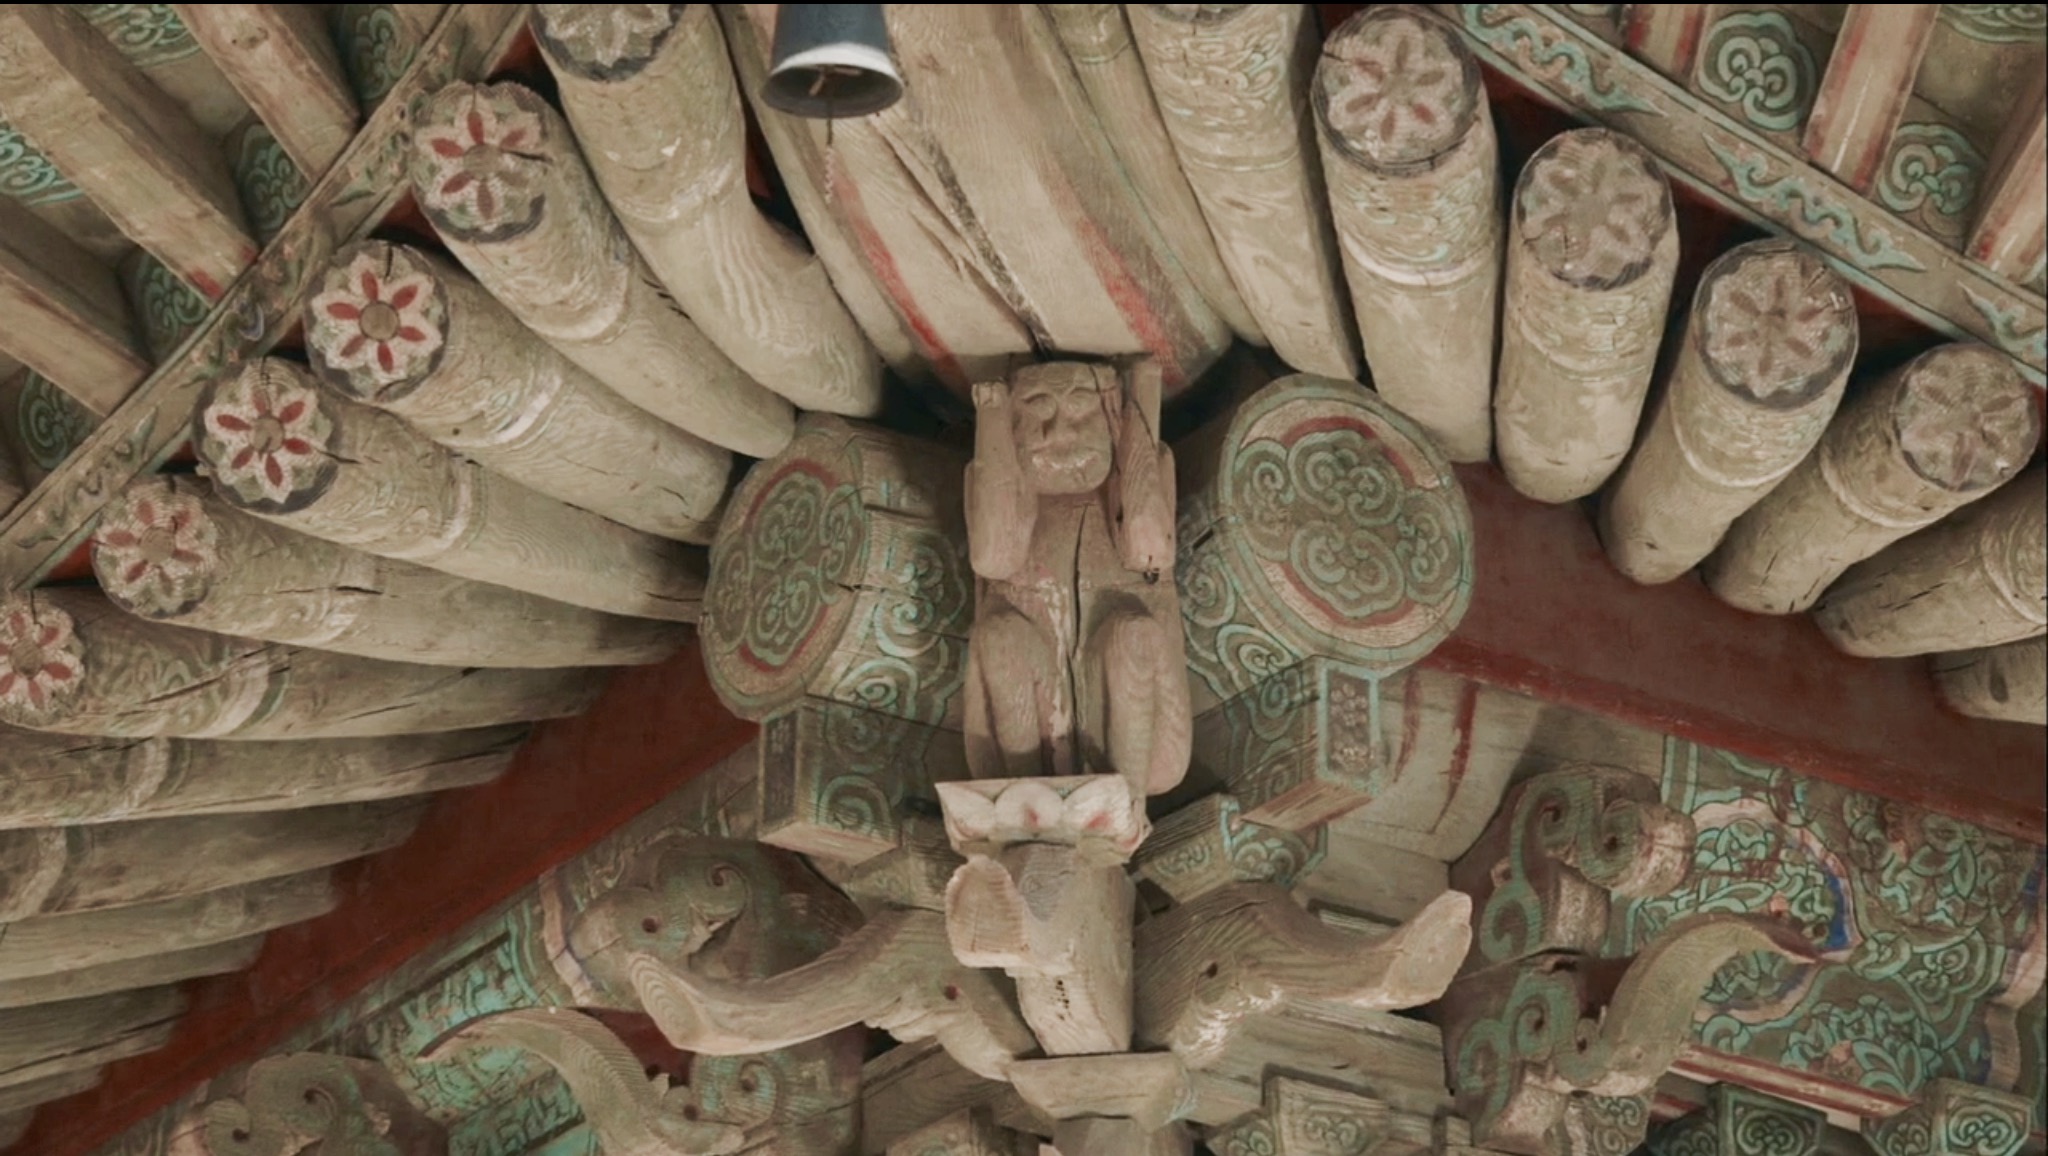 My favorite version (of course it is!) is more specific as to the intentions of the carpenter: his wife grew tired of waiting for him to return and left him. He carved the small crouching figures holding up each corner of the roof to symbolize his wish for her to carry a heavy burden for the rest of her life. Omo!