This week I had to spend two hours in the dentist’s chair. And if that wasn’t bad enough, I was “Clockwork Orange-d” into watching two hours of a TV program about creative storage solutions for the home.
Some of the examples I remember over the whirring of the dental Dremel:
Hinge your steps and create trap doors on the landings of your stairs to make small bins in the wasted space between your stringers.
Find stud walls that are used for utilities and turn them into built-in chests of drawers.
In attic spaces, create sliding racks on the interior of a high-pitched roof. You slide giant plastic bins into the racks – it’s a bit like a top-hanging drawer.
Through the entire program I wanted to throw up – but that was mostly because I have a sensitive gag reflex. But it was also because these “storage solution” programs neglect to mention the easiest way to control clutter: Get rid of it.
Take your excess clothes, books and nicknacks to a worthy charity so the items can plague the homes of others. Give your excess tools away to Habitat for Humanity’s Re-Store or a local tool-sharing co-op. Burn your scraps for heat. List your excess machinery on Craigslist. It can all be done in a day, which is easier and better than building some lame hidey-hole in your house that will require three trips to the home center, four screaming fits and five bad words to complete.
Possessions are like fingernails – they need to be constantly trimmed (or else this).
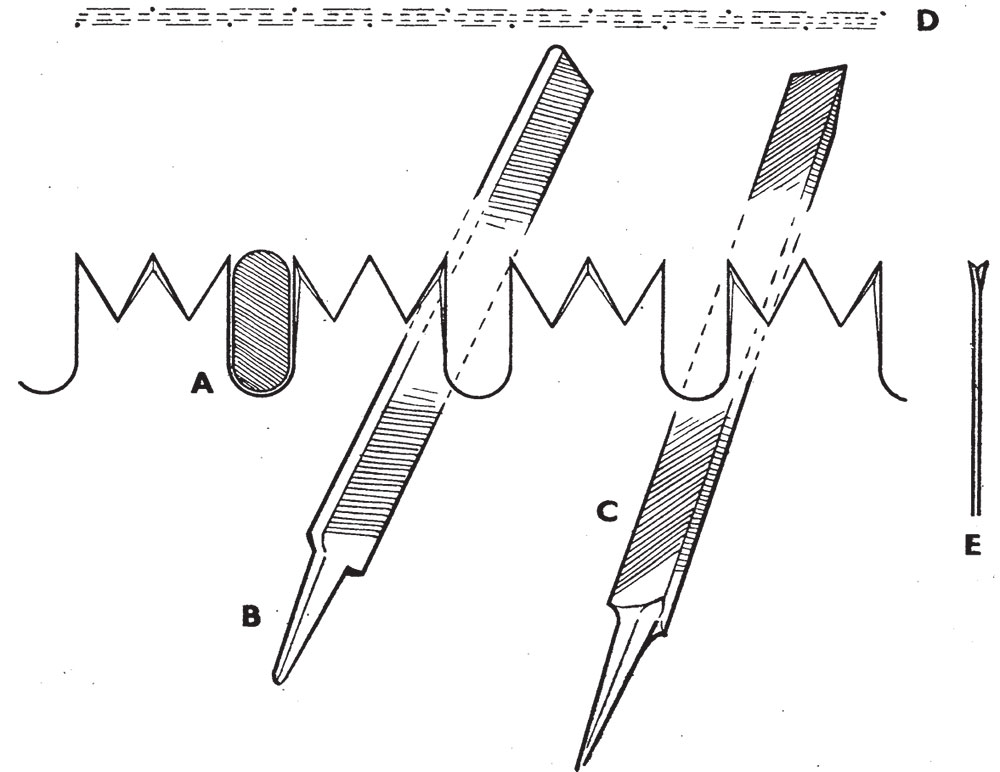
FIG. 1. THE TEETH SHOWN IN DETAIL AND HOW FILE IS HELD. A. Filing gullet of saw teeth. B. Sharpening long edge of teeth. C. Filing short edges. D. Amount of set required. E. Set extends halfway down teeth only
A reader has sent us a sketch of the teeth of a saw he wishes to sharpen. These are the farmer’s American or lightning type, and are intended for cross-cutting. He enquires the correct bevel and set to give the teeth. We give the reply here as it will probably interest other readers.
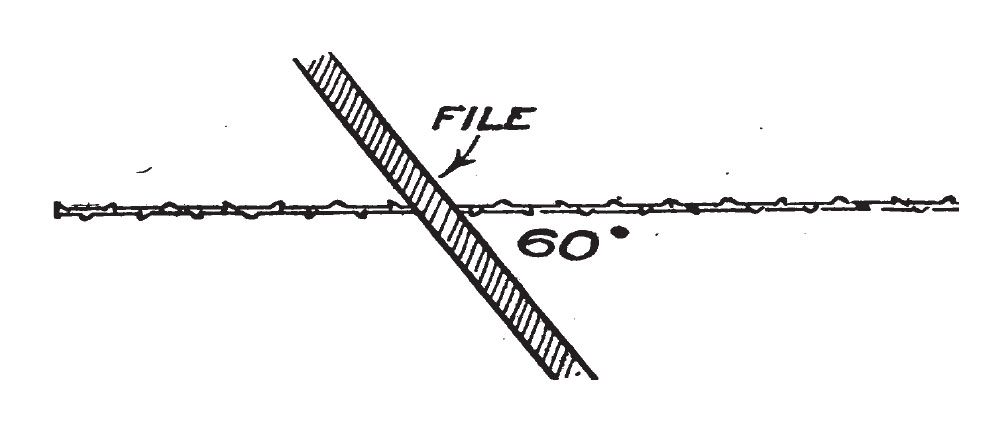
The sharpening is rather different from that of the ordinary cross-cut handsaw. In the latter the file is held at an angle varying from 45 to 60 degrees with the line of the blade and is kept perfectly horizontal. The back of one tooth and the front of the next are sharpened in one operation. In the lightning tooth one side of one tooth only is sharpened at a time. There are three distinct operations, of which the first is gulleting (A, Fig. 1), in which a special file with rounded edge is used. In this the file is held at right angles with the blade and perfectly horizontal. The filing of the long edge of the end teeth follows and for this the near end of the file is dropped so that it points upwards at an angle somewhere in the region of 45 degrees and at about 80 degrees with the line of the teeth. The exact angles cannot be given because it is largely a matter of individual handling. However, the bevel at which to aim is one in which the teeth are in alignment with an ordinary three-cornered file when rested horizontally across them at 60 degrees, as in Fig. 2.
FIG. 2. TESTING BEVEL OF TEETH This is a test only and does not represent the way the teeth are sharpened
The professional sharpener does not need to do this, but it is a handy test for the inexperienced man. Fig. 1 at B shows how the long edge is sharpened. The short edges of the end teeth and the middle teeth follow, and for these an exactly similar process is followed (see C). If, after several sharpenings, the teeth tend to get out of shape, they should be corrected by running the file straight across at right angles and horizontal. When true the sharpening as already described follows.
With regard to setting (this of course precedes sharpening), since lightning tooth saws are generally used for green wood which is liable to cling, a full set is desirable. If an impression of the points of the teeth is taken on paper it will generally be found that they will register about twice the thickness of the blade. D shows about the right amount of set. As in all other saws, the set should never extend more than halfway down the depth of the tooth (E).
The deluxe edition of “Roubo on Furniture” is currently at the bindery in New Mexico. There, in addition to binding the pages, employees are making the custom slipcases for the books.
The latest word we have from the bindery is that the job will be complete in early or middle August. When we get more exact information, including a shipping date, we will post it here.
We are as excited and anxious about this book as you are. While we love the standard edition of “Roubo on Furniture” (shipping now for $57) and enjoy the ability to search the pdf version, we want the deluxe version. We want its huge 11” x 17” pages (the same size as the original l’Art du menuisier”). We want the incredibly crisp printing. Heck, we just want a book that is worthy of all the years of labor that have gone into this project from everyone from the translators to the designer to the indexer.
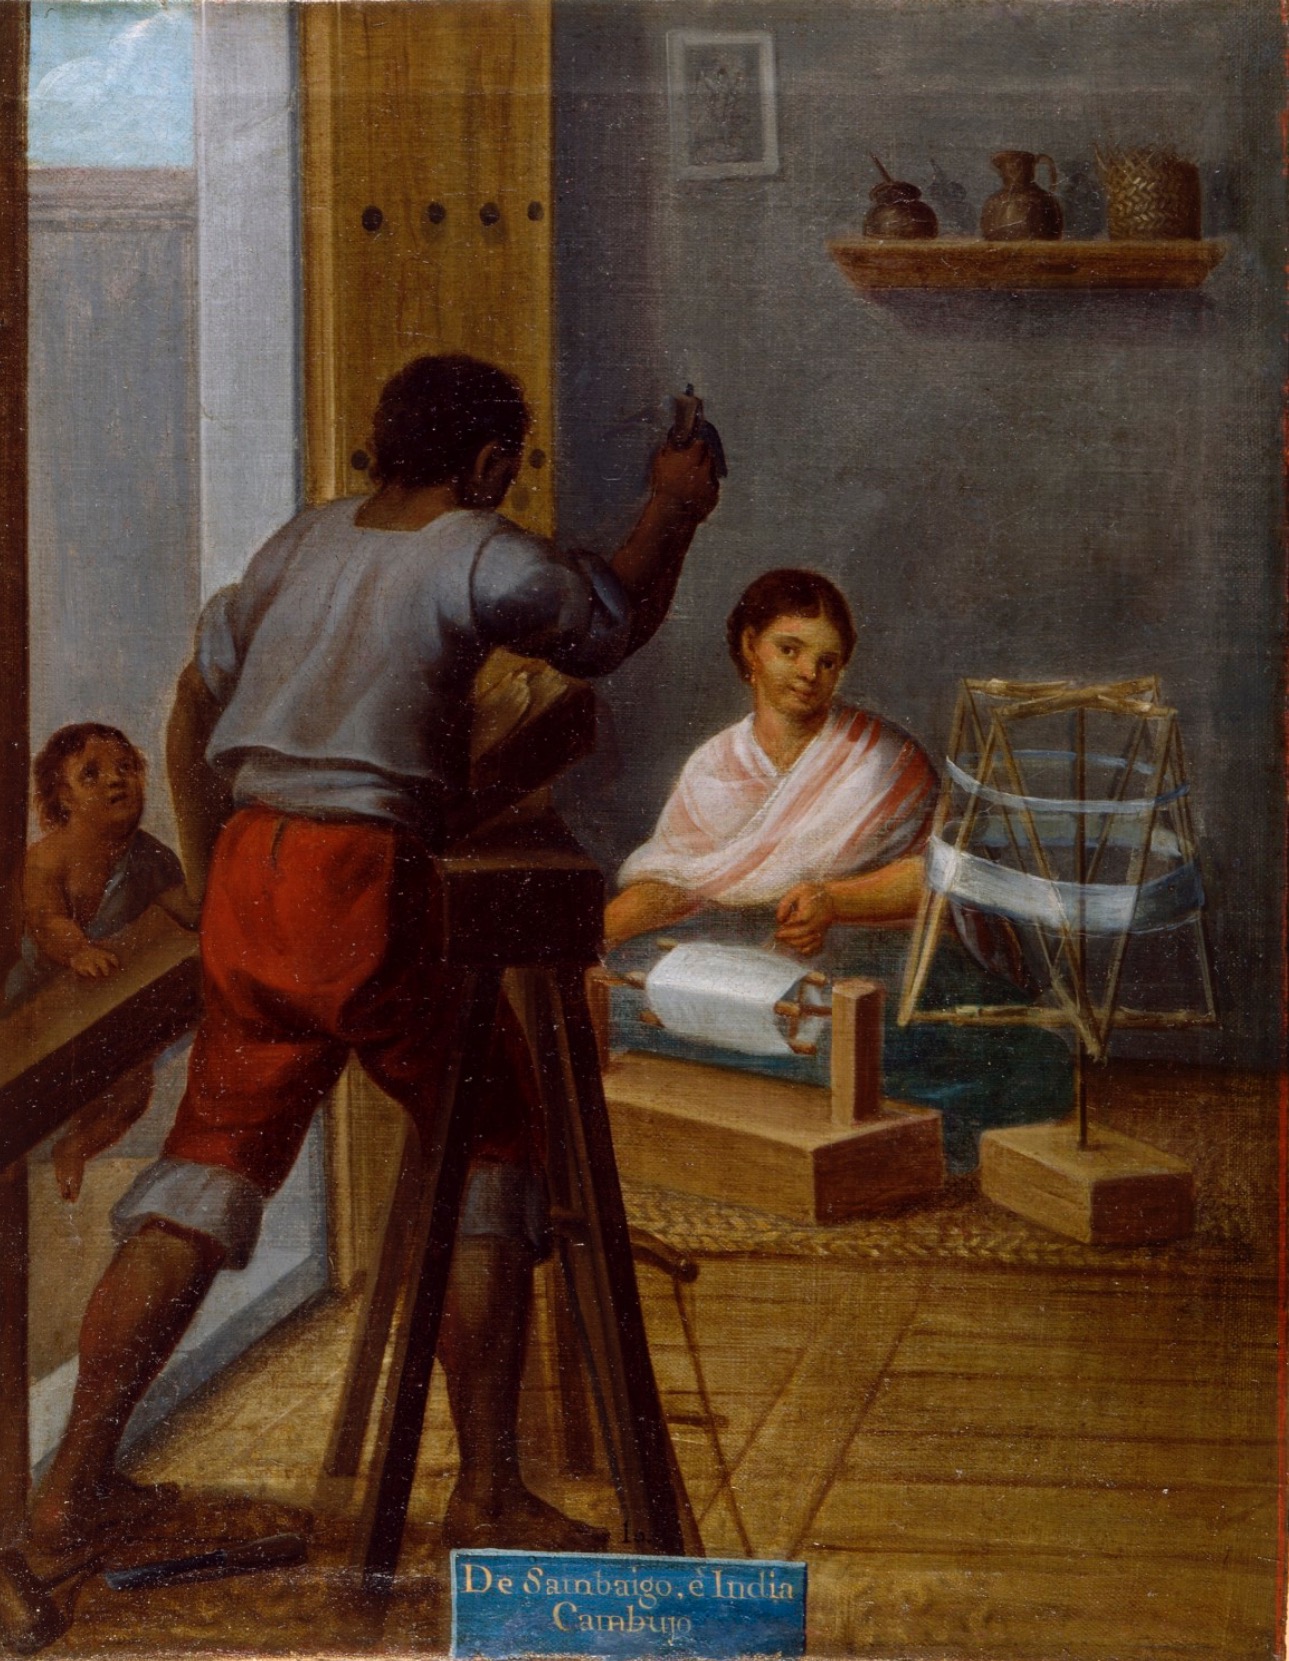
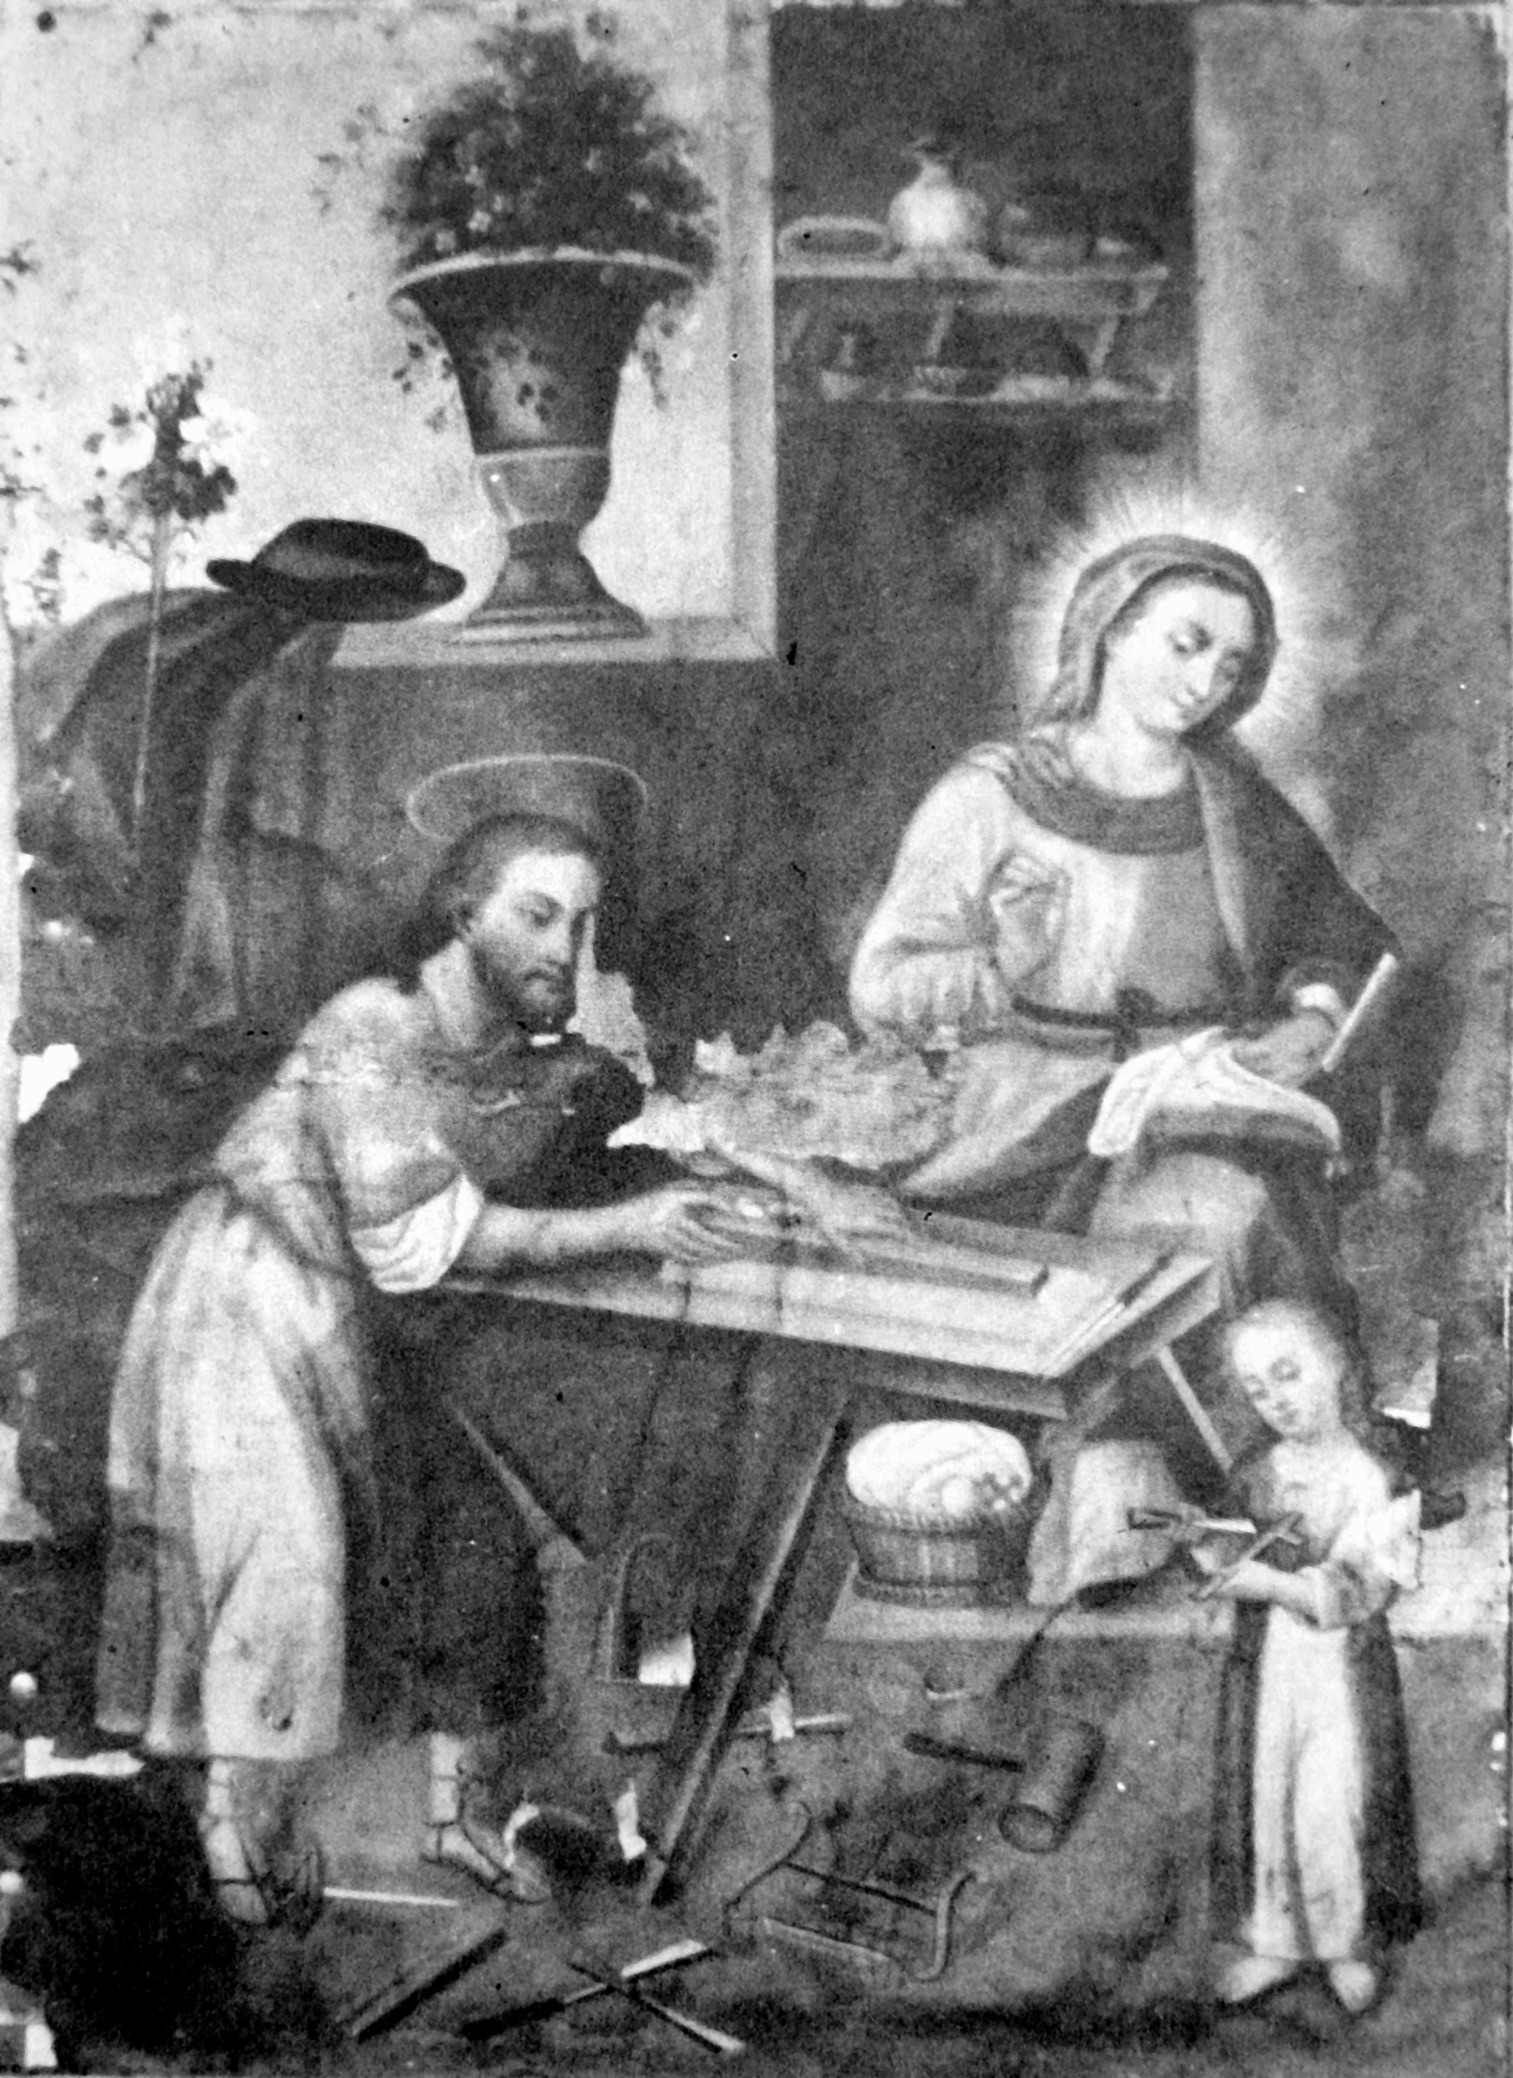
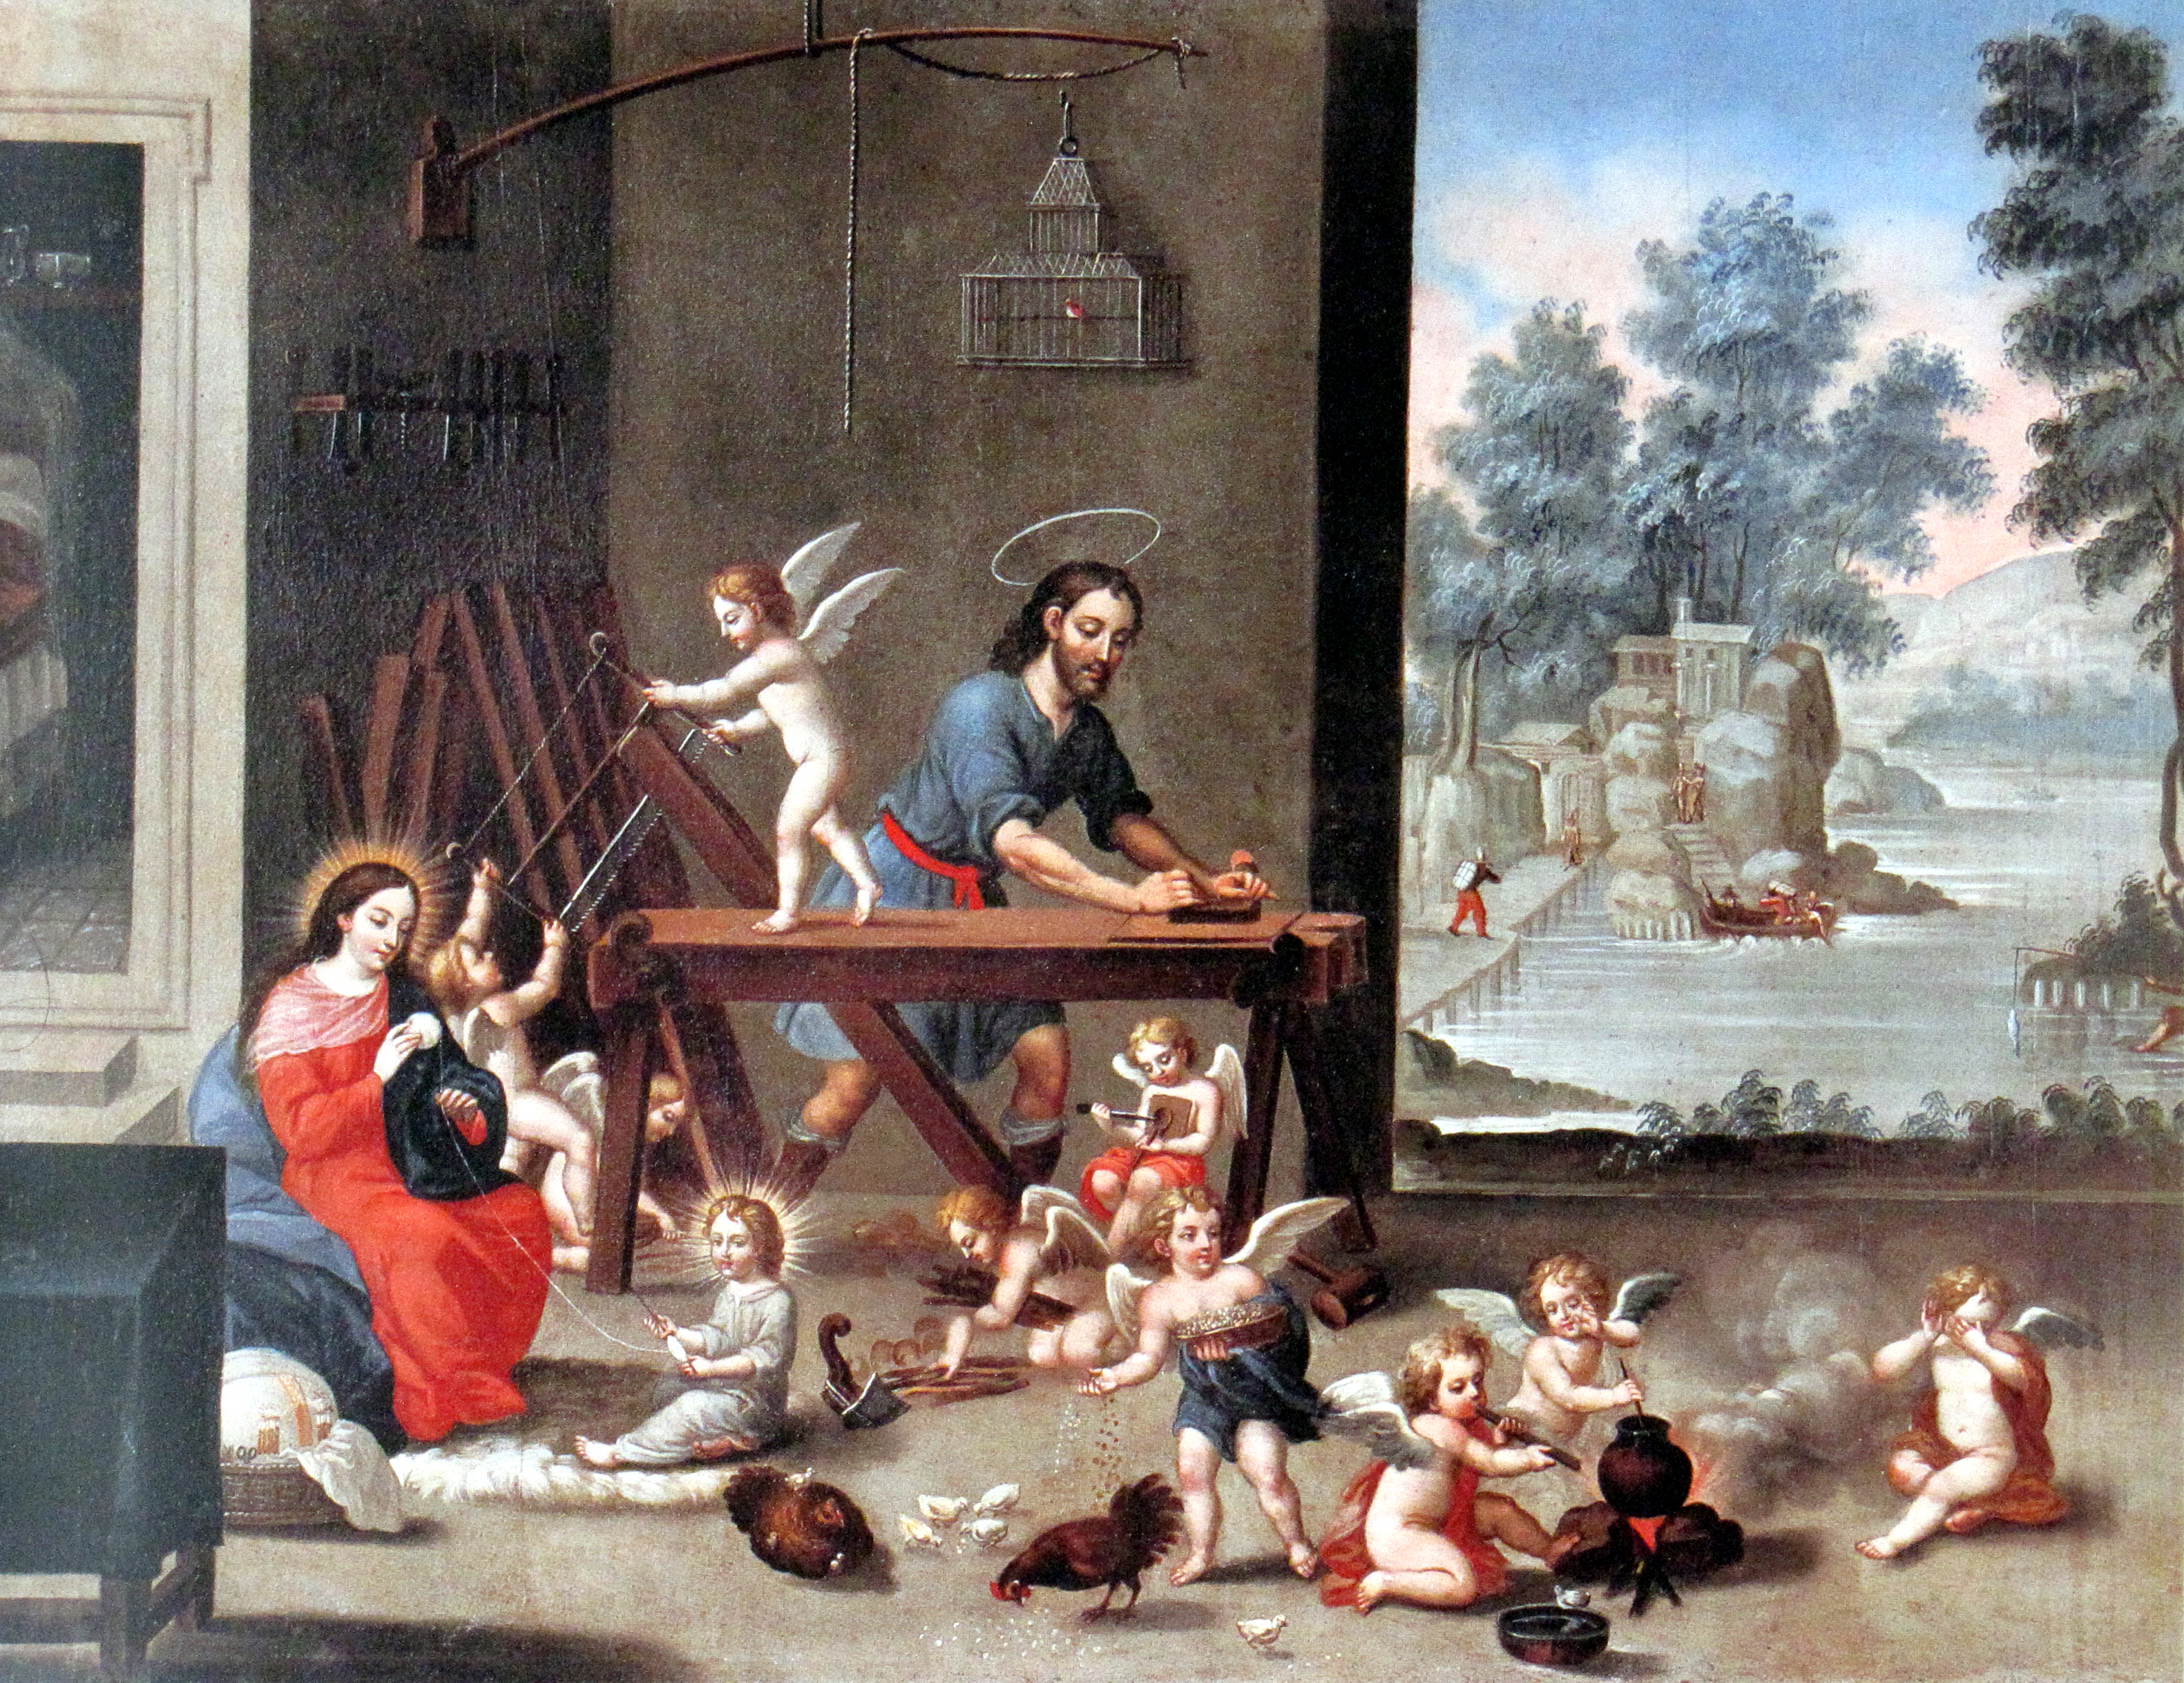
‘La familia en el taller de Jose’ end of 17th c., Anon. Photo: Morton Casa de Subastas.
While searching for examples of lowrider (Roman-type) workbenches for Chris, I started to find images of workbenches from the Spanish Colonial era in Mexico and South America. As this is a field that is underrepresented, Chris and I thought it would be a good idea to assemble them for study. I found woodworking images from seven countries, with the majority from the early 17th through late 18th centuries.
Except for a very few, the majority of Spanish Colonial images are of religious scenes. In Europe, the shift from religious to secular images occurred earlier, but in the Spanish-controlled lands religious orders of the Catholic Church set up craft guilds for the converted indigenous peoples, and controlled much of the production of painting and other arts until the 19th century.
Paintings from Spain were used to communicate religious ideas and also served initially as examples to copy. And many copies were needed as churches were erected in every settlement, and new arrivals from Spain built new homes. In a twist that did not occur in North American, the Amerindians in Spanish-controlled territories began to infuse elements of their ancient cultures into the art they produced.
Along with workbenches, you will also see the basic tool kit in use, some sawing, angels and a few cats.
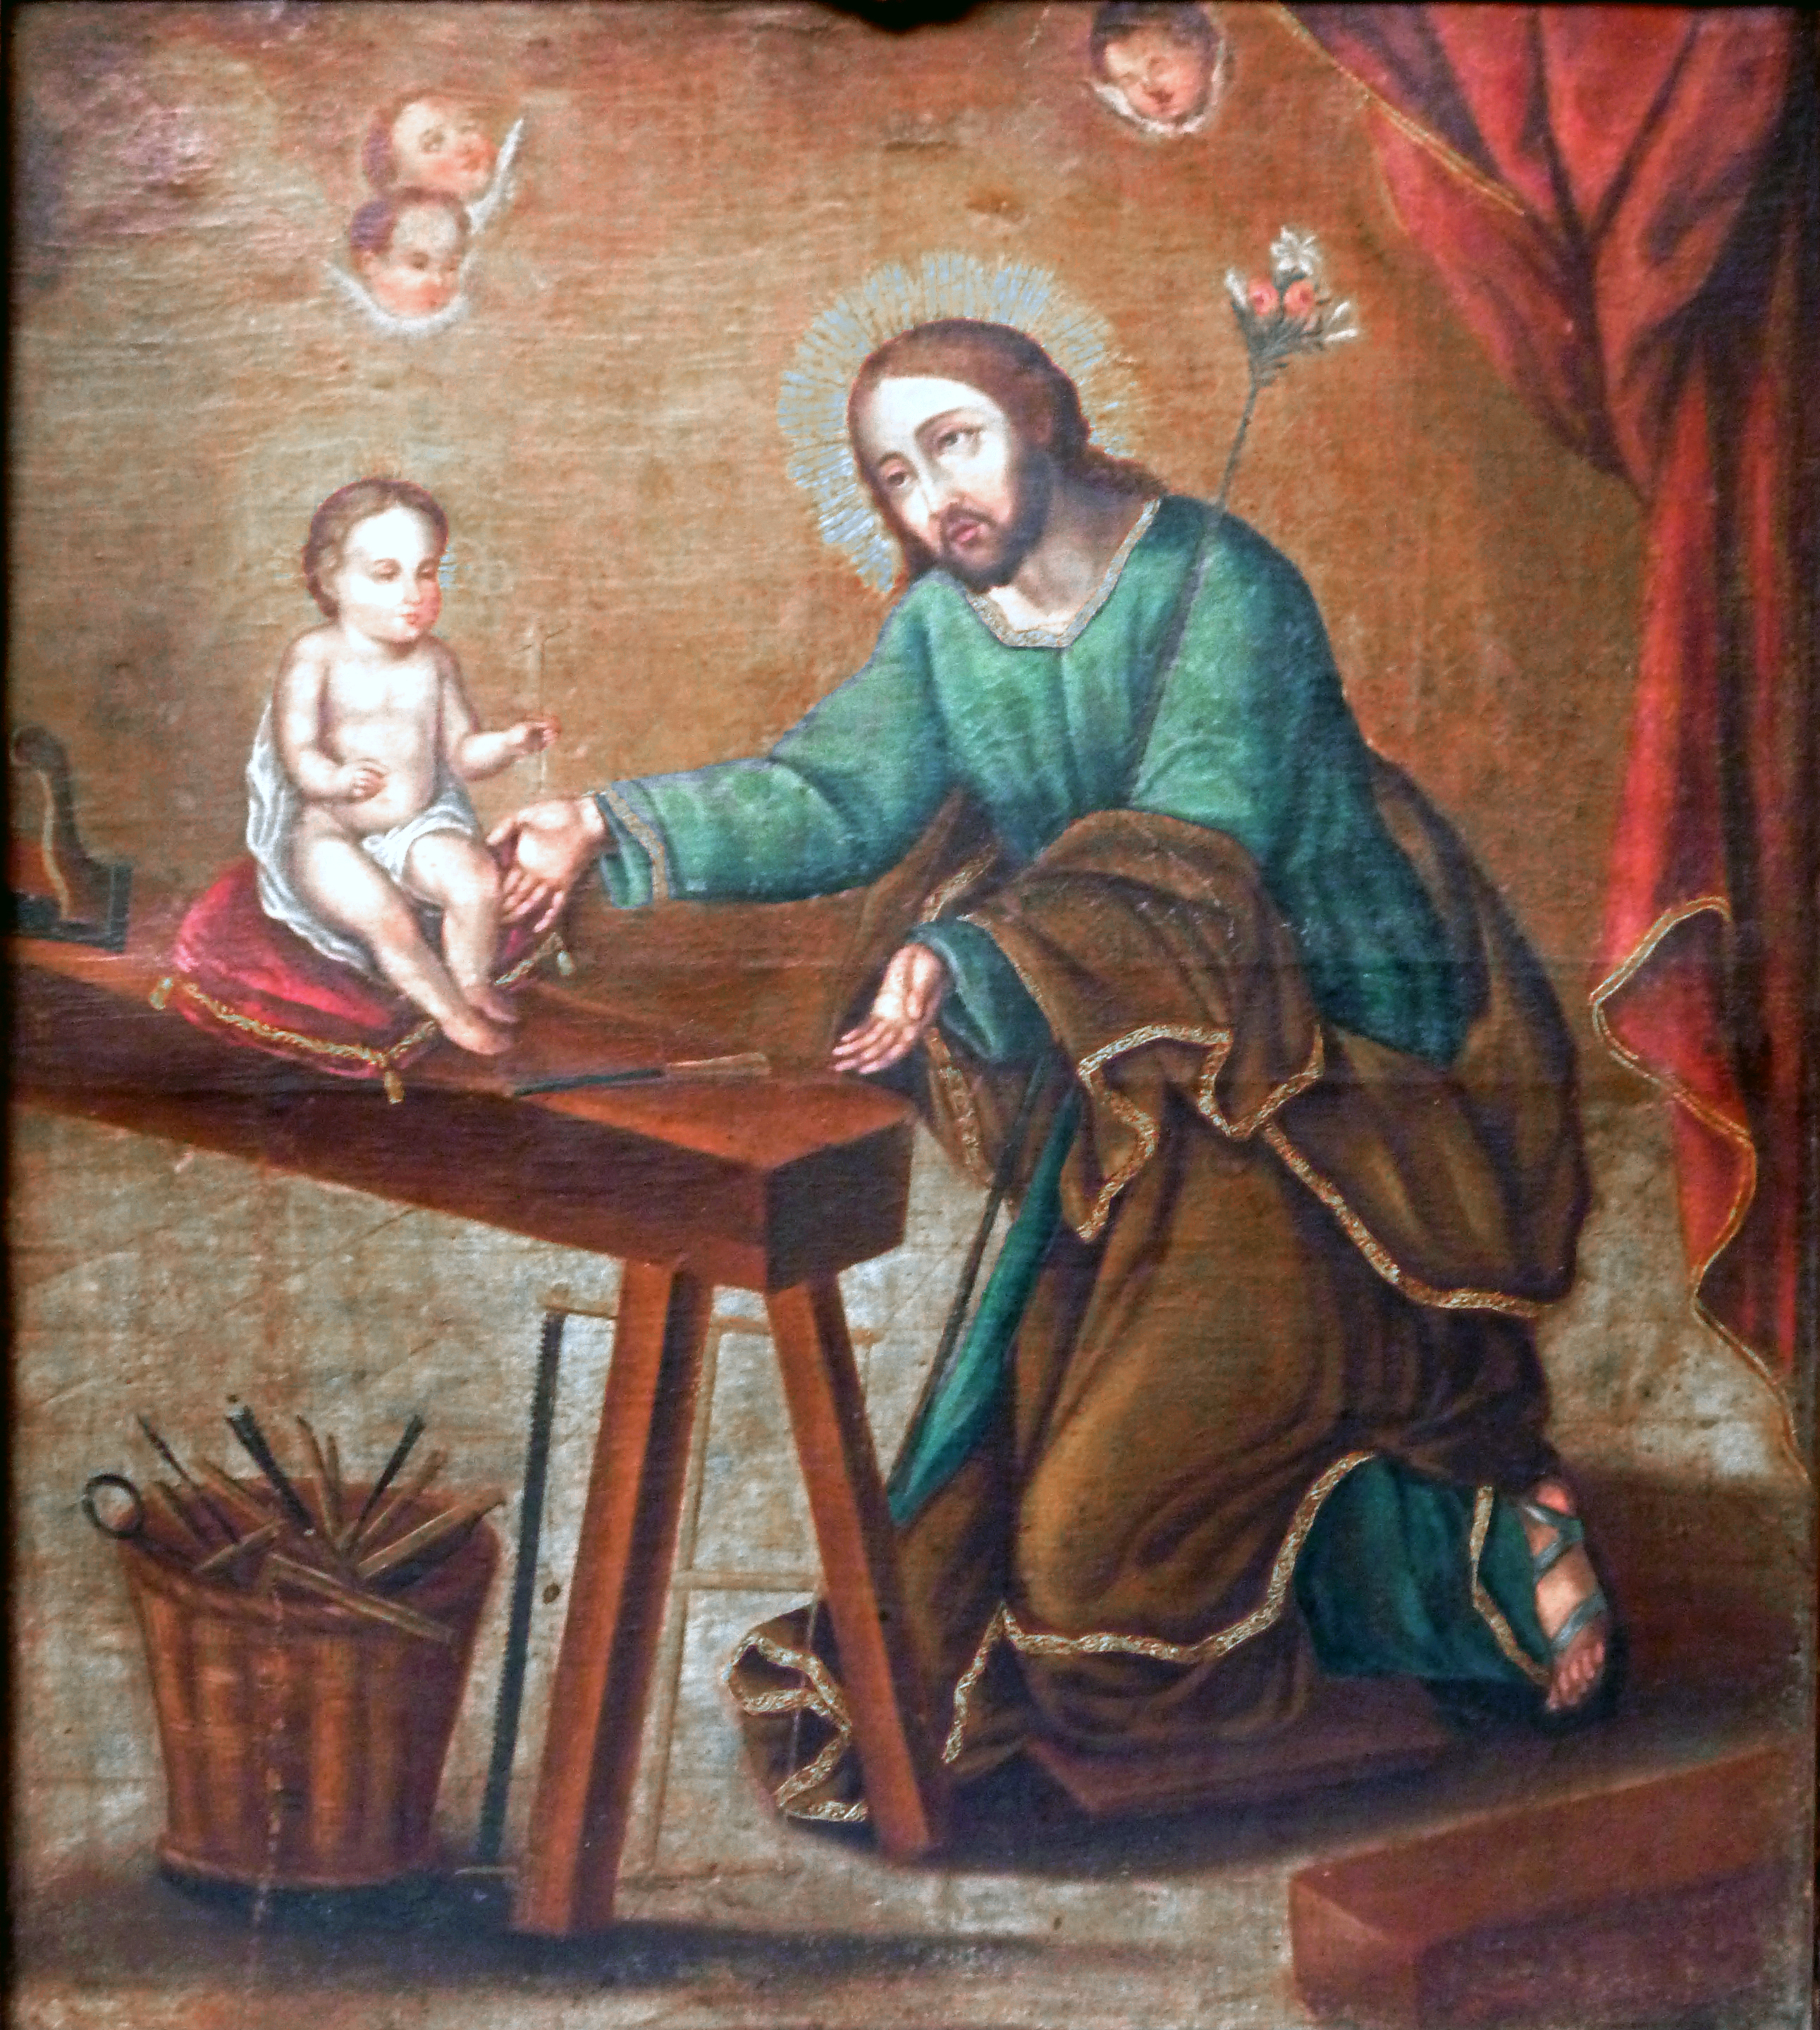
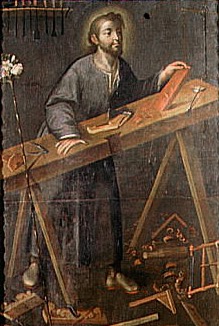
Mexico
In the image at the top (lightened to see detail) Joseph is using an adze at a simple staked bench. Note the cabinet in the upper left corner with the basket of tools and two planes. You will not see all of Joseph’s workshops so neat and organized. And there is a parrot.
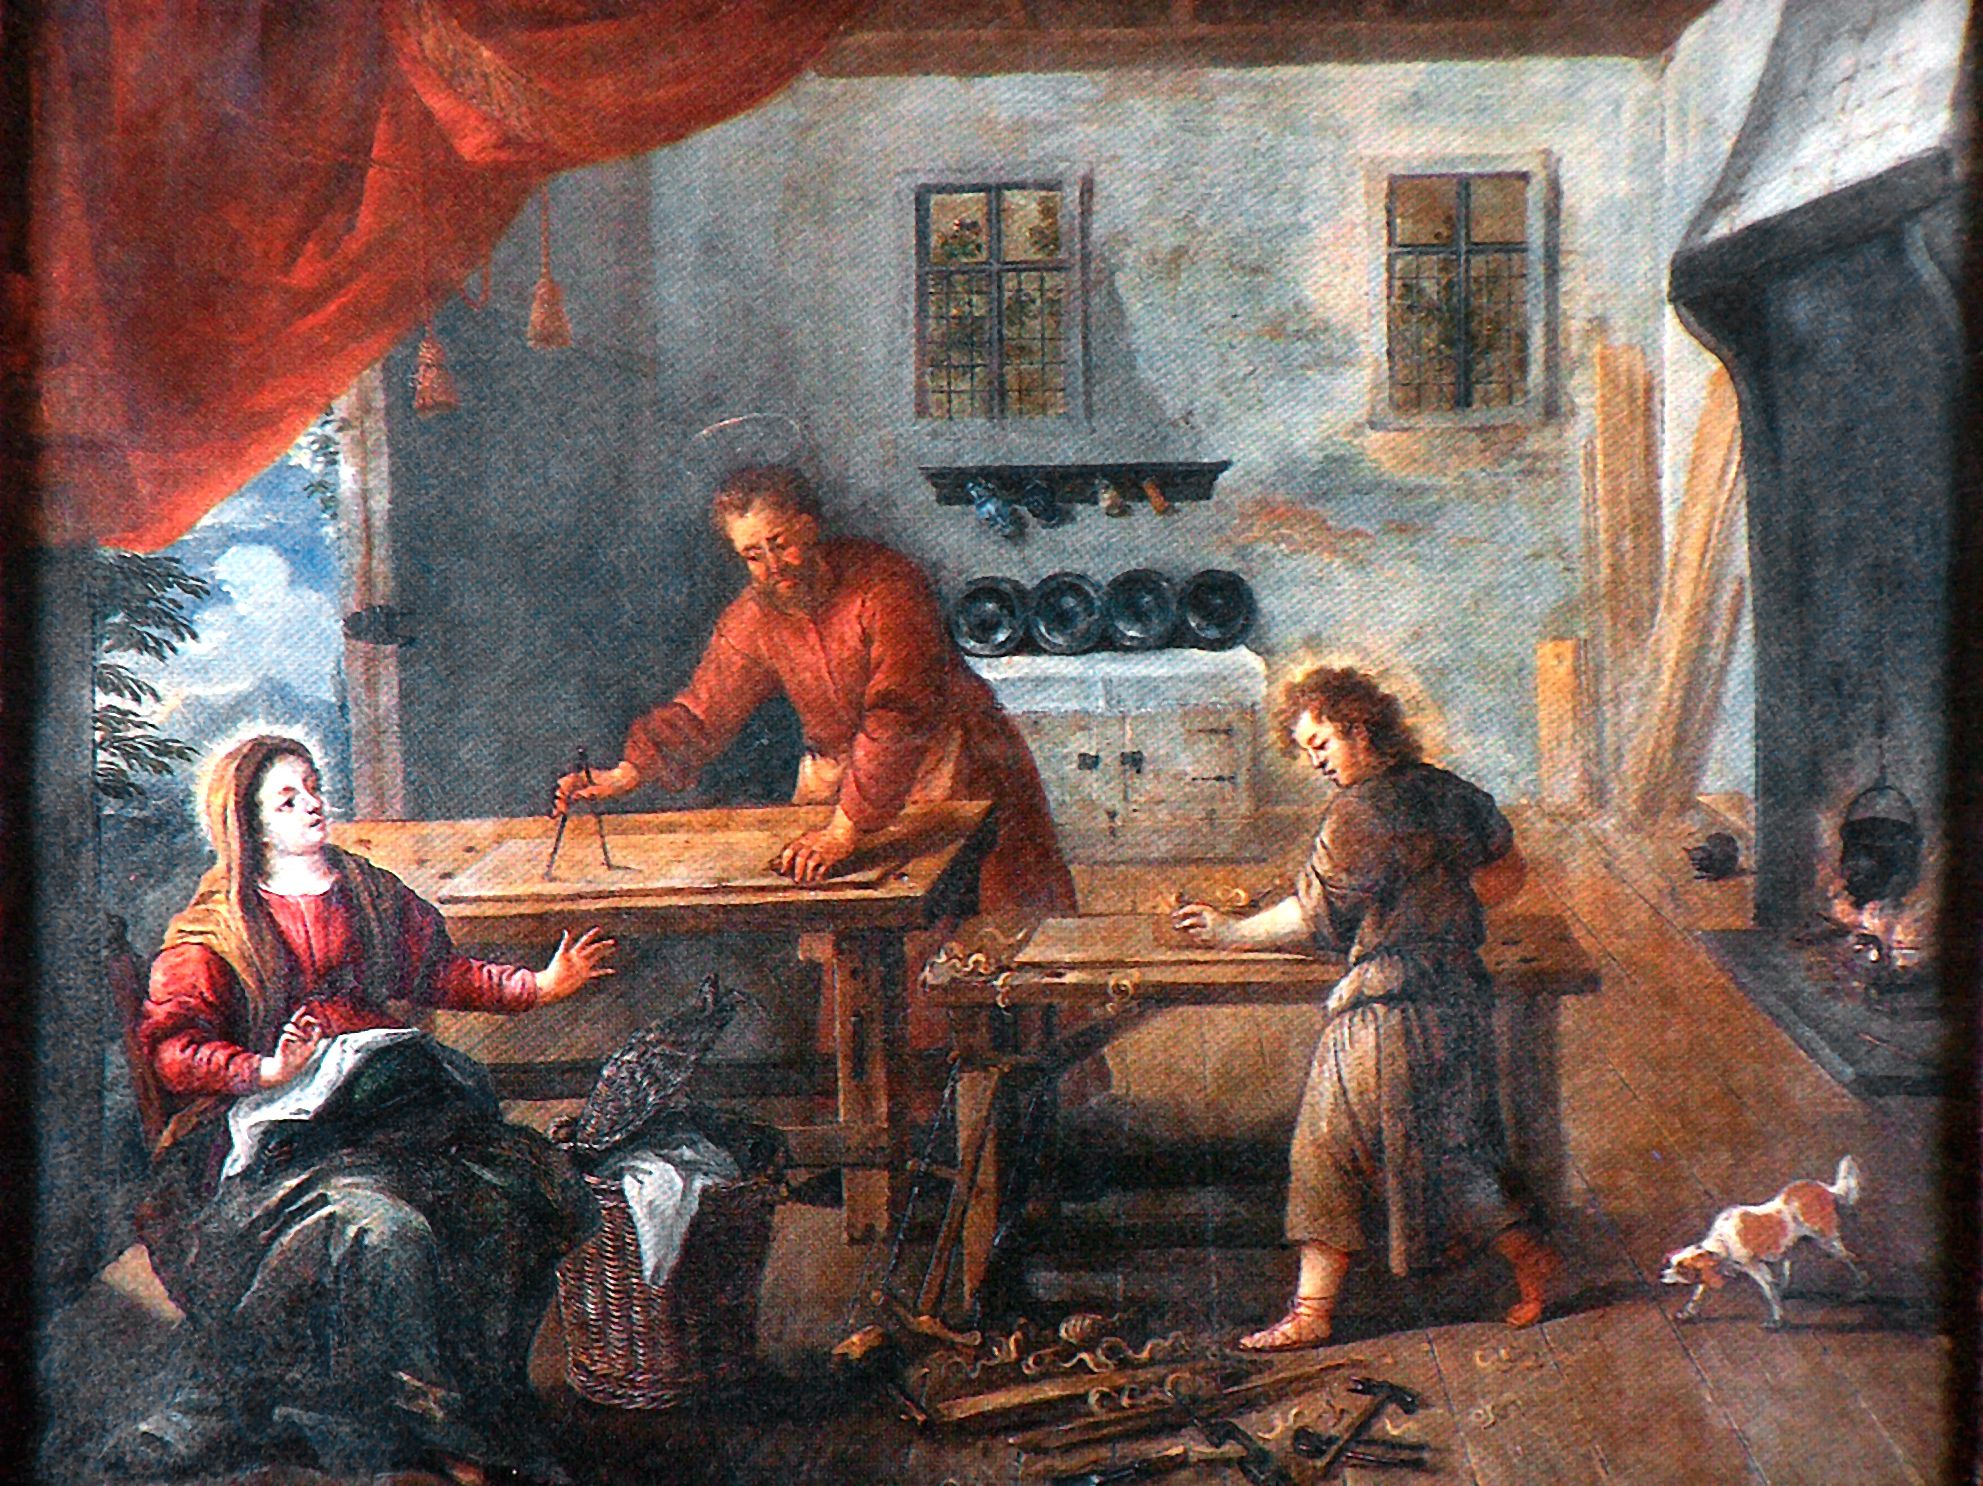
The painting above shows a simple bench with a substantial top and stretchers. A wall cabinet with a door is somewhat unusual in colonial paintings. Jesus has contrived a support for sawing on his own, no angels needed. This painting is probably a close copy of a European painting.
‘La Sagrada Familia en el taller de Nazareth’ 17th c. (?). Location unknown. Photo: ARCA.
The painting above is from Oaxaca. Joseph and Jesus use a low and very long bench to support their sawing. There is a tool rack on the back wall and strewn about the floor are a selection of planes, chisels, an adze, square and mallet. It looks like Joseph is using his leg and a short bench as an additional support for the piece they are sawing.
In Mexico in the 18th century a type of secular paintings were made to illustrate a complicated and legal caste system. Very briefly: with a population of Iberian Spanish, colonial-born Spanish, Amerindians and Africans there were bound to be intermingling; racial mixtures were used to determined levels of status. Casta (caste) paintings generally illustrated 16 mixtures.
In the secular trinity above we have a nice example of the staked bench, although a bit higher than Chris would like, and a small selection of tools.
Casta painting by Francesco Clapera (1746-1810). Denver Art Museum.
Of the hundreds of Casta painting I looked at most of the craftsmen were shoemakers, so I was surprised to find some carpenters. With adze in hand he works the wood supported by his bench and child.
It is highly likely some of the workbenches are exact copies of benches in European paintings. As more immigrants and members of religious orders arrived, more paintings and other artwork was available to copy. However, I think the Casta paintings and paintings from missions point to the type of bench most commonly built and used in mission shops and by craftsmen working in city shops.
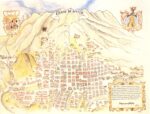
The Spanish-controlled lands in the new world became part of a global trade network that extended from Spain to Asia. Via “La Nao de la China,” otherwise known as the Manilla Galleon, precious metals found in the New World, especially silver, were transported to Manila to trade with Chinese merchants.
The route of La Noa de la China.
The Manilla Galleons ran from 1565-1815 and ultimately completed two voyages a year using the largest ships in the world. The goods from Asia landed in Acapulco with some distribution in the New World. The bulk was moved over land to the Atlantic Ocean and thence to Spain. The human cargo consisted of slaves and freeman and with them the colonies were exposed to new materials, methods and influences.
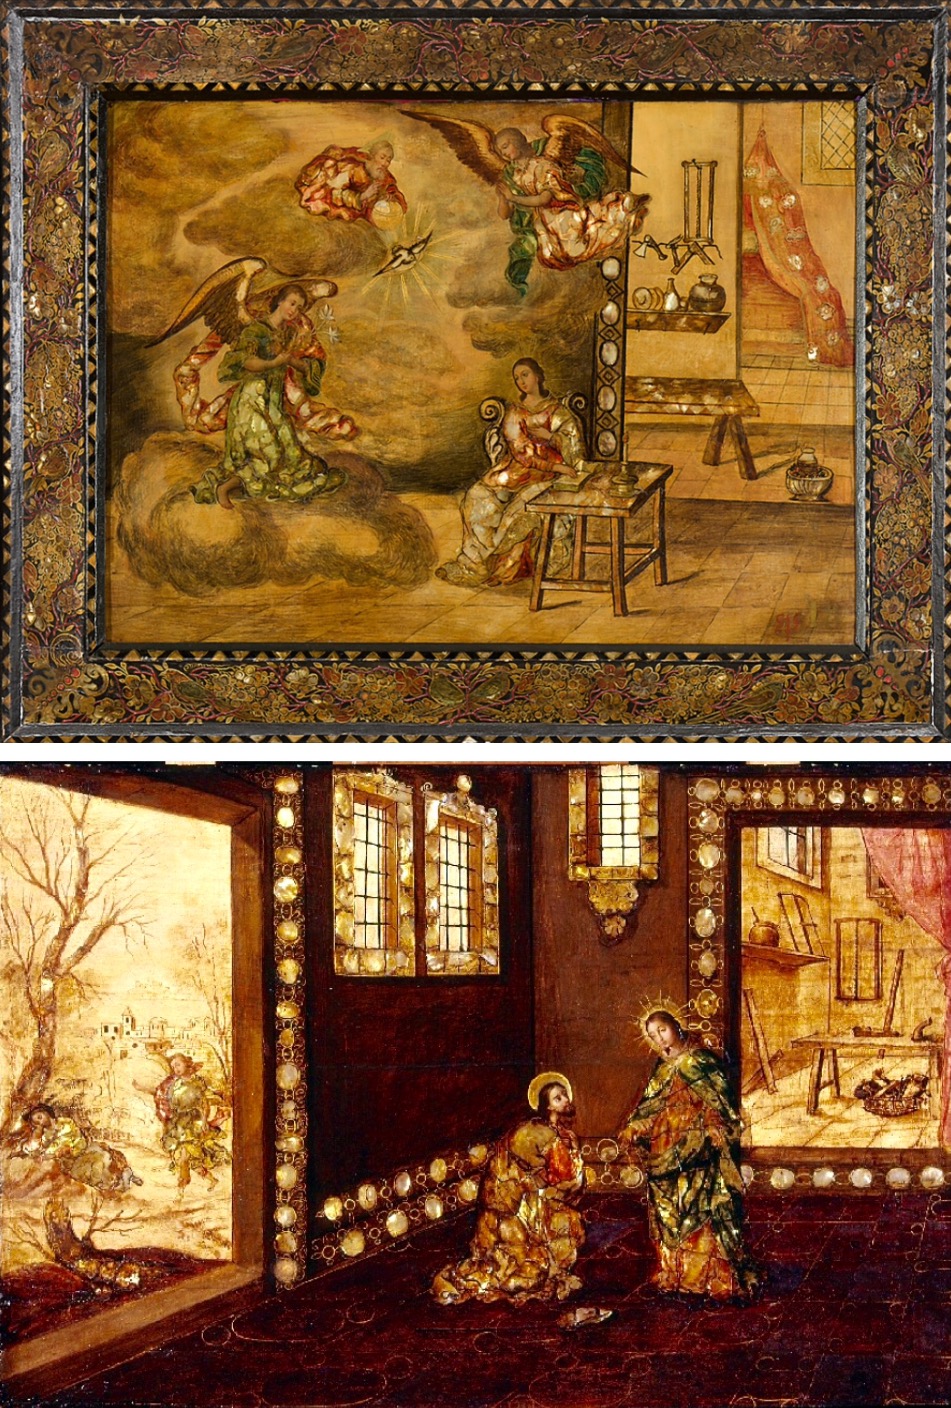
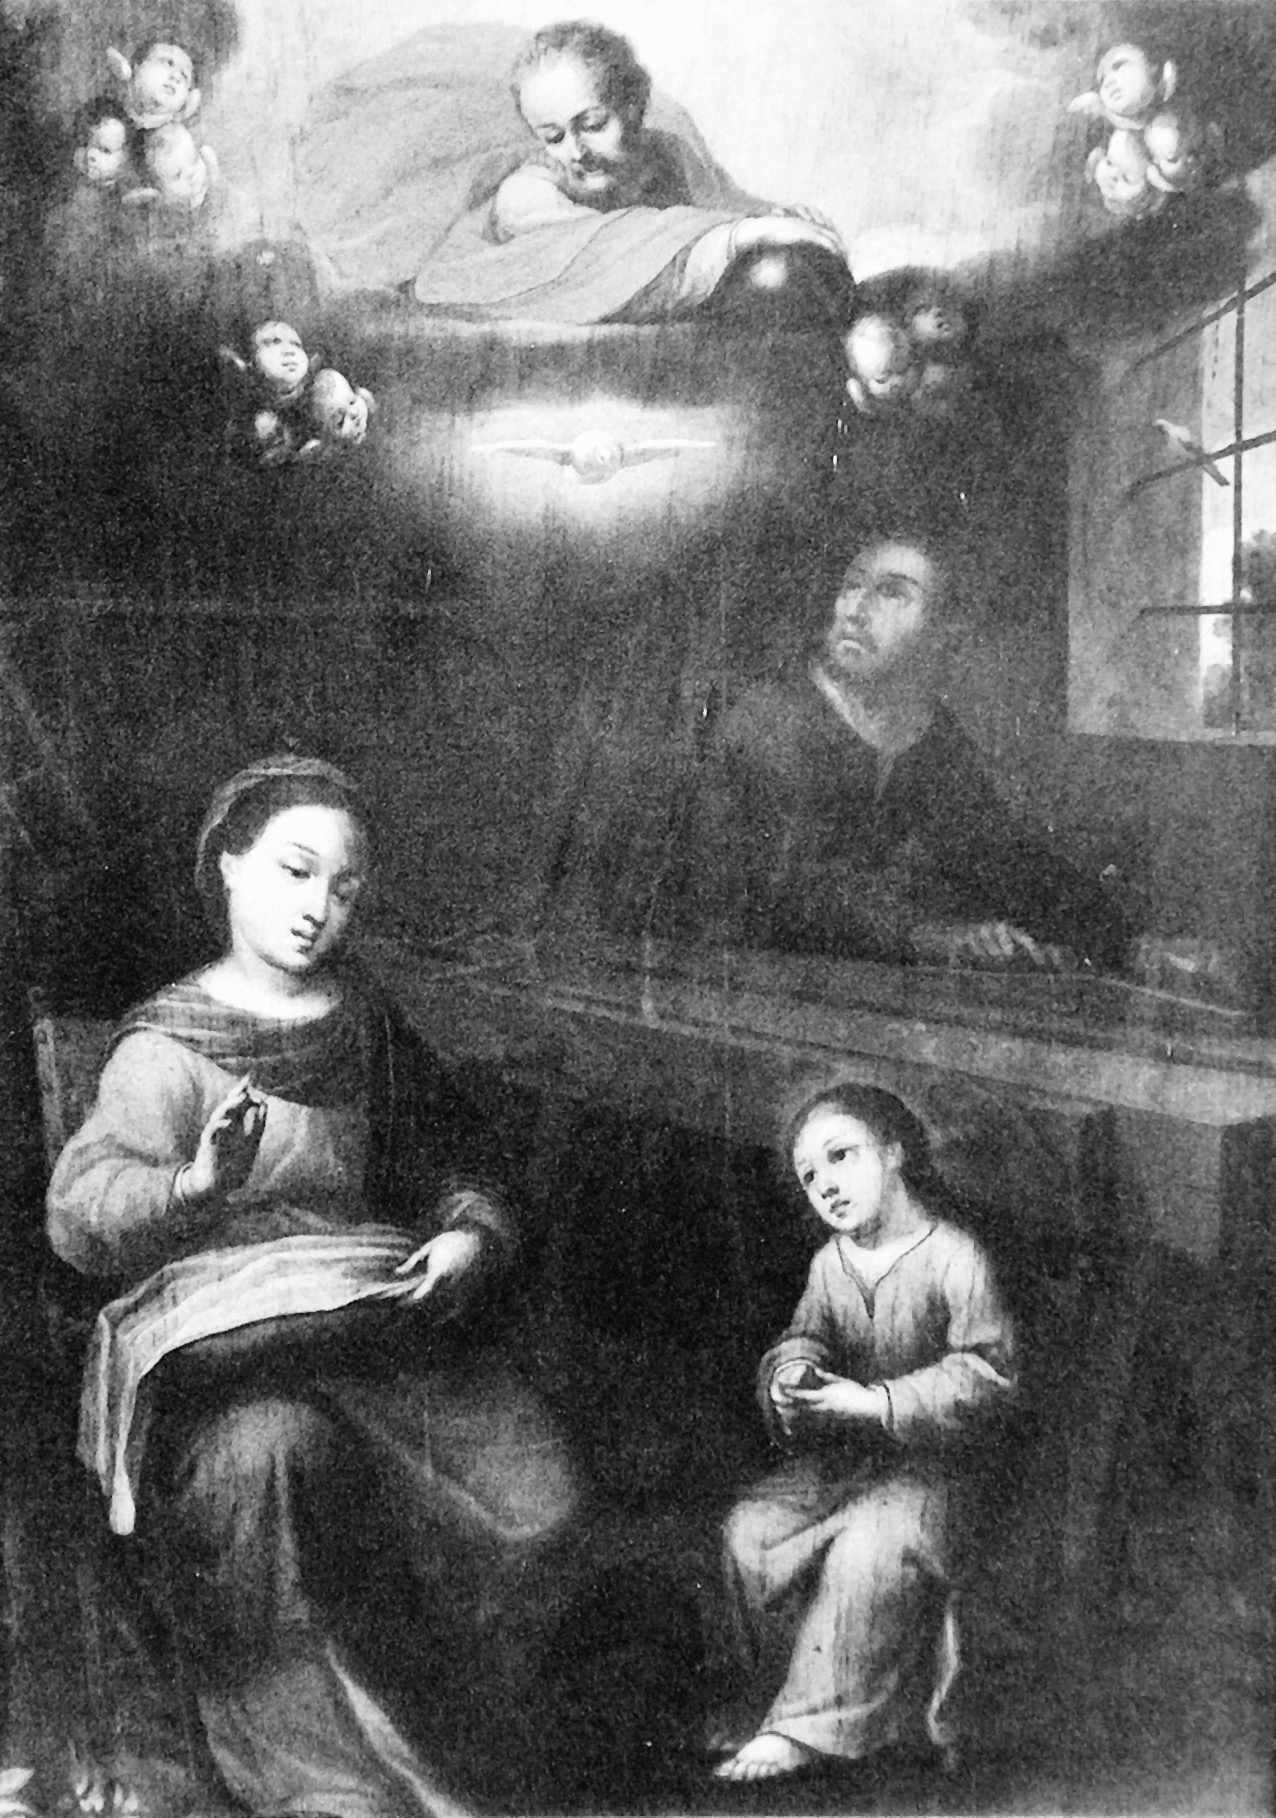
Top: ‘La Anunciacion’ from Balclis Auctions, Barcelona. Bottom: ‘San Jose ante Maria’ Museo America, Madrid. Both 17th centrury.
One example is the use of mother of pearl for inlay (a craft the Japanese had perfected) which became known as enconchada. In paintings it was generously used to impart a richness to the subject. In dim churches and homes, the garments of Mary and Joseph, angel’s wings and the embellishments around doors and windows would glimmer and glow.
Back to the benches. Similar low staked benches, one with stretchers. On the left there is the not-recommended tool storage above the dishes. On the right, we have a sensible woodworker with only a gluepot (?) and a smaller saw on the shelf and a nice basket o’tools.
In the Mexico gallery there is a painting with bench that may be a reproduction, more glowing, some polychrome sawing and a vista. Click on each image for a description.
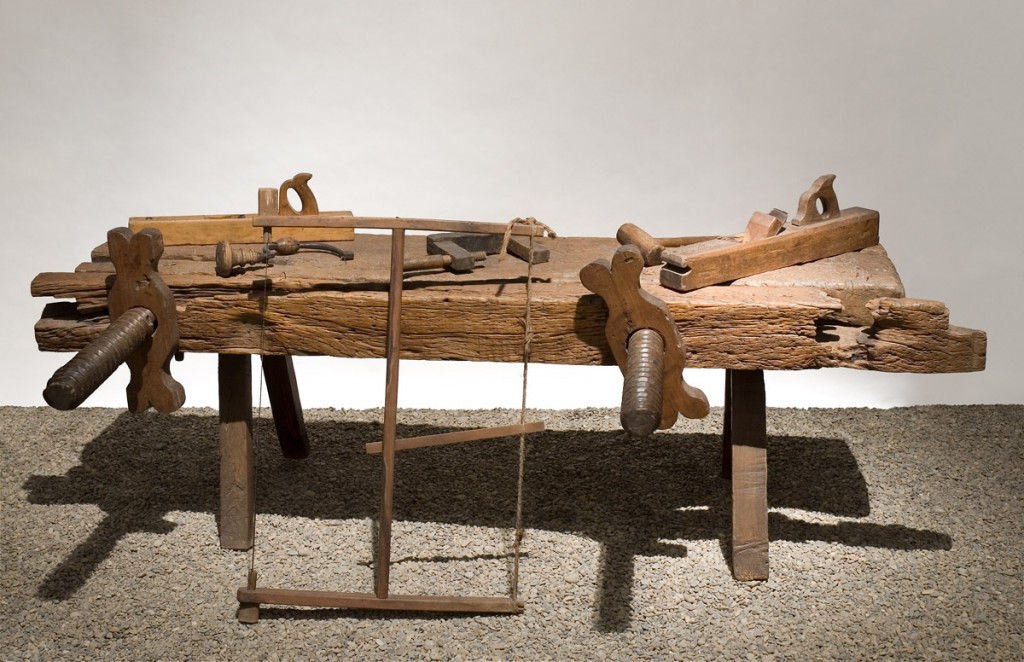
To wrap up Mexico here is a 19th century bench of a master carpenter.
The legs look like they have been replaced. The bench is 228 cm long and 127 cm wide. Chris commented that he suspects the face vise screws are so long to accommodate sawing pieces for veneering. My contribution is to name the nuts “double-bunny ears.”
Colombia
‘El taller de San Jose’ first half 17th c. Anon. Colecciones Parroquia de Egipto, Bogata. Photo: benrepubcultural.org
Flemish paintings brought to the colonies introduced the idea of spiritual scenes warmed with details of domestic life. This is very likely a close copy of a European painting.
Jesus is a bit older and has his own bench. Both benchtops seem to have holes for pegs (or a holdfast) to use for work holding.
The right leg on Joseph’s bench seems to have holes and perhaps a holdfast.
‘Hogar de Nazareth o Trinidad doble’ 17th c. Anon. Private collection.
This painting is from Medellin. The staked bench has a substantial top and legs. Tool collection on the ground and a cat.
‘Sagrada Familia’ (1657-1710). Gregorio Vasquez de Arca y Ceballos. Iglesia San Ignacio, Bogota. Photo: ARCA.
Nice heavy bench top and a face vise with indeterminate nuts.
‘Hogsr de Nazareth’ 17th c. (?). Anon. Private collection. Photo: ARCA.
Staked bench with a very skimpy top and wonky legs, but you get the idea. The same set of tools strewn about. Baby Jesus is not using a safe chiseling method.
‘San Jose en el taller’ 18th c. Convento de Santa Ines, Bogota. Photo: ARCA.
I add subtitles to images in my notes to remember which is which. This one is, “Get that baby off that bench!” But, we are back to the long and narrow staked bench. Demerits for the Baby Jesus on the bench (with chisel), merits for using a basket for tool storage.
‘San Jose carpintero’ 18th c.(?). Anon. Museo de Arte Religioso, Duitama.
Chisels in a rack on the wall, squares, planes, mallet, and saw on the floor. Dividers and adze on the bench. Bench more than a bit too high for its legs. Wait! What is that NOTCH on the front edge of the benchtop? I can’t repeat the exclamatory phrase Chris used when I sent this image to him. I believe this bench joins the Roman Saalburg workbenches in Workbench Mystery No. 326 (read that post here).
The Colombia gallery has two more benches and a vista.
Ecuador
‘Hogar de Nazaret’ 2nd half of 17th c. Isabel de Santiago (1660?-1714). Museo Jijon Caamano, Quito.
Isabel de Santiago was the daughter of a well-known painter. Using her will, and other documentation, it was determined she had painted several paintings attributed to her father. Of course, the re-attribution occurred a few centuries after she died.
Joseph is about to strike a chisel with his mallet. An angel with dividers in one hand and a square in the other works alongside Joseph. The bench is similar to others earlier in the post with the addition of a cat and dog.
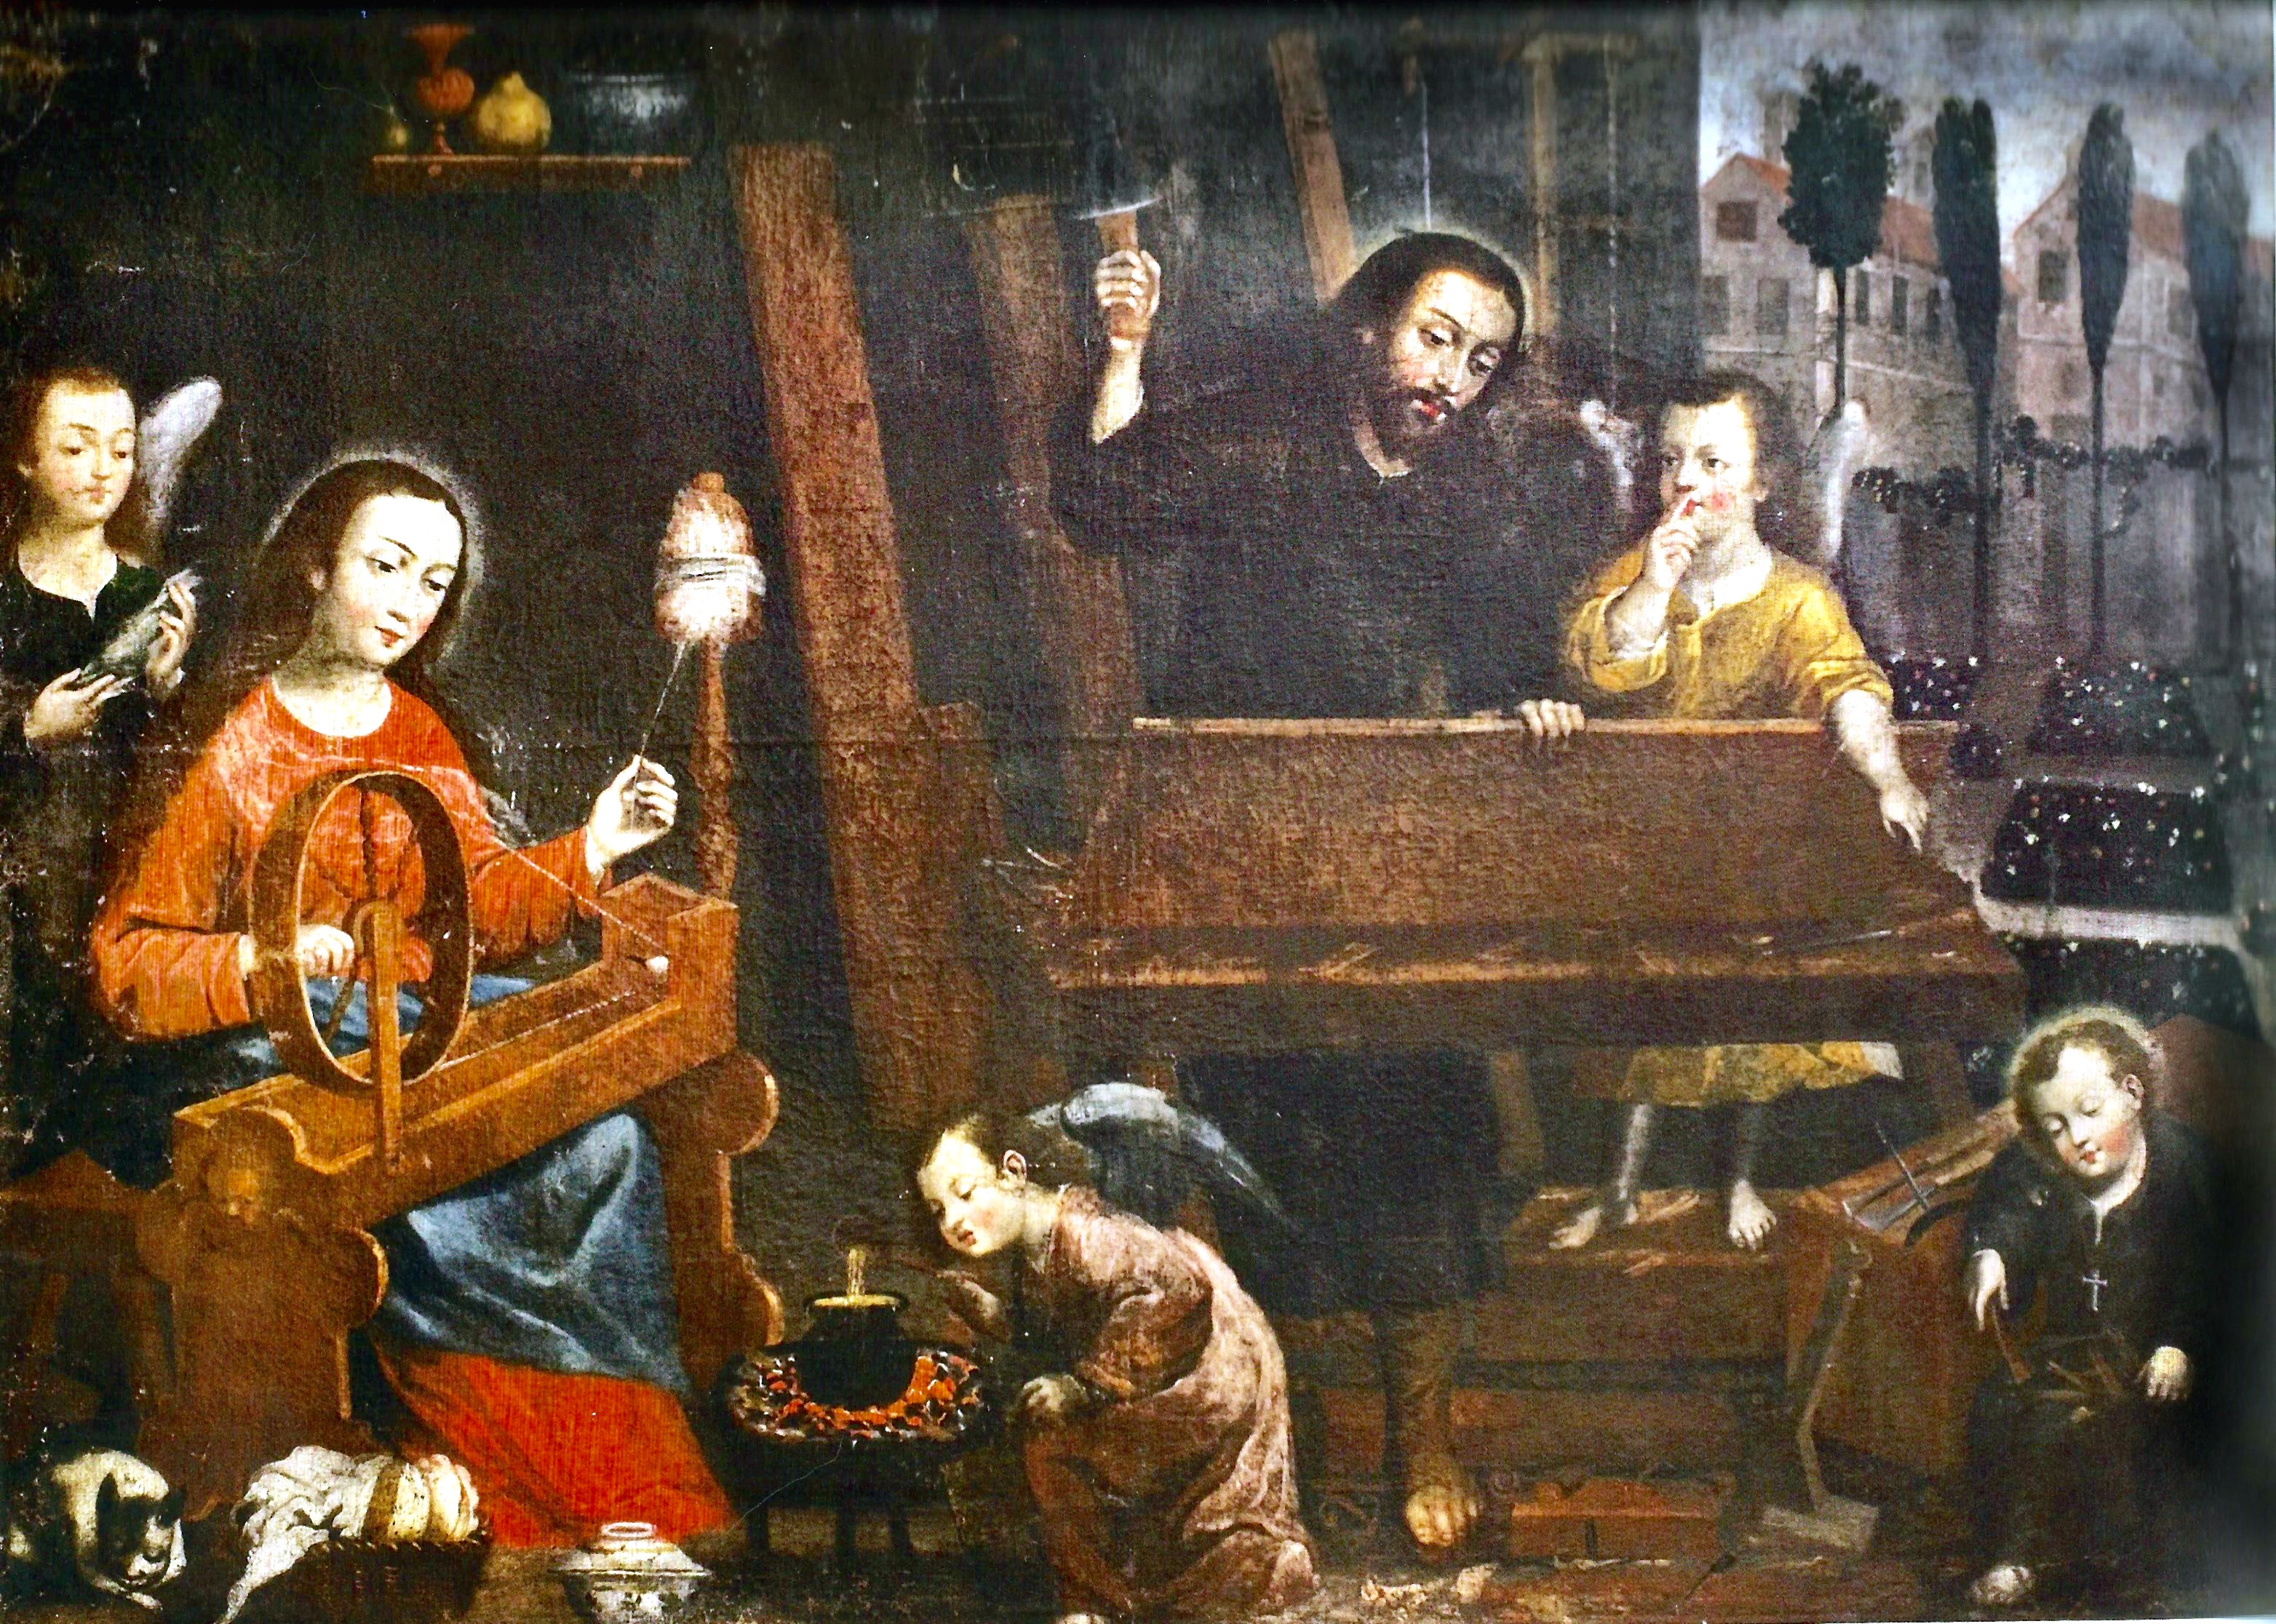
‘Teller de San Jose’ 18th c. Miguel de Samaniego (1767-1824). Museo del Banco Central de Ecuador, Quito. Photo: ARCO.
I had almost given up on finding a clear and uncropped image of this painting.* The bench has a face vise with hurricane nuts. There is a tool rack on the wall and minimal tossing of tools to the ground. The painter, Miguel de Samaniego, a mestizo, is considered one of the premier painters in Ecuador’s colonial era. He clearly had a sense of humor.
He gave Joseph a plethora of shop angels: naked angels are ripping, but who is supporting the other end of the wood? Joseph’s leg? The clean-up crew is busy. The chickens are being fed. Over at the soup pot, one angel blows air to stoke the fire while another suffers from smoke inhalation. And under the bench we have a spoon carver.
‘Taller de Nazaret’ 18th c. Anon. Convento de San Francisco, Quito. Photo: ARCO.
A staked bench with no face vise. Just as Joseph is about to bring his adze down, his helper angel puts finger to lips in the international sign of “Shhh” and points to the sleeping Jesus.
In the Ecuador gallery there is another painting by Isabel de Santiago (Joseph and bench are in the background), from the coastal city of Guayaquil a painting of Joseph with his tools and two vistas.
*A big thank you to Jaime H. Borja Gomez and his ARCA project. I was able to find missing information and better photos of previously found paintings, and many more images I would not have otherwise found.
I hope to have the next post up in a few days and it will cover Peru, Bolivia, Paraguay and Argentina.
“Der Narzissmus der kleinen Differenzen (The narcissism of small differences).”
— Sigmund Freud, 1917
The topic of sharpening is plagued by Freud’s “narcissism of small differences,” and the best example of this is all the noise about the shape and angle of the tool’s bevel.
Almost every word written about this topic is nonsense, at least from a practical perspective. Let’s talk first about the shape of the bevel.
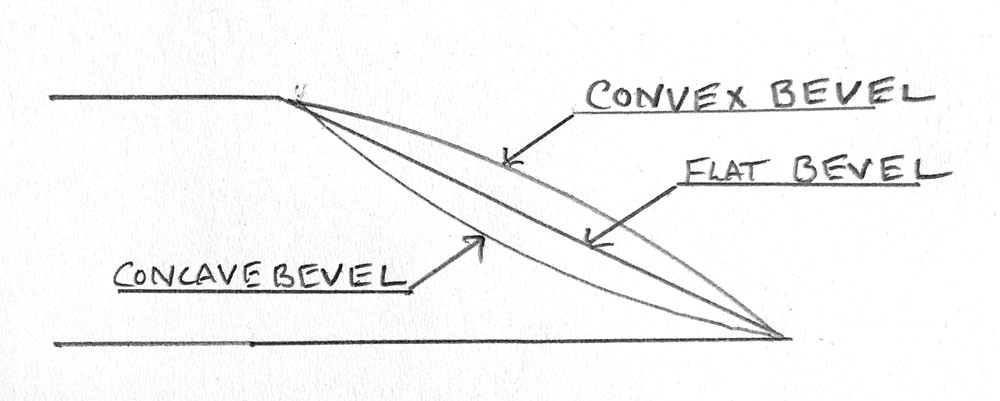
Convex, Concave or Flat? All the wood can see is the tiny intersection of the bevel with the back. It cares only about two things: the angle at which the edge is cutting and whether or not the edge comes to a zero-radius intersection.
The wood doesn’t care if you hollow-grind your bevel and hone it flat on stones. It doesn’t care if you have a dead-flat bevel. It doesn’t care if you add a secondary bevel. Or if your bevel is convex.
The wood never sees the bevel – only you can.
So from a practical standpoint, the shape of the bevel is unimportant (I’ve worked extensively with all of these shapes). Unfortunately, theory and speculation cloud what is – at the bench – dead simple.
A hollow-ground edge is not weaker than other edges. You might draw diagrams that show how the cutting edge isn’t as well-supported by the iron atoms behind the edge, but you are only making noise. Please stop that. A hollow-ground bevel works very well.
A flat bevel that is fully polished is not particularly difficult to sharpen. Yes, it might take a little longer to polish the scratches out because you are polishing a lot of iron and steel. But the time difference is not significant enough to warrant discussion. If it were, entire woodworking cultures wouldn’t have done it for thousands of years. So a flat-sharpened bevel also works very well.
A secondary bevel works very well. The wood has no clue you are using one.
And a convex bevel isn’t any more robust or easier to sharpen than any other bevel. Yes, there is theory that our human brains might ponder, but the wood doesn’t care about your theories. Bottom line: A convex bevel works very well.
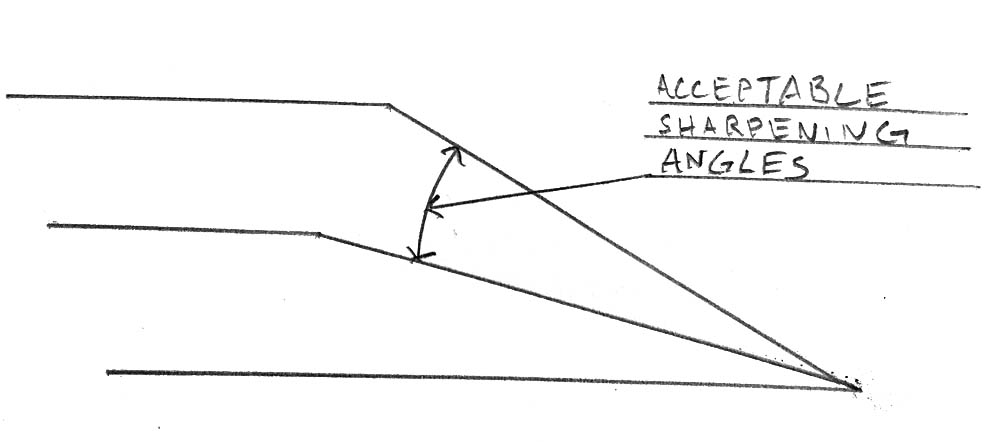
Animosity Toward Angles Another source of intense noise is the exact angle of the bevel. I’ve written about this red herring before. It seems logical that low sharpening angles are best for end grain, and high sharpening angles are good for mortising.
What’s is far more important than the angle, however, is the zero-radius intersection. You can pare end grain with a sharp chisel honed at 35°. I do this all the time. In fact, almost every tool in my chest is honed at about 35°, which keeps my sharpening regimen simple.
Pre-industrial woodworkers didn’t seem to care much about angles, either. In the old texts, a wide variety of angles are acceptable (check out Joseph Moxon’s discussion in his ‘Mechanick Exercises’” for a good example). The advice of the dead: If the edge crumbles easily, raise the sharpening angle. If the tool becomes too hard to push or won’t take a shaving, lower it.
So pick a practical angle – somewhere between 20° and 35° – and see what the wood and steel tell you. Soon you’ll forget the sharpening angle you’re using (I certainly do) and focus more on that zero-radius intersection and less on the shape of the bevel or its angle.
— Christopher Schwarz
Read the other installments in the “Sharpen This” series via this link.
 The deluxe edition of “