We have a sizable load of Crucible lump hammers in stock and ready to deliver. They are $85 plus shipping. These hammers tend to sell quickly, so if you want one, don’t wait too long.
We also have a big batch of Crucible American-made T-shirts in stock at a special price – $17. That’s basically our cost to buy the shirt and print them here in Kentucky.
When I built my first woodworking project as an adult, I didn’t have a single subscription to a woodworking magazine and the only woodworking book I owned was a tattered Graham Blackburn tome, “Illustrated Basic Carpentry,” from 1976. What I knew about joinery, glue and finishes could fit in a teaspoon (with room left over for sugar).
I didn’t know enough to be apprehensive about designing a sitting bench. Or that my joinery choices (dowels) were laughable. Or that I wasn’t supposed to put an oil varnish over a water-base stain. Or that I needed more than one sharpening stone to get a keen edge on my block plane.
Of course, the project came out just fine. I sit on it every day in our kitchen as I work out the groceries I need for dinner. Hundreds of guests have sat on it as our dinner parties inevitably moved to the kitchen. Its finish is well worn by nearly 30 years of use, but it is rock solid.
I could build a nicer bench, but this guy serves as a reminder not to act too smart. Or to make things too technical. And that ignorance – coupled with strong desire – can go a long way.
The Rainbow Room in New York is one of the commercial interiors for which Heitink has furnished custom-veneered panels. (Photo from Heitink website)
My favorite instructor, Mr. Williams, always said Anyone can do something right. The real skill is knowing how to fix things that go wrong.
Maddeningly, there will always be things that go wrong. Overlooked abrasive marks beneath your flawless finish? Check. (Scrape the whole tabletop down and refinish.) A brand-new oven front dented by a dropped cabinet door? Check. (Pay to have oven part replaced by manufacturer’s service person.) Etc. The moment of discovery is always a punch in the gut.
My most recent experience with this sickening phenomenon came earlier this week. I was making great progress on a job I’d started that morning—months later than anticipated, thanks to a stack of other work commitments (and also thanks to my clients’ patience). The job involves a set of panels custom veneered with dyed eucalyptus. As I made the first cut, my client’s reaction to the price was still ringing in my ears. “X-thousand dollars? Just tell me–is this like buying a gold-plated toilet?” No, I reassured him; the purchase didn’t necessarily qualify as extravagant. The price reflected the exotic species of veneer, which was dyed in Europe, then exported to the United States.
Around midday I was lifting another panel onto the tablesaw to miter an edge when my eye was caught by a note in my handwriting on the order form: Grain to run horizontally, i.e. parallel with dimensions under “width.” The grain on the panels was vertical.
I got the job folder from my bench and sifted through the records. Sure, the evidence was right in front of me on the order form, but I honestly couldn’t remember which way the clients had wanted the grain to run. It had been so long since we’d discussed it–and the magnitude of the cock-up (to use a charming British term) would be so daunting that I just wasn’t ready to believe it.* I called the clients to check. No answer. I left a message. Next I wrote by email.
By bedtime there was still no response. I hardly slept that night; each time I lapsed into slumber, I found myself in a different subconscious-generated torture scenario involving horizontal versus vertical grain.
The following morning I contacted Max Jeffrey, the salesperson at Heitink Veneers, and let him know there might have been a mistake. He said he would look into it and assured me they would make things right.
And that’s exactly what they did. No prevaricating, no drama; just a sincere apology for having laid up the veneer in the wrong orientation, while noting that this kind of error is exceedingly rare because they take grain orientation seriously. (As a customer of theirs for nearly a decade, I know this to be true.) Tell us what we need to do to make things right for your clients, Max said.
When my client called back, I explained the situation and asked whether he would like Heitink to order new veneer and remake the panels, or would he and his wife like to keep the grain vertical. My personal preference, I added honestly, was the existing vertical orientation, because the island’s stone counter has a bold lengthwise grain and I thought the added linearity of horizontal-grain panels might make the island seem as though it was ready to shoot through their back door. They asked for a break on the price, and Heitink agreed to refund that amount. (The clients had purchased the veneered panels directly and had already paid in full.)
To paraphrase Mr. Williams, Anyone can do something right. What’s truly impressive is making things right for your customer—graciously—when you have made a mistake on their order. When I asked Jan Heitink (he’s Dutch; his name is pronounced “Yon”) whether he would permit me to identify his company in this post, he said yes, adding, “We strive for perfection in our products but in real life there is no such thing and when a situation does not go as planned, how we react to the situation is what will leave a lasting impression.”
I couldn’t have put it better myself.–Nancy Hiller, author of Making Things Work
One of several jobs in which I have incorporated custom-veneered panels from Heitink, this was a kitchen refaced in composite teak. (Photo by Kendall Reeves, Spectrum Studio)
*This is why I put everything in writing. But even so, in this case, I wanted to consult the clients to make sure I had ordered what they wanted.
“I try to keep in mind that if I dropped dead tomorrow, all of my acrylic workplace awards would be in the trash the next day, and my job would be posted in the paper before my obituary.”
— Bernie Klinder, a consultant for a large tech company, The New York Times, Jan. 26, 2019
Dick Proenneke looking down Glacier Canyon toward Twin Lakes. Developed May 1984. Photo courtesy of the U.S. National Park Service
We are pleased to announce that we’re working on a new book about Dick Proenneke who lived alone in the wild Alaskan wilderness for 31 years. You may know Proenneke as the subject of four PBS documentaries that have fascinated many, including “Alone in the Wilderness” and “Alone in the Wilderness Part II” (all Bob Swerer Productions).
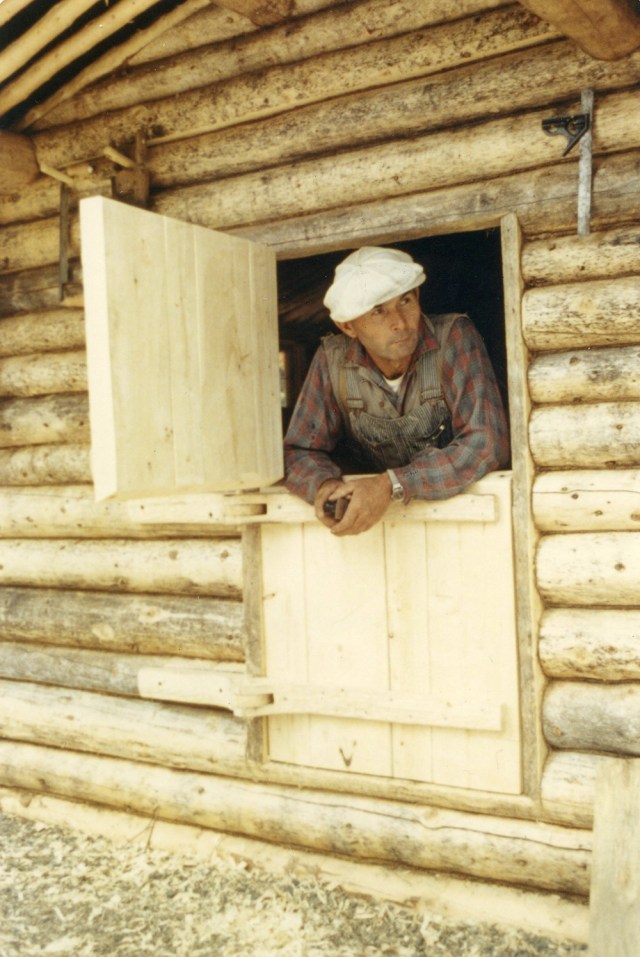
Dick Proenneke looking out the double Dutch door of his cabin. Photo courtesy of the U.S. National Park Service
Monroe Robinson and K. Schubeck, caretakers of Dick Proenneke’s cabin. Photo byRee Slocum
Author Monroe Robinson, a woodworker and log restoration specialist who, along with his wife, K. Schubeck, has been involved with all the work of maintaining Proenneke’s cabin for the past 19 years, is currently sorting through hundreds of photographs and building some replicas of Proenneke’s hand tools for illustration.
The lifestyle of Proenneke reminds me of Henry David Thoreau on steroids. The lulling-yet-captivating films remind me of a mash-up of Bob Ross, “Planet Earth” and “Primitive Technology”. And the deep exploration of Proenneke’s handcrafted life reminds me of Joshua Klein’s “Hands Employed Aright”.
To say we’re thrilled about this project is an understatement.
Dick Proenneke. Date unknown. Photo courtesy of the U.S. National Park Service
May 21, 1968, Proenneke traveled to Twin Lakes, Alaska, at the age of 52. He had spent the year prior scouting a site for a cabin and cutting logs in preparation to build a cabin the following year. And he did build his cabin, by himself, using only hand tools. He also built all his own furniture, a cache to store his food and many of the hand tools he used.
Proenneke ended up living in his 11- x 15-foot cabin, alone (although, perhaps, alone is not the right word as he found great company in nature), for 31 years, only occasionally leaving to visit family. He kept detailed journals and documented his life on film while maintaining his cabin, hiking up to 35 miles in a single day and working closely with the U.S. National Park Service.
Chelsea, Monroe Robinson (who was working on the cabin) and Dick Proenneke, during Dick’s last visit to Twin Lakes in 2000. “After looking at the copper end caps I’d installed to protect the exposed roof logs, he looked back to me with an approving nod,” Monroe says. Photo by K. Schubeck
Proenneke left Twin Lakes in 1999 at the age of 82. He died in 2003. He donated his cabin to the U.S. National Park Service, and it’s now part of Lake Clark National Park.
Monroe Robinson replicating Dick Proenneke’s sled. Photo by K. Schubeck
While a handful of books have been written about Proenneke and his life, none focus solely on his use of hand tools and only materials found in the wilderness. Monroe has taken an in-depth look at how Proenneke used the things he made and sought to repair instead of replace.
“Dick lived a full and challenging life while limiting his consumption of today’s material possessions,” Robinson says. “It is an invitation, an inspiration, to feel the joyous wonder of making what one needs with simple tools and materials around you.”