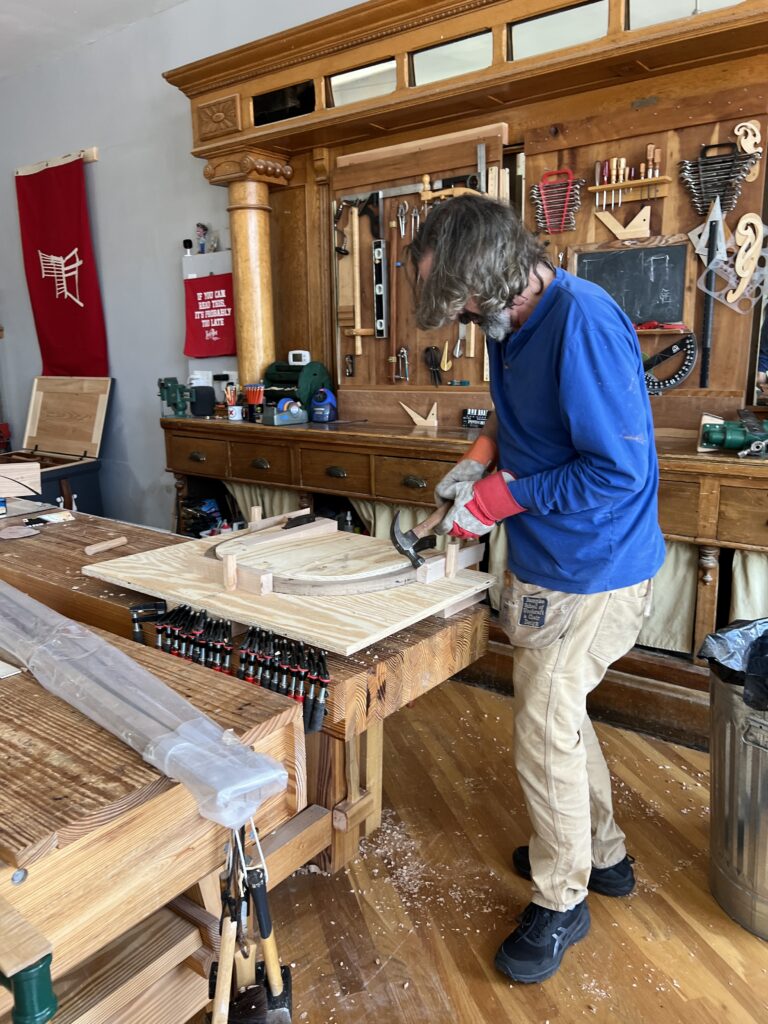
Chris is working on some bends for an upcoming seating project.
Update: Comments are now closed. Thanks for entertaining us on our drive!
Got a woodworking question? Then today is you’re lucky day: It’s time for Open Wire! You have until 5 p.m. Eastern to pose your question in the comments section below, and we’ll respond – hopefully with a informed and useful answer…but no promises. (And it’s possible your fellow readers will have answers, too – and perhaps you’ll have an answer for someone else).
Chris and I are driving to Northern Indiana to pick up a thing…so if you’re wondering why I’m answering many of the chair questions…I’m not. I’m the amanuensis on those. But I’ve you covered on many of the not-chair questions.
– Fitz
p.s. The remaining Open Wire dates for 2025 are August 9, October 25 and December 13.
The following is excerpted from “The Essential Woodworker,” by Robert Wearing. In our opinion, “The Essential Woodworker” is one of the best books on hand-tool usage written in the post-Charles Hayward era. Wearing was classically trained in England as a woodworker and embraced both power and hand tools in his shop and in his teaching. The book is filled with more than 500 hand-drawn illustrations by Wearing that explain every operation in a hand-tool shop. His illustrations are properly drafted, drawn in perspective and masterfully clear.
Design brief: Before commencing on any design other than a copy a design brief must be prepared. A design brief is a collection of all the data relevant to the construction and use of the article and the design is based on this information. The brief can best be produced by writing down as many questions as possible about the job, and then by experiment, research, measurement or judgment, find the answers to these questions. For example, questions about a coffee table might include the following:
Where will it be used? Who will use it? How many people will use it? What will it carry? How will people sit at it? What will be its top shape? How high will it be? What will be its basic constructional form? What will be the finish? What wood is preferred or is available? Will the top have any special finish? Will a shelf or rack be required?
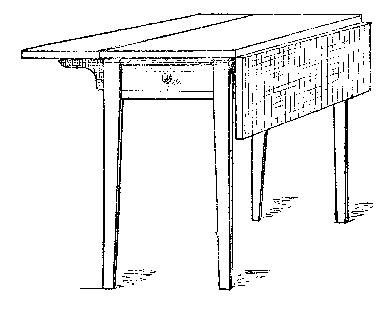
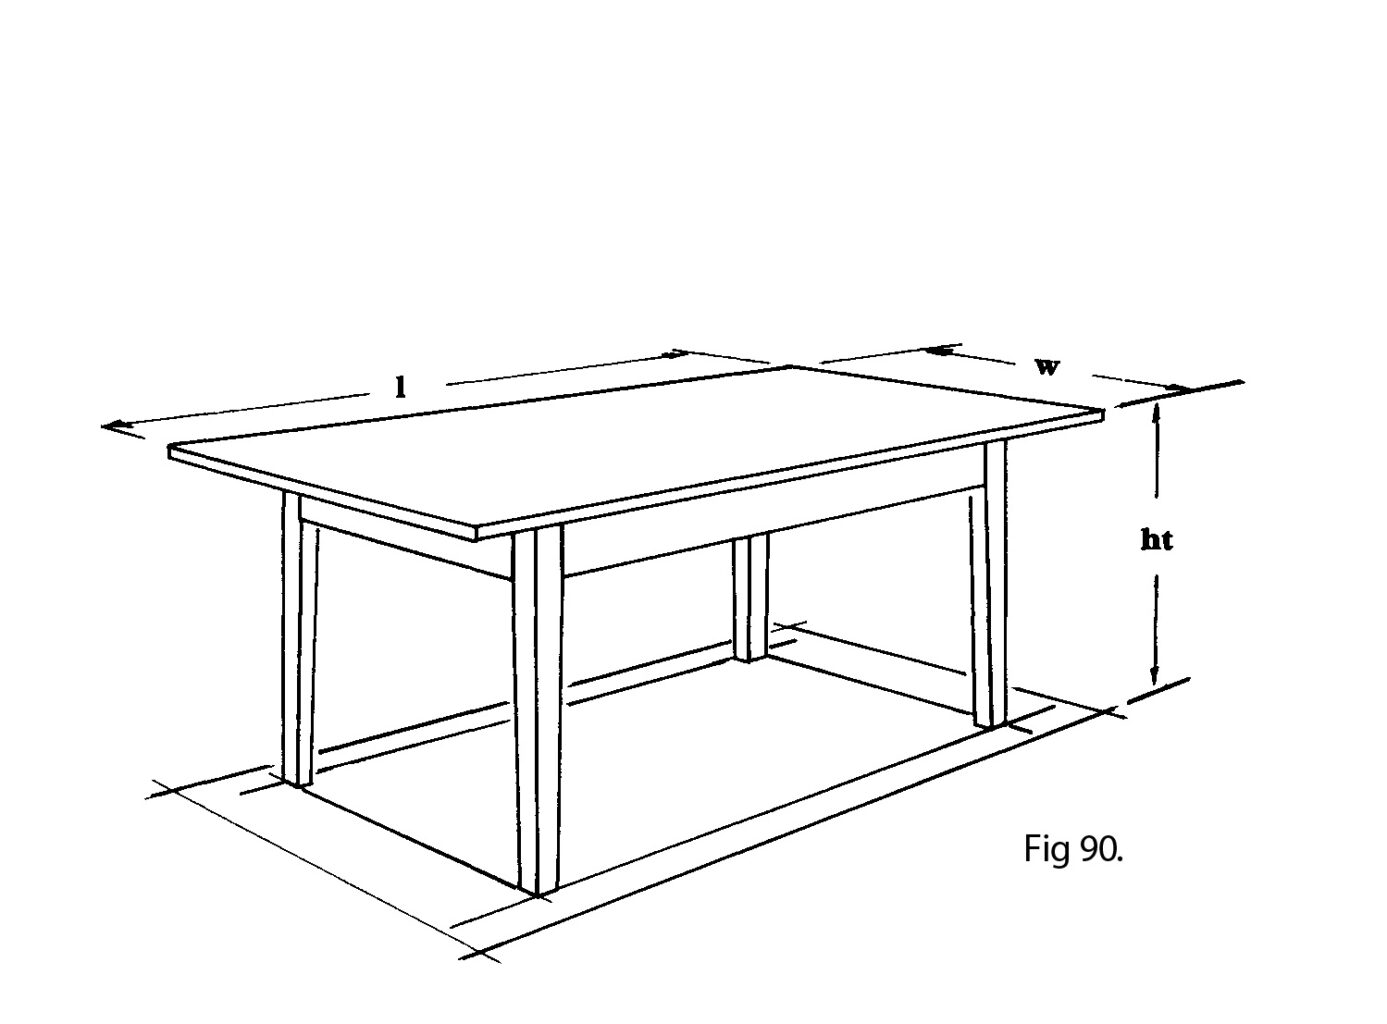
Design sketch The answers to these practical questions will give the worker the length, the width and the height required. From these three figures a number of design sketches may be produced and the best one selected (Fig 90, for example).
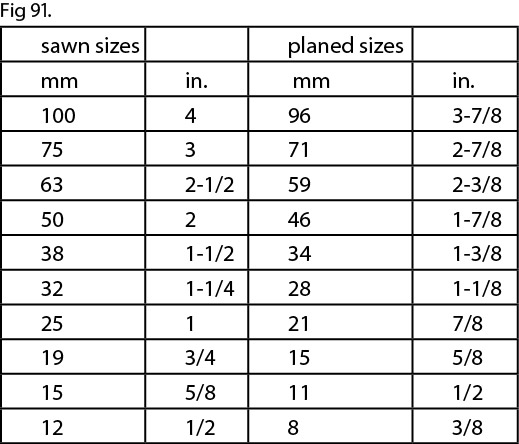
Working drawing From the design sketch it will now be possible to build up a working drawing. For items of coffee-table size a full-sized drawing is an advantage; larger items must of course be drawn to scale. These full-sized drawings can be drawn on decorator’s ‘lining’ (ceiling) paper. Before making a start the following table of ‘finished sizes’ should be consulted (Fig 91).
The sawn sizes are those used by the timber yards when sawing logs into boards. The finished sizes are those to which the sawn boards can be planed, either by hand or by machine. This figure is both the maximum which can be obtained from the sawn board and also the size marketed as a planed board. In planning component sizes these sizes should be kept in mind in order to use wood with the greatest economy. A reduction of thickness of 1mm (1/16in.) may afford a considerable cost saving.
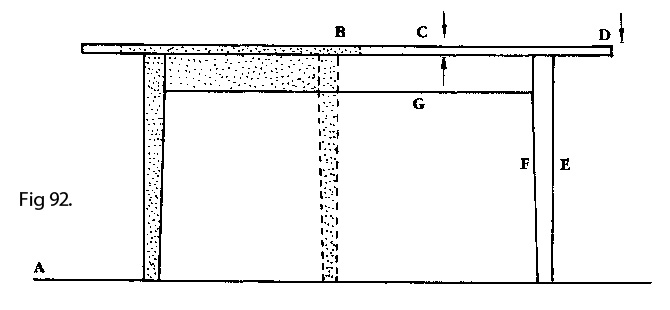
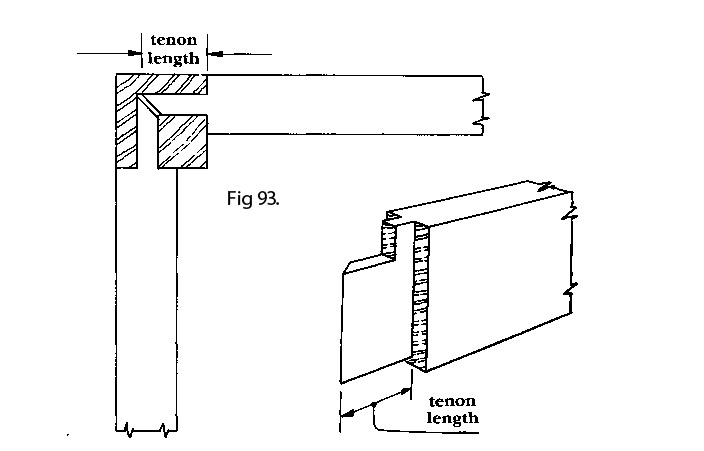
The working drawing (side view) (Fig 92) is built up as follows. Draw the ground line (A) then draw the top of the table (B). Consult the finished sizes and draw in the top thickness (C). Mark this off to length (D). Consider the overhang and draw in the outside edge of the legs (E). Consult the finished sizes again and draw in the leg thickness (F). The top rail (G) is drawn in next, wide enough to give a good joint but not wastefully wide. This can be made narrower if the extra support of a stretcher rail is given. The end (width) view can be similarly drawn. To save space this can be superimposed on the front view (shaded area). When a proper mortice and tenon construction is to be used (as in this example) the length of the tenon must now be ascertained. This is easily done (Fig 93) by making a full-sized drawing on graph paper. Finally the inside edges of the legs can be tapered below the joint. This design retains the simplicity of an all-right-angle construction.
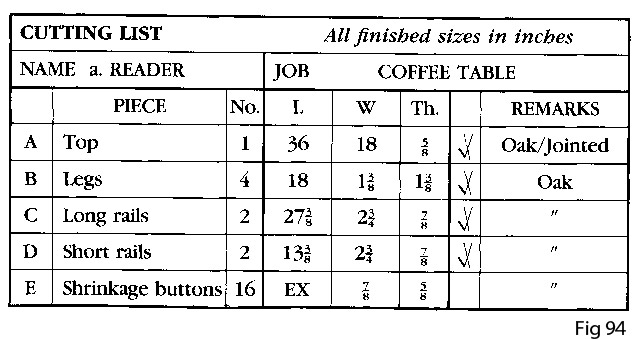
To obviate frequent reference to a drawing in the early stages it is convenient to produce a cutting list (Fig 94) and to work solely from this in the early stages.
Finished (i.e. final) sizes are used in the list, which avoids allowances being added at several stages in the work. Unfortunately, although there are only three dimensions there are many more names for them, e.g. length, height, width, depth, broad, thick, and so on. The three to be used are length (the distance along the grain), thickness (the smallest dimension) and width (the intermediate size). Width and thickness are often the same size.
To avoid confusion components are often lettered, as in the first column. The remaining columns are self-explanatory except for the blank one. A tick here signifies that the component has been sawn out. A cross tells that the piece has been produced to size and is ready for marking out.
A couple weeks ago, one of our warehouse’s dehumidifiers lost power and dripped water onto a pallet of “Ingenious Mechanicks” books. We dried them out, but a couple hundred of them suffered some water spotting on the back covers and have pages that are a little wavy from the moisture (the waviness will likely disappear over time). See the photos below for examples of the spotting.
We cannot sell these as new, so we are selling them at a discount. The water-spotted books are $26 (that’s $18 off the regular $44 price). All sales are final on this special offer.
We are not fancy here. So when Megan threatened to wear a skirt, I knew this was a serious event.
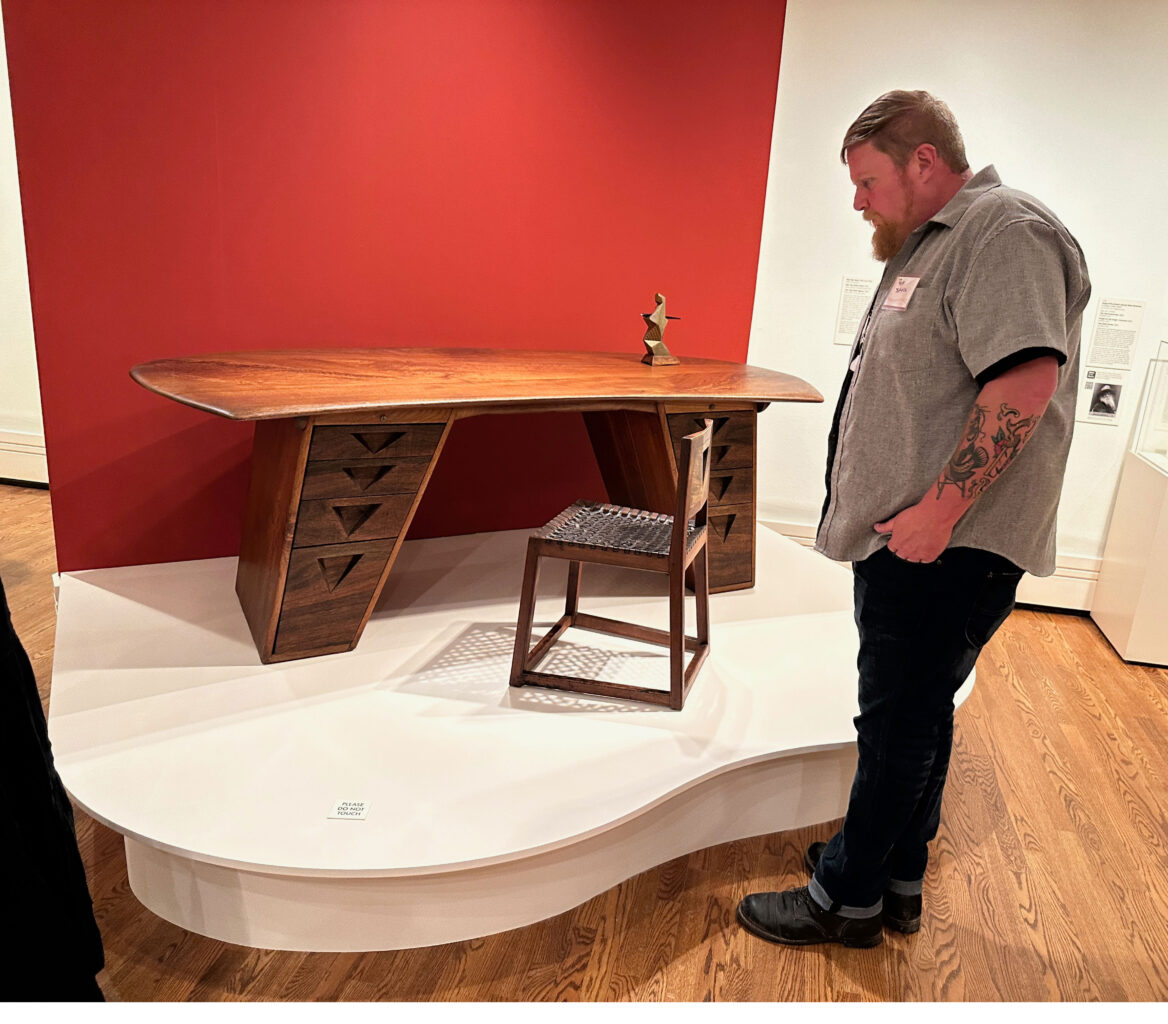
Rob Spiece, director of woodcraft at Berea Student Craft, had scored invitations for all of us to see the opening of a new exhibit at the Taft Museum in Cincinnati: The Crafted World of Wharton Esherick.
It’s rare for Esherick’s pieces to leave Pennsylvania, and this was a chance to see the pieces interpreted by Rob, a woodworker who knows a lot about Esherick’s work and life (Rob is from the Philadelphia area).
So I put on a chambray shirt and pants that weren’t visibly ragged. And we arrived at the Taft’s valet parking station in my minivan.
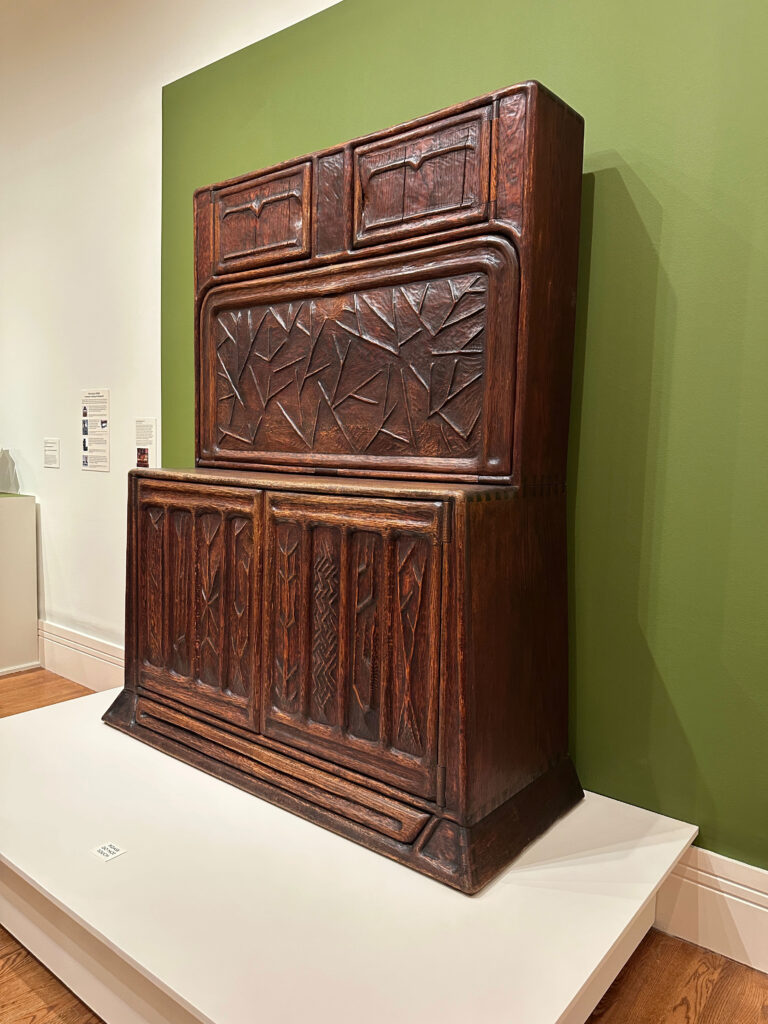
Esherick (1887-1970) was a polymath who excelled at painting, sculpture, woodblock prints and furniture design. His paintings brush up against American impressionism at the end of the Arts & Crafts Movement in this country. His furniture is incredibly forward-looking, presaging the studio furniture movement in the 20th century.
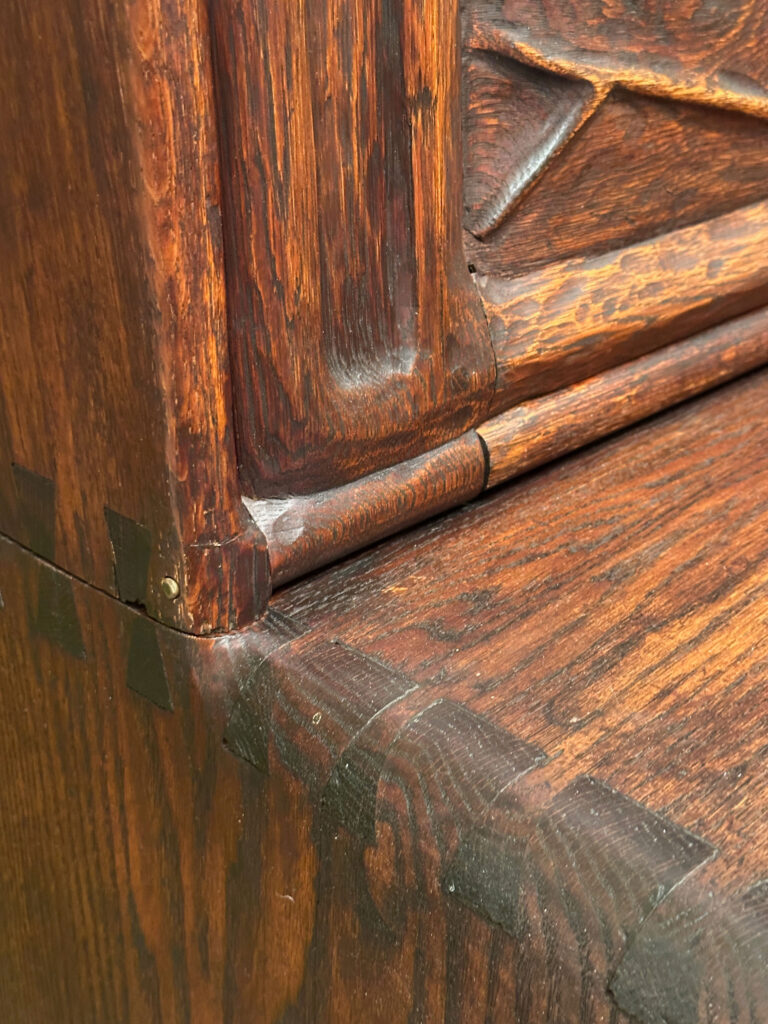
The first piece we looked at (above) was Esherick’s first woodworking project, Rob said. It’s a huge drop-front desk with massive wooden carved hinges. The little detail in the base that looks like moulding? That’s a big flat drawer. The piece was made with little concern for wood movement or traditional practice, and it has cracks here and there. But the piece has an incredible presence.
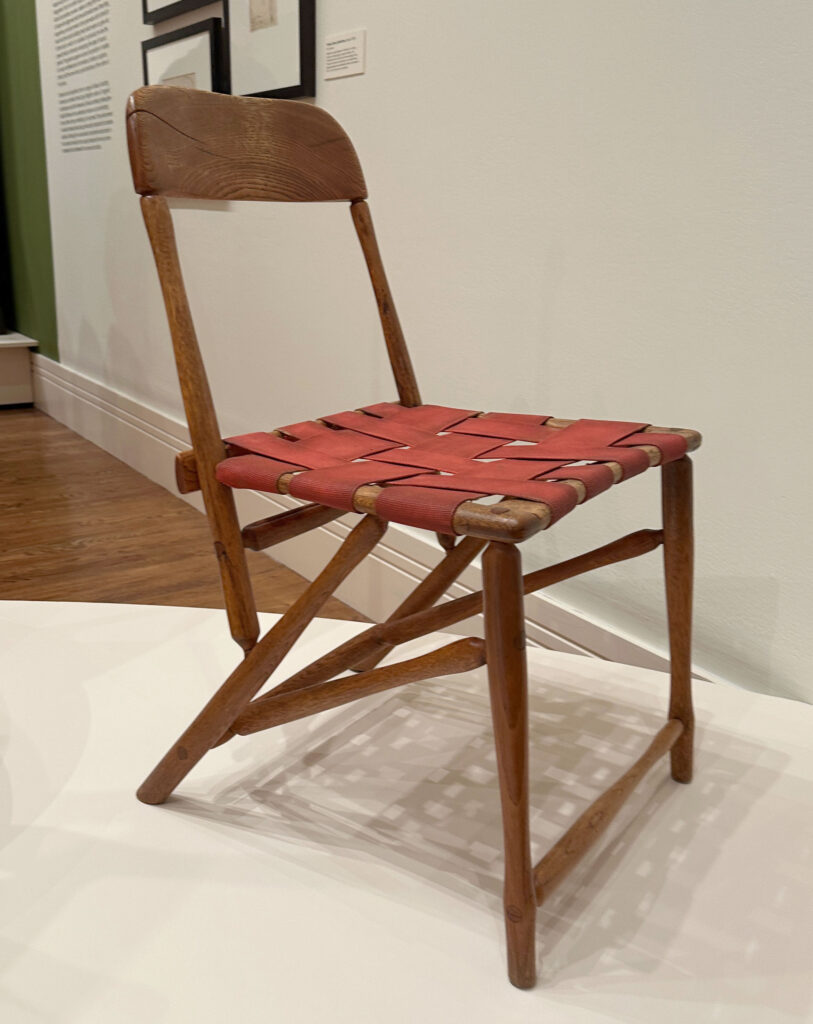
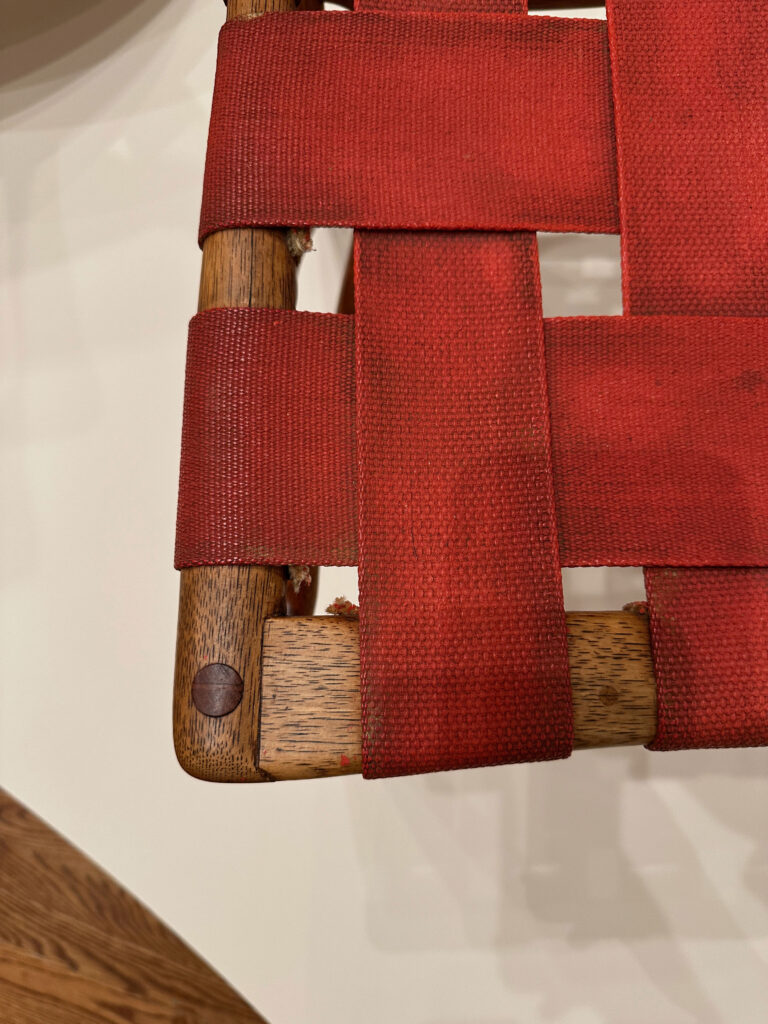
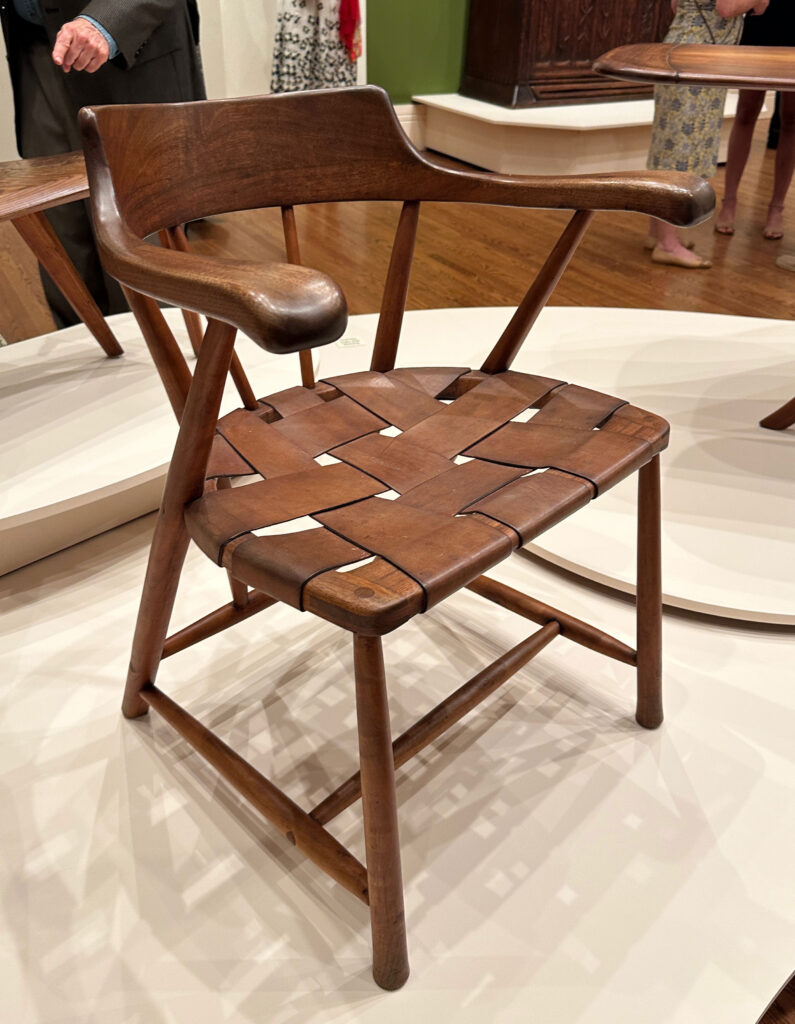
I, of course, was interested in Esherick’s chairs. First up was this woven-seat chair made from hammer handles. While the idea was a simple art school trope (furniture from alternative objects), the execution was sublime. Even the choice of wood for the backrest.
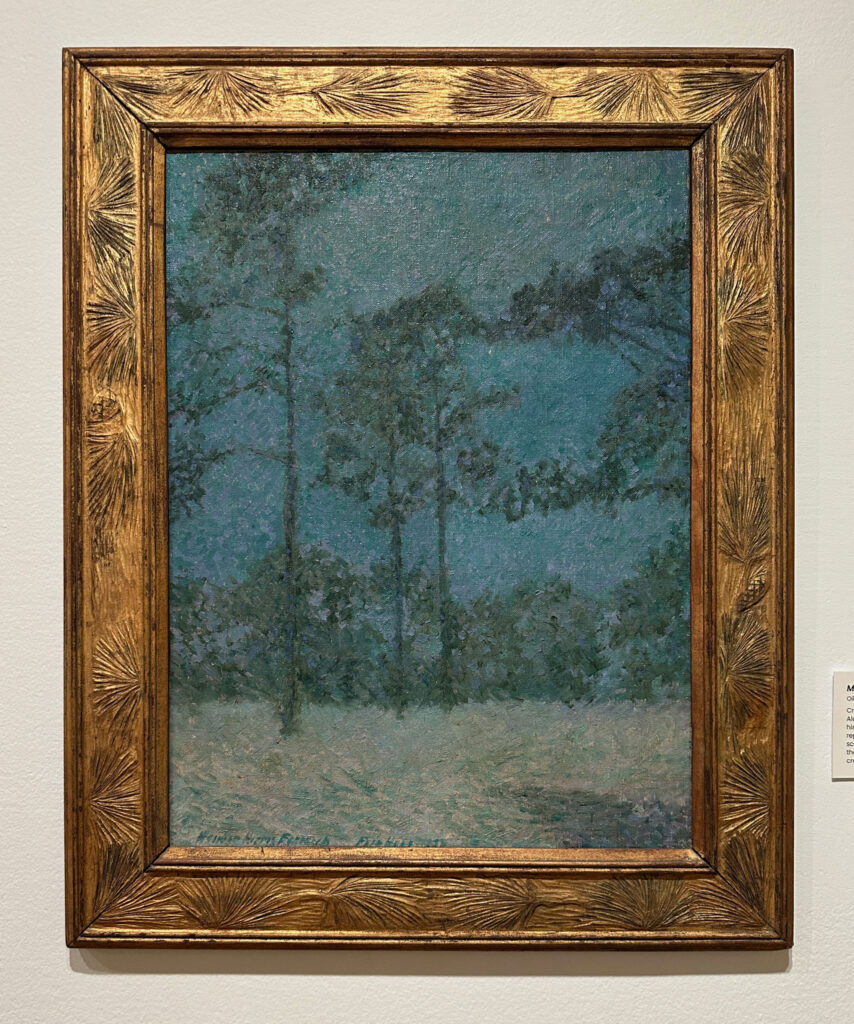
This impressionist painting (below) by Esherick was a turning point for the artist, Rob said. Esherick built and carved the frame for the painting, and Esherick’s painting instructor suggested he might be a better carver than painter (I think the painting of yellow pines is beautiful, but what do I know?).
That remark helped propel Esherick into the world of furniture. His home in Malvern, Pennsylvania, became a complete art project for him. Every aspect of the building, from the stairwells down to the drawer pulls, are marked by his work.
Every aspect of his desk reflects this sensibility, all the drawers are filled with handmade cubbies and trays that provide dedicated spaces for all his writing tools.
If you visit Cincinnati in the next few months, I highly recommend visiting this exhibit. I don’t have room to show or discuss his woodcuts, which are incredible. The Taft Museum itself is worth a visit for its architecture – an early wooden Greek Revival home preserved in downtown Cincinnati.
And really, you don’t have to wear a skirt to the exhibit (Megan stuck with her jeans during our visit).
Editor’s note: Our Mind Upon Mind series is a nod to a 1937 Chips from the Chisel column (also featured in “Honest Labour: The Charles H. Hayward Years”), in which Hayward wrote, “The influence of mind upon mind is extraordinary.” The idea being there’s often room for improvement. (You can read the entire Chips from the Chisel column here.)
To that end, we’ve asked you what else you have thought of, tried out and improved upon after building projects from our books. We’ve loved reading all your submissions!
Today’s pick is from Matt Williamson.
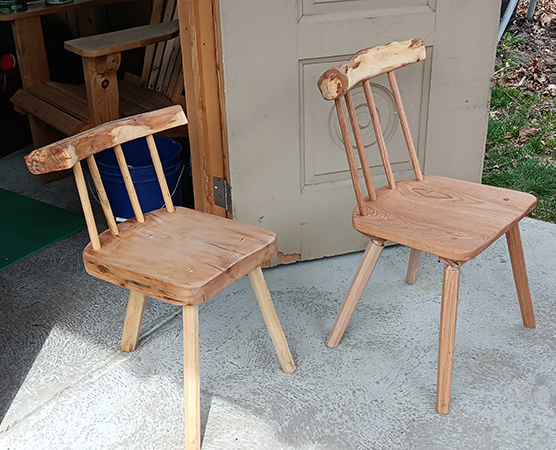
I have been messing around with “The Anarchist’s Design Book” and have made a few adjustments that you might find interesting. These are probably not improvements so much as solving problems caused by my desire to use what I have in lieu of greenwood I have yet to source.
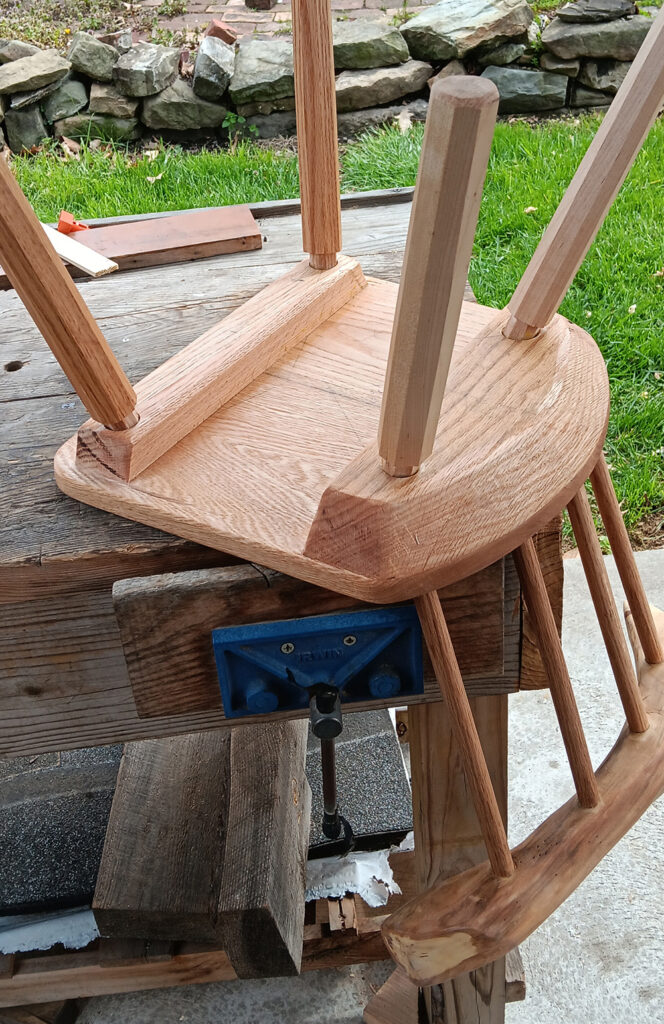
For the staked stool, the seat is from a 13-1/2”-wide 9/4 pine joist I pulled from dumpster when a historical building in the neighborhood got rehabbed. For the staked chair, the hardwood I had included some 4/4 red oak and some 6/4 red oak that, again, I dumpster dove for in the neighborhood. These 6/4 scraps were not big enough to make a seat, but I thought they would add strength to the 4/4 seat panel and give the legs something to hold onto. It is a bit heavy.
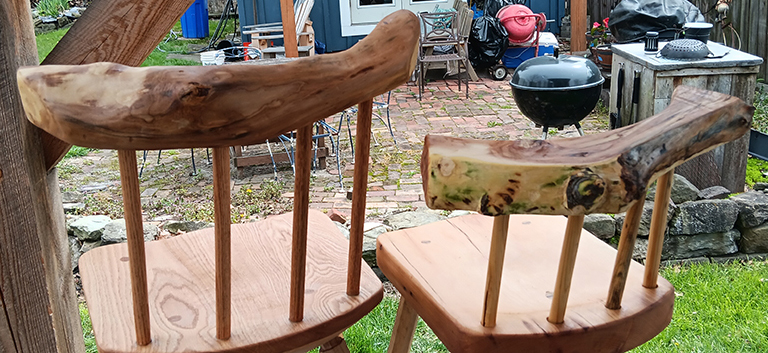
I did not have any greenwood that could be bent for the staked stool back so I used a piece of apple wood from a tree I cut in the fall that basically followed the 12″ curve. I kind of liked it and found another piece to use when I made the staked chair a little while later.
Did you change up one of our projects or do you have a clever idea for an improvement? Email kara@lostartpress.com. You can read more about the submission process here.