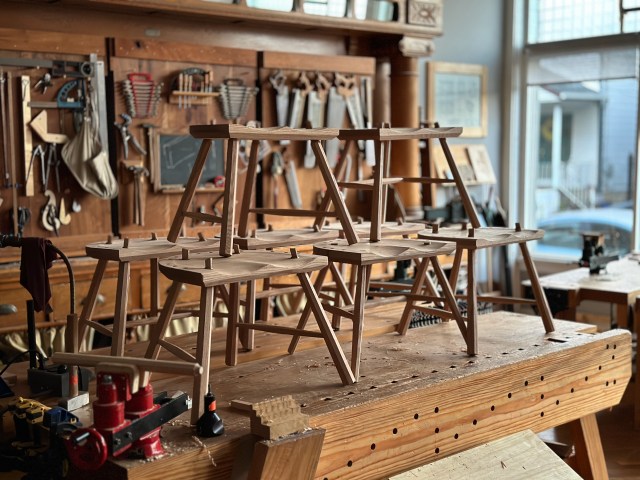
Chair nerds unite! A class picture from LAP’s most recent Chairmaker’s Toolbox class.
Applications are now open for this year’s full-scholarship class here at Lost Art Press. Six spots are available for six aspiring chairmakers to build a comb-back stick chair in beautiful Covington, Kentucky. The class will be held Sept. 16-20, 2024.
If you aren’t familiar, The Chairmaker’s Toolbox is an organization founded by fellow under-represented chair nerds for under-represented chair nerds. The Chairmaker’s Toolbox aim is to provide access and equity in the field of chairmaking.
No pyramid scheme here. Just some chair nerds having fun.
Are you an aspiring chairmaker who has been historically excluded from the trade? This is your class. We encourage you to apply for the chance to work alongside like-minded individuals who share a love for all things chair.
Katherine managed to make another batch of wax this week. I’m guessing she has some vet bills to pay because Bean now has a younger brother. Meet Billy! He has a bobtail, and he pretty much purrs with happiness every moment he’s awake.
He also likes to wrestle – and so does Bean. It looks like a great match.
You can snag a jar of Soft Wax 2.0, which is now in her etsy store. You can watch a video of how to use the wax here.
Instructions for Soft Wax 2.0 Soft Wax 2.0 is a safe finish for bare wood that is incredibly easy to apply and imparts a beautiful low luster to the wood.
The finish is made by cooking raw linseed oil (from the flax plant) and combining it with cosmetics-grade beeswax and a small amount of a citrus-based solvent. The result is that this finish can be applied without special safety equipment, such as a respirator. The only safety caution is to dry the rags out flat you used to apply before throwing them away. (All linseed oil generates heat as it cures, and there is a small but real chance of the rags catching fire if they are bunched up while wet.)
Soft Wax 2.0 is an ideal finish for pieces that will be touched a lot, such as chairs, turned objects and spoons. The finish does not build a film, so the wood feels like wood – not plastic. Because of this, the wax does not provide a strong barrier against water or alcohol. If you use it on countertops or a kitchen table, you will need to touch it up every once in a while. (I have it on our kitchen countertops and love it.) Simply add a little more Soft Wax to a deteriorated finish and the repair is done – no stripping or additional chemicals needed.
Soft Wax 2.0 is not intended to be used over a film finish (such as lacquer, shellac or varnish). It is best used on bare wood. However, you can apply it over a porous finish, such as milk paint.
APPLICATION INSTRUCTIONS (VERY IMPORTANT): Applying Soft Wax 2.0 is easy if you follow the simple instructions. On bare wood, apply a thin coat of soft wax using a rag, applicator pad, 3M gray pad or steel wool. Allow the finish to soak in about 15 minutes. Then, with a clean rag or towel, wipe the entire surface until it feels dry. Do not leave any excess finish on the surface. If you do leave some behind, the wood will get gummy and sticky.
The finish will be dry enough to use in a couple hours. After a couple weeks, the oil will be fully cured. After that, you can add a second coat (or not). A second coat will add more sheen and a little more protection to the wood.
Soft Wax 2.0 is made in small batches in Covington, Kentucky. Each glass jar contains 8 oz. of soft wax, enough for about five chairs.
1) The Workshop, including the design and construction of workbenches, tool chests and wall cabinets. There’s also an entire section devoted to “appliances,”which are workshop accessories such as shooting boards.
2) Furniture & its Details, includes a discussion of all the important Western furniture styles, including their construction, mouldings and metal hardware. This section also includes the construction drawings for many important and famous pieces of furniture examined by Charles H. Hayward during his tenure at The Woodworker magazine.
3) Odds & Sods. In addition to offering its readers practical information for the shop, The Woodworker also asked it subscribers to think about the craft and its place in modern society. We have included many of our favorite philosophical pieces in this final section.
During the last few years the ball catch has become remarkably popular. It is far neater than the old-fashioned turn and is much more convenient in use. There are many occasions when a door needs something to hold it in place when closed but when a lock seems unnecessary. Take, for instance, a sideboard. Often enough locks are not really needed. The key is invariably kept in the lock and it is turned merely to prevent the door from remaining ajar and looking untidy. A ball catch would answer the purpose equally well.
Although the fitting is usually a straightforward job, there are sometimes slight complications. In any case the requirements of the fitting should be understood properly. In the first place, the ball catch itself has a slight flange at the top. When recessed into the door this flange is bound to project. This means that the catch plate must be sunk into the cupboard by an amount rather more than its thickness. If this were not done the flange would strike against the plate and would prevent the door from closing—unless the door was a very loose fit. This is made clear in Fig. 1.
When the door closes in flush with the cupboard the work is simple. First make a pencil line in the middle of the stile at the top and square it across the top edge of the door. Close the latter and transfer the mark to the edge of the cupboard as shown in Fig. 2. Square the mark back for about 1 in. Since the projecting part of the plate must be flush with the front of the cabinet, a gauge can be set to the over-all width (see A, Fig. 3) and the cupboard marked. Holding the plate level with this line and so that the pencil line runs exactly across its centre, mark round it with a marker or sharp pencil. The recess is cut easily by chopping down all round the shape and easing away the waste. The chisel should be placed a trifle inside the line so that the recess is not too large. After a little experience the exact position in which to place the chisel will come automatically, giving a perfect fit. In some fittings the screw holes are pressed out to form a countersink, and this necessitates countersinking the screw holes in the wood to enable the plate to go in flush. Another recess is also needed at the centre where the hole for the ball occurs. This again is best done with the countersink. The ball catch itself merely needs a hole drilled in the door. It is made a fairly tight fit and requires no other fixing.
The fixing is sometimes complicated by the front of the cabinet being chamfered, or having some carved decoration. This prevents the gauge from being used. Proceed as before, marking the pencil line at the top of the door and transferring it to the cabinet. Fit the plate first. Hold it centrally over the pencil line and keep the projecting part of the plate level with the cabinet front (Fig. 4). Having fixed the plate, close the door and mark with a pencil the position its front occupies (see A, Fig. 4). Set a pair of dividers from this pencil line to a line running through the centre of the hole for the ball (B). (This usually lines up with the screw holes.) With the dividers mark the line on the top of the door, keeping one leg of the dividers at the front. This gives the position for the hole for the ball catch.
We were simply overwhelmed by your generosity of so many donations in Nancy Hiller’s name to support The Ranch Cat Rescue – a rescue in Nancy’s adopted hometown of Bloomington, Ind. (and that Nancy continues to support in perpetuity with 10 percent of net sales of her book “Shop Tails”). It’s enough to make me well up (which usually happens only when someone accidentally hits me with a hammer). To everyone who donated: You’re so very kind; thank you. Today, I’m mailing a cashier’s check – for $8,770.85!!! – to the rescue’s director/resident human Alison Zook. The raffle winner of Carol Russell‘s fiddleback Tasmanian blackwood cat (I’ll miss this gorgeous little carving!) is Melinda in California; the winner of the book we used as “cover art” for the audio version of “Shop Tails” is Jay in Virginia (both have been notified via email).
Alison asked me to share the paragraph below –
Y’all. To say I don’t have words for this generosity is an understatement. These last few weeks I’ve been thinking I want to do something permanent with these funds, something that really honors Nancy. So I had an idea. While some of your donations will go toward medical care, food and supplies, I’m putting a portion aside and starting the Hiller Fund (working title). This will specifically be used for building projects and improvements made at The Ranch Cat Rescue, with a focus on empowering women and girls to pick up tools and get some sawdust in their hair. While these projects won’t hold a candle to Nancy’s woodworking skills, I know that she would have loved to be a part of them. This way she always can be. Thank you, new friends, for being the beginning of this.
As soon as Alison schedules that first building project, I’m clearing my schedule. I’ll be there.
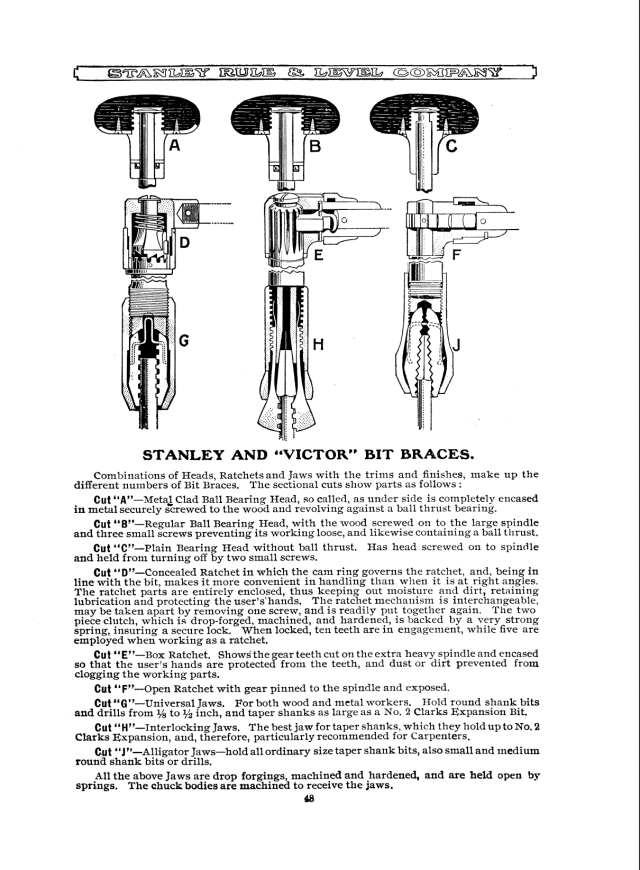
Now that we’ve sold through our copies, we’re offering a free pdf of our high-quality scan of the “Stanley Catalogue No. 34.” You can read it in this post, and click on the link below the window to download.
This catalog shows nearly every tool needed in a hand-tool shop, from the chisels to the butt gauges to every sort of plane in Stanley’s 1914 line. The catalog’s text explains what each one was used for and how it functions differently from other similar tools available at the time.
The catalog also has fantastic exploded views of many of the complex tools, such as the company’s miter boxes, the multi-planes and handplanes.
It’s a great way to better understand how hand tools of all sorts work.