When Megan Fitzpatrick at Popular Woodworking Magazine asked me to write a project article about an Arts and Crafts style bookcase three years ago, I had something Stickley-ish in mind. I pictured something long and low in amber maple, designed to fit behind an antique settle in the home of some clients in Chicago. There was just one catch: My clients hadn’t yet found the right settle. There was no telling how long or tall the settle would be until they had it in hand, which meant the bookcase had to wait.
After a few months, I decided to forget about trying to combine the article with a commission and just build a bookcase. My husband and I are hardcore bibliophiles; we can never have too much storage for books. But we decided that this bookcase, which would be the loveliest one I’d made to date, should have a special purpose: to commemorate our son, Jonas, who died shortly before his 16th birthday. We would call it the Jonas Longacre Memorial Bookcase.
Some people can’t bear to mention those they’ve lost, but Mark and I love to talk about Jonas. He was a self-motivated learner who excelled at school. He was always game to do his part around the house. He wanted to learn Latin and started a Latin club at his school (even though he was the only member). In fact, he was fascinated by languages of all kinds, including computer code; after his death, we found a blog post written that morning in which he proudly announced to the world that after several months of effort, he had just finished creating an online translation tool. Of course he could have used a similar tool made by someone else, but he found it more exciting to figure out how things work. Books were some of his favorite things.
Jonas at 13 or 14 with a piece of limestone on which he carved a description of students at his school, using an old railroad spike
Tragically, it was just this curiosity that caused his death. I came home after work on the night of January 2, 2014 to find him lifeless. Amid the cognitive dissonance, I happened to notice that even though he had a rope around his neck, suggesting he had hung himself (which made no sense, considering how eagerly he was looking forward to the family reunion that weekend and the new semester at school), his feet were on the ground. He had also padded the rope with a t-shirt. Neither seemed consistent with intentional hanging, but I wasn’t analyzing these details as I stared, disbelieving, at his body while I waited for an ambulance to arrive. Thanks to the insight of a friend and conscientious work by the detective who came out to our house that night, we learned that Jonas had died while experimenting with the choking game.
Since that day I’ve learned a lot about the choking game, especially from Judy Rogg, who lost her own son the same way, and Trish Russell, an MD who also lost her son to this practice. Although boys are statistically more likely to die while playing this game, girls do too. Many fit a similar profile: They’re excellent students, curious about how things work, athletic, creative, and they tend not to be interested in alcohol or drugs. Hence one nickname for the practice: “the good kid’s high.”
Along with Judy, Trish, and others, I now make a point of spreading the word about this dangerous activity. Hence this post. If you have children or know others who do, please inform yourself and others.
May is, of course, peak box turtles-crossing-the-road month. Here’s one that managed to evade Chris’s car:
This individual is of the “eastern” subspecies of common box turtle (Terrapene carolina).
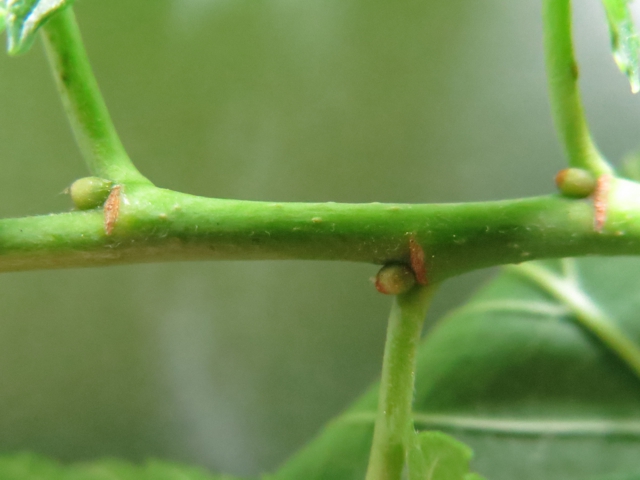
I mentioned last month that I wasn’t able to find a good example of a black maple (Acer nigrum). Naturally, I came across a perfect example the very next day. Unfortunately, that tree was inaccessible; I would have had to climb down a steep slope into a swamp to be able to collect a leaf. I did eventually find another one:
Notice that it looks a bit like a seriously overweight sugar maple; the lobes are broad, the sinuses between lobes are very shallow, and the two outermost lobes have all but disappeared.
I also mentioned last month that the leaf of the boxelder (A. negundo) is disturbingly similar to that of eastern poison ivy (Toxicodendron radicans). I came across this tableau in Ottawa County, along Lake Erie in northern Ohio:
The leaf circled on the left is poison ivy; the one on the right is boxelder.
A common maple lookalike of a different sort is American sycamore (Platanus occidentalis):
In the UK, what we call sycamore is called plane or planetree, and what they call sycamore is a maple, A. pseudoplatanus. And this is why I always give the scientific names </rant>.
Even with the scientific names, it can be a puzzle. Note the sycamore maple’s scientific name, Acer pseudoplatanus: “maple that is a fake plane.” London plane is a common ornamental tree in the UK that is hybrid between American sycamore and oriental planetree (P. orientalis). It is sometimes given the scientific name Platanus orientalis var. acerifolia (“eastern plane with maple-like foliage”). No wonder people get confused.
Several Ohio trees bloom in May. The northern catalpa (Catalpa speciosa) is uncommon in the wild around here, but frequently planted for its abundant showy flowers:
The native range of northern catalpa is uncertain. It was once thought to be native only to a small area of the Mississippi River drainage, between Arkansas and southwestern Indiana, but recently discovered archeological evidence from West Virginia suggests that it was present in the Ohio River drainage near here prior to European settlement.
Willow flowers aren’t showy, but there are enough of them that, from a distance, they give the trees an overall yellow fuzzy appearance. Here are some black willow (Salix nigra) flowers:
In North America, most legumes (family Fabaceae) are non-woody herbs. In the tropics, however, legumes are often trees, and some of the most highly prized tropical hardwoods, such as the rosewoods (Dalbergia), are in fact legumes. There are a few North American legumes that reach tree size, but only the mesquites (Prosopis) are traded commercially to any significant extent. Legumes often have showy flowers, and the North American species with perhaps the showiest is the black locust (Robinia pseudoacacia):
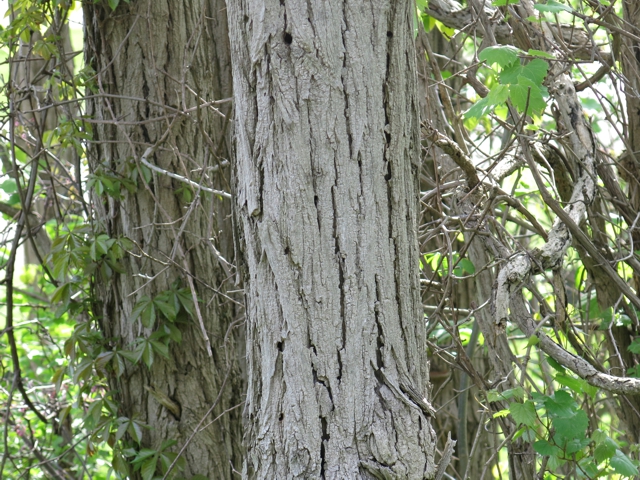
The bark of the black locust is pale gray with a greenish tint, arranged in thick, vertical ropes:
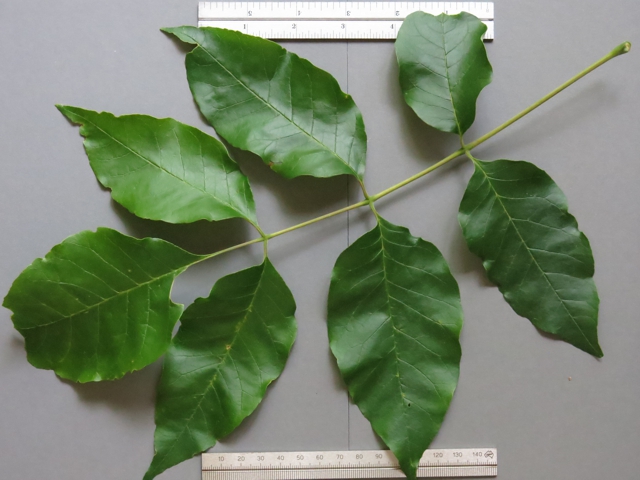
Most legumes have compound leaves of one sort or another. The leaves of the black locust are pinnate, having a central axis (the rachis), with elliptical leaflets along either side:
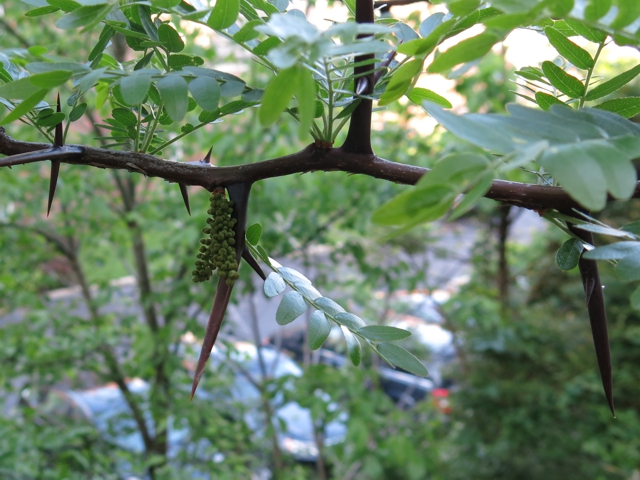
The other North American tree called locust, honey locust (Gleditsia triacanthos), is actually not all that closely related to the black locust. It is most easily recognized by its formidable thorns:
(You can also see a flower bud near the center of the photo; in contrast to the black locust, the honey locust’s flower doesn’t get much bigger than what you see here.)
The bark is much smoother than that of the honey locust, but the thorns give it away:
(Note that there are thornless cultivars that are planted as ornamentals, so a tree that looks like a honey locust but doesn’t have any thorns is probably one of these.)
The leaves are bipinnate, meaning that the leaves are pinnate, and the leaflets are as well:
Although it’s not too common in Ohio, the Kentucky coffeetree (Gymnocladus dioicus) is also a legume, with enormous bipinnate leaves, up to three feet long. I know where there are some Kentucky coffeetrees nearby, but none with leaves close enough to the ground for me to reach, and in any case I don’t have a gray card big enough to lay one on.
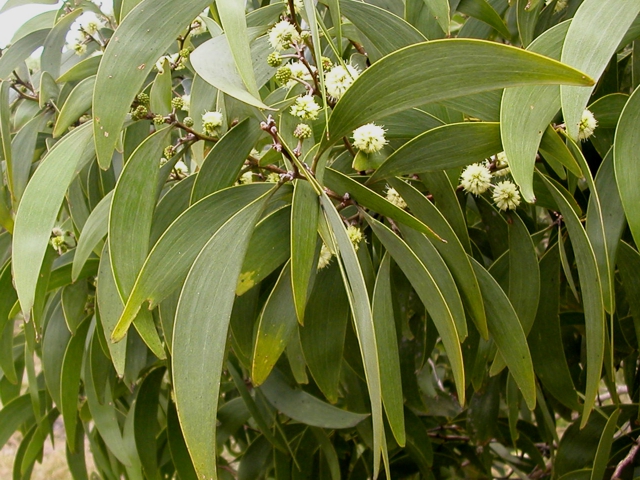
There is an American legume with significant commercial value, but it’s not a North American tree:
This is the koa (Acacia koa) of Hawaiʻi. What appears to be a leaf is actually a structure that emerges as a swelling from the petiole (leaf stem), called a phyllode. Most mature koas have no true leaves at all, but in younger trees, you can usually find a few leaves in the interior of the tree, and they have the familiar legume appearance:
(I took these photos on Kauaʻi several years ago.) The closest relative of koa is Australian blackwood (A. melanoxylon), which also has phyllodes.
The eastern redbud (Cercis canadensis), which we first encountered back in March, also has attractive flowers. Those are long gone by May, but the seed pods are ripening:
It is said that the young pods can be cooked and eaten whole, like snow peas, but I have never tried them. Every year, by the time I think of it, they’ve gotten too old.
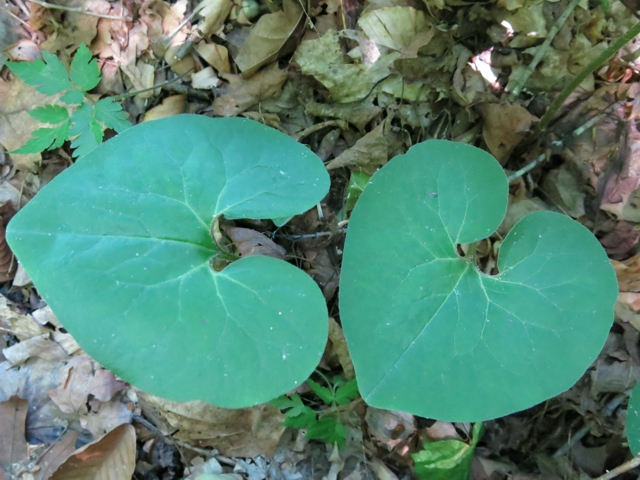
Unusual for a legume, the redbud has simple, heart-shaped leaves:
Another tree of the local forests with heart-shaped leaves is American basswood (Tilia americana):
If you look closely, you can see that the leaf is somewhat asymmetrical near the base, with one side reaching further back than the other. I don’t know why this is, and not all of the leaves are like this, but it’s a feature that is shared by several other unrelated trees.
Elms have asymmetrical leaves, too. Here is a slippery elm (Ulmus rubra):
(It’s a little hard to see the asymmetry in this one.)
And an American elm (U. americana):
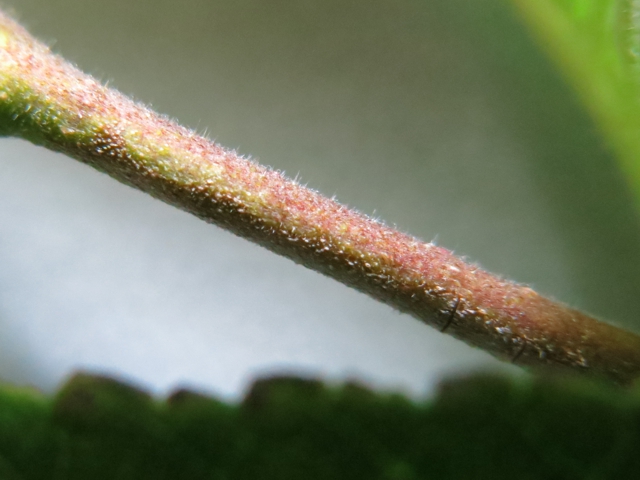
The leaves of the slippery elm are densely covered with fine, stiff hairs. If you place one on a tabletop and press the palm of your hand flat against it, it will stick to your hand like Velcro. American elm leaves are usually much less hairy, but can sometimes look almost identical to slippery elm leaves. The easiest way to distinguish the two is to look at the stem between the leaves. In slippery elm, this stem is hairy:
In American elm, it’s smooth:
Another tree whose leaves have this same kind of asymmetry is the common hackberry (Celtis occidentalis):
Hackberry trees are easy to identify from their bark, covered with warty protuberances:
Unfortunately, the emerald ash borer has reached Athens County. I would estimate that over half of the larger ash trees are already dead or nearly so; the smaller ones seem to be hanging on a bit longer. Here’s a dead white ash in Ottawa County; you can see how the beetle larvae eat through the cambium in such a way as to cut off the tree’s nutrient supply:
The more common species here is green ash (Fraxinius pennsylvanica). The leaves are pinnate, usually with seven leaflets:
The leaves of white ash (F. americana) are very similar:
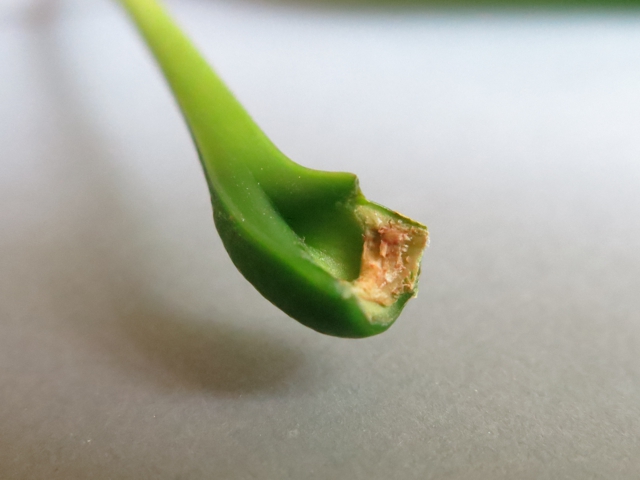
With a leaf in hand, however, there is a simple way to tell the two apart. If you look closely at the base of the petiole, where the leaf attaches to the branch, the cross section of the green ash’s leaf is roughly circular, with a small cutout on top:
While the white ash’s petiole has a much deeper groove:
Rare in Athens County, but more common to the north, the leaves of the black ash (F. nigra) usually have nine leaflets (sometimes more), rather than seven. There is a large tree on our land in Meigs County that I think is a black ash, but the tree is so tall that I can’t get a decent look at the leaves, even through binoculars.
The seeds of both local ashes are encased in samaras that remind me of surfboards:
By May, the forest floor is pretty dark, so there’s not that much going on as far as wildflowers are concerned. Some species occur around forest edges, where there’s more light. One of the common May wildflowers in my yard (but strangely absent in other places that would seem to be appropriate for them) is foxglove beardtongue (Penstemon digitalis):
The flowers that we usually think of as roses are all Asian imports, but there are a few native species, like this Carolina rose (Rosa carolina):
Venturing a bit deeper into the shade, we can find touch-me-nots, especially common along roadside ditches. This one is a pale touch-me-not (Impatiens pallida):
The name comes from the fact that the ripe seed pods are spring-loaded. If you squeeze one, it explodes, shooting seeds in all directions. (It’s a good practical joke when you’re out in the woods with someone who isn’t familiar with the flora: “Here, squeeze this between your fingers.”)
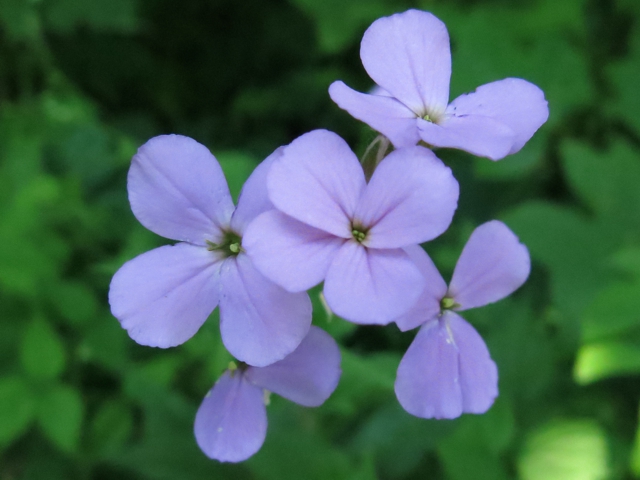
This one is limestone bittercress (Cardamine douglassii):
It also goes by the name “purple cress,” but there are a gazillion other flowers that also go by that name.
In the deepest shade, we can find Canadian wildginger (Asarum canadense, unrelated to culinary ginger):
You have to get down on your knees to see the flowers, though; they’re hidden below the leaves and practically buried in the leaf litter:
One of the most attractive spring/summer ferns is the northern maidenhair (Adiantum pedatum):
There is also a more southerly species called common maidenhair, which looks quite different, but I wasn’t able to find one. Maybe later this year.
When you’re walking in the woods, it pays to look down, and not only for wildflowers and ferns. I almost stepped on this (Odocoileus virginianus) when I went to fill the bird feeders in my backyard a few weeks ago:
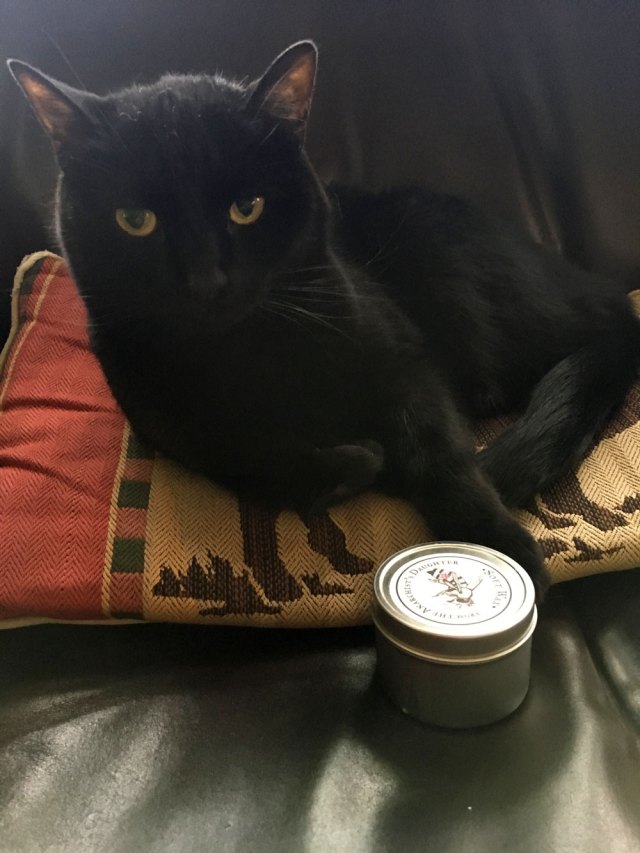
“Really? More wax? Can’t you make my play a piano or ride a Roomba?”
Sometimes the animals in our house get tired of being asked to pose with wax or stickers (hmmm, we still haven’t asked Skeletor the Undying Frog). So it should come as no surprise that Wally shot lasers out of his eyes today when showed a jar of Katy’s Soft Wax.
Yes, Katy has a batch of soft wax up in the store that is available for immediate shipment. You can order it on her etsy.com store.
Note that cats are not necessarily stupid. After he was told he would get a cookie, Wally instantly changed to “marketing genius” (see below).
— Christopher Schwarz
“Why yes, this wax is the finest in the land. I use it daily.”
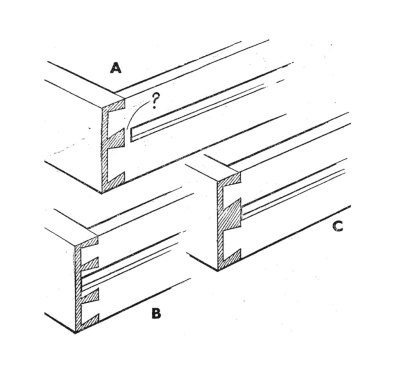
FIG. 1. TYPICAL OPERATIONS SHOWING THE ADVANTAGES OF TAKING THE TOOL RIGHT THROUGH: A. Through groove worked with plough and stopped groove. B. Trenching taken right across and stopped trench. C. Use of plane on straight edge and edge with stops. D. Plain chamfer and one with stops
The practical working of wood is largely based upon an extraordinarily simple fact; a fact which every man who goes in for woodwork, even in an elementary way, soon comes to discover for himself. This is that it is easier to take a tool right through than to stop it short—at any rate so far as hand tools are concerned. Men in the past found this out at a very early period, and traditional methods of construction have been based on and developed around this simple truth, but it is rediscovered daily by every man who picks up saw, plane, file, and so on.
Consider the number of times you experience this; how much easier it is to work a through groove than a stopped one; how simple it is to take a saw right across a piece of wood, but what a different proposition when it has to be stopped short as when sawing the sides of a stopped groove; how straightforward it is to plane an edge straight, yet what a nuisance it becomes when it is stopped at one (or both) ends and you cannot use the plane except at the middle (haven’t you been tempted to plane the edge straight and plant on the stops afterwards!); how a simple chamfer can be formed with the plane in a few seconds, but takes probably ten times as long when it is stopped; and so the list might be continued. These points are brought out in Fig. 1.
Of course, it does not follow from this that grooves are never stopped or that chamfers always go right through. Sometimes you cannot help yourself; possibly the one may be a constructional necessity, or the other so attractive a feature that it is worth the trouble involved. But there is no point in work for its own sake; it is much better to go about things in a simple way, especially when the involved method carries with it no corresponding advantage.
FIG. 2. DRAWER WITH SUSPENSION RUNNERS: Construction at A is faulty for hand work since plough cannot be taken right through. B and C are better
It is because of this that it is generally easy to tell whether a design is the work of a practical man; or, to take another aspect of the same thing, why a design by an artist invariably requires the cooperation of an experienced woodworker to convert it into terms of practical working. A simple example came to our notice recently. The sides of a drawer had to be grooved to fit suspension runners attached to the cabinet sides. They were shown stopped at the front as at A, Fig. 2. Surely no practical man would ever have given such a detail to be worked by hand when it would have been just as easy to arrange things as at C in which the plough could be taken right through before assembling the drawer. In fact the arrangement at B could have been followed, so enabling the runner to afford support almost to the extreme front.
FIG. 3. HOW STONE MASON WORKS HIS MITRE IN A CORNER BLOCK OF STONE
This running-through business is of particular interest because it is largely peculiar to wood, and it is partly due to wood being a natural material which must be used in the form in which it is found (we are ignoring here made-up materials such as laminboard, plywood, etc.). Some materials (metal, plastics, etc.) can be cast or moulded, and projections and stops present no more difficulty than flat surfaces. With timber you fell the tree, convert the log, and then think in terms of so many straight pieces of material. Another point affecting the thing is that wood is comparatively soft so that you can set a metal cutter in a stock (that is, make a plane) and take off shavings, the device having the advantage of helping to make the work straight and true. But of course you have to be able to take the tool through without hindrance.
Perhaps a better appreciation of this point is to compare it with the method used by the stone mason. You cannot use a plane on stone; you have to chip it away with chisel and hammer. There is therefore no point in running through. If a mason has to work a moulding around, say, a window opening, he does not form the joint right at the mitre. Instead he carves a special corner stone as in Fig. 3, this having the two joining mouldings carved in it. Thus we see how a fundamental difference in methods of working has evolved a technique peculiar to the material, this basically affecting the design.
FIG. 4. (left) MASON’S MITRE APPLIED TO WOOD. FIG. 5. (right) NORMAL MITRE USED BY THE JOINER
This brings us to an interesting point. The carver in wood uses tools and methods of working which are similar to those of the sculptor in stone. He uses gouges and chisels as distinct from the planes and ploughs of the joiner or cabinet maker. Consequently the running-through idea does not apply to him. When therefore a wood carver makes a piece of woodwork he often carves it in the solid rather than joins pieces together, and the mitres of his mouldings are like those of the mason. In fact, the same idea is occasionally carried out in joinery in which a timber framing is used. In Fig. 4, for instance, the joint in the moulding is not on the mitre line, but runs straight across in line with the shoulder of the joint. Clearly the moulding plane could not be used on the uprights, and the corner would have to be cut by the carver. This joint is, in fact, known as the mason’s mitre, and the corresponding joiner’s mitre is given in Fig. 5.
It is an interesting thought that if the technique of woodwork had developed through the wood carver rather than the joiner, the mason’s mitre would probably have become the rule rather than the exception.
Bulrush seat for a Voysey two heart chair, one of the builds in the book I’m writing about English Arts and Crafts furniture for Popular Woodworking, scheduled for publication in May 2018. Cathryn Peters wove the seat earlier this year, so the rush still has its beautiful fresh colors. Photo by James Davis, Ruef Design www.ruef.com
When most people stop at a fast food restaurant, they run in and out without so much as a glance at the surrounding landscape – and that’s if they get out of their car at all; a high percentage place their order in the drive-through and sit there idling until they’re at the head of the line.
Cathryn Peters is different, at least when she visits her local McDonald’s in Cook, Minnesota. Peters doesn’t go there for the burgers. Her treat’s in a marshy spot behind the parking lot: bulrush.
Peters has been weaving seats since the 1970s, when her son was an infant. Thinking that she should have something constructive to do besides caring for the baby, her mother-in-law brought over a seat frame she wanted to have woven, along with rush weaving instructions from a magazine article and a pack of paper fibre rush. (The British spelling is used in the United States to differentiate the artificial paper material from the natural cattails and bulrush).
“My mother-in-law talked me into learning how to weave this seat using the instructions in the magazine article,” Peters says. The payment for the job was a walnut drop-leaf table from her mother-in-law’s home. “I got the better end of that deal for sure,” says Peters, looking back. “The chair seat I did looked horrible! It had a big hole in the center, there were overlapping strands and the gauge of paper rush was too small for the chair frame.”
That first chair seat
In the 40-plus years since then, Peters has woven thousands of seats – some for new chairs, some for chairs undergoing repair, and some she bought for resale. She also weaves traditional baskets in a variety of materials and her signature antler baskets.
Although she has taken a few workshops in basketmaking, Peters is primarily self-taught at weaving seats. In the early years, pre-internet, she was able to get some direction from pamphlets provided by material suppliers. But most of her learning came from trial and error or from taking apart seats that were going to be rewoven to figure out the patterns.
In the mid-1980s The Caner’s Handbook by Bruce Miller and Jim Widess, The Craft of Chair Seat Weaving by George Sterns, and a few other books were published – an immense help to seat weavers across the country. Resources in print and online, many of them written by Peters herself, have proliferated since then.
Peters demonstrating her craft
A high point of Peters’s career came in 2006, when she was awarded a fellowship to study in England with basket maker and seat weaver Olivia Elton Barratt. Barratt was the President of the Basketmakers’ Association (BA) and was also installed that October as Prime Warden of Basketmakers in the Worshipful Company of Basketmakers, a guild in existence since 1569.
During her ten-day fellowship and stay with Barratt, they traveled across the country meeting members of the Basketmakers’ and Seatweavers’ Association, of which Peters has been a member since the early 1990s. Barratt also taught Peters how to weave a bulrush boater’s hat at her home studio. They drove to see the harvesting of bulrush from the River Ouse with Felicity Irons, watch the weaving process of making willow coffins (if I were going to be buried, I would definitely want one of those — how cool!) and hot-air balloon gondolas at Somerset Willows, visit the Coats basketry museum, and to the Musgrove Willows farm to learn how cultured willow is grown and how buff willow and white willow are processed.
Peters weaves seats using a variety of natural and commercially prepared materials: natural bulrush, cattails, paper fibre, cane webbing, strand cane, Danish cord, rawhide, oak, ash and hickory bark splints.
Natural hand-twisted rush seats are woven with the round stalk, stems or strands of the bulrush plant, and cattails with the flat leaves. Both plants are just right for harvest between late August and September, when they have reached maximum height and the ends of the cattail leaves have turned brown. Peters harvests the natural bulrush and cattails from her rural northern Minnesota farm and the surrounding area.
With so many years of experience, Peters can weave a seat in far less time than it would take a beginner. The 15” seat for the hand-twisted bulrush Voysey chair would typically take her from six to eight hours to complete. After a couple of years, the fresh green and gold tones of the natural rush will fade to a nice, warm honey color.
If you’re interested in learning how to weave hole-to-hole cane and over-the-rail cane seats, Peters will be teaching a class at the Marc Adams School of Woodworking on the weekend of Sept. 16 and 17, 2017.