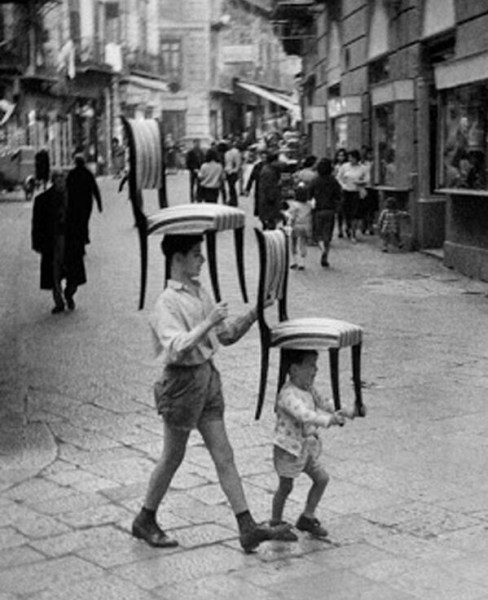
On Saturday, Chris Schwarz and I had our biennial chair conversation. I subjected him to a mind probe about his recently purchased a Welsh stick chair and an Irish Gibson stick chair he is currently building.
Suzanne: Please confirm if you have more Welsh chairs (made by other chairmakers) than house cats.
Chris: We are at a 2:5 chair:cat ratio. To be honest, Chris’s (Williams) chair has melted into the fabric of our daily lives and furniture because it isn’t a “room broach,” like so many pieces of custom furniture are. That’s the beauty of these chairs – they are so charitable. Welsh chairs like the one I purchased last week are as rare as hen’s teeth – especially here in the States. It’s a bit odd seeing it in an American house. I put it by my fireplace so it might feel a bit more comfortable.
Suzanne: Your newest chair was purchased during your visit with John Porritt. Not to get too personal but to use a term referenced in “The Anarchist’s Tool Chest” (p.50) did you experience the “tingling in the bathing suit area” when you saw this chair? What struck you about the chair?
Chris: My first sight of the chair was less like a tingling and more like the aggressive groping I received from Kym Harper during 8th grade.
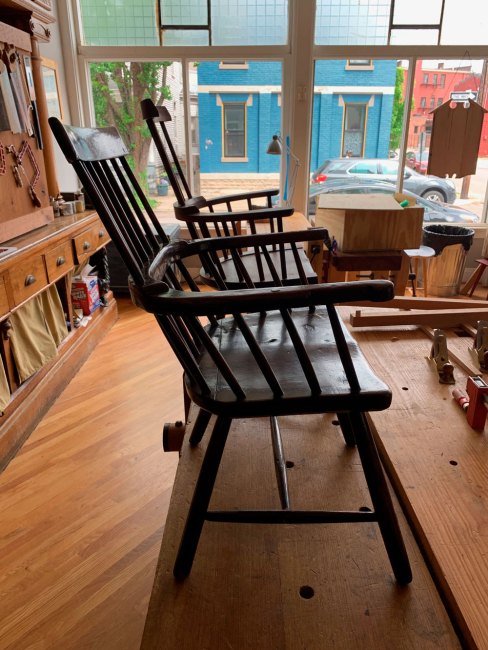
It was the second-best chair that John Porritt owned (the best one was in his house, see the gallery below). That chair is good enough to be in a museum.

What I like about Welsh stick chairs, especially the one I bought, is their motion. Most chairs are designed to look fairly balanced and stable to give you the confidence to sit in them. Welsh chairs, on the other hand, have a wildness.
The chair rakes back aggressively. It suggests it will be a comfortable chair to lean back in. And it delivers on the promise.
Also, there are many little details of this chair that deserve study. Some of the tenons into the arms are blind – not through. That’s quite unusual, and I am eager to work out the best way to build a replica. The crest rail has some subtle shaping that is difficult to photograph. The ends have a bit of a waterfall-like curve.
The armbow is clearly a bent stick that has been resawn, scarfed and bookmatched. It’s just a lovely piece of work. The only bummer about the chair is the shiny finish – likely shellac – which looks a bit wrong to me. I’m going to live with it for a while before I consider cutting it back. I’m not eager to mess with antique furniture as that’s not my specialty.


Suzanne: You have given a lively description of why this chair has such a strong pull for you. I’m looking forward to reading about more details after you have spent more time with the chair. As for the finish, live with the chair for a long while before thinking about a change.

When comparing the new Welsh chair with your American Welsh chair you wrote the chairs look distantly related, but also your chair is “uptight” in comparison to the old chair. That made me take a second look at the side view photo of the chairs. The older chair looks more relaxed and your chair perhaps has a stiffness to it. What elements of your chair do you think make it “uptight” and are you OK with that?
Chris: There are many elements of my chair that are more “uptight” in the craftsmanship. Some are obvious and some aren’t.
Obvious: I use hard edges and facets on every possible surface. I don’t like things that are rounded over. Even my seat, which is saddled and curved, has a sharp line surrounding it. The legs and stretchers are faceted – not turned or smoothed to round. I don’t round over the arms. My crest – same thing.
Less obvious: My sticks are consistent and have little tapering or entasis. One of the hallmarks (and charms) of an old Welsh stick chair are the small handmade inconsistencies in the construction. The sticks are not as regular and may taper or have a lot (or no) entasis. Also, I shoot for precise spacing of my sticks, which adds to the overall sharpness of the design.
I am, of course, happy with my design. It reflects the way I approach furniture, writing, cooking, music and making my bed. I like my desk to be clean….
But, I would like to be able to work in the older mode as well. This will require just as much thought and work. It’s not a sloppiness or a shortcut.
Suzanne: Adding to the sense of relaxation in the Welsh chair are the spindles under the arm. They tilt back in concert with the back of the chair and are another suggestion offered by the chair to sit down and lean back.
Your chair by itself is clean and it is evident you have thought through every detail. When placed next to the older Welsh chair the hard details of your chair stand out. If we were looking at two humans they would be an old pensioner next to an edgy teenager.
A few more questions about details. When you are working to make each detail exact and as precise as possible are you losing spontaneity?
Chris: Probably. But I think spontaneity in furniture should be in very low doses. Some people can make big design swings (and succeed) while building an object. I am not that kind of designer or builder.
Suzanne: Using pre-made dowels for spindles saves time, and you aren’t trying to make replicas, but does it take away from the Welsh aesthetic of the chair?
Chris: Perhaps. I use factory dowels in the classroom to remove a barrier that many first-time chairmakers face, which is the difficulty of making long, thin sticks. I make my own sticks for customer chairs. Even so, every stick – factory made or not – is scraped and shaped to fit. They do give a very consistent place to start, and they do contribute to the overall consistent look of the finished chair, like it or not.
Suzanne: Adding the sharp edge around the seat echoes the sharp edge of the armbow but does it make the chair more inviting?
Chris: I think the sharp edge around the seat removes the mushy line I see on many chairs. I hate mushy lines. My opinion is either have a sharp line or blend the seat and spindle deck together completely. The former is my approach because I like to repeat design elements up and down a chair. The second option (no line whatsoever) is one employed by old chairmakers who weren’t trying to show off.
Suzanne: You also wrote in a recent post you obsess over every detail. When do you know when a chair is finished and you can comfortably walk away?
Chris: For me, I spend a long time looking at my work from different vantage points and in different lights. I’m looking for things I can improve. I keep working until there’s nothing left that I can improve.
That doesn’t mean the results are perfect. There are lots of things on a finished chair that are not perfect. Those imperfections are details I cannot repair without starting over. A good example of this might be a wedge that is 5° off the axis I was shooting for. I can’t fix that without destroying the entire thing.
For me, making furniture is as much about looking as it is about doing.
Suzanne: I think it is the same for craftsmen and artists in any field. Step back, step away then come back to see what needs to be tweaked before saying the chair is done. You will also have a list of changes for the next chair because chair begets chair, no?
Chris: Yup. I have already made changes to my American Welsh Stick Chair. I incorporated those into a chair that hasn’t yet been made public. I also have a couple minor changes to make to the arms in future chairs. I don’t think it ever ends. Heck, I still make changes to my tool chests….
Suzanne: On to the Gibson, a variation of the Irish hedge chair! In “Irish Country Furniture 1700-1950,” Claudia Kinmonth wrote, “…although the origin of the name, which may be associated with Oldcastle, county Meath, is unclear. This design is distinguished from others by the distinctive ‘W’ (or less often an ‘M’) shaped arrangement of back spindles…Gibson chairs were once common in county Cavan, although they were generally made in northeast Leinster, especially counties Louth, Monaghan, Meath and Westmeath.”

The first Irish stick chair I found was painted green and not a Gibson but I loved it. Then, you turned up a true Gibson (although not painted green) and I liked it even more. These are wide and open-armed chairs. You have started making your first Gibson chair. What are your thoughts so far?
Chris: I’m in the middle of building the first one, and today I fit the arms to the front spindles.
A couple things really stand out for me with this chair. It seems to me to be an all-wooden version of a Morris Chair. The geometry and seat height (and other factors) give me the same feeling as when I first started making Morris Chairs in 1997 or 1998. The back leans 25°. That’s insane. Plus the seat is low – 15”. The position of the arms is similar. The extreme (24”) width of the seat is also similar to Morris Chairs. I’m not saying one influenced the other but the similarities are remarkable.
The best part of building the chair is trying to get into the heads of the chair’s original makers. This is necessary because there is obviously a right order of operations and a wrong order of operations when making this chair.
After I drew the chair full-size on paper and started to work it out at my bench, I received little flashes of communication across the centuries from Ireland. Things that aren’t completely obvious.
Like today: Mounting the arms on the front sticks first allows you to easily find the 25° angle of the two outside back sticks. Once you drill those, then it’s a piece of cake to drill the ‘W’-shaped sticks.

In other words, once you get into the briar patch, it’s obvious how to get out. Until then, it looks like a nut-doodle chair that is hard to build. It isn’t.
Mostly, I’m looking forward to sitting in it. My spine has a lot of questions.
Suzanne: I have to take you to task for your “Do the Irish have big butts in general” question on an Instagram post last week. I believe you could have used “generous bottoms” or “perhaps a bit wide abaft the beam” instead. The Gibson is a big welcoming chair and nothing wrong with that, boyo.
Chris: Apologies. But could you answer the question?
Suzanne: I’ll do some research and get back with you much, much later.
Chris Williams, your Welsh brother, will be returning to Covington later this month. What are you most looking forward to during his visit?
Chris: Mostly the arguing about the chairs. We work in very different ways. And we see the chair in different ways. He has baggage I can’t claim. And I have my own personal hang-ups. In the end, we’re both better for it. And I don’t have anyone else that I can talk to about this stuff who isn’t bored out of their minds after five minutes of splay-splaining. So my relationship with Chris is a healthy and wonderful thing. It is one of the greatest gifts the internet has given me.
Suzanne: What is the perfect place to put your chair (either one). Sit down and get comfortable. What are you drinking and what are you reading?
Chris: I like to be alone. The dream is to put it by a fireplace. Three-legged cat on my shoulder. Glass of red at hand. And a book of short stories by Wendell Berry.
Suzanne: My Welsh chair is by a fireplace, bottle of red and rereading “Tinker, Tailor, Soldier, Spy.” The Gibson under a tree, sipping a fine whiskey, memorizing “The Lake Isle of Innisfree,” a cat sprawled next to me (because the chair has plenty of room).
The gallery has two more images of the green Irish stick chair and a gathering of Gibsons.
— Suzanne Ellison


