I am not much of one for New Year’s Resolutions, preferring instead to periodically articulate attainable goals for the coming year rather than pie-in-the-sky wishes that will soon evaporate. But this year I was adamant that the pseudo-albatross of “A Period Finishers Manual” would be on that list for the last time. Yes, it has simultaneously been a labor of love while being a weight on my neck for the past few years.
Last week was a momentous one here in the hinterlands: The first installment of the book was sent to the first group of reviewers for their critiques, feedback and guidance. These folks were selected as readers specifically because they were avowedly finishers of limited experience, and could tell me whether or not what I was writing made sense to them. They are the proxies for every woodworker who might eventually pick up the book.
As we began I gave them this charge:
“I wrote the entire manuscript for the Studley book in about six weeks averaging over a thousand words a day. I have been working on this one off-and-on for almost six years, happy sometimes with a couple hundred words at a time. In the former case it was all I could do to wring out a manuscript from what I thought was a paucity of knowledge and yet it flowed like water from a firehose. I am having the exact opposite problem here, trying to cut it down to an easily readable yet beneficially instructive book, a determination you are charged with helping me to achieve.
“My tone is just the way I write, I want the reader to feel as though we are simply conversing.
“Further complicating things on my end is that I do not write in a linear fashion, never have and likely never will. I’m 65 with little desire for any fundamental changes in life. In other words I do not begin at The Beginning and conclude at The End. I write episodically, creating and working on vignettes throughout the manuscript as the spirit moves me (even true when I write fiction) then merging them and backfilling as necessary. It is a Billy Pilgrim sorta thing, I guess, or was it George Orr? That results in the current situation wherein the skeleton of the manuscript is complete but the connective tissues are being grafted in now. That is sometimes much more time consuming than creating the original mass of words.
“My current strategy is to get you the manuscript in a linear fashion, hence this first document is the Introduction, basically the mission statement of the book. Though not at all technical, it should give you some sort of roadmap about the journey we have begun together. Feel free with your comments and edits.”
From this point on, approximately every two weeks, another chapter of the manuscript will be sent to this naïvely valiant group of volunteers. I say “naïve” because by the time we are finished, they, too, will be glad to see it in the rear-view mirror of their lives.
Once a passage has passed from my hand to theirs and back, with the revisions integrated (I may or may not accept their suggestions, but the results thus far indicate we are all on the same page – all the suggestions have been excellent and useful), the sections will be passed on to the second group of reviewers. They are highly experienced finishers with decades of experience, which will allow them to comment on the workbench techniques and technical veracity of my verbiage.
At the moment the manuscript is nine chapters, although a couple of them are quite long-ish and may be subdivided.
It looks like I just might meet my goal of being able to move on to the next Roubo volume by Christmas.
Hey, we never put our books on sale. But we have several hundred T-shirts that were dwelling in our cellar that we need to clear out. These are leftovers from Handworks and are of excellent quality.
The shirts are 100 percent cotton American Apparel shirts. Made in Los Angeles and printed in Kentucky and Indiana. We are selling them for $17 plus $5 shipping anywhere in the United States (sorry these ship only in the U.S.). Basically, these are at cost, plus what it costs to box them and ship them. Quantities are limited, so don’t dawdle.
The fastest way to see the shirts is to go to the Apparel page of our site via this link.
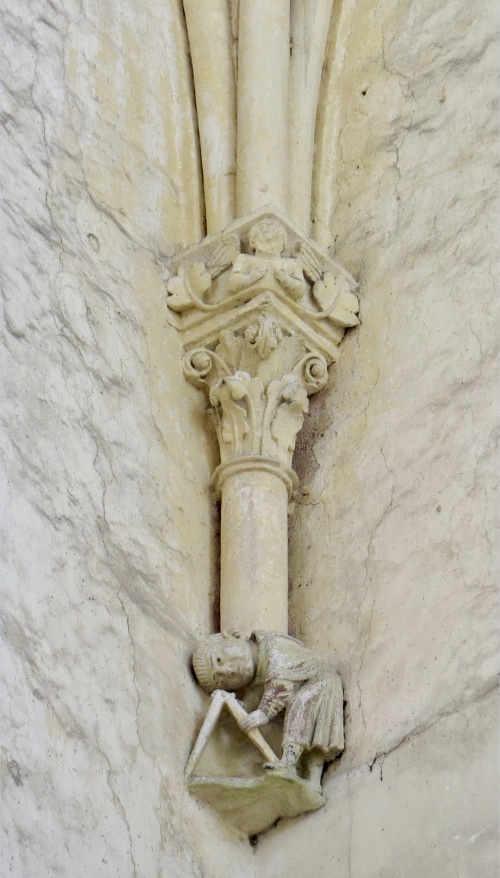
Le maître du trait, Abbaye de la Trinité, Vendôme, France.
The trades of the carpenter, joiner, cabinetmaker and turner, and their tools, have long been an inspiration for artists. Woodworkers and tool historians have, in turn, studied artwork to learn how tools were used in the past and how they have evolved. Some artwork centers around a celebration of just the tools and in some cases tools are arranged as amusements.
Note: If you are a long-time reader of this blog you will see some familiar images.
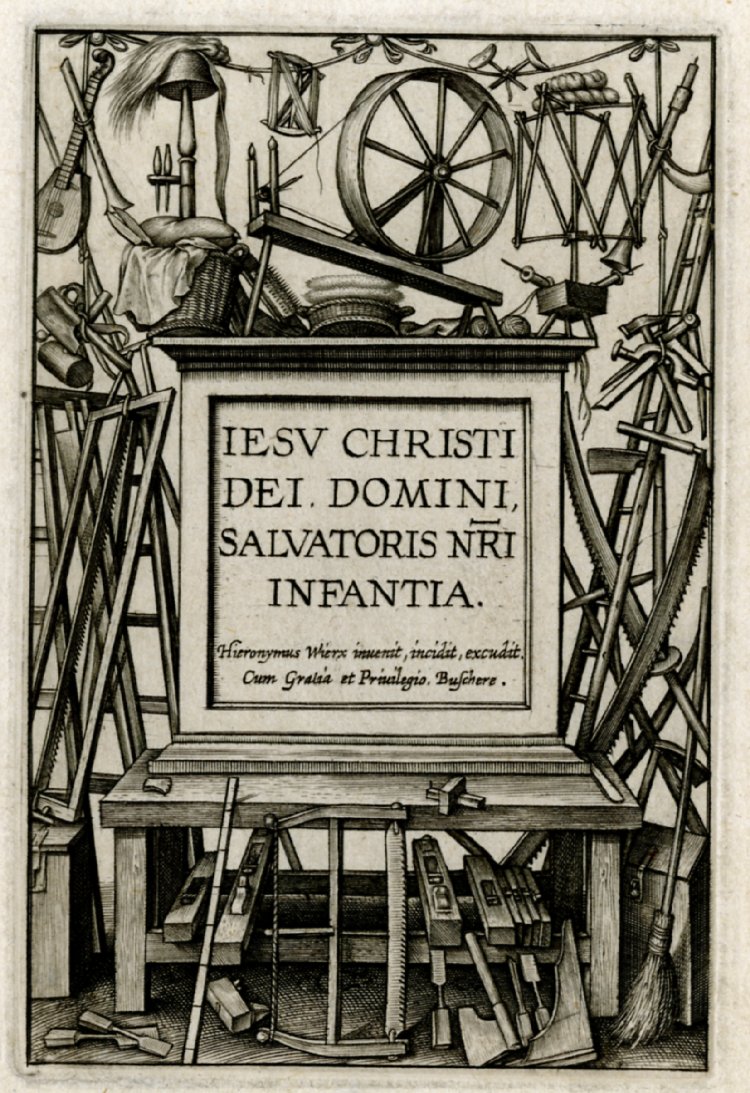
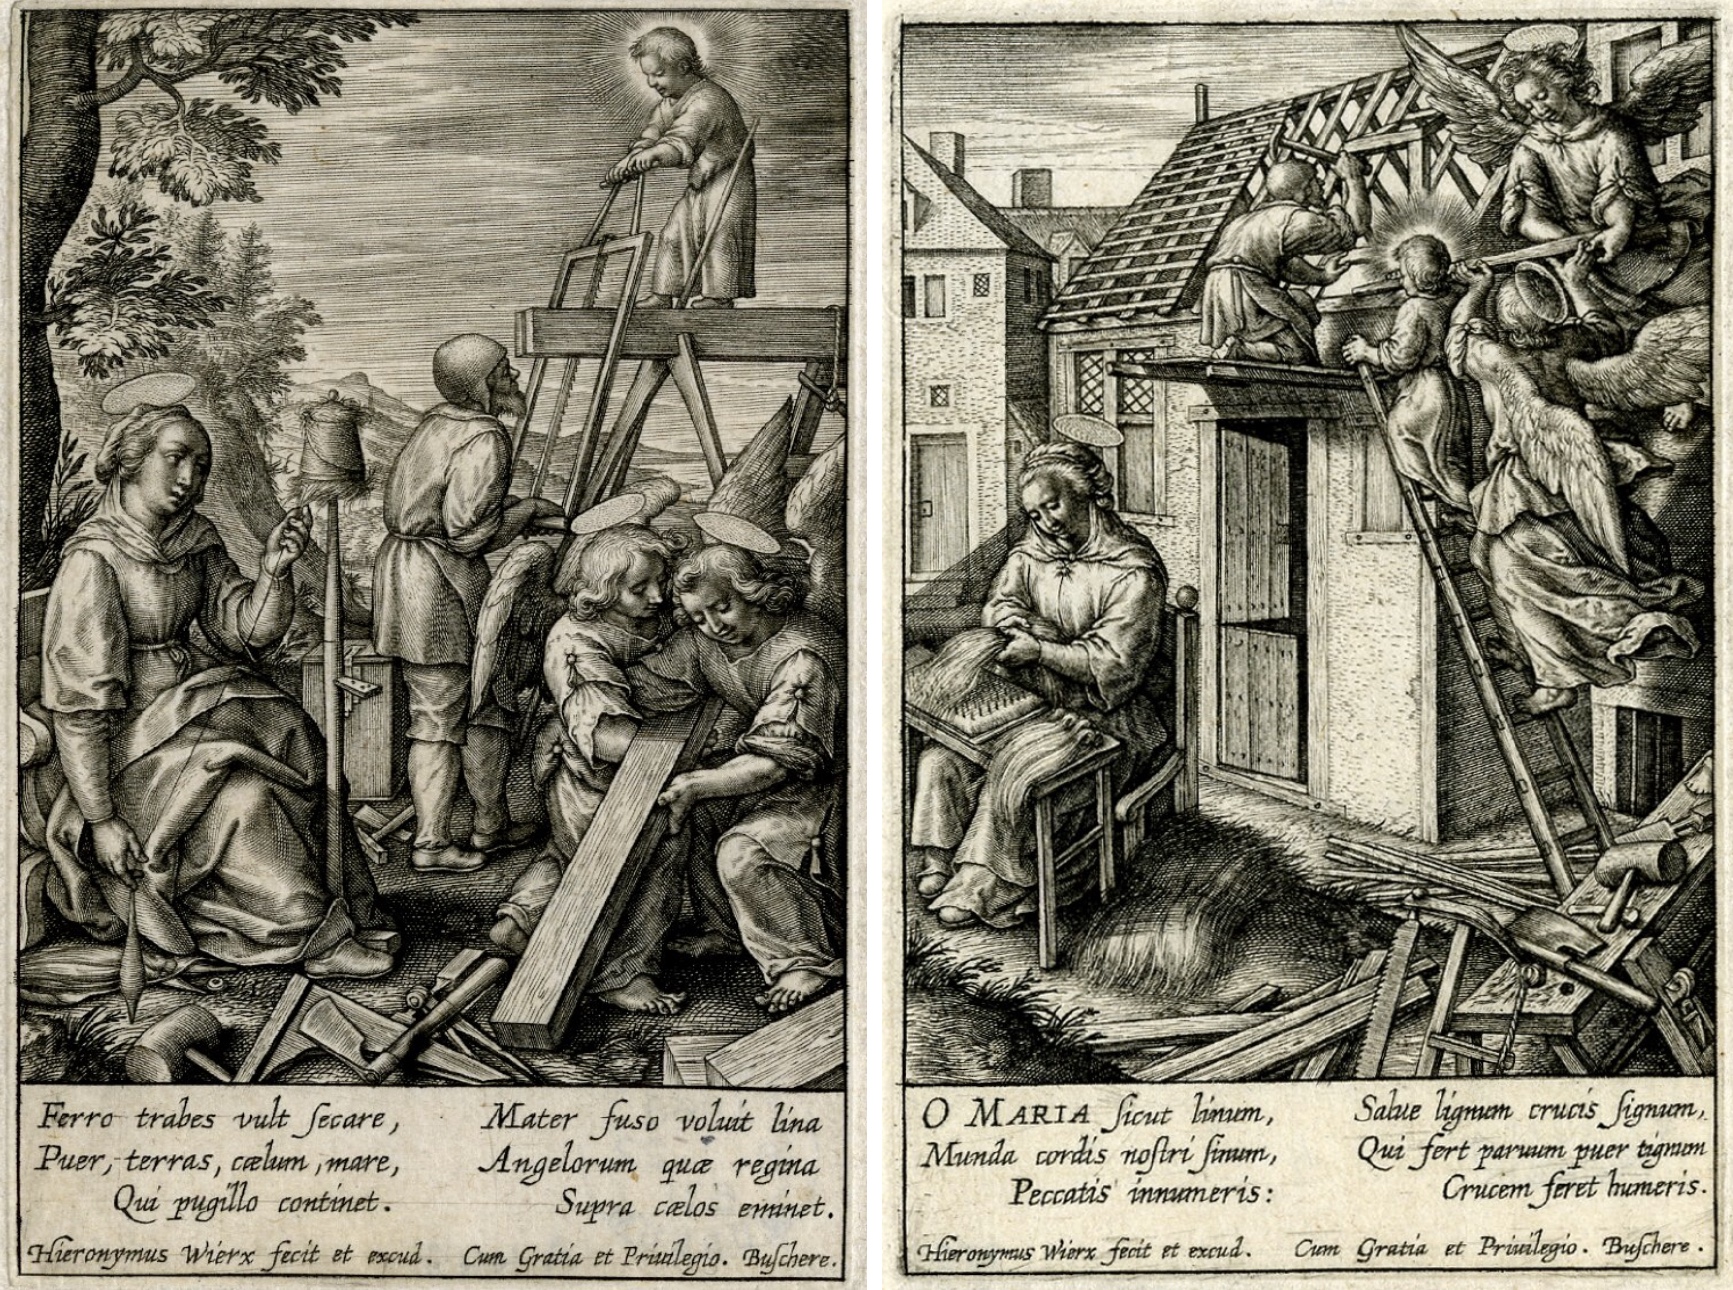
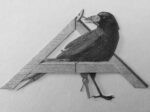
‘Life of the Infant’ by Hieronymus Wierix (1553-1619), Antwerp. Rijiksmuseum.
This title page for a portfolio of 12 plates about the childhood of Jesus is one of the iconic images in the woodworking world. Wierix used a square cartouche for the title with a surround of tools. The clutter can be overwhelming, however, when all the plates are assembled and each page studied the title page gets easier to figure out.
All of the tools used by Jesus, Joseph and the helper angels, as well as the implements used by Mary, are “summarized” on the title page. Wierix essentially made a tantalizing opening sequence of just the tools, perhaps not surprising as his father was a painter and cabinetmaker.
The construction of Noah’s Ark has been a rich source of information on early woodworking tools and methods.
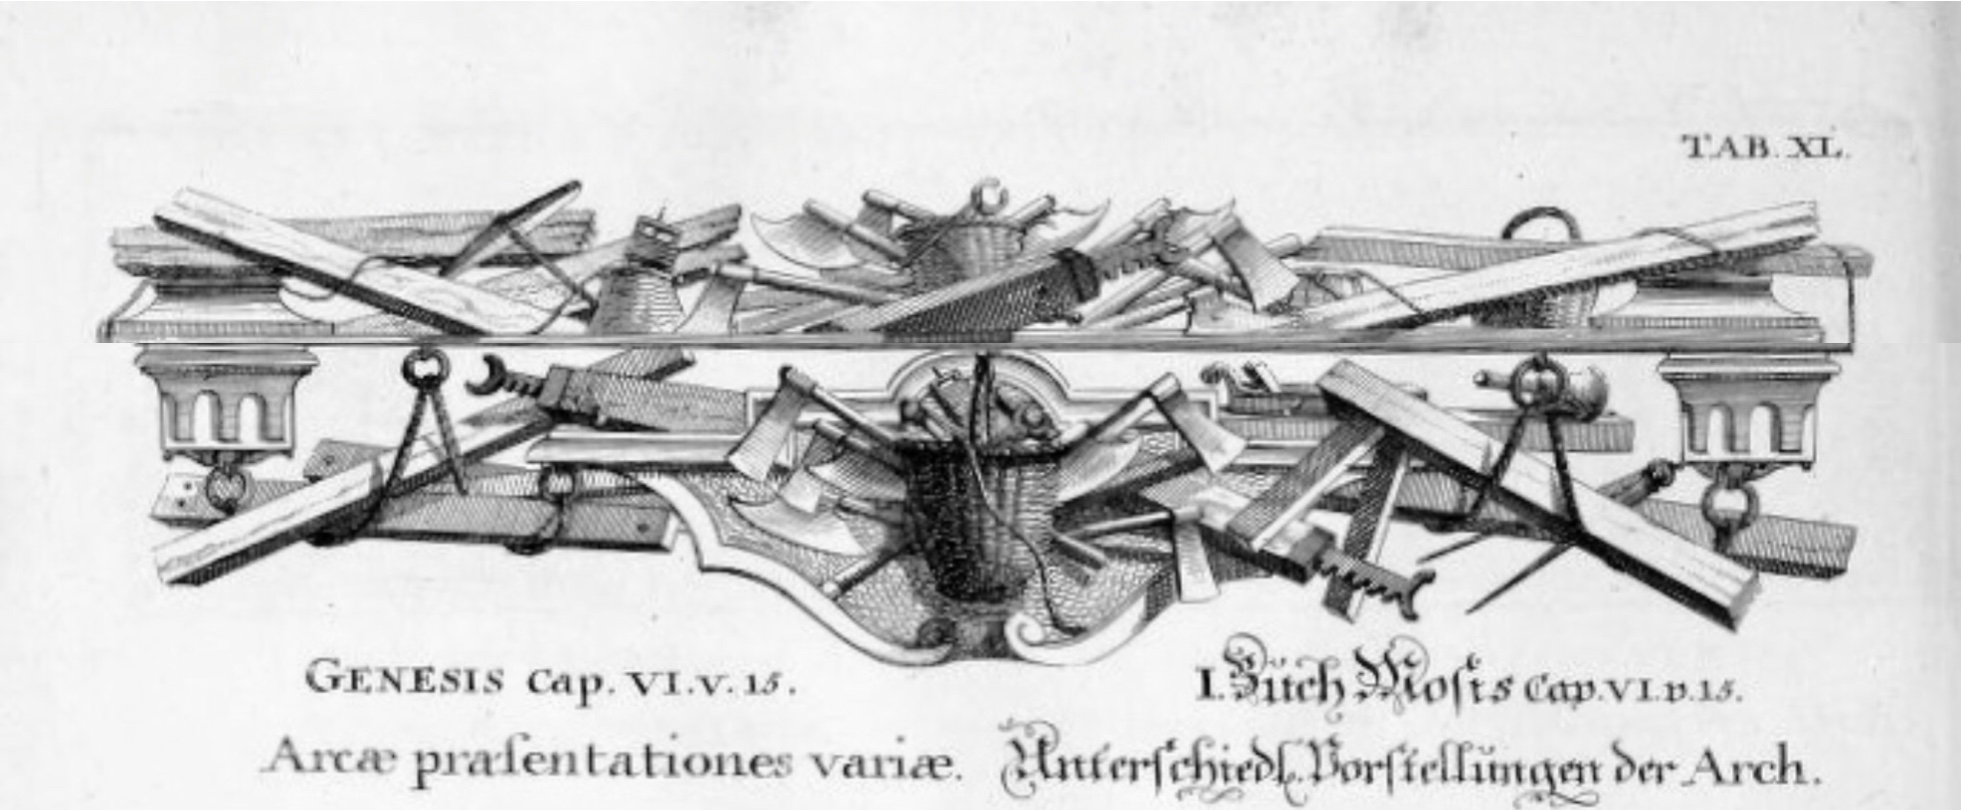
From ‘Physica Sacra, Volume I’ by Johann Jakob Scheuchzer (1672-1733), Swiss. Internet Archive.
The four volumes of Scheuchzer’s ‘Physica Sacra’ contain numerous engravings illustrating the Old Testament and its natural life. Each engraving is augmented with a tableau which provides a frame for the image. At the top, the spool of the line marker (to the left of center) unwinds, the line wends it way to the right, drops over the side and draws the eye to the bottom set of tools.
Of course, the top and bottom tableaux let us look at the tools in use at the time of Scheuchzer, but not necessarily available to Noah.
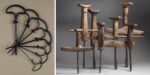
Tool Trophies
How better to honor a woodworker than to surround his portrait with his tools?
Hans Bach, 1617, carpenter and fiddler, BnF. Adam Billaut (1602-1662), cabinetmaker and poet, Château Versailles.
Hans Bach is portrayed with his carpentry tools, his fiddle and his favorite beverage (?). The placement of his tools is similar to a trade card. As can be seen in Billaut’s portrait a more formal arrangement is to form the tools into trophies.
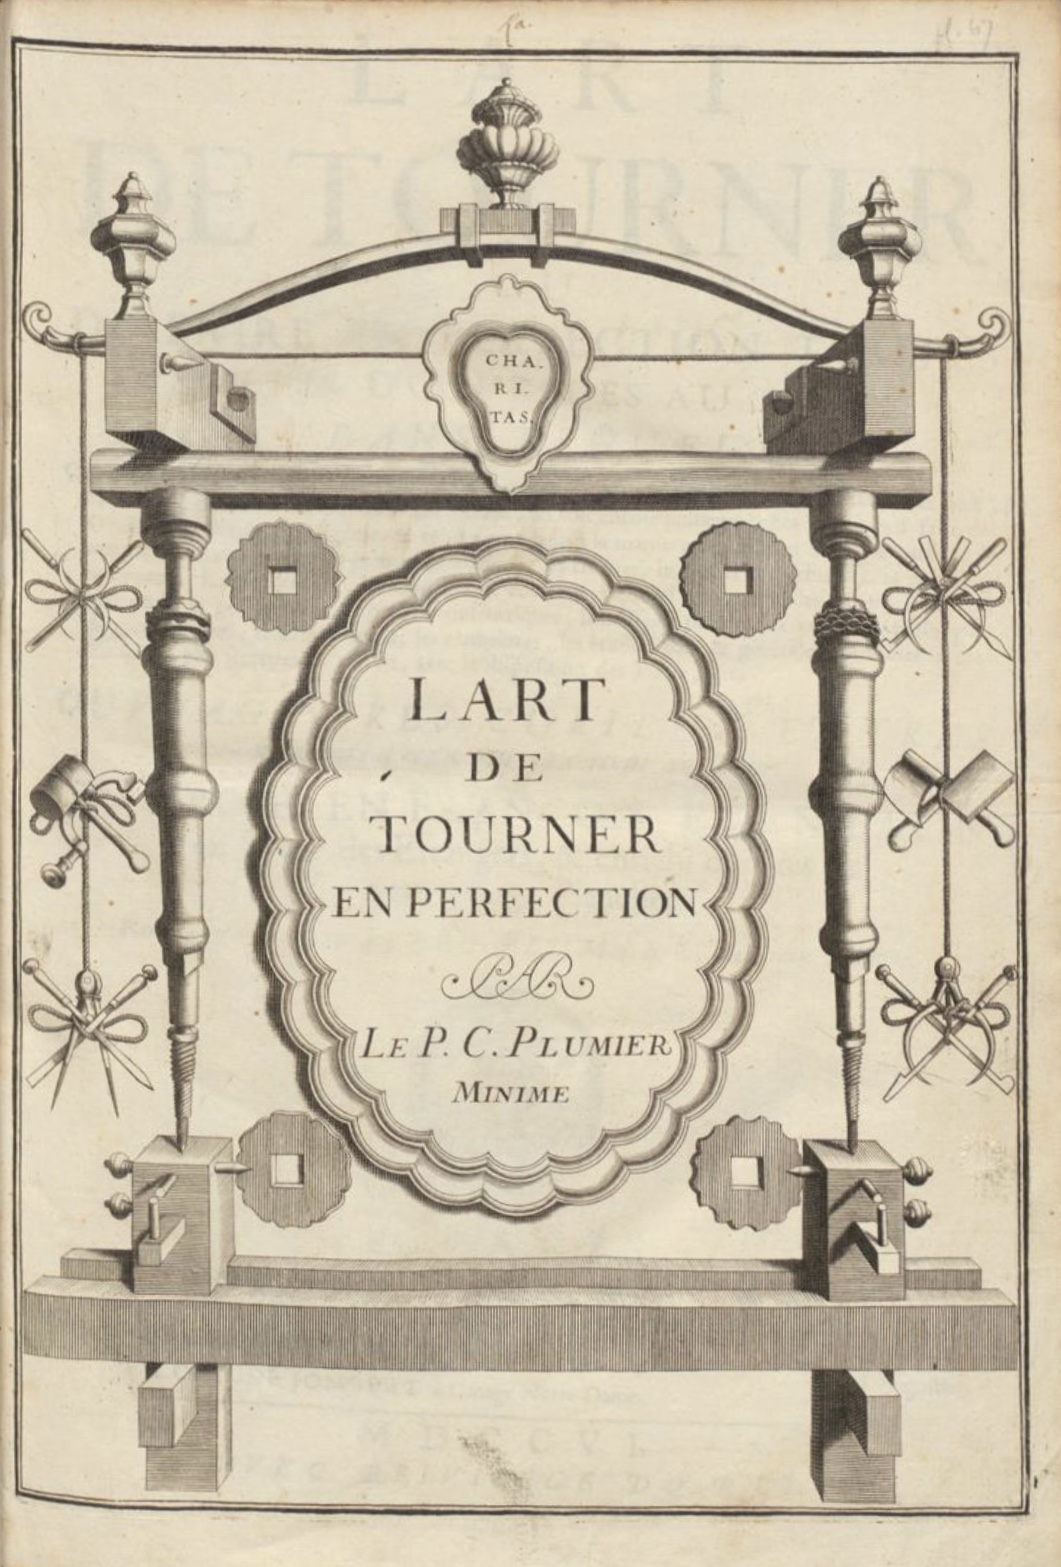
A trophy is a celebration of victory and achievment. The items in a trophy are tied in bundles with a line or ribbon and the bundles hang vertically. Trophies often feature weapons and armor (spoils of war) or tools of a trade. Other than a plaque or maybe a mythical being the trophy is all tools. In the Wierix engraving two small trophies hang on either side of the title cartouche. And on the title page to Plumier’s opus on turning (above) two very neat trophies help introduce the tools used in turning.
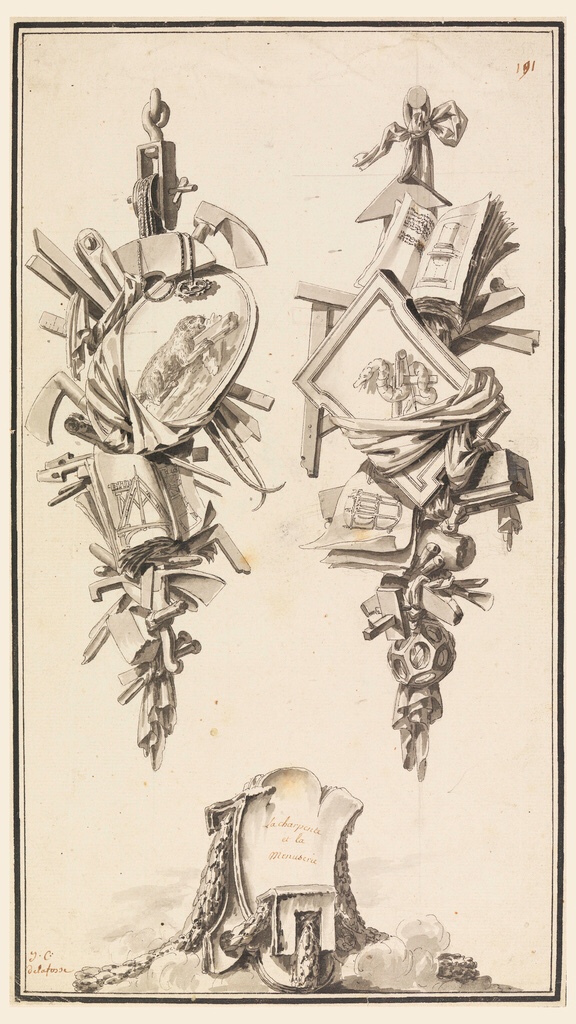
Jean-Charles Delafosse (1734-1789), dated 1770, Cooper Hewitt Design Museum, New York.
Delafosse crammed in so many extras into his trophies for ‘La charpente et la Menuisier’ that it is hard to see the tools for the flourishes. These trophies are more a tribute to the professions than an attempt to fully display the tools.
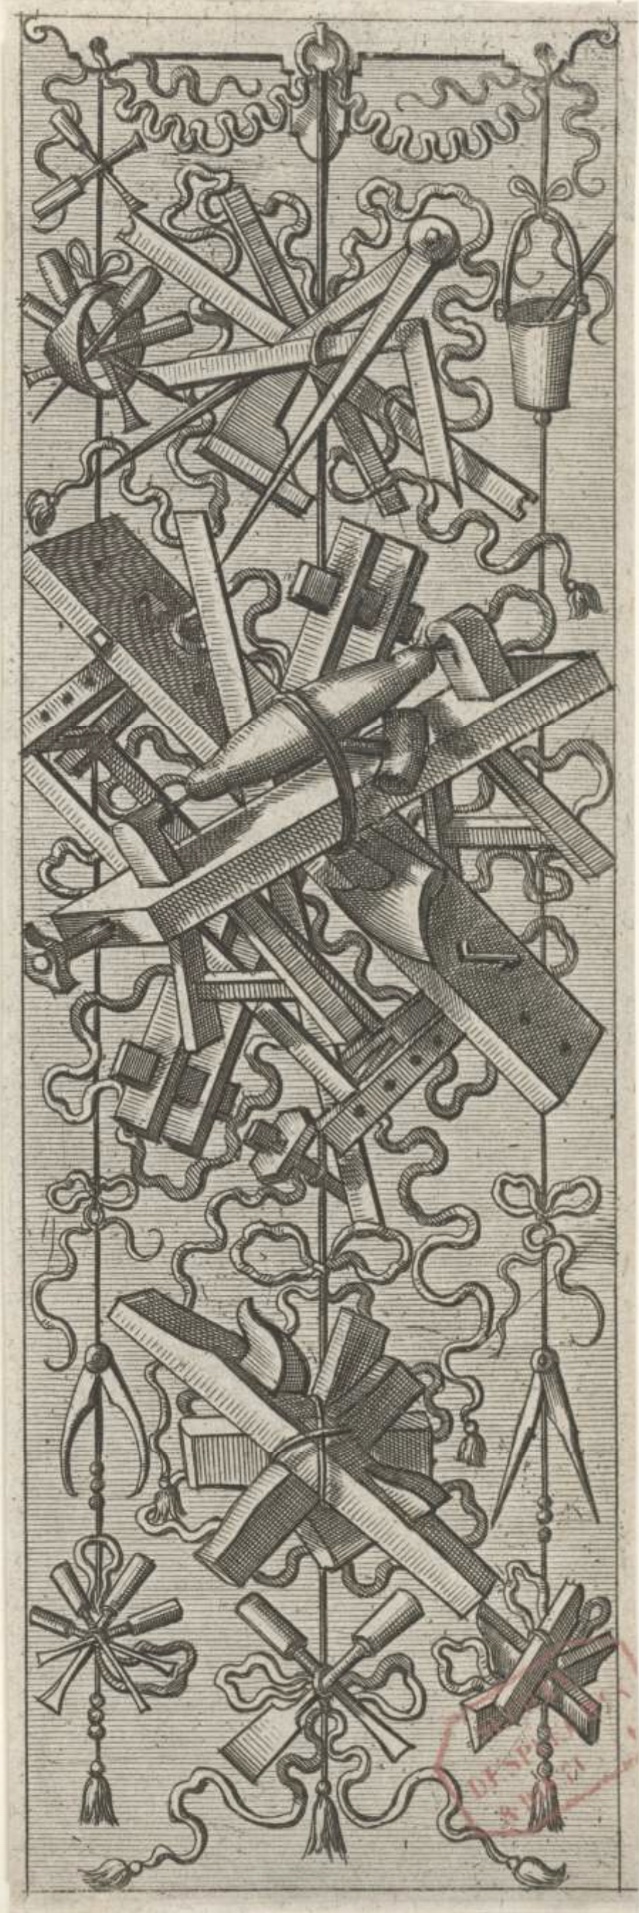
Johannes of Lucas van Doetechuk, 1572, Rijksmuseum.
Completed two hundred years before Delafosses’s work, this trophy (one of four on the same paper) gives a clearer view of the tools. It has the surprise of including a workbench with a holdfast. I am convinced the most appropriate method of viewing a trophy is to first drink a glass or two of beer or wine. A relaxed mind is crucial.
A 19th century cabinetmaker’s sign with a spectacular asking price of $18,000.
Two modern versions of a trophy from the delightful ‘Grandpa’s Workshop’ by Maurice Pommier. Maurice fills his book with creative depictions of tools and I urge you to get this book (from Lost Art Press).
Caricatures
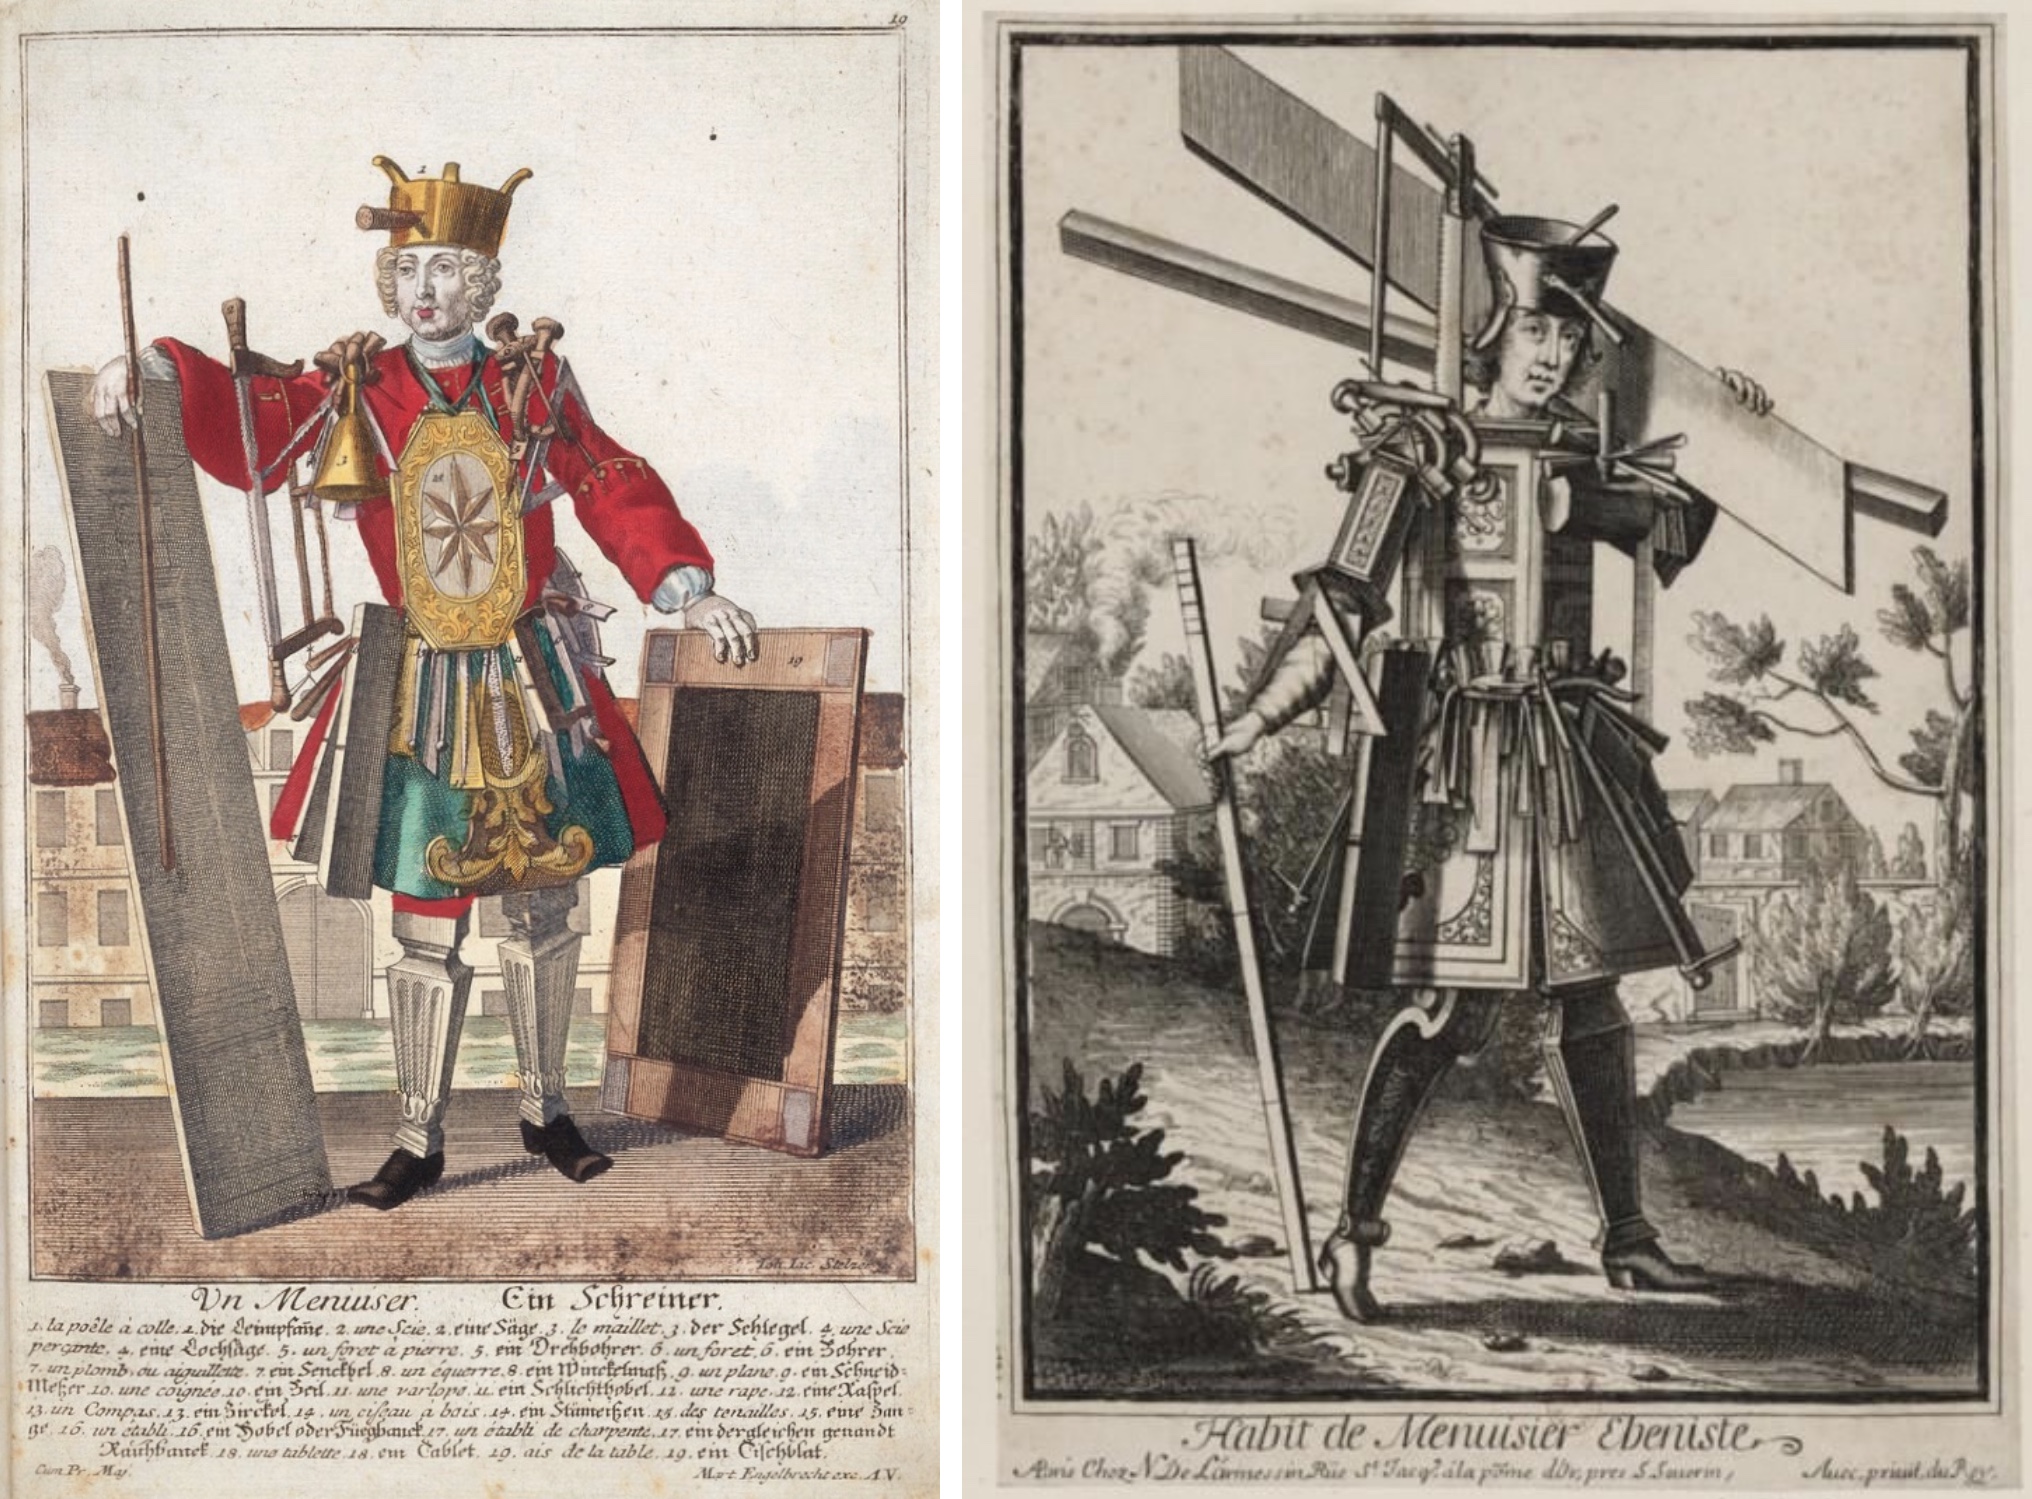
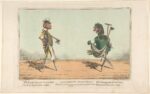
There are many books illustrating trades with a small engraving and a short paragraph. The lighter side of this category is the Costumes Grotesques, or Costumes of the Trades in which the tradesman is dressed with the tools of his profession.
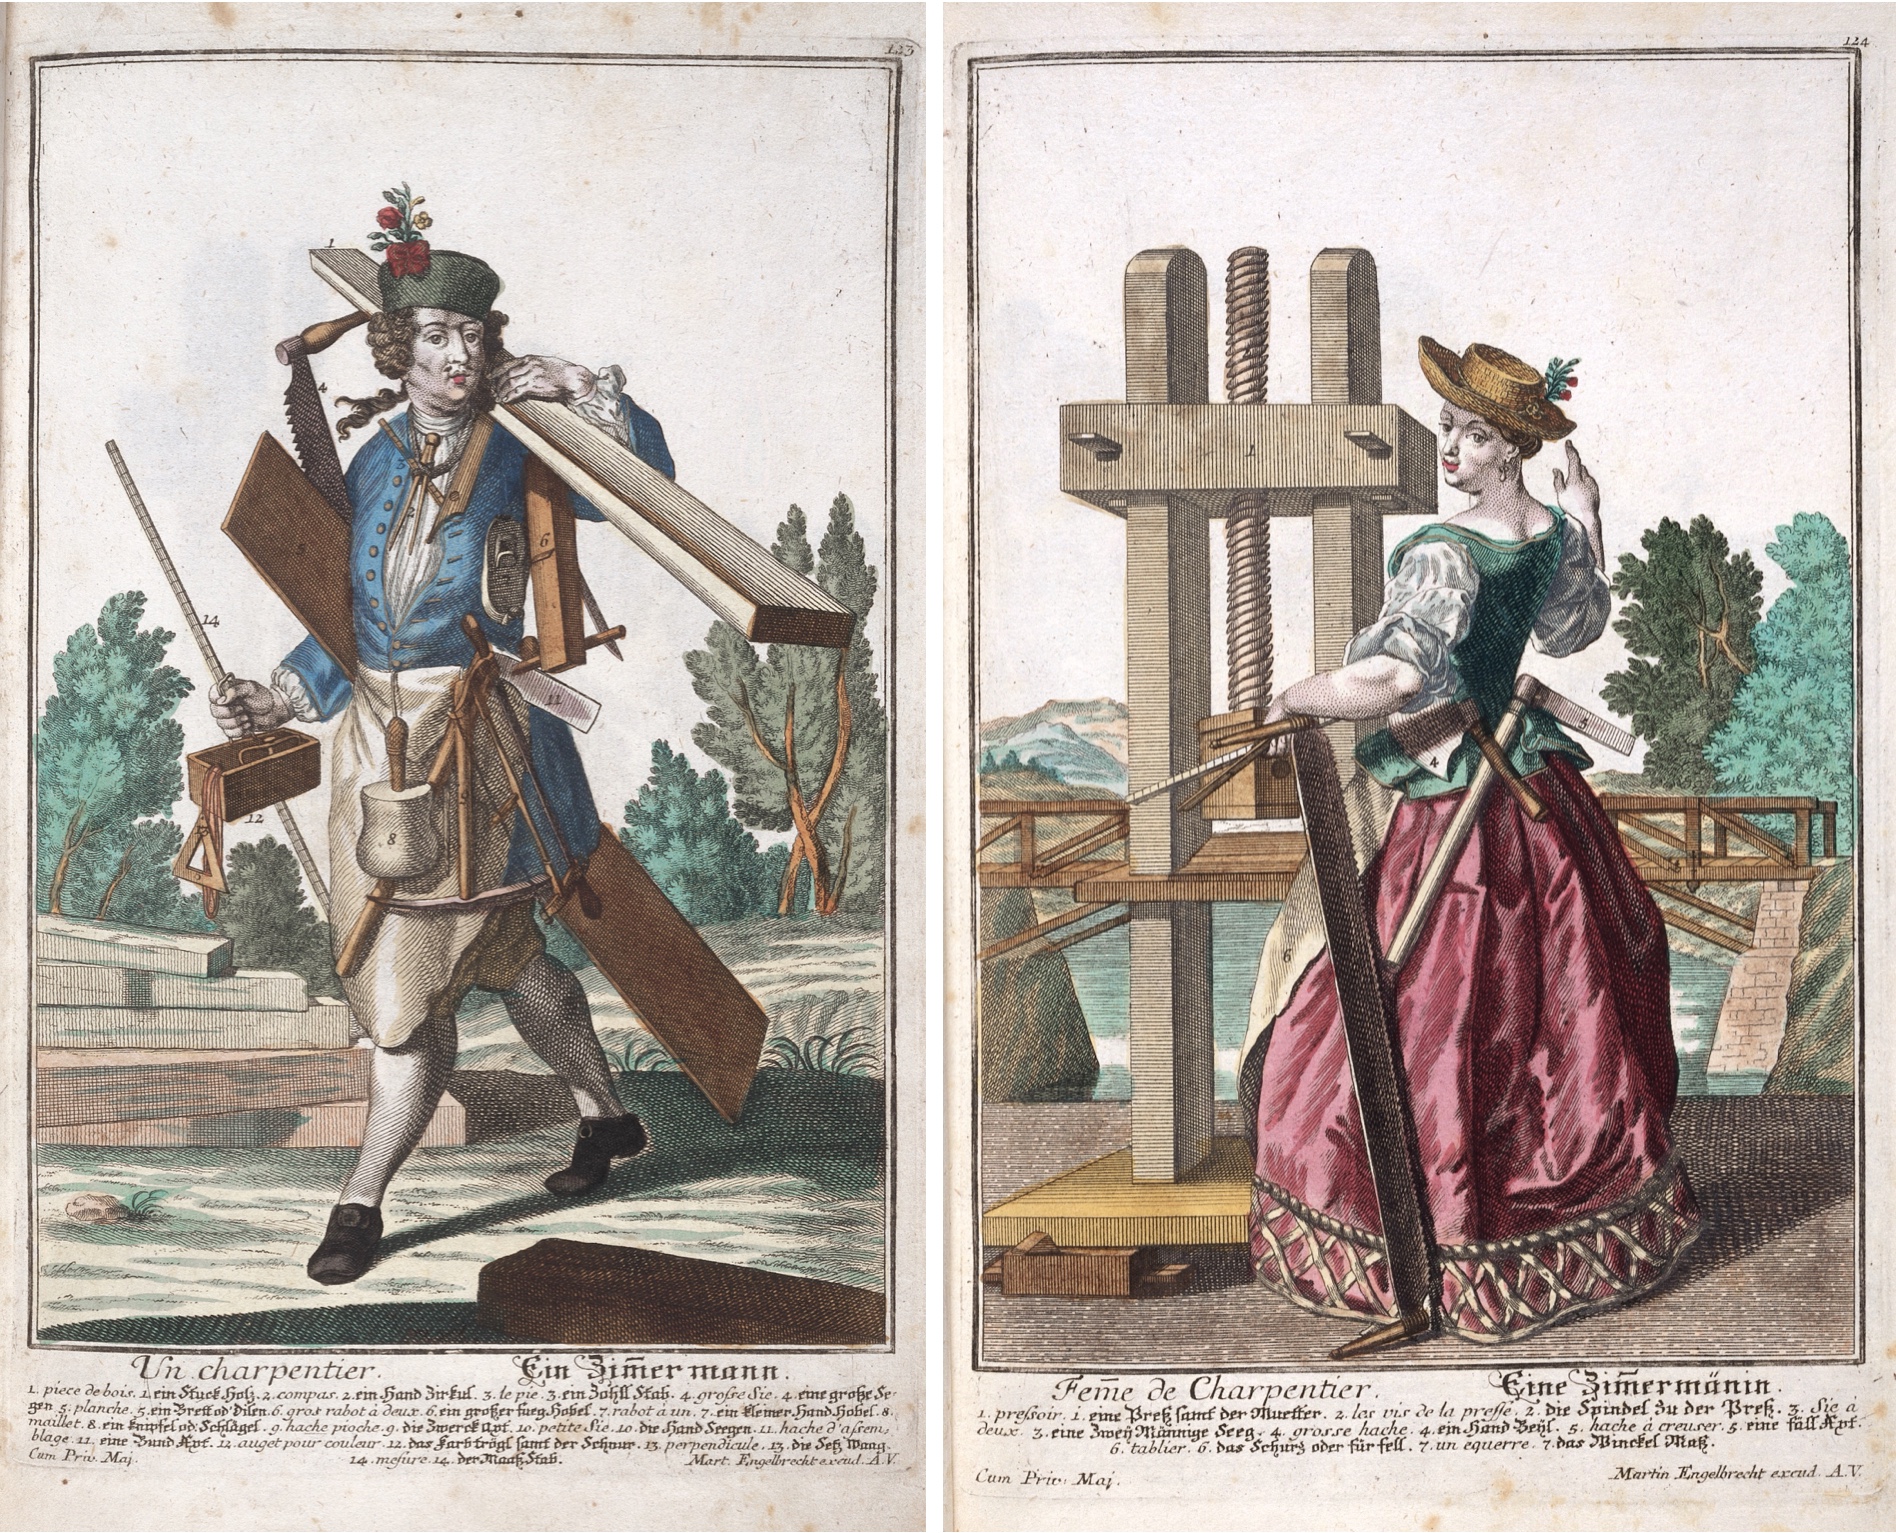
Martin Engelbrecht (1684-1756), Wellcome Library. Nicolas de Larmessin (1632-1694), BnF.
While both versions of the menuisier are fascinating, de Larmessin’s is the more creative rendition. He “clothed” his menuisier in finely worked wooden panels. Engelbrecht, on the other hand, provided a legend for the tools and a corresponding female, or wife, of the tradesman. Unfortunately, the wife of the menuisier is not yet available in the public domain.
Martin Engelbrecht, Wellcome Library.
We do have the charming carpenter and the carpenter’s wife with actual hats on their heads instead of glue pots.
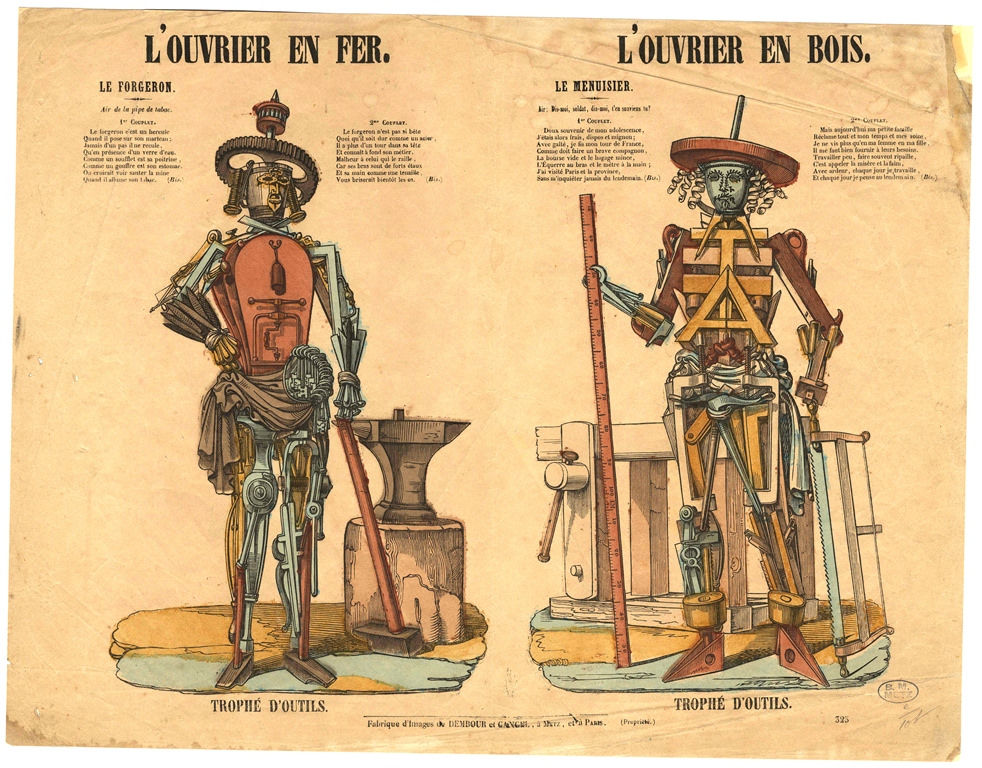
Imagerie Dembour et Gangel, 19th century, Bibliothèques-Médiathèques de Metz, France.
Cross a tool trophy with a cariacture of a tradesman and you get a blacksmith and a woodworker composed entirely of tools. If you have visited the Lost Art Press storefront and made a trip to the men’s room (the one with the urinal) you probably have seen the black and white version of this image.
Tool Storage
How tools are stored can also be a work of art.
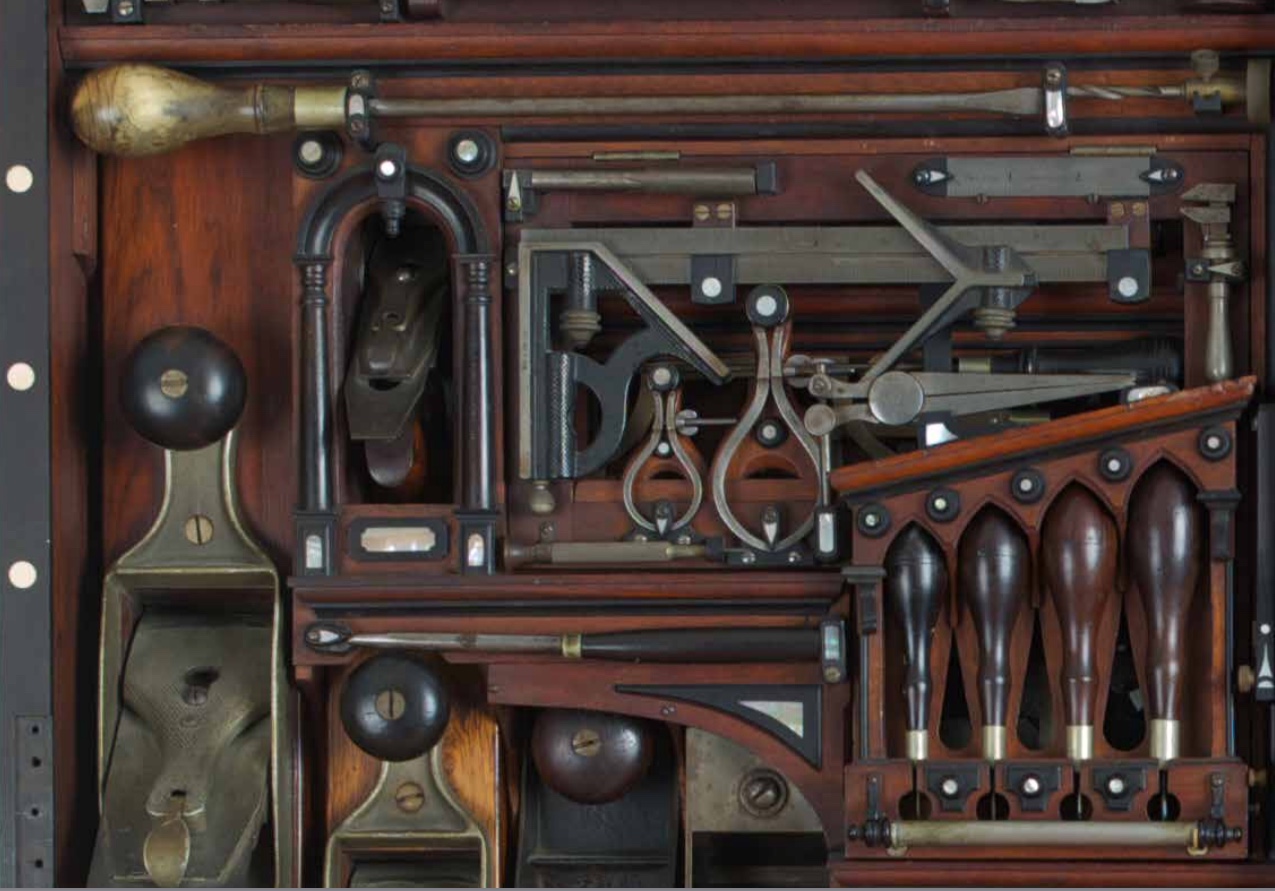
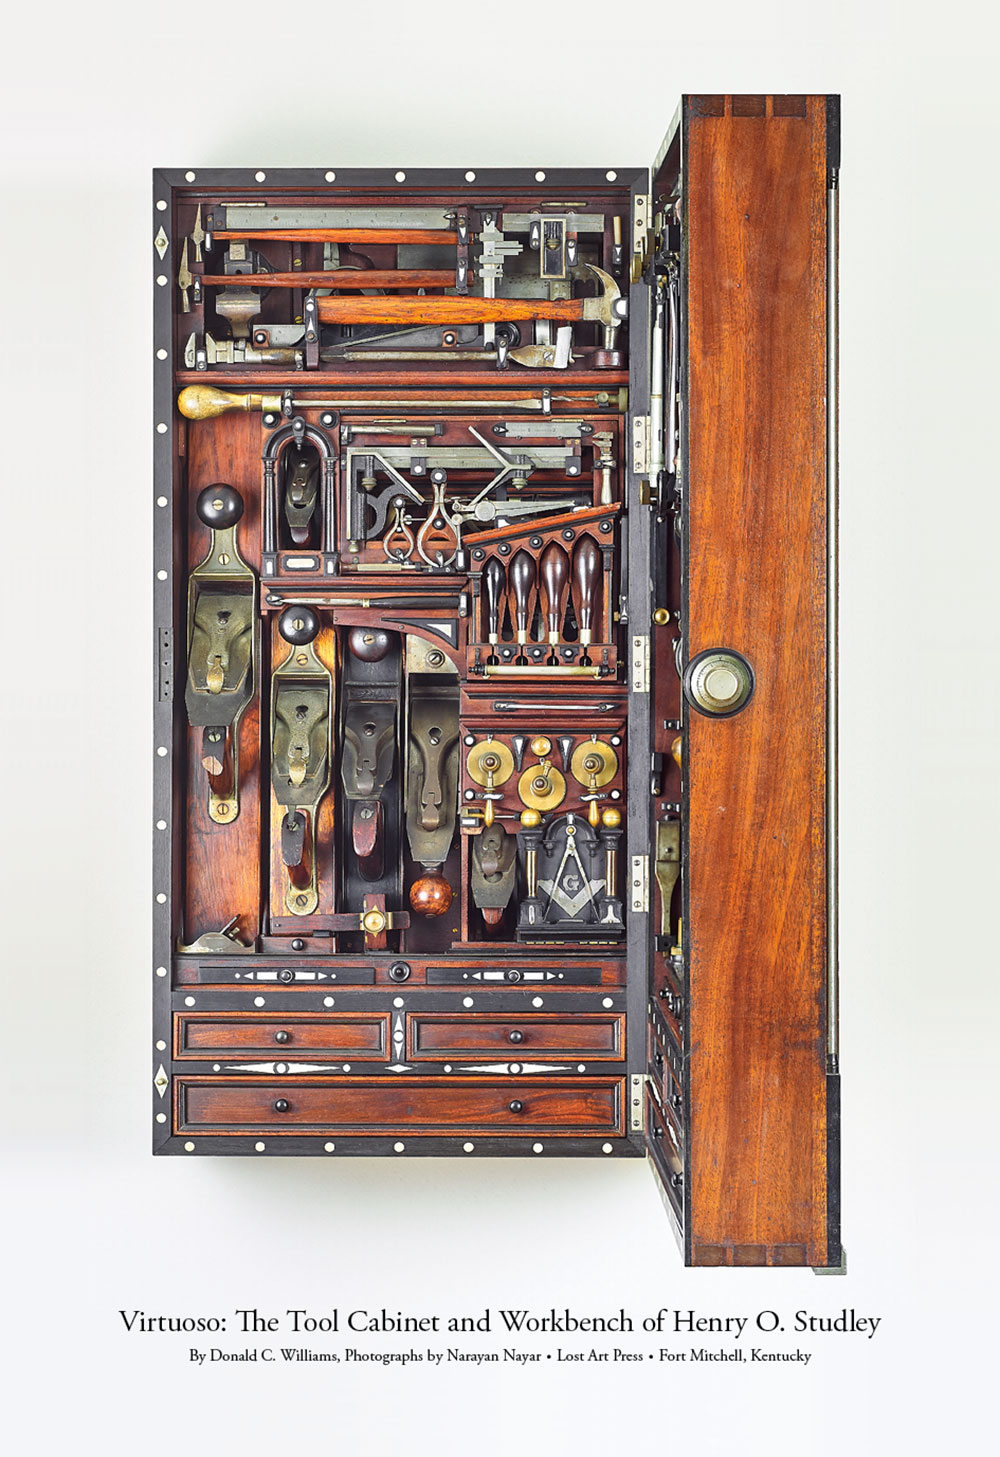
Portion of the H.O. Studley tool cabinet, private collection. Photo by Narayan Nayar.
Studley used exotic woods and incorporated architectural elements to display his many tools. His artistry is such that the tools and the design elements are in harmony; the gothic arches and chisel handles sit comfortably together and the hand plane is not lost in the arched niche.
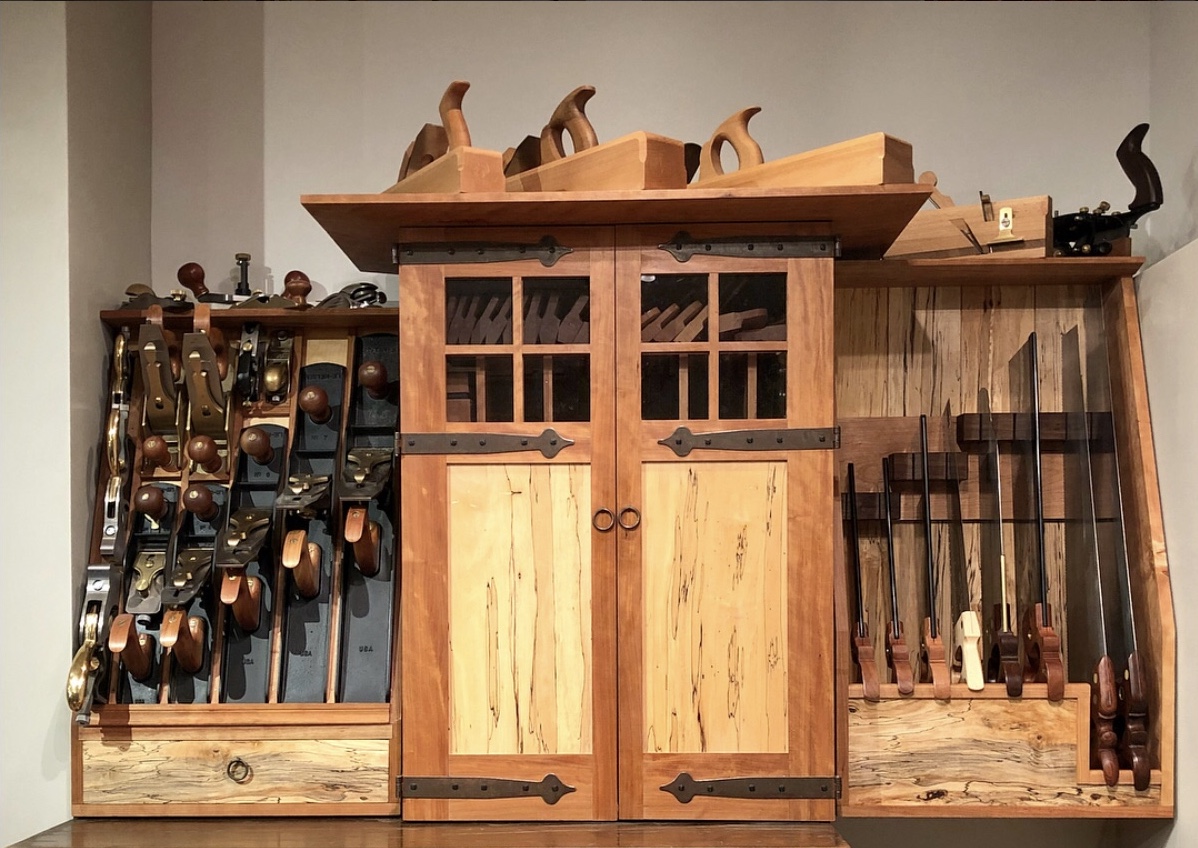
Photo by Narayan Nayar.
In the photographer’s own workshop his eye for composition and balance offers another way to store tools in his ‘Tool Triptych.’
The Tool Chest Lid
The woodworker’s tool chest is another canvas for artistic displays of tools.
Joiner’s tool chest, 1790s, Building of Bath Collection.
The Bath joiner, with beer in hand, gives us a warm wecome to his shop and a gander at his most important tools.
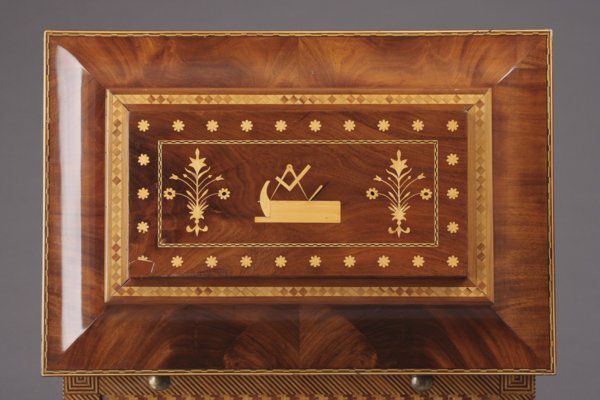
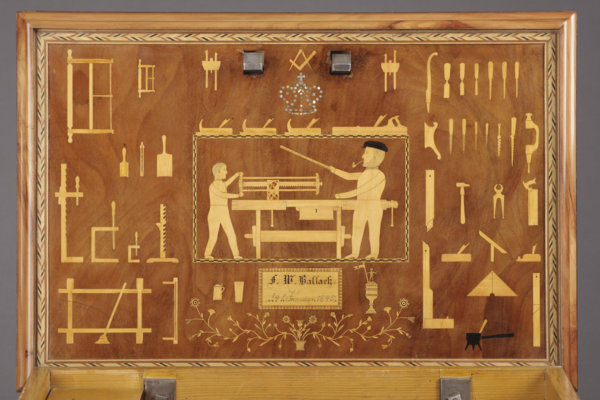
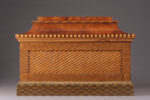
Top of the F.W. Ballack tool chest, 1845.
Finch & Co. Auctions in London had a Prussian cabinetmaker’s tool chest up for sale a few years ago. The chest was made in Mewes, now known as Gniew in northern Poland.
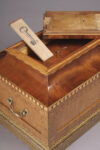
Interior lid of the Ballack tool chest with the cabinetmaker and apprentice.
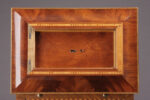
No lock is visible on the front of the chest and how it opens it is a puzzle (see the gallery for the solution).
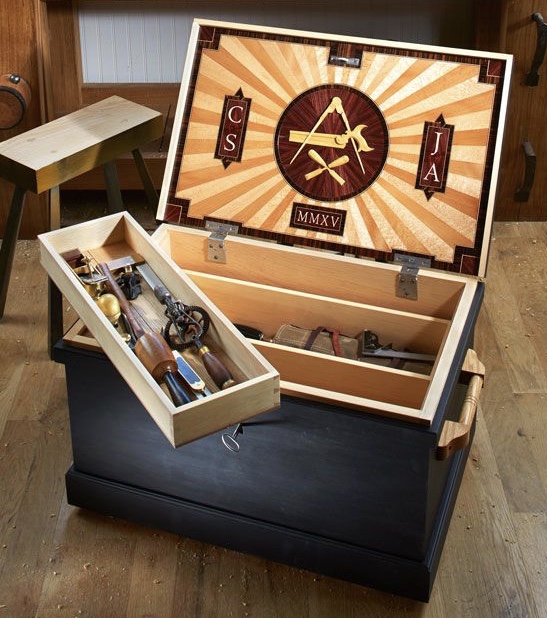
In 2015 there was a collaboration on this traveling tool chest. Chistopher Schwarz built the chest with bomb-proof joinery. The fancy-pants lid was created by Jameel Abraham.
As long as there have been woodworkers artists have been beside them documenting their tools and work. From orderly arrangements to dizzying aggregations, the artwork of tools gives recognition to the hands that make and use them.
–Suzanne Ellison
In the gallery: 1. the full page of four trophies by van Doetechum (Rijksmuseum); 2. ‘Implements Animated’ by Charles Williams, active 1797-1830 (Met Museum); 3-5. the front, top compartment and hidden lock of the F.W. Ballack chest (Finch & Co.); 6. arranged for sale: French gimlets (Objects of Use) and antique breast augers (Robert Young Antiques); 7. tools from the ‘Book of Plates’.
We weren’t happy with the paper thickness of our H.O. Studley posters that went up for sale in May. So we found a new printer that would work with thicker paper. We reprinted the entire run and have sent replacements to everyone who ordered posters through the Lost Art Press website.
Almost everyone should have received their replacement posters by now. If you haven’t, give it until Monday’s mail arrives and then send a message to help@lostartpress.com and we’ll check your order. If you bought one of the posters at Handworks, please send a message to help@lostartpress.com, and we’ll send you a replacement immediately.
The Studley posters now in the store (click here) are printed on the new, thicker paper by a company a few blocks from our storefront in Covington, Ky. The posters are significantly heavier (they were a bit of a struggle to roll to get into tubes) and are still $20, which includes domestic shipping.
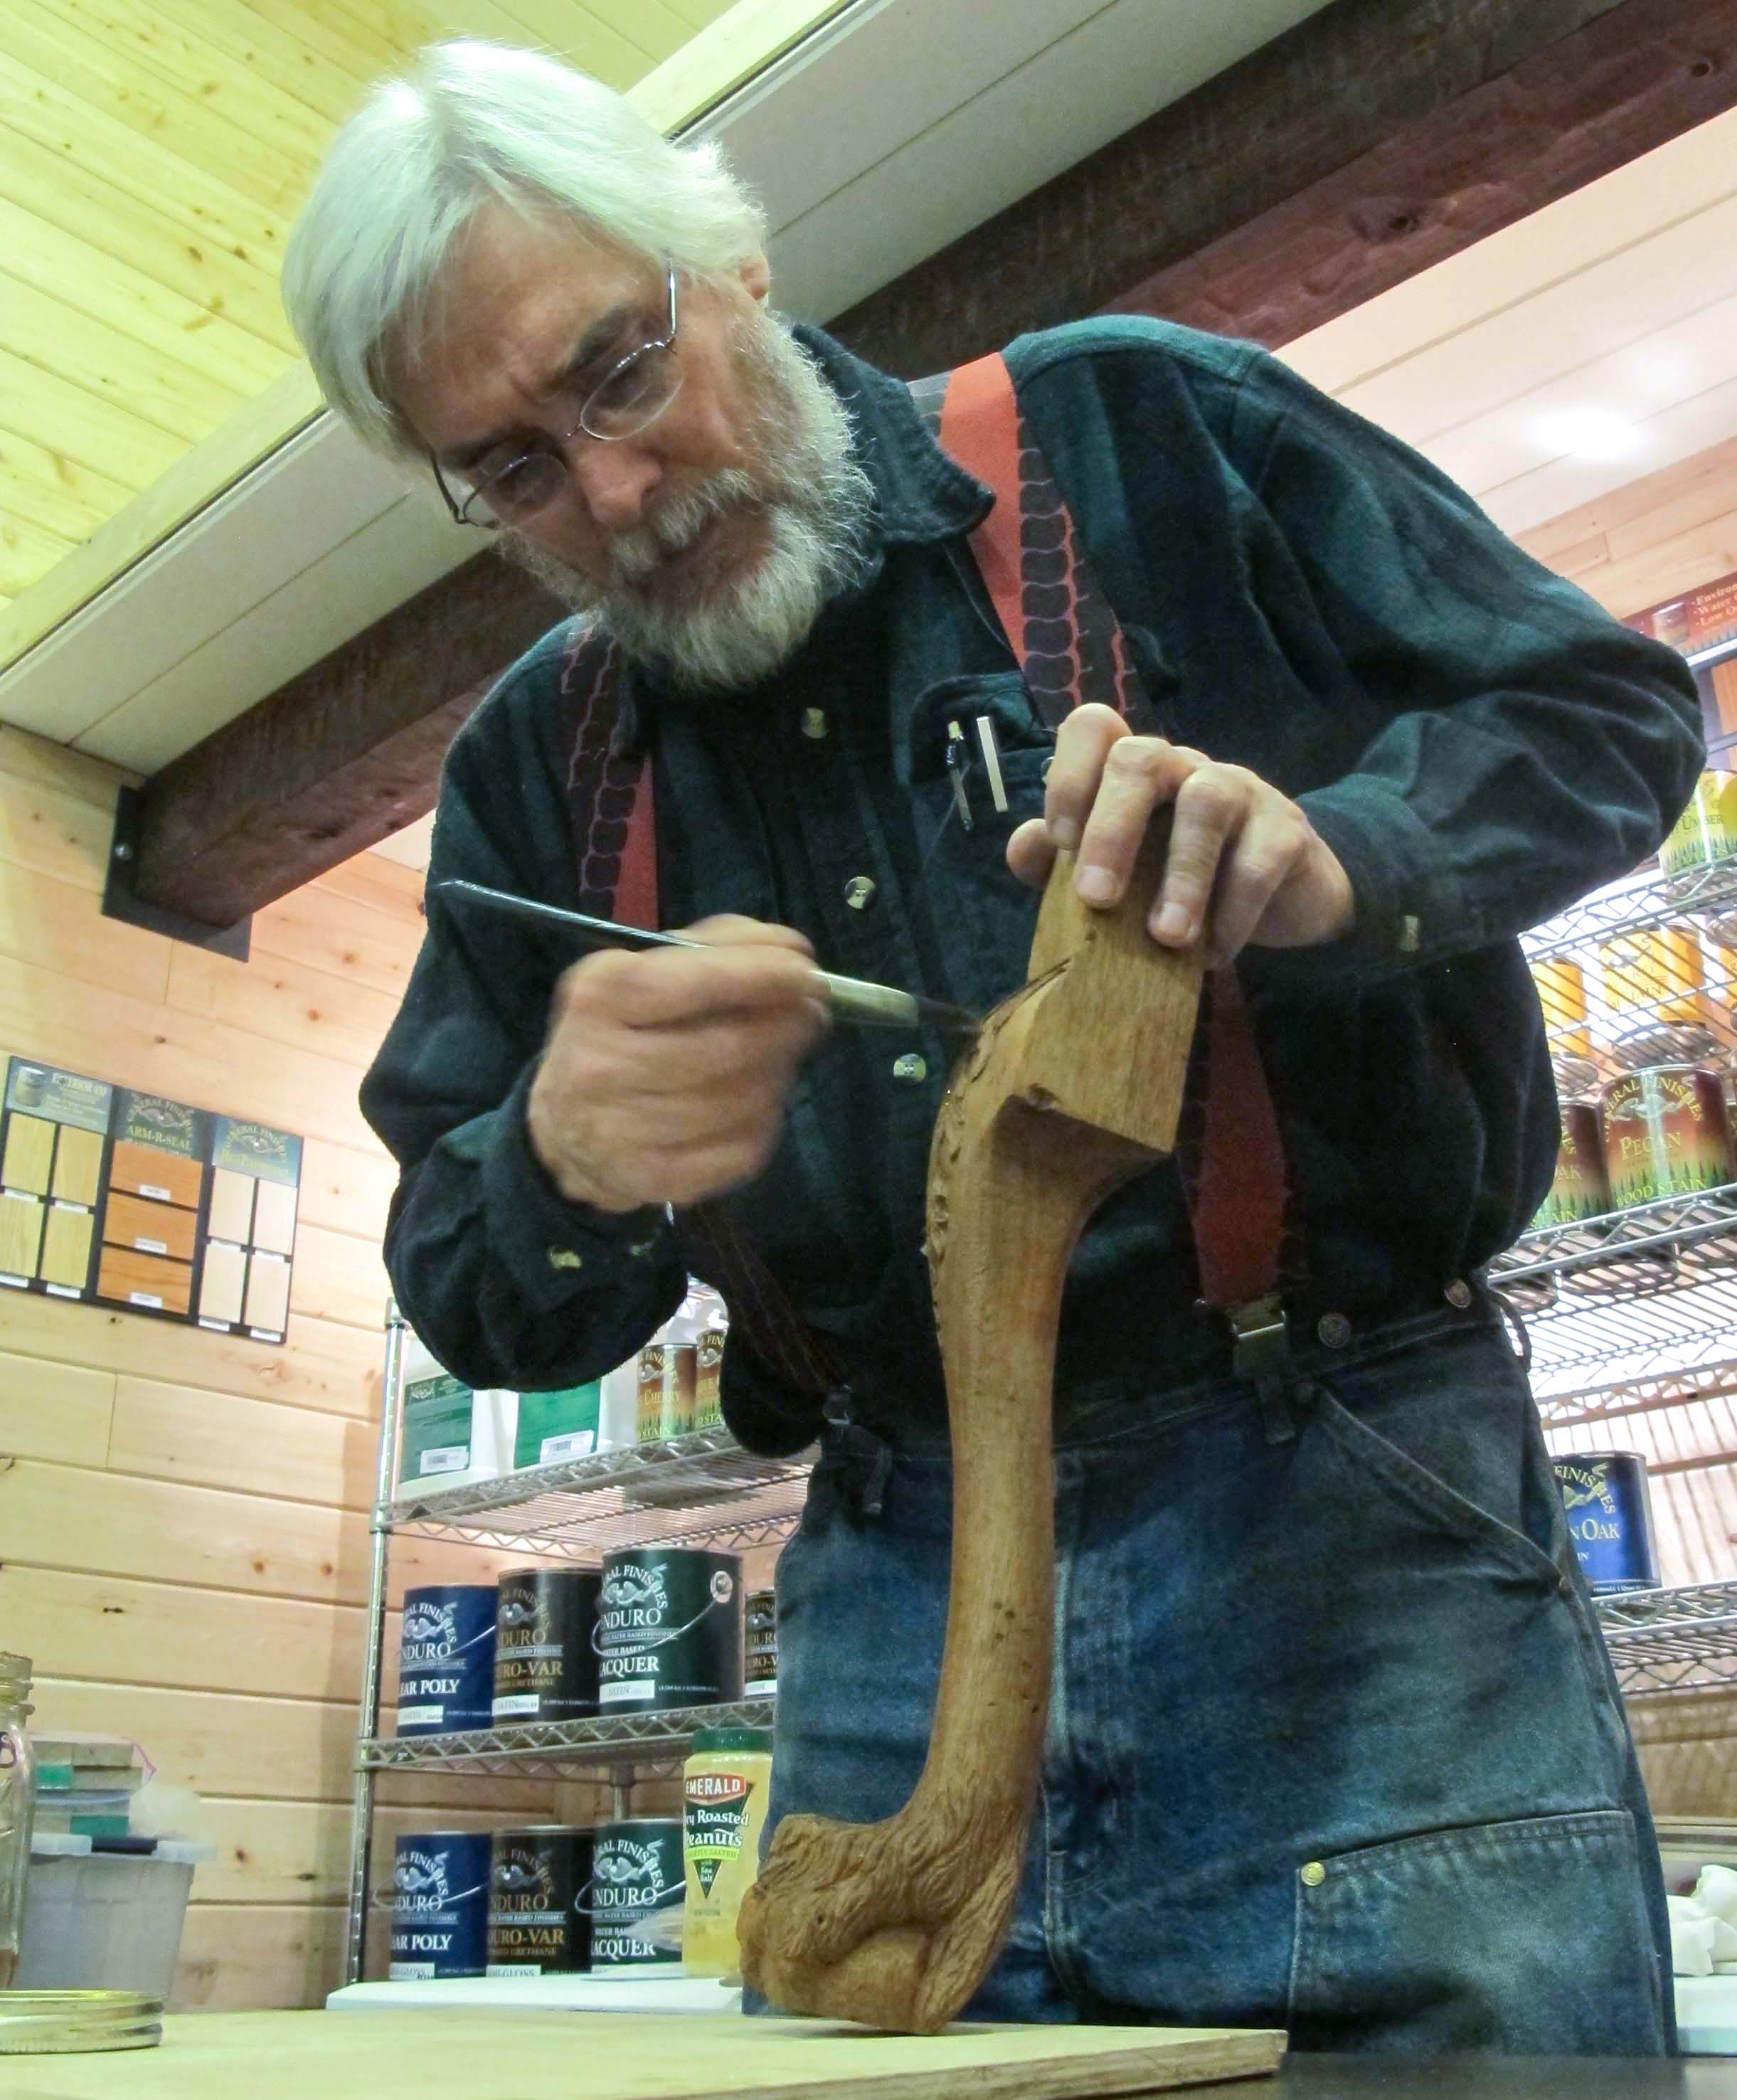
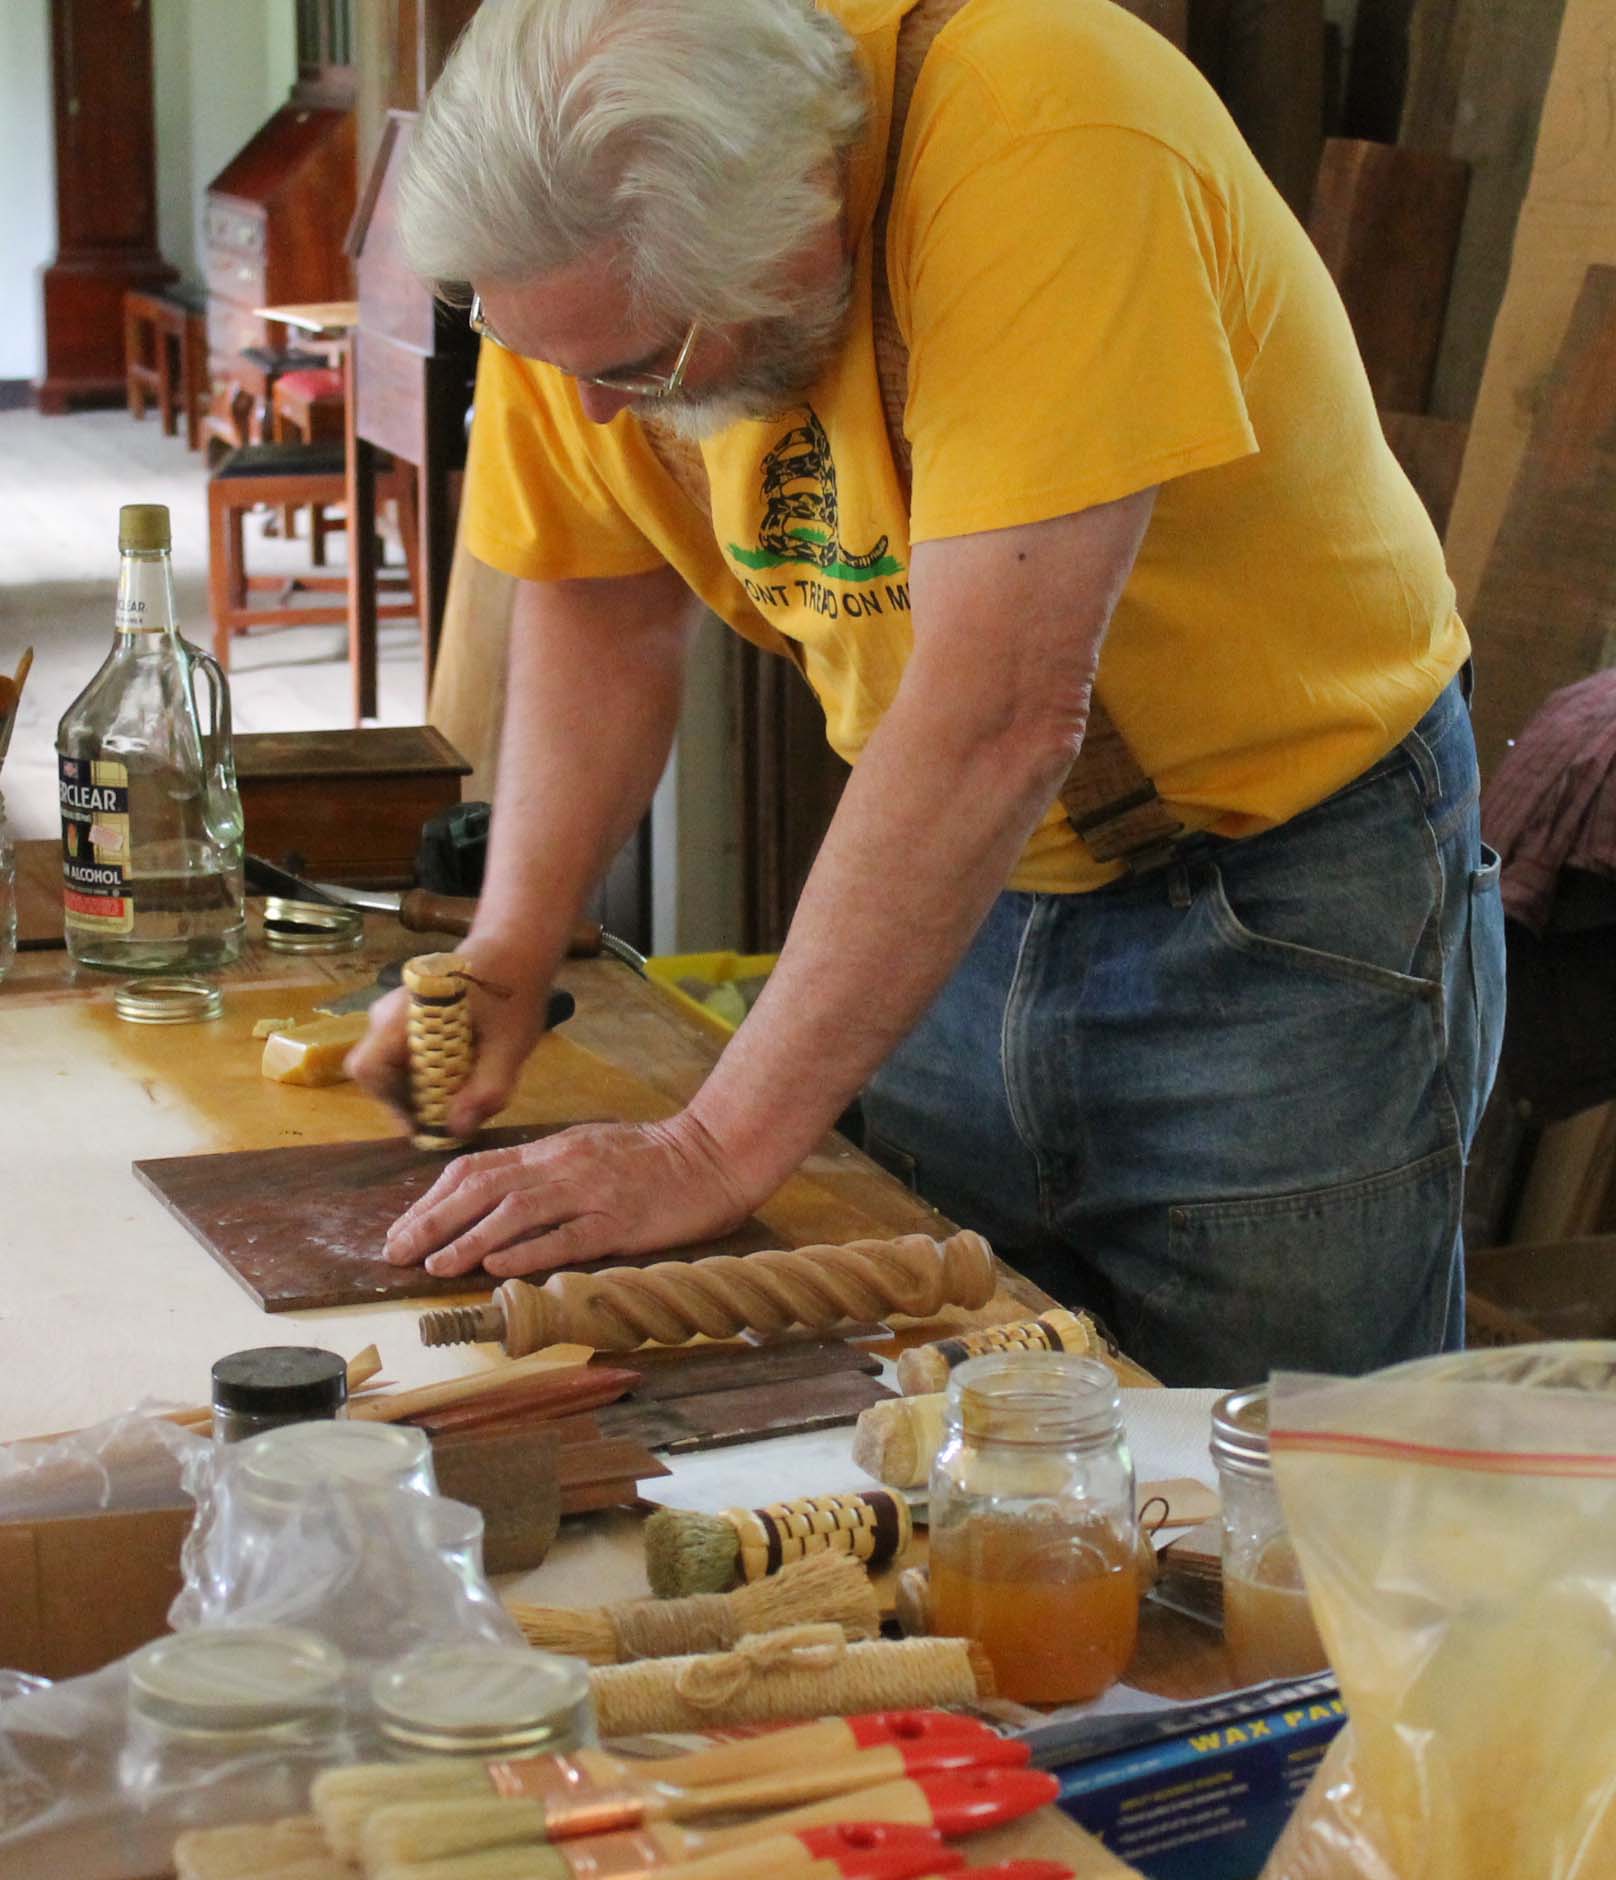
Editor’s Note: Longtime LAP author Don Williams is in the process of writing a new book: “The Period Finisher’s Manual.” The book will be a culmination of his years working as a conservator, educator and scholar (including more than 25 years of service to the Smithsonian) with expertise in conservation, woodworking and wood finishing. Here he talks about his writing process. You can find Don online at donsbarn.com.
— Kara Gebhart Uhl
For most of my working life, writing tasks were simply a matter of plugging information clusters into whatever format the recipient required. Artifact condition reports, conservation proposals and conservation treatment reports follow a regular format. Either you had the information at hand or your did not. Ditto budget requests, performance evaluations, monthly and annual reports, and a multitude of bureaucratic tickets to be punched.
Much to my surprise I discovered that I did not mind the writing itself and began to explore it outside the 9-to-5 boundaries. I did not care if I was any good at it, rather I found it to be a pleasant diversion. I recall the day in the 1990s when I was reading a well-known thriller from the library. After several dozen pages I put it down and said to myself, “Self, you can do better than this.” So, over the next year I wrote a novel about a guy in the wrong place at the wrong time with the wrong woman and the bad, bad things that ensue; a story that tied together threads from the Weather Underground, Stasi terror brokers, mobsters, purloined identity, and a history teacher at a remote private school (and, of course, a beautiful sniper).
I have no idea if it is any good but there is a beginning, a middle with many rabbit trails, and an end. From the start, I knew where the story was going, but I did not always know how it was going to get there. I did not write it in a beginning-to-end manner. Since the bare bones of the story required a lot of embellishment I found that the enriching texture was added when Whimsy would strike and individual vignettes unfolded irrespective of where they fit in the plot. When the pile was large enough I knitted all the pieces together, smoothing out their connections. I found in subsequent fiction writing that this strategy fits my temperament perfectly. (My current book plot involves weaving together 1760s Parisian ateliers, a 1930s Skull-and-Bones-ish group, the French Underground, the contemporary New York museum scene, and a furniture conservator putting his life back together after a 10-year bender and how he saves Western Civilization while the bodies start piling up.)
In the former cases the text was established by Roubo himself via Michele Pietryka-Pagán and all I had to do was make it sensible to a 21st-century woodworker. There were times I thought the latter text (“Virtuoso”) wrote itself because Studley’s tool cabinet was so iconic all I had to do was write what I saw, gather as much primary source material as possible (thank you, John Cashman!), get it all down on paper and smooth out any wrinkles (aka “editing”). As I recall, the first draft of “Virtuoso” took about 10 weeks, eight hours a day most days, or about 100 words per hour. The captions took another two weeks, at a faster pace. But that was at the end of several years of traveling, observing, measuring and researching, so the raw material was ready at the waiting.
My current labor on “The Period Finisher’s Manual” began years ago with a detailed outline, so for good or ill it will have a fairly cogent organization. I hope. When the time comes, Chris will tell me if I am correct and instruct me on changes if I am not.
My typical working habit is proving to be true for “The Period Finisher’s Manual.” With my working outline in hand, and mental sketches of the knowledge to be conveyed, I wait for the paragraph (or paragraphs) to emerge from my experience of almost five decades of practicing and exploring wood finishing. “The Period Finisher’s Manual” content thus congeals in a non-linear fashion but in the end congeal it does, and the gelatinous masses are merged in a careful review and self-edit. Sometimes smoothing these wrinkles is more work than creating the original fabric.
One minute I might be working on a section describing the nature of solvents and a half hour later something about good finishing shop rags or making 18th-century sandpaper followed by using molten wax grain filler or building a flawless spirit varnish then extolling the virtues of avoiding power tools near the finishing shop might come up. I do not labor over a section if it is not flowing well from my fingertips – that just means those words are still in gestation. I know that the words will emerge when their time comes. Once a larger section has all its swatches I sew them together, a sometimes-arduous task. I am reminded of Edison’s description of invention: “It is 1 percent inspiration and 99 perspiration.” That probably explains why the timeline for any book covers many years, a characterization that fits this book, too.
When writing a book like “The Period Finisher’s Manual,” my job is to first create the skeleton (outline) then fill in all the holes of the outline one at a time and do my best to make it accurate and readable. On Day One, all the holes were empty so I had a target-rich environment – any paragraphs I threw out there would fit something, somewhere. As I told someone recently about this project, “You start with one paragraph somewhere in the book. Anywhere. It does not matter. You keep writing until you have a 1,000 or 1,500 paragraphs. You connect them together seamlessly. Then you have a book.”