There’s a lot going on in the world these days and as such, scheduled programming can sometimes be preempted. There is a possibility of this happening so Monroe’s live broadcast, which was originally scheduled for tomorrow, is being rescheduled for Thursday, April 7, 9 a.m. to 10 a.m. Pacific (12 p.m. to 1 p.m. Eastern), on Johanna Wildoak’s “Wildoak Living” radio program on KZYX, Mendocino Public County Broadcasting. The broadcast will be live-streamed on the KZYX website here.
The program will also be archived in the KZYX jukebox for about two months. You can look for the program by date and time of broadcast here. It will also appear as a podcast on all major podcast platforms. Simply search for “KZYX.”
Below, a few journal entries from Dick Proenneke, beginning April 7, 43 years ago today.
— Kara Gebhart Uhl
April 7, 1979:
My arm and shoulder showing only a trace of soreness from the heavy gouge work so gave them another go at it by continuing with the burl bowl.
April 10, 1979:
I sanded more on my burl bowl. Nearly good enough and now if I had some Flecto wood finish I would see if it was worth the elbow grease that went into carving & sanding.
April 14, 1979:
From a poplar wood log I sawed, chopped and gouged out a holding device for holding spruce burls for hollowing. A wide notch with the end undercut to catch the lip of the burl and prevent it from tipping while I use the gouge.
April 20, 1979:
I wrote another letter and then after noon I would do a little sanding. I was surprised that it went so well. Maybe fifteen minutes work to finish the burl bowl that I then wrapped for mailing to the lady in Juneau who sent me the ceramic mug.
Although it is several days after the Equinox (sorry, I was busy), it’s still close enough to let you in on a dockside tradition. If you have spent any time around saltwater sailors you may be familiar with The Burning of the Socks. If not, the poem below will explain.
Here are a few more ship building tools to match to the tools on the sign board. It may seem the cupid in the upper left is holding a hurley, but that is highly unlikely.
Register now for GreenWood Wrights’Fest in Pittsboro, N.C., April 22-24, 2022 – a weekend of green woodworking fun, camping and family friendly entertainment. Revel in greenwood camaraderie as you learn traditional hand-tool skills, carving spoons and bowls, timber framing, basket making, steam bending, post-and-rung stool making and much more. Roy Underhill and other talented green woodworkers from around the country will be leading hands-on workshops, lectures and free demonstrations.
In addition to 26 workshops, there will be special events including a marketplace, and music and dance. Weekend tickets include one workshop, demos, nature walks, free camping, music, dancing and special events. Additional tickets for workshops will be available once admission tickets have been purchased. Food will be available on site, and beer will be available – in the evening, after knives and axes have been stowed – by the Red Moose Brewing Company.
“What I wouldn’t give to be there! Shaving away at a Slöjd-infused spoon while listening to Master Underhill weave his yarns sounds like a dream vacation to this wandering mule. Please give him my best affection, cheer, and a moderate serving of the Devil’s Biscuits™.” — Nick Offerman
The following is excerpted from Peter Follansbee’s “Joiner’s Work.” Follansbee has spent his adult life researching this beguiling time period to understand the simple tools and straightforward processes used to build the historical pieces featured in this book. “Joiner’s Work” represents the culmination of decades of serious research and shop experimentation. But it’s no dry treatise. Follansbee’s wit – honed by 20 years of demonstrating at Plimoth Plantation – suffuses every page. It’s a fascinating trip to the early days of joinery on the North American continent that’s filled with lessons for woodworkers of all persuasions.
After building all these boxes and chests, something happens. You have scraps, offcuts, short bits of this and that left over. These bits of wood accumulate around the shop of most woodworkers I know. Reminiscent of Donald Hall’s “String Too Short to Be Saved”– they are a lignin guilt trip, collecting dust and taking up space. When using riven stock, you have a lot of time and labor invested in these bits, and they are perfect quartered stock. Surely they’re too good to burn, but how to use them? They are usually too short to be truly useful, or too few in number to amount to much. Mostly, they sit there mocking you as they take up every available space, waiting for a day that may never come.
I stumbled onto one small item that uses scraps and adds some specialized mortise-and-tenon joints to the repertoire to boot. For years I made turned bookstands based on a single example I studied in a house museum in Massachusetts. One thing that always bothered me about that one was its singularity. I’m leery of “unique” items; they are hard to pinpoint as to when they might have been made. So I was thrilled one day to find another bookstand in an auction catalog. Even better, this one was joined. So I’ve since made several, some in oak, some in walnut. I based the proportions on the turned one I studied.
The joinery was another matter. With only one photo to go by, I had to improvise. So what follows is pure speculation, but it makes a fine bookstand.
Start by choosing and prepping the stock (you can substitute sawn stock if you have no riven wood). The stand is composed of two stiles, one top rail and the bottom shelf. In between these two parts are two crosspieces, into which are fitted the two pieces that form the ratchet mechanism.
Make the stiles from stock that’s about 1″ or more in thickness. Mine are around 2″ to 2-1/2″ wide by 16″ long. After dressing the stock, carve the design. I’ve used various patterns – just keep in mind the parts are pretty narrow. Next comes the joinery. I made a story stick to lay out the stiles because I knew I’d make these again and again. You can follow my dimensions, or adapt some of your own. Chop a 5/16″ mortise for the crest rail, about 1-1/2″ deep. Lay this out so the tenon is stepped down from the top edge of the top rail. This top rail is about 2-3/4″ high (and 12″ shoulder to shoulder), so I made the mortise about 2″ long. This keeps the joint from showing at the top of the rail-and-stile juncture.
The mortise for the shelf is trickier. I wanted the shelf thin to keep the bookstand from becoming too heavy and awkward. Chopping this 7/16″-long by 5/16″-thick mortise seemed fraught with peril; there’s no room to pry. So I chose to bore the bulk of it out and clean it up with a paring chisel.
The mortises for the crosspieces are also bored, not chopped.
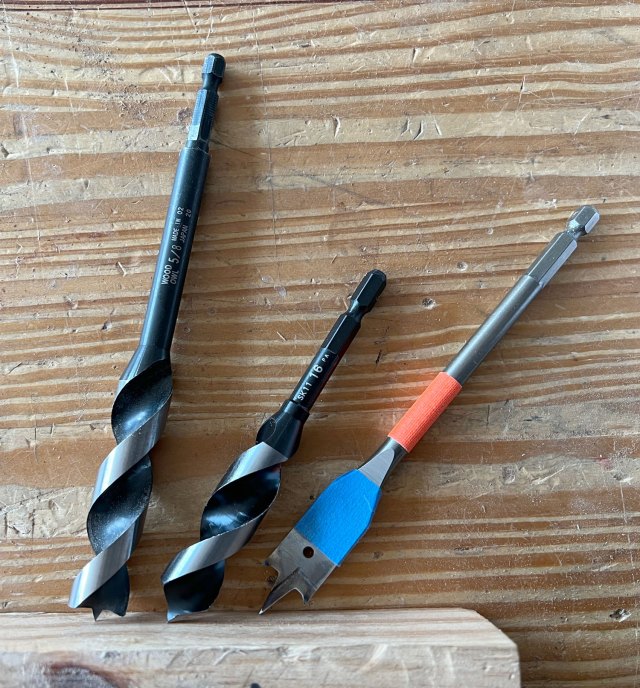
Mark a centerline and prick the spacing. For accuracy, I use an auger bit when boring these, in this case a 1/2″ bit. Then saw and chisel a flat round finial at the top of the stiles.
The crest rail’s details can vary. I made one version of this stand with a row of arcs cut in its top edge. Mark these out with gouges or a compass. To cut them, saw down to the spot where two curves meet, then chop down the arcs with a chisel. Another top rail has small ogees cut along its straight edges. I make these rails with barefaced tenons, that is, a tenon with no rear shoulder. They don’t have to be this way; I think I used this joint on my first joined bookstand, probably stemming from the thin stock on hand. Ever since then, I’ve made these rails featuring barefaced tenons.
Plane the stock to 5/8″ thick; the back of the 5/16″ tenon is flush with the back face of the rail. These joints are drawbored and fastened with tapered oak pins.
The shelf is another story. I couldn’t see the joinery used on the shelf in the only photograph I had, so I decided to make it up. This one’s about 7/16″ thick. But how to join it to the stiles, and have it overlap the front face of the bookstand’s frame? I decided to adapt a tenon I have seen on joined work from the 17th-century Plymouth Colony and elsewhere. For lack of a better term, furniture historians have called this a “lipped” tenon.
I decided I wanted the shelf to extend about 3″ in front of the frame, and marked a line this distance from the shelf’s front edge. Then I marked out the tenon placement and thickness from this line. The shoulder-to-shoulder dimension matches that on the top rail. The ends of the shelf run beyond the sides of the stiles by about 3/4″.
Saw down the struck lines with a ripsaw, then chisel out the bits between the tenon and the overhang. Saw off the rear shoulder. Clean up the end grain with a sharp chisel. Cut the tenon to length (less than the depth of the mortise).
The two crosspieces that engage the ratchet parts are 1″-square sections. Chop 5/16″ by 1-1/2″ mortises in these pieces before turning them. I’ve taken to making these through-mortises, so I mark out the joinery on both sides. This allows me to chop these mortises from both sides, resulting in a tidy finished joint. Now mount the piece on the lathe and turn the tenons. The good news is these are the easiest tenons of your career – they have to be undersized! That’s how the ratchet parts swing to adjust the angle of the bookstand.
The ratchet mechanism parts are also oak, about 1-1/2″ wide by 3/4″ thick. The upper one is about 9-3/4″ long, the lower about 10-1/4″ long. Cut the tenons, then the notches in the lower one. Finally, taper the upper one to engage the notches. The tenons are the full width of the stock. Cut them just as for any 17th-century joinery work, with undercut front shoulders and rear shoulders cut behind the line. These get drawbored, too. But first cut the notches and tapers in them. Lay out the notches half the thickness of the stock, and about 1″ apart. Saw down to a marking gauge line with a tenon saw.
Now comes the part that requires some thought – you can easily chop the notches in the wrong direction. I always stop and try to visualize how the piece fits into the bookstand then check to see that I remove the stock from the correct side of the saw kerf. To chop these, first use the chisel bevel down to waste out the wood, then flip it over to pare the final surface of the notch more cleanly. Shave a slight bevel on the edge of the notches, too.
Tapering the upper ratchet part is easy enough, and there are many ways to do it. You can use a hatchet, plane, spokeshave – really, just about any cutting tool. Test-fit the end into the notches to see that it fits all the way down to the notch bottoms.
Once you have these two pieces cut, you can pin them into the crosspieces. Drive your tapered hardwood pins into the offset holes to secure the parts together. Trim the pins front and back.
Now set one stile on edge on the bench with its mortises facing up. Drop the top rail into its mortise, then the two middle rails and the bottom shelf with its lipped tenon. Because the shelf runs long beyond the stiles, you might need to prop the stile up on some scraps to be able to drive the shelf all the way home in its mortise. Drive the other stile onto the ends of all these pieces that are sticking up in the air.
I glue the shelf’s joints and pin the top rail. The middle rails should swing freely. I often will wax their joints before assembly. Trim any protruding pins, then apply a finish. I make pegs for holes I’ve bored in the shelf for holding the book open. They’re small diameter holes and the pegs (or pins) are just like those used for securing joinery.
Join us Saturday, April 16, 1 p.m. to 3 p.m. (837 Willard St., Covington, KY, 41011), for a release party for Kara Gebhart Uhl and Elin Manon’s “Cadi & the Cursed Oak.” Kara will read an excerpt from the book, give a short talk and answer questions. You’ll get to view Elin’s beautiful illustrations on large screens, as well as some pictures of real-life objects from the Nannau oak, and scenes from the book.
“Cadi & the Cursed Oak” will be for sale, as well as the entire line of Lost Art Press tools and books. You can also check out some stick chairs, similar to the ones Cadi’s dad builds in the book. Kara’s generous friend (and excellent cook) will also be serving homemade Welsh cakes with preserves and lemon curd, Welsh rarebit, and drinks. Kids are welcome!