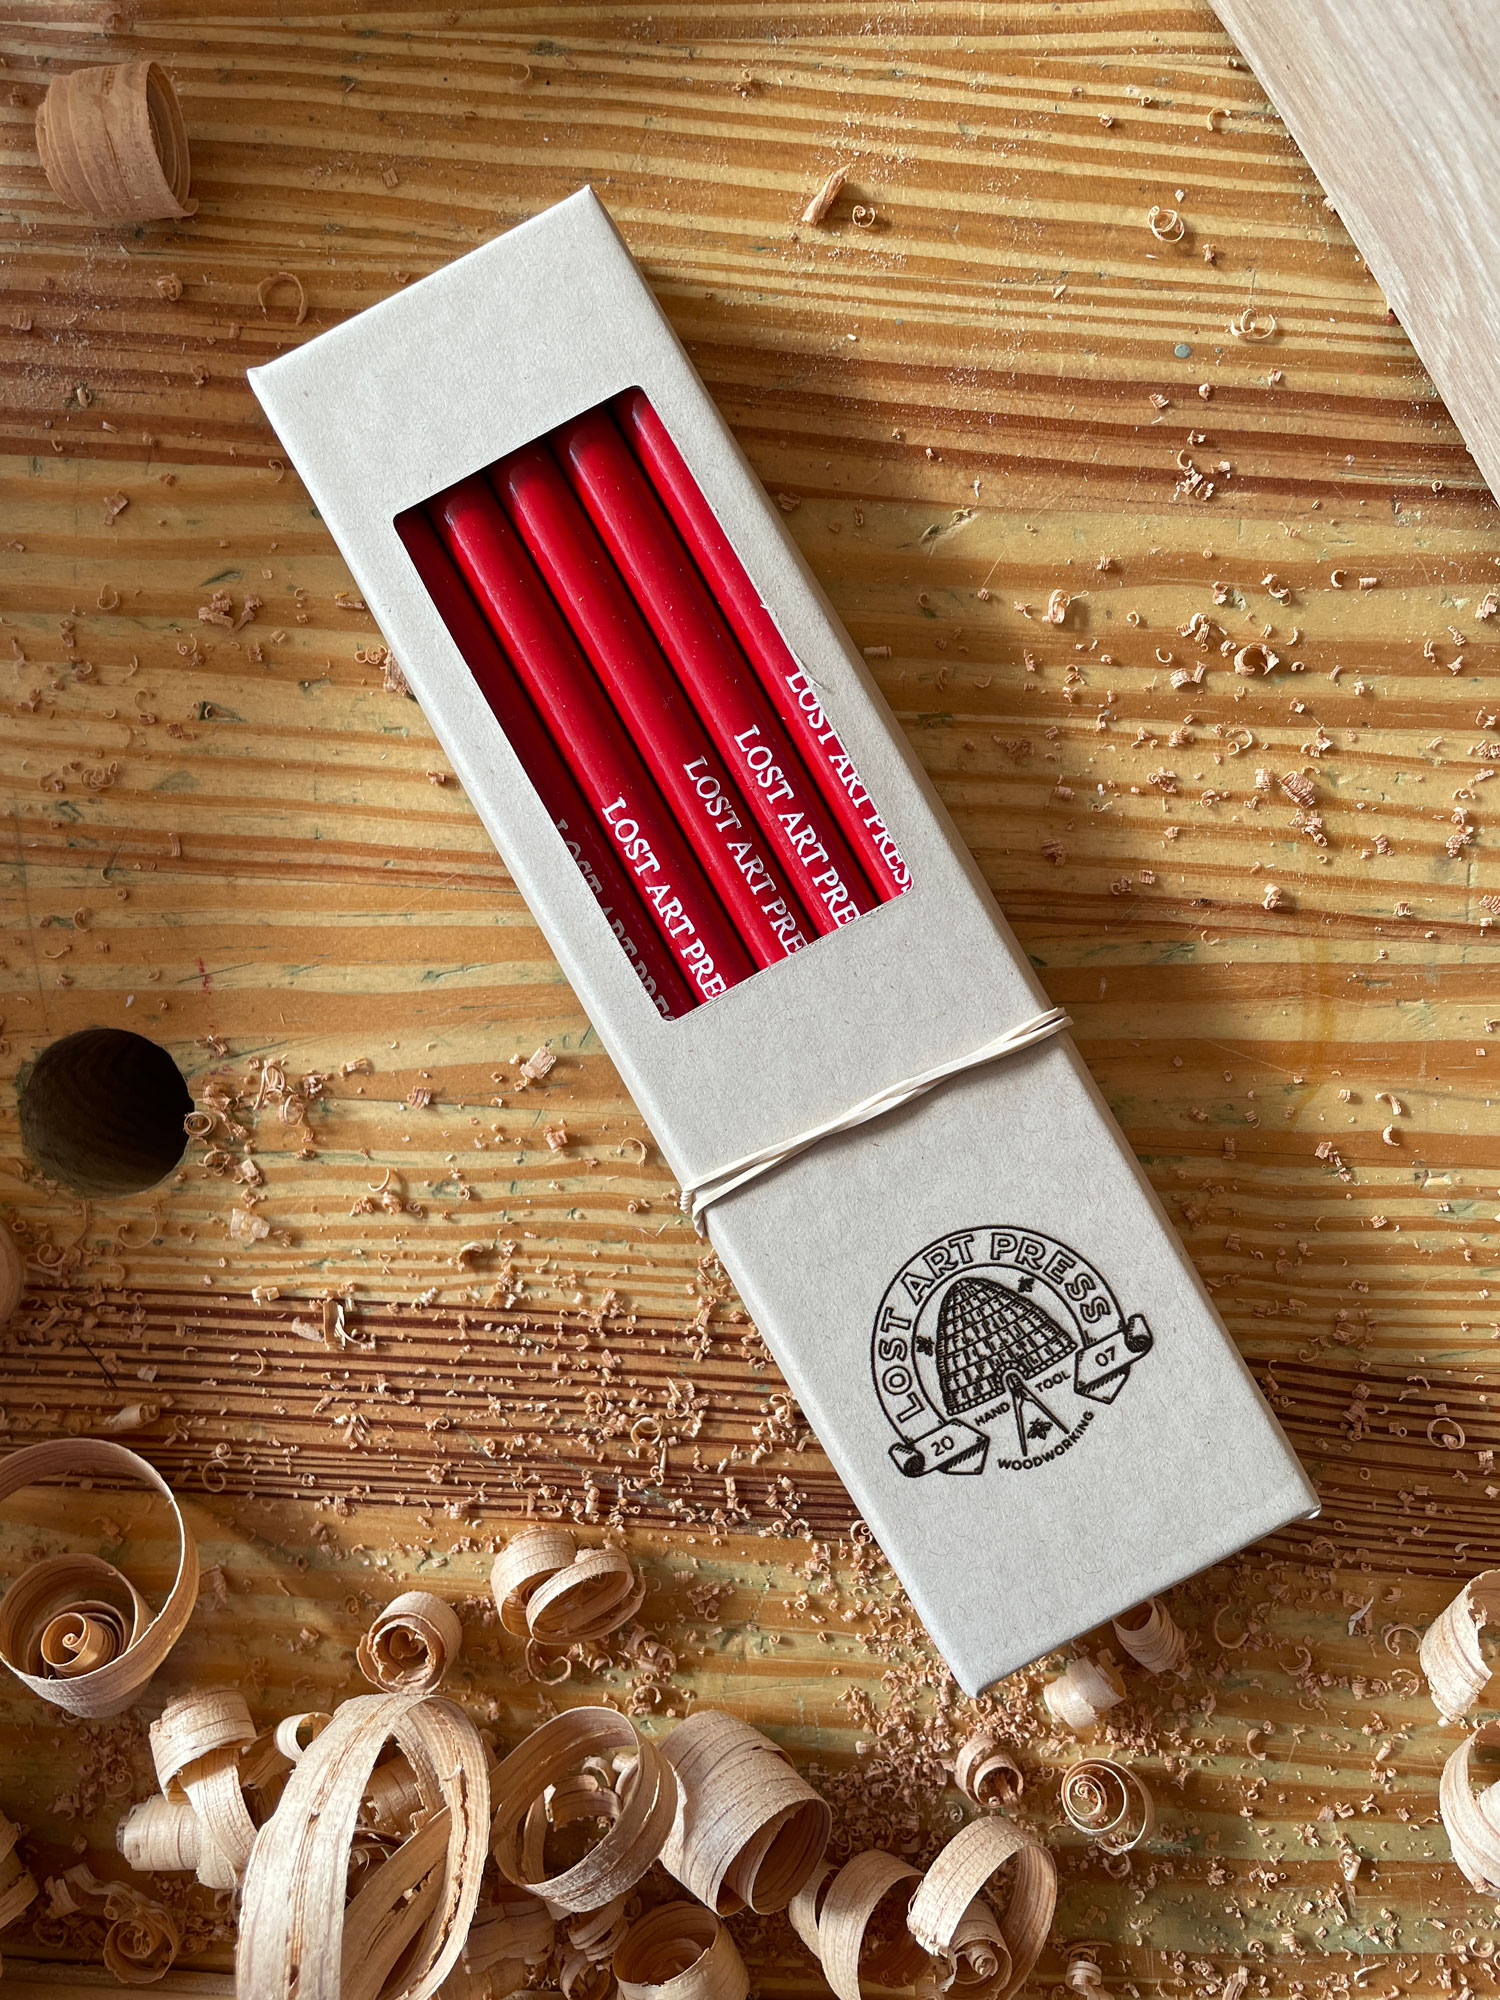
We haven’t given up on getting everything restocked in our store. Today I’m happy to say that our Lost Art Press Pencils are back in stock. These U.S.-made pencils are made to our specifications and come in a nicely printed box.
I don’t have good news, however, about restocking “The Anarchist’s Tool Chest.” Our Michigan printing plant had to shut down earlier this month for cleaning after a bad rash of COVID in the plant. Add to that some paper, cloth and staff shortages. While we hope the book will ship in early December, I wouldn’t bet money on it.
If you need this book for the holidays, check with our retailers, many of which have copies to sell.
At least once a month someone asks about lid stays for the Anarchist’s tool chest; now I’ll be able to refer them to this post.
Both Christopher Schwarz and I (now) use chains to hold out chests open, but they attach differently. Both methods work. As will multiple other methods, but these are ours.
But let’s back up two ticks. In “The Anarchist’s Tool Chest,” Chris directs readers to leave the back corners of the dust seal a little overlong and cut an angle on them. That will work if you’re gentle with your chest, and don’t use it all the time. If you are not gentle, and do use it all the time, that corner will start to break off – then you’ll need to come up with another method of holding your chest open.
The back corner of the original lid stay (after years of use), as shown in the book.
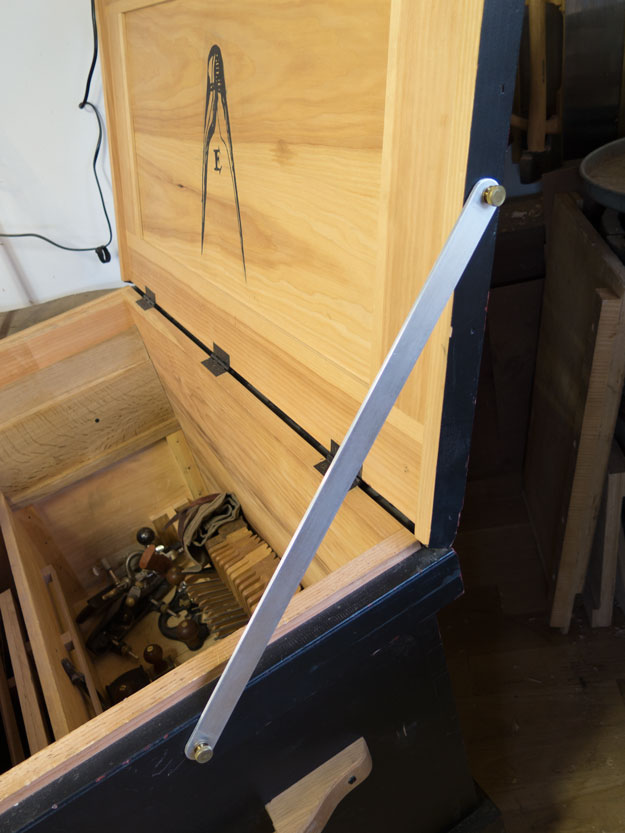
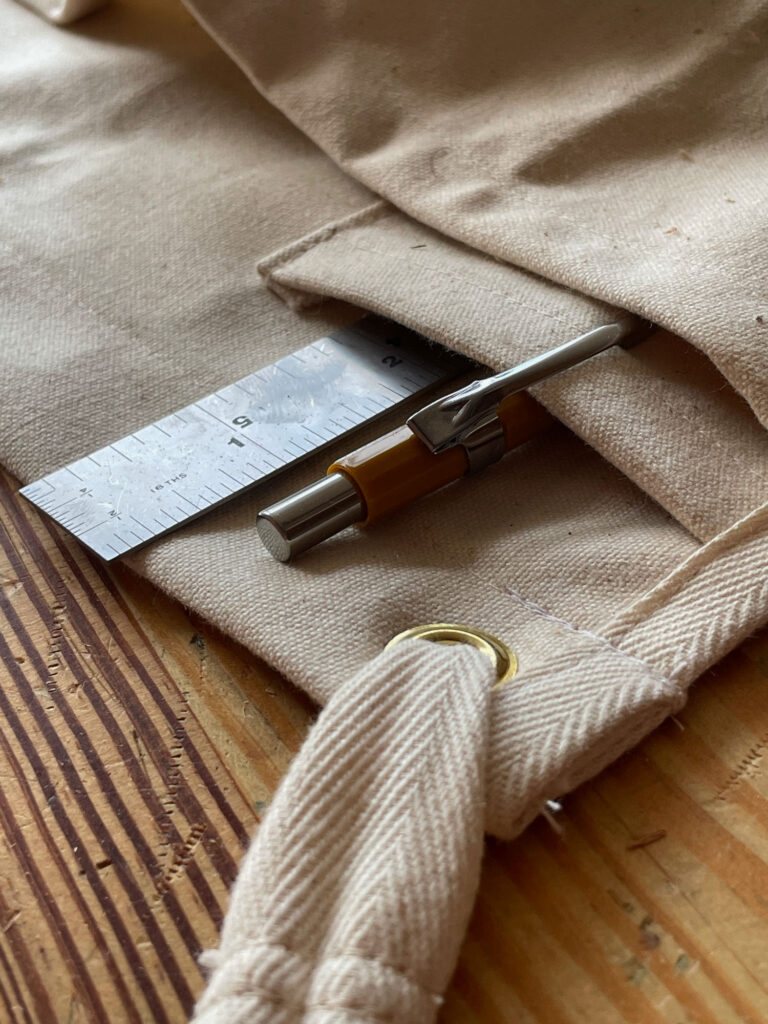
After the back corner of his dust seal started to show its years, Chris added a rigid aluminum lid stay, held in place by knurled knobs. The problem – if you can call it a problem – is that to use it, you had to unscrew the knob, put the stay in place, then screw the knob back in. And reverse that to close the lid at the end of the day.
Chris’ aluminum lid stay.
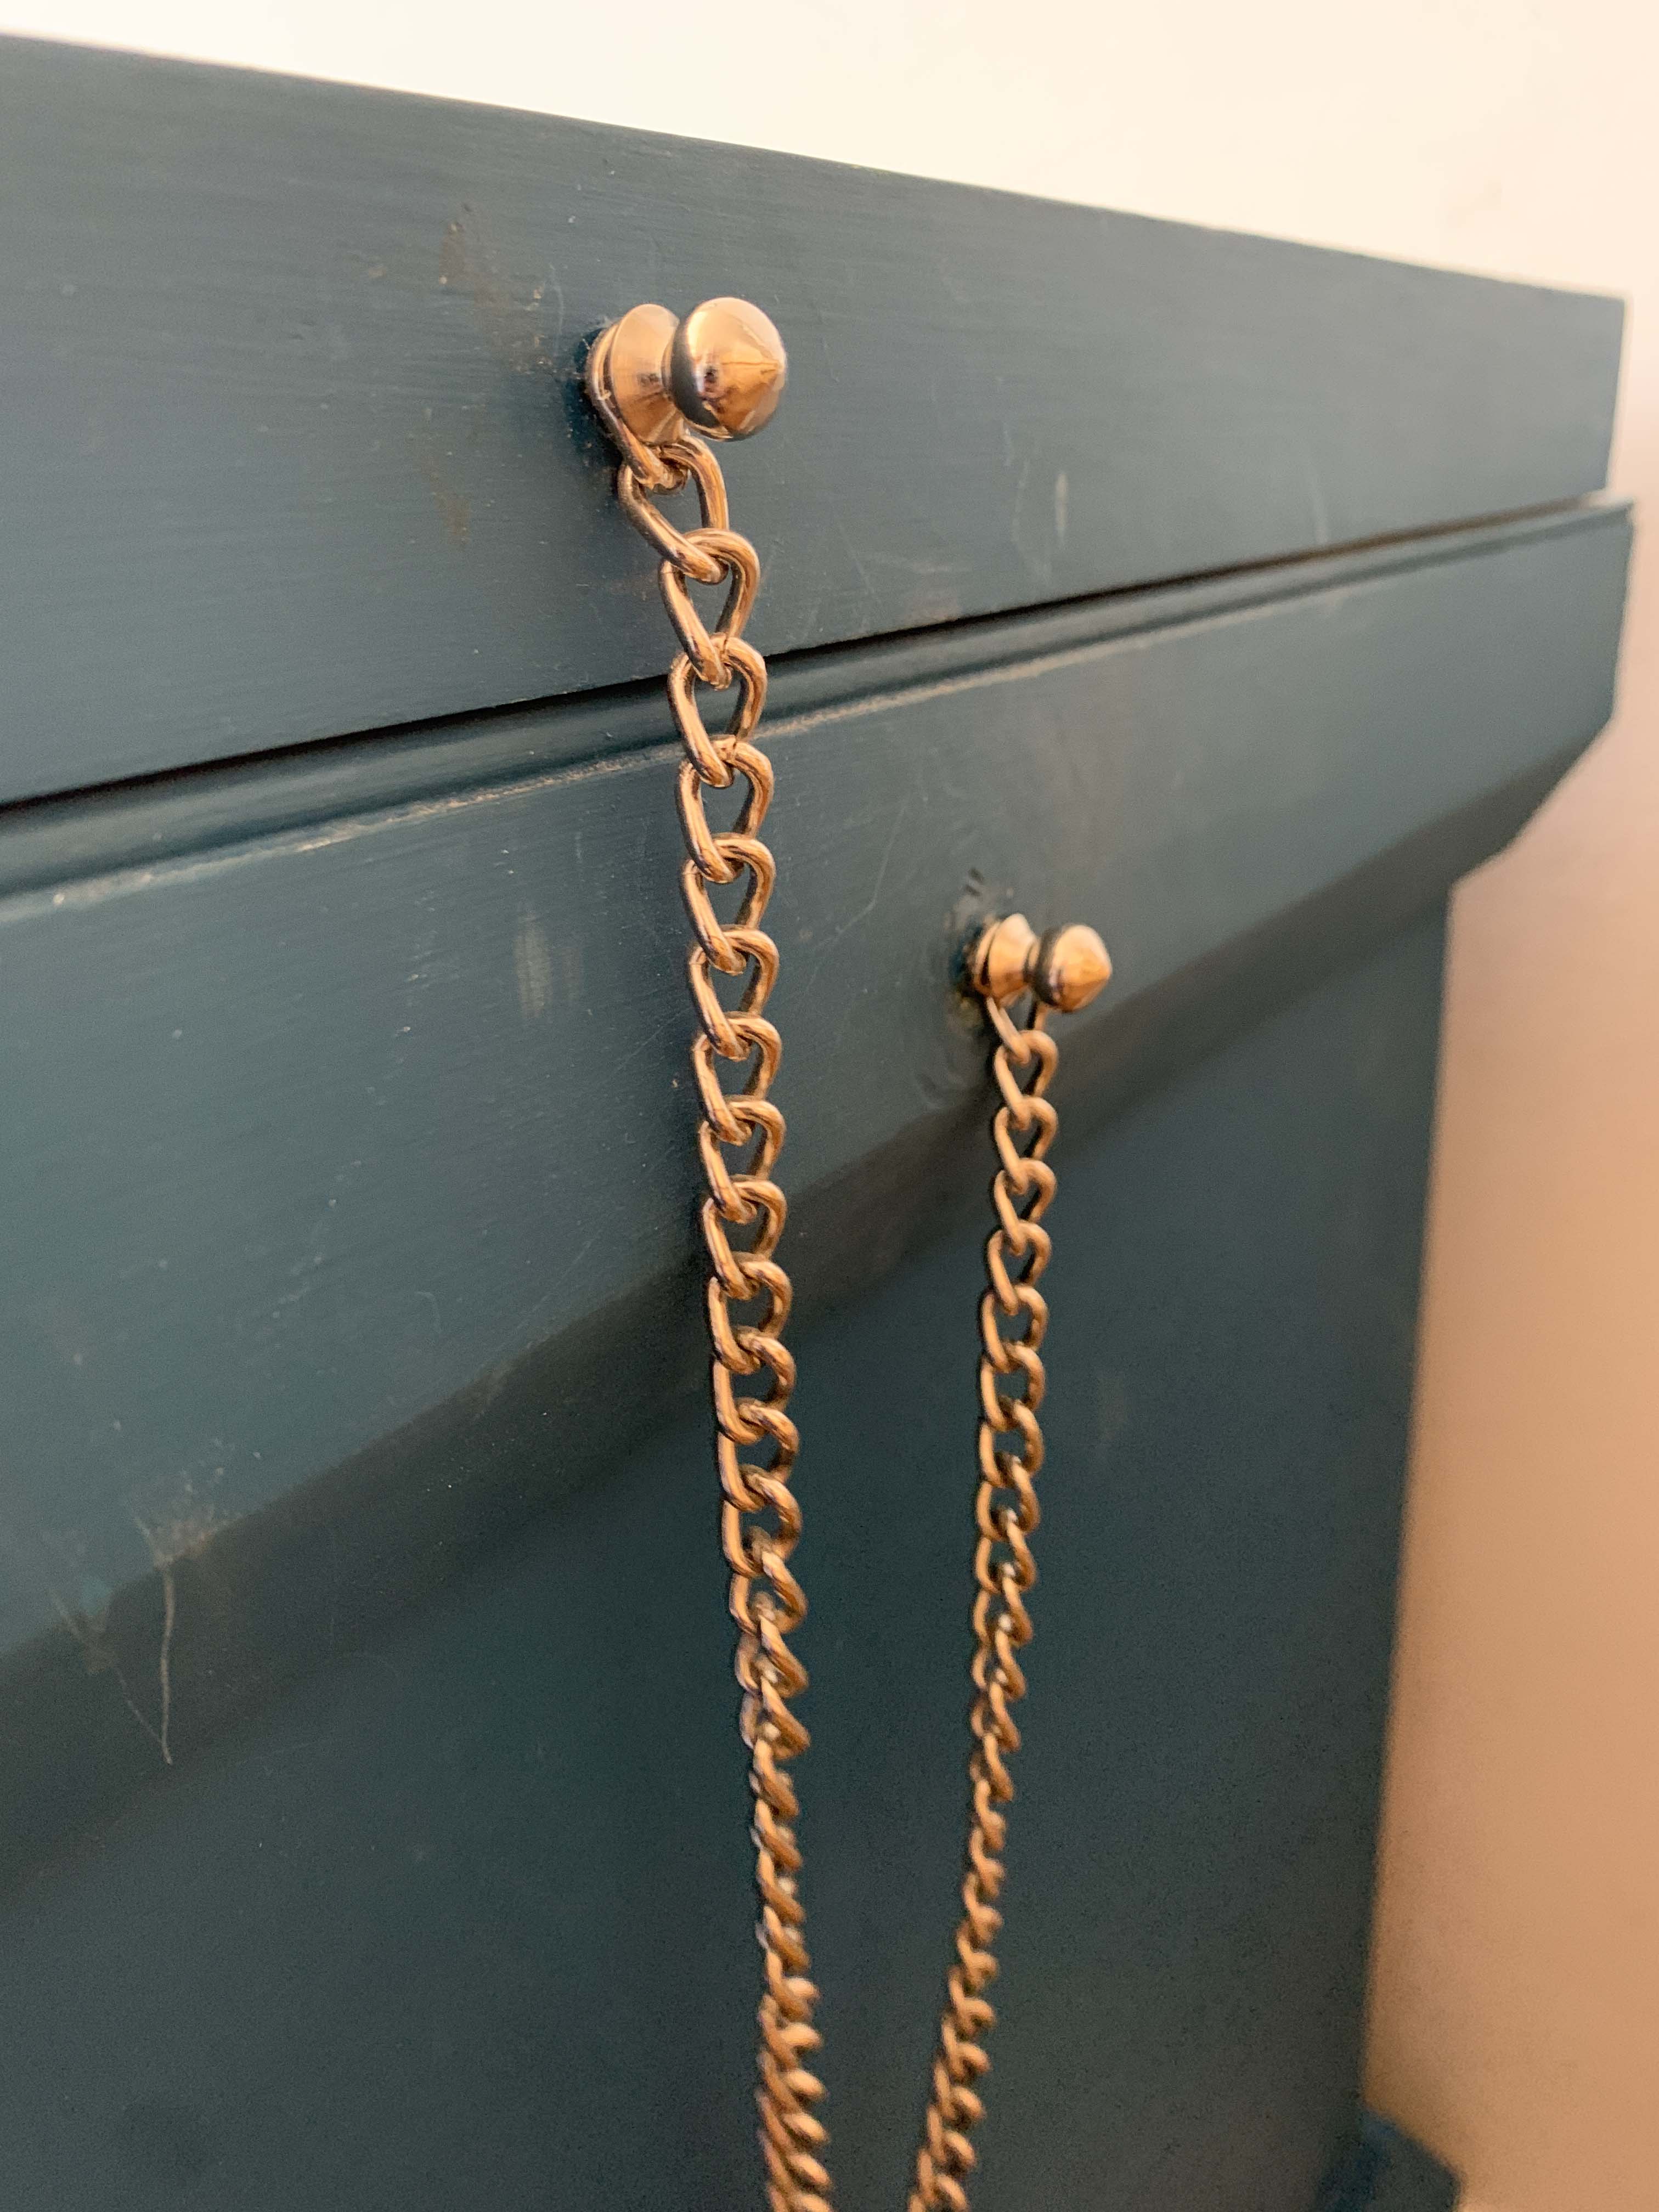
When I built the ATC I use at the Lost Art Press shop, I decided to add a nickel-plated chain to the outside, because I like shiny silvery things. So I bought a length of chain from McMaster-Carr along with some 3/8″ threaded rod, and found female-threaded finials on a lamp-repair-supply website. I cut two pieces of threaded rod to length, then epoxied them in place in the side of the dust seal and upper skirt. The chain fits over the rod; the finials screw onto the rod. (I’ve used this same approach on a couple of chests built on commission…but I added a threaded insert into the side of the lid and top skirt for extra insurance. Overkill, but I’d rather err on the side of solid when I’m sending out my work.)
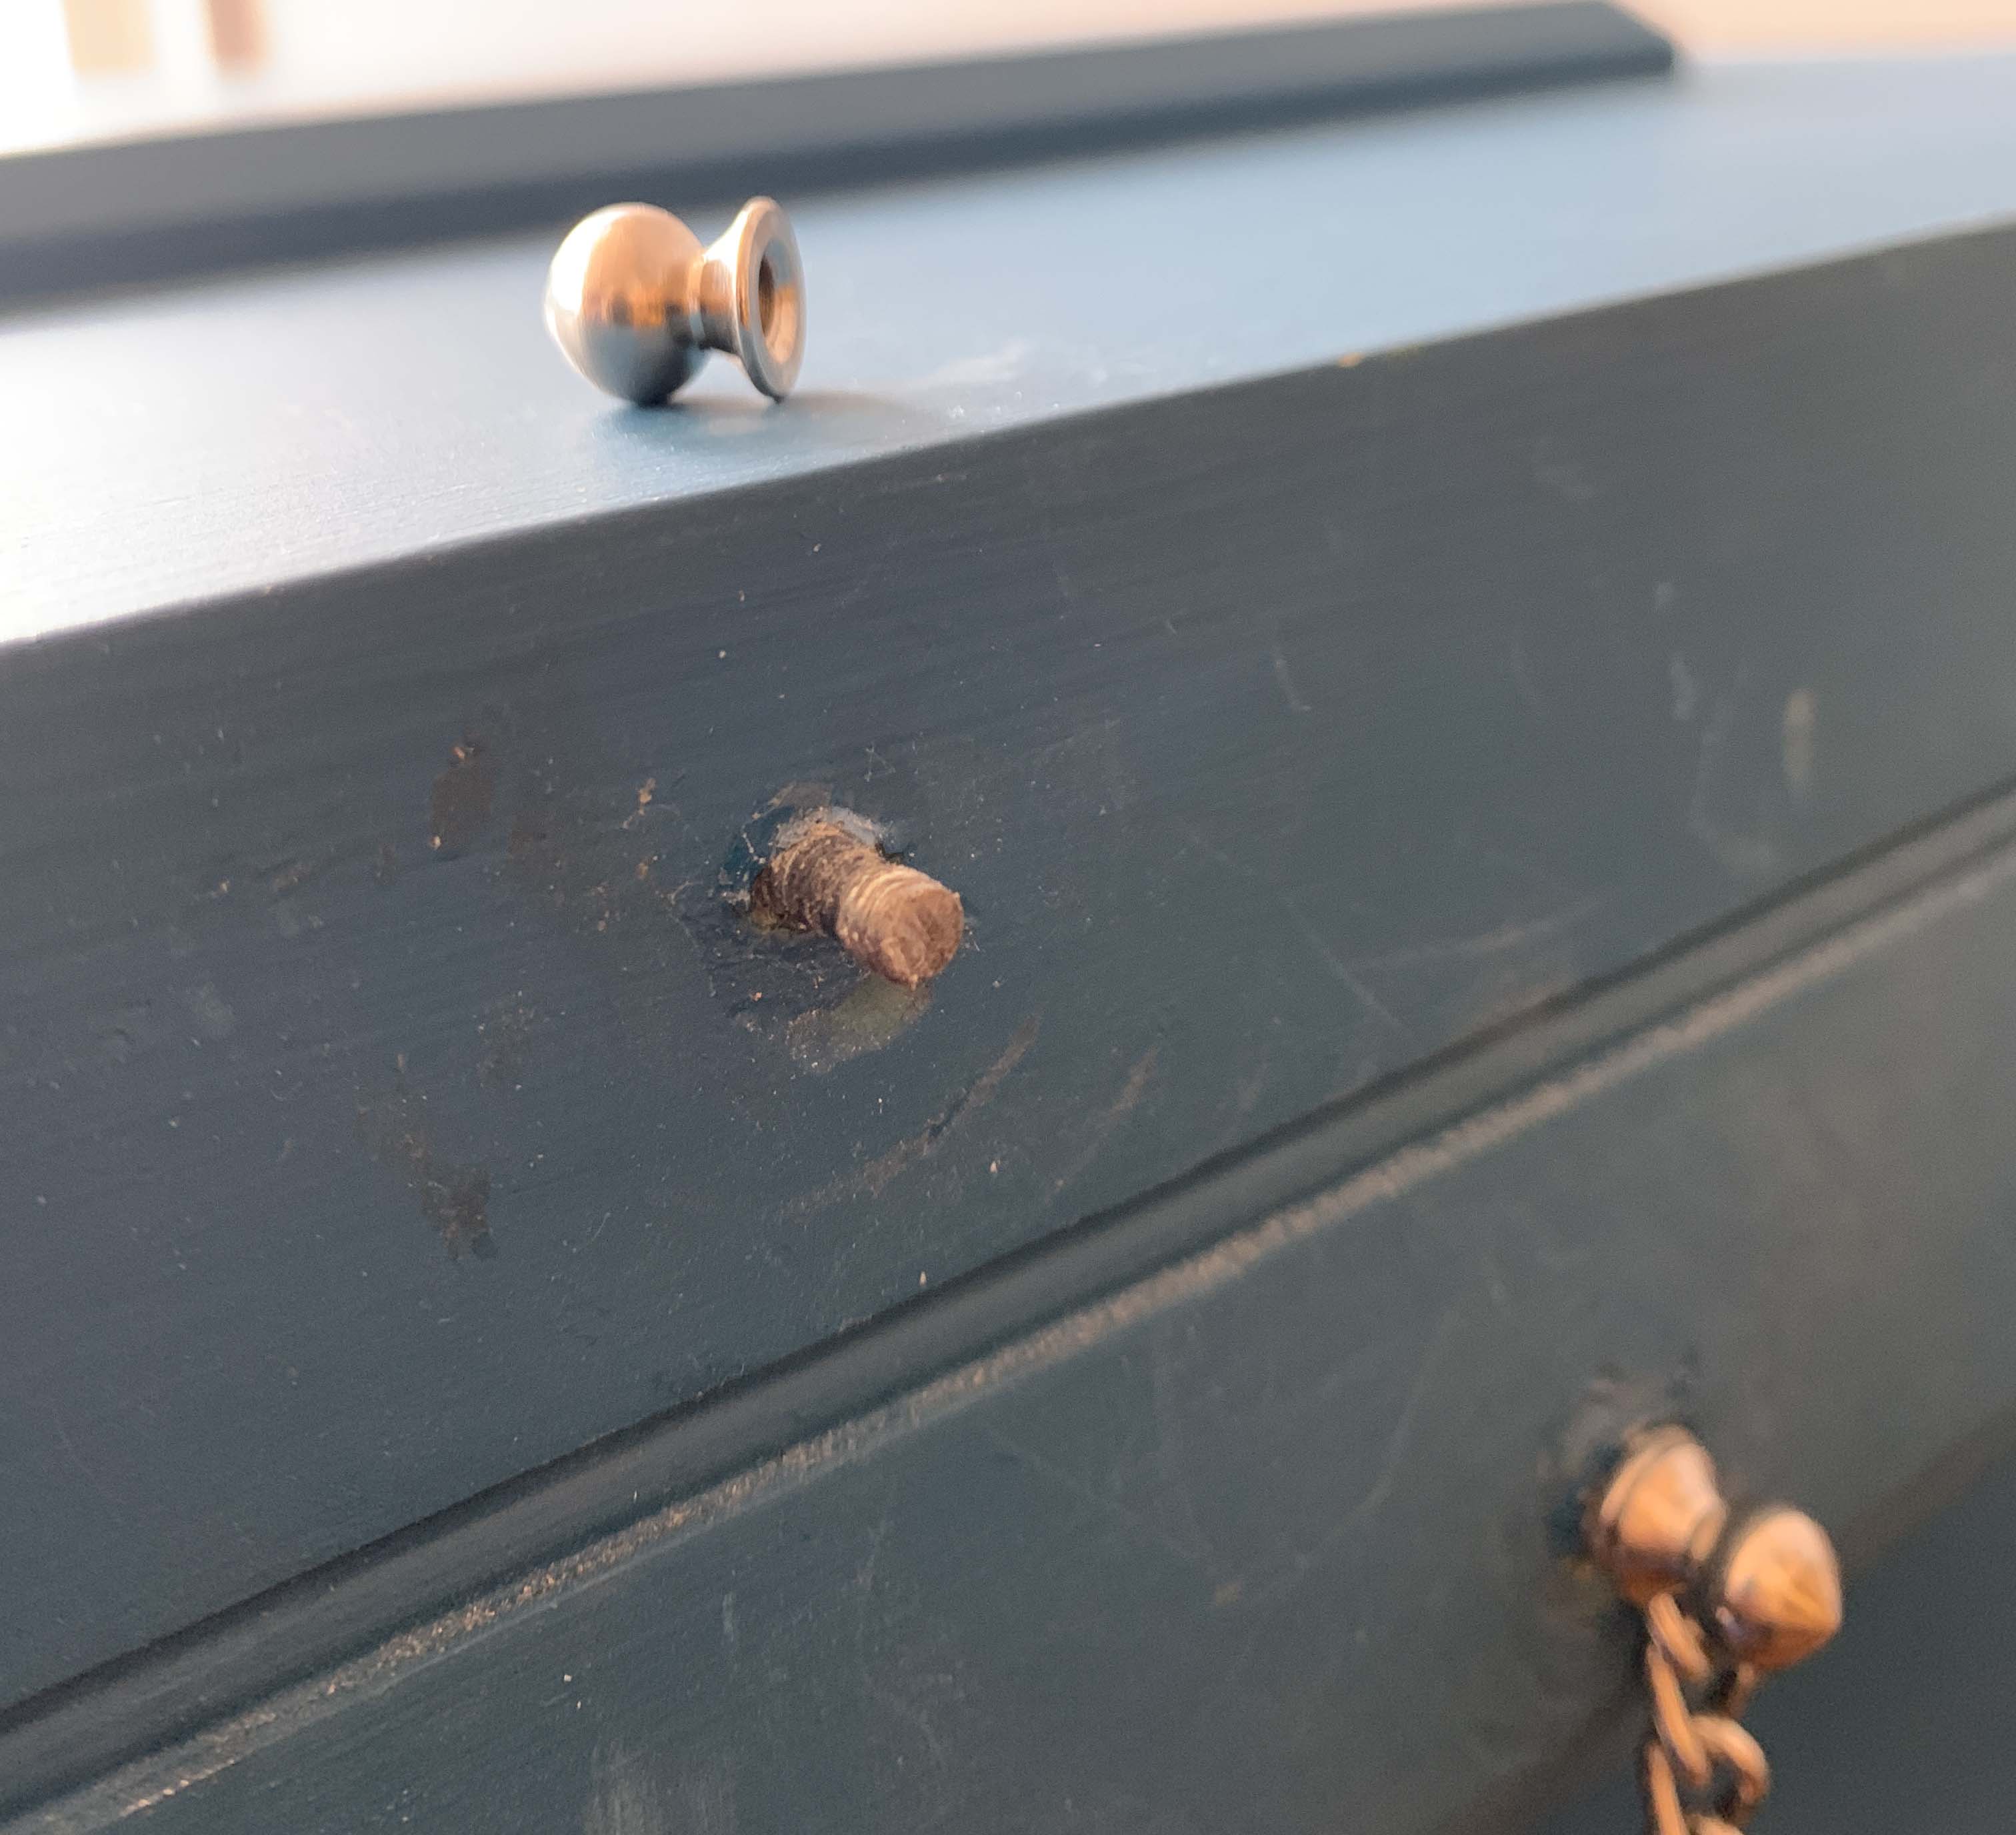
It doesn’t look pretty when the finial is off – but it works.
That’s better!
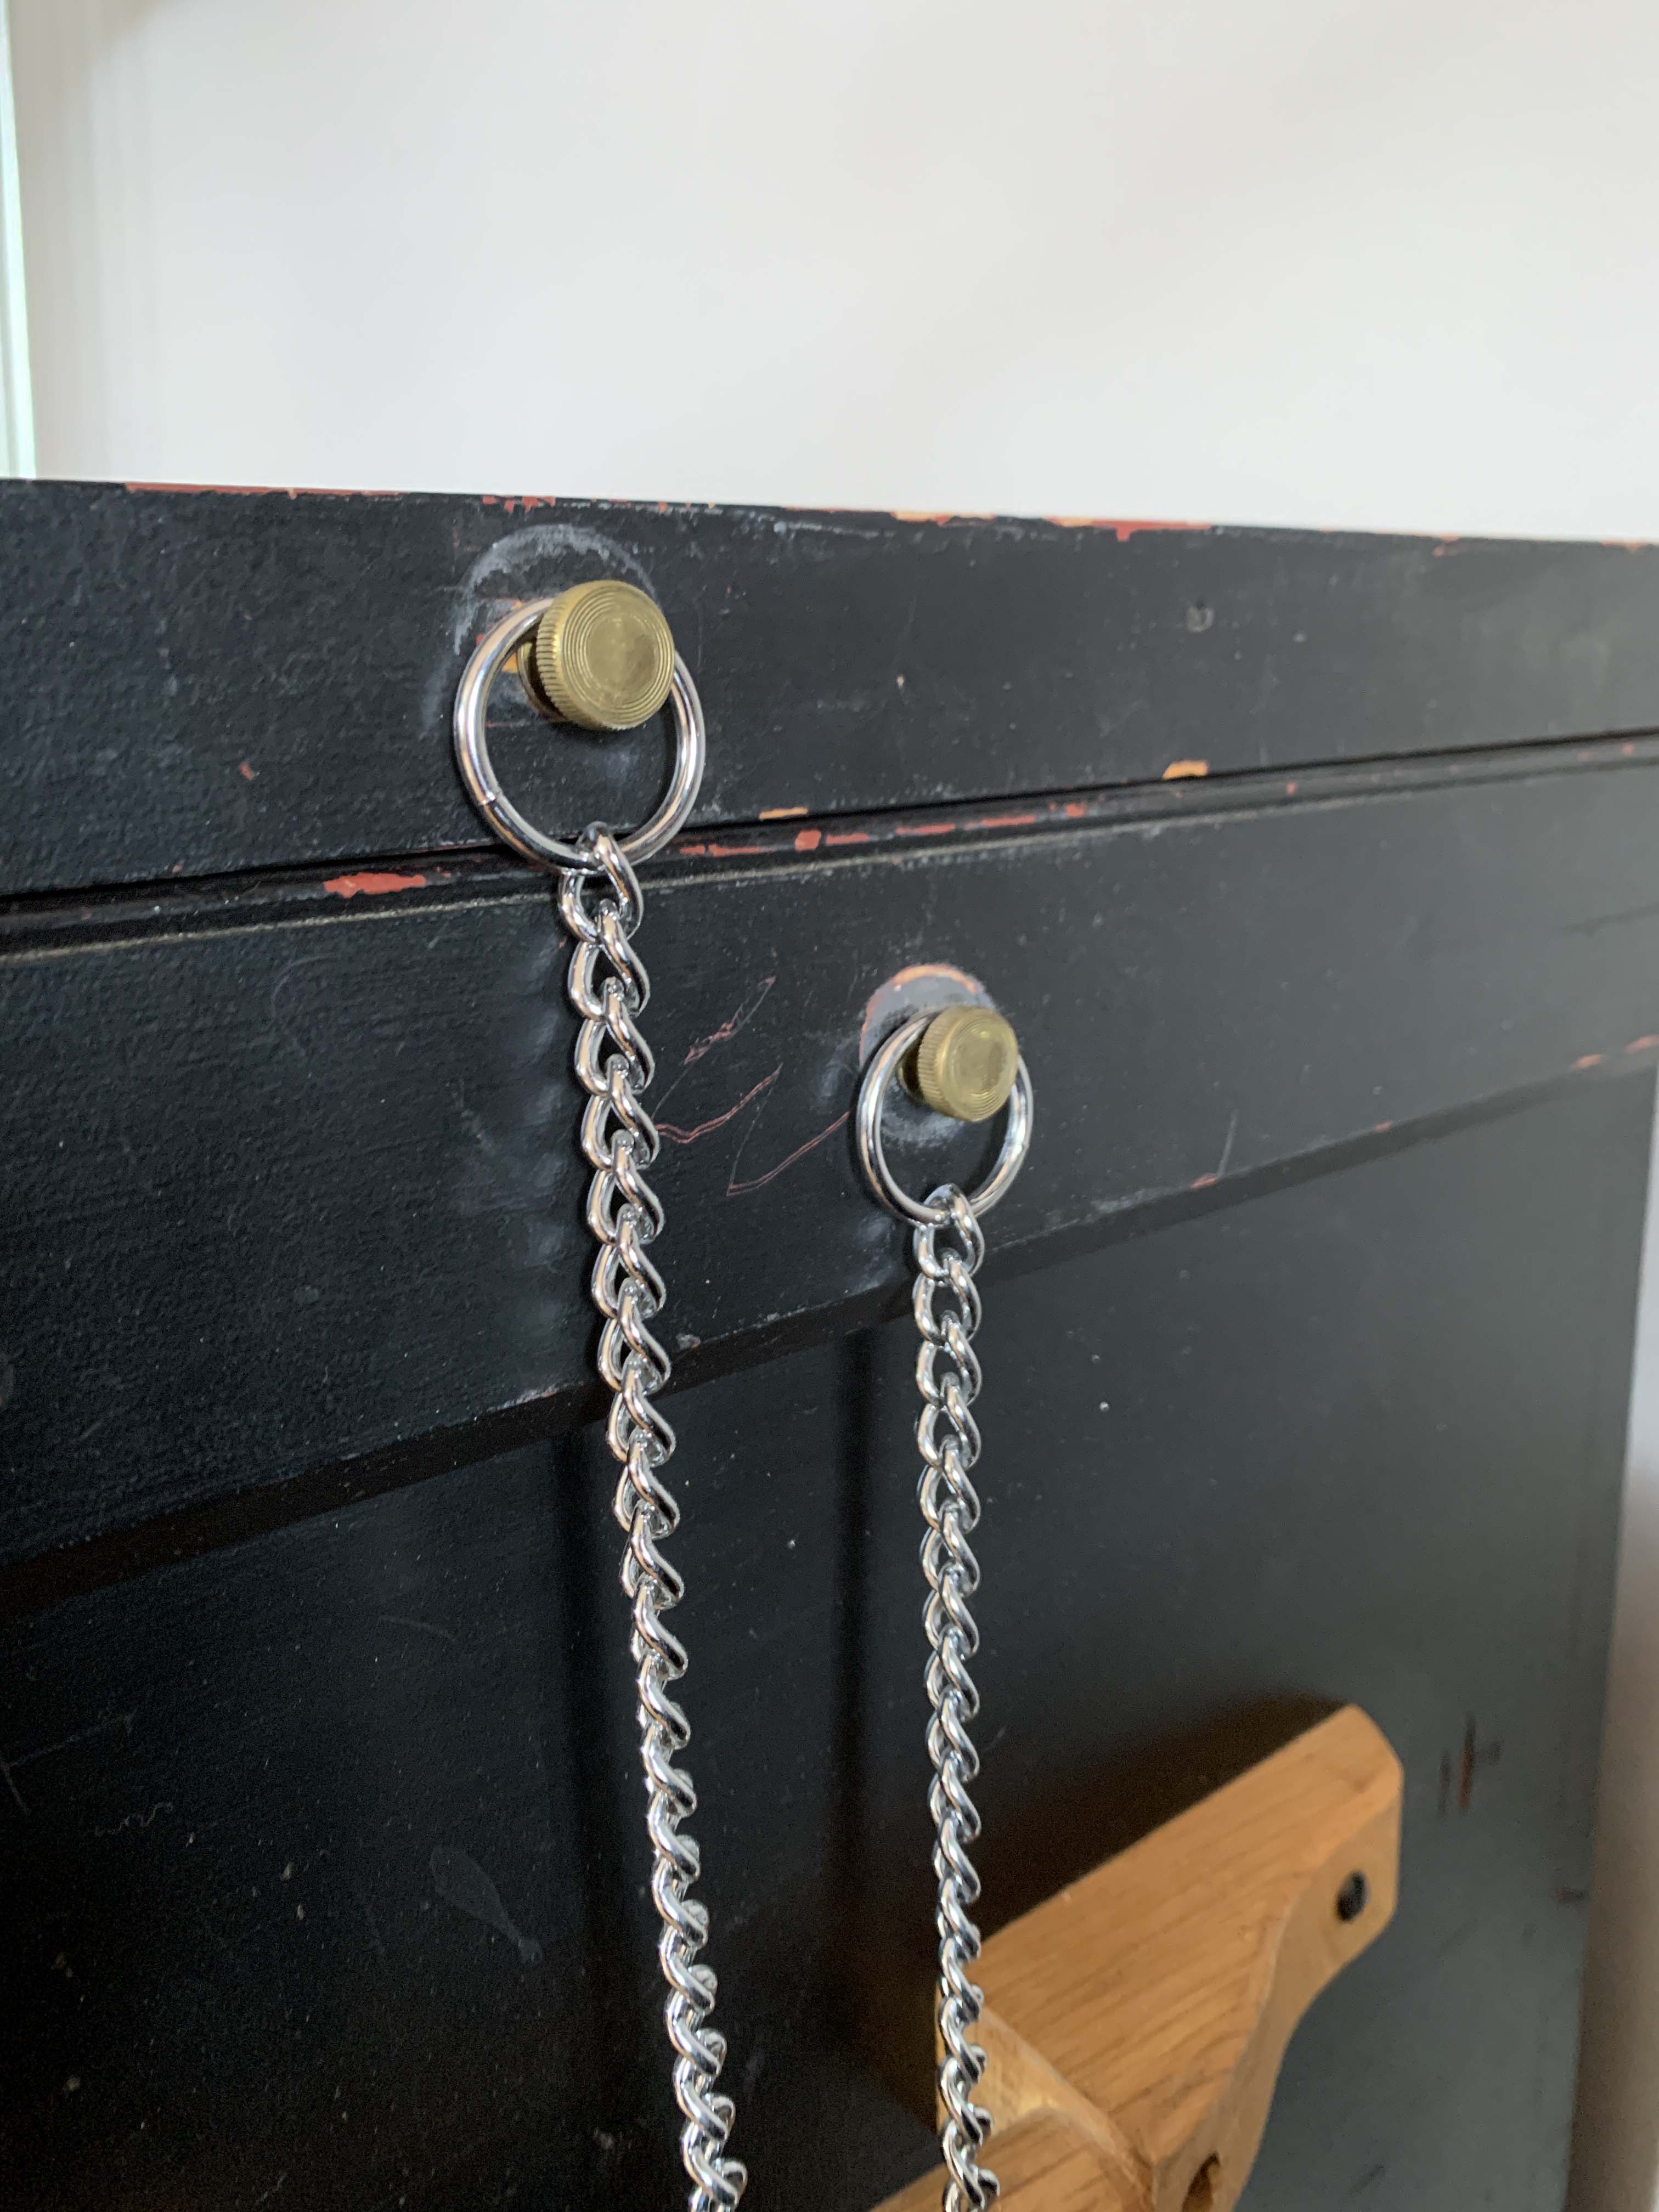
Chris used a different approach, in part, I think, because he already had threaded inserts and knurled knobs from the aluminum lid stay.
A knurled knob and its insert.
He simply screwed both knobs in tight, then bought a dog collar.
The advantage here is that the chain can be removed in a jiffy when Fido needs to go for a walk.
In truth, though, both of us store our chests against a wall – so more often than not, it’s a wall, not a chain, that holds our chests open.
Happy smiles (none are faked!) from a 2022 class. (After hours, of course – the bourbon doesn’t come out until the tools are put away.)
Next Tuesday at 10 a.m. Eastern, registration will be open on our ticketing site for classes in the second half of this year – including two from visiting instructors. (Note that if you click through to read more about each class, you’ll see a “buy tickets” button – but you can’t buy tickets until 10 a.m. Feb. 21.)
Classes are limited to six students (seven for one class…because Will Myers travels with his bench, thus we’ll have an extra), so each student gets plenty of attention from the instructor…whether they want it or not. And if you want to take a class and travel with your family, there’s plenty of fun and interesting stuff around here for the non-woodworking visitor.
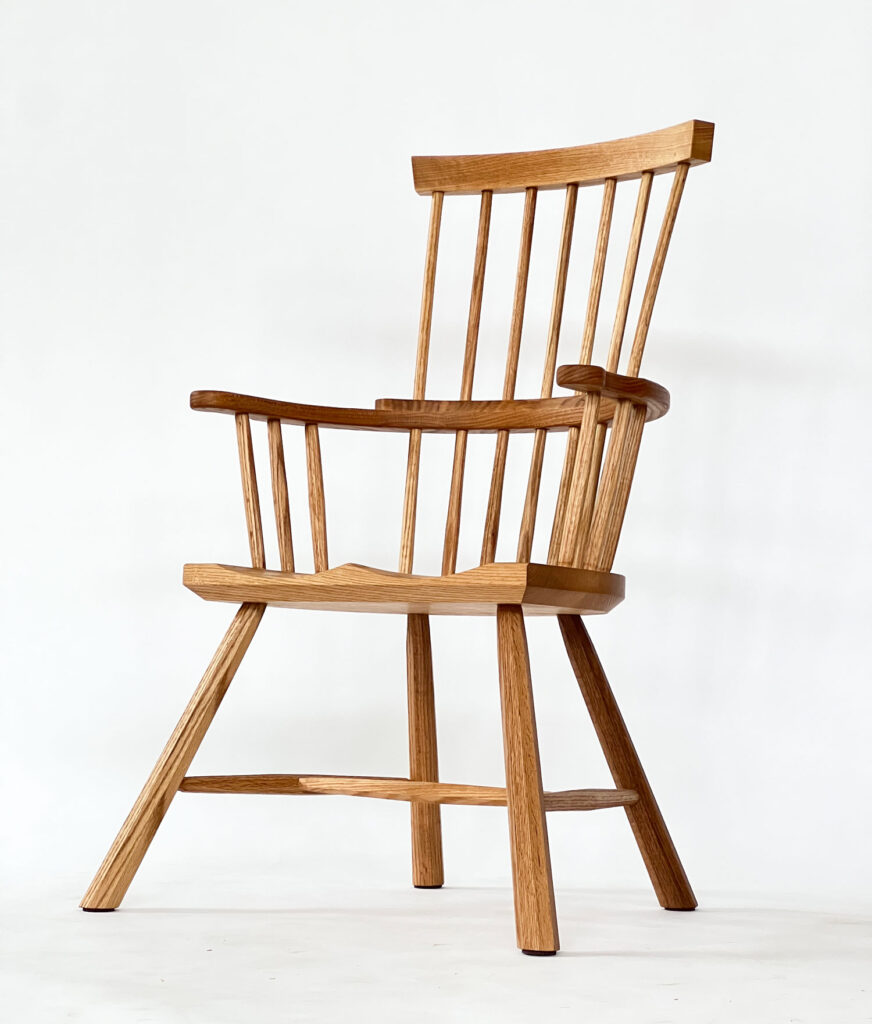
In addition to the classes mentioned above, we’re taking applications for an Aug. 14-18 Comb Back Stick Chair class with Christopher Schwarz. The class description follows (and includes an explanation as to why we’re trying this approach with this – a relatively advanced – class).
Build a Comb-Back Stick Chair with Christopher Schwarz Cost: $1,800 (price includes all materials and lunch every day) 2023 Class Description, Tools & Materials
Build a comfortable stick armchair in the vernacular tradition using many tools and materials that are familiar to the typical woodworker.
The form is inspired by historic examples of 18th- and 19th-century stick chairs from Wales that have been refined by John Brown and Christopher Williams – two of my favorite chairmakers. I designed this version to be built with American woods, familiar bench tools and a few specialty chairmaking tools.
Students will be encouraged to customize their chairs (no two stick chairs should be alike). The hands, armbow and comb can all be changed to suit the builder’s style. Students also will be shown how to design their chairs to be more contemporary or ancient-looking. (Stick chairs are chameleons.)
While stick chairs are an ideal form for a first-time chairmaker, it does require intermediate woodworking skills, plus some muscle and stamina. Students should be very comfortable with edge tools and be able to sharpen and maintain them. You will need to be adept with a cordless drill. And be prepared for hours of shaving while on your feet (we have wooden floors here, FYI).
This class requires long hours and will make you tired (but happy at the end of the day). Because of the nature of this class, we bring in lunch every day for students. Plus, all materials (wood, glue etc.) are included in the cost of the class. So the price is higher than a typical week-long class.
This class will be filled via a somewhat random drawing. To apply, send an email to covingtonmechanicals@gmail.com with the subject line “August 2023 Chair Class” by Feb. 24. In the email, please let us know your name, and the most difficult woodworking project you have built on your own (not in a class). And, using no more than four sentences, let us know why you want to take this class (personal enlightenment, professional development, you want to teach others etc.) There are no right or wrong reasons.
Why are we trying this application process? We’ve watched some students who are extremely skilled or others who are new to the craft get frustrated because the pace of the class is too slow or too fast. We are simply trying to find a pool of students with similar skills. If we have a big group of beginners, we will put together a beginner class. Likewise if the applicants are mostly advanced woodworkers, we will gather a class of experts. We are just trying to improve the classroom experience for everyone.
On March 1, we will let everyone know who is in the class and who is on the wait list.
Bean and Wally are THRILLED about the upcoming gift guide.
We will kick off the Anarchist Gift Guide on Thursday, Oct. 21 (tomorrow!). That’s a little earlier than usual, but the world is off its axis, and we want to give you plenty of time to get your gifts sorted for the holidays. Plus, this will be our biggest gift guide yet.
If you aren’t familiar with the gift guide, it has been a yearly tradition here for about a decade. It’s mostly little things that we find useful in the shop. It’s not sponsored and not affiliated. It doesn’t plug or promote our products. We do it because we love you (even you, John Cashman).
Hey – That Feels… Almost Normal
It was a relief to receive Nancy R. Hiller’s “Shop Tails: The Animals Who Help Us Make Things Work” from the printing plant in Tennessee. It took only 10 weeks to get it printed. That turnaround time is not like the old days when five weeks was the norm. But it’s way better than some other recent titles. (“The Stick Chair Book” is coming up on 17 weeks in gestation.)
So if you are looking for Lost Art Press books as gifts, here are four quick updates.
“The Stick Chair Book” should be shipping the second week of November. Fingers crossed.
“The Handcrafted Life of Dick Proenneke” is also scheduled to ship about that same time.
We are running dangerously low on stock of “The Anarchist’s Tool Chest.” The cotton cloth we need for the cover is in limbo. If you need this book for a gift, don’t hem. And don’t haw.
With publishing mostly on the ropes, Megan and I have been full-time furniture makers and tool designers during the last few months. We’ve been sending a lot of furniture out the door lately, but that doesn’t help you with Christmas (unless you ordered a chair or a tool chest from us).
The good news is that we should have Crucible Planing Stops in stock before Christmas. These ductile iron bench accessories should be less than $50 and will be super easy to install (drill a 5/8” hole in the movable block; drive the stop in; done).
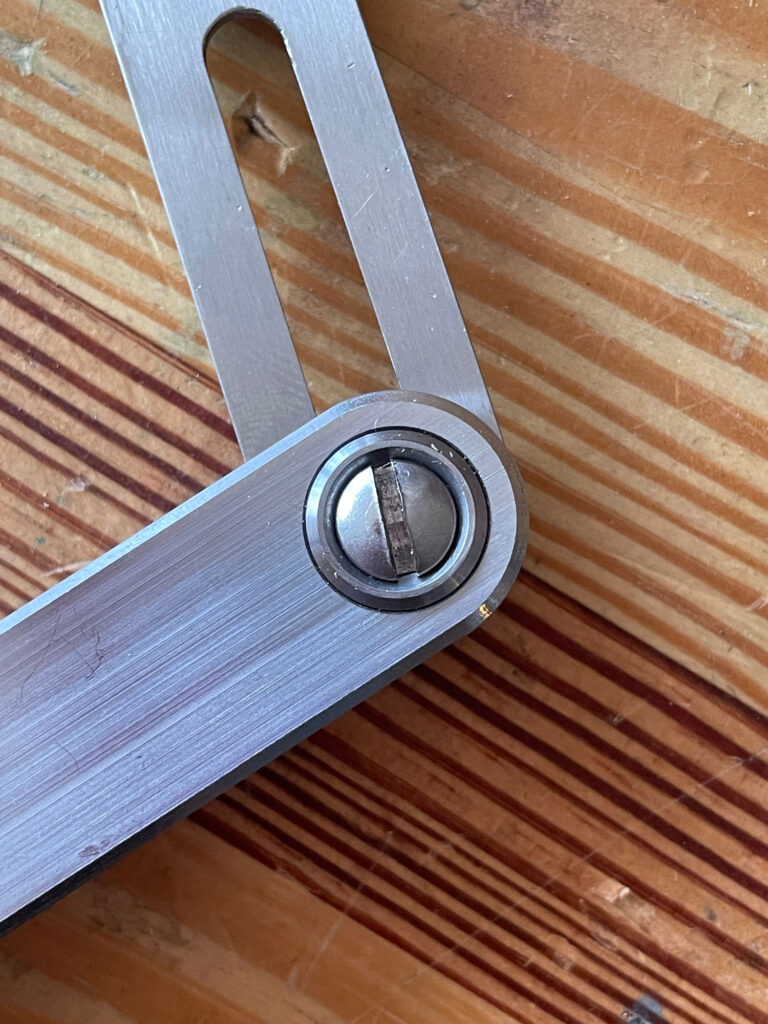
We have also been working on two new tools that are now in the prototype stage. One is a sliding bevel that holds its setting better than any tool I’ve ever used. And the second is a handy waist apron that is great for woodworking (and will feature a cool vintage-y screen print). Both of these new tools will launch in early 2022.
And by then I hope things will get back to normal, and we’ll have some new titles to announce.
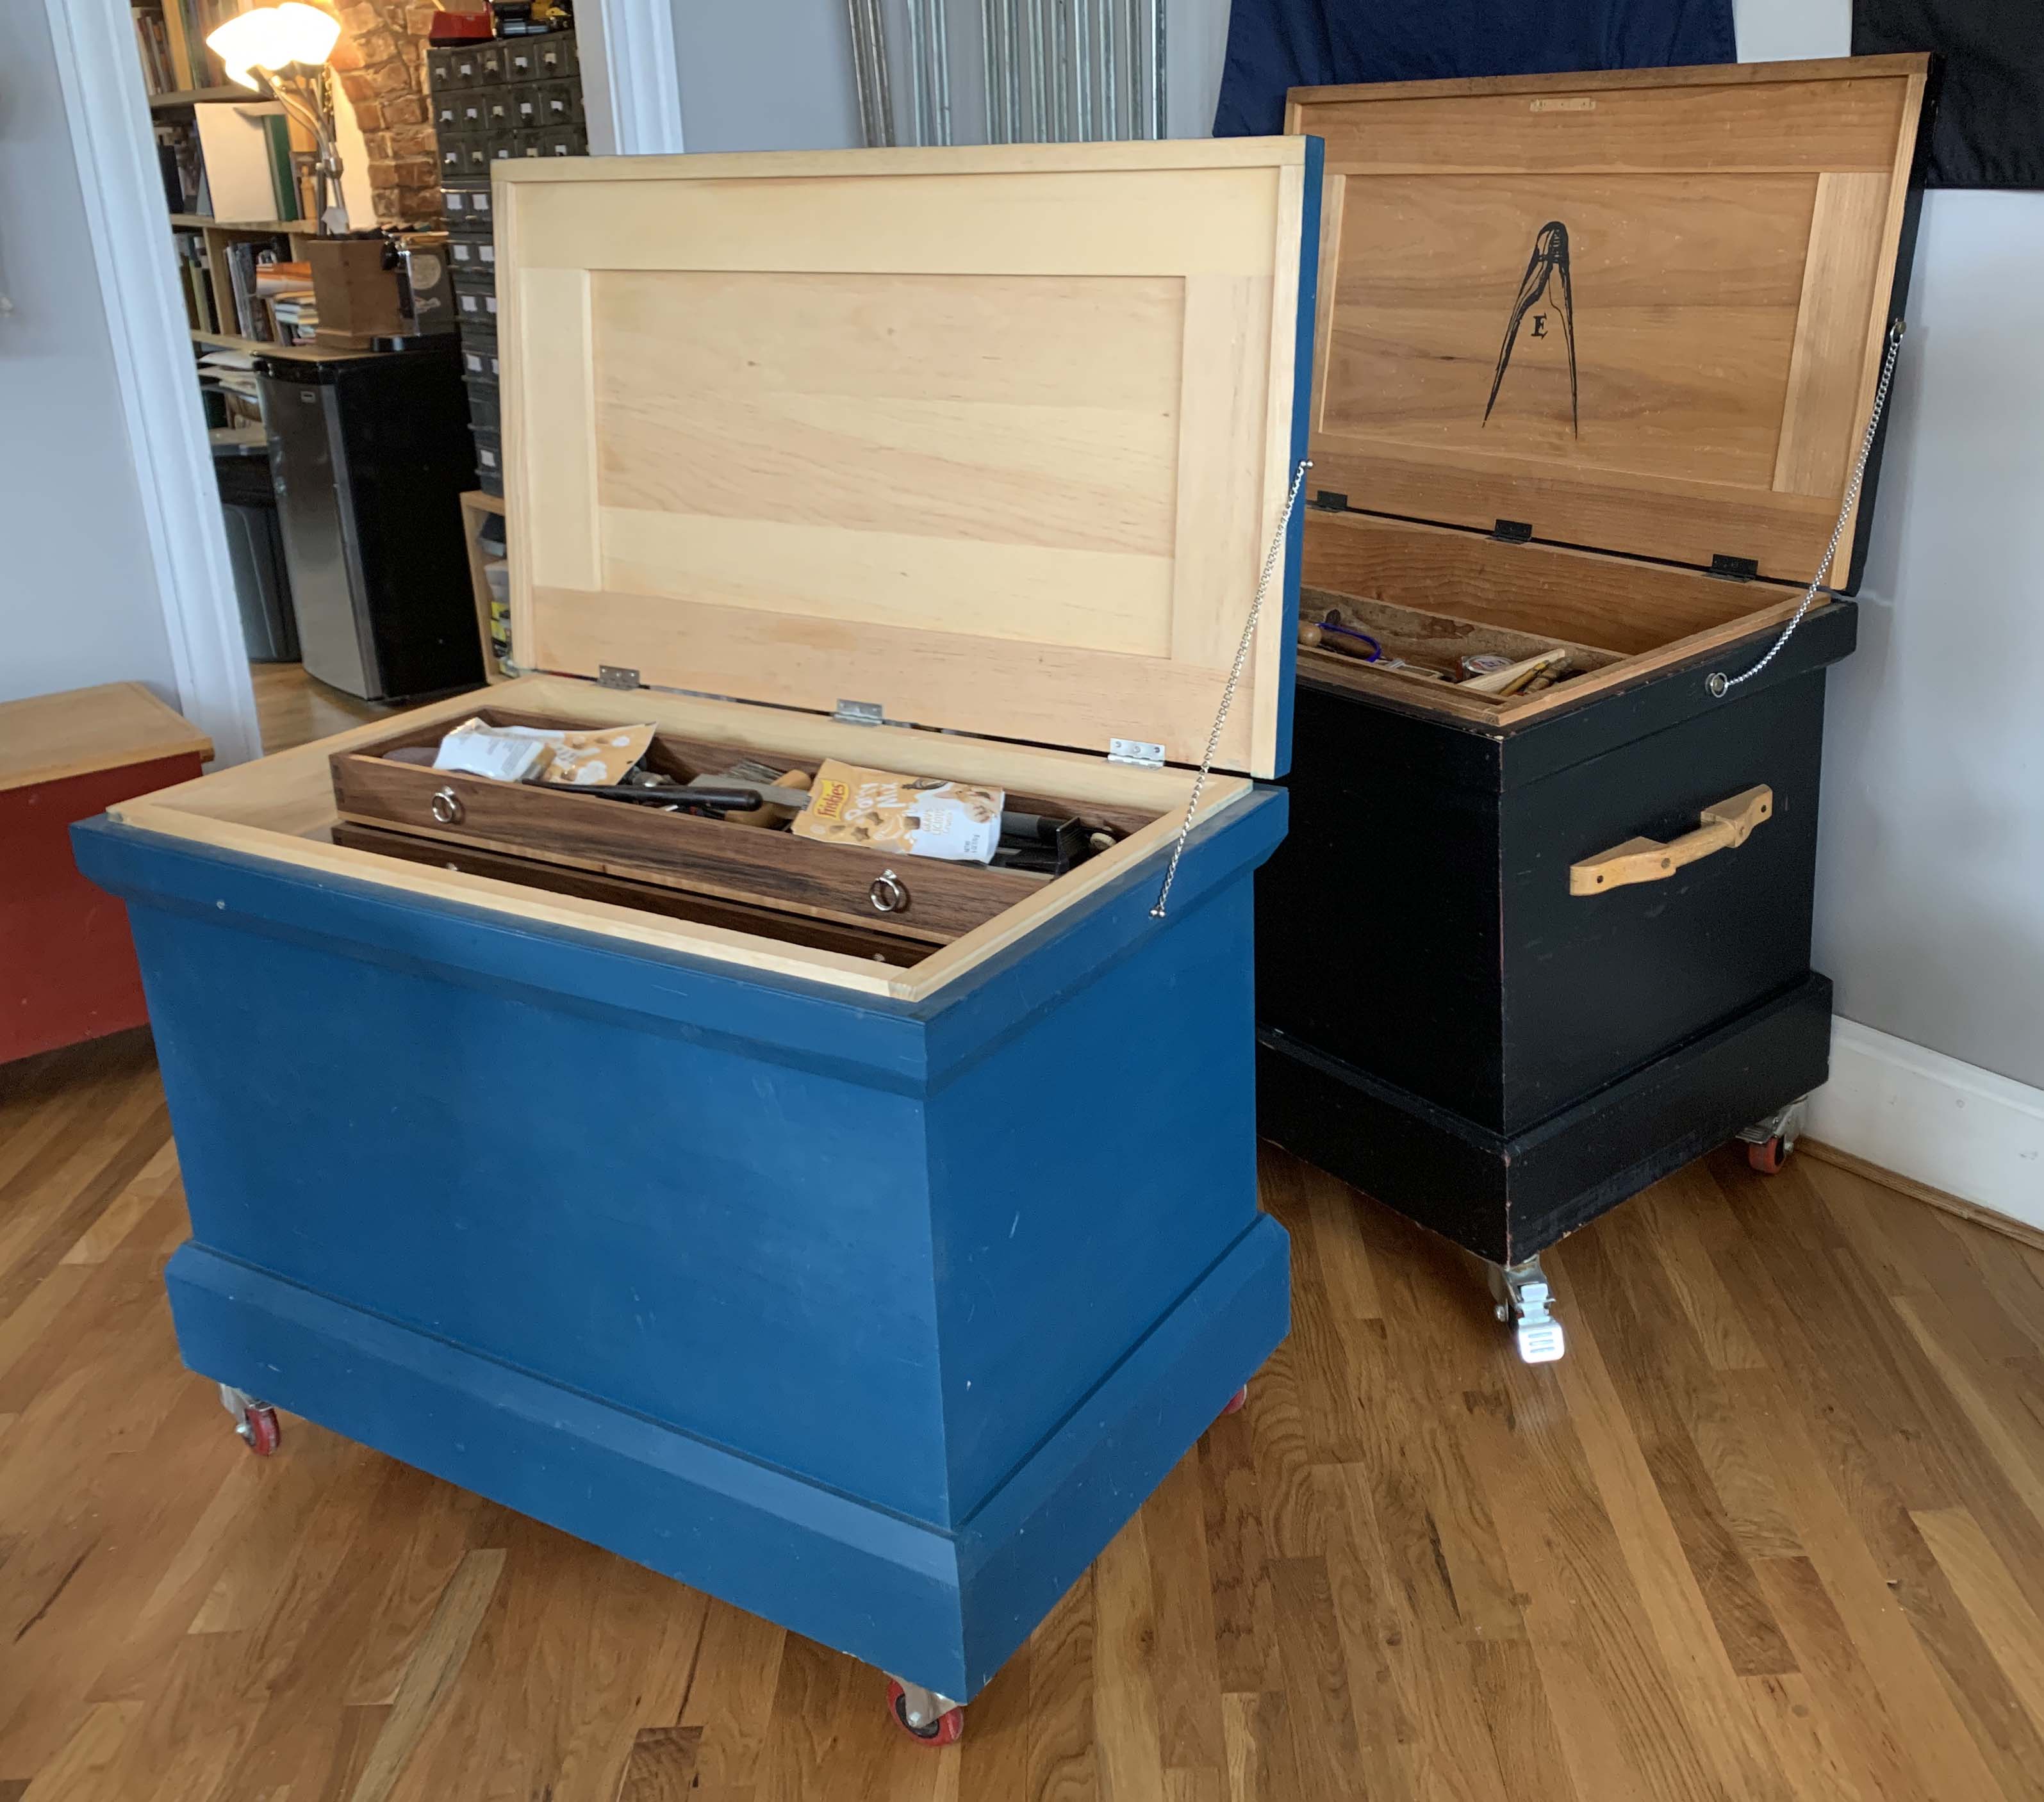
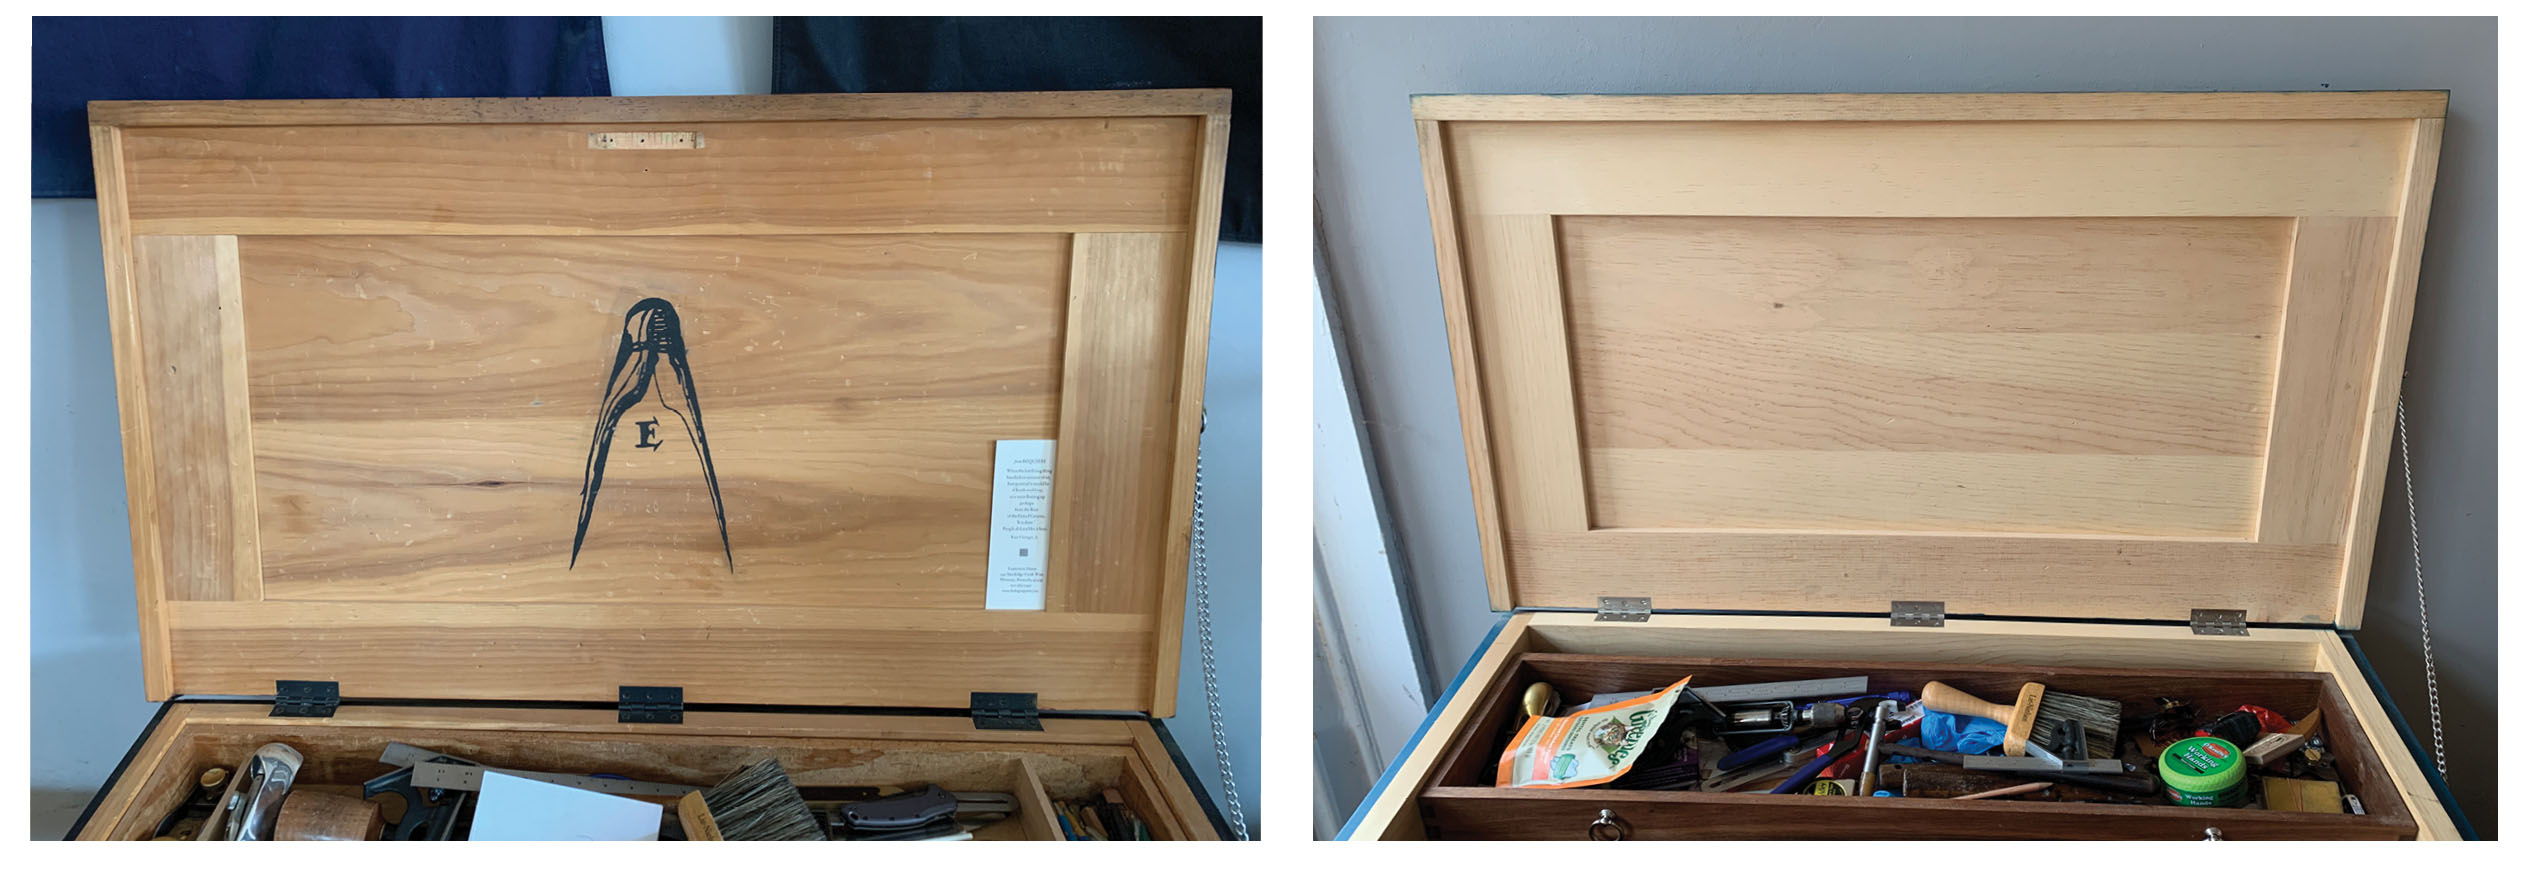
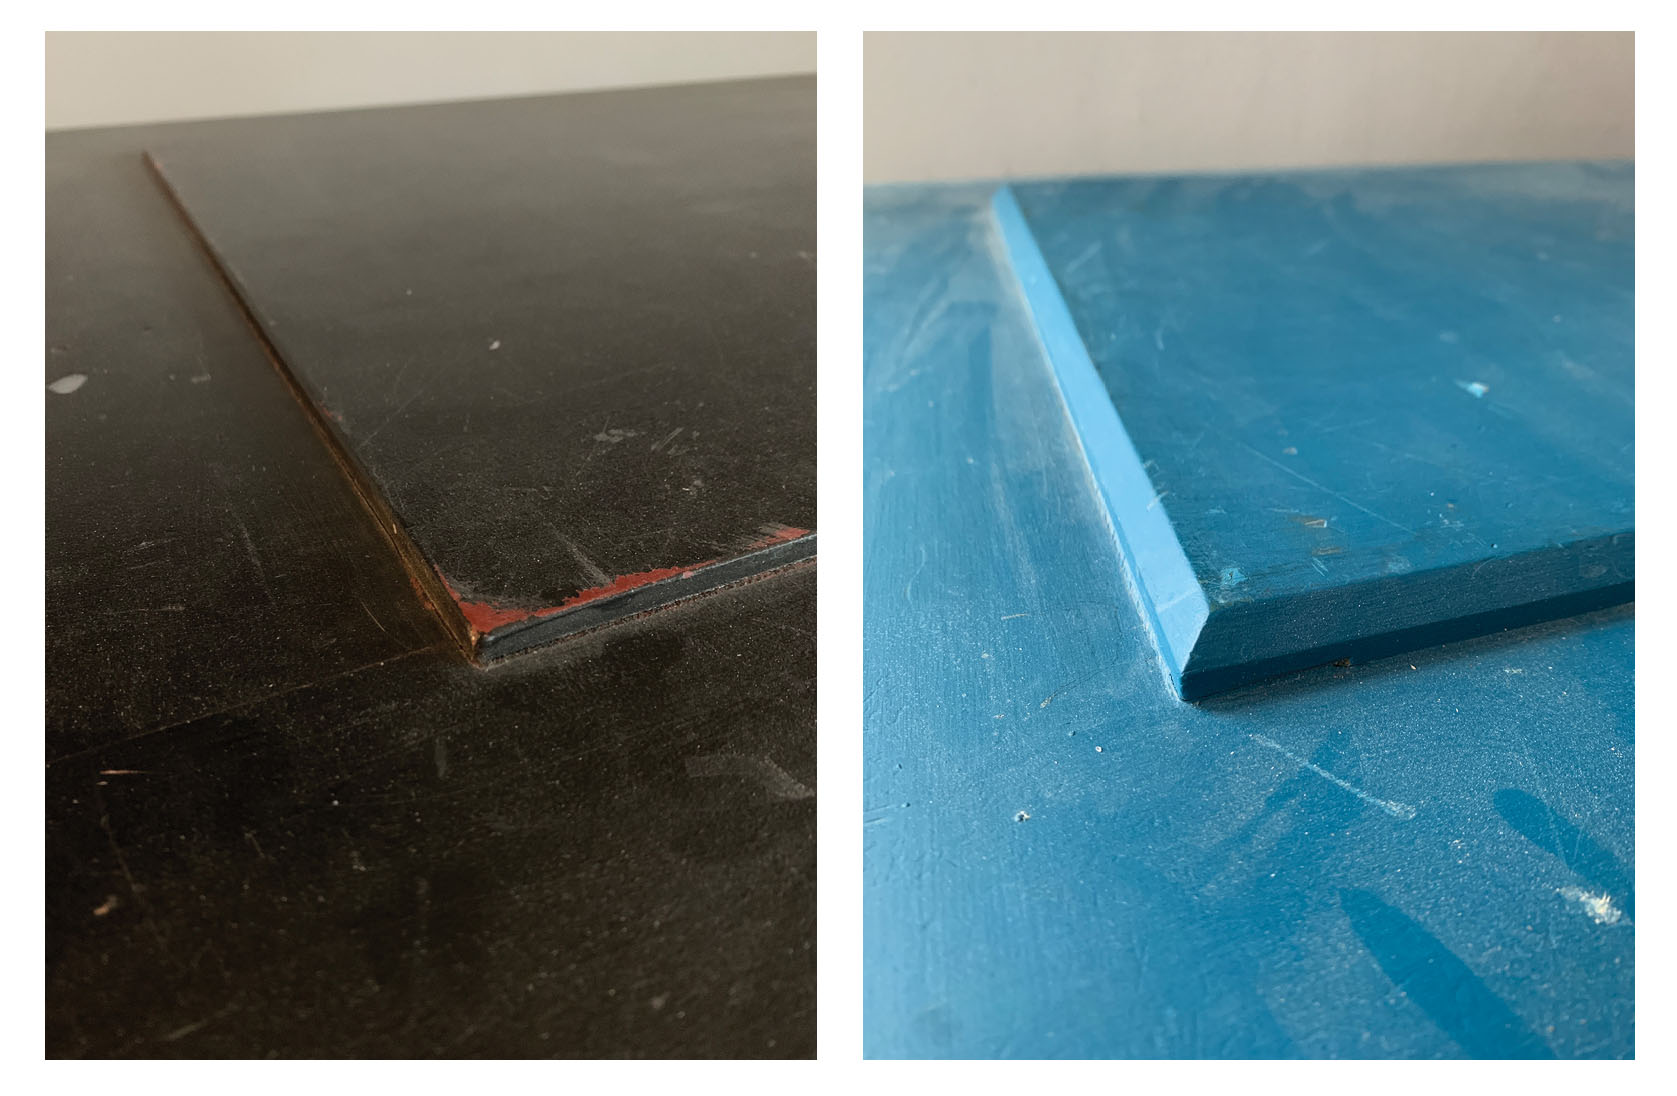
On the left is the lid of the original ATC, with through mortise-and-tenon joinery. On the right is my ATC at the Lost Art Press shop, with loose-tenon joinery. You can’t see the difference (except on the back edge of the lid), and like the one on the left, the one on the right is strong enough for even the largest of sitters.
Editor’s note: As promised, Christopher Schwarz and I are writing a series of blog entries that explain how we have improved the construction process for “The Anarchist’s Tool Chest” during the last nine years (and several hundred chests).
Loose-tenon joinery goes back to Greek and Roman times – boats were built using drawbored loose tenons. I start with this fact so as to (hopefully) stave off slings and arrows (which go back further than Roman times).
When Chris built his lid for the first Anarchist’s Tool Chest (the one in the book), and when I built my first one (now in my basement shop at home), we cut through mortise-and-tenon joints for the lid. Now, we employ that loose-tenon joint that goes back to antiquity. Sure, we use a modern approach (the Festool Domino), but the joint is time-tested, and plenty strong enough for these lids (a theory that has been tested time and again by people triple my size sitting on the lid of my chest at the Lost Art Press shop).
The mortises and tenons as shown in the book.
If you’re building one at home and feel the urge, go ahead and cut the mortises and tenons if you like – that joint is the strongest. But also plenty strong enough are two other joints Chris tried out in classroom settings: the bridle joint (slightly easier/faster), then the half-lap joint (easier/faster still). He was on a quest to get the builds down to five days when he tried these out – and they helped to shorten the journey…but not enough.
Now, we pull out the Domino XL, because it’s the only way we’ve found to get the lids glued up before the students leave on Day 5 (and again, the joint is plenty strong). And while at the beginning of the week, we get a grumble or two from time to time when someone asks how we’re doing the lids, by Day 5, everyone is so tired and eager to be done that they embrace the change. And they all leave with the frame-and-panel assemblies done.
But the Domino XL is a $1,500 tool, so use one of the three other approaches if you don’t have or have access to one.
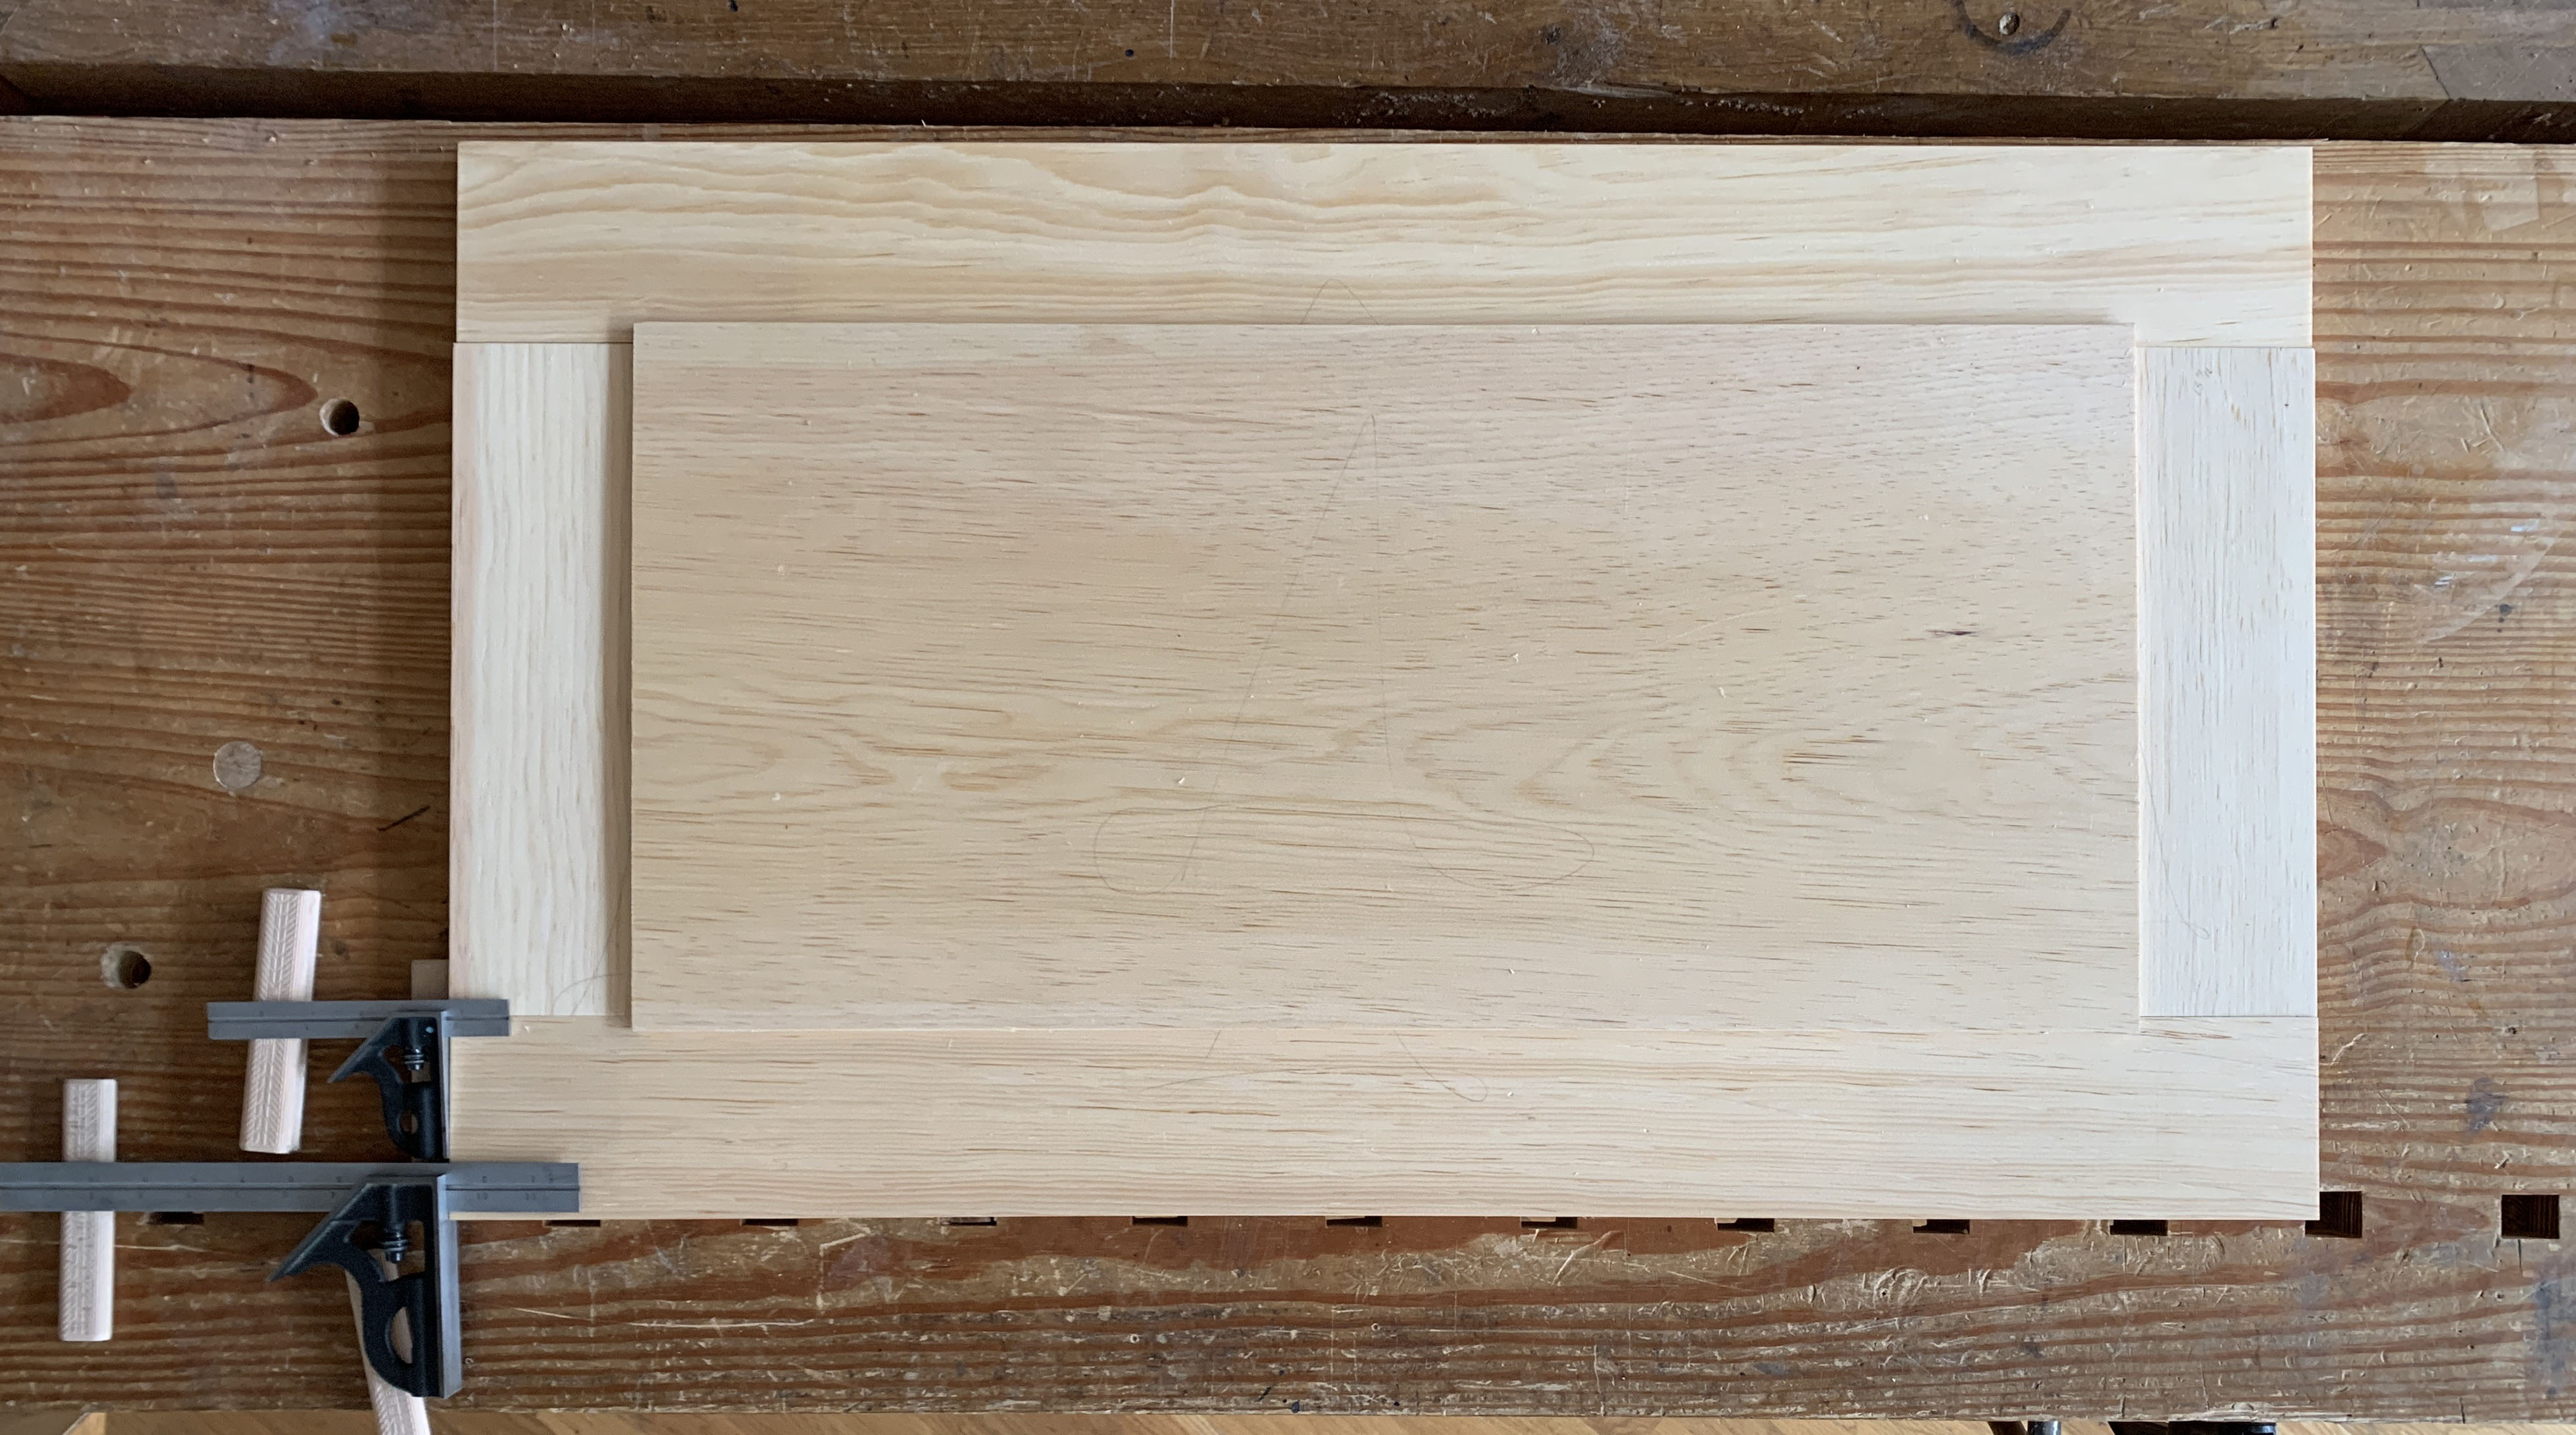
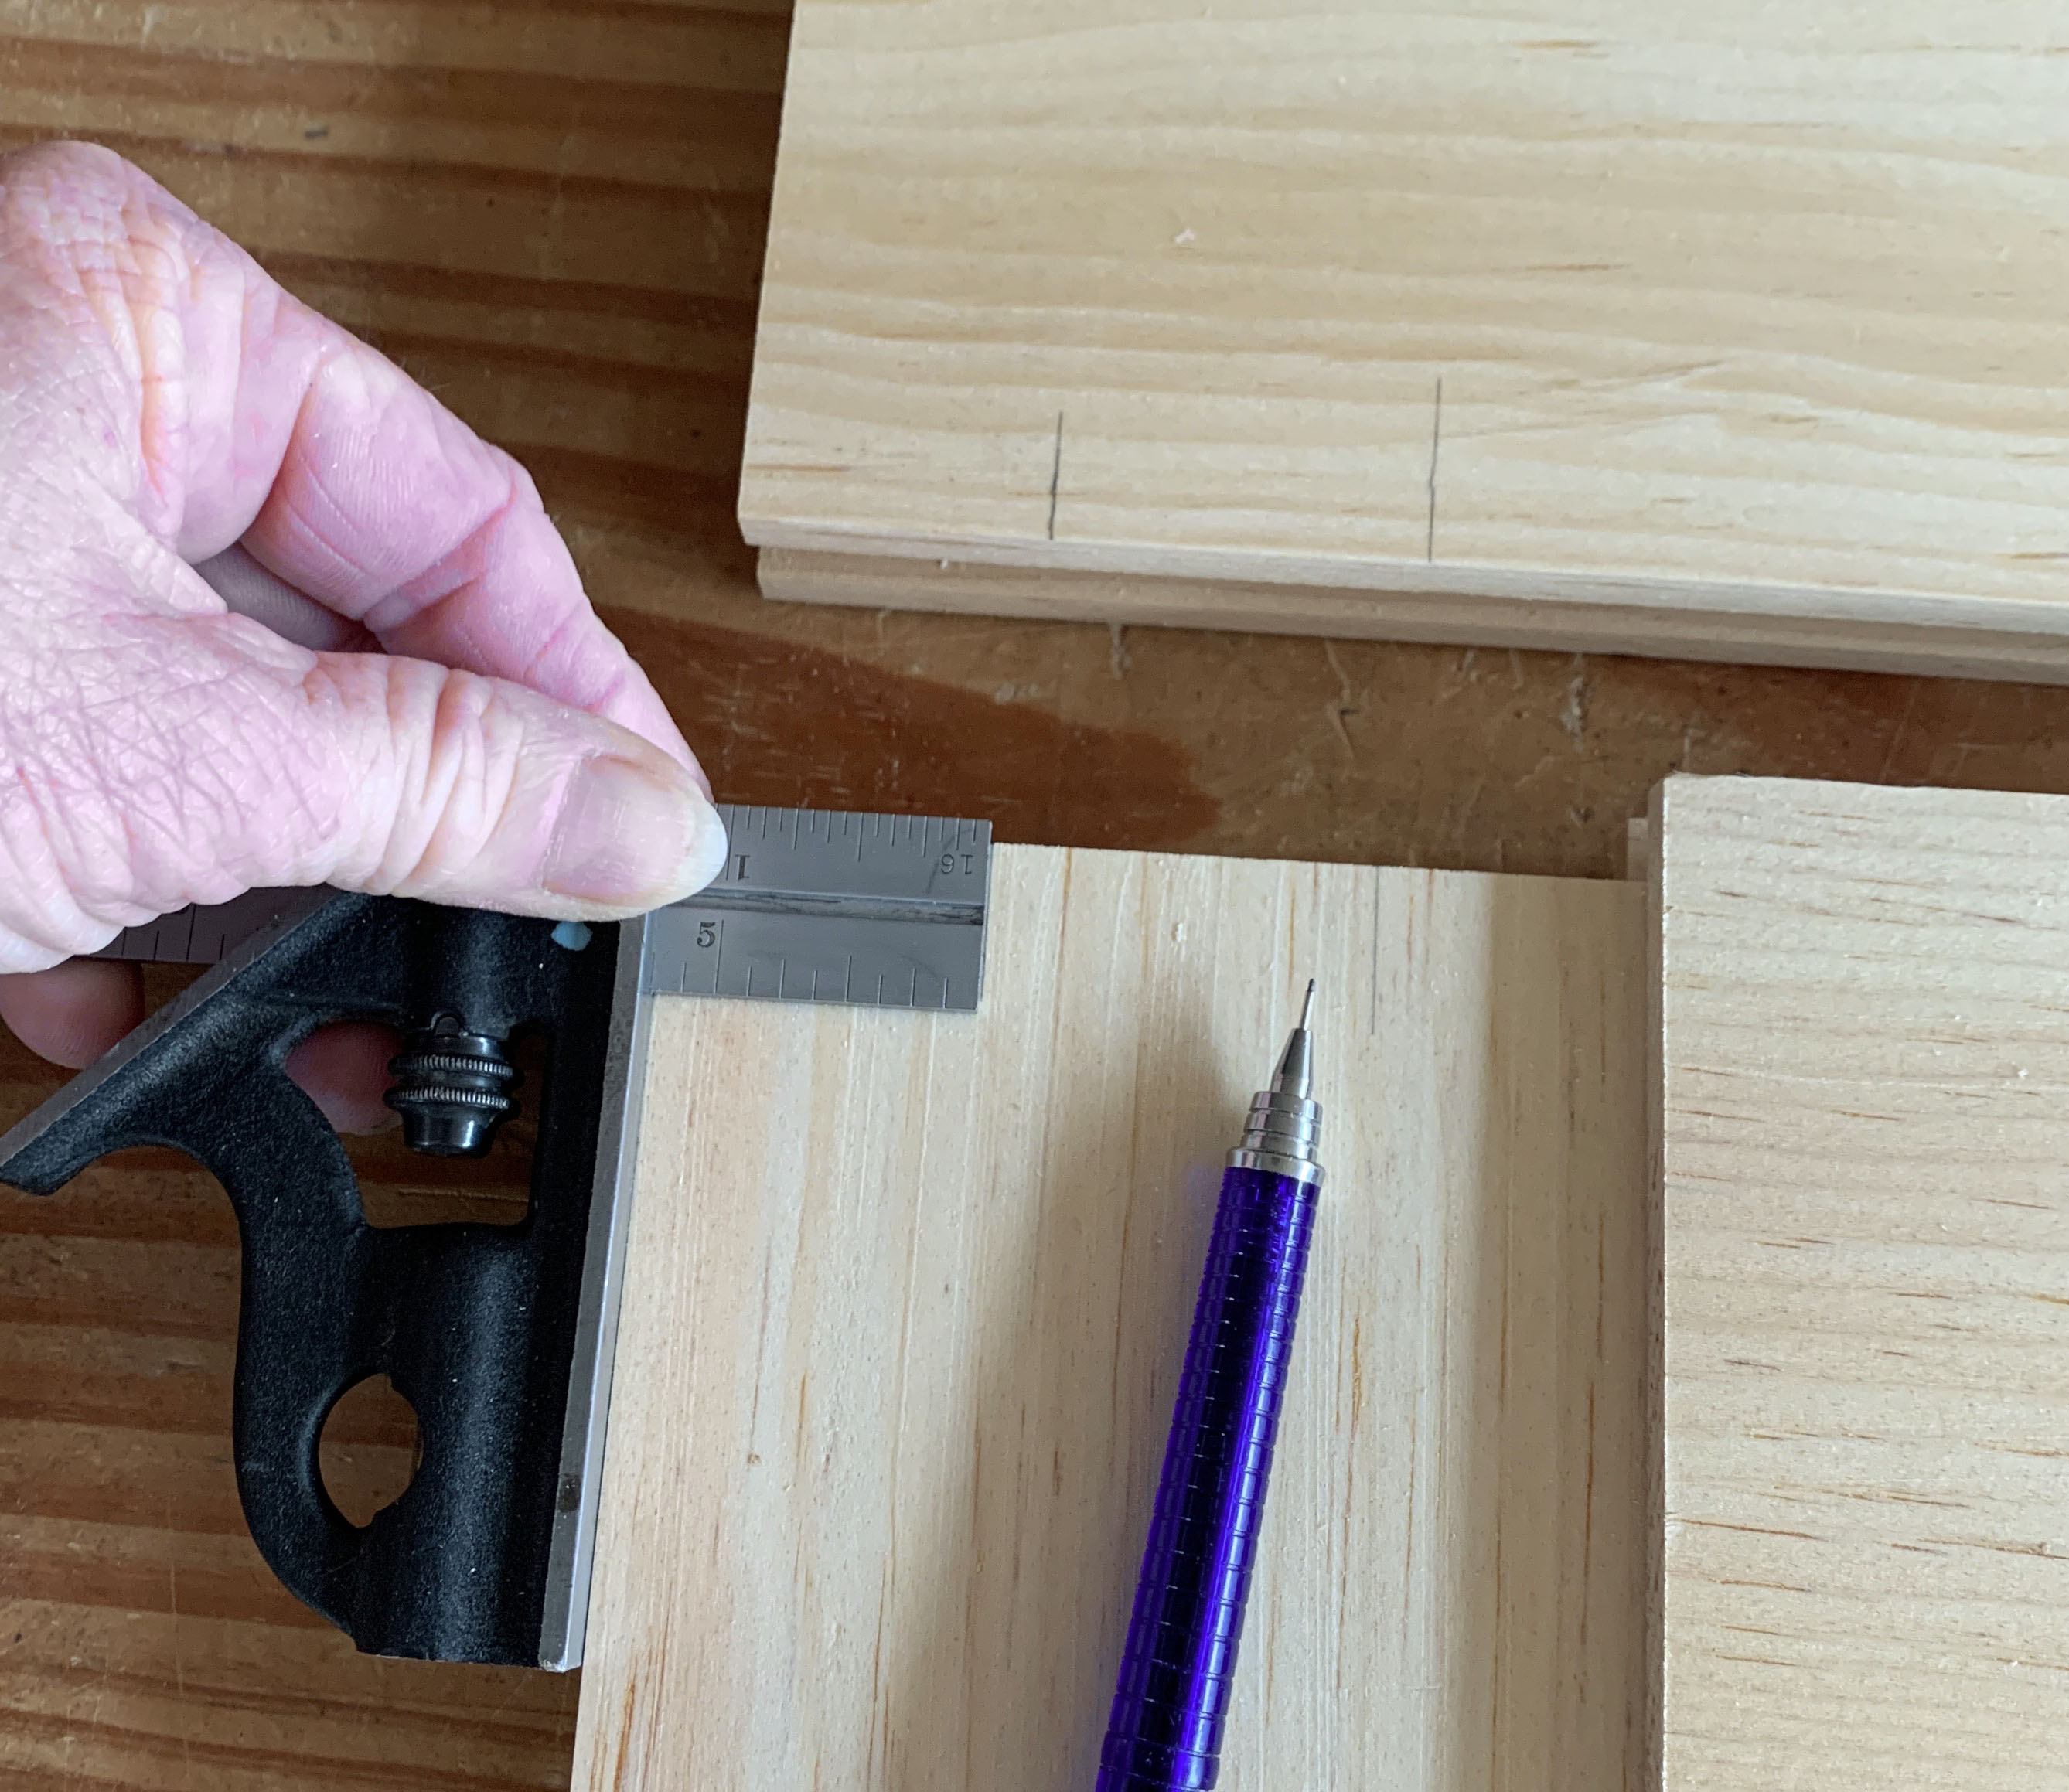
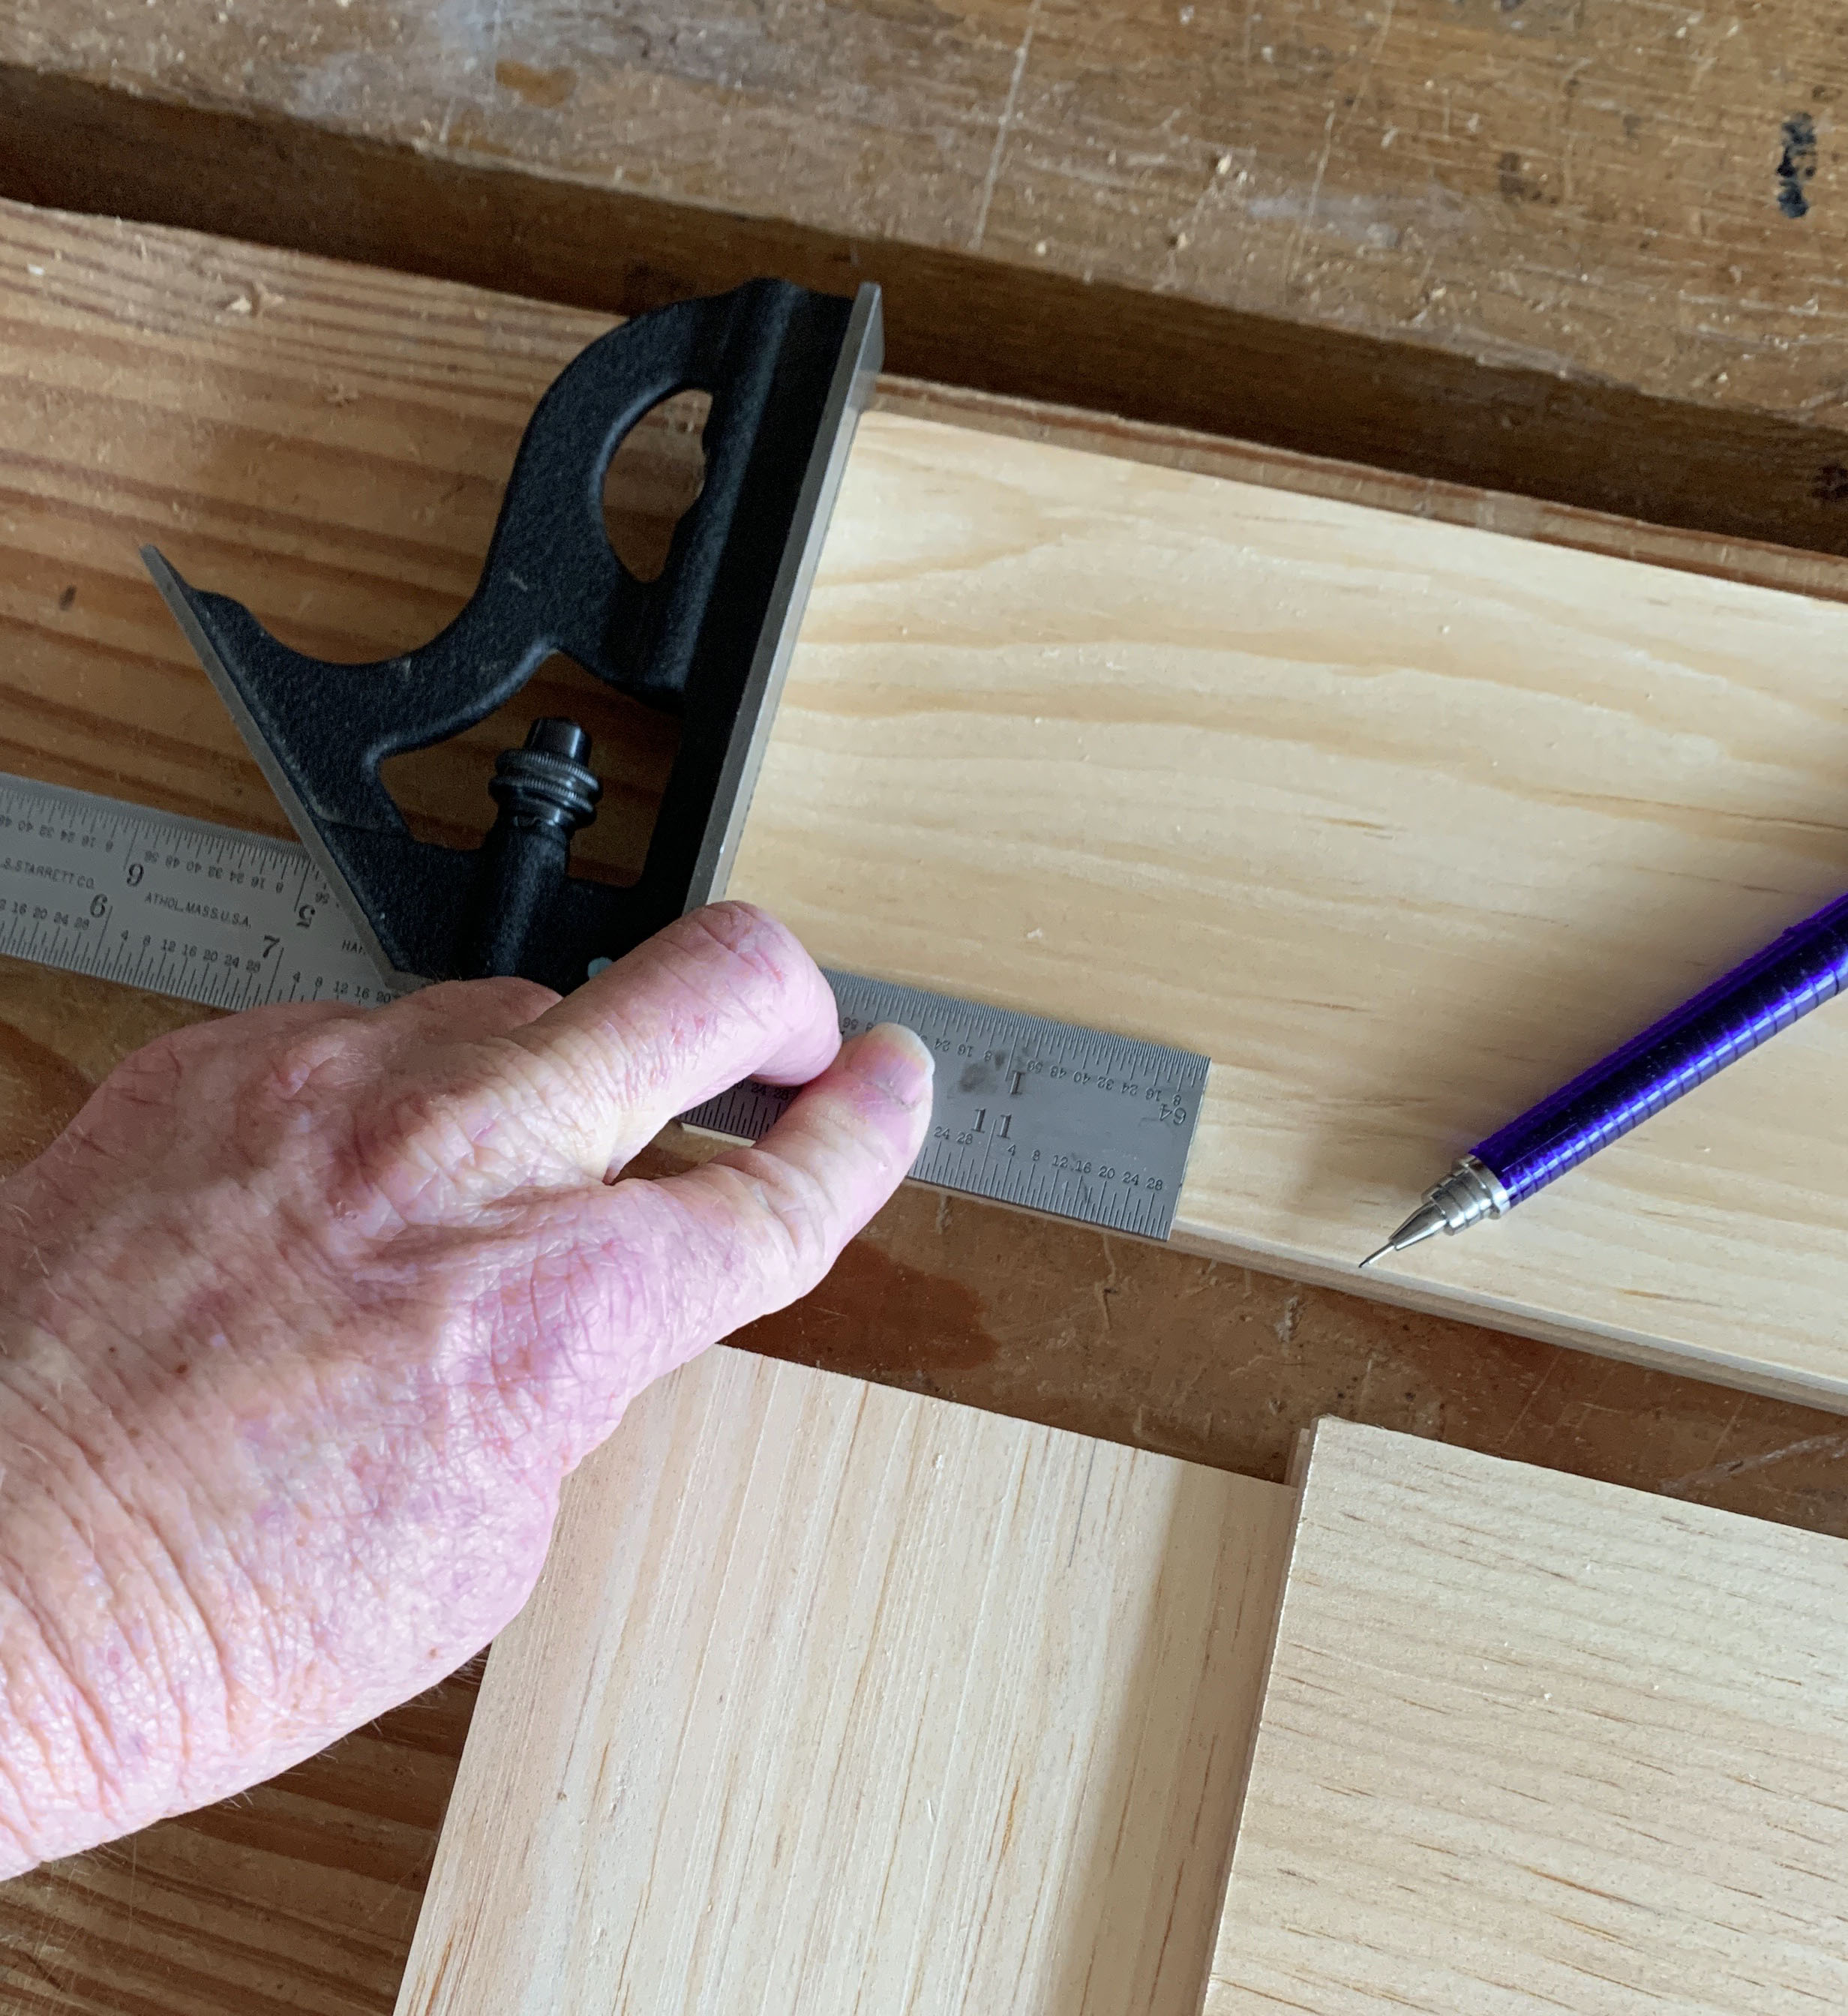
After running the mating grooves on the frame pieces and panel (which in all but the most advanced-student circumstances we do with a dado stack on the table saw), dry-fit the assembly to determine the layout of the two 12mm x 140mm loose tenons. We use the same setup for all students in a given class, so we then set two combination squares to the desired settings: one small (the shorter measurement) and one large (the longer measurement).
While you could perfectly align all the pieces and mark across both at once, we find it’s safer (read: fewer mistakes) if we have folks use the squares – with a reminder to always register the stock off the outside edges – to mark the mortise locations on each piece individually. Anal-retentive? You bet. Does it cut down on errors? Absolutely.
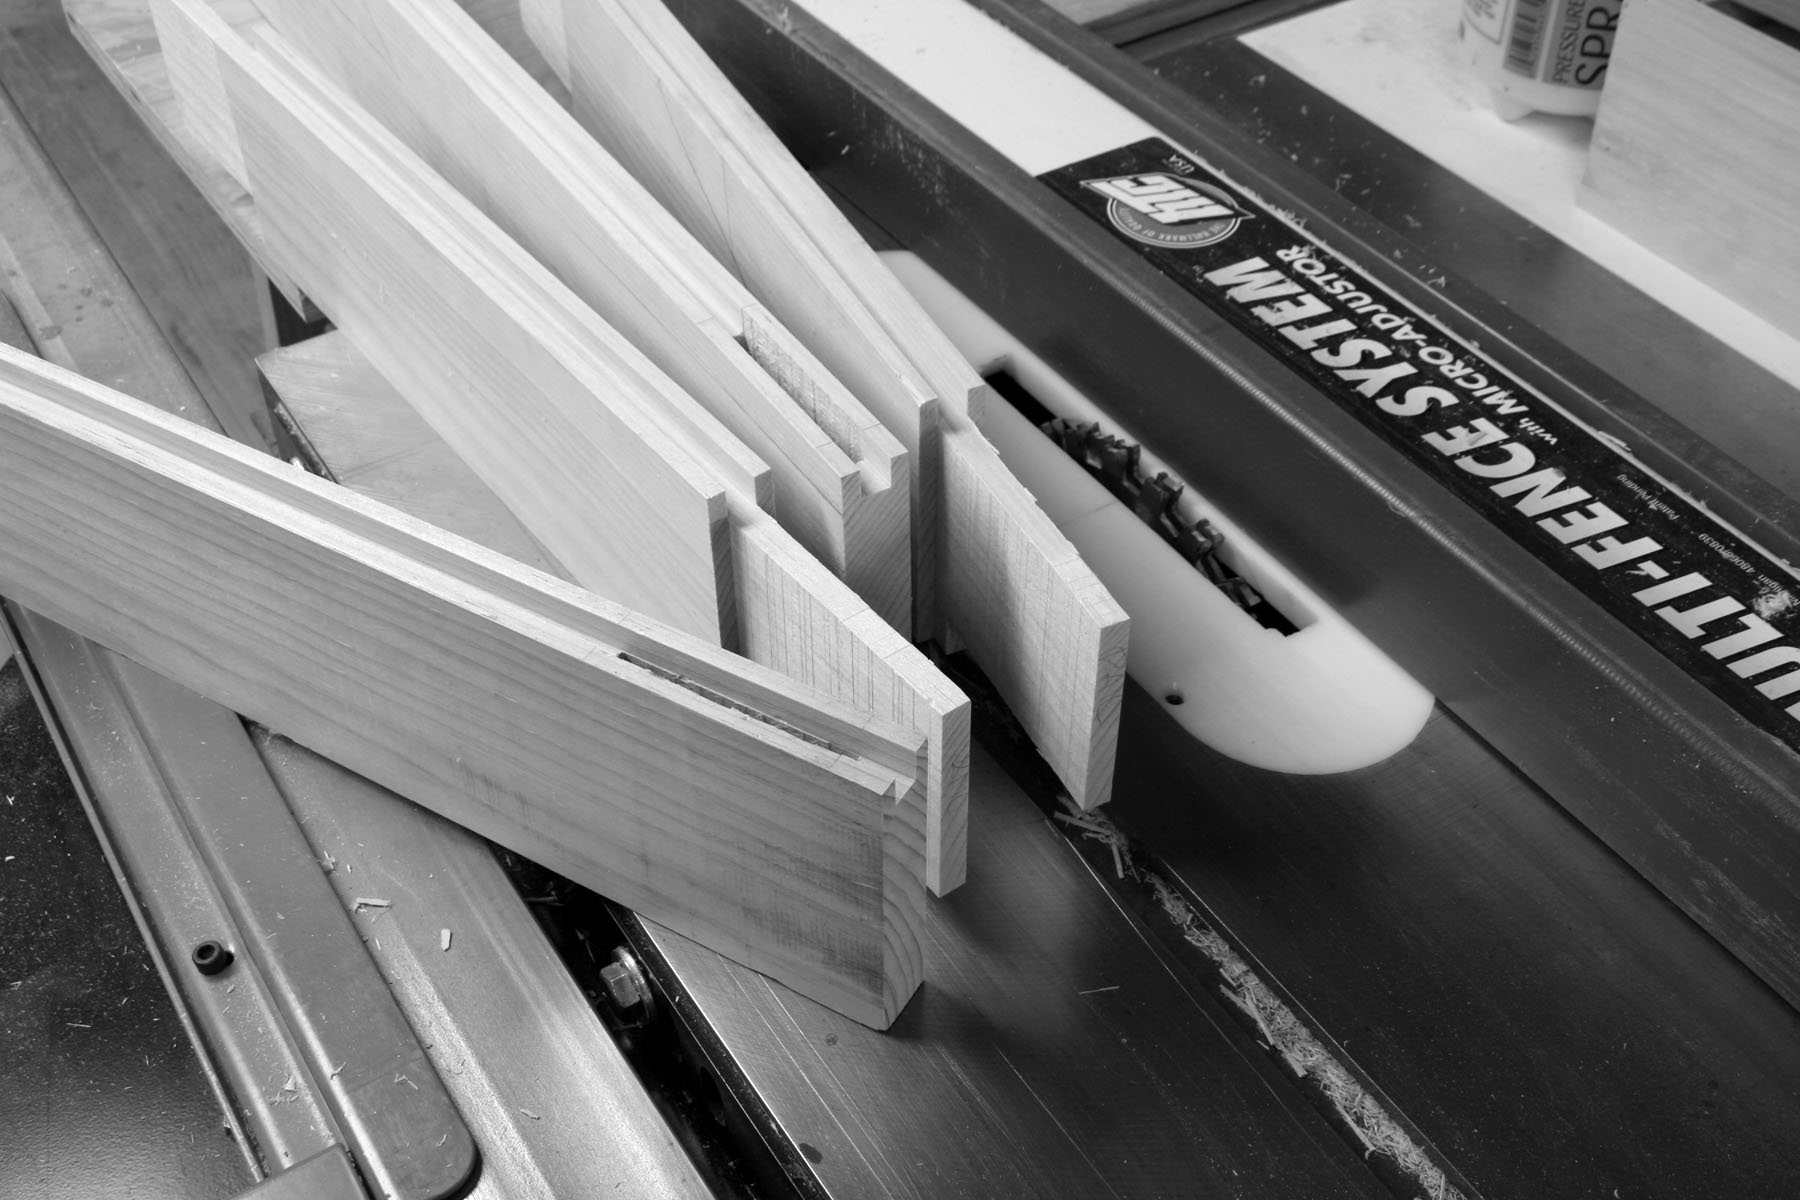
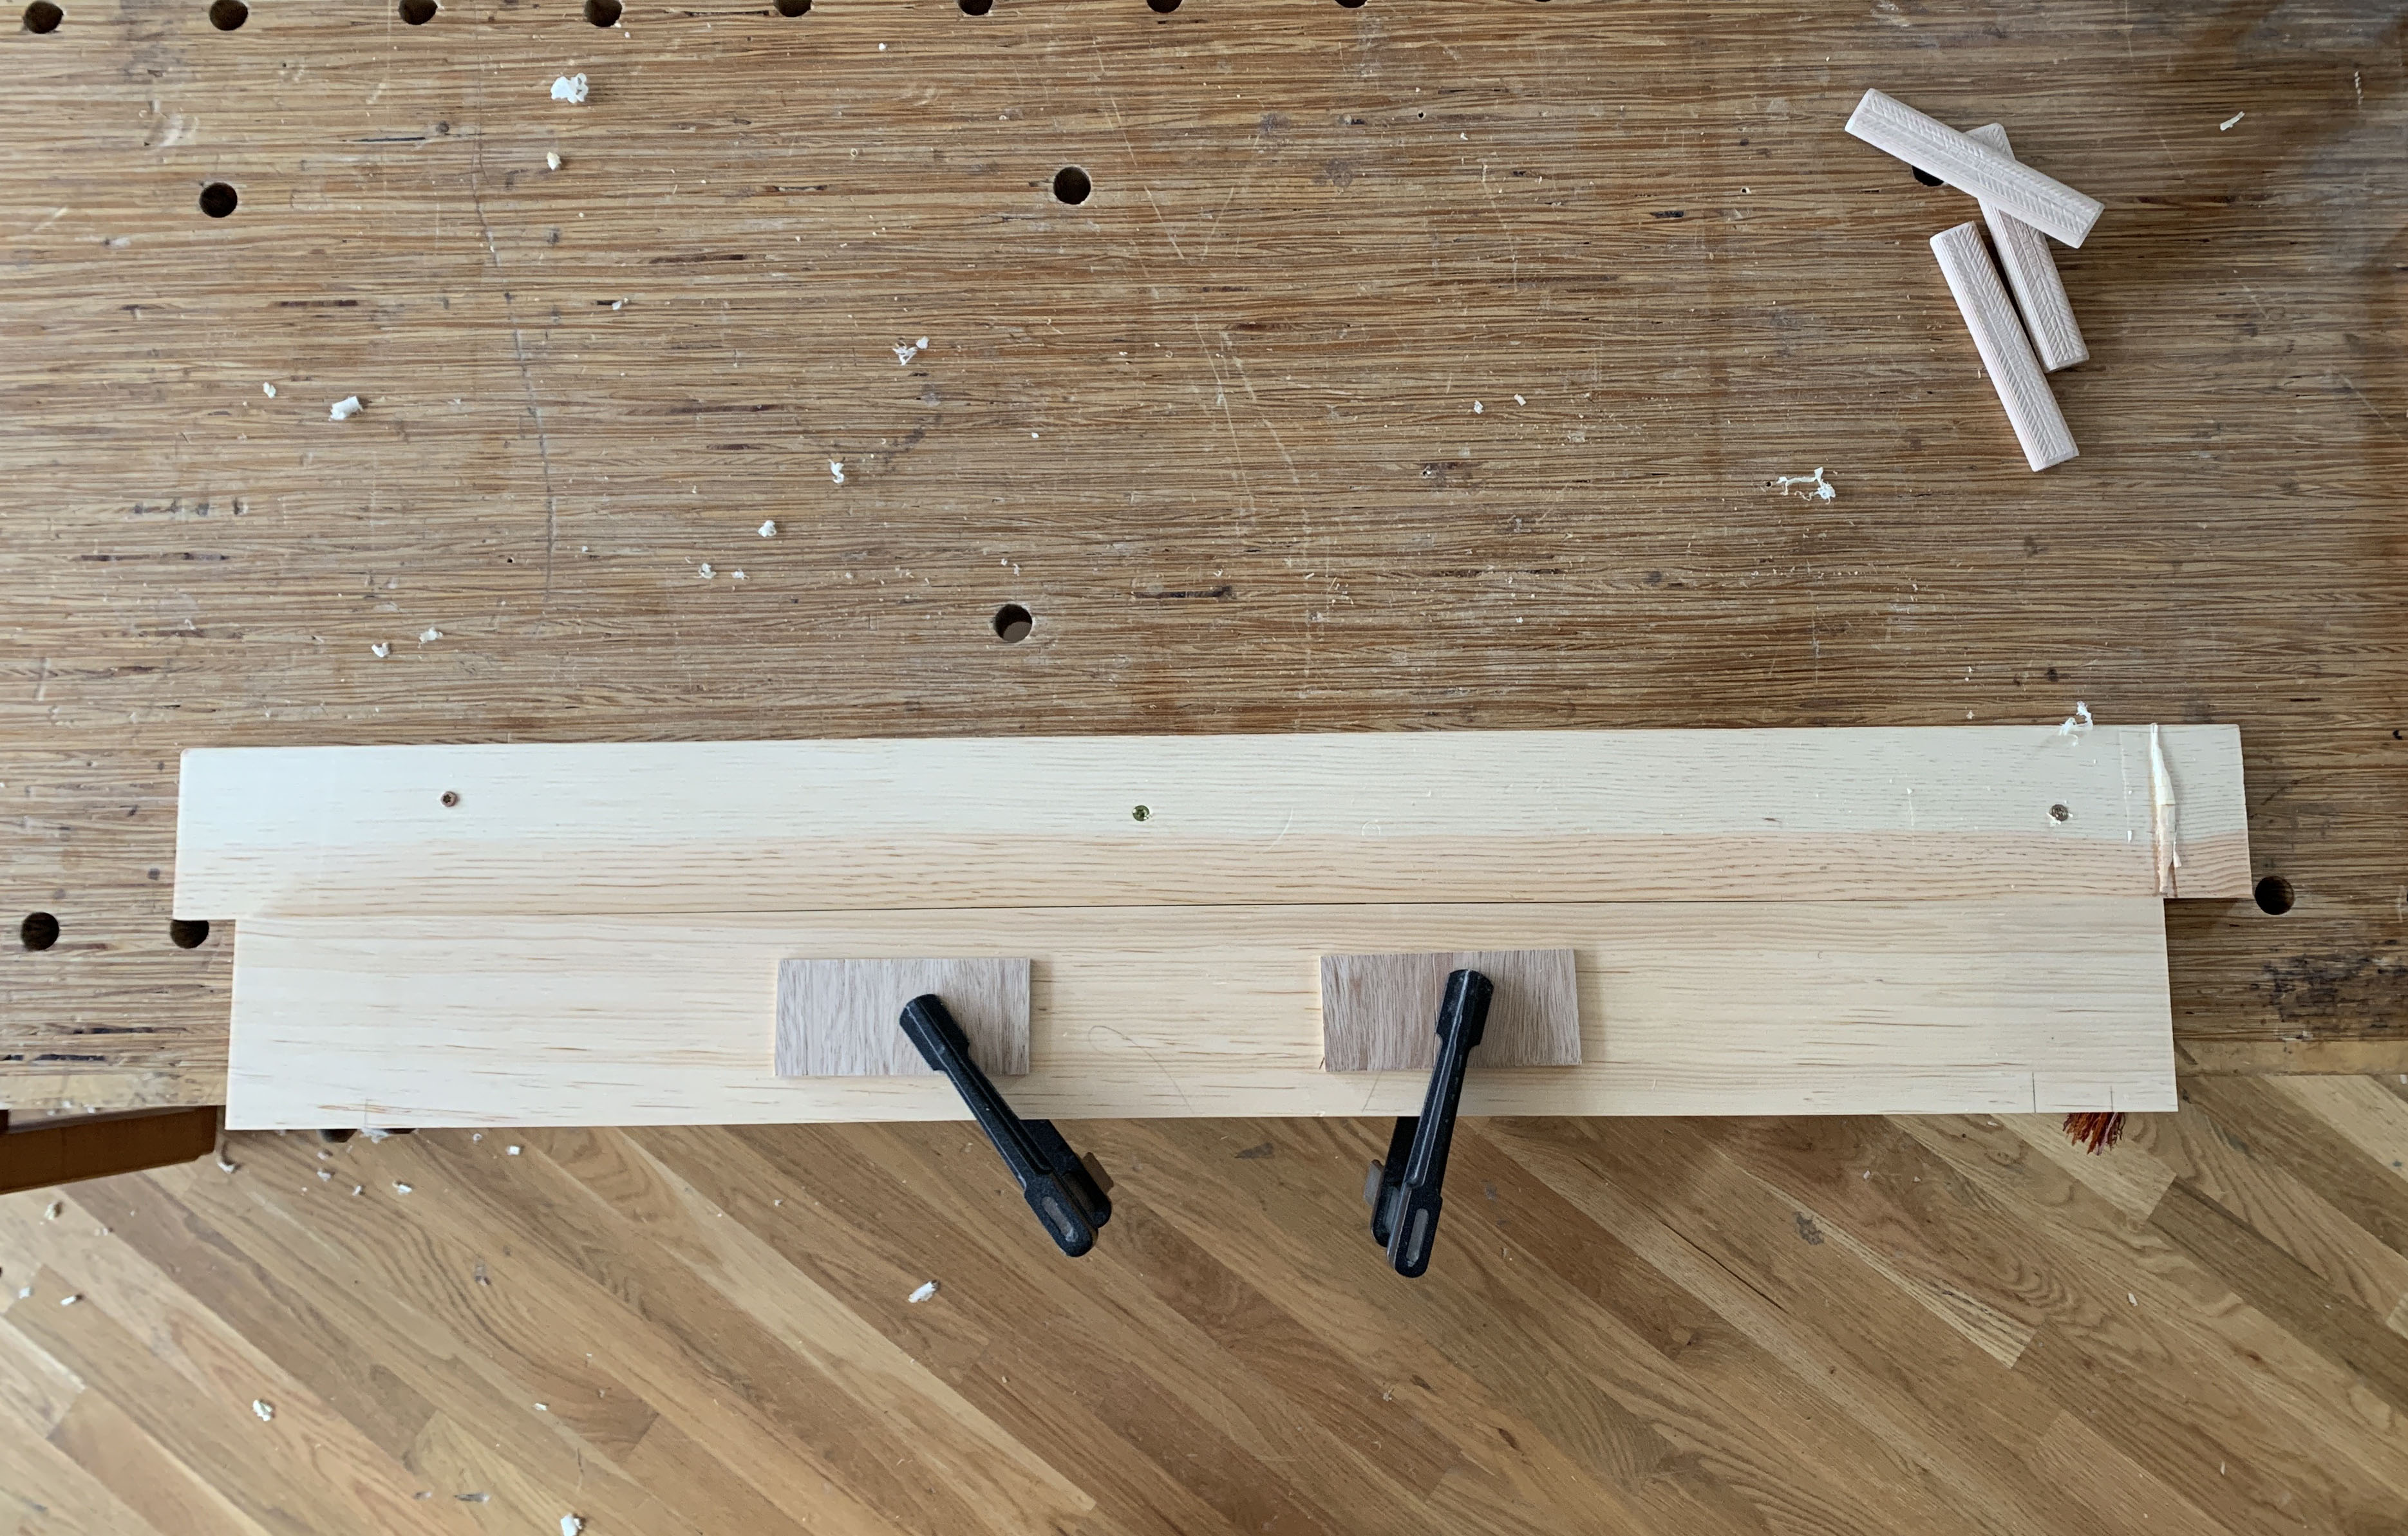
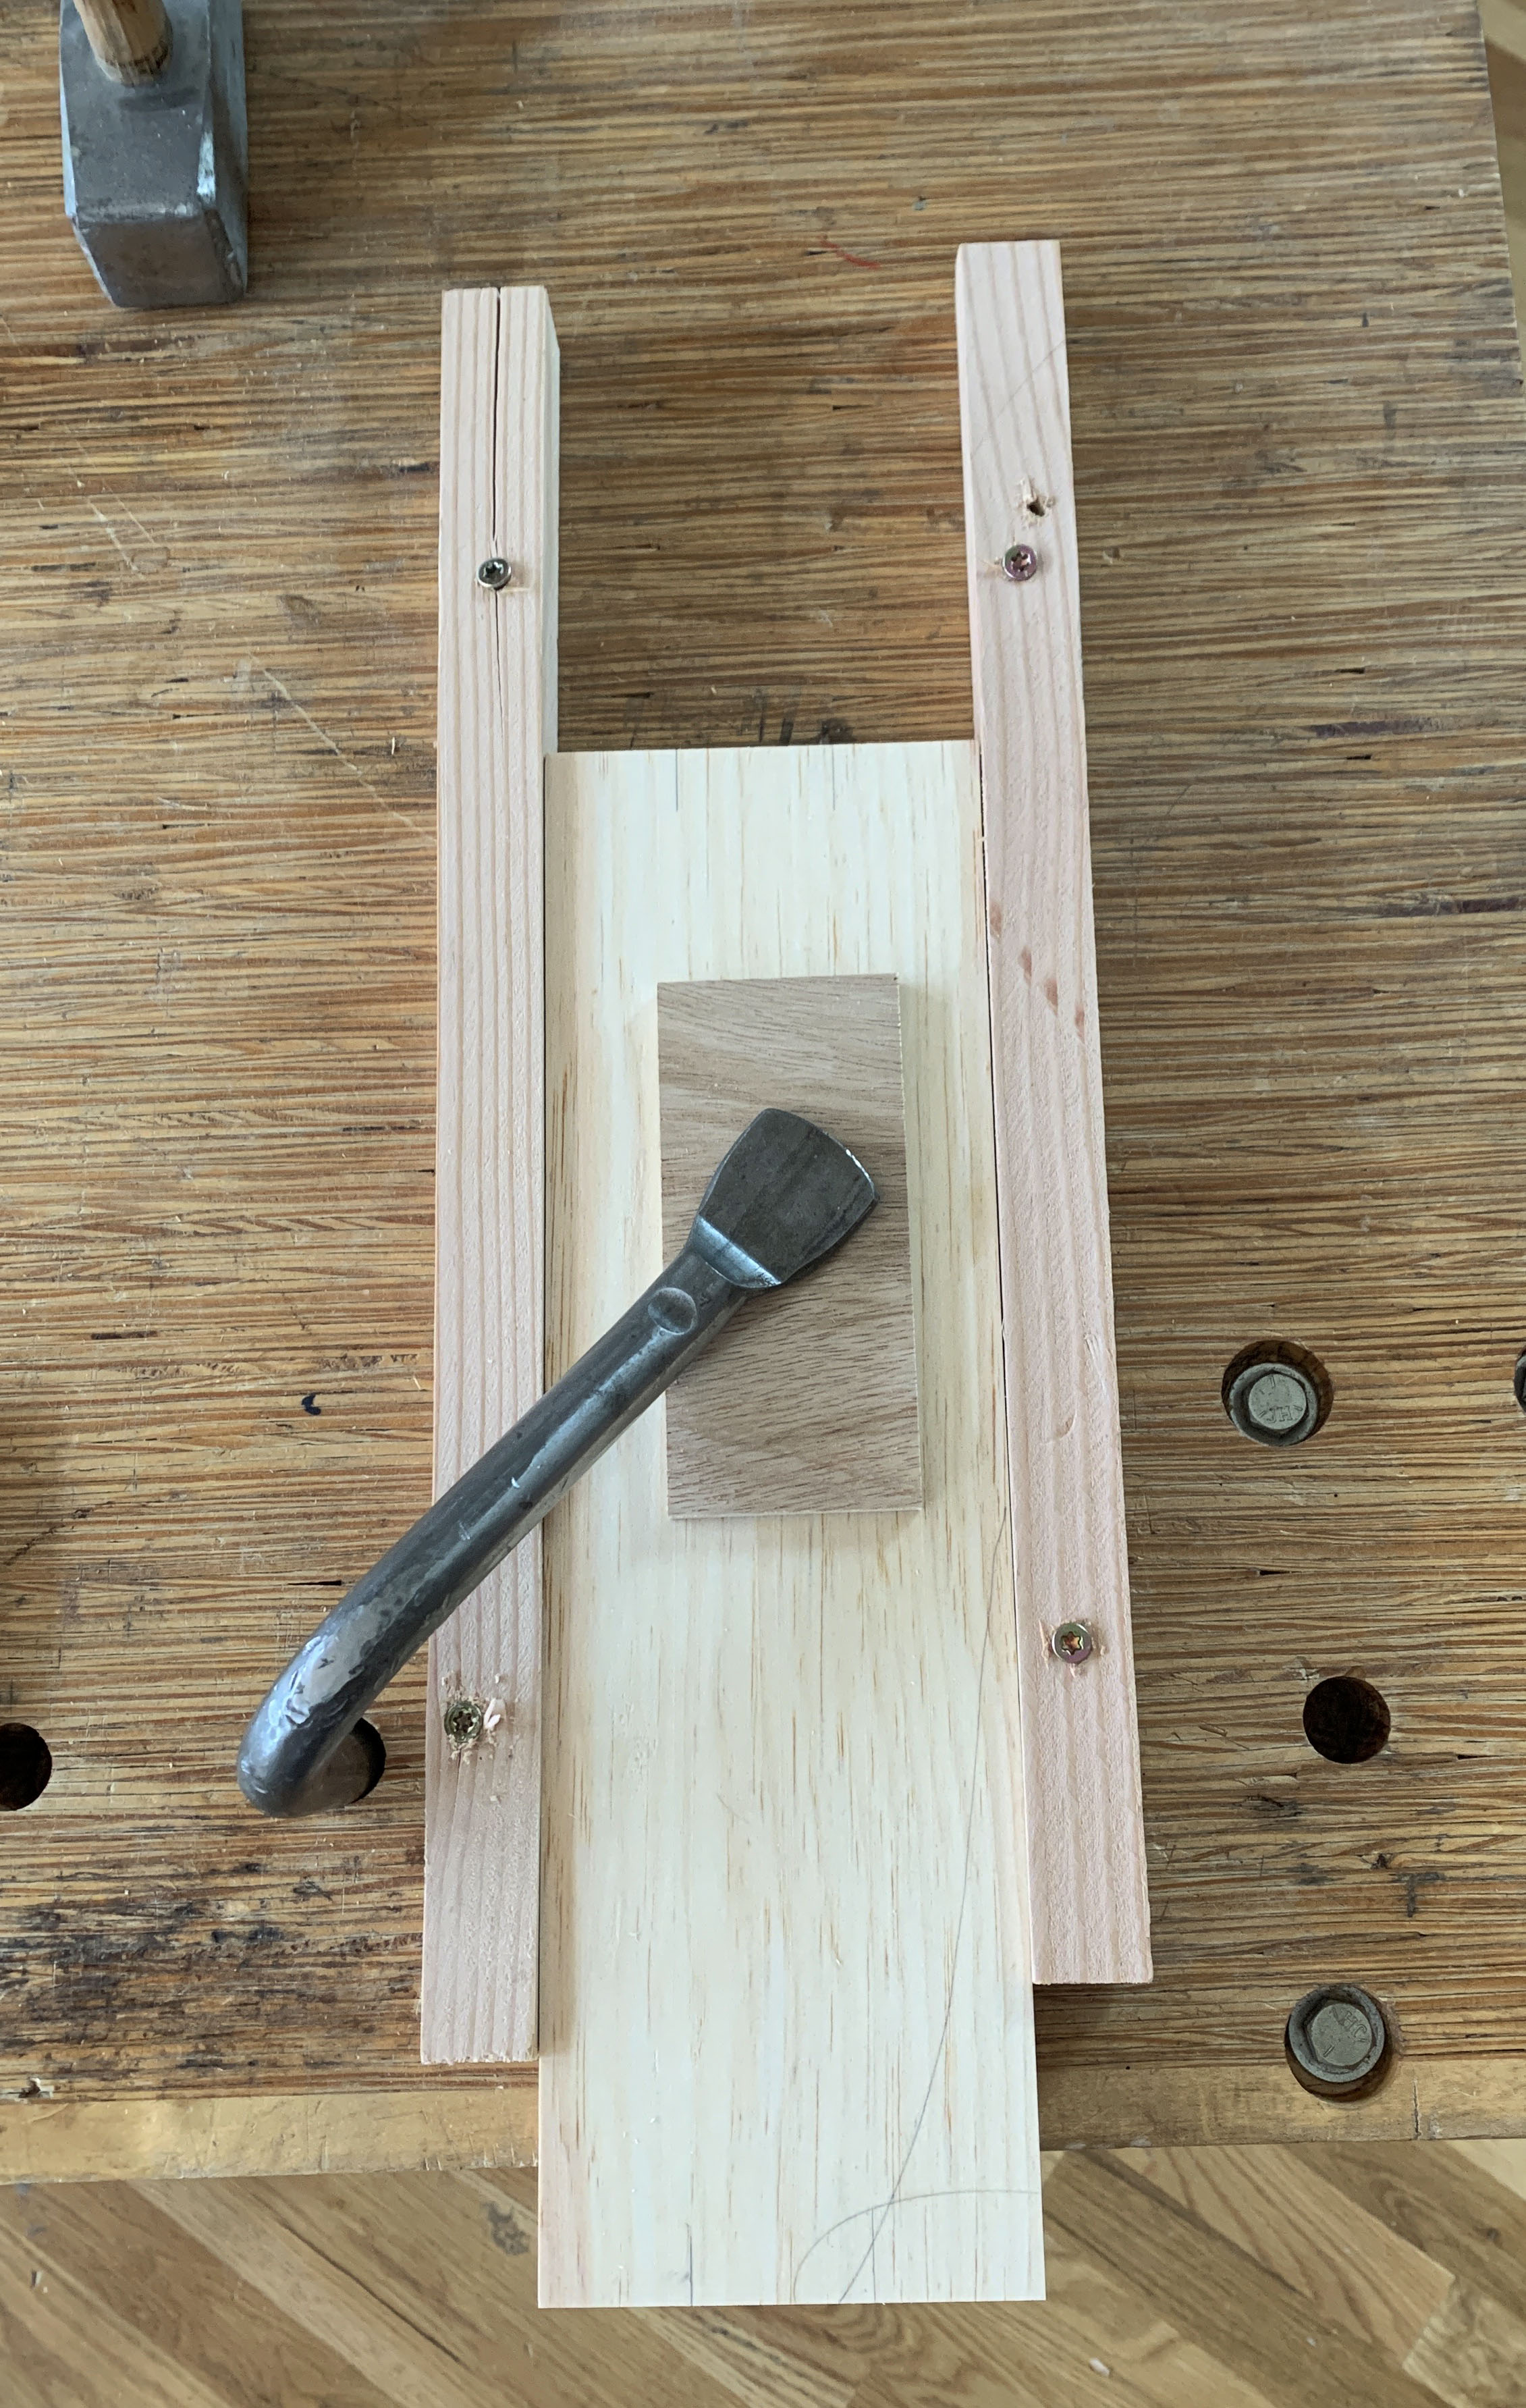
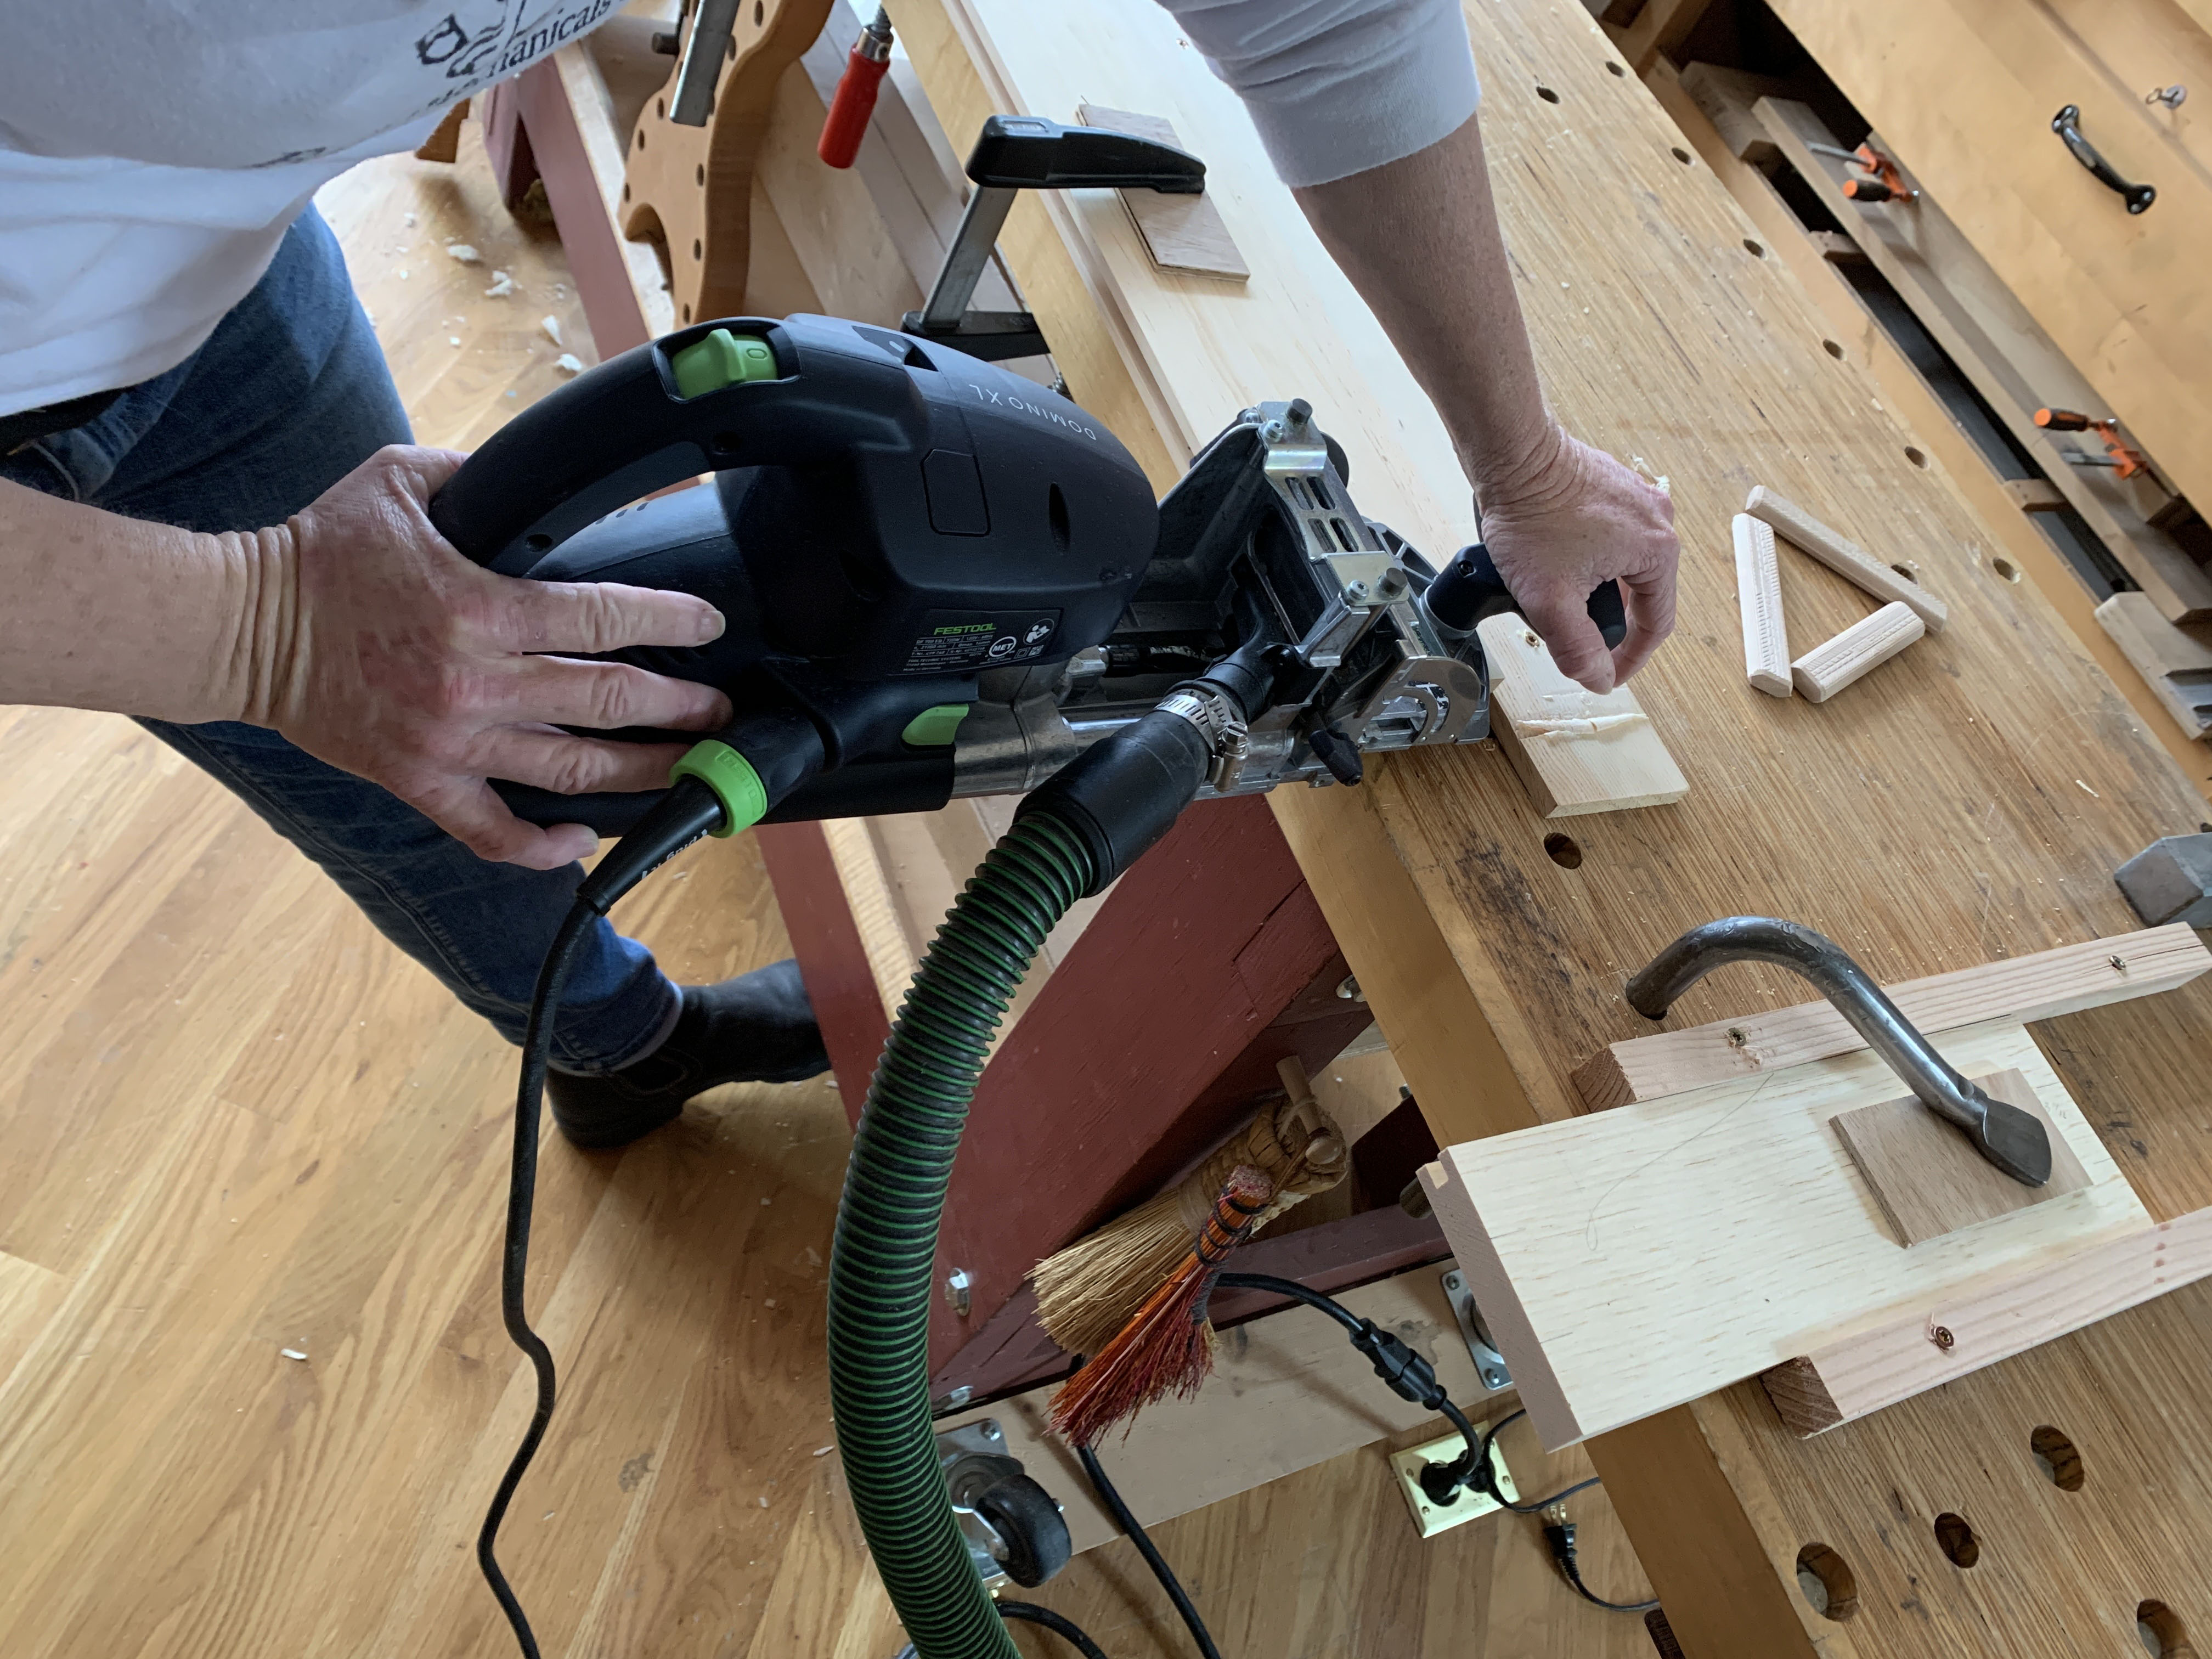
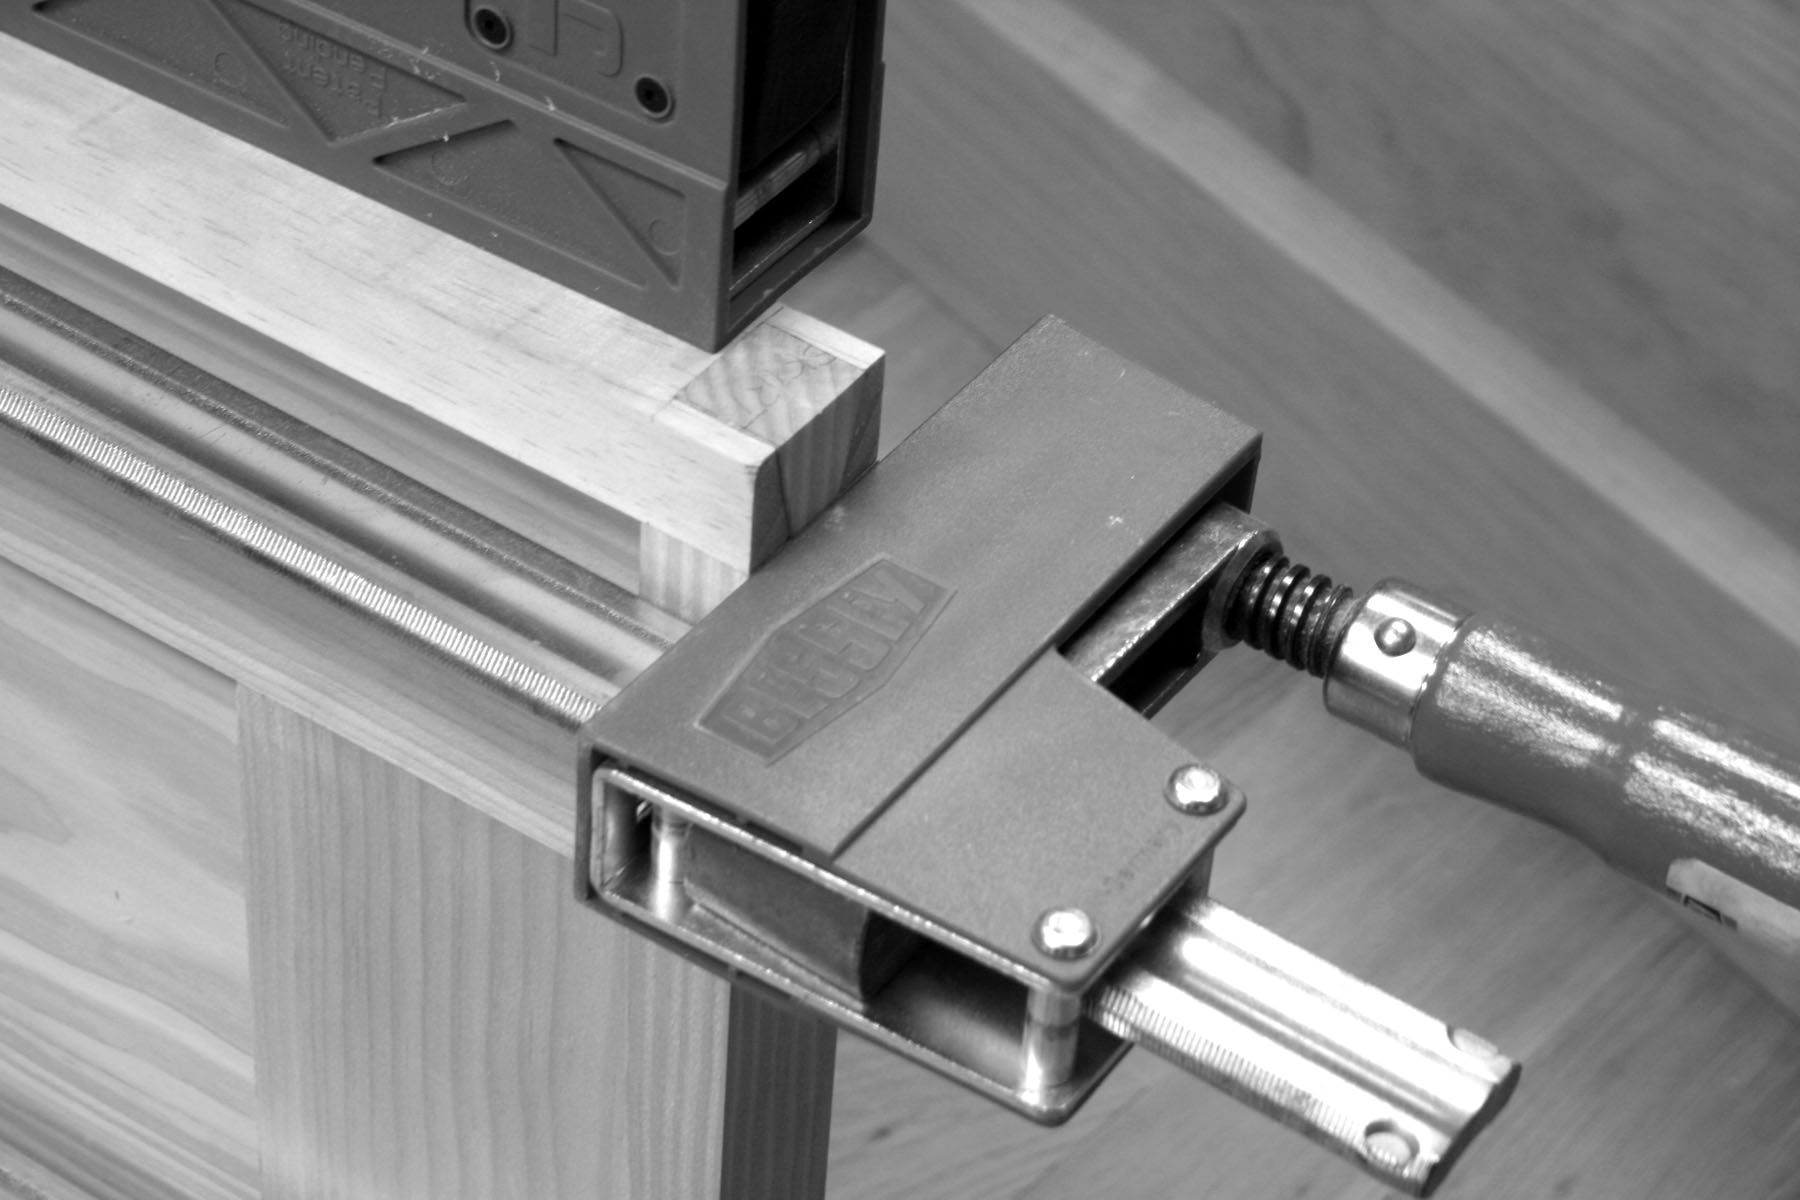
To further reduce the possibility of mistakes, we set up stops to hold the work while using the Domino; they restrain the work against the fairly significant pressure required to plunge the tool into the work, and hold the work flat to the bench. If the mortises aren’t at 90°, it causes problems, so everything we can do to help make them perfect, we do.
With the work restrained, it’s simply a matter of keeping the fence on the Domino flat to the wood, so we encourage – strongly encourage – that you grasp and push down with one hand, using your other hand to plunge by pushing on the back of the tool, but not grasping the handle. (We’ve found that grasping the handle results in folks pushing down and tipping the tool a bit during the cut.)
Here, I’ve aligned the registration mark on the business end of the tool with one of my mortise location marks on the rail. Note that all my pressure downward on the tool is with my left hand. My right hand is simply pushing in. I also have the toes on my left foot hooked under the rail of my workbench. You have to exert a fair amount of pressure to plunge the tool’s cutter into the work; my hooked toes keep me from sliding backward.
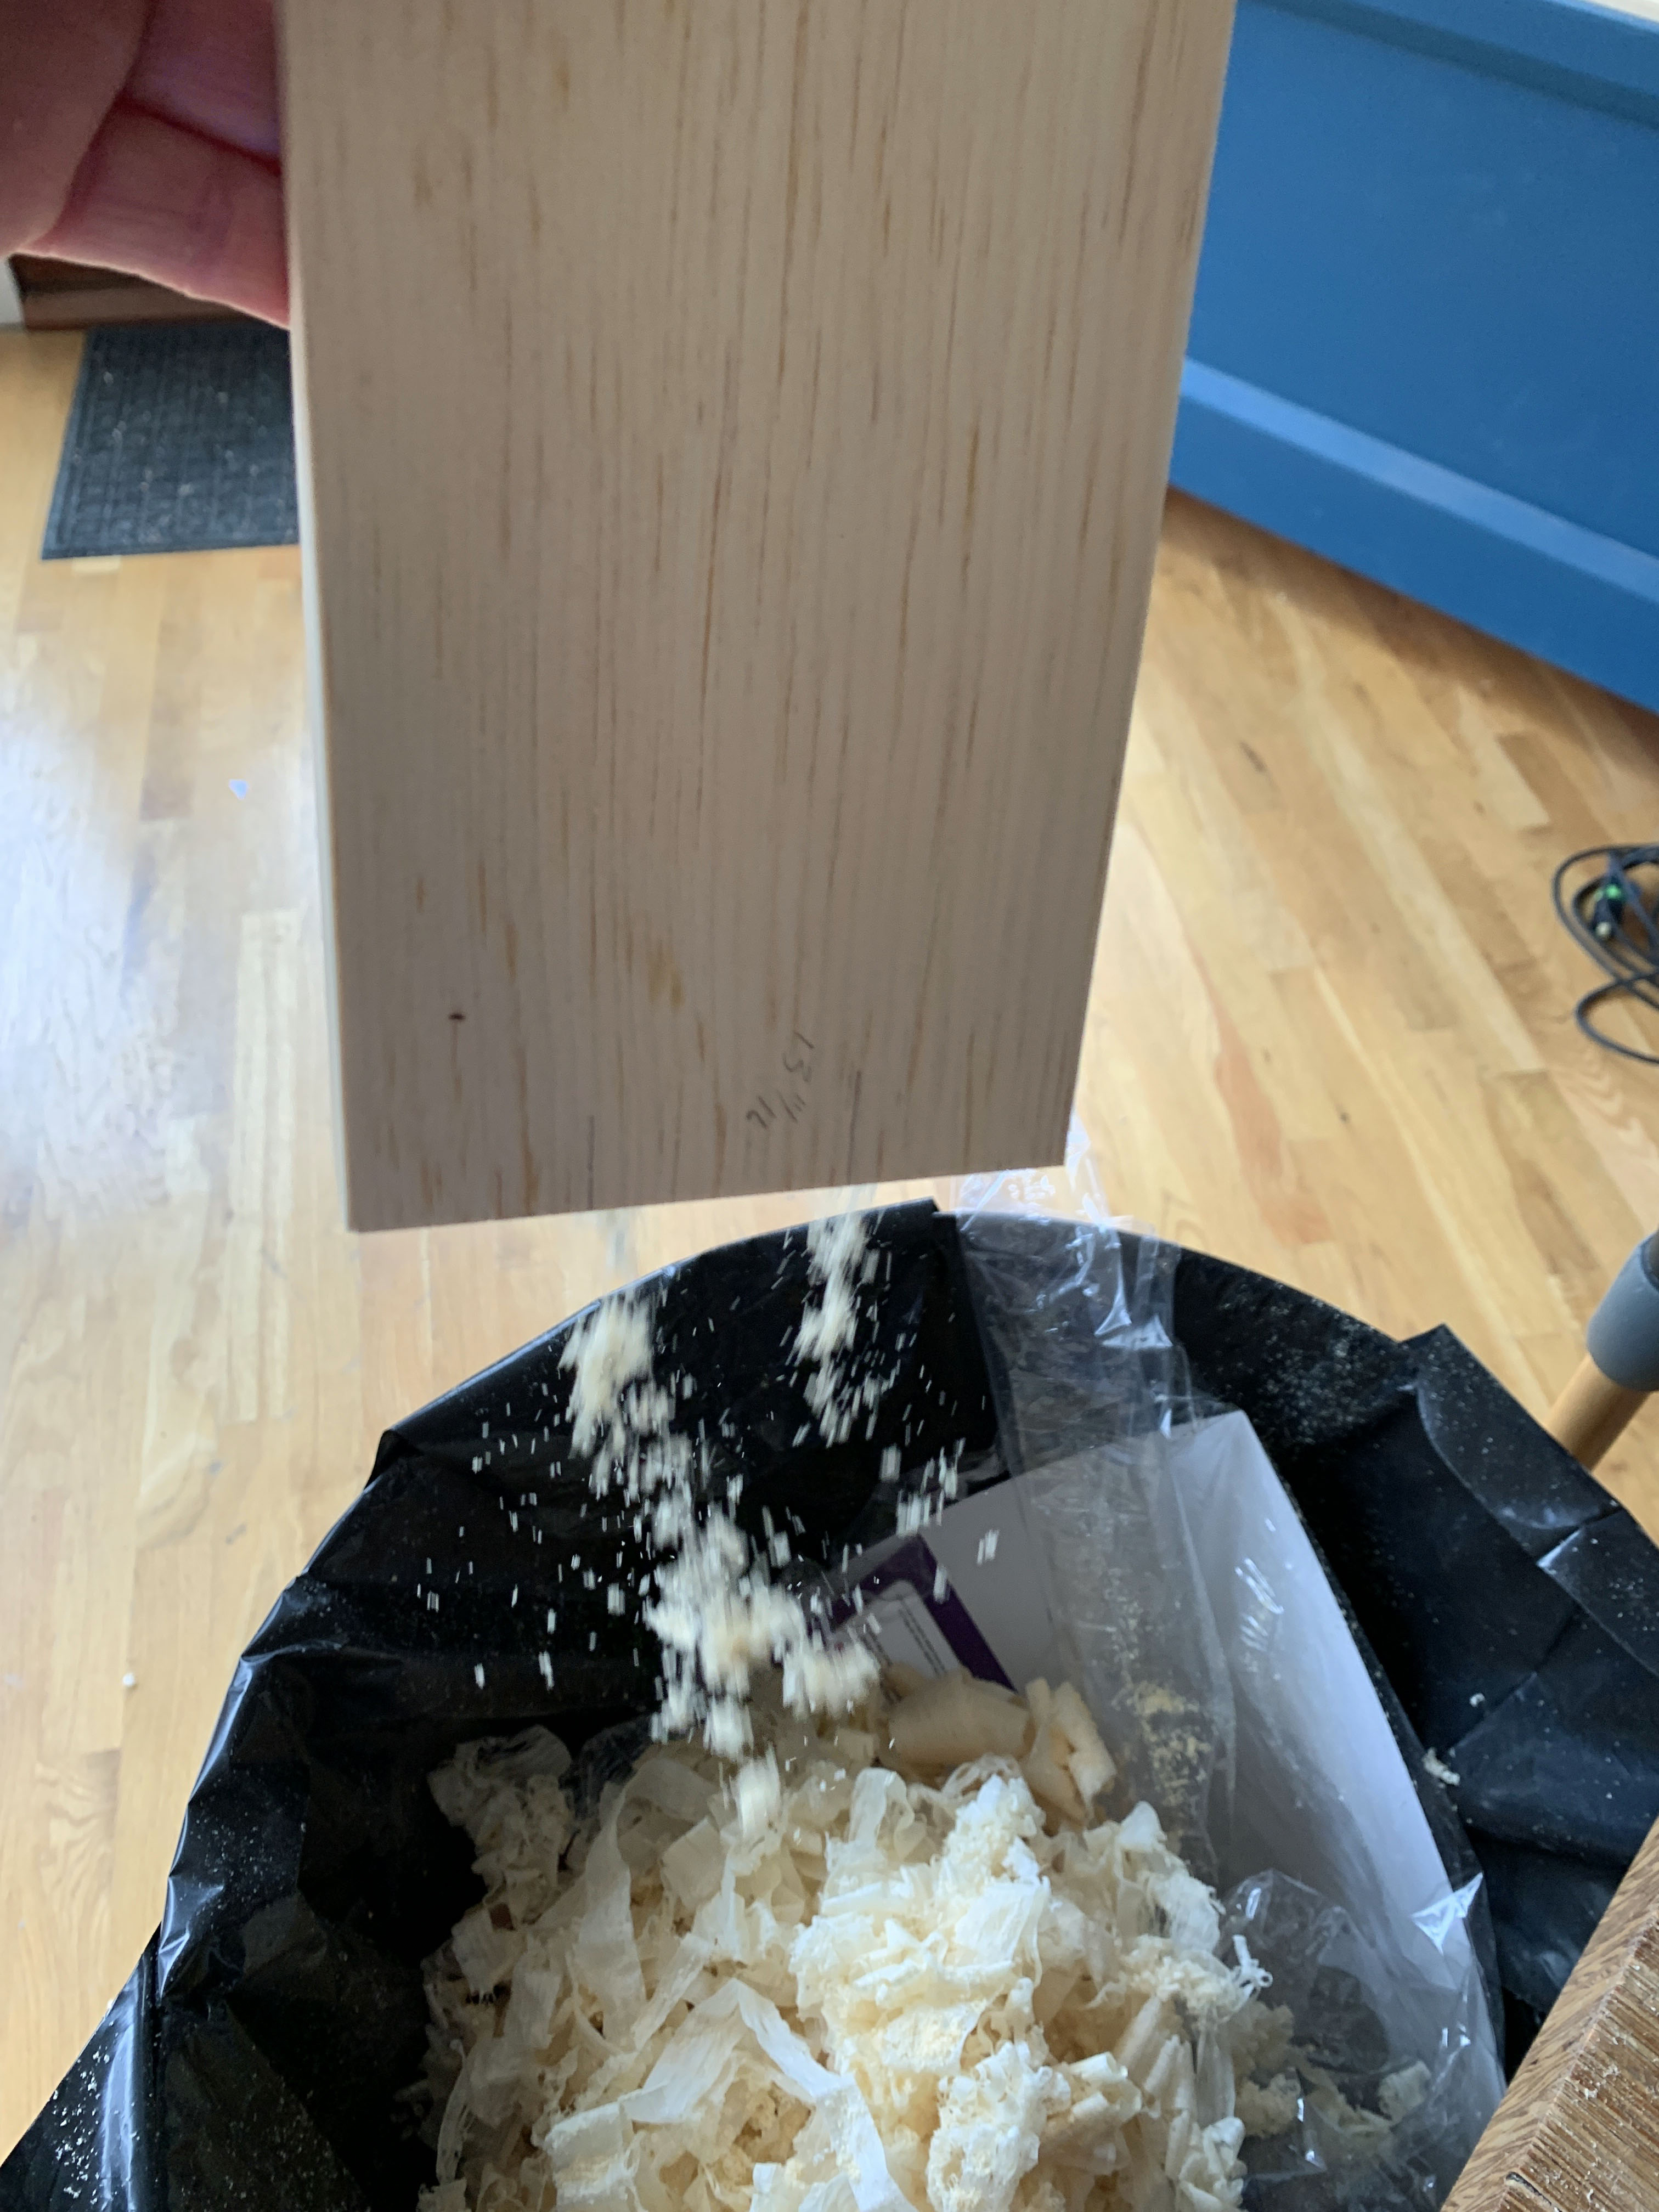
After the mortises are cut, make sure you dump out the sawdust in the bottom of the mortise. Though our dust collection is good, it’s not good enough to clear all the dust from the mortise bottoms.
No, you don’t really need this picture…but I was so happy to catch the falling dust with my camera that you get it anyway.
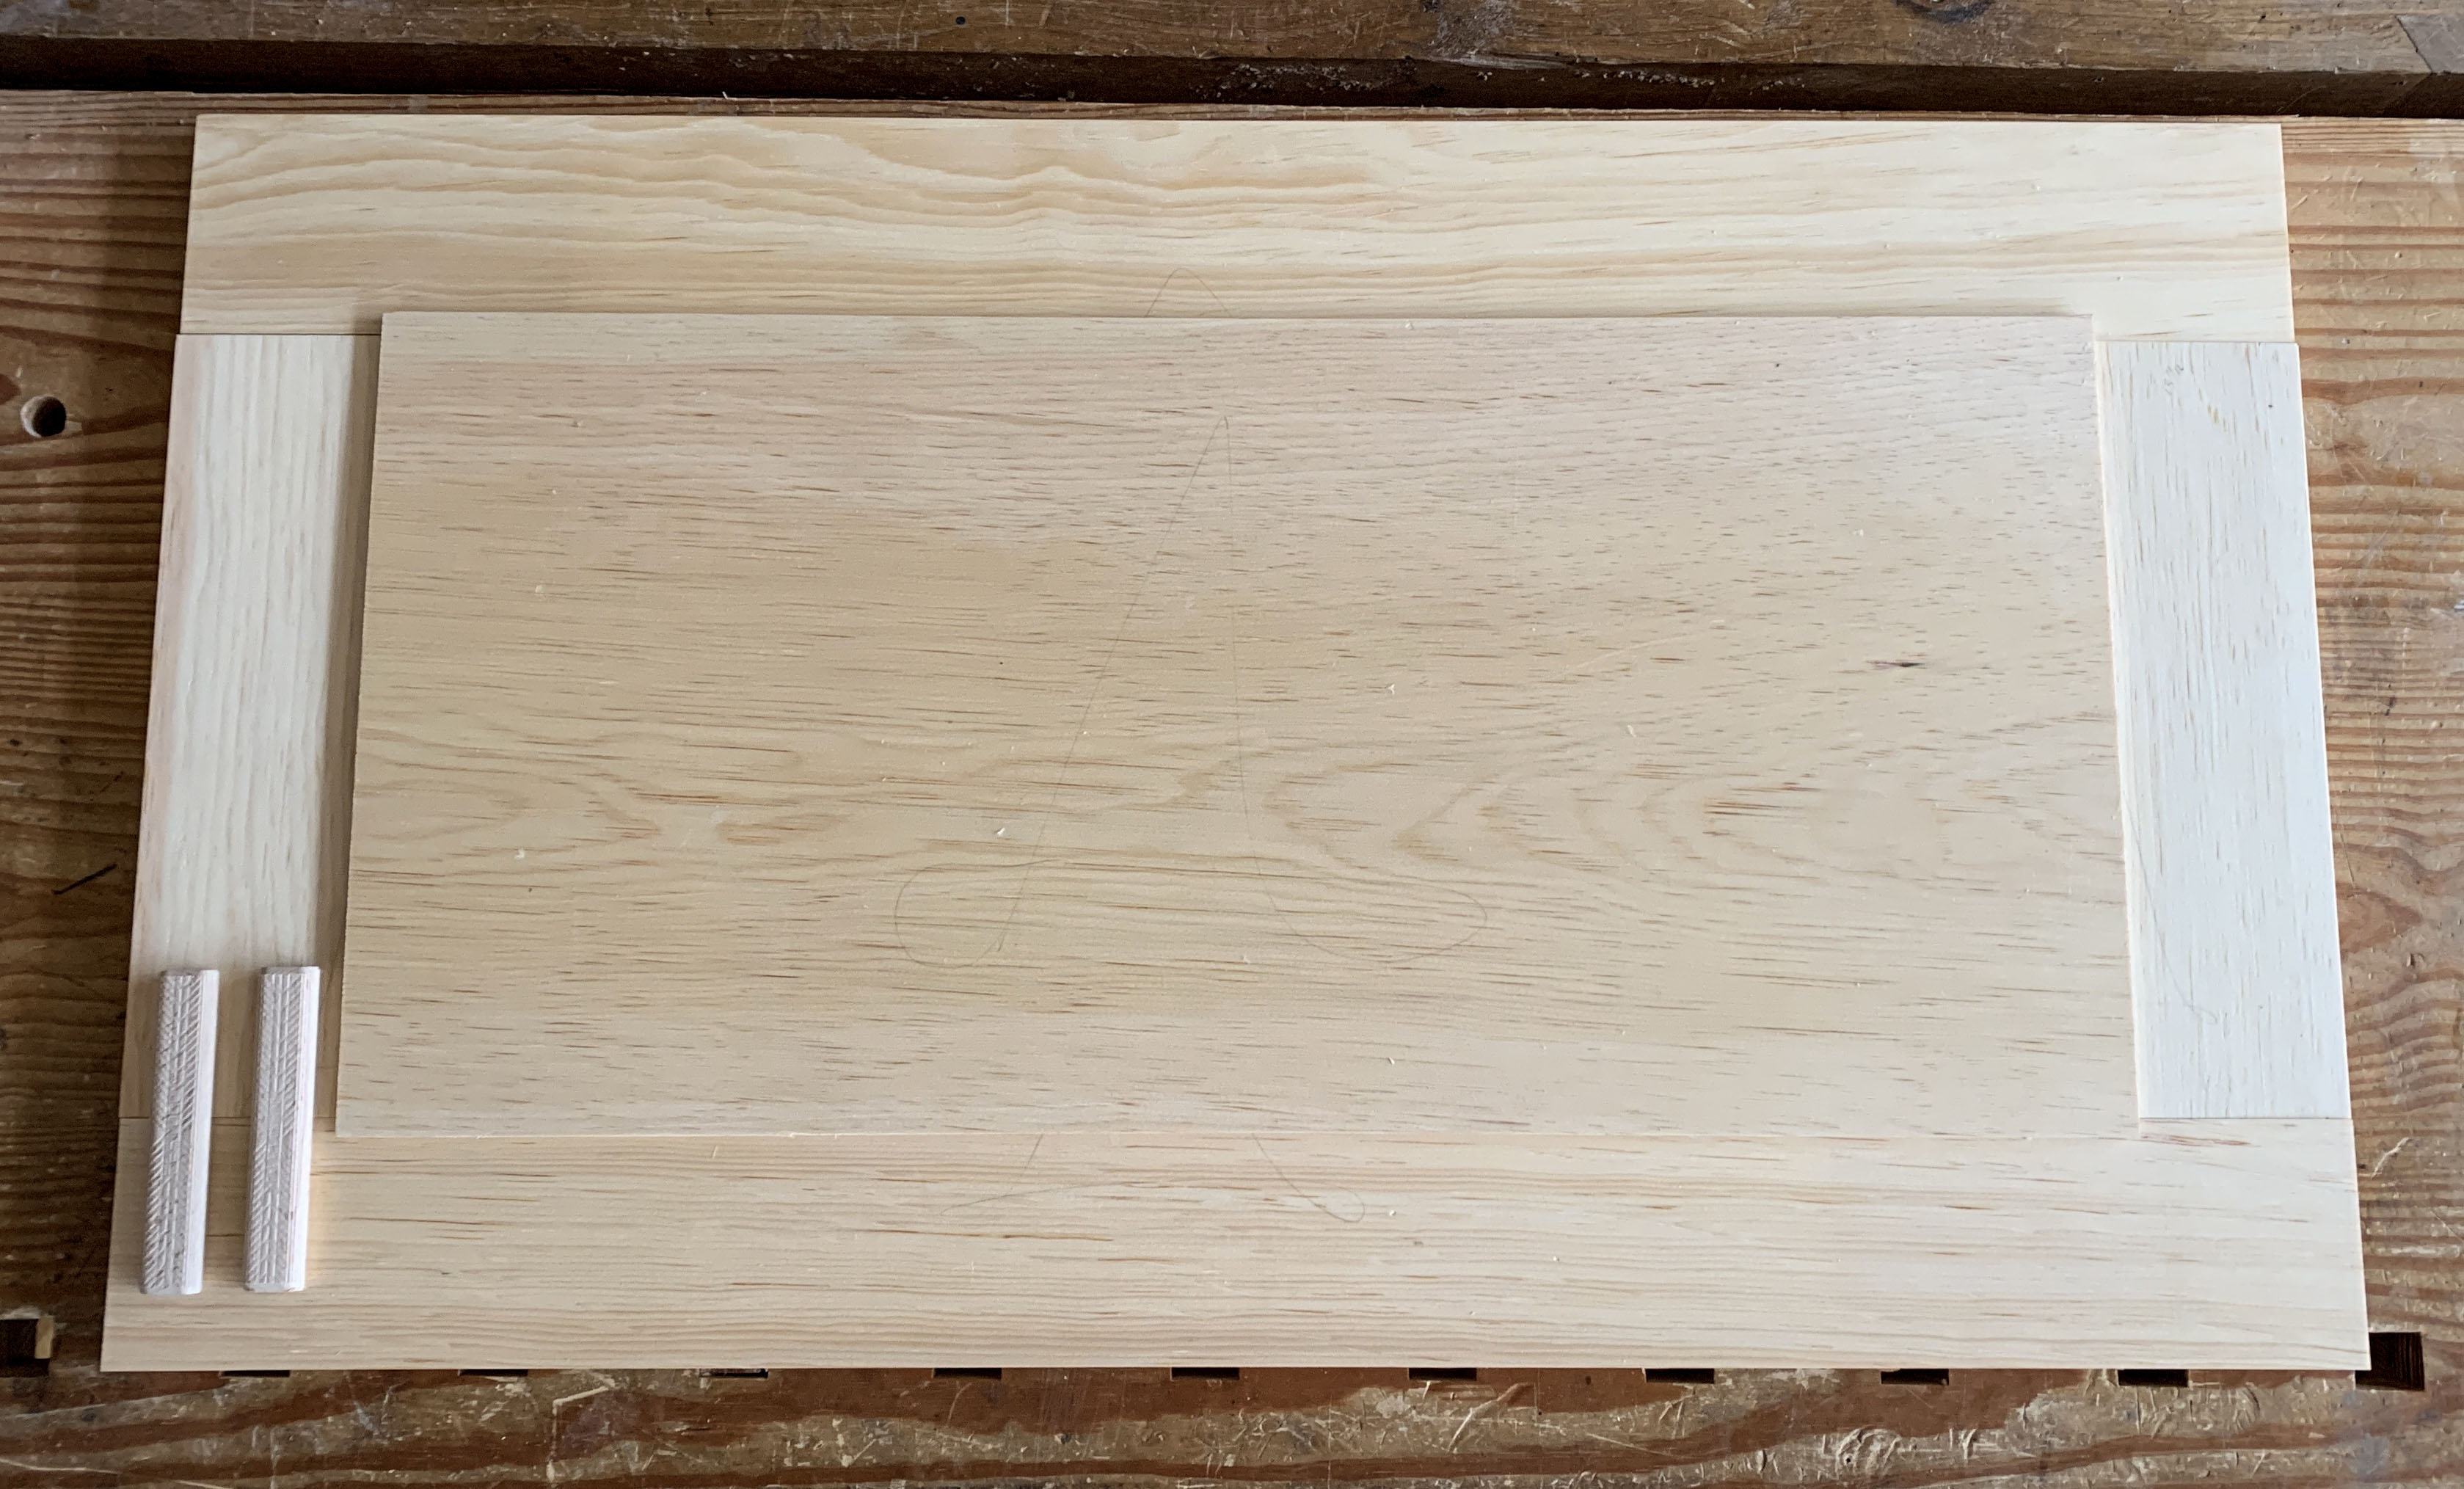
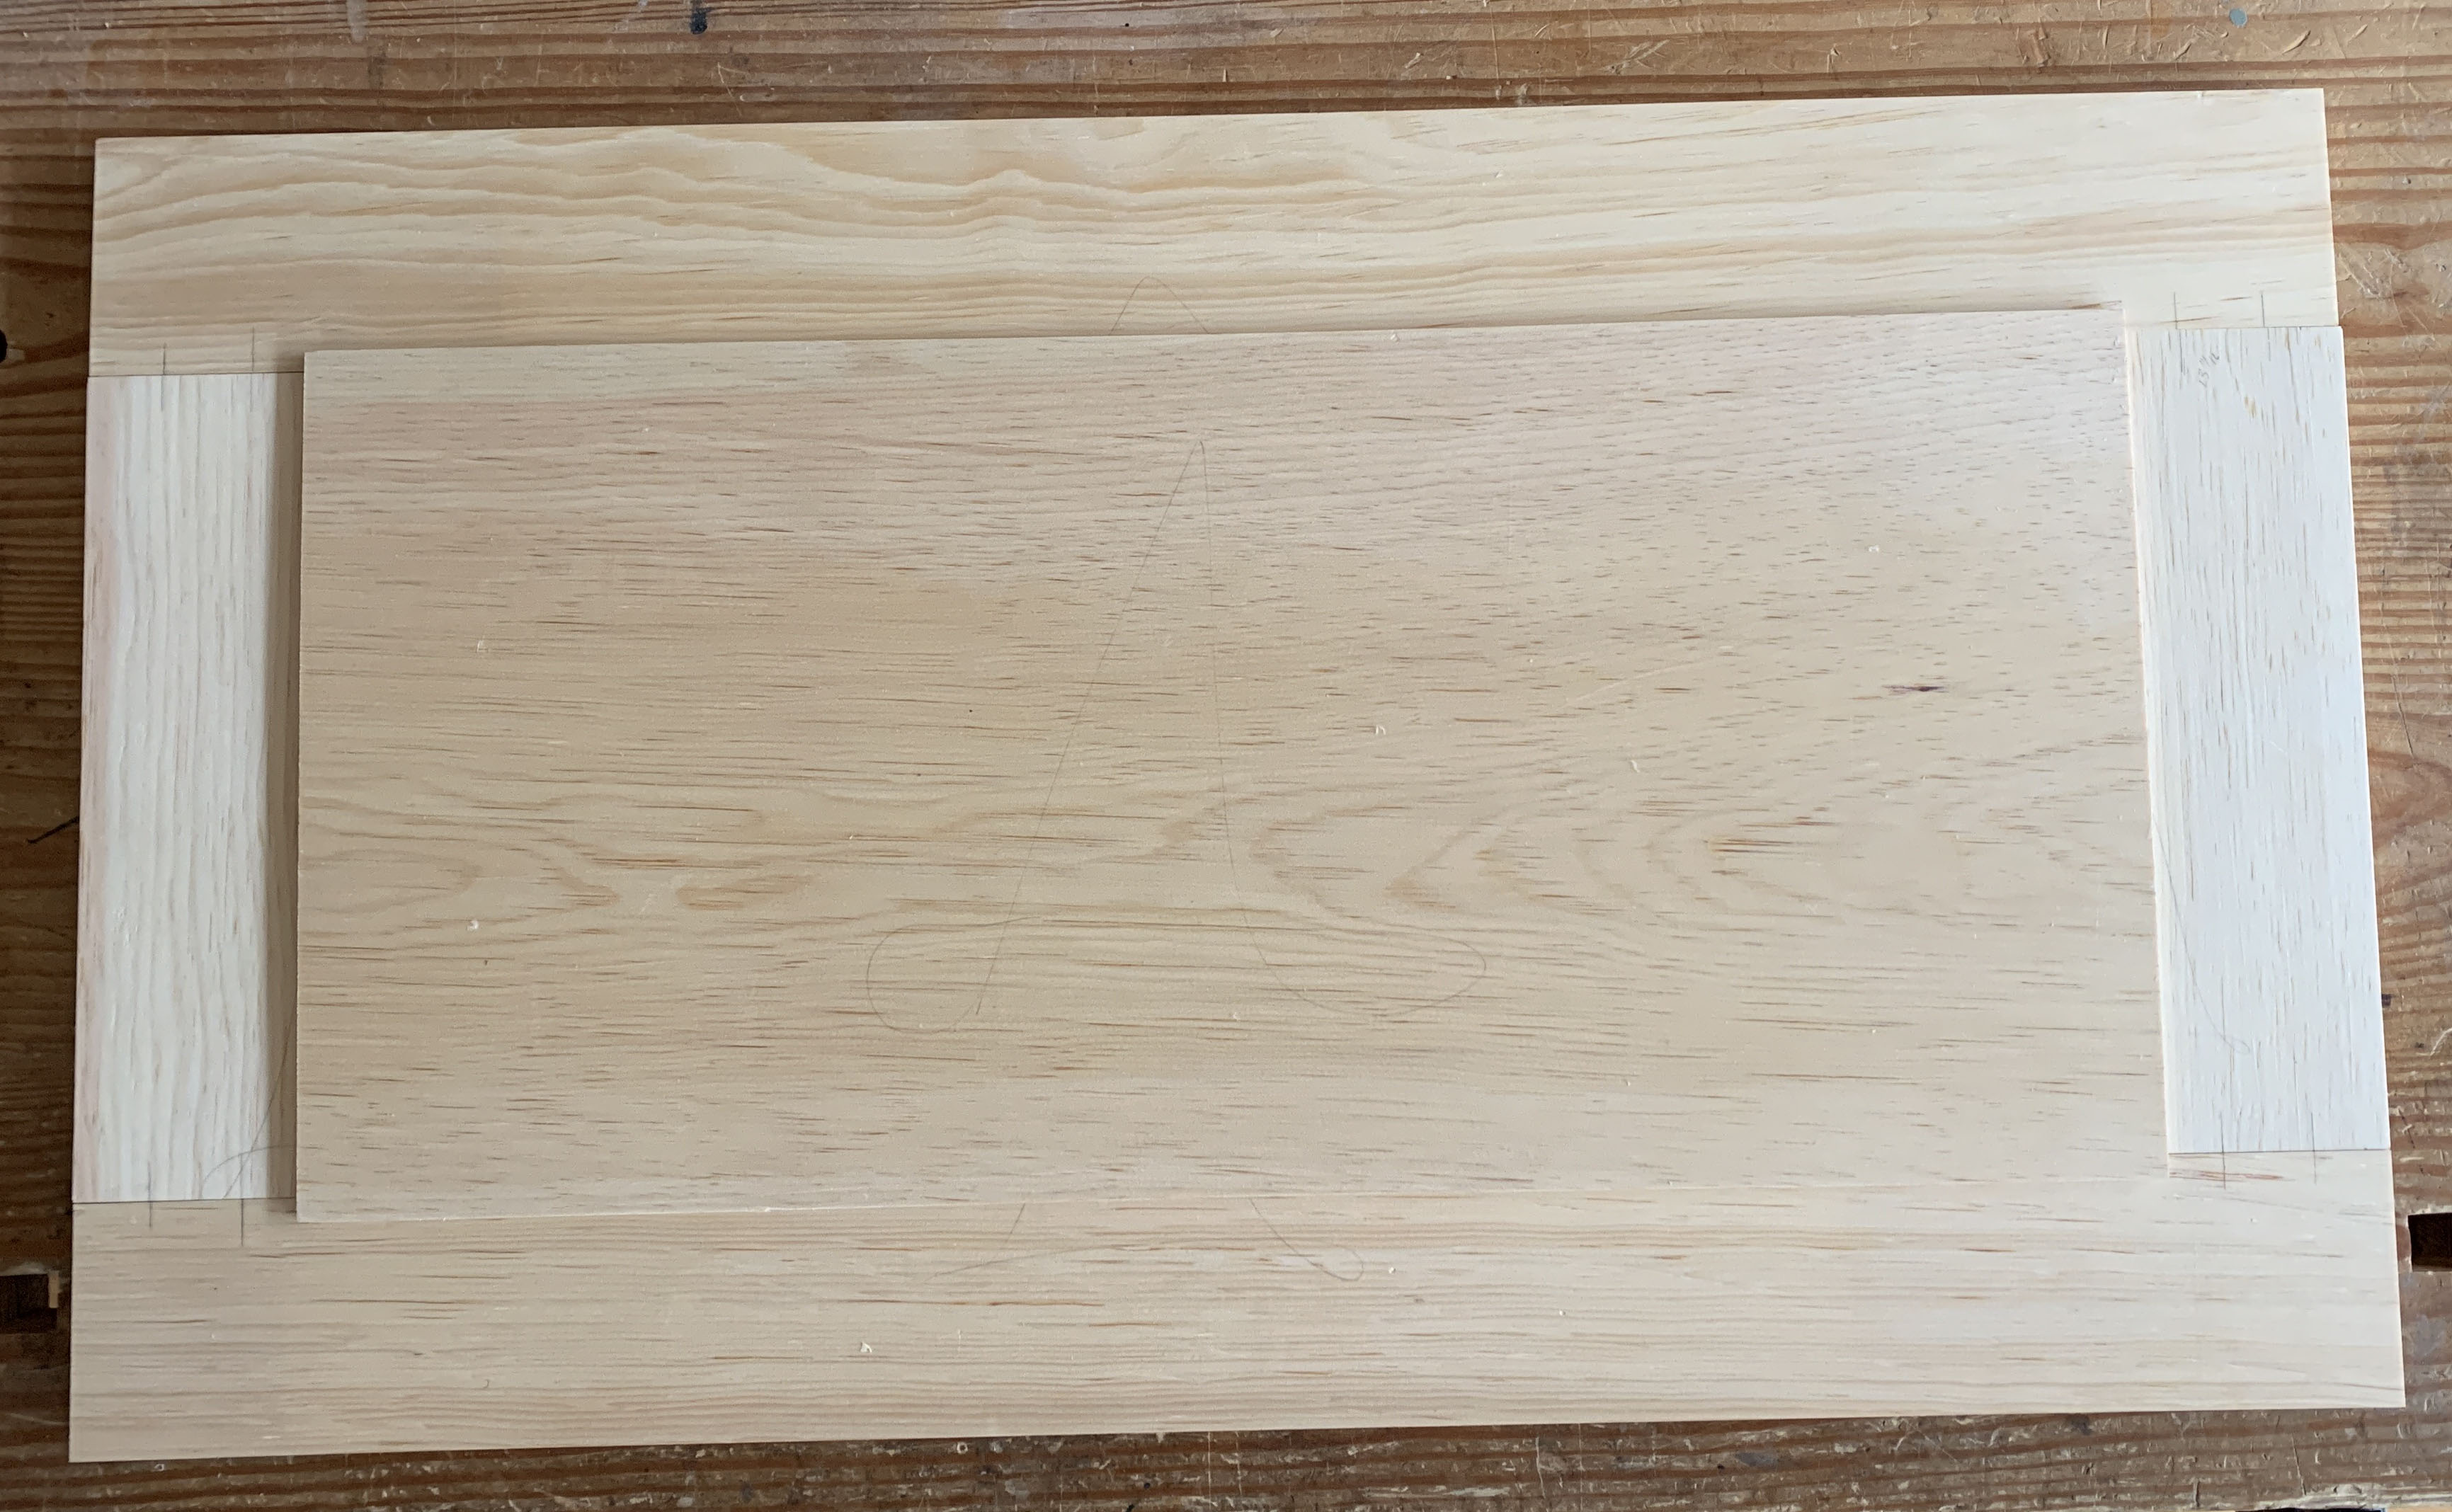
With the mortises all cut, do a dry assembly before opening the glue.
Oh good – it worked! (Note the faint marriage marks on the top of all the pieces – I re-established those on each piece after I planed up the surface. Those make it a snap to get things together in the right orientation.)
Once everything fits together, cut a 30° bevel on the top edges of the lid (or just soften the edges, per the book) before glue-up.
No bevel on the left; bevel on the right (plus my lid panel is a little thicker, not by design, but because that’s what the stock for the class in which I built this one allowed).
Arrange the rails (the long pieces) with the mortises facing up, and squeeze in a healthy amount of glue, spread it all around and up the mortise sides with an acid brush, then stick the loose tenons in place. Put glue in the stile mortises (move quickly now, as things will get drippy) and slip them onto their mates on one rail. Slide the lid panel in place (remembering that the lid panel lips over the rails…not under), then put the second rail in place and clamp until dry.
Unless things go very wrong, you should need only one clamp at each end. Make sure to push the rails and stiles down flush to the clamp’s bar – that will help you get a co-planar assembly.
Now, just as it says in the book, cut dovetail joints for the dust seal (one tail on each side piece) and glue the dust seal to the front and sides of the lid. Then add some nails for good measure. The dust seal will see a lot of opening and closing action.
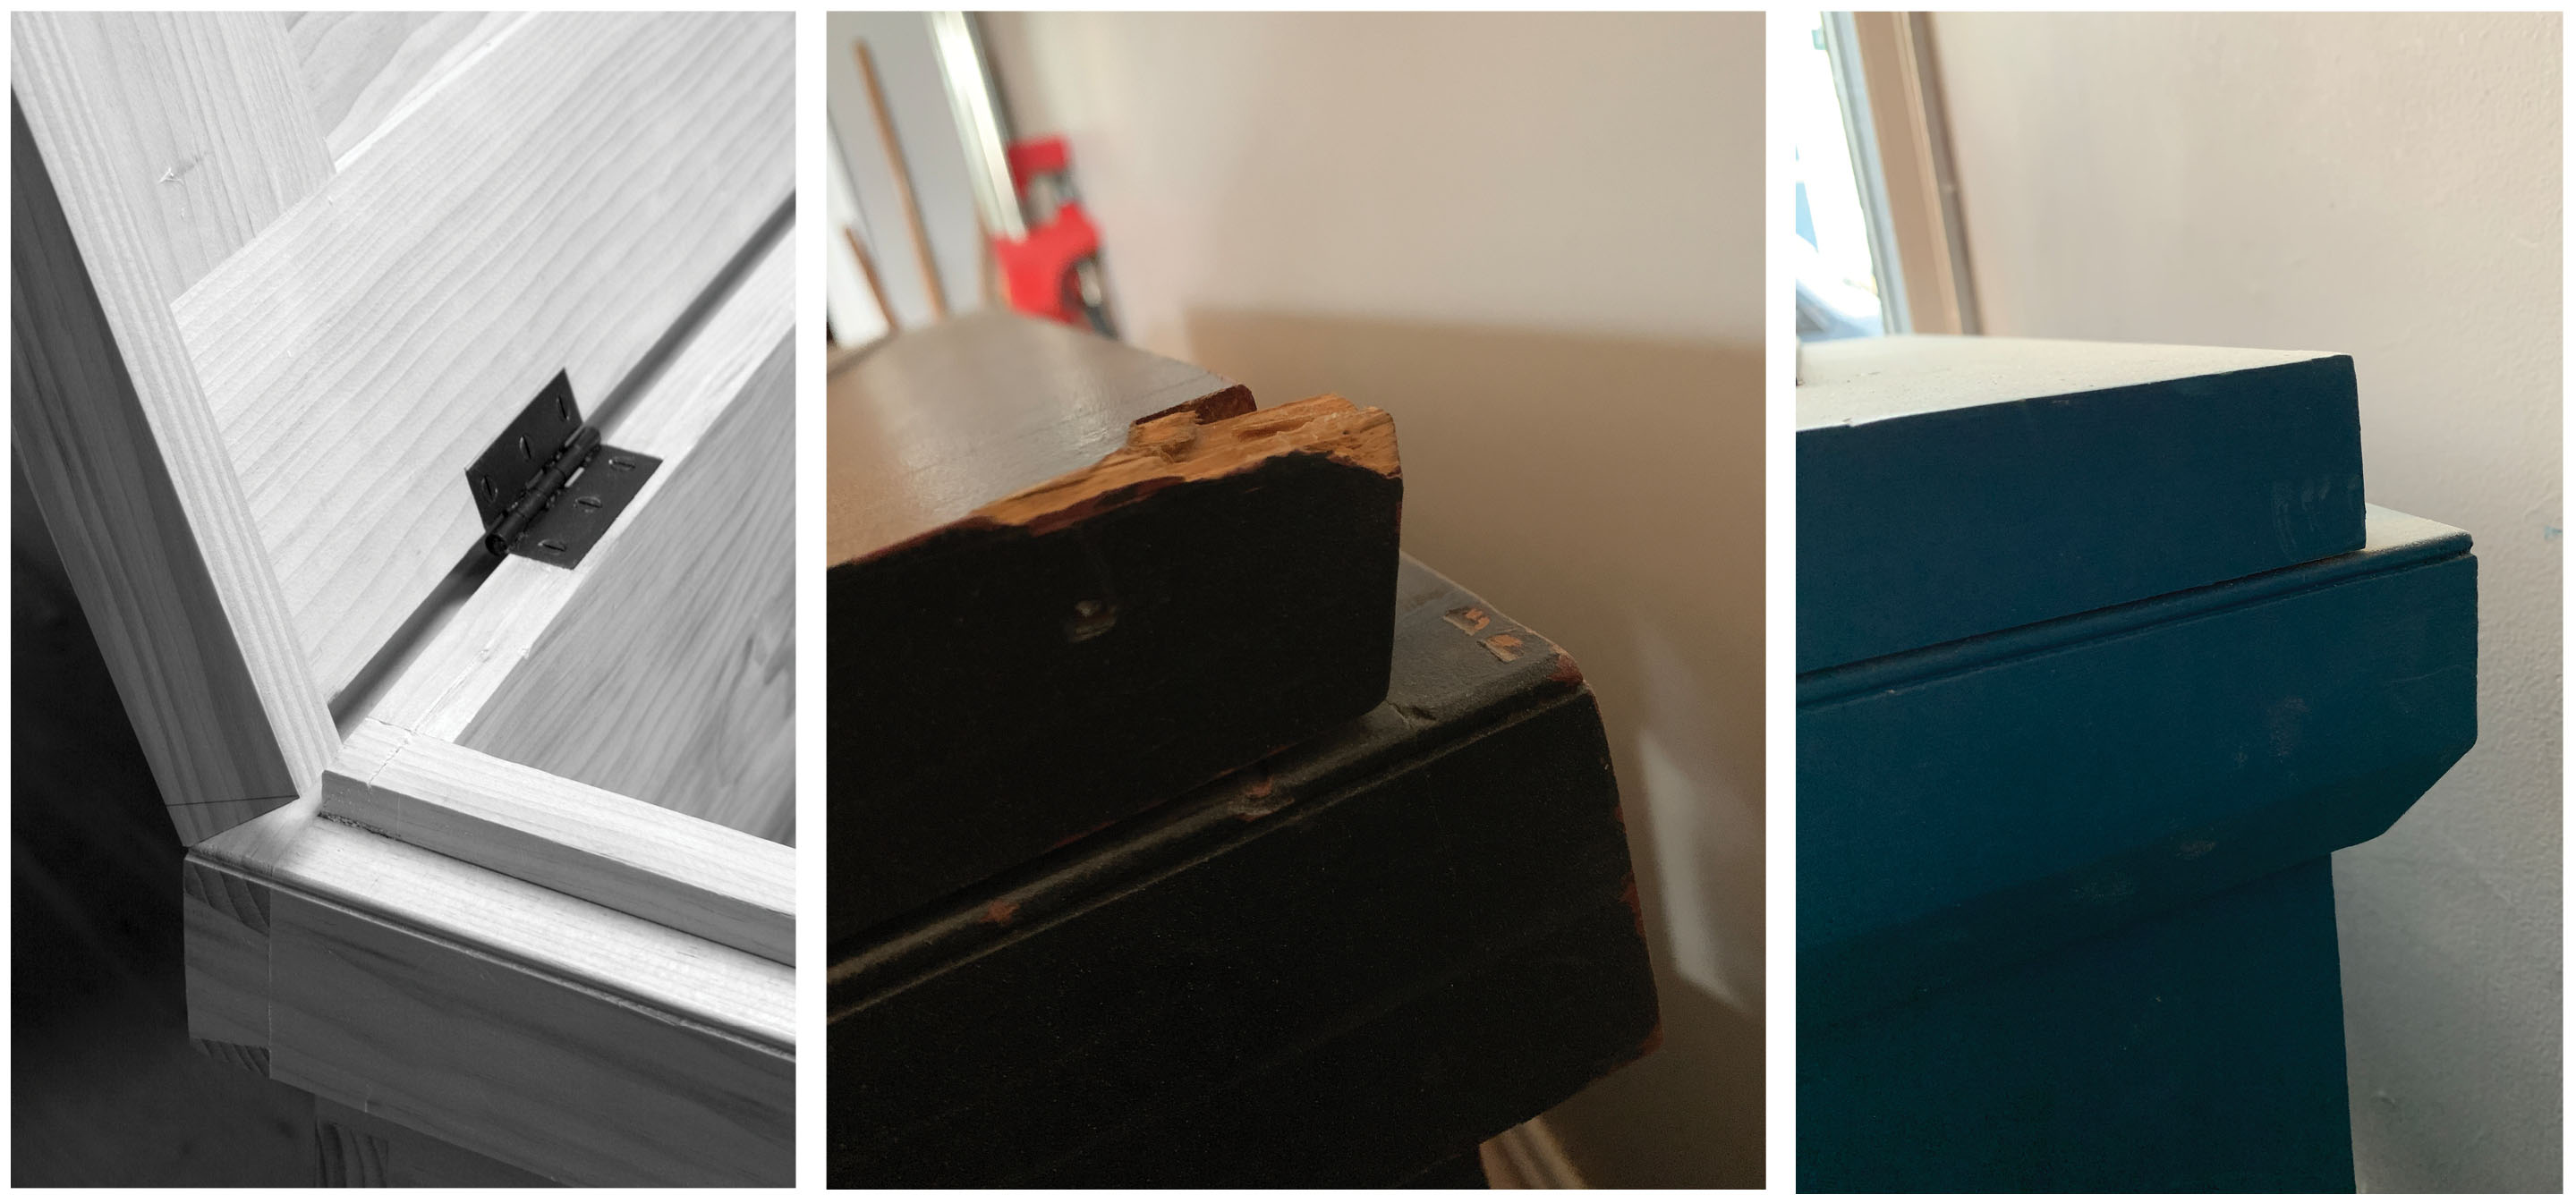
There’s one last difference – and this one is motivated by experience, not by a classroom setting. In “The Anarchist’s Tool Chest,” Chris writes to cut a bevel at the back ends of the dust seal to act as a stop when the lid is open. The bevel can break off with repeated use, so now, we cut these two sticks flush with the back edge of the lid’s frame-and-panel assembly. The wall makes an excellent lid stay.
At left is the “stay” image from the book; in the center is one of Chris’s bevel stays after nine years of use; at right is my flush-cut dust seal. (I have a chain on my chest that acts as a stay…but the wall is right there, so I don’t really need it.)