The great people at Alexander Brothers have put together a new kit of materials that help you make a Roman workbench, the earliest design of bench that we know of.
The Roman bench isn’t just an historical footnote. It’s a dang-good bench that we use all the time in our shop. The bench is portable, easy to build and has a small footprint. It’s a favorite among apartment woodworkers because it can serve as a coffee table when not being used to make furniture.
Also, woodworkers with physical disabilities love the bench because you sit down to work on it.
How does the bench work? Glad you asked. I wrote a book about this bench and how to use it called “Ingenious Mechanicks.” It’s a free pdf download from our store. (Or you can buy a copy of the book – we don’t mind.) We also have a long-form video for sale on building this bench and its workholding here.
The kits are reasonably priced and come in both ash ($311) and maple ($331). The wood we purchase from Alexander Brothers is always top shelf. Buy with confidence.
Also, while you are there, get one of their coffee mugs. These are handmade and beautiful, with nice thin walls (a mark of skill in ceramics and turning). I bought one before Christmas and love it.
With our final class at the Willard Street workshop behind us, I’ve rearranged the bench room, the Mechanical Library and the machine room for four woodworkers, instead of a classroom.
First and biggest change: We scotched four workbenches. We sold three and will move the fourth to Megan’s workshop. That change gave us space for an 18” x 30” x 60” assembly table that I built last week. I’ve always loved low assembly benches, but I’ve never had room for one – until now.
I’ve arranged the four remaining benches so they stand alone. You can walk all around them. They are all parallel to one another, just like in the workshop shown in Plate 11 of “l’Art du menuisier.” And they’re arranged by seniority – on purpose. Apprentice Katherine is up front by the window, then Journeyer Kale, Editor Megan and me at the back.
The idea is that the more experienced people will always be able to see what the less-experienced people are up to. And be able to jump in (or shout a warning) if something goes amiss.
The back of the bench room now has the junior editors’ editorial workstations – I built their height-adjustable table using a 1960s-era drafting table and a massive tongue-and-groove white pine top. There’s lots of space to spread out to write, edit and design.
In the Mechanical Library, more changes are afoot. Megan is staying in her same cubicle but will need a new desk (the desk Megan has been working on for the last 10 years is Lucy’s). The rest of the library is being returned to its original configuration: loveseat plus a tool chest acting as a desk, with everything facing my stereo. This is how I like to write and listen to records.
In the machine room, my Delta 14” band saw is going to Megan’s shop. It is being replaced by the JET 14” industrial band saw that used to be in the bench room. With no classes in the bench room, we need only one band saw up there. And the General 490 is staying up front.
I have additional small changes planned, and I’m sure we’ll move things around again. But I think the new bench arrangement works already. Photography is easier without benches being butted up against each other. And it’s nice to be able to get to all sides of your work. Plus, all the benches have the same arrangement of natural light: Loads of light from the front of the bench with a little side light from the south-facing windows.
Mostly, however, it’s quieter and we all have a little more room to move.
— Christopher Schwarz
Editor’s note: Our ATCs facing off across the room reminds me of the dueling banjo scene from Deliverance.” I do not, in this scenario, know which of us is Lonnie …
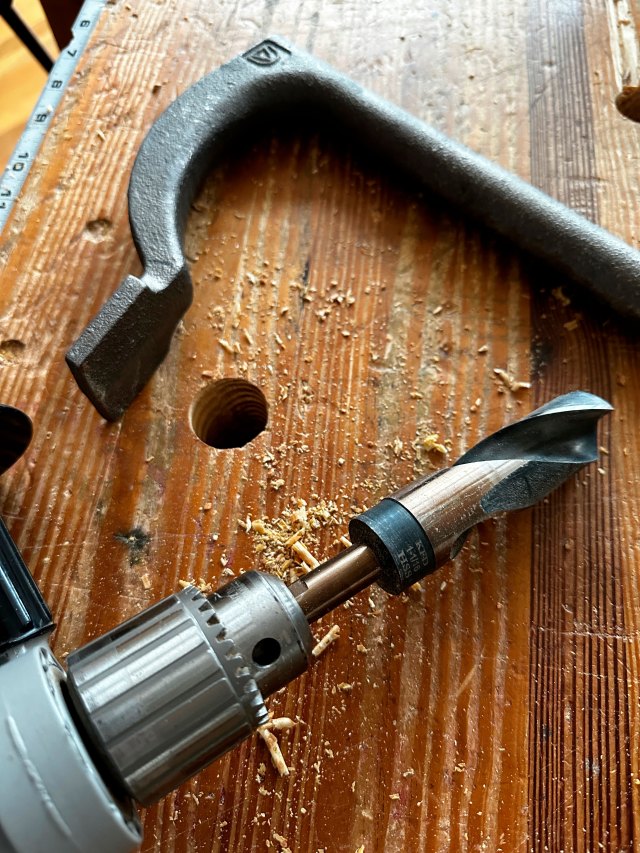
You can open up your holdfast holes a tad with a slightly oversized bit.
After a few years of drying, my workbench’s benchtop shrank a bit. It’s not a big deal, but the drying process also shrank my 1” holdfast holes. And with a few of the holes it became difficult to insert the holdfast’s shaft.
There are a few ways to open up the holes a bit. Reaming them out with a 1″ drill bit and “wallering a tad” works, but it can take some effort to get the middle section of the hole to size.
A second expensive-but-precise method is to use a tool called a “bridge reamer” or “car reamer.” These construction tools have a slight taper and are used to correct misaligned holes in steel construction and the like. These cost $100 or more, which is a lot for a single task.
The third option is to buy an inexpensive 1-1/16” drill bit such as this one. Before running this drill bit into your holes, I recommend you open up the top rim of the hole with a rasp so the bit won’t tear up your benchtop’s surface.
For drilling, use a corded drill with a side handle, especially if your benchtop is made of a hard wood. Yellow pine is especially tricky because of the differences in density between the earlywood and latewood. Take your time, don’t rush and you’ll get through it.
Holdfasts work best where there is a close fit between the shaft and the hole, so don’t over-do it.
My current bench: a Benchcrafted ‘Classic’ 84″ (with custom hub bling).
A few years back, we decided we had too many benches in our shop, so I hired movers to transport and get my “Gluebo” into my basement. (Its weight almost killed us moving it from my former workplace to Lost Art Press in 2017.)
Then we decided we had too few benches, and that we should have a commercial bench on site so that we could try it out and perhaps recommend it to those who didn’t want to (or have time to) make their own bench. (And OK… we did the math, and realized our time was better spent on editing and things other than making a new bench.) So we asked Benchcrafted to make me a 30″-tall version of the 84″-long “Classic” (the standard height is 34″). At 5’6″ (OK…I’m a little shorter these days), 34″ is too high for me to comfortably plane atop for long periods of time – and I spend a fair amount of time at the bench. So I was happy that Benchcrafted agreed.
And it is an excellent bench; we do recommend it – though I wish it were about 2″ wider. (It would be easy to add a piece of maple to the back edge…I just haven’t done it.)
Now we need to move a bench over to our new storefront, so folks have one handy on which to try out Crucible tools (and so that we have one on site for photography). Kale is a couple inches shorter than am I…and I must have had on Birkenstocks the day we measured for that bench height. In my work boots (which I wear about 10 months out of the year), 31″ is a better height. So Kale is taking my Classic, and we have once again begged Benchcrafted to make a custom-height bench for me. We’re moving Kale’s current bench, the Holtzapffel, to the Anthe building
This time, we’re getting the Split-top Roubo, because people ask about it a lot. And having worked on one for only a couple weeks on and off while teaching at the Florida School of Woodworking, I don’t have an informed decision about it. So I’m about to find out.
It’s easier for Benchcrafted to do a run of benches at one time – and they don’t typically do custom. So if anyone else needs a 31″-high bench, get your Split-top Order in ASAP (I’d say by no later than Dec. 11), and send the Benchcrafted guys a note immediately afterword stating that you want the shorter height.
– Fitz
p.s. How do you know the right bench height? The way we figure it is to stand straight and let your arm hang down loosely by your side. Have someone measure the distance from the knuckle joint on your dominant hand’s pinky to the floor. That’s the ideal height for the top of your bench, if you do a lot of handplaning with metal planes; those who use wooden-stock planes might prefer a slightly shorter bench. To raise things to a comfortable height for sawing, I use a twin-screw vise.
p.p.s. We also plan to film a video in 2025 on making the Anarchist’s Workbench at 31″ tall. That one will likely become my bench (unless I fall in love with the split top), then I’ll take home my “petite Roubo” that found its way over here when we were still a bench short. I miss having that one at home. It is white pine – no need to hire movers (which is why we brought it here instead of bringing back the Gluebo). Then we’ll have enough benches for all our classes, and at various heights so that we can more easily match them up to people. Plus, lots of different styles so that folks can try out the different “models.”
Traditional shop in miniature. This workbench scene, owned by tool collector John Sindelar, shows a complete, functioning shop. But what if you don’t own a bench?
The following is excerpted from “The Anarchist’s Workbench,” by Christopher Schwarz. The book is – on the one hand – a detailed plan for a simple workbench that can be built using construction lumber and basic woodworking tools. But it’s also the story of Schwarz’s 20-year journey researching, building and refining historical workbenches until there was nothing left to improve.
Along the way, Schwarz quits his corporate job, builds a publishing company founded on the principles of mutualism and moves into an 1896 German barroom in a red-light district, where he now builds furniture, publishes books and tries to live as an aesthetic anarchist. Oh – and the PDF of the book is free (see the first sentence at this link.)
There’s only one reason that the cheap-o workbench industry exists. And that’s because people think they need a workbench to build a workbench (or are truly delusional and think it will be fine for furniture making).
So many woodworkers I’ve met have spent $200 to $500 on a bench that isn’t worth the BTUs to burn. The things wobble like a broken finger. The vises hold like the handshake of a creepy vacuum salesman. They are too lightweight for even mild planing tasks.
You don’t need one of these benches to someday construct a “real” bench. In fact, I build benches all the time without the assistance of a workbench. It’s easy. Start with sawhorses. Glue up the benchtop on the sawhorses. Sawhorses + benchtop = ersatz bench. Now build the workbench’s base on top of that ersatz bench. Put the base and the benchtop together. You’re done.
If you want a temporary workbench until you build a “real” workbench, there are ways to get the job done with just a little money and a little frustration. This brief chapter seeks to give you some options. I know that some of you will insist on buying something as soon as you anoint yourself a woodworker. It’s an instinct we’re trained into as consumers. Here are a few things to put in your shopping cart instead of a cheap workbench:
Buy an industrial steel packing table with a hardwood top. You can get these from many, many suppliers (McMaster-Carr is one). These feature a heavy welded steel base and a wooden top that’s maple, if you’re lucky. These metal tables don’t rack like a cheap workbench and cost less (way less if you find a used one). You can screw thin pieces of wood to the top as planing stops so you can plane the faces of boards and legs and the like. And get a large handscrew clamp to stabilize boards when planing them on edge. These packing tables don’t come with any vises, of course, but you can fix that with your credit card.
Buy a couple bar clamps (you’ll need clamps no matter what) that are long enough to span the width of the top of the packing table. Screw a 4×4 below the benchtop right at the front edge of the top – this will allow you to clamp your work to the front edge of the benchtop so you can work on boards’ edges and ends.
That’s one solution. How about a simpler approach?
Use your kitchen cabinets, kitchen table or dining table as the workbench. You can clamp planing stops to the tabletop (you’ll need a couple F-style clamps for this). Don’t forget to buy a large handscrew clamp to help stabilize boards when planing them on edge on the tabletop.
For working on edges and ends of boards, buy a commercial Moxon vise, which you can clamp to any tabletop or countertop. This vise will let you work on the edges and ends of boards. Even after you build a “real” workbench, you’ll continue to use the Moxon and the handscrews.
Is that still too much money? Do you have a public park nearby?
Use a picnic table. Drive nails or screws into the top to serve as planing stops. With a picnic table you get both high and low working surfaces. You can drive some nails into the picnic table’s benches to act as a planing stop and use them like a Roman workbench.
Buy a couple big handscrew clamps (every woodworker needs these anyway). Clamp or screw these handscrews to the picnic table so they work like vises so you can work on boards’ edges or ends.
Here are other time-honored solutions I have observed in the wild.
Take four pieces of 3/4″ x 24″ x 96″ CDX cheap-o plywood and screw them together face to face to make a 3″-thick benchtop. Screw this benchtop to a used metal desk. The old metal desks that populated schools, warehouses and government offices are ugly, cheap and widely available. They are almost all 30″ high. Add a 3″-thick benchtop and you are in the right height range for most Americans. Some of these desks have MDF desktops. Some have sheet metal tops. Either way, you can screw your plywood benchtop to the desk. Bonus: The drawers give you tool storage. Add workholding as above.
Conscript an old dresser/bureau. This is a three- or four-drawer cabinet for storing clothes. One 19th-century book I read showed how to turn this into a workbench. Attach planing stops to the top of the bureau/dresser. For sawing, keep it simple – use 5-gallon buckets as sawbenches (thanks for that tip, Mike Siemsen). You also could clamp a Moxon vise to the top. The lower drawers are for storing tools. The upper drawer can catch sawdust (not my idea – it was mentioned in the book).
The Apocalypse Workbench When I teach or demonstrate woodworking on the road, the venue is occasionally luxurious and other times it’s more like “Lord of the Flies.” I’ve showed up at woodworking clubs where the workbench on offer was a folding table with metal legs and a particleboard top.
After years of encountering this problem, I learned to travel with an emergency kit of things that allowed me to work without bursting into sweat and tears in front of an audience. Here’s the kit:
Two large handscrews
Two 36″ bar clamps
Two F-style clamps (usually with 12″ bars)
Thin strips of plywood, usually 3″ x 24″ and in two thicknesses: 1/4″ and 1/2″
Small clamping pads of scrap plywood, to prevent denting my work when I pinch it
A few softwood shims
A couple simple bench hooks for sawing.
This kit has converted many desks and tables into somewhat-functioning workbenches. The handscrews and bar clamps act as face vises. The plywood scraps can be made into planing stops for planing with the grain or across it. And the F-style clamps can clamp my work – or other clamps – to the tabletop.
To be sure, I’m always happy to return home to my workbench. But until I find a way to fit it in an airplane’s overhead compartment, this kit has become a way that I can work almost anywhere.