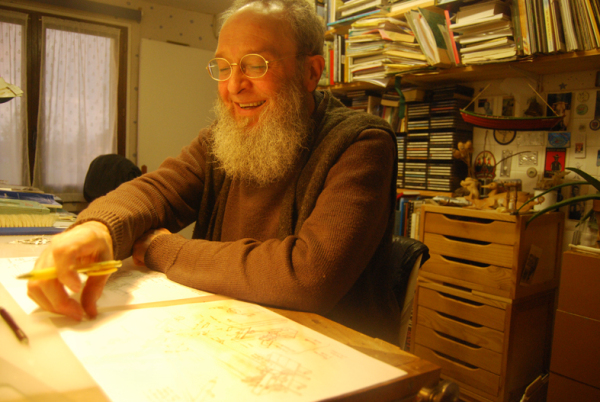

[Editor’s note: We recently reached out for an interview with Maurice Pommier, author and illustrator of “Grandpa’s Workshop” (translated by Brian Anderson – you can read about Brian’s visit to see Maurice and his workshop in 2012 here). Maurice lives in Évreux, France, and speaks little English. But he responded, in the most generous way – an illustrated letter. Here are his words, as he wrote them without edits from us, along with a handful of illustrations, sketches and pictures to help paint a small picture of who Maurice is and some of the brilliant work he has done.]
I am not very able to speak of me. I am born in 1946.

My mother was dressmaker. She worked hard, early morning and late evening.

My father, alive but broken by the nazis.

We lived in a little village, Peyrat de Bellac. I go to school and after I was boarder at collège in the nearby town.
I thank life for having put in my company a lot of great people – I can not name them all. I choose three, the others do not be dissatisfied.

Tonton Dédé, the best, with working with tools and with his hands.

Pépé Léonard, the best storyteller. When he stop speaking, he was whistling.

Mémé Anna.

I think I’ve been drawing since I know how is made a pencil.

In 1968, I married Francine, she supports me since that date. We live in Évreux. We had three children and now four grandchildren; I worked at the Post Office for a long time. But I did not stop drawing.

My friend Xavier Josset has been presenting my first book to a publisher, me, I would have never been there.
After things changed, I left the Post Office, but I continued to draw and scribble. And write stories. In the following pages I enclose a small catalog of my bad habits.
J’espère ne pas être ennuyeux.


Drawings & Colors
Some pictures made when I work in the team of Guides Gallimard.


Originally the barn was built with five bays. It was later extended to the south with five further bays. The barn is oriented north to south in its length. The drawing here shows the older part of the barn. The cross-frames, the main purlins and the bracing are shown, but for clarity, the rafters and the intermediate purlins are omitted. The doors, which have undergone several alterations over the course of the barnʼs history, have also been omitted.
La grange était constituée à son origine par 5 travées. Par la suite elle fut agrandie vers le sud, par 5 travées nouvelles. La construction est orientée nord/sud. Voici un petit schéma décrivant la charpente la plus ancienne. Il montre les travées, les fermes et le contreventement, pour plus de clarté, les chevrons n’ont pas été dessinés, ainsi qu’une partie des pannes. Les portes, modifiées ou crées au cours de son histoire, ne sont pas représentées non plus.
— “Daubeuf Workshop Diary,” p. 11, Carpenters Without Borders, (ink + sweat …)


Papercuts


“The genies of the fields and woods that accompanied St. Nicolas; as they were a source of disorder, the religious authorities forbade them.”
Tools & Wood


My current job, under Patrick’s direction. I met Patrick Macaire a few years
ago and since, in my drawing workshop, there is a struggle for space between little pieces of wood and drawings.


P. 93


Tracés théoriques qui ne seront pas repris intégralement à l’épure (Theoretical plots that will not be fully included in the sketch)
P. 99


Jambe de force
La jambe de force peut s’établir en prolongeant sa face inférieure jusqu’au lattis et en reportant son niveau sur la ferme de croupe et de l’arêtier; puis, en plan, en générant une sablière d’emprunt (au niveau de la ligne de trave) et en la faisant tourner à l’axe. Vérification en générant un faîtage d’emprunt au niveau de la dalle et en faisant tourner: les trois points doivent s’aligner.

We are finishing the Deuxième carnet – it’s been 7 years since we are working on these two notebooks.

— Kara Gebhart Uhl


