Our pottery supplier ran out of our glaze colors for our latest batch of 20-ounce steins. Because we weren’t sure when the potters would get our color back in, we tried a new glaze combination: red over a dark blue.
Of course, as soon as these red/blue steins arrived here, the pottery was able to get our old glaze color.
So we are left with one batch of about 100 steins that are red over blue. Instead of trying to stock two colors or something equally complicated, we decided to simply sell this small batch at a significant discount. Normally our handmade steins are $39. We are selling these for $24.
These are handmade by individual potters in Minnesota. They are not in any way defective. In fact, they are dang-near perfect. They are just not in the color we’ve been using.
Click here to order the ones on sale for $24 plus shipping.
(Yesterday this post was sent out to email subscribers with a draft introduction. If you received that yesterday and were confused, blame me. You can see the post in its correct entirety here. Below is the introduction to the piece you didn’t receive.)
During the last four years, I’ve lost four members of my immediate family (mom, dad, stepfather, sister), most of them suddenly and unexpectedly. And if I’ve learned one thing from the experience, it’s this: Tell people who are important to you how you feel about them. Today. Don’t wait for a nice evening on the back porch.
As many of you know, Nancy Hiller is battling pancreatic cancer. Her treatment has its ups and (deep) downs. And while I am counting on her to be one of the long-term survivors of this horrible disease, I also didn’t want her to ever leave this earth without know how important she has been to me as a person, woodworker, writer and supremely ethical being.
I’m not alone. Kara Gebhart Uhl spent the last couple weeks talking to some of the people in and out of Nancy’s orbit. And below is what they had to say.
If you’ve read her books, been a student in one of her classes or been a customer of hers, you know that this only scratches the surface of a most impressive and lovely person.
C.H. Becksvoort, furniture maker, designer, author, contributing editor to Fine Woodworking magazine
I first heard of Nancy back in 2004 or 2005. I think it was a kitchen cabinet design article in Fine Woodworking magazine. She stayed on my radar for several more years and wrote a few more articles, as well as a series of pieces for Pro’s Corner. In 2017, her book “Making Things Work”really caught my attention. Here was a kindred spirit who made her living from woodworking, without a rich partner or a trust fund. And she did it in a male-dominated field. The book was amazing, in that she debunked the common woodworking images of curly shavings, satisfying smells and days of crafting hand-cut dovetails. Instead, she revealed what it was really like to run a day-to-day business: difficult customers, insurance payments, bookkeeping and tax hassles, and time management. She’s paid her dues.
Not only that, but Nancy is a wonderful, gifted and generous human being. And a good friend.
***
Laura Mays, woodworker, designer, educator, director of The Krenov School
When I first came across nrhillerdesign.com a handful of years ago, I was genuinely confused; was this a group of people? A workshop or a company? Were they designers or historians or cabinetmakers? It never occurred to me that I was seeing the prodigious output of just one person, and I navigated away, bemused.
It wasn’t until a couple of years later that I read “Making Things Work” [some of which takes place in England], and I started to understand the fullness, the depth and breadth of Nancy. But before understanding came a lot of laughing, deep out-loud belly laughs, that are rare for me in adulthood. It was the descriptions of the miserable weather/plumbing/dampness/general decrepitude seen through the eyes of an affectionate outsider that really got me. I had grown up at a similar time on the adjacent island of Ireland, where similar conditions prevailed, and I had gone through a somewhat parallel trajectory of abandoning academia and a professional career for woodworking. I resonated.
So when Deirdre Visser, Phoebe Kuo and I embarked on interviewing women woodworkers for a project, called at that time “Making a Seat at the Table,” I knew this would be a tremendous opportunity to meet Nancy in person. This long-limbed woman with a huge laugh welcomed us into her house in Bloomington, rearranging her pets, making us comfortable, with a constant stream of talk that moved quickly, seamlessly, between the profane, the intellectual, the moral, the practical. It involved swear words and Latin quotes; it revealed someone who reflected on her life while also enthusiastically pouring herself into it.
This, I think, is one of Nancy’s greatest gifts to woodworking and the world: to bring together morality and material, to examine what it is to do good work, in both an ethical and craft sense. This of course is the primary idea at the core of the Arts & Crafts movement, and it is no surprise that she has studied and written about that period extensively. There is a direct line of thought between them and her, between their concerns of labor and value and honesty and meaning, and hers. But where they, at least in my rather flippant understanding, appear to be a bunch of middle-class men who dropped out of London society and moved to the Cotswolds, she is the 21st-century self-employed woman version, working out how to make a living from her work in the context of Ikea and supply chains and gig work, and all the other pressures and intricacies of late capitalism “Me Too” globalization.
Nancy’s book about English Arts & Crafts furniture is an exemplar of how she brings together the material and the mundane: not only is a beautifully written study of the ethics at the core of the movement and short biographies of some of the key thinkers, it is equally a how-to, or a how-done, on the actual making of several pieces of furniture. While this combination might, I suppose, reduce the book’s academic gravitas on the one hand, and on the other, be off-putting to someone who just wants the woodworking content, for me, it is exactly this juxtaposition that makes Nancy important. “No ideas but in things,” and vice versa.
In article after article in Fine Woodworking magazine and elsewhere, Nancy pores over how to make a living, make a life, making things. She parses, for example, the relative merits, ethical and otherwise, of different pricing structures with an honesty and a depth of detail that is refreshing, like having a window thrown open on what can be murky and hidden. She doesn’t shy away from the annoyingness, the hard work, the nitty-gritty, but she always brings it back to what it means to live a good life, to be fair and just to oneself and to others. There is no one whose moral compass I trust better than Nancy Hiller’s.
***
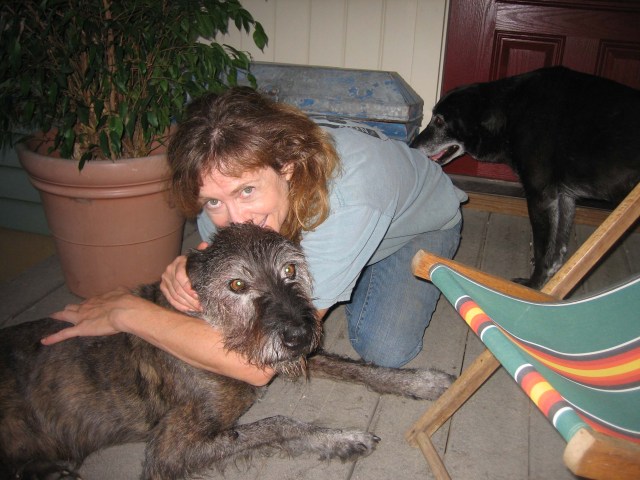
Nancy with her dog William.
Charles Bickford, carpenter, writer, photographer and former senior editor of Fine Homebuilding magazine
It’s hard enough for anyone, at any time, to run a one-person cabinetshop. It’s a whole hat rack full of jobs rolled into one – getting clients, keeping clients, managing clients, design, building, finishing, maintaining the shop, keeping track of expenses – that usually doesn’t leave much time in the day for anything else. Somehow, Nancy Hiller has managed to run a successful shop by herself for the last 30 years or so (a feat worth celebrating in itself), while at the same time, she has written five books, countless magazine articles and blog posts, in addition to leading the occasional furniture class.
And while other craftspeople might consider writing just another means to marketing their goods, it seems like Nancy has spent as much time writing as she has building. (I suspect she’s fast on the keyboard, but that’s just a guess.) As she has pointed out, she’s not writing for the money, of which there is precious little anyway in the writing game. That’s a shame in itself, because she’s as good a writer as she is a furniture builder, and by now should be wealthy as Croesus.
She writes to inspire and advise the community of shop rats, both the professionals and the part-timers, that are her audience. Where else would they go for advice on the potential pitfalls and obstacles of running your own shop? How to stay creative, or how to deal with customers? Or info on the proportions of a sideboard, Johnny Grey, Arts & Crafts design or (who knew?) Hoosier cabinets. Or how to train and keep a hop-a-long canine shop foreman named Joey? Who else does this? Through her hard work and by example, she raises the bar for everyone else, and continues to weave the strands that make the woodworking community stronger, more aware, more connected and more informed.
She still makes great furniture, too. And don’t you forget it.
Being in our 60s, Nancy and I have been involved in the woodworking world for about the same amount of time. But it wasn’t until four years ago that my friend and colleague, Chris Becksvoort, started to mention her. He suggested that I get to know her. He felt it would be beneficial for me to hear her stories. He would always say “she has really been in the trenches.” One might question why I did not know of Nancy since she had been published for a while. Well, the answer is after going through a challenging professional experience in 1994 that lasted a decade, my self-confidence was so shaken that I chose to go underground, making my woodworking world small and self-contained.
Fast forward to 2018 when I ordered Nancy’s book “Making Things Work.” I was so taken by her writing style, her wonderful sense of humor, and her honesty. I devoured the book and then read it again. I share so many of her experiences, especially being a woman in a non-traditional field trying to make woodworking my career. Nancy’s down-to-earth approach put us all in a level playing field – no more hierarchical attitudes that I had grown accustomed to. Quality work is quality work no matter how one chooses to express that.
I have read so much of Nancy’s work since my initial introduction to her. Her example evokes confidence in others, promotes support rather than judgement, encourages us to share successes as well as hardships and to remain vulnerable to the whole journey. Whether we make historic pieces, carve beautiful wooden critters, make contemporary furniture, create beautiful kitchens, conserve other’s work or make wooden barrels, we are the lucky ones who have found common ground through her. I will be forever be grateful to have found Nancy. Her bright light helped guide me back to myself and the places I have honored before.
***
Nancy and her great smile.Nancy teaching at a cabinetmaking class at the former Kelly Mehler School of Woodworking, 2008.
What a lucky day it was when I first saw some of Nancy Hiller’s beautiful cabinetry in the pages of the Sept/Oct 2005 edition of Fine Woodworking magazine! Little did I know that reading that article and subsequently contacting Nancy would result in a long-time professional association and a warm friendship that hasn’t diminished over time and distance. I invited Nancy to teach a cabinet-building class at my former* school, her first such experience, and I was pleased that she accepted the offer. After seeing her in action, I invited Nancy back many times, and she developed a following with many students who continued to sign up for classes she taught.
It was clear from the first class day that Nancy had not only the technical skills necessary to teach, but more importantly she had the people skills that made the students feel comfortable with taking on new information and new skills. Nancy has a great smile and a frequent laugh. Her affirming ways with class participants inspired confidence and motivation even when technical problems arose. I specifically remember Nancy splayed out on the floor helping a student to problem solve a difficulty with hanging the door of a cabinet. The tone of the interaction went from frustration to laughter right away.
I have so enjoyed seeing Nancy’s prodigious skills gain recognition and accolades over the years. Yeah Nancy! Since our first encounter in 2005, Nancy continues to shine brightly through her writing (books, blogs and periodicals), her teaching and her design talents. She has an uncanny nose for sniffing out talent and originality in the work and stories of others. Her articles and interviews are fun to read as she describes the makers and their settings and work.
Nancy’s own work blends the integrity of good design with the joy of creating cabinetry and furniture that reflect the unique settings in which those pieces are placed, and the practical ways that the pieces are to be used. I learned those things from Nancy first-hand as she helped us design a completely new kitchen in our former residence, a 100-year-old log home. The outcome of that effort is a comfortable, functional and aesthetically pleasing kitchen where friends and family gathered. What a gift!
Nancy is a people-connector for certain. Above and beyond woodworking, that is her gift. I’m so glad that our paths have crossed and zigzagged in so many interesting ways.
*The former Kelly Mehler of Woodworking is now owned by Berea College and operates as The Woodworking School at Pine Croft.
***
Nancy and her great laugh.Nancy and Johnny Grey, 2019.
Johnny Grey, kitchen designer, author, educator, founder of Johnny Grey Studios
I have a soft spot for workers of wood. Nancy is in that mould but unusual in straddling the practical life of a carpenter with great skill in writing both academic and lifestyle books. Though in correspondence with her for many years, I only met her when she and her husband, Mark, came to stay with us in England not long before lockdown. Our family took warmly to them – a mutual love of dogs and the gift of a fine bottle of bourbon playing a role – and the visit was over all too quickly.
Nancy’s journey starts, I think, with her mother’s can-do attitude, a way of life of making things that she luckily passed on to her daughter. It happens that I share some early experiences with Nancy. Like me (and many of us), she took pleasure as a child in rearranging the furniture in her living room and bedroom. We both also started out on our careers, coincidentally, by restoring an 18th-century pine dresser, a halfway house to making something new. A similar dresser is pictured in Kara Uhl’s charmingly interesting blog profile of Nancy.
I first came across Nancy when she was writing “The Hoosier Cabinet in Kitchen History” (2009, note to publisher: please reprint). This was the book I was looking for without realising. It serves as a justification for an ambitious and slightly crazy idea of mine: making kitchens with real furniture along with coining the phrase ‘the Unfitted Kitchen’. In Nancy’s vision, kitchen furniture was both an organising principle and a space for creativity, fun and efficiency. Hoosier, a company from Indiana, built functional cabinetry for cooking and storage but also developed their own quirky and witty marketing. They used catchphrases and slogans such as, ‘A kitchen without a cabinet is like a farm without a plow’ and ‘Saving work is saving youthfulness.’ These were fun, modern responses to domestic workloads, and by 1920 the Hoosier Manufacturing Company had sold 2,000,000 cabinets.
Nancy’s analysis in the book relates the wit and energy from this period of kitchen history to fresh thinking in our time. She explores current kitchen culture, including gender roles, and questions the nature of a ‘residential’ kitchen. One answer to that comes from our recent response to lockdown, as we now regularly acknowledge the kitchen as a hybrid space that all the family occupies and use as an office, homework zone and place to play. Nancy generously includes some of my ideas on this sort of thing in her chapter on the Hoosier legacy. She includes quotes from Christopher Alexander in “A Pattern Language” on the ‘self-selecting features’ of a friendly home, and celebrates the concept of the kitchen as a living room that has, ideally, evolved well beyond the cramped little workplace for hard-pressed women that it admittedly still is in many cultures.
Nancy breaks through glass ceilings without making a fuss. I find it extraordinary that there are not more female cabinetmakers in the U.S. (it’s 7.5 percent, according to Zippia), although she tells me that there has been a growth in women working in the U.S. construction sector. In the U.K. it’s a worse story. Statistics are hard to come by. The number of craft courses at the tertiary education level has dropped by 46 percent due to the government’s education reforms.
I see Nancy as a designer-maker ambassador, a timeless figure who embodies the craftsmanship and the emotional and ecological benefits of the handmade. We need more voices like hers in the world of construction, design and the kitchen industry, but don’t hold your breath.
I noticed Nancy’s work before I noticed her. She had a piece in Fine Woodworking magazine when I was at Popular Woodworking magazine, and I remember thinking that it was a fine example of Art & Crafts work… and we were always looking for good Arts & Crafts (and Shaker) for Popular Woodworking. Then I noticed it was by a woman. I think it’s fair to say I started stalking Nancy. I read everything of hers I could get my hands on (she’d written a couple of books at that point, and articles for Fine Woodworking, Fine Homebuilding and Old House Journal). There just weren’t that many other woodworkers who were women, doing the kind of work I liked, who were featured in major magazines. I didn’t know her, but I loved her from afar for showing me what was possible (and because she’s a darn fine writer).
Nancy is an excellent person to emulate in work and in life. She is obviously a talented furniture maker and designer – but she is also hilarious, incredibly generous on every front, and kind to pesky editors and small animals. I am honored to now call her my friend, and to love her from close up.
***
Nancy during a photoshoot in 2017. (She’s just pretending to be mad.)
In 1988 my career took an interesting turn when I was offered the opportunity to switch from running restaurants, hotels and country clubs on the west coast to selling hardwood lumber on behalf of Paxton Lumber in Cincinnati. That is a story, but this story is about Nancy Hiller. Knowing absolutely nothing about hardwood lumber, I was assigned to a sales territory that included all southern Ohio, southern Indiana and Kentucky. I would introduce myself to my inherited and prospective customers as a service-oriented salesman with no experience in hardwood who needed their help in understanding the processes of cabinetmaking, flooring, furniture manufacturing and custom millwork. In return for teaching me about their craft, I would be sure that they received the quality lumber they needed, when they needed it. My customers were happy to show me their craft and I made sure that I delivered on my promises. My territory grew quickly. Bloomington, Ind., was in my territory and there were quite a few small woodworking companies of all sorts there, so I spent a good deal of time there building relationships.
In my work there I came across a small high-end cabinetmaking shop in Nashville, Ind., run by Nancy Hiller, the only female cabinetmaker I had yet encountered. The shop was small, only Nancy and her husband. I made sure to visit them when I was in the area and was awed by Nancy’s spectacular work. She said that she learned cabinetmaking in England, which I found to be extremely interesting. She stood out to me instantly as being at the top of her field, overshadowing the work of every other cabinetmaker in my vast territory.
I enjoyed our visits and I made sure that my service and the quality of the lumber I shipped to the shop matched the respect I had for her as a person and as a fine woodworker. Our visits were always enjoyable, and I learned about how a fine craftsperson worked. I was her salesman for about six or seven years, then I wound up working with another company and we regrettably lost touch. In 1996, I started to work with the Frank Miller Lumber Co., in Indiana, covering the U.S. west and all of Canada. I found out after a few years there that Nancy bought some quartersawn white oak from their outlet store. Since my territory was nowhere near Bloomington, Ind., I passed my greetings to her through her salesman.
Around 2010, I started traveling the country lecturing on the quarter-sawing process, the core business of Frank Miller Lumber. I found myself as speaker at a traditional building conference in Baltimore. I went to the room where the speakers were to drop their materials and when I turned around, I saw Nancy. It had been almost 20 years since I last saw her, and she immediately recognized me and gave me a hug. It was a brief but happy reunion and when I told her that I was working with Frank Miller Lumber, she said that they were favorite lumber supplier. She was very pleased that I worked for them. I said I was giving a talk the next morning and she was crestfallen that she would miss my talk, since she had to leave that night after her talk. Shortly after our chance meeting she gave a great talk about the evolution of the American kitchen. As she opened her remarks, she told her audience that her “favorite lumber salesman from her favorite lumber supplier” was in the audience. She gave them my name and told them to all come to my talk the next morning. It was very kind of her since my talk was scheduled for 8:00 a.m. on Saturday and I had low expectations for attendance. I was pleasantly surprised to see many members of her audience in my audience the next morning. That was a great kindness that I will never forget.
Several years later I took a film crew with me to Bloomington to interview Nancy and document her building a Voysey chair with Frank Miller’s quartersawn white oak. She was an inspirational subject and a generous host to me and the crew, even providing us lunch.
I have read all her books and have learned much from them, but by far my favorite is “Making Things Work: Tales from a Cabinetmaker’s Life,” which chronicles her amazing professional journey starting in England, where she dropped out of Cambridge and set herself on the harrowing journey to become the fine wood craftsperson she is today. It is an inspiring story of tenacity, strength and perseverance – the qualities she is teaching us as today as she faces her current health challenges. Nancy brings beauty to the world through her art and is a stellar human. The world is a better place because she is in it.
I would not be making a living as a cabinetmaker today if it were not for Nancy Hiller. Nancy took me on as her assistant in 2004. At the time, her shop was newly built and somewhat unfinished. It was home to two insane dogs, Wilhelm von Wundt and Winnie, who became my workday companions, and a cat or two depending on the year. Nancy’s shop was a relatively small workspace for two people, so when there wasn’t an interesting NPR story on WFIU or a machine blasting, we would regale each other with absurd stories and silly jokes. I’ve always been able to make Nancy laugh hard – in her signature hyena way – and take great pleasure in seeing her keel over from one of my inappropriate jokes.
When I was offered the job as her assistant, I was thrilled to be working alongside a craftsperson who was trained in England and had an impressive portfolio of work. I knew it was a great opportunity to hone my craft alongside such a skilled practitioner. But I didn’t know all the other things that I would learn along the way.
Working with Nancy provided me with invaluable lessons in historic preservation, the history of furniture design, building relationships with homes as if they were people, etymology, grammar and, of course, myriad woodworking techniques. She also modeled how to run a woodworking business with integrity.
It became clear to me early on that Nancy has a deep ethical core. While she can wax eloquent on the philosophy of ethics, she lives out her principles daily. I witnessed Nancy’s integrity in her treating clients with fairness and respect, building things the right way (even when it was less profitable), and always having her employee’s back – when the work ran dry, when clients behaved badly and when dark clouds rolled in.
It has been an honor to have had the opportunity to work alongside Nancy and be able to call her my mentor. It has been even better to maintain a relationship with her and call her my friend.
***
Anissa Kapsales and Nancy.
Anissa Kapsales, furniture maker and editor at Fine Woodworking.
If you know anything about Nancy Hiller you know that her contributions, her commitment and her place in the woodworking community are legendary. For decades she has plugged away in a calling where it is difficult to succeed professionally. She has written countless articles showing how to make gorgeous pieces of furniture. She has written books about designing and woodworking and life. She’s a woodworking social media icon. She has taught and lectured around the country. She has blogged about the realities, joys, trials and every other aspect of the woodworking life you can imagine. Through her LAP blog “Little Acorns: Profiles by Nancy Hiller,”Nancy has introduced us to each other. She has a remarkable knack for seeking out the fascinating aspects of people’s lives and writing eloquently about them. This I attribute to the person Nancy is. She doesn’t simply interview her subjects with a series of questions, rather she just talks with them. She enjoys the conversation and gets to know them. She listens. She’s naturally curious, interested and sincere.
Nancy has paved the way for aspiring woodworkers, authors, women in woodworking and designers. And now she is illuminating a dark path for anybody who struggles, so … all of us. In the same strong, determined and steady way that she moved through her career, Nancy is confronting her pancreatic cancer diagnosis, thinking creatively, managing one obstacle at a time, learning, teaching, advocating. I am in awe.
All that said, I must tell you that I was intimidated by Nancy when I started out as an editor. At least I was, for a blip, way back in 2006. Fresh out of the nurturing cocoon that is the Krenov School, I had just started at Fine Woodworking magazine and was assigned to work on an article with Nancy. “Arts & Crafts Wall Shelf” would be my first (mostly) solo assignment, and I would be traveling to Nancy’s shop, with Mike Pekovich shadowing me to make sure I didn’t completely screw it up.
Prior to the shoot, Nancy and I had worked together on the months-long process via phone calls and emails getting her manuscript turned into a shot list. I had called to introduce myself, tell her the proposal was accepted and get things rolling. The instant we got on the phone for the first time it was clear I was out of my intellectual league and every other league I cared about. She was talented, educated, articulate and could woodwork circles around most pros. She could write quite well, had ridiculous design skills and was clearly going to be on top of her deadlines. And I was a nervous newbie editor/photographer. Every speck of intimidation was coming from within me, and had nothing to do with what Nancy was putting out. But intimidated I was, nonetheless.
When I arrived for the shoot, Nancy was all those amazing things. Even more, she was kind, thoughtful, very well prepared, humble, professional, accommodating, funny and had an ease about her that started things off on the right foot. We made our way through that shoot and article and today, more than 15 years later, we’ve done so many more together. I think we’re a pretty darn good team! I often wonder if I had been paired with a different author on that first shoot if I would have made it past the first year in a job with a steep learning curve.
What began with me feeling intimidated has transformed into something great. I admire Nancy for her life and woodworking wisdom, her sense of humor, her empathy, her sage advice, the breadth of knowledge she has on so many topics, her incredible talent as a designer and maker, her fortitude in the face of all things.
Nancy, I am far better because I know you. You have what is probably the best freaking laugh and smile on the planet. It is my pleasure to capture it every time we shoot together! With all my love, I am proud to call you my friend.
David Charlesworth, one of the most influential woodworking writers and teachers of the last century, died on May 22, 2022, after a long illness.
Though he was a professional furniture maker by trade, Charlesworth was known worldwide for his three books and multiple long-form videos, which explored the details of furniture and sharpening technique in exquisite detail.
He is perhaps most known for his “Ruler Trick,” a simple sharpening hack that greatly shortens the time required to set up and polish a handplane’s blade for use.
No matter what technique Charlesworth studied, he brought a methodical and open-minded approach to the task, as opposed to an historical approach. As a result, Charlesworth’s research nearly always resulted in discovering new and better ways to perform old tasks.
Charlesworth studied furniture making with Edward Baly, the founding member of the Devon Guild of Craftsmen. In 1973, he began working as a professional craftsman, and later he turned his attention to writing and teaching. Charlesworth was a frequent contributor to Furniture & Cabinet Making magazine in the UK, and many of his best articles were compiled into his first book, “David Charlesworth’s Furniture-Making Techniques” (1999, Guild of Master Craftsman).
During his long career, which focused on the fine details of sharpening and hand-tool use, Charlesworth developed the “ruler trick,” which was first widely broadcast in his 2004 DVD with Lie-Nielsen Toolworks, “Hand Tool Techniques Part 1: Plane Sharpening.”
Today the ruler trick is used by millions of woodworkers, and is still debated by some (personal note: It works fantastically). For many woodworkers, this small trick was an entree into Charlesworth’s other work, including his instructions for shooting planes, secret mitered dovetails, drawer making and knuckle joints.
Charlesworth’s influence on the craft of woodworking cannot be overstated. So many woodworkers and woodworking instructors have been influenced by his books, videos and methods. In fact, his influence is so widespread that many don’t even realize they are using modern techniques he developed for jointing board’s edges and faces, for example.
Charlesworth mostly taught in the UK and Europe, but occasionally traveled to the U.S. to teach classes and make videos with Lie-Nielsen Toolworks.
That all ended in 2016, when Charlesworth was hospitalized for respiratory problems while teaching a class in Germany. He then stuck close to his workshop in Devon with his wife, Pat. Though he would occasionally venture out to some of the UK woodworking shows.
David Charlesworth and Thomas Lie-Nielsen at Cressing Temple.
I first met Charlesworth through Thomas Lie-Nielsen, who helped arrange for Charlesworth to teach a dovetail class at the Marc Adams School of Woodworking in 2006.
It was Charlesworth’s first trip to the U.S., and when he got off the plane late at night, we took him to the only place that was open, a Texas Roadhouse. We told Charlesworth that all the waitresses were going to be charmed by his accent. He thought we were pulling his leg. (If I recall correctly one of the waitresses tried to sit on his lap at one point.) Charlesworth was most bemused by all the peanut shells on the floor.
That weekend Charlesworth spent the entire weekend cutting a single set of dovetails to the absolute rapt glee of his students. In his methodical manner, Charlesworth went over every single detail of the joint and showed how to make it without leaving anything to chance.
During a subsequent visit to the Indiana school, he and Lie-Nielsen volunteered to help me and John Hoffman move a huge Nicholson-style workbench into Hoffman’s basement. We’d all had a few drinks that night, and the workbench almost killed Charlesworth, Lie-Nielsen and myself before crashing into Hoffman’s basement wall, destroying it.
While I have many funny stories about Charlesworth, my favorite is about his fingernails. Charlesworth worked with waterstones, and his fingernails were often long and packed with slurry and other workshop grunge.
Many people noticed his fingernails. Charlesworth had written a few articles for my magazine, Popular Woodworking, and I had to stop the art director from cleaning up his fingernails in Photoshop.
During one of his visits to Indiana, Susie Adams (Marc’s wife) decided to take Charlesworth out for a manicure to do something about his fingernails. Instead of being insulted, Charlesworth was both gracious and delighted.
The last time I saw him in person was at the Cressing Temple woodworking show in the UK. We chatted for hours and discussed how to get all three of his three woodworking books back into print (we failed).
As we parted, Charlesworth again invited me to visit his workshop in Devon. It was something I’d always hoped to do, and it will stand as one of my bigger regrets.
— Christopher Schwarz
P.S. If your life has been similarly touched by Charlesworth’s please leave a comment below. I know that his family and friends would love to hear it.
After long delays because of shortages of clay and glaze, we now have a fair number of our handmade coffee mugs back in stock and ready to ship.
Made by an artists’ collective in Minnesota, these mugs are outstanding for the workshop, with a wide base that makes them difficult to knock over (our cats have tried….). The generous handle makes them easy to pick up, even if you have gloves on.
Both our coffee mugs and steins are made by Grey Fox Pottery, and are as high-quality as our books and our tools. Because of continued shortages, which are an everyday thing these days, order now to avoid disappointment as we likely will run out of these in short order.
Books Going to Press
After a long dry spell, Megan and I are getting three books to press this month. “Euclid’s Door” by George Walker and Jim Tolpin is at the final proofing stage where we review the pages for problems on press. This book continues George and Jim’s exploration of workshop geometry that they began with “By Hand & Eye.” This book shows you how to put geometry to work to make beautiful and useful workshop tools, everything from a wooden try square to a panel gauge. As always, their work is eye-opening and mind-bending.
This book should be released this fall.
Today I am sending off the final pages of The Stick Chair Journal to pre-press. This annual publication is an obsession-driven personal project. If you are interested in nerdy chair stuff (and the occasional wild folk tale), you might enjoy the Journal. We are doing only one press run of the Journal. If you wish to be notified when it is released this fall, go here.
Finally, Megan is working with John Porritt to finish up work on “The Belligerent FInisher,” an outstanding little book on how to add aged-looking finishes to new pieces. Porritt is a lifelong professional chairmaker and antiques restorer. His methods are simple and surprisingly effective. If all goes to plan, this book will also be out this fall.
More news to come on future books, maybe even a book on Dutch tool chests?