This six-stick comb-back is a significant step forward for me. While I would never call my chairs “Welsh” (I am but 2 percent Welsh and live in Kentucky), this chair is the most Welsh of the chairs I’ve made to date.
What’s different? Mostly the wood for the arms and the comb. The oak’s grain follows the curve of the arm and the comb. While many Welsh chairs would use a curved branch to obtain this curved grain, I used oak from a trunk that had grown incredibly curved. This required a lot of careful cutting and a lot of waste. But I am pleased with the result.
Also Welsh-ish: the color. During my visits to Wales I saw traditional cottages with the doors and woodwork painted red. I am sure I don’t have the correct shade, but it is close to my memory. Plus, I have left many of the tenons slightly proud and burnished them smooth.
The chair is one of the four shown during the filming of our new video about how to build stick chairs, so you will see your chair a few times as it comes together in the background of the video.
I am selling this chair for $1,700 via a random drawing. The price is a little higher than usual because of all the waste – plus the involved finishing process. Instructions on purchasing the chair can be found near the bottom of this blog entry. Here are some more details about its design and construction.
This particular chair is set up for general use. The back is fairly upright at 12° off the seat. And the seat tilts at 4°, giving the chair an overall tilt of 16°. The seat is 16-3/4” off the floor to accommodate both short and tall sitters, and the chair is 39” high overall.
All the straight components of this chair were sawn or split out to be as strong as possible. The arms are made from four pieces of red oak. All of the chair’s major joints were assembled using hide glue, so repairs in the (far) future will be easy.
The chair’s finish was a multi-day process. First, the entire chair was burnished with a chainmail pot scrubber (a detail I learned from John Porritt’s “The Belligerent Finisher”). Then I applied three coats of acrylic paint. Finally, I applied a coat of black wax to fill the pores and mellow the bright red paint.
How to Purchase This Chair
This chair is being sold via a drawing. If you wish to buy the chair, send an email to lapdrawing@lostartpress.com before 3 p.m. (Eastern) on Monday, Sept. 5. In the email please use the subject line “Chair Sale” and include your:
First name and last name
U.S. shipping address
Daytime phone number (this is for the trucking quote only)
After all the emails have arrived on Sept. 5, we will pick a winner that evening.
If you are the “winner,” the chair can be picked up at our storefront for free. Or we can ship it to you via common carrier. The crate is included in the price of the chair. Shipping a chair usually costs about $175 to $300, depending on your location. (I’m sorry but we cannot ship it outside the U.S.)
Almost 2,000 years ago, Hero described how large wooden screws were cut in Greece. The same saw-and-chisel technique was demonstrated by Louis E. Bergeron (pseudonym for L.G. Salivet) in this detail from his Manual du Tourneur (Paris, 1792).
The following is excerpted from “The Workshop Book,” by Scott Landis. First published in 1991, it remains the most complete book about every woodworker’s favorite place: the workshop.
“The Workshop Book” is a richly illustrated guided tour of some of the world’s most inspiring workshops — from garage to basement shops, from mobile to purpose-built shops.
The author traveled all over North America to discover the workshops featured in this book. The result is an intriguing and illuminating look at multiple successful approaches to shop layout.
Without threaded wood or metal screws, the modern woodworking vise wouldn’t exist. Richard Starr, a woodworking teacher and writer in Vermont, has long been fascinated by wooden threads. Here he examines their history and how they’re made.
The first person to make a screw probably did it by hand the way the Eskimos did. Historical photographs suggest the Eskimo’s technique: holding a piece of antler, bone or wood in one hand, they’d twist it past a knife grasped in the other. With the blade at an angle to the shaft, the knife would scribe a helical mark (a spiral) on the material, resulting usually in a left-hand thread because most people are right-handed (try it!). Then, whittling toward the incision, they produced a buttress-shaped thread that could hold a spear tip to its shaft.
That this isolated aboriginal society had threads is a glitch in the history of technology, since most researchers believe every screw on earth had direct ancestors in ancient Greece. Though helices appear in nature and in decorative arts worldwide, we know of no practical application of the shape until the first century B.C. in the land of Plato and Aristotle. The pyramid building Egyptians never thought of it; Chinese machinery did without screws until the 17th century. So if the Eskimos did come up with the idea on their own, they share the pride of invention with a rather sophisticated culture.
By the first century A.D., screws of wood and metal were common in Hellenistic technology. A press for flattening cloth has survived at Herculaneum (covered by Mount Vesuvius’s eruption in 79 A.D. ), its wooden screw in fine condition. At the surgeon’s house in neighboring Pompeii were found dilating instruments (specula) operated by metal screws, as are modern ones. A twin-screw press appears in a wall painting in that doomed city.
How were screws manufactured in antiquity? Fortunately, we had a reporter on the scene: Hero of Alexandria, who lived during the first century A.D. He created several tools of fundamental value, including a basic surveying instrument, but he is best remembered for his simple steam turbine, which was only a toy. An early engineer who wrote broadly about the mechanical technology of his time, Hero described the evolutionary improvement of screw presses used to produce olive oil. Machines identical to the ones he knew survived into the 19th century. He also explained how screws were made in both wood and metal.
Until quite recently, historically speaking, large wooden screws, up to 12 in. or more in diameter, were cut the way Hero described. After laying out a helix on the surface of the cylinder (he used a metal template) you would saw a notch along the mark to the depth of the threads. Then you’d chisel the V shape into the sawkerf. I’ve tried this; it’s easy.
Making the nut was a problem. The earliest method was to use a bare hole with one or more dowels intruding into it to engage the threads. This worked, but lacked strength. Another method was to carve the nut in two halves, then fasten the halves together. This was stronger than the dowel method, but its strength was limited by the integrity of the fastenings, which might have been glue, rivets or bindings of some sort. Besides, fitting the female thread to the male was incredibly tedious. Despite these shortcomings, the practice survives today, as shown in the photo [below].
To carve the female threads, the ancient Greeks commonly cut the nut in half. Robert Yorgey, a Pennsylvania farmer, makes screws for his vises the same way. Yorgey fits the threads by using lampblack on the crests, the way a dentist locates a raised filling with carbon paper. Photo by Richard Starr.
Finally, Hero described (and possibly invented) a mechanical tap that etched a thread in a hole, working a little like a modern machine lathe. This gadget, shown in the drawing below, remained in use for almost 2,000 years until hydraulic presses made the wooden machinery obsolete.
In Hero’s time, if you needed a small-diameter metal screw, you’d probably cut it with a file and use the dowel-in-the hole method for the nut. It was also possible to cast a nut around an accurately filed screw. The worm drive, where a male screw engages a gear rather than a nut, is said to have been developed by Archimedes in the third century B.C.
Blacksmiths had a technique where inside and outside threads were made at the same time. First the smith would forge a ribbon of iron, square in section, and fold it back on itself, then he would wrap the doubled strip around a metal rod. Sliding the rod out, he’d separate the pair of helices, then solder one to the rod, the other inside a hole. Large screws for presses or vises were made this way and jewelers could use the method on tiny work.
Threading taps for metal and wood, similar to the design common today, were described by da Vinci in the 16th century and probably were in use much earlier. Usually these amounted to notches filed on the corners of a square rod, very simple to make but capable of cutting a decent thread.
Note: Hero described this thread-cutting screw box in the first century A.D. Male screw threads are hand-cut on one end of a shaft. These run in a temporary nut, above left, formed by pointed dowels inserted in drilled holes. At the other end of the shaft, above right, an iron cutter is wedged in a slot. The cutter is propelled forward when the screw in the temporary nut is turned.
Dies, the female-threaded devices designed to cut male screws, are probably as old as the metal-cutting tap needed to make one. Screw boxes, the wood-cutting equivalents of the die, used a V-gouge cutter positioned against a nut. I imagine this tool to be very old, although I doubt they existed in antiquity or Hero would have described them. Da Vinci sketched a tool that may or may not be a screw box; if it is, it’s the earliest representation I’ve been able to find. The 18th-century screw box and tap are almost identical to those available today. Several devices are now available that use a router to cut screws in wood very neatly.
After Hero’s wood-threading tap it was probably twelve or fourteen hundred years before people resumed the search for new methods of cutting screws quickly and accurately. Most methods were adaptions of the lathe, a tool that had been in worldwide use for thousands of years. The challenge of threading and, later, of turning screw-like ornamental shapes, stretched mankind’s ingenuity and eventually evolved into the machine-tool industry upon which our modern technology is based. As woodworkers we owe a nod to the early inventors who made possible our labor-saving machinery. And when we cut a screw in wood for a child’s toy or a workbench vise we are a lot closer to our roots than we may think.
Publisher’s note: The following is the essay I wrote at the beginning of The Stick Chair Journalthat explains what it’s about and what is coming in the future. This is the only excerpt we’ll be publishing on the blog.
The world does not need any more chairs. Or magazines, for that matter. And yet I am compelled to create both.
When I left my corporate publishing job in 2011, I was determined to stay away from magazine writing. And for years I turned down a half-dozen friendly offers from former competitors to write tool reviews, a column or long-form feature articles.
It turns out, however, that what I hated about corporate publishing was just the corporate part. The endless fleecing of customers (why does the cost of a yearly subscription go up for loyal subscribers?). The pressure to grow revenue 20 percent every year (without additional resources). The constant cheapening of the printed product (if there’s a thinner, crappier paper out there, they’ll find it and use it). The pandering to advertisers at the expense of the readers. The non-stop pressure to write articles for the lowest-common denominator.
It took me 11 years to recover from that toxic diet. Then one day while taking a shower I realized I could start a publication on my own terms. No advertising. Beautiful paper. No pressure for growth. And the magazine/journal/zine could be filled with the minutiae that I obsess about.
And that’s how The Stick Chair Journal was born.
What’s it about? Chairs that look like they are made from sticks. While the first issues will surely be about the chairs that I love and build, the world of “stick chairs” is much wider. I consider Windsor/Forest chairs to be stick chairs. In the hills of Kentucky, Tennessee and West Virginia, ladderbacks are often called stick chairs. All these chairs share one central feature: They are built from very slender, roundish components (sticks!) that are joined to create a lightweight and comfortable place to sit.
Unlike frame chairs, which are rooted in the cabinetmaking tradition of square mortises and tenons, stick chairs use different technology. The joints are circles instead of squares. And instead of deriving strength from bulk, stick chairs survive thanks to the exploitation of wood at the cellular level.
In each issue, we hope to highlight techniques that you might find helpful. Discuss tools that fly under the radar of mass-market magazines. Offer plans for one chair per issue that you are free to build for yourself and even sell to customers. And I want to explore the cultural aspects of stick chairs. What does that mean? Read “A Vampire Chair” in this issue for a taste.
I consider The Stick Chair Journal to be a supplement to “The Stick Chair Book.” That means that my plans use the techniques already discussed in that book. If you are an experienced chairmaker, you probably will be able to follow the plans here without any help. But if you are new to chairmaking, you might want to pick up a copy of “The Stick Chair Book” to get grounded in the basics first.
For future issues, we hope to convince other makers of stick chairs to share their methods and designs. But first, we have to get a few issues under our belts to establish a rhythm for the editing, production and printing of the Journal.
Oh, one more thing: We don’t plan to offer subscriptions. We don’t have the staff or infrastructure to manage a subscription/renewal database. In any case, most magazines are trying to trick you into renewing (sometimes for several years). And I don’t have the stomach for that game any more.
The Journal will be printed annually and will be released in the fall – stick chair season. If you want a copy, you’ll be able to buy it from Lost Art Press, plus (I hope) the outlets where we sell our books. Purchase only the issues you want. Skip the ones you don’t. If you don’t like an issue, send it back for a refund.
If all this sounds like a lousy way to run a railroad, you are probably right.
But let’s find out anyway.
P.S. We still have PLENTY of Stick Chair Merit Badges to give away. Here‘s how to get one!
My Grandma West spent a large part of her life observing my grandfather, Joe, and my uncle, Tom, at work – either on a house or in the shop. Both were skilled woodworkers, among other things, but each had a different way of looking at the craft.
“Joe could look at a staircase or some other project and knew exactly how everything should go together,” she told me once. “Tom could look at the same project and knew exactly how everything could go wrong.”
When the two worked together, it was a struggle at times.
Though my DNA doesn’t indicate it, I inherited exactly equal parts of Grandad and Uncle Tom. The Grandad chain of DNA is the “hell yes we can build this just let me get my toolbelt” polymer that puts my feet on the floor every morning at 6:30 a.m. The Uncle Tom part of the double helix is what makes me draw out every angled joint in full size to see how everything intersects before I’ll pick up a tool heavier than a pencil.
Most times, it’s a good combination of traits. Grandad offers the “go fever,” while Uncle Tom keeps me out of trouble.
But other days, I’m immobilized. I can see everything that might go wrong with an operation. But then I wonder: Can I really see *everything*? Could I be missing something obvious? And then I go back over all my drawings and the cutlist. Twice. Thanks, Uncle Tom.
Meanwhile, Grandad is tapping his foot. He would be done and onto the next task.
This week, both men are working in my shop. I had an oak seat to saddle, and it was a riddle. The seat is made up of two boards. On one of the boards, the grain is mild. On the other board, the grain has a wild grain reversal right at the seat’s pommel.
Is this a good thing? A bad thing? I draw it out and try to figure out how the scorp should move. But I don’t know what’s going on inside the glue joint between the two boards. So I set the seat aside to think about it some more. Perhaps I should cut the seat apart? Get a look at the grain inside? And then glue the boards back together?
Grandad rolls his eyes, and scrounges for a Pepperidge Farm Bordeaux cookie in the kitchen.
That’s when I know I need to listen to another deceased woodworker, Joseph Moxon.
“Therefore you muſt examine the Temper of your Stuff, by eaſy Trials, how the Plane will work upon it, and ſet your Iron accordingly,” Moxon wrote in his chapter on fore planes.
This is one of the most important sentences in Moxon. And I think about it every day: “Easy Trials.”
Of course.
I step up to the chair’s seat with a scorp and take the lightest cuts possible across the grain of the seat at various angles. I remove about 1/64” of material with each pass, but I can clearly see a difference in how the wood cuts as I adjust the tool’s angle.
It doesn’t look like I am accomplishing anything. But I am finding out everything that can go wrong. I adjust the tool and take off a 1/32” of material. Then I bear down harder and take 1/16”.
I find the rhythm that allows me to take heavier and heavier cuts. And I have a good roadmap of the work ahead thanks to my earlier “easy trials.”
I hesitate to talk much about tools from other makers (Anarchist’s Gift Guide excepted). It doesn’t seem fair because of my work with Crucible. But occasionally I break my rule when I find something interesting or well done.
As always, my opinions are unsolicited. I pay full price for my tools. I have no relationship with either of these manufacturers.
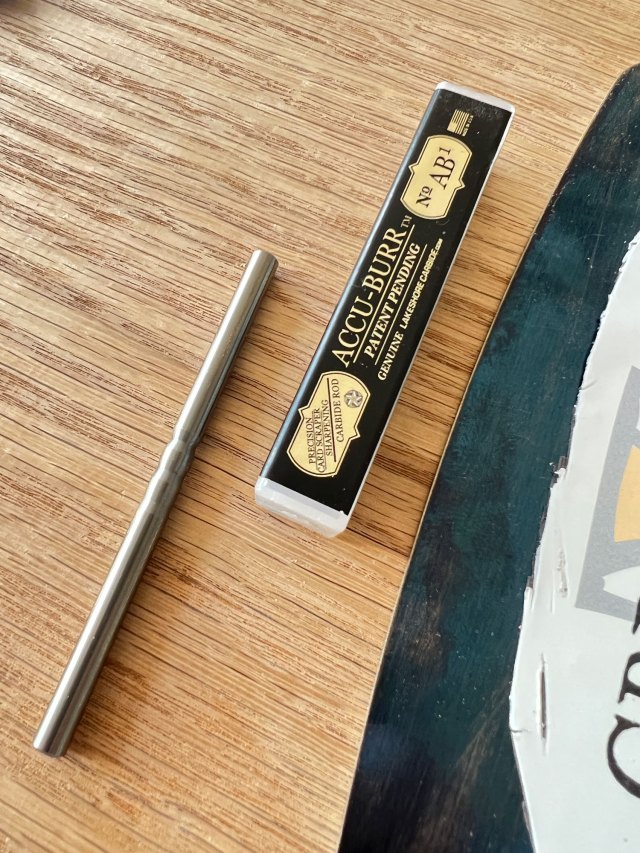
Accu-Burr Burnisher
The Accu-Burr is one of those tools that makes you wonder why it has never been made before. It’s a carbide burnisher that turns two hooks on a card scraper in one motion.
The burnisher has three grooves for three different hooks – 5°, 10° and 15°. After stoning the edge (and face if you like) you place one of the three burnisher’s grooves on the edge of the card scraper. Plus a drop of oil to make life easier. Then you run the Accu-Burr over the edge with moderate downward pressure.
And then you are done – both corners of the card scraper are deformed with a nice hook.
It worked for me the very first time (I’ve been sharpening card scrapers almost daily for 26 years). But there are detailed instructions and a video to guide you.
The burnisher works on both straight and curved scrapers with ease. You can buy an Accu-Burr (patent pending) from Heartwood Tools. It’s quite clever and well-made in the USA.
Benchmark 6” Rule in Black
Months ago I discussed our efforts to make a black satin rule that had only 8ths and 16ths (no 32nds or 64ths). Well Benchmark beat us to it.
The company offers a 6” and 12” in black with white markings, which are nice for old eyes. And the price is excellent: $5.99 for the 6” rule and $7.99 for the 12”. Based on a close inspection, I suspect these rules are made in the same factory (or use the same manufacturing process) as the SPI black rules that I recommended last year. The Benchmark has the same bloom pattern on the rule’s finish.
I’ve been using the Benchmark 6” rule for a few weeks and like it. I wish it were made in the USA, but if it were, it sure wouldn’t be this price.