Great news: We are honored to welcome back Lie-Nielsen Toolworks to the Lost Art Press storefront for the first Lie-Nielsen Hand Tool Event since before the pandemic! Details on the event from Lie-Nielsen are here. (The company’s 2024 Hand Tool Event schedule is here.)
Admission is free, and there is an abundance of free street parking within walking distance of our storefront.
Lie-Nielsen will have its full line of tools on site for you to try out, and company representatives will be on hand to answer questions and demonstrate hand tool techniques. (And with a few exceptions, any Lie-Nielsen tool ordered at the event will get free shipping.)
And of course we’ll be here too, with our full line of books and tools.
Please note that the event will be held at our storefront on Willard Street – not our warehouse at the Anthe building on Madison Ave.
The first book ever published by Lost Art Press (left) and the revised version from a few years later.
In a nod to Christopher Schwarz’s talks this weekend at Colonial Williamsburg’s Working Wood in the 18th Century Conference, below is an excerpt from “The Art of Joinery,” the first book Lost Art Press published – itself an excerpt from Joseph Moxon’s “Mechanick Exersises,” which was the first English-language book that discussed woodworking, with modern commentary from Chris on every one of Moxon’s sections on tools and techniques.
When we published Moxon’s “Mechanick Exercises” in full, we took the excerpted version out of print – but if you want Chris’ commentary, you can still get it: “The Art of Joinery” is yours to download, free simply by clicking here (and we don’t ask for your email, first-born or phone number).
S. 10. Of chisels of several sorts. And first of formers [firmers].
Formerly called a former. The rectangular shape of the blade identifies this as a former (or firmer) chisel. Once common, these tools are now scarce in modern catalogs.
Formers [firmers] marked C 1. C 3. are of several sizes. They are called formers because they are used before the paring chisel, even as the fore plane is used before the smoothing plane. The stuff you are to work upon being first scribed {as I shall show in its proper place}, you must set the edge of the former a little without [away from] the scribed stroke with its bevel outwards, that it may break and shoulder off the chips from your work as the edge cuts it. And you must bear the helve [handle] of the former a little inwards over the stuff, [so] that the former do[es] not first cut straight down, but a little outwards [instead]. For, should you venture to cut straight down at the first, you might with a negligent or unlucky knock with the mallet, drive the edge of the former under the work and so cut, before you are aware, more off the underside than the upper side of your work, and so {perchance} spoil it. Therefore, you may make several cuttings to cut it straight down by little and little until your work is made ready for the paring chisel. When it [the former chisel] is used, the helve [handle] of it is knocked upon with a mallet to drive the edge into the stuff.
Analysis This section introduces an error in numbering. This is “Section 10,” and so is the section above.
Firmer chisels are now uncommon, but they were the standard for many years. They were rectangular in cross-section and lacked the bevels on the two long edges that are on modern garden-variety chisels.
The term that Moxon uses for them, “formers,” suggests the tools were used for forming or roughing out joinery or shapes. And then the formers were followed by the paring chisel to clean things up. Moxon also describes a fact of chiseling that bedevils every woodworker – that they don’t travel down in a straight line that follows the face (some call it the back) of the tool. Instead, they tend to undercut your joints, which is frustrating. The solution in the 17th century is the same as today: Take smaller bites. Tip the handle back a little toward the face of the chisel so the tool won’t undercut your work.
S. 11. Of the paring chisel.
Moxon’s paring chisel.
The paring chisel marked C 2. must have a very fine and smooth edge. Its office is to follow the former and to pare off and smoothen the irregularities [that] the former made.
It is not knocked upon with the mallet, but the blade is clasped upon the outside of the hindermost joints of the fore and little fingers, by the clutched inside of the middle and third fingers of the right hand. And so its edge being set upon the scribed line and the top of the helve [handle] placed against the hollow of the inside of the right shoulder. With [the workman] pressing the shoulder hard upon the handle, the edge cuts and pares away the irregularities.
This way of handling may seem a preposterous posture to manage an iron tool in, and yet the reason of the original contriver of this posture is to be approved.
For should workmen hold the blade of the paring chisel in their whole hand, they must either hold their hand pretty near the helve [handle], where they cannot well manage the tool, or they must hold it pretty near the edge, where the outside of the fingers will hide the scribed line they are to pare in[to]. But this posture all workmen are at first taught; and [their] practice doth so inure them to it, that if they would, they could not well leave it.
Finishing chisel. The paring chisel, whether old or new, is a finesse tool in the right hands. Keep it sharp and with a low bevel angle on its edge and you will be able to work magic.
Analysis The paring chisel is used to clean up the junk left behind by the former, and the way that Moxon describes it in use seems a bit unusual: The blade is woven between the fingers and pressed with the shoulder into the work. This grip gets your hand near the bevel (which increases control) but also allows you to see the scribe line you are working to (a good thing). If you try this, I think you’ll be hooked. It is an effective way to drive a paring chisel, assuming the height of your bench allows it. A bench that is too high or too low makes this motion awkward.
S. 12. Of the skew former.
Moxon’s skew former (left). Moxon says this isn’t used much by joiners, who fit houses with moulding, doors, windows and cabinets. It might be more useful to a cabinetmaker who would use it for dovetails. Brutes of the chisel world (right). Mortise chisels are even stouter than former chisels and are beefy so they won’t easily snap in deep mortises, which I have seen happen during the quite violent process of mortising.
The skew former marked C 4. is seldom used by joiners but for cleansing acute angles with its acute angle on its edge, where the angles of other chisels will not so well come.
Analysis This skew chisel is great for cleaning out all sorts of dovetail sockets. Though it is a “former” chisel, it is generally not struck with a mallet today, but it is driven by hand.
S. 13. Of the mortise chisel. The mortise chisel marked C 5. is a narrow chisel, but hath its blade much thicker and consequently stronger {that it may endure the heavier blows with the mallet} than other chisels have, so that in grinding it to an edge, it is ground to a very broad bevel as you may see in the figure. Its office is to cut deep, square holes, called mortises, in a piece of wood. Joiners use them in several breadths according[ly] as the breadths of their mortises may require.
Analysis The mortise chisel of the 17th century is a bit different than modern forms, but it is used the same way. The biggest difference is in the blade. The old form swells in thickness at the tip (this saves steel) and modern chisels don’t. They are thick along their entire length.
S. 14. Of the gouge.
Not for carving. A gouge like this, sometimes called a firmer gouge, will be used to remove large chips without splintering the grain, like a firmer chisel might.
The gouge marked C 6. is a chisel having a round edge for the cutting [of] such wood as is to be rounded or hollowed.
These several sorts of chisels joiners have in several sizes [so] that they may be accommodated to do several sizes of work.
Analysis This is presumably a firmer gouge, not a carving tool. These remove material in a localized area, such as removing waste from a very large tenon or breadboard end on a tabletop. You can follow this tool with finer tools if the work requires it.
Truly one of the best values in woodworking. This 16-ounce can, which should last a decade (even with students using it in every one of my classes to fill inconsequential gaps in dovetails), cost $2.39.
None of us likes accidents, but they are sometimes unavoidable. When possible, we’ll disguise workshop oopsies with wood – a plug, shim, wedge or dutchman. Sometimes we’ll add a metal plate (a decorative one if it shows) to keep a split from getting larger (and even when we know it won’t get larger, to add peace of mind for a future owner). But sometimes, we have to resort to wood filler. And for that, we most often reach for Durham’s Rock Hard Water Putty.
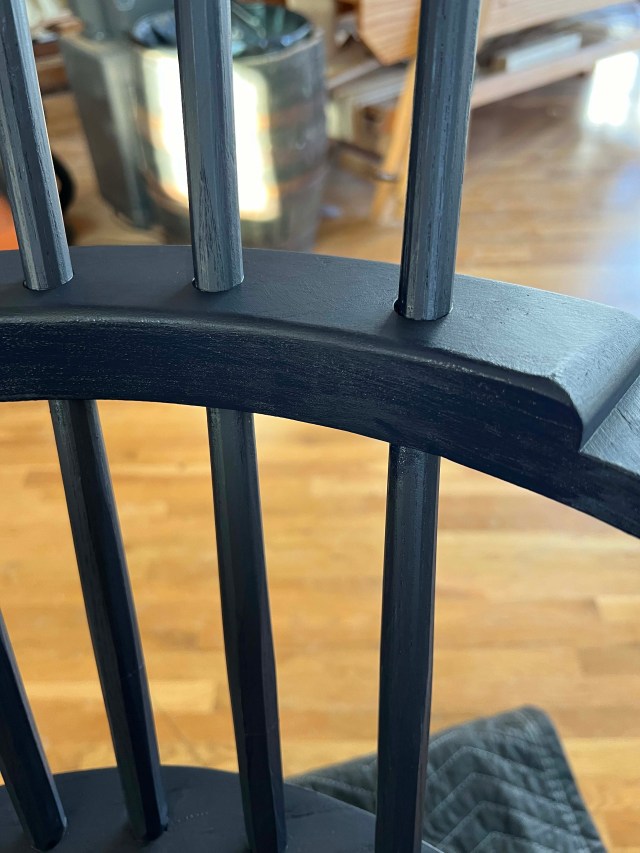
On a recent chair build, Chris experienced a little non-structural blow-out on the underside of the armbow, and it showed when the chair was viewed from the front. Patching it with wood could be done, but it would be a right royal pain in the posterior, and it would still show. That made the repair decision and thus the finish decision easy: paint.
This is a close-up from underneath of the damage to be repaired. It looks extreme only because of the macro lens – that stick is 5/8″ diameter. (And yes, I would typically effect the repair before painting…but I forgot. Glad this chair needed a second coat of paint anyway!)
Why paint? Because Durham’s dries darn-near white, shows under a clear finish and doesn’t take stain. (Neither does any other filler I’ve tried, and that includes glue and sawdust,) But Durham’s doesn’t shrink or fall out, it dries fast, is easy to use and takes paint beautifully. And the packaging is fantastic!
Simply put a small amount of the powder in a Dixie cup (I usually scoop no more than a teaspoon, a) because I rarely need more, and b) it dries so quickly that by the time you’ve used that amount, anything left in the cup is probably too dry to use). Now add water – sparingly – and stir it up. The mixed putty should be about the consistency of creamy peanut butter to use on a flat surface, and a little thicker if you need a mold an edge. A small scoop of the powder will need only two to three drops of water.
A common mistake is to put water in a cup then add powder – that almost always results in far too much product, because two to three drops of water in a cup looks too lonely and you inevitably put in more than that. Then you have to add a lot of powder to soak it up, so you end up with too much putty and have to throw lots away. Not a big deal given the cost, but I hate wasting things.
If you’re filling a deep crater or damage on an edge, you don’t typically want to do it all in one go; it will take too long to dry. Fill it below the surface (I use a flexible metal putty knife), as I’ve done in the photo below, and let it dry completely before adding more on top to create the show surface(s). That means mixing another, even smaller amount for the second application.
Wow – that looks terrible! But it won’t when I’m done. This is the first application – note that it’s not quite flush with the surface on the front of the armbow – that’s where I’ll add more after I sand the dried first coat.
After the putty turns from tan to near-white, sand as needed. If you’re working on a shallow repair on a flat surface, sand it flat using a block so that it ends up perfectly flush. If you’re working on a deeper repair, sand flush any product that landed outside your work area (as on the armbow above), mix another batch of putty – and in this case, my second mix was thicker, so I could mold the corner without it sagging. Work quickly and don’t overwork it. You likely won’t be able to make a perfectly crisp corner with the wet putty. But you can sand away the excess after it dries for a perfect (or near-enough-perfect) repair.
Had I waited for the touch-up of paint to dry on the repair, I perhaps flatter myself that you wouldn’t be able to spot it.
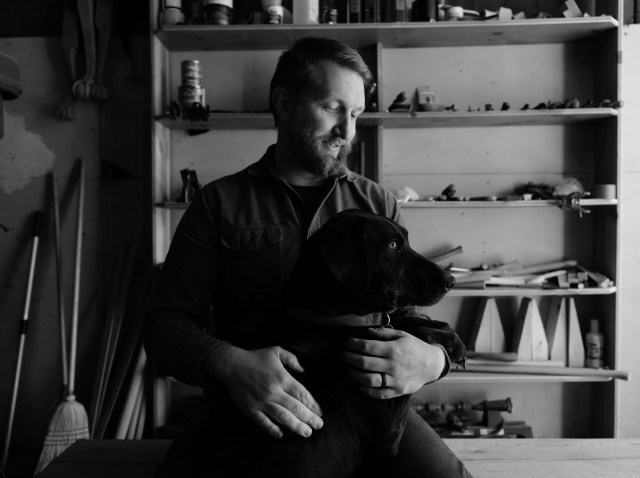
Chris will be presenting in Colonial Williamsburg this weekend and I’m up to my hairline in work – so we asked Andy Glenn, author of “Backwoods Chairmakers” (the most recent book release from LAP) if he’d like to take a Saturday stint of answering your woodworking questions. Reader, he said yes!
Andy is a fount of knowledge on post-and-rung chairs (particularly those from the Appalachian region), but he’s well-schooled (and not just metaphorically!) in all areas of woodworking. He trained at the North Bennet Street School (NBSS) before working in furniture repair shops, cabinet and furniture shops, and a wooden boat repair shop. For more than a decade, he’s taught continuing education classes at NBSS and has been a guest instructor in the Cabinet and Furniture Making program at his alma mater. For several years, he was also supervisor of the Woodcraft Program at Berea College Crafts and ran the Woodworking School at Pine Croft.
So get those questions ready for Saturday! As always, the post will go live at around 7 a.m., and comments will close at 5 p.m. – and there may be a lag between your questions and Andy’s answers (I believe he has an ice skating commitment mid-day).
For more than 200 years, chairmakers in Appalachia built ladderbacks to sell to neighbors and the occasional tourist. It was a tradition that was handed down through generations. But with the rise of furniture factories and mechanization, woodworker Andy D. Glenn wondered if there were any traditional chairmakers left. So he set off into the mountains with a camera and a tape recorder. There, he found many still working the craft – some by hand, and others who have added machines to their workshops.
Part travelogue, part profile and part how-to, “Backwoods Chairmakers” explores the tradition of this enduring form. Glenn takes you inside the shops of more than 20 makers, with photos and personal interviews about their lives and techniques.
Then, Glenn shows you how to make a post-and-rung side chair and rocking chair using the traditional techniques explored in the book.
“I come from a long line of good ol’ boys and strong women who were yeoman farmers first and foremost, and makers out of necessity. They made chairs, furniture and wagons, and were blacksmiths and toolmakers, carpenters – both rough and finish – sawyers and farm-implement makers. One grandfather started out in the family wagon business after completing the eighth grade, and by the early 1930s they were out of business as the carriage went horseless.”
— Lyle Wheeler
The Appalachian ladderback goes by different names, depending on the region and the maker’s preference. “Post and rung” is the umbrella term used to describe these chairs, but during my travels only a single chairmaker called it that. Post and rung refers to the construction method: vertical posts receive horizontal rungs. And it refers to any chair design of similar fashion, whether made in Appalachia or elsewhere.
Instead, I heard the chair called a split bottom, common chair, mule ear, settin’ chair, ladderback, hickory bottom, woven chair or mountain chair. Or, as one maker put it, “It’s simply a chair.” The terms all refer to the same style: rungs below, some of which create a frame for a seat, and slats above to support the back. It’s a simple form, familiar to anyone in the region, with each chairmaker or shop adding distinctive details.
It’s also a form that requires only a few tools. A skilled chairmaker could fashion a chair with as little as an axe, bit and brace and a pocketknife. This made the form ideal in the mountains of Appalachia. Drew Langsner (Chapter 8) describes the form as the first chair an Appalachian family would add to their home, “…from no chairs to this chair.” It was the evolutionary first step.
Randy Ogle weaving in a seagrass seat on a walnut dining chair.
There is no single definitive Appalachian chair style, though there are characteristics found on chairs throughout the region. For each example of a characteristic, there are multitudes of counter examples. A typical Appalachian mountain chair uses a combination of these characteristics, with each chair style determined by the maker’s preferences and the style of the region.
One defining characteristic of an Appalachian chair is the restrained use of ornamentation. The vertical posts, when turned, may have a few details left by the turner, but most shaved chairs are left plain. The “foot,” or lower posts near the floor, frequently taper toward the end to give a more delicate appearance. The back posts might have a finial – turned chairs are more likely to possess the finial than shaved ones.
A leather seat on a chair by Eric Cannizzaro.
The back posts are either straight or bent. The bend adds considerable comfort to the chair, and Appalachian chairmakers claim the bent back posts are their distinct contribution to the ladderback form. The bend comes from a natural wind in a tree, or, most frequently, from the chairmaker steaming or boiling the back posts before bending them on a form.
The last common characteristic is the woven seat, often from hickory bark, though chairmakers also used seagrass, flat reed, paper cord, cotton tape or corn shuck (though I didn’t find a contemporary maker using corn shuck). Hickories are abundant in Appalachia. Though collecting the bark is hard on the back and hands, the material can be harvested within a maker’s community.
Sarah Mace weaving in a corn shuck seat. 1955. Photo courtesy of the Southern Highland Craft Guild.
The Chair’s Joinery The chair’s durability, essential to its long-term success, is determined by the post-and-rung joinery. Round joints are frequently derided within woodworking circles for wiggling loose and failing. That derision is not without merit. One reason the joint fails is that nearly all the glue surfaces within the joint contain end grain. Drill a hole, glue in a same-diameter dowel, put it under the stresses of a typical chair and the glue will fail. The tenon works loose.
There is a simple trick to add strength when building the chair: manipulate the moisture difference between the rungs (dry) and posts (wetter). Wood shrinks when it dries. The wet post shrinks, holding the rung ever tighter as it dries. The rung, if dried below the moisture content in the air, will swell once in the chair. Each chairmaker I visited described this technique to me. They used shorthand when describing the process, often simply calling it “green wood.”
Unknown maker, somewhere near Berea, Kentucky. Undated. Photo courtesy of Warren Brunner.
The Wood & How it’s Used The chairmakers I visited use local materials, most often oak, hickory, maple, cherry and walnut. Most collect their own logs or work closely with a trusted logger. Extreme discernment is necessary in pursuit of raw material. The quality of the timber directly affects the quality of the chair, and thus the chairmaker’s reputation.
Some chairmakers split out parts, though most work from air-dried milled lumber. Most seek out clear, straight-grained timber. Straight-grained material works easier with hand tools and results in stronger parts. However, a couple chairmakers incorporated winding grain and natural movement into their pieces.
Whether using parts with straight grain or otherwise, every maker follows the grain with their cuts. Following the grain is stronger and allows for thinner parts.
With straight-grained material, repeatability and uniformity are easier to achieve. When splitting out a log, the chairmaker’s goal is to get parts with the grain running the length of the piece. Grain runout, a challenge when using boarded or slabbed material, makes the part weak and requires bulking up pieces for additional strength. It’s for this reason that chairmakers seek clear, straight-grained logs without figure, twist or blemishes. Log yards sell them as “veneer grade.” These logs are the most expensive, yet they yield the most material with the least troubleshooting, waste or compromised parts.
The chairmakers who used the natural grain movement within the log also kept the grain running end-to-end within the piece. The flowing material around knots, natural bends and the swelling at the base of the log all provide opportunity to incorporate natural movement into a chair for an experienced maker.
An early chair by Terry Ratliff. The grain flows from one end of each part to the other end. The lower back rung came from the part of the log around a knot, creating the movement. Terry retained the part’s integrity by following the grain. Movement like this is a trademark of his chairs.
Good Material is Vital Today’s chairmakers frequently run into sourcing problems. The most common reason given for stopping or slowing down was a change in access (rather, the sudden lack of access) to quality material. Sometimes a trusted local log yard, sawyer or supplier went out of business. The relationship between chairmaker and timber supplier is vital for the rural maker, and one that takes years to develop. Once lost, it takes substantial effort to develop the relationship with another supplier and educate them on the ideal material – especially the sawyer, who can maximize the potential chair parts within a log.
A disruption in access is especially hard for the lathe-based chairmaker, who needs straight-grained planks of consistent quality. Chairmakers who split parts from the log are more adaptable than lathe-based chairmakers who worked from slabbed materials. Disrupt the material to a lathe chairmaker, and it may temporarily shutter the operation. I met a couple idle makers during my travels whose shops were quiet while they sought new suppliers.
The Chairmaking Life & its Future While the construction of the chair is straightforward, the circumstances around being an Appalachian chairmaker are far from it. The chairmakers I encountered needed encouragement to share their successes; they were more comfortable discussing timber quality than themselves. They contributed, some appreciating the recognition while others doing so in spite of it. Yet all of them hoped that their lives might be encouragement for the next generation of chairmakers. Each maker was bullish on the continuation of the tradition and wanted to help see it forward, even if they didn’t know a single other chairmaker still working.
An early Brian Boggs chair of Jennie Alexander’s design. White oak and hickory bark. Early 1980s. Notice the lightness of the frame and thinness of parts, made possible by straight-grained white oak. Chair from the collection of Richard Bellando.
The chair, like its maker, is sturdy yet flexible. It’s lightweight when the parts follow the grain, and durable thanks to the greenwood technique. It’s a chair that’s supported the lives of countless makers and families. It’s deeply rooted within the region, yet it is open to contemporary ideas and the next wave of makers.
Appalachian chairmaking is a dynamic tradition at an important moment in its history. There’s reason for both optimism and concern for its future. All of which made me excited to get on the road and find chairmakers.