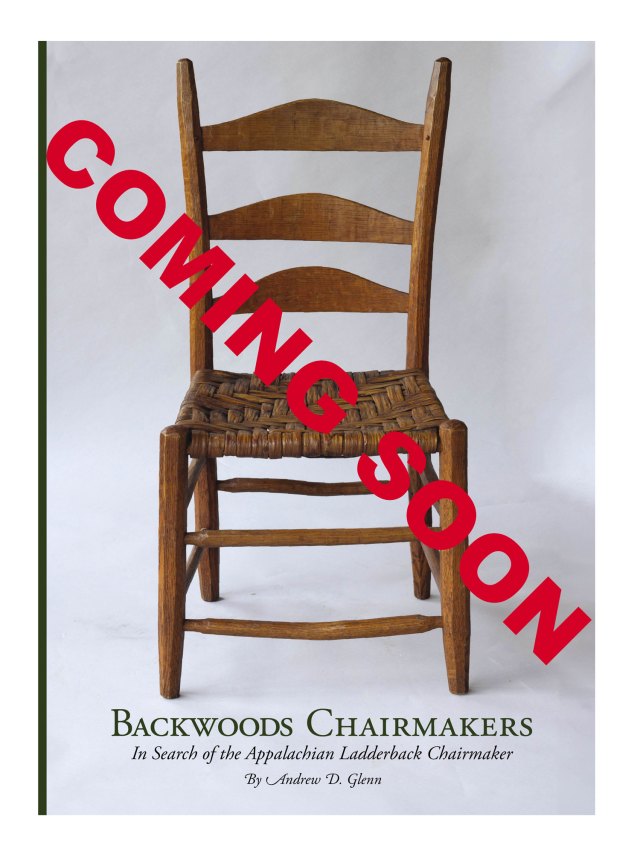
Andy Glenn’s long-awaited book, “Backwoods Chairmakers,” is just about complete at the press in Tennessee. We should get the books sometime between Thursday and Jan. 4 (barring weather or other delays).
If you order the book before midnight on Sunday, Dec. 31, you will receive free shipping plus a free pdf of the book immediately at checkout. After Dec. 31, the pdf will cost an additional $11.75. And shipping will add another $7.50 or so to the cost.
“Backwoods Chairmakers” is the kind of book I love to publish. It is filled with colorful stories of chairmakers who live in the hollers and small towns of Appalachia. And it is also packed with practical information you can use at the bench, on your front porch or wherever you build chairs.
The book is illustrated with hundreds of new and archival photos that Andy collected during his years-long research process. Just looking at the book’s photos is a visual treat.
“Backwoods Chairmakers” will, I hope, begin to give Appalachian ladderback chairmakers the credit they deserve for this enduring and interesting form.
As always, we have done our best to make a permanent, quality book. The book’s 304 pages are 8.5″ x 11″, and the text is printed on #70 matte coated paper. The book’s signatures are sewn with cotton-covered nylon thread, which allows the book to open flat and retain its pages through years of use. All that is wrapped in heavy cotton-covered boards and a tear-resistant dust jacket. The book is, of course, made in the USA – like all our books.
This gorgeous book (we can say that without being braggadocious because we replicated the design from the Swedish original) teaches you techniques for cutting triangle chips, fingernail cuts, lines and letters — plus you’ll learn what kind of wood, knives and tools you need to get started, and techniques for painting your finished work. You’ll find 15 projects, from simple decorations on knife handles and signs to more demanding objects such as boxes and combs.
In addition to providing practical knowledge, “Karvsnitt” opens a window into older slöjd and folk art, and provides fascinating in-depth descriptions of the traditional meanings of different patterns and symbols.
“Blåudd” (Blue chip) has two ridge borders with single-sided triangle chips and a X-shaped border with fire-eyes in between. “Rödkryss” (Red cross) has an X-shaped border with lines running through each cross, which are cut before the three-sided triangle chips. Spoon carvers: Top left Jarrod Dahl; top right Derek Sanderson, with a kolrosed braid pattern. The rest are made by the author.
The spoons you carve will be too beautiful to stash away in some box. They deserve to be displayed on the wall! This spoon rack has many names. In Sweden, it comes in local variations, such as the spoon chair, spoon bar, spoon tree, spoon shelf, spoon rack and spoon hedge. It might be fun to check the archives of your local museum to see what it was called and how both the shape and pattern have been designed where you live.
Level of difficulty: intermediate Tools: Froe, maul, axe, drawknife, sheath knife, fine-toothed Japanese saw, chisel 18mm (11/16″), small wooden mallet, chip carving knife. Material: Straight-grained birch.
Method Split out a piece of straight-grained birch, ~40 x 4 x 2 cm (15-3/4″ x 1-9/16″ x 13/16″). Carve it smooth and evenly thick in the shaving horse or plane it with a smooth plane on a workbench. Cut a wide bevel on the front side, on both top and bottom. Space the spoon holes evenly on the side facing the wall. They should be 25mm (1″) wide. The wall between each hole should be 10–12mm (~3/8″). Saw cuts 12mm (1/2″) deep. Hollow out the gaps with a chisel. Place the blank against a flat board that can take marks from the chisel. To avoid unexpected tear-out, remove half the material with the first cut before turning the blank and clean-cutting in line with the depth mark from the other side. Carve the sides of the spoon holes and drill holes for screws or nails about 20mm (13/16″) from the end grain. Clean-carve all the sawn surfaces.
Sketch the pattern. Divide the front into rectangular sections and mark them with crosses. Draw single-sided triangle chips a short distance from the centerline of each cross to create a flat surface of about 2mm (1/16″) in the shape of a cross or X-shaped cross. If you feel confident, you can also cut them directly, without sketching. Leave about 1mm (1/32″) of flat surface toward the sides.
The long V-shaped grooves can also be cut with a small V-tool, but the chip carving knife creates a deeper blackness in the bottom of the cut.
Where the crosses meet, a ridge is formed between them, creating a fire-eye. It’s most practical to make all the cuts with the same angle along the entire border at once. Start with all the 90° angles and finish with the 30° angles. More detailed descriptions can be found in the chapter on cutting techniques. Paint and wax, then hang your spoon rack in the kitchen. Warning! Daily use of wooden spoons with carved patterns can lead to a lifelong addiction.
Detail on a mangle board from Nord-Trøndelag, Norway. The white cowrie shell is a small porcelain-like shell from the Indian Ocean that has been used to decorate harnesses for draft animals. Its shape was an exotic feature in folk culture and was often painted or incorporated into patterns. Here, the border consists of elliptical grooves, known as vesicae piscis, and three-sided triangle chips combined with V-shaped grooves.
Editor’s Note: One of these days, I’d like to try making the hanging tool rack for the ATC or DTC a la this project from Jögge – can’t see why it wouldn’t work!
Hickory bast seating. This chair was 22 years old when these photos were taken. The upper surface is polished from sitting; no finish was applied. The underside looks like it did in 1997.
In 1978, Drew Langsner released his book “Country Woodcraft” to the world, and it sparked a movement – still expanding today – of hand-tool woodworkers who make things with mostly green wood.
The 304 pages of “Country Woodcraft” showed you how to split wood from the forest and shape into anything you might need, from a spoon to a bowl, from a hay rake fork to a milking stool, a pine whisk to a dining table.
After more than 40 years, Drew revisited this long-out-of-print and important book to revise and expand it to encompass what he has learned since “Country Woodcraft” was first released.
The result is “Country Woodcraft: Then & Now,” which has been expanded by nearly 100 pages and has been updated throughout to reflect what Drew has learned since 1978. Among many other additions, it includes greatly expanded sections on building shavehorses, carving spoons and making green-wood bowls.
The original book’s text is intact, and the old photos are in black and white. Throughout the book, Drew has added text, which we set in a slightly different font, to explain what he does differently now after 40 years of daily work on the North Carolina farm he shares with his wife, Louise.
In many ways, the book is a delightful conversation between the younger Drew, who is happy to chop down trees with a felling axe, and the older Drew, who now uses an electric chainsaw and band saw to break down stock to conserve energy (and likely aspirin). New illustrations and color photos throughout show how Drew works now.
Below is an excerpt from the Appendices.
A Few Usually Useless Woods – Then Trees are generally defined as single-stemmed woody plants that attain a height of at least 20′. The smaller shrubs are often a nuisance to commercial woodsmen. Unsurprisingly, certain shrubs contain excellent-quality wood. Like roots and branches, the irregular sections can be used to advantage in specific situations.
In rural Finland, lilac is considered to be the best material for rake tines. Rhododendron makes fine spoons, shelf brackets and clothes hooks. Holly, generally planted as an ornamental, will grow into a fair-sized tree with excellent-quality hardwood.
Roots are generally not considered wood. They are often gritty (dulling sharp tools), difficult to work and hard to adapt to profitable production. They are a stringy fibrous material, with shrinkage and other characteristics shared with the wood above ground. As might be anticipated, peasant and nomadic craftsmen found special uses for these tough, twisted subterranean forms. The natural curvatures of roots are used for hooks, handles, and other special uses. Knotty roots are also tough and can be used for maul heads – hickory and dogwood – or even bearings for slow-turning machinery. The Swiss Alpine butter-churn stand is traditionally made of dry pine roots.(1) Large spruce roots, cut with the lower trunk, are used in boatbuilding.(2) Finer spruce roots can be split into lacing thongs or basketry material. During a recent project removing roots in our driveway, I learned that roots have reaction wood, just like tree trunks and limbs.
Country Workshops 2017 summer intern Will Burney is using a drawknife to remove the outer bark from a tulip poplar sapling. The tree is about 5″ in diameter.
Bark, another waste material of industrial technology, has many uses for the woodland crafts worker. Birch bark has surprisingly fine, lasting qualities when wet. It can be peeled in early summer, then used for the hull of a canoe or the underlayment of a sod roof. Birch bark baskets are made throughout Scandinavia and northern Europe. Tulip poplar bark can be scored and folded into containers such as berry-picking boxes. Basswood bark was used for making shingles in Russia and other places. The inner bark – called bast – of hickory, bass and tulip poplar can be cut into strips for post-and-rung chair seating and to make a tough, durable lacing material, and even rope. Leather tanners used bark from oak, birch and alder as their source for tannin. In nearby Greeneville, Tenn., Cecil Self and his brother were tanning cow hides for horse harnesses with oak bark until about 1970.
Even twigs and small limbs can be useful. Fences can be woven from many pliable species; willow and hazel are often considered best. First-year willow growth is the standard basketry material in many areas. Young pine limbs may be shaved down and used for bucket hoops. Birch twigs and many kinds of brush are used to make broom sweeps.
Before the takeover of industrial economics, trees, shrubs and even roots were valued for many uses that have since been superseded by synthetics and manufactured products. The following list provides a few examples from traditional handcrafts of Europe and North America.
Bark – Entire, or Outer · Alder. Tanning leather · Birch (white, paper). Canoes, basketry, roofing (Scandinavia, under sod), clothing (Pacific Northwest native Americans) · Linden (also known as bass, and lime in the U.K.). Shingles · Oak (various species). Tanning leather · Tulip poplar. Primitive shelters, folded boxes · Willow. Aspirin
Bark Bast (Bast refers to inner bark.) · Elm. Rope · Hickory. Chair seating, basketry, thongs and lacing · Linden (Also known as bass, and lime in the U.K.). Basketry, rope · Tulip poplar. Chair seating, cordage
Limbs · Apple, pear and other fruit woods. Spoons, ladles, hooks for hanging just about anything · Birch (any kind). Spoons and ladles, wall hooks for clothing, harness · Dogwood, holly and other slow-growing hardwoods. Spoons and ladles · Pine limbs. Bucket hooping (Swiss Alps)
Roots · Dogwood. Mauls and clubs (Integral with the lower trunk of saplings) · Sassafras. Root beer · Spruce. Thongs and lacing
Saplings · Hickory and other tough hardwoods. Clubs and mauls, splitting gluts · Birch. Fencing (Scandinavia) · Conifers (various). Fencing (Scandinavia) · Hazel, sourwood and other small saplings. Walking sticks
Shrubs and Scrub Trees · Lilac. Rake tines · Rhododendron. Spoons and ladles, wall hooks
Twigs and Rods · Birch. Besom brooms, rope, fencing · Hawthorne. Living shrub fencing · Hazel. Baskets, walking sticks, fencing · Willow. Basketry · Any species. Fire starter, fuel for cooking/baking
A Few Usually Useless Woods – Now Tulip poplar bast chair seating. During the early years of Country Workshops’ ladderback chairmaking classes, we learned that the inner bark from tulip poplar can be used for woven chair seating. The idea was quickly dismissed. It was assumed that poplar bast is an inferior material that would tear or deteriorate quickly. Also, we were in love with hickory bast, which is an exceptional material – for appearance and strength.
Peeling the first strip shows how deep to drawknife the succeeding strips. This piece is looking a little thick.
The problem with hickory bast is getting it. Hickory grows in many parts of the eastern U.S., but it’s relatively scarce in our area, compared with tulip poplar, which seems to sprout almost everywhere. More than 30 years had passed when I received a phone call from Jack Ruttle, back then the editor of Organic Gardening magazine, and also a participant in one of Country Workshops’ early chairmaking courses. Jack told me that when he returned from the CW course he prepped and wove a seat for his chair using tulip poplar bast.
DL – “Great! How has it held up?” JR – “That’s what I want to tell you. We use the chair every day.” DL – “And?…” JR – “It’s still looking fine. No tears or other problems.” DL – “OK! That’s fantastic. I’ll give poplar a try, ASAP.”
That summer, Will Burney and I cut a nice-looking tulip poplar sapling. The diameter was about 5″ at breast height; it was straight, with just a few small knots. The pole we hauled to the shop was about 15′ long.
The shaving and peeling technique is the same as for getting hickory bast, only somewhat easier. Like hickory, poplar bark can be peeled from mid spring to about mid summer, during the early year growth when cambium cells are dividing, forming new layers of wood and inner bark. Sometime around mid summer, growth slows, and it becomes difficult – or impossible – to peel the inner bark.
Once in the shop, our poplar pole was set on two sawhorses. Will and I took turns holding the pole and shaving off the outer bark. We used a straight drawknife, held bevel down. We quickly learned that this needs to be done carefully; it’s easy to cut into – and destroy – the bast. Depth of cut is determined by trial and error along a narrow test strip, maybe 2″ wide. We used a chalk line to define strips about 5/8″ wide.
A box cutter – a carpenter’s zip knife – works well for cutting through the inner bark to make the strips. If you do this between spring and summer, the bast will peel loose from the cambium with little effort. If it seems to be too stiff – more than 2mm in thickness – lay the bast back on the pole and do some more shaving. This fine-tuning can be done with a spokeshave. Remove the first strip.
With a strip removed you can see the thickness of the two adjacent sections that will become the next strips. This greatly helps in determining how deep to shave. Use a spokeshave for the final passes. Because a tree isn’t a true cylinder you’ll need to cheat here and there, letting the strips wander or die out.
Where a strip intercepts a knot there are several options. If the knot is to the side of the strip, you can continue as if it doesn’t exist. There’s about a 45-percent chance that this section will end up on the bottom of the seat, or become overlapped with the weave on the top of the seat. In tension, narrow sections of bast are almost as strong as full-width sections. Sometimes a very small knot will be almost centered within the width of a strip. I leave these; they become a visual feature. You can also just come to a stop, making a shorter strip. Long strips are nice, but you can use various lengths when it comes to doing the seat weaving.
As you proceed, slime from the fibrous bast will attach to the drawknife and spokeshave blades. Wipe this off with a wet rag. Continue working with wet tools. Water seems to minimize slime accumulation. (Dry and oil the tools when you’re finished.)
Let the strips dry before weaving the seat. The fresh strips are somewhat fragile. Also, they will shrink in width. Seats made with green bast will result in gaps in the woven seat. Roll and tie the strips in coils for drying. This might take a week. Coiled bast can be stored indefinitely.
As with hickory bast, the best weaving pattern for poplar seating is a herringbone. A one-over/one-under checkerboard weave becomes too tight to finish the weaving process. A double checker board (two-over/two-under) is OK, but it’s not as attractive as the herringbone.
On weaving day, plop the coiled bast into a bucket of warm water. It becomes pliable in about 15 minutes. Don’t soak all the bast at once; you want it to be workable, but you don’t want it to soak up so much water that it expands in width. Directions for the herringbone weave, including how to tie strips together with a weaver’s knot, are in my book, “The Chairmaker’s Workshop.”(3)
Both hickory and tulip poplar bast hold up well. With use, hickory bark takes on a nice sheen on the upper surface. (A true butt rub!) Poplar smooths out some, but never looks polished. On my poplar bast ladderback, the material crumpled slightly where it wraps around the rungs. This doesn’t weaken it, but it would be nice to eliminate. Perhaps pre-limbering in both directions will do the trick. As it dries on the seat, poplar bast shrinks in width a little more than hickory. But the shrinkage might also tighten the weave. We’ve been using the chair in the photo with poplar bast seating for three years; we’re happy with it. Still, hickory bast is king.
This tulip poplar bast seat had been used for three years. I’m not aware of any degradation.
A later note on poplar bast seating. Recently I found myself looking at the chair with poplar bast under low level and low angle light. I discovered that the crumples correspond to the arrises of the small spokeshaved flats of the rungs. I’m now quite sure that crumpling would not have happened, or be less prominent, if the upper seating rungs had been made rounder and smoother. This could be done with a hollow sole spokeshave, scraper or just sandpaper.
Wood scraps from a green wood chairmaking workshop. When I visit city-based woodworkers I’m often surprised to see that wood scraps are tossed into the trash, along with package wrappings, the newspaper and even food waste. This is a shameful situation that was even worse before recycling. During 39 years of Country Workshops’ ladderback chairmaking courses, vast quantities of wet, green wood waste were produced, along with the many chairs. We produced drawknife shavings, followed by spokeshave shavings, plus waste cutoffs from over-long chair parts and wood that didn’t meet standards of quality. There was very little saw and sanding dust. Here’s how this stuff was utilized – and almost everything was utilized, even some of the wood dust.
Dry drawknife shavings from any kind of wood are among Planet Earth’s best fire-starters. Because we and our neighbors mostly heat with wood, we can always use wood shavings. We store drawknife shaving until needed in plastic trash cans – like the ones sold for curbside pickup. (Which we don’t have out here.) I use a 2″ hole saw to bore 50 or so air vents in the plastic side walls. This is for ventilation so that the shavings will dry, which is what’s needed for fire-starters. The trash can lids are nice to use if the shavings are stored outdoors.
One tip that would drive some CW students nuts is that the drawknife shavings are roughly sorted before going into the trash cans. 1. Sweep the shavings into a pile. 2. Grab a bunch of shavings and shake them, so that small, frassy stuff falls away. Don’t shake on top of the shavings pile! 3. The remaining shavings go into the trash can. The reason for this is that the rejected small dusty stuff tends to fall on the house floor and be messy. You’ll appreciate this when you do it.
Spokeshave shavings can go into the same fire-starter. But there’s a much better use if you’re doing woven chair seats… Once upon a time this woodworker/teacher/author rejected the tradition that woven chair seats should have a stuffing between the layers. But as I got older, and learned that even hickory bast chair seats stretch and sag, I came to agree with conventional wisdom. But what to use? Several layers of cardboard is common, and also plastic foam sheeting (various kinds.) One day Brian Boggs was visiting when our class was finishing their ladderbacks. Brian told us that he had been testing “just about everything” for the stuffing and that he had concluded that the very best is spokeshave shavings. By far the best are from green wood when you’re finishing rungs with a spokeshave. Green wood shavings are springy, whereas dry wood shavings tend to crumple and weaken as they pass over the spokeshave chipbreaker.
Sweep the shop floor when switching from drawknife to spokeshave. When spokeshaving is finished, put the shavings into a box to dry. They will keep indefinitely. The shavings are also premium packing material for anything shipped in a cardboard box. Or just put them in with the fire starter.
Green cut-off wood scraps are dried – in other hole-y trash cans – then burned in the shop woodstove. Any other leftovers are tossed in the forest to decompose, which might be what all of this stuff should really be doing. Amen!
1. Drew and Louise Langsner. “Handmade.” New York: Harmony Books, 1974. 2. Herbert L. Edlin. “Woodland Crafts in Britain.” Newton Abbot, UK: David & Charles, 1949. 3. Drew Langsner. “The Chairmaker’s Workshop.” Original edition published in Asheville, NC: Lark Books, 1997. Author’s reprint edition Marshall, NC, 2008.
I am back from a fruitful trip to the U.K. where I got to see (finally) the Benjamin Seaton Tool Chest at the Guildhall Museum in Rochester. (More on this tomorrow on the blog).
As you can imagine, things are bonkers here this time of year. Megan, John and I have all been pitching in at the Anthe building to fulfill holiday orders. We are happy to do it. Honestly, I kind of missed it (I have always loved manual labor).
But today we are here to answer your questions. If you are wondering about what to finish a dining table with, click here. If you somehow have some other question for us, write it in the comments field below, and we will do our best to answer it.
FIG. 73. Wooden spoons: 1. Spoon from Muhu, Mäla village, ERM A 290:150; 2. Spoon from Karja, Koikla village. EM 16957.
The following is excerpted from “Woodworking in Estonia.”The author, Ants Viires, devoted his life to recording the hand-tool folkways of his country without a shred of romanticism. Viires combined personal interviews and direct observation of work habits with archaeological evidence and a thorough scouring of the literature in his country and surrounding nations.
If all this sounds like a dry treatise, it’s not. “Woodworking in Estonia” is an important piece of evidence in understanding how our ancestors worked wood and understood it more intimately than we do. Viires records in great detail everything from the superstitions surrounding the harvesting of wood (should you whistle in the forest?) to detailed descriptions of how the Estonians dried the wood, bent it, steamed it and even buried it in horse dung to shape it for their needs.
Viires covers, in detail, the hand tools used by the Estonian, including many that will be unfamiliar to moderns (a beehive turner?). He then discusses all the different products Estonians made for their own use and for sale in the markets, including bent-wood boxes, chairs, chests, tables, sleds, carriages, spinning wheels, spoons, tobacco pipes, bowls and beer tankards.
During the Early Middle Ages the hollowing method was at least as important in peasant woodwork as was the process of hollowing the contours of timber. Special tools were used for this process, such as the scooping axe, the hive-scooping blade, the spoon chisel, the draw knife, etc. which, as we have already seen, were used already in the Early Middle Ages. Moreover, their forerunners date as far back as the Stone Age. The Estonian language has many words meaning “hollowing” (“õõnestama, õõnitsema,” southern Estonian “kaivama, kaevama”). Similar words bearing the same meaning are known in other Finno-Ugric languages. The scooping of small objects, such as spoons, cups, etc., are usually described by the words “kõverdama, kööveldama, kõm(m)eldama” (Finnish: “kovertaa”); this also has a bearing on the terms used for the spoon chisel and draw knife.
The common feature of all the above utensils is the quality of the timber from which they were made, which usually had to be green wood. Its softness made it pliant.
Hollowed utensils may be divided roughly into two groups based on the technology of production and outward appearance. The first group contains objects such as are scooped out from the side (spoons, ladles, certain kinds of shovels, cups, troughs, boats, coffins). The second group covers the utensils processed from the top with an inside penetration forming a cylindrical body, such as vats and a number of household containers. In working the former group the main tool applied is the scooping axe (for smaller objects the spoon chisel and draw knife), whereas working the latter group requires the use of the hive-scooping blade as well as the draw knife.
Objects Scooped from the Side. Until the beginning of the century, spoons and ladles for home use were generally produced by the peasants themselves. The preferred timber was that of birch, hard pieces of birch root and sometimes juniper. To prevent these articles from cracking, they were frequently boiled in hot water (they were also known to have been dried in the bread oven) (4). The bowl parts of the Estonian spoons (as well as the Latvian and Finnish ones), are of elongated shape, differing in this respect from the Russian round-bowled spoons. (5)
Often the spoons were covered with carved designs (Fig. 73). The Russian spoon with the round bowl, often pointed, became known in Estonia in the course of the 19th century mainly through being introduced by men returning from military service from Russia. Only toward the end of the century did the Russian spoon appear in the shops, or they were bought from by hawkers. The following is from Räpina: “Later, about 40 years ago [= ca. 1900] then no longer country spoons were made for eating. The Seto people started to bring and sell wooden spoons. The Seto exchanged spoons against grain and rags. There was a factory in Pihkva (Pskov) that made them. It was better to eat with factory spoons than with spoons made by ourselves. There was thick paint on them and there was no need to wash them so thoroughly and the color stuck well. Country spoons remained only for making of butter and cooking. Old people, who had not been accustomed to eat with the other spoons, ate a long time with self-made spoons.” (6) In the first decades of the 20th century metal spoons put a full stop both to country spoons as well as the Russian wooden spoons as tableware. Wooden spoons remained in use only in cooking.
It is worth mentioning that although the Estonian and Russian wooden spoons were quite different, the word “lusikas” (south Estonian “luhits, luits”) is actually an old Russian loanword (Old Russian “льжька,” Russian “лoжка”), as a result of which it has been believed that Russian spoons were spread already quite early as an article of trade among Baltic-Finnic people, and because of it the original old names have been forgotten. (7) One of such old names could be “koost,” which denotes a wooden spoon on the western shore of Saaremaa and Hiiumaa (Karuse and Varbla). That Russian spoons were actually found in the Baltic counties at an early time is confirmed by a find of typical Russian spoons in Riga, in all likelihood from the 13th to the 15th centuries. (8) To a certain extent the previous position is in a certain contradiction with what people have stored in their memories – which, as we have seen, link the appearance of Russian spoons at a rather late date. It is also interesting that the word “lusikas” (spoon) has in its turn spread into the speech of Russians on the other side of Lake Peipsi as “лузик” (9) (it may be to distinguish it from the different spoon with a longish bowl which Avinurme home industry people could have sold on their commercial travels in the 19th century on the other side of Lake Peipsi). The words used for ladle, “kulp” or “kula” (the latter is a west Estonian term used to describe a ladle with the bowl at an angle, used to scoop milk from the urn), are probably of Baltic–Finnicorigin. (10) On the other hand the south Estonian term “kopp” originates from the Lower German “koppe.” (11) The same word is applied in other parts of Estonia to mean a wooden bowl with a handle. In the Võru dialect and in other eastern parts of the country the wooden bowl with a handle, especially the one for use in the bath, is known as “korets, karits” (Russian “korets”).
FIG. 74. Hollowed bowl, Põlva, Kaapa village, ERM A 227:86.
Bowls (Fig. 74) were usually made of softwood – linden, aspen, alder, sometimes also from birch. Usually they were made from a stem cut in two, crosswise, although lengthwise was sometimes preferred. The latter were not as durable and had a tendency to crack. Tools used in the manufacture of homemade bowls were the scooping axe, the chisel and the draw knife. However, in the 19th century most bowls were already being produced by turnery, and the bowl ceased to be a homemade article (see the chapter on Turning). There are only a few such bowls in museum collections, as by far the greater number of bowls have been turned. This shows that in the 19th century making of bowls was mostly the duty of turners, and no longer belonged to the circle of the peasant’s home carpentry. The production of bowls by hollowing was a laborious process often aided by burning. This may be seen from extant bowls such as one from Lüganuse, where “the hollow was burnt out, not hollowed out. After burning it was smoothed over by a rough stone.” (ERM A 395 : 142). Following is a fuller description from Viru-Jaagupi: “The bowl was first hollowed out by a chisel; you then put hot, glowing charcoal inside and blew to keep it glowing. Ever so often you scraped out the burned wood and threw out the ashes. Then you put in more coal and went on burning until the bowl was deep enough.” (12) There are no specific words in the Estonian language to denote a bowl hollowed out by burning. The word “kauss” (bowl) is borrowed from Latvian “kauss,” while the southern Estonian dialect uses the term “liud,” which is closely connected with the Latvian “bļoda” and the Russian “blyudo.” (13) The old northern Estonian terms “ge(n), vaanas” have also been taken from the Russian “vaa-ganki.” (14) In the coastal area and in Hiiumaa the word “tisk, tiski” has its origin in the Estonian-Swedish dialect (< Swedish “disk”), as well as from the Finnish (< Finnish “tiski” < Swedish). (15) All these terms could be found already in 17th century dictionaries. At the same time, none of them are any older than the millennium. It is quite evident that they became popularly known in the Early Middle Ages. We can further deduce that, previous to feudal days, i.e. during the communal primitive society, earthenware bowls were mainly used. With the introduction of turnery, the wooden bowl became the dominant tableware in the peasant home. (16)
FIG. 75. A washing trough in the yard, Rapla, Tõrma Village, Photograph by the author, 1957.
In southern Estonia wooden bowls were not commonly used as regular tableware, even in the 19th century. Tubs and firkins were preferred. In fact, not every household owned a bowl; only on festive occasions, such as weddings, were they considered the right tableware to serve food. (
While the bowl remained basically the product of turnery, i.e. of specialized craftsmen, the trough (Fig. 75) was essential in every household, and was produced by each peasant for his own purposes. Pig troughs, draw-well troughs, washing troughs, etc., were generally hollowed out of pine or aspen trunks. Bread troughs (known in the southern Estonian dialect as “mõhk,” and in the islands as “leiva-lõime”) were usually made of oak in the islands or spruce on the mainland. Most of the work of hollowing the trough was with the ordinary axe, and only in the last stages of the job was the scraping axe applied. Animal troughs were mostly made with the axe alone, while bread and washing troughs were finished off with the draw knife. In view of the tendency to crack, especially at the ends, the troughs were mostly coated with tar.
Troughs are the oldest artificially made containers used for agricultural and household purposes. The terms denoting them originate in the primitive communal period (northern Estonian “küna,” southern Estonian “ruhi”). (18) Their use remained widespread right into the 19th century; in addition to the uses already enumerated; the troughs were employed for beer brewing, wine making, corn chaffing, etc. Even small-sized troughs used as tableware were not unknown.
The trough as a water-going vessel is of even older usage on all inland waterways, but especially so in southern Estonia where they may be seen to this day. A similar clumsy conveyance was also used in the Emajõgi, Pärnu and Kasari river basins.
Building river craft is obviously more intricate and difficult than hollowing out a trough, and was therefore taken over by the boat builder rather than being left to home industry. Hollowing out a boat is externally similar to boats constructed of planks. They are generally 16′-20′ (5-6 m) long, up to 3-1/2′ (1 m) wide, very light and easy to sail.
They were made of aspen, which is light, easy to process and shape, green wood being used. Because the sides had to be fairly thin (in some places 3/4″ to 1″ or 2–3 cm), the wood had to be carefully worked so as to not cut through it. There were various means of checking the thickness of the side so as to gauge the correct measurement.
The simple way was by knocking on the side with the axe, the sound produced indicating the extent of hollowing. In the Pärnu and Emajõgi rivers basins a more advanced method was employed. Before the hollowing process was begun, a number of holes were bored along the side of the stem at intervals of about 11-3/4″ (30 cm), the depth of which corresponded to the required thickness of the sides of the boat. When the hole became visible from the inside, this served as an indication that the correct thickness had been reached. When the work was done, the holes were plugged with pieces of wood.
Sometimes the plugging was done before hollowing, in which case wood of a different color was used for plugging. There was a special measuring rod for the plugs whereby they were cut to the correct length, corresponding to the desired thickness of the sides of the boat.
FIG. 76. Expanding the boat. Tori, Riisa village, Photograph By M. Riis, 1920. Photo library 133:38.
Prior to proceeding with the final curving of the sides of the boat, it was heated by boiling water or, what is simpler, by plunging heated stones into the water in the boat. Planks the length of the desired width were then pressed into the boat, giving it the required width (Fig. 76). If the first sticks were too short, they were replaced with longer ones until a sufficient width was achieved.
For propping up the upended boat, arched wooden ribs were inserted; these were generally made from naturally shaped timber (usually roots). In order to secure the ribs, varying methods were applied. In Pärnu special hooks (known as “nakid, kabad”) were knocked into the inner sides of the boat, the ribs being attached thereto with strips of bast. In Kasari the ribs were secured with pegs or wedged in. In the Emajõgi river basin the ribs were simply knocked into the sides of the boat.
Similar types of boats were known in many lands where man navigated rivers and lakes, throughout northern Eurasia, and as far south as the lands of the South American Indians. In Northern Europe the eastern Baltic coast constitutes the limit of popularity of this type of boat. (19)
Finally, consideration must be given to the trough-shaped coffin hollowed out of pine trunks. In Latvia a few such coffins were still being made in the previous century. (20) In Russian forest areas these coffins were sometimes homemade (in Kostroma in the 19th century). (21)
Research has established the existence of such coffins in eastern Estonia, in what was called “the old days.” (22) Hollowed-out coffins were recently used for the burial of small children (V. Jaagupi, Lutsi). The only eyewitness description in Estonia comes from Hargla by Kusta Lipstok (b. 1866), who remembers seeing such a coffin being made in his boyhood. (23) “The coffin was made in the forest. It was worked like an ordinary trough. First a groove was made with an axe, big enough to get the scooping axe in. Then it was scooped out further. At the bottom it was narrower than at the top. The lid was made from a different log and a cross-bar was secured at one end of the coffin.” Grooves were scooped out along the sides of the coffin and the lid was made to slide inside along those grooves. Some sources believe that the log used was cut half horizontally, so both the coffin and the lid came from the same trunk (Narva region, Jõhvi, Vastseliina). This was also the accepted method for processing hollowed coffins in Latvia.
At any rate, it is clear that in the second half of the 19th century hollowed coffins were rarely used in Estonia. This means that coffins made of boards were already in use in the Estonian village throughout the 19th century and possibly earlier.
4 e.g. KT 101, 9, Räpina. 5 Such spoons with an oval bowl occur in the Slavonic area in Central Europe (Opole) since the 10th to the 12th centuries. (Hołubowicz, Fig. 122:1 p. 277). Wooden spoons used in the 15th to the 16th century are relatively similar in their shape to Russian spoons of the 19th century. (Рабинович. Из иcтoрии быта, Fig. 10:7. p. 51). 6 KT 101.9–10 (Joosep Hermann, b. 1866), cf. also EA 15, 116 Avinurme; KV 78, 124 Jõhvi. 7 Mikkola, p. 45, 66; Kalima, Slaavil, san., p. 120. 8 Šnore, plate II, 5, 8. 9 Kalima, Ostseefinn. lehnwörter, p. 157. 10 Хакулинен I, p. 103; Ariste, Hiiu, p. 176. 11 Saareste p. 245. 12 EA 3, 489. Also the hollow of an ancient tool, the mortar, has been frequently burned by means of hot coals, but unfortunately there is no closer description of that work. The mortar was usually made of spruce or pine. As it was always necessary to hollow it along the timber and conically downward, making of a mortar was rather cumbersome without the help of burning. This has been pointed out in Poland (Moszyński, p. 670), in Finland (Arkisto III. p. 237), among the Chuvash, (Никольский, p. 137), among the Mari (Kрюкова, p. 59) and others. A more thorough description of the hollowing of the mortar in that way is in Hungary (Bátky, p. 316). 13 About these words see Saareste, p. 244. 14 Kalima, Slaavil, san., p. 180. 15 Ariste, Eesti-rts., p. 107. 16 Wooden tableware was quite usual in Europe in the Middle Ages. It had an important place in Russian cities in the 11th to the 17th centuries. (Рабинович. Из истории быта, p. 50-51. In Germany on the Lübeck citizens’ tables it ruled until the 16th century (Neugebauer, p. 190) and on Finnish peasants’ tables as well as in Estonia it dominated as late as the middle of the 18th century (Sahlberg, p. 37). 17 KT 18, 32-33 Rõuge; cf. also EA 35, 761 Sangaste, EA 39, 371 Hargla, EA 37, 182 onward. Saarde. 18 See Saareste, pp. 246-248. Later the Low German mold, moll, loanword (< “kasks molde, molle”) which usually denotes a smaller trough has been added to the names mentioned before. Also the name of the long cattle drinking trough in southwest Estonia is of late origin. 19 See I. Manninen, Zur Ethnologies des Einbaums. – Eurasia Septentrionalis Antiqua I, Helsinki 1927, pp. 4-17 About their manufacture in Finland a well-illustrated overview: Vilkuna-Mäkinen, pp. 302-313. 20 Bielensteil, p. 181; J. Janusems, Bluka zārki. – Senatne un māksla II, Riga 1939 pp. 41-52. 21 Laugaste. p. 77 (79). 22 e.g. EA 38, 157 Narva parish.; KT 76, G–Jõhvi; EA 3. 491 V. Jaagupi; EA 40, 303 Simuna; EA 2, 417 Rõngu; EA 39, 347 and the foll., Hargla; EA 36, 771 Vastseliina; EA 31, 177 Lutsi Estonians. 23 EA 38, 347 and the foll. Figs. pp. 351, 355.