I want y’all to know that you have adoring spouses and family members. Every year in mid-November we get flooded with requests from people who want to give you gifts with a little extra something special.
A few years ago, we got a request from a woodworker’s wife. She had bought one of our books at a used bookstore. She mailed it to us, and her request was something like this:
Please write an essay on the inside cover that will inspire my husband to continue woodworking. In your essay, I would like you to touch upon the following themes from his life:
The death of his father at a young age and the lack of authority figures in his life.
His two beloved dogs.
The difficulty he has at work because of his boss and the need for him to find a hobby.
……
….
.
!
It was then that John and I designated November and December the “Lexapro” season – when we are regularly pulled into anxiety-provoking family situations.
During the 2015 Lexapro Season (or was it the 2012 season?), a spouse asked if we could include a day of woodworking lessons with the book she wanted to buy for her husband. We replied with, “We charge $700 a day for one-on-one lessons.” And then she became very incensed that we couldn’t do it for free.
I hear those white pills rattling, rat- rat- rattling for me…
If you do have an overachieving spouse, we recommend they stop by our storefront on one of our open days if they want a personal signature – that really is the only way we can fulfill unusual requests. (Our last open day of 2017 is Dec. 9.) Because I’m in Kentucky and our warehouse is two hours away in Indiana, there’s no way to pull certain orders, sign them in blood and repackage them.
I honestly wish we had the staff to honor requests such as these as they are an indication of how much you are loved. And who doesn’t love love? But we are just two guys, and I have bathrooms to clean.
I will teach two classes in June 2018 at Dictum in Germany – one class on building a Roubo workbench and a second short course on building a staked three-legged stool.
The classes are held at Niederalteich, a gorgeous monastery in Bavaria. Students can stay in the comfortable guest rooms at the monastery or at one of the local bed and breakfasts in the town. The monastery has a really good restaurant and lively beer garden. It is a perfect setting if you want to disconnect from the outside world and focus on the craft.
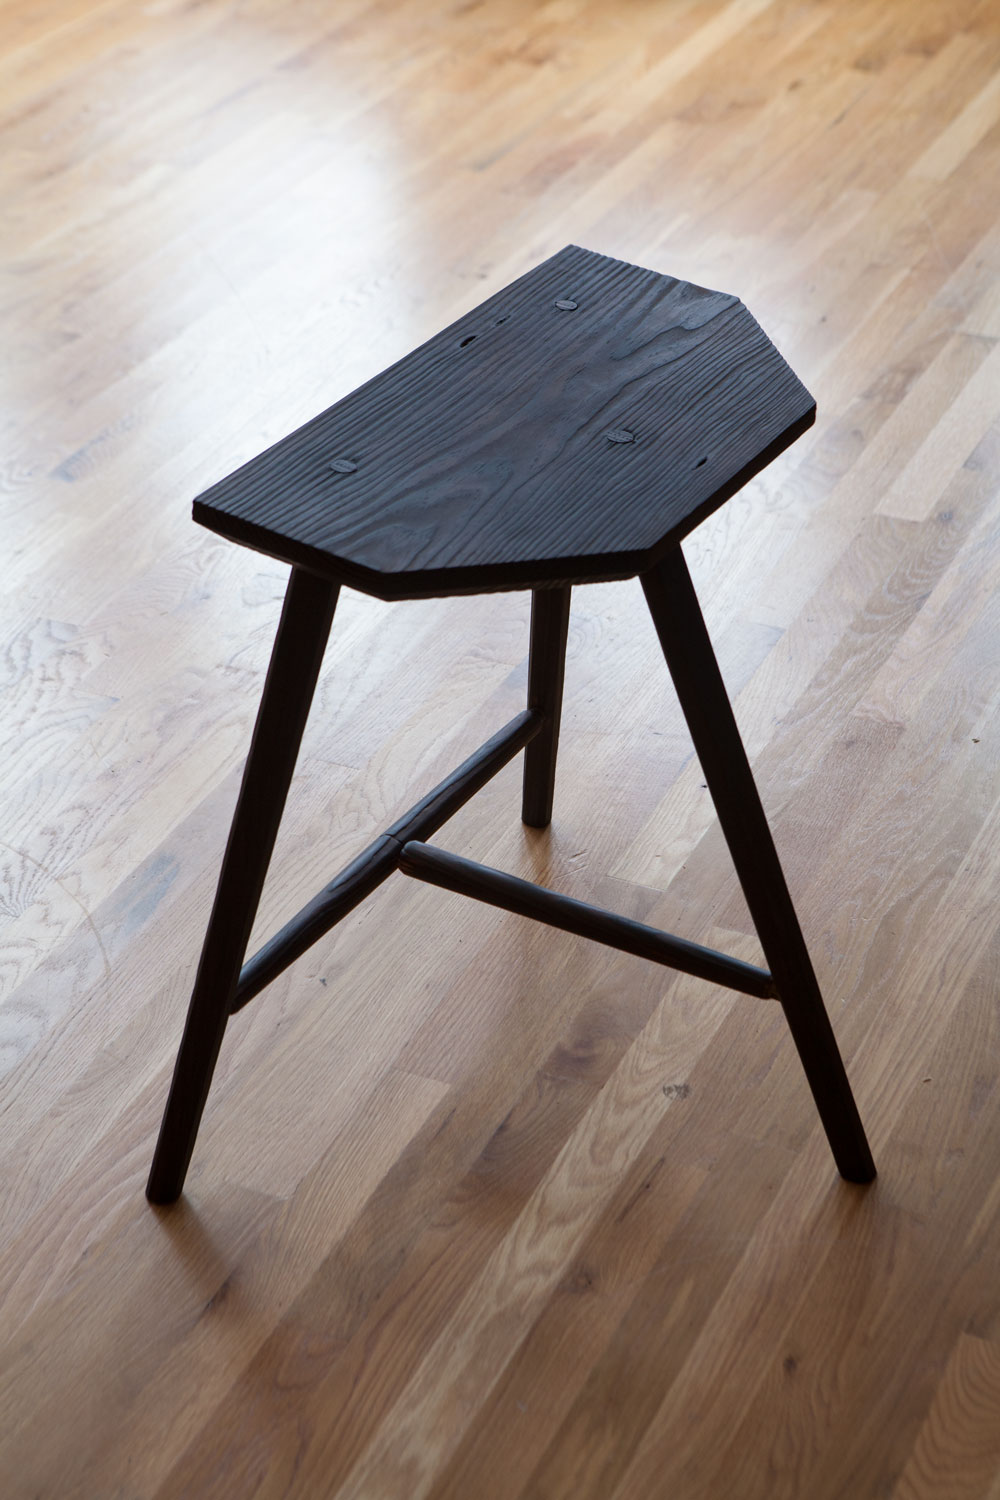
The staked furniture class is June 9-10. During the class we’ll build a three-legged staked stool. This class is an excellent introduction to the world of chairmaking. We’ll discuss how to design and execute compound-angle joinery without math or trig tables. And we’ll explore the tapered mortise and tenon, the foundation of staked furniture.
For more details or to sign up for the course, visit this page.
The workbench class is an intense five day class from June 11-15. Each student will build a Roubo-style workbench. The class will focus on making the bench and helping you decide what vises or workholding you need in your shop. We will build the bench using traditional mortise-and-tenon construction and the massive sliding dovetail used on early French benches.
For more details or to sign up for the bench course, visit this page.
Note that these classes do not mark my return to a regular teaching schedule. Teaching these classes in Bavaria helps fund my research into early woodworking in Europe. Plus, I owe the people at Dictum a personal favor for which I will ever be grateful.
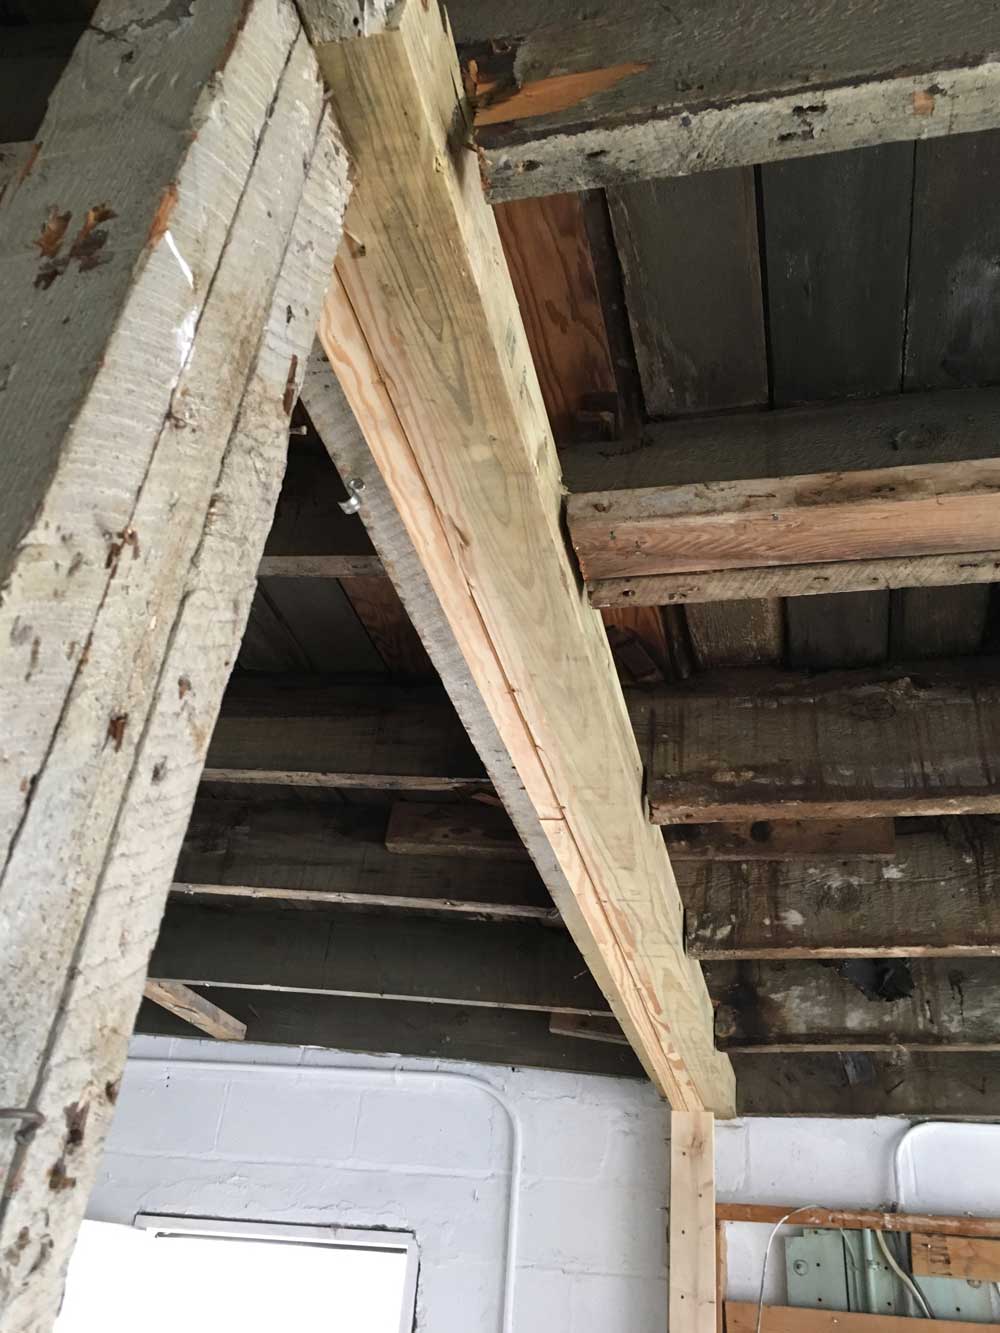
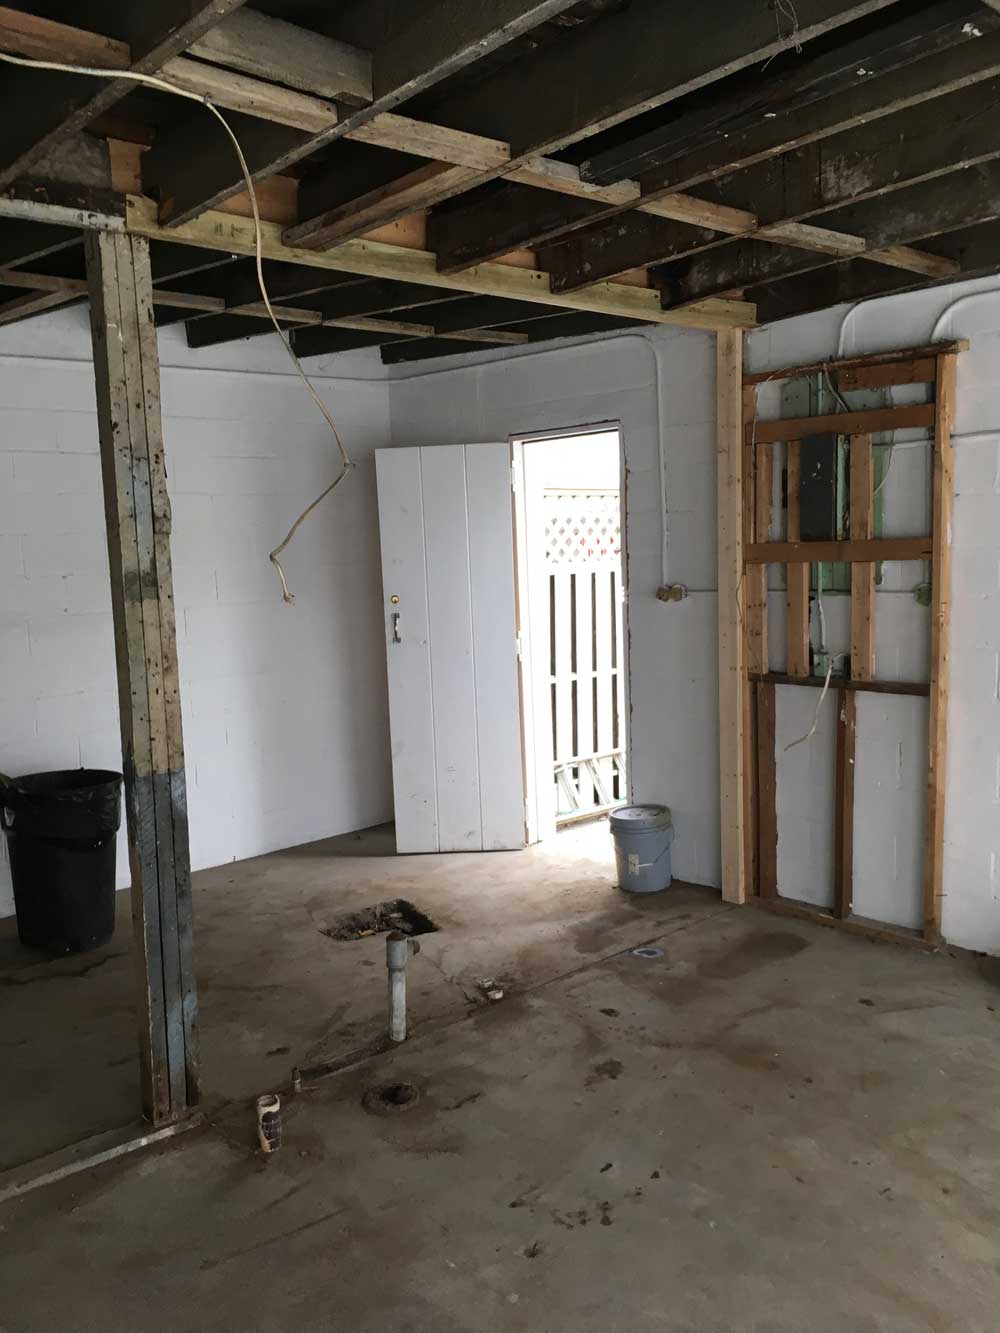
Replacing the main beam of the Horse Garage has been hanging over my head for more than a month now. Every time I go in there I feel like Damocles and wonder if I will become buried in my work.
Last month, Brendan Gaffney, Megan Fitzpatrick and I jacked up the garage’s joists to relieve pressure on the rotted beam. Today was the day to replace the punky thing.
Lucky for me, woodworker Jeremy Hanson was in town, and I hired him to help. Jeremy is a cabinet maker, carpenter, tattoo artist and art teacher from Seattle, Wash., who is traveling around the country with his charming family in a Toyota Tacoma that is outfitted with a camper. They stopped by the open house yesterday, and Jeremy volunteered to lend a hand.
It took us about four hours of dirty work, but at about 2 p.m. we lowered the joists back on the new beam. All the pieces returned to their proper places without complaint.
Now comes the rush to button the place up before winter comes. I have a roofing company prepared to add a membrane roof. And I am starting to build the new doors tomorrow.
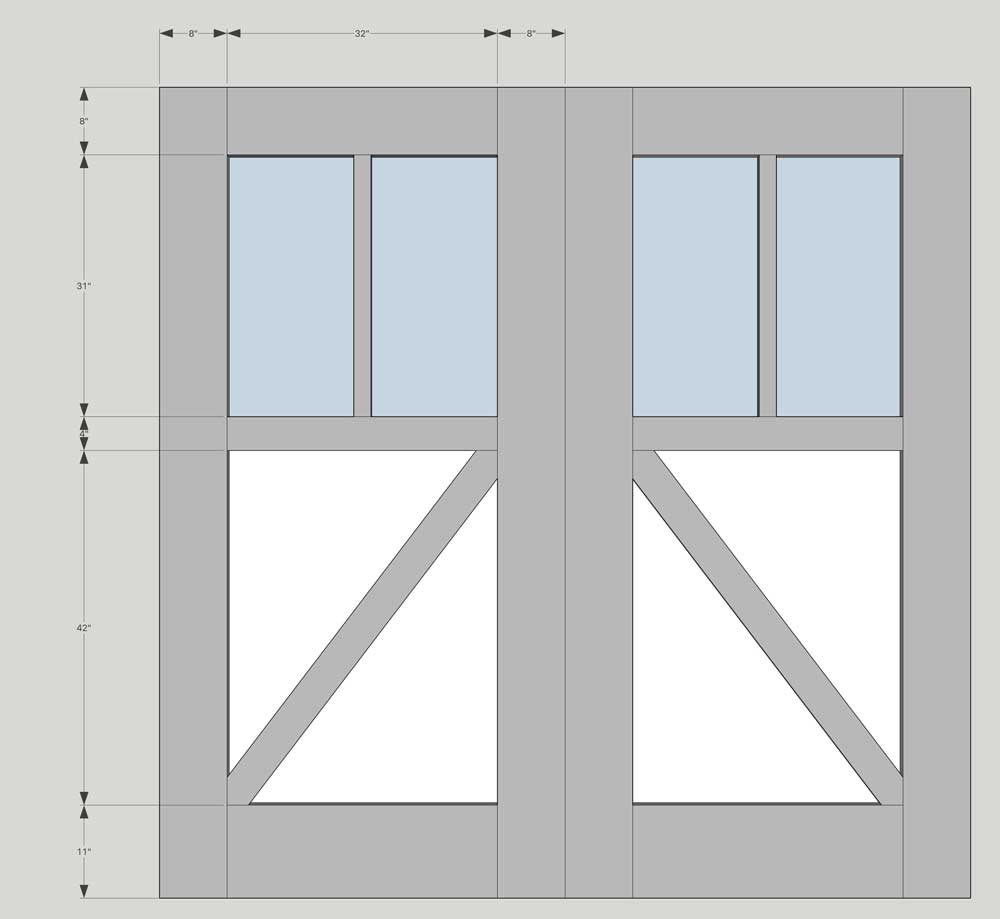
The doors will be lightweight pine, joined with mortise-and-tenon joints and painted for protection. After all the wacky repairs we’ve been making to the Horse Garage, doors will be a cakewalk.
Then I will be out of money – again. After I complete a couple furniture commissions I should have enough money to add electricity to the building. (And, if I’m fortunate, enough money for a mini-split as well.)
There is still a long way to go, but the Horse Garage might be in business before the end of 2017.
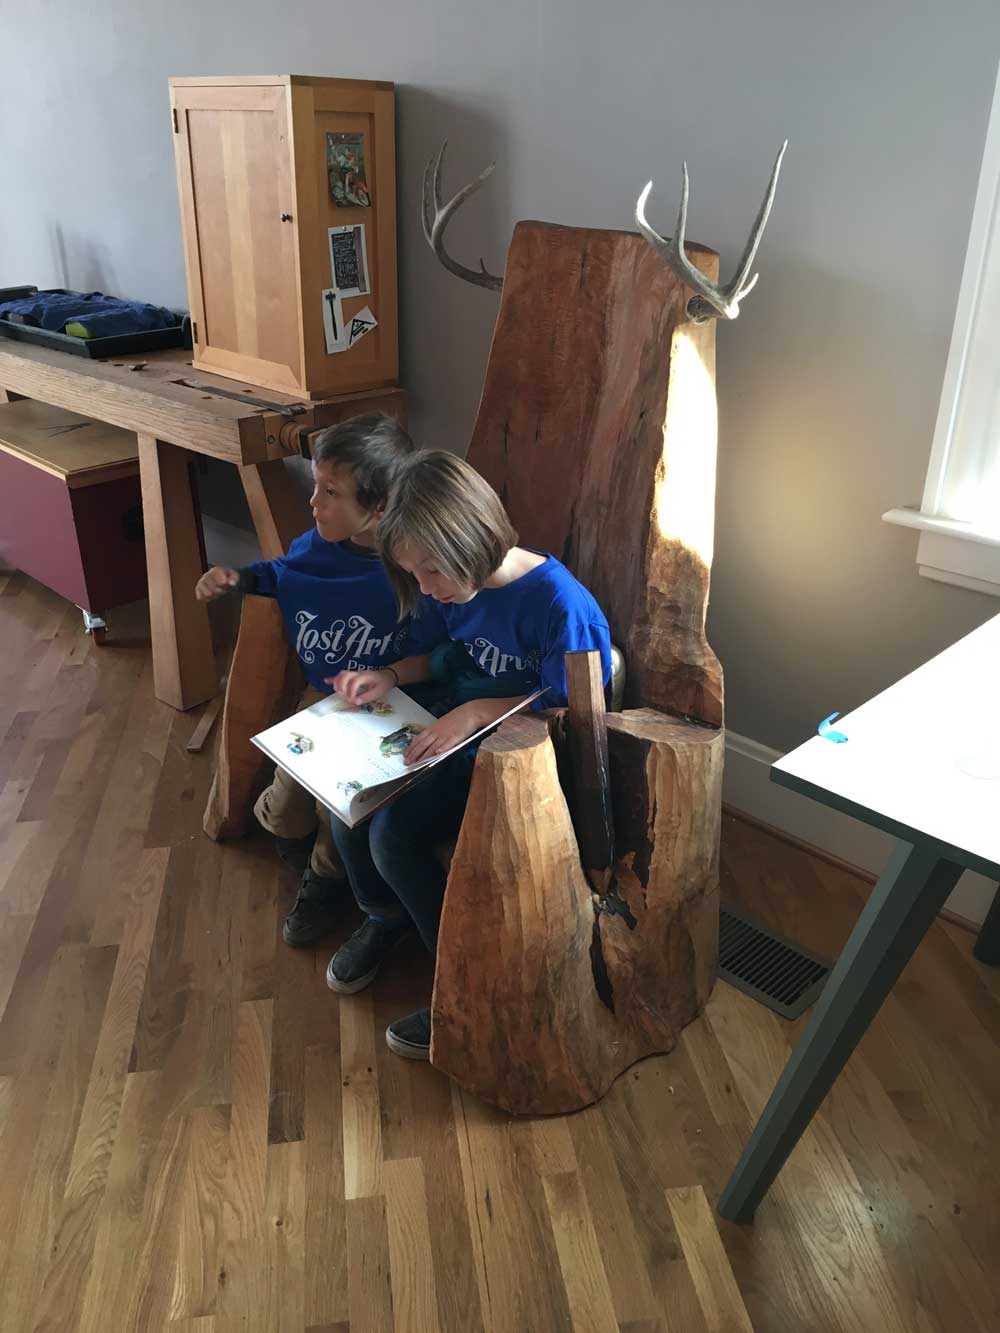
Note: No deer were harmed in the making of this project. These antlers were shed by a buck and retrieved from the woods by a so-called “shed collector.”
Getting the antlers fastened to the chair was straightforward in the end. But I’ve spent many nights pondering the possibilities. Rejected ideas:
Bore a hole for the irregular antler and pack epoxy and maple shavings around the antler.
Use a staked furniture joint: Use a tapered tenon cutter to shape the antler. Ream a matching hole in the chair.
Build a mounting board – like a taxidermist would – that would be fastened to the chair.
In the end, I decided to use hanger bolts. One end is threaded like a machine screw – that goes into the antler side. The other end is a wood screw and goes into the chair.
We also decided to cut a shallow counterbore in the chair to obscure the joint between the antler and the chair. This worked brilliantly.
Because you’ll never see a project such as this in a woodworking (or deerworking) magazine, here are a couple tips.
If you don’t own a tap for the machine screw, the hanger bolt is strong enough to form threads in the hole in the antler.
A dab of quick-set epoxy on the machine threads is a good idea.
Have a spotter (or two) help you drill the holes in the irregular chair and antler. It’s more difficult to do alone and make it look right.
After we installed the antlers, most of our customers that day asked to sit in the chair and have their picture taken with it. So either the project is a success, or I’ve created something so ugly that people want a photo to warn others not to do this.
Writing for woodworking magazines is a strange experience in many ways. You never know what readers will make of your work — the artistry, thinking, writing, building, calculating, drawing, and editing that go into a project article. Will they love it? Hate it? Discover some hideously embarrassing error in the cutting list even after three eagle-eyed editors have gone through it with a fine-tooth comb? Odds are, many people won’t even venture beyond the title. But the one thing of which you can be certain is that you can’t please all of the people all of the time.
Sometimes I hear nothing after an article is published. Every so often I get a super enthusiastic message that makes my day, such as one I recently received from Larry Nottingham:
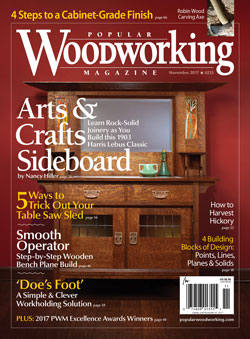
“I knew the sideboard on the cover of Popular Woodworking was yours even before I saw your name. All I can say is WOW. I recently purchased a bunch of quarter sawn white oak and, even though I’m just an amateur, I’m gonna give that one a try. Your work inspires me.”
The most common response is a request for more detailed plans. I write back, explaining that I have no more detailed plans and that the drawings in any article I write for Popular Woodworking or Fine Woodworking show far more detail than anything I use in my own work or have ever been given in the shops where I worked for others. The fact is, unless you’re working side by side with the person who wrote an article, you’re going to be interpreting and extrapolating from the instructions and plans, no matter how much detail an article contains. Add to this the reality that publishers today are working with fewer staff and lower budgets than before the Great Recession, and I think it becomes easier to understand that for authors and editors both, selecting what to include is a risky business virtually guaranteed to tick someone off. “I’m not subscribing to xyz for spoon feeding,” some will say, while others lament the lack of exactly that level of instruction.
Let me offer some insight based on my experience.
When doing small-scale custom work (as distinct from production work, whether in a one-person shop or a factory setting where every step of the process has to be just-so in order for the next parts to fit the ones that have already been made*) there’s typically some allowance for the craftsperson to interpret a drawing and build it in whichever way will best suit the job in question. A good example is the Voysey two heart chair in my book about English Arts & Crafts furniture for Popular Woodworking (forthcoming in June 2018). As I explain in the introduction to the chair build, real-life chairs made during Voysey’s lifetime based on his drawings diverge from those plans in multiple ways. Some of the variations were probably requested by customers when they commissioned their seats; others were undoubtedly decided on by the craftsmen who built them, in an effort to make the work affordable.
The drawings I use for my own work are meant to convey to clients how a piece will look and function, as well as provide the basic information I need to build it.
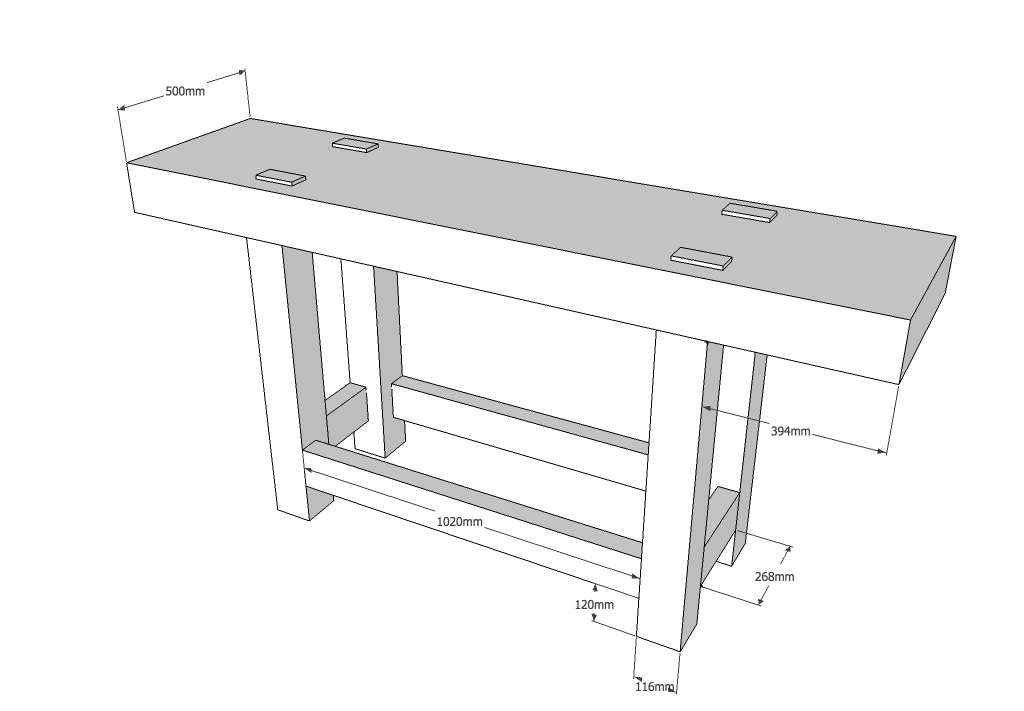
Drawing for a recent commission. This is the original drawing I showed the client, explaining that I might make changes to dimensions if the mock-up indicated that they were warranted for comfort’s sake. In the end, I made the seat a few inches deeper — night and day in terms of comfort — and changed a few other details, some of them scribbled on the drawing as I worked. I also omitted the back stretcher once I realized that the T-bridle joints at the front provided excellent racking resistance.The completed benchEven my bare-bones drawings are head and shoulders above those I often got from my employers in the past, such as this delight:
My employer’s drawing for a three-part dining table to be built in ash, circa 1986. The idea was that the table could be used as one large piece, a square and two half-circles, or a square and a circle. The legs and top(s) had to fit together just-so, in every configuration.Of course, when you’re building something from an article in a magazine you don’t have the luxury of checking in with the person who designed it as you work your way through the structure. Having made a couple of pieces from articles in magazines over the years (a benchtop bench and some leaded glass panels), I can say I’ve found that even in simple cases such as these, I’ve wished there were more detail. Each time I was stumped, I stopped, thought through the logic of the process, and moved ahead when I thought I had it figured out. I have had to redo a few parts — a drag that might have been unnecessary, had the articles contained more detail. But I chalk such things up to learning, whether a new skill (such as making leaded glass panels) or how to use unfamiliar hardware (as in the benchtop bench). Some readers, such as my friend Bill Heidt, construct a piece on the screen before digging into material in the shop; this is another way to work through the ins and outs of a build beyond an article’s text and illustrations.
So while the basic information should be in the article, it may require clarification. Apparently one or two aspects of the recently published sideboard in Popular Woodworking have had some readers scratching their heads, for which I apologize. Thanks to Megan Fitzpatrick, you can find SketchUp plans with additional information here.–Nancy R. Hiller, author of Making Things Work
*In the shops where I’ve worked, every step of the build is adjusted for the parts that have been made. Flexibility is part of the m.o. You start with a few basic dimensions on a drawing, but the rest are based on direct measurement of the piece in progress.


![IMG_2474[1]](https://blog.lostartpress.com/wp-content/uploads/2017/11/img_24741-e1510069460550.jpg)
![IMG_2468[1]](https://blog.lostartpress.com/wp-content/uploads/2017/11/img_24681.jpg)
![IMG_2473[1]](https://blog.lostartpress.com/wp-content/uploads/2017/11/img_24731.jpg)