This is an excerpt from “Hands Employed Aright: The Furniture Making of Jonathan Fisher (1768-1847)” by Joshua A. Klein.
Fisher’s biographers have dealt extensively with his academic interests, especially mathematics and science. The archives at the Fisher House are full of notebooks of geometry lessons, surveying formulas and navigational methods from his studies at Harvard. Notebooks from his time in Blue Hill also show elaborate calculations and scale drawings – even for simple projects such as outbuildings.

His fascination with natural science is evident from weather records, drawings and notes about animals he studied, and the almost-clinical observations he made in his journal about his ailments and physical condition. One of the most vivid examples of his analytical mind can be seen in a journal entry from Nov. 29, 1824, only days after the death of his daughter, Sally. Here he wrote, “In the evening while calm in mind and not then thinking particularly of my deceased daughter, a great heat came over my breast, which followed with restlessness; then a prostration of strength, or nervous debility and faintness, from which I was gradually restored within 2 or 3 hours. A sympathy, I suppose, between the nervous system and the mind, but in a manner to me inexplicable; something similar but less in degree I experienced several times after the death of my eldest son. We are fearfully and wonderfully made.”

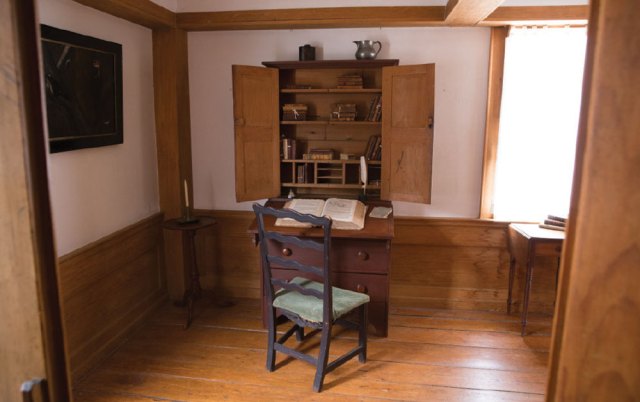
His time alone in his study was sacred. This wood-paneled room, opposite the front parlor, was where Fisher spent much of his time. Most mornings he sat near the fireplace working on his Hebrew or on sermons.
His daughter, Nancy, recorded once how his “little room [was] consecrated to learning, Devotion and perhaps sometimes to the Muses.” Fisher commended academic pursuit not only to his own children but to the community he ministered. His involvement was critical in bringing about the Blue Hill Library and Blue Hill Academy. He also served as a trustee and regularly gave money to Bangor Theological Seminary, “the palladium of truth in this region.” He wrote several books and broadsides, the most ambitious of which, was his 350-page self-published, “Scripture Animals” (1834), which contained descriptions of every animal recorded in the Bible, accompanied by a woodcut that he engraved. Besides his native English, he was proficient (or at least moderately so) in several languages: Latin, French, Hebrew, Greek, Aramaic and Malay, as well as that of the local Passamaquoddy tribe. He preached all throughout Massachusetts and Maine, and devoured newspapers and books, saving or transcribing interesting anecdotes or recipes for future use.

His preaching tone was heavily influenced by his academic training and was described as more instructive than inspired. An excerpt from his conclusion to “Scripture Animals” illustrates this well. In defending the good character of God despite the existence of predation in the natural world, he writes, “To illustrate the subject, I will suppose that by means of the several kinds of carnivorous animals, three animals subsist where otherwise but two could have subsisted. I will suppose that each of these animals enjoys as much as either would have done; if there had been but two; in this case the enjoyment is as three to two. I will next suppose the comparative enjoyment of animals to be, on an average, nine degrees, for one degree of suffering; this gives eight degrees of positive enjoyment for each animal. If there are three animals for two, there are eight degrees of enjoyment for twenty-four. Let us suppose the suffering under this economy diminished one third, which I think probable, then in the case of three animals the degrees of suffering will be but two, and the degrees of positive enjoyment by means of rapacious animals twenty-five, instead of sixteen. Is it not then real evidence of benevolence in God, that there are rapacious animals?”
Winsomeness was not his forte.
— Meghan B.


