The title of a book is serious business. For me, the title is not about marketing. Instead, it is a sincere expression on every page of what the book is about.
When we work with our authors, we ask them to propose a book title before they sign the contract or write a single word of the manuscript. Few of these proposed titles become the title of the completed work. Sometimes the title changes because the book’s content changes course. Sometimes the title changes because the proposed title is so generic – “About Wood” – that the title might as well be, uh, “About Wood.” But having a title in mind helps you focus as you write.
All of the books I’ve written were born with different names (except for “Campaign Furniture”). I keep a long list of ideas for book titles on my phone and append it every week as I take long walks through Covington’s neighborhoods.
For the last few months, I’ve been looking for a better title for “The Stick Chair Book.” It’s not a bad title, but it doesn’t capture the tone of the chapters I’ve been writing. Here are some of the titles I’ve jotted down. Note that I allow even crap-tacular titles onto this list because they might lead me to something useful.
Where the Chairs Have no Names
Irregular Chairs
First Chair
Musical Chairs
Armchair Critic
Be Seated
The Easy Chair
All of these titles suck donkey eggs. But creating and tending to this list keeps my brain working on the problem, even when I’m asleep, showering or writing blog entries to fill an empty Sunday on the calendar.
The work always pays off. A couple weeks ago as I was answering an email or blowing my nose, I thought: My book should be called “Guerrilla Chairmaking.” And I scrambled for my phone to add this to my list of ideas (I’ve lost too many ideas by not writing things down immediately).
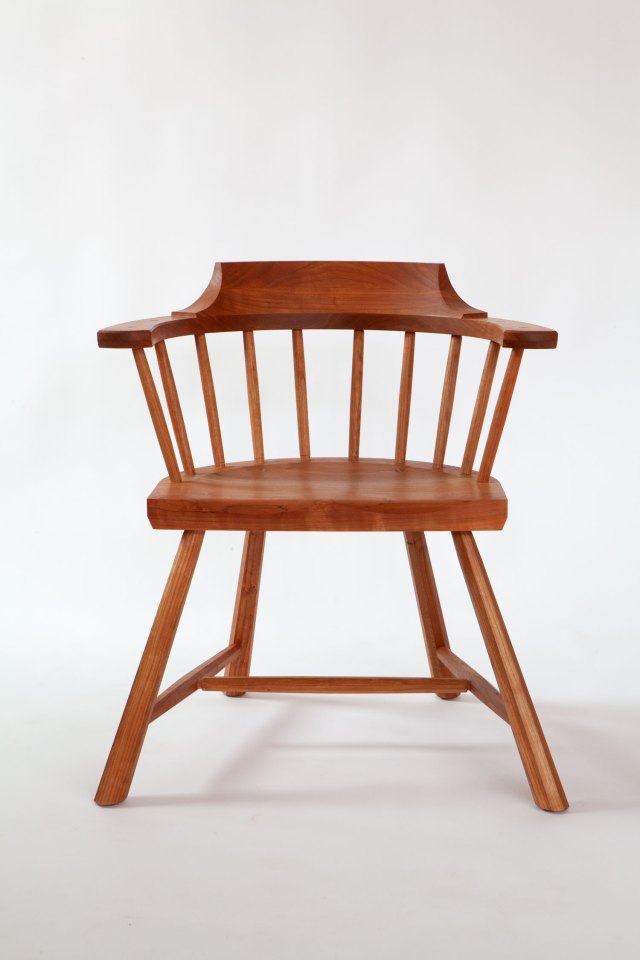
You might hate the title. That’s OK. But it’s the right title. I came around to it as I was building the cherry lowback chairs shown in this blog entry. This chair is built primarily using a jack plane, a block plane and a band saw. That’s about 90 percent of the work. Yeah, you need a couple specialty tools to saddle the seat. But really, you can skip those if you want. The wood is kiln-dried stuff from the lumberyard. No steambending. No shaving horse. No drawknife. No riving green wood.
Really, this book is about making chairs without proper chairmaking tools, chairmaking training or chairmaking techniques. And the chairs aren’t half bad.
It’s also not a rejection of proper chairmaking tools, techniques or training. It’s merely a stepping stone for those of us who want or need to make chairs but don’t have the skills, tools or access to materials to create the fantastic stuff coming out of other professional chairmakers’ shops.
It’s a way to get started with what you have on hand. And to do a good job.
Plus, with the title “Guerrilla Chairmaking,” we might be able to show some gorillas making chairs in the book for fun.
— Christopher Schwarz
Read other posts from the “Making Book” series here.
Like this:
Like Loading...