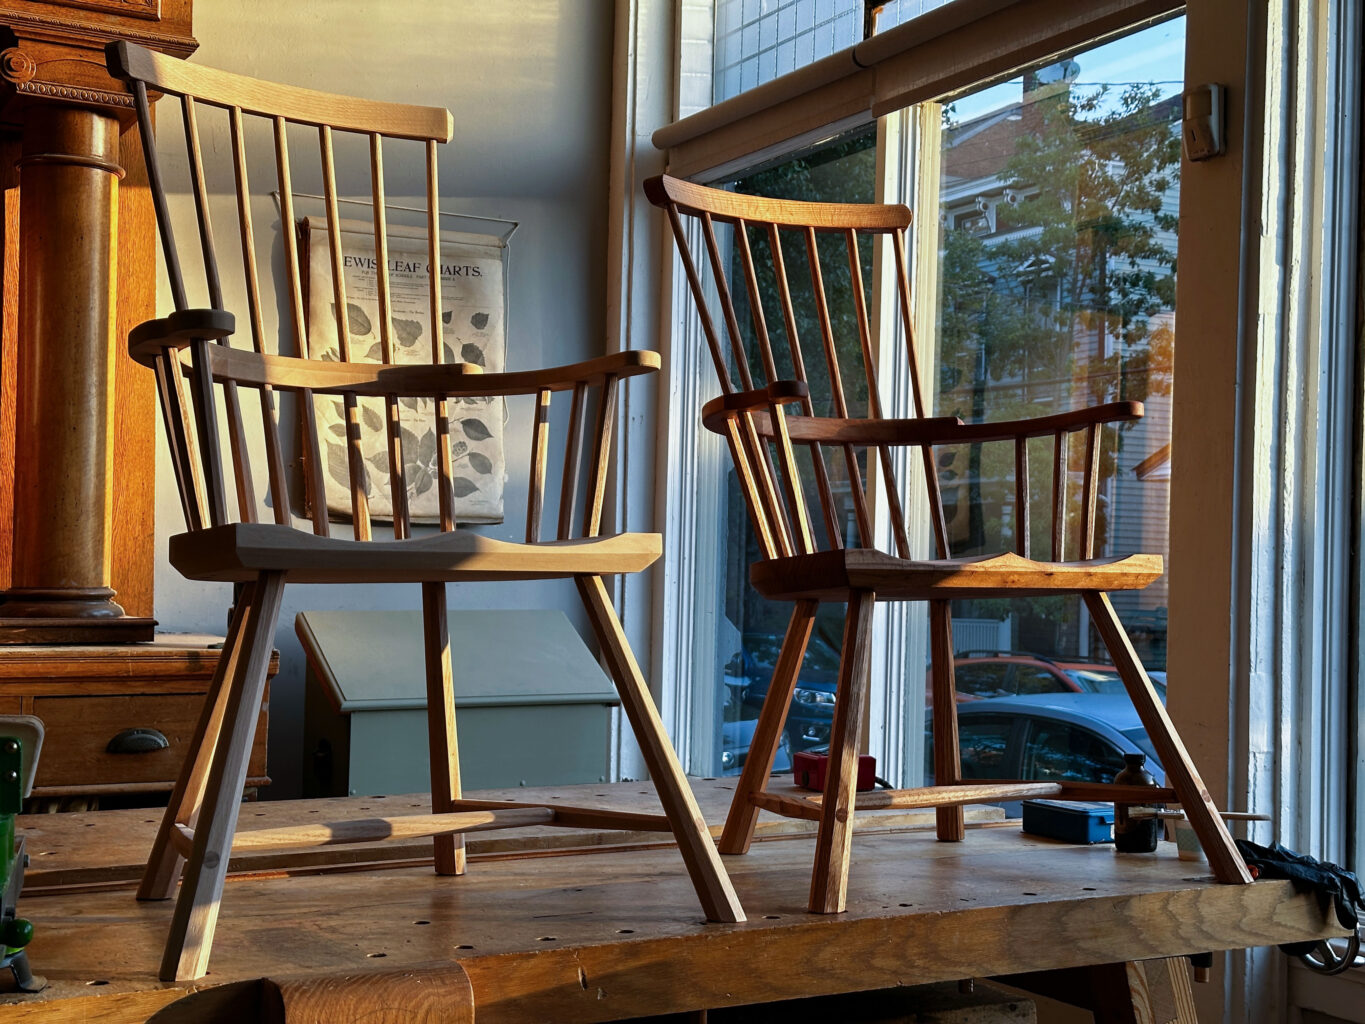
Two new stick chairs. The one on the left was built by a student. The one on the right is mine.
I’ve never shown my work in a gallery. I’ve been asked a few times, but my problem is this: I don’t want to give up 50 percent of the sales price to the gallery. I’d rather skip the glory of cheese and boxed wine in plastic cups and sell my work direct.
But gallery shows are fun. And you get to see a lot of interesting work. So we are going to put on our own show on Saturday, Nov. 23, at our Willard Street storefront. And it’s going to be a little different.
The Chair Show will show my chairmaking arc (and my influences) over a 21-year span. There will be an original John Brown Cardigan chair, a Chris Williams four-stick Welsh stick chair, plus an original Welsh antique I bought from chairmaker John Porritt.
I’ll be showing my first chair, plus some other waypoints on the journey – my first lowback, the chair from “The Anarchist’s Design Book” and some prototypes.
Plus, I’ll have some new chairs to sell. These will be priced at the low end of my typical range.
Here’s the fun part: You’ll be able to touch, study and measure all of them. And you’ll be able to sit in all of them (with one exception – the Welsh antique needs a repair).
Like all our Open Days, we’ll have our complete line of books and tools here, plus blemished books for sale and some tools, too. Megan will be on hand to sign her new book “Dutch Tool Chests.” And Wally will accept your petting. The show will be from 10 a.m. to 5 p.m. on Nov. 23 at 837 Willard St. in Covington, Kentucky 41011.
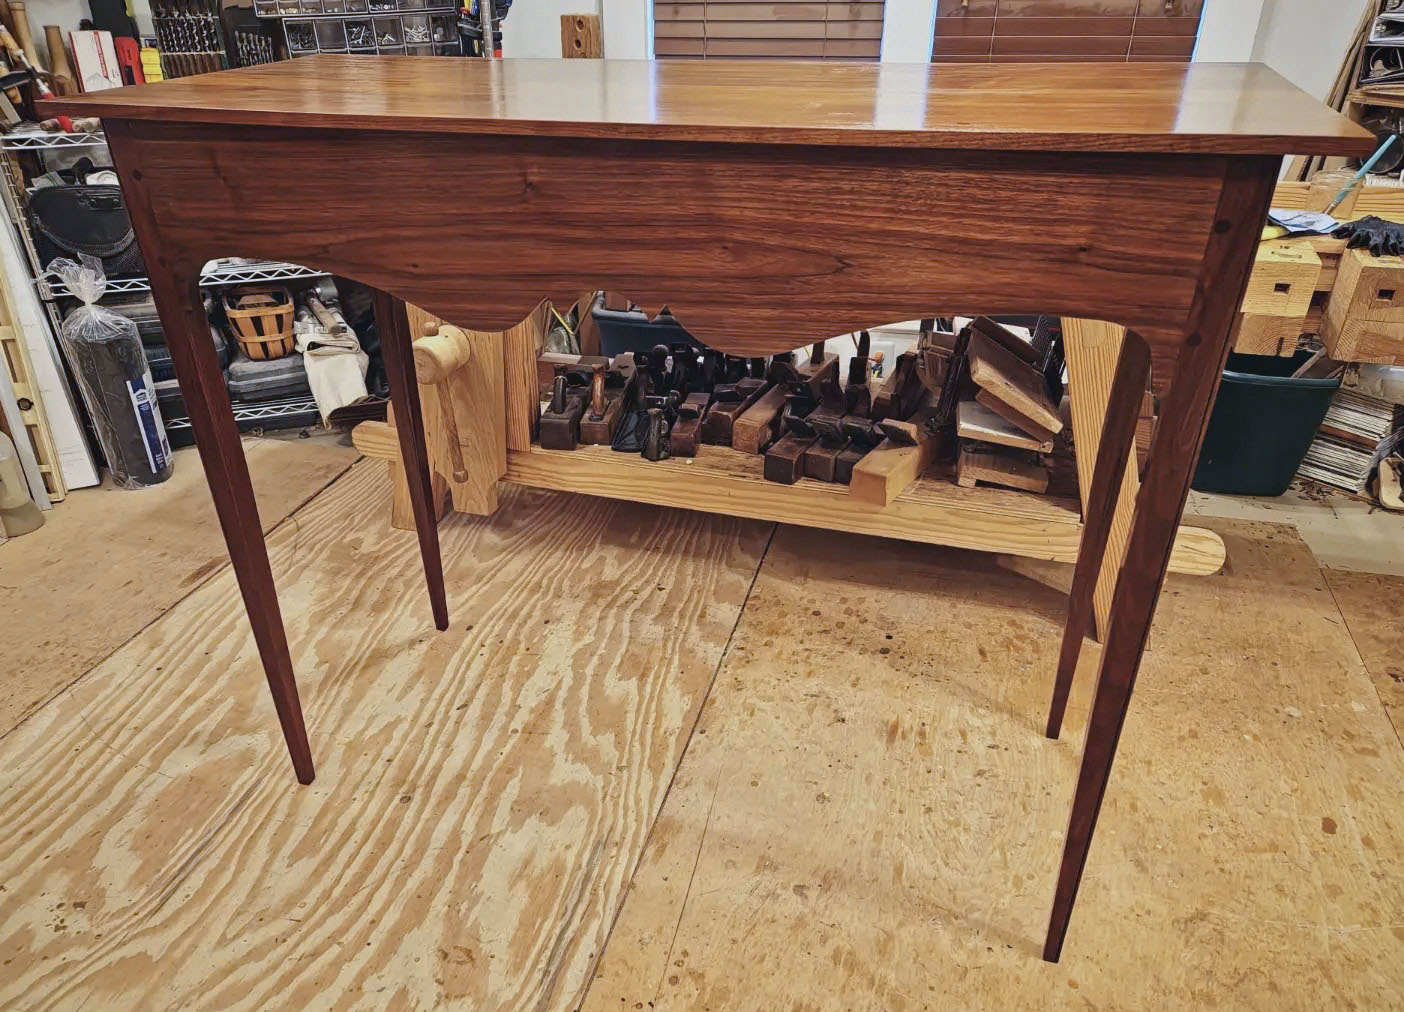
We’ve added a new class: Build an 18th-century Southern Table with Jerome Bias – it’s Feb. 17-21, 2025, in our Covington, Kentucky, shop. You can read more about it (and register now) at our ticketing site – but if you’re interested, don’t dally. Space is limited!
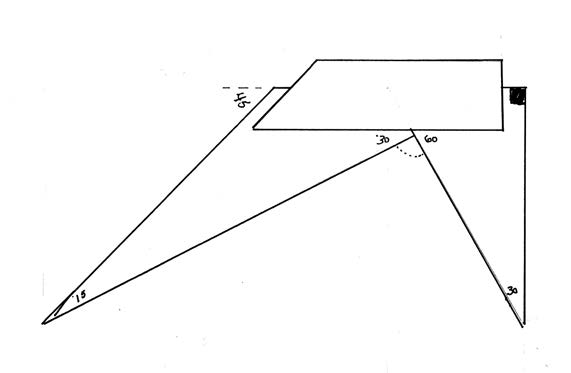
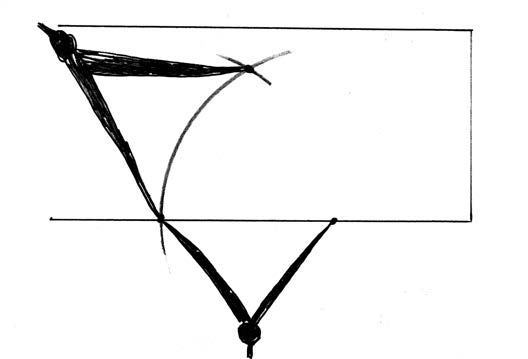
This is an excerpt from “Euclid’s Door” by Geo. R Walker and Jim Toplin. The book teaches how to make the tools from “By Hand and Eye.” At this point in chapter 7, a miter square that has a 15° tip is being constructed. This fragile corner of the tool has to be taken into consideration when choosing its placement on the grain of the board.
Fig. 7.13 The triangle on the left with its thin 15° tip poses a unique layout challenge
Many geometric layouts begin with just a given line. This has real practical value. It means we can construct the layout from just a small piece of the overall picture. This construction is a little more complicated than what we’ve done so far, so I suggest you work through this sequence on paper to get an understanding of it.
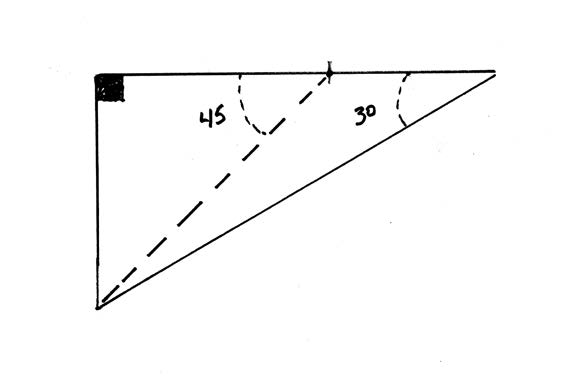
Fig. 7.14 The blade we eventually end up with has a clipped corner so we can have a 45° reference edge.
Case in point is this second triangle from our multi square, Fig. 7.13. The sharp blade that juts out to the left begins life as a 30:60:90 triangle that gets altered to include a 45° reference on one end, Fig. 7.14.
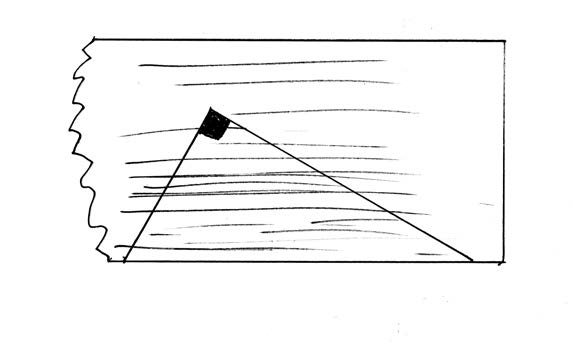
But that leaves us with a fragile, narrow point. We must lay out our triangle so that the hypotenuse is aligned with the long grain on our blank, Fig. 7.15.
Fig. 7.15 This layout is a challenge because our right angle is located up in the middle of the blade material. The only line we can know for certain is our hypotenuse located on the bottom edge.
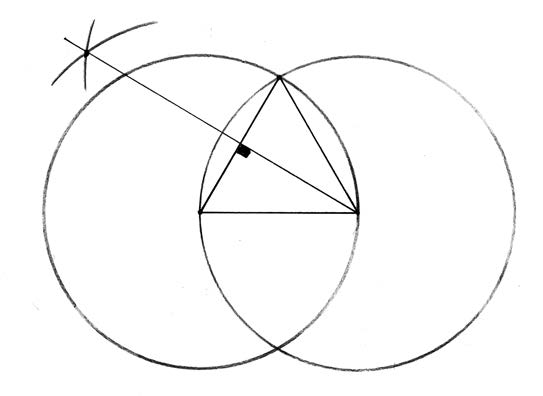
So we need to lay out our triangle, but all we have to start our construction is the line that will be our hypotenuse. Before we proceed, let’s step back and take a look at a different geometric layout to get an understanding of how we get there. Here’s the construction we’ll base this on, Fig. 7.16.
Fig. 7.16 We’re going to use a few bits and pieces from this construction to reach our destination.
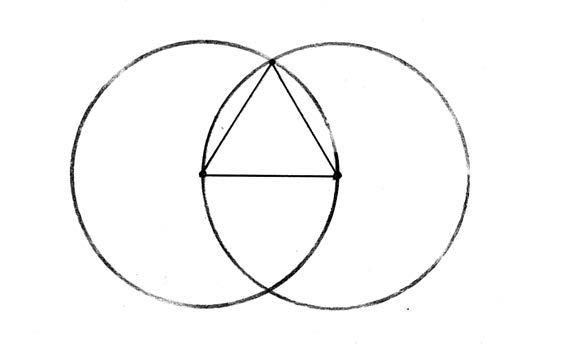
Let’s break it down into smaller pieces. We begin with Euclid’s first proposition, which is how to construct an equilateral triangle from a given line. Start by using the ends of a line to set the compass span and, using the end of the line as anchor points, draw two identical overlapping circles. Connect the top intersection where the circles overlap. Take note that the lines that connect the intersections also happen to share the radius of both circles. You just created a triangle with all sides equal which means all three corners are 60°, Fig. 7.17.
Fig. 7.17 The internal angles of all triangles always add up to 180°, so if our sides are equal, each corner must be 60°.
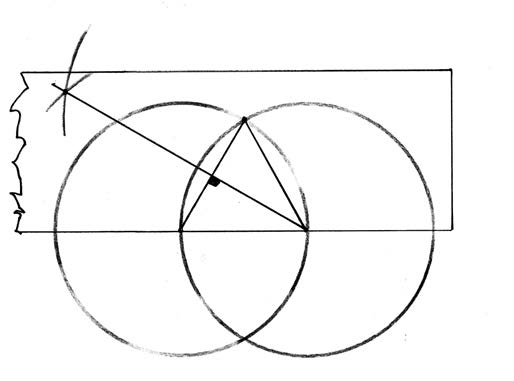
If you bisect this triangle, you get a pair of back-to-back 30:60:90 triangles, Fig. 7.18. It helps to see what you are after by superimposing this construction over our blade stock to see how it might apply, Fig. 7.19.
Fig. 7.18 (left) Note the hypotenuses of these two new triangles are facing out. Fig. 7.19 (right) In practice though, we don’t execute the entire construction, just a piece of it. It’s not really practical to draw this entire layout because much of it is out in space beyond our blade blank.
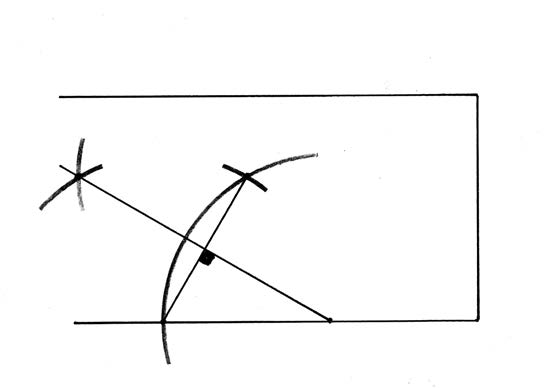
This is quite common in layouts at the bench. We don’t need to scribe every line, just the important ones that get us our result. Let the bottom edge of your blank be the hypotenuse of our triangle. Set a compass to span the length of your hypotenuse and strike an upward arc from the lower edge. Leave the compass at the same setting and anchor it where the arc touches the bottom of the board then strike a second mark across the arc, Fig. 7.20.
Fig. 7.20 The first arc is a portion of one of those overlapping circles. That’s all we need to execute our layout. The second mark defines the second side of the equilateral triangle.
Strike a line connecting these points then bisect this chord on one end of the triangle. Now you’ve created our 30:60:90 with the correct grain orientation, Fig. 7.21.
Fig. 7.21 Go back and compare this with our first layout. Does it come together for you?
We’ll use this construction to create our second blade with the proper grain orientation.
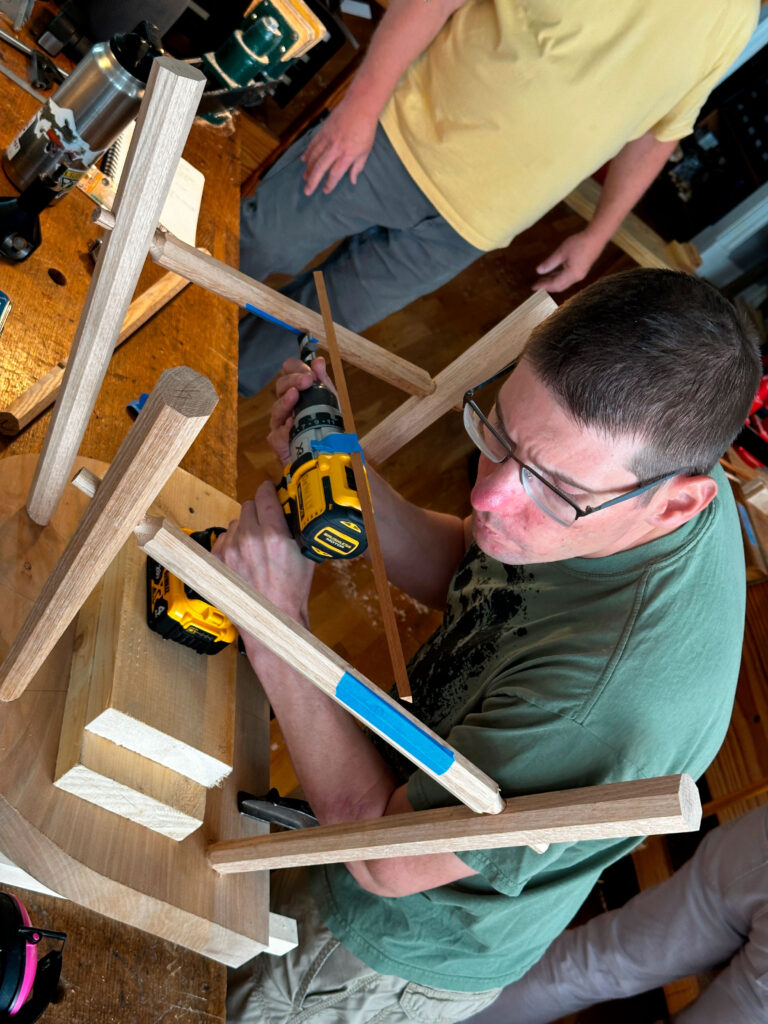
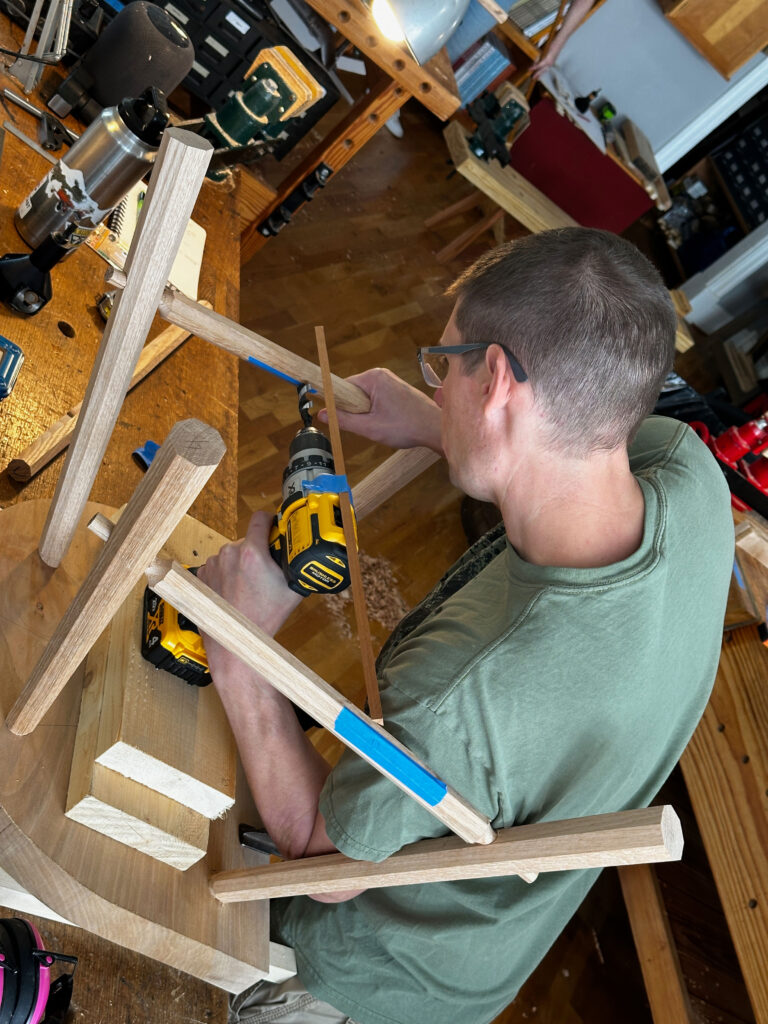
Steve lines up the stick (taped to the drill) with the mortise location on the side stretcher.
I cut dovetails pretty much the exact same way I did 20 years ago. Same layout, same sawing, same chiseling, same fitting. But when it comes to my chairmaking, things seem to change every day.
I’ve been building stick chairs since 2003 (and frame chairs since 1997). So it’s not like I am new to the chairmaking craft. But for some reason, I am constantly finding new and usually small ways to make things easier.
When I wrote “The Stick Chair Book,” I thought I was pretty much settled in how I make my chairs. But by the time we had to reorder the second printing, I decided to revise the book. Not in major ways, but in many little minor ways. And I added a lot of little shortcuts I had discovered.
Now, about a year after releasing the revised edition of “The Stick Chair Book,” I’d like to revise it again for the next printing. Again, nothing major, just small things here and there that make it easier to drill and assemble things.
Even today, I came up with a stupid little trick that really helped. Here it is. When drilling the mortises for the stretchers, tape a stick or skewer or chopstick to the centerline seam of your drill. It helps immeasurably in lining up the drill between the mortises in the legs and between the mortises in the side stretchers.
I’ve seen lots of tricks that use rubber bands or lasers. But none is as simple as taping a scrap to the drill.
When the scrap is aligned with both mortises, Steve drills the mortise in the side stretcher.
As a chairmaker and author, I know I’m not alone in the way I feel about my past writings. Many other chairmakers are constantly finding new ways to make the process a little easier.
Why have we not created the “Unified Method of All Chairmaking?” Because there are at least 100 ways to make a chair. And 1,000 tricks that go with each method.
This is one of the things I love about woodworking – the constant discovery. But it can be frustrating both as an author and a reader.
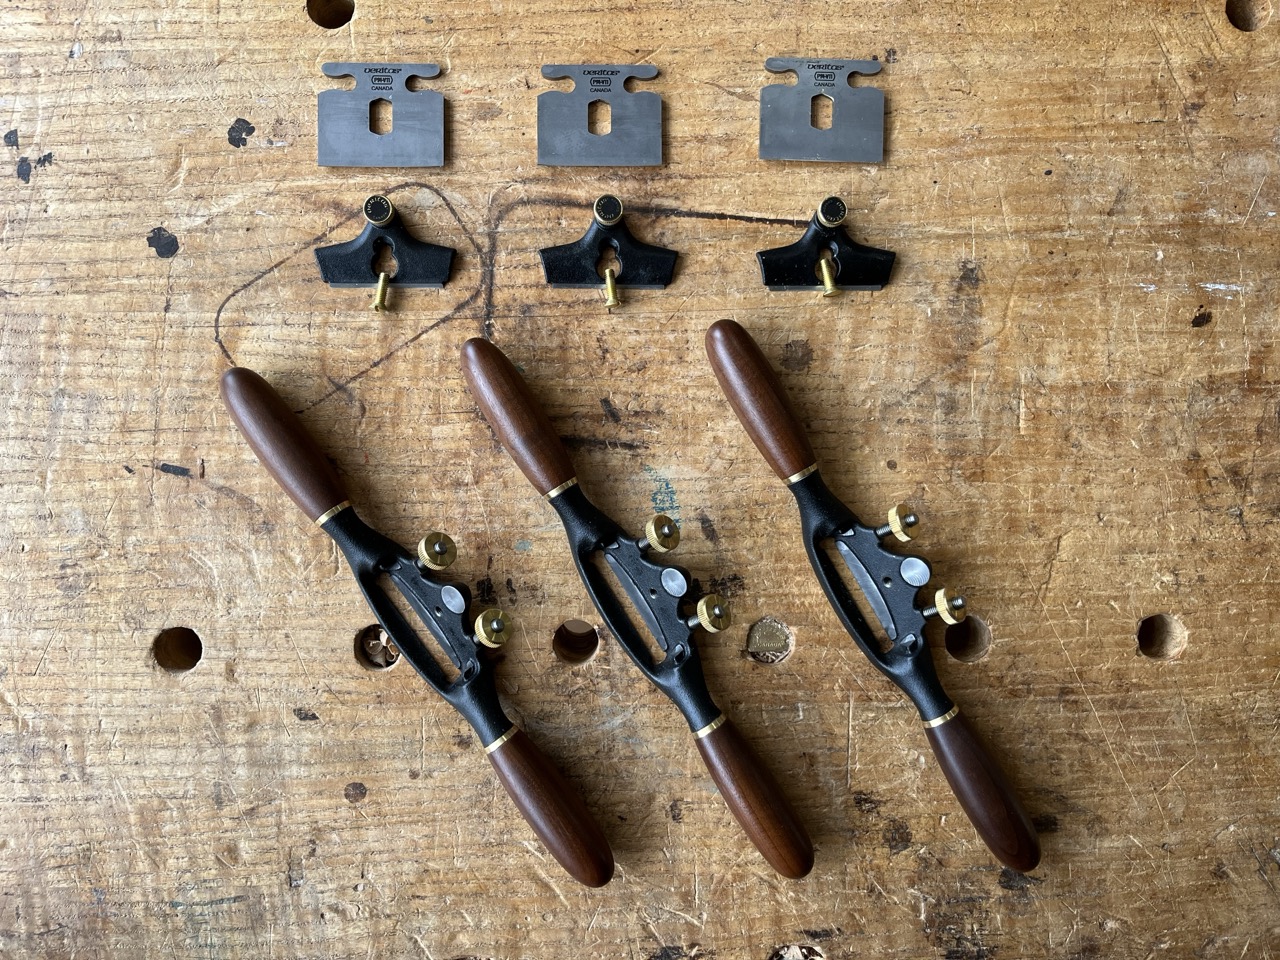
Last week I walked into work to a brand-new Veritas spokeshave sitting on my bench. Chris had ordered several for students and kindly ordered an extra for me. (I’m spoiled, I know.)
Grateful, I took a picture of my new tool and posted it to my social media account, not thinking much of it.
The following day I received a comment: “Would you mind posting a video of how you file the throat (if you follow Chris’s approach)?”
Huh? File a throat?? This was news to me, but according to Chris, this is common practice when breaking in a new spokeshave.
He explained that in chairmaking, sometimes cuts that are ranker than the spokeshave will allow are needed. The solution? File the throat, just a hair or two to allow a thicker shaving to pass through.
So as asked, we created a video demonstrating the process. Next week’s chairmaking class will be the first to break the new spokeshaves in.
Well, back to work for me. I have two more spokeshaves to file.