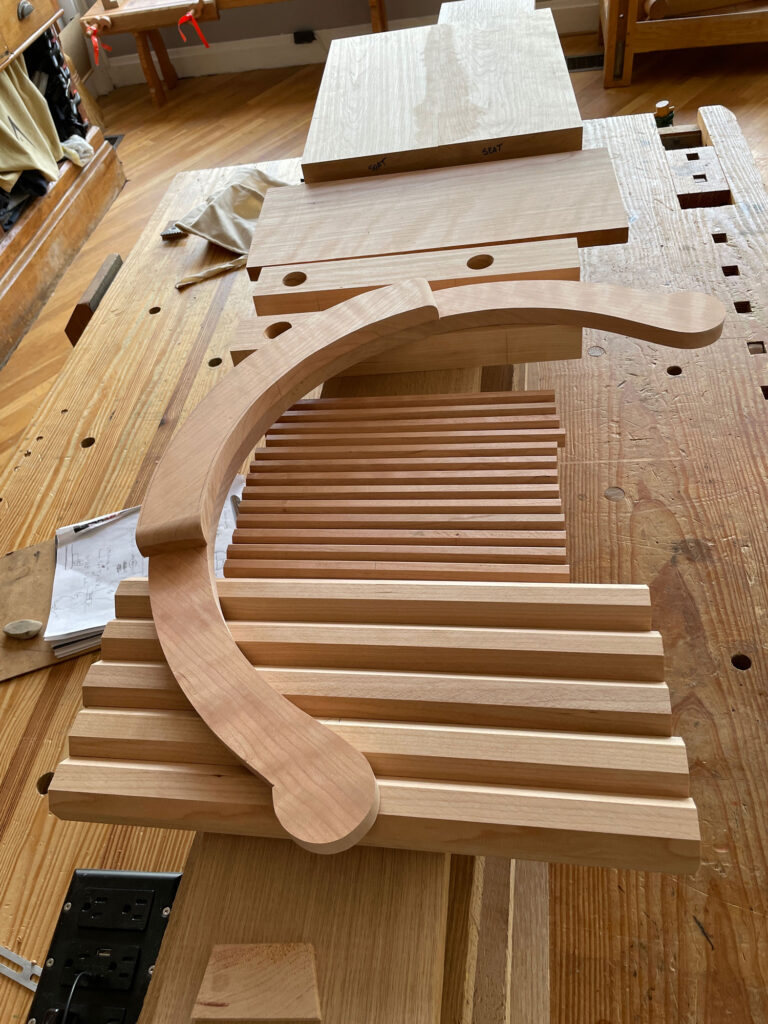
This week I am building a Hobbit-y chair for a customer in black cherry instead of white oak. Is cherry strong enough for a stick chair such as this? Of course. How do I know? I added 1/8” in diameter and thickness to some key components. So now I can sleep without worry.
If the above paragraph makes little sense, then you haven’t read my chapter on wood in “The Stick Chair Book.” No, this isn’t an advertisement to twist your arm into buying the book. Instead, I hope to help you think about the strength of wood in a different way.
First, I think we can agree that when we increase the thickness of a tenon, that it will be stronger. Right? So let’s say we have a 1/2”-thick tenon and we decide to double its thickness to 1”. Because we have doubled the thickness, that should double its strength. Right?
Wrong.
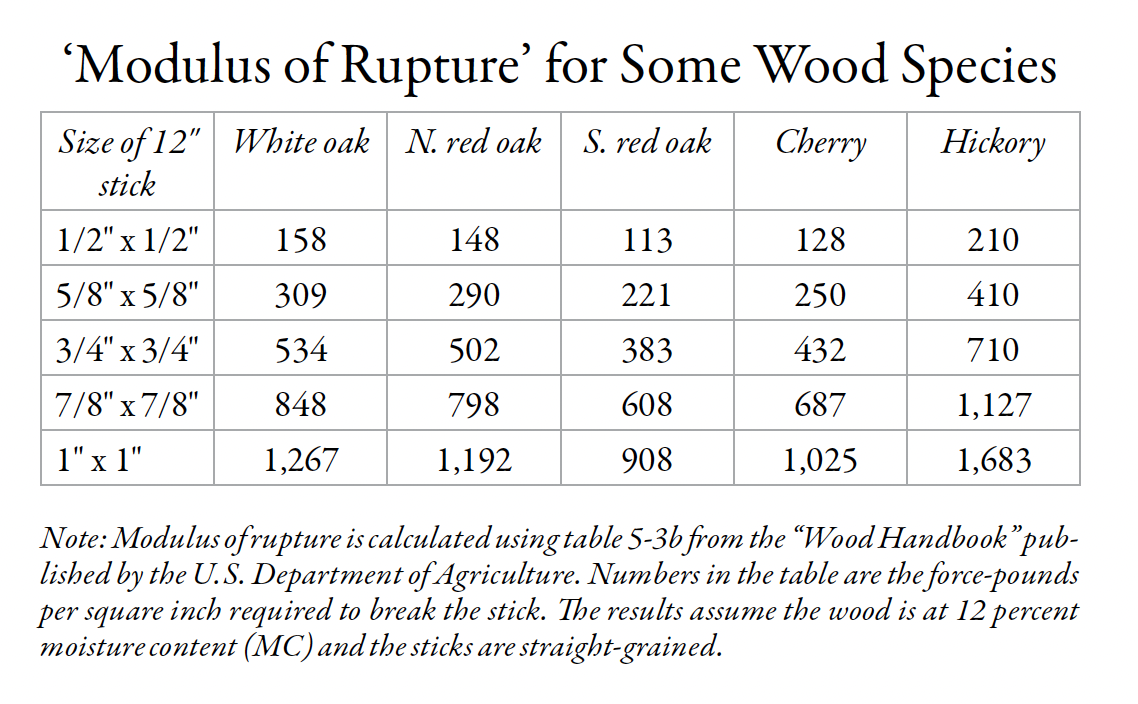
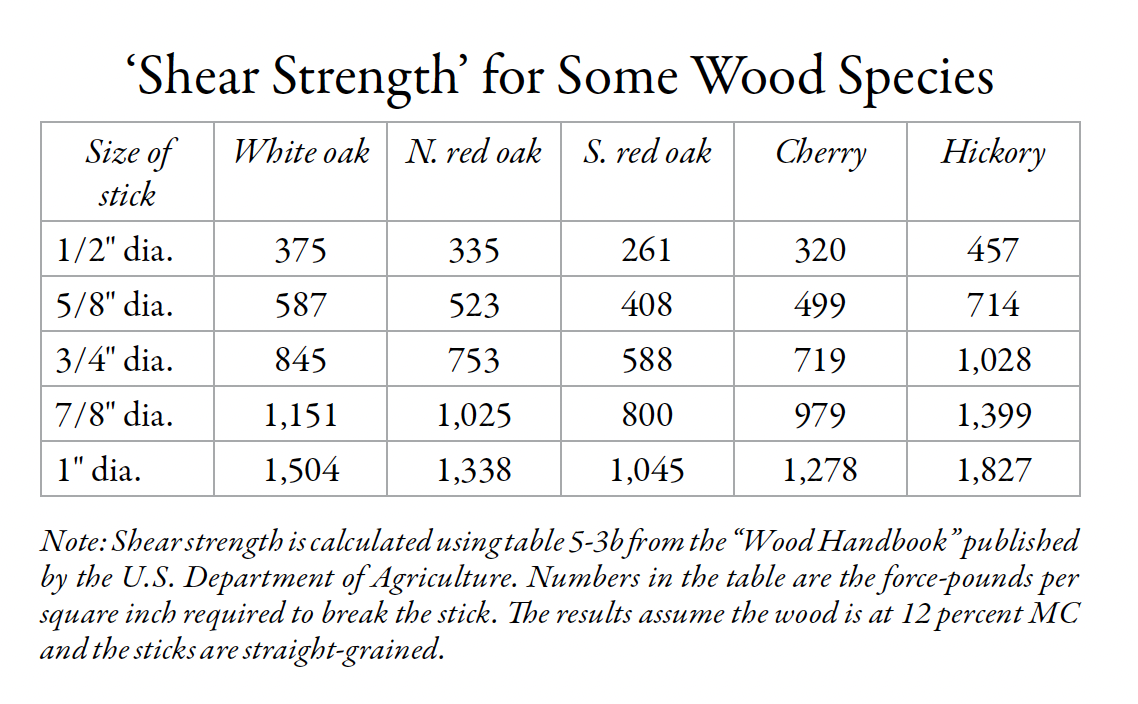
When we double the thickness of that 1/2” tenon, it can increase the strength of the component by four-fold or eight-fold. How much additional strength you get depends on the component – whether you are testing its “modulus of rupture” or its “shear strength” (this is covered in detail in the book – this is still not a commercial, I promise!).
The bottom line is this: small increases in the size of components can increase their strength dramatically. This is hugely important when building chairs, stools, benches, workbenches or any object that will see abuse.
Let’s get back to this Hobbit-y chair for a moment. Cherry is weaker than oak. But if I increase the diameter of the leg tenons or the thickness of the seat by a mere 1/8”, I will more than make up for the difference between the two species. And the 1/8” added thickness isn’t really noticeable to the naked eye.
Take a look at these charts for some details.
These formulas are not my doing. They are created using the formulas from the “Wood Handbook” from the U.S. Department of Agriculture (a free download). For me, they help me design furniture that is strong without being bulky. I know that I can increase the thickness of a tenon by 1/8” and get a disproportionate increase in strength. I can do the math to prove it to myself.
Or, as I discussed before, I can prove it with a sledgehammer.
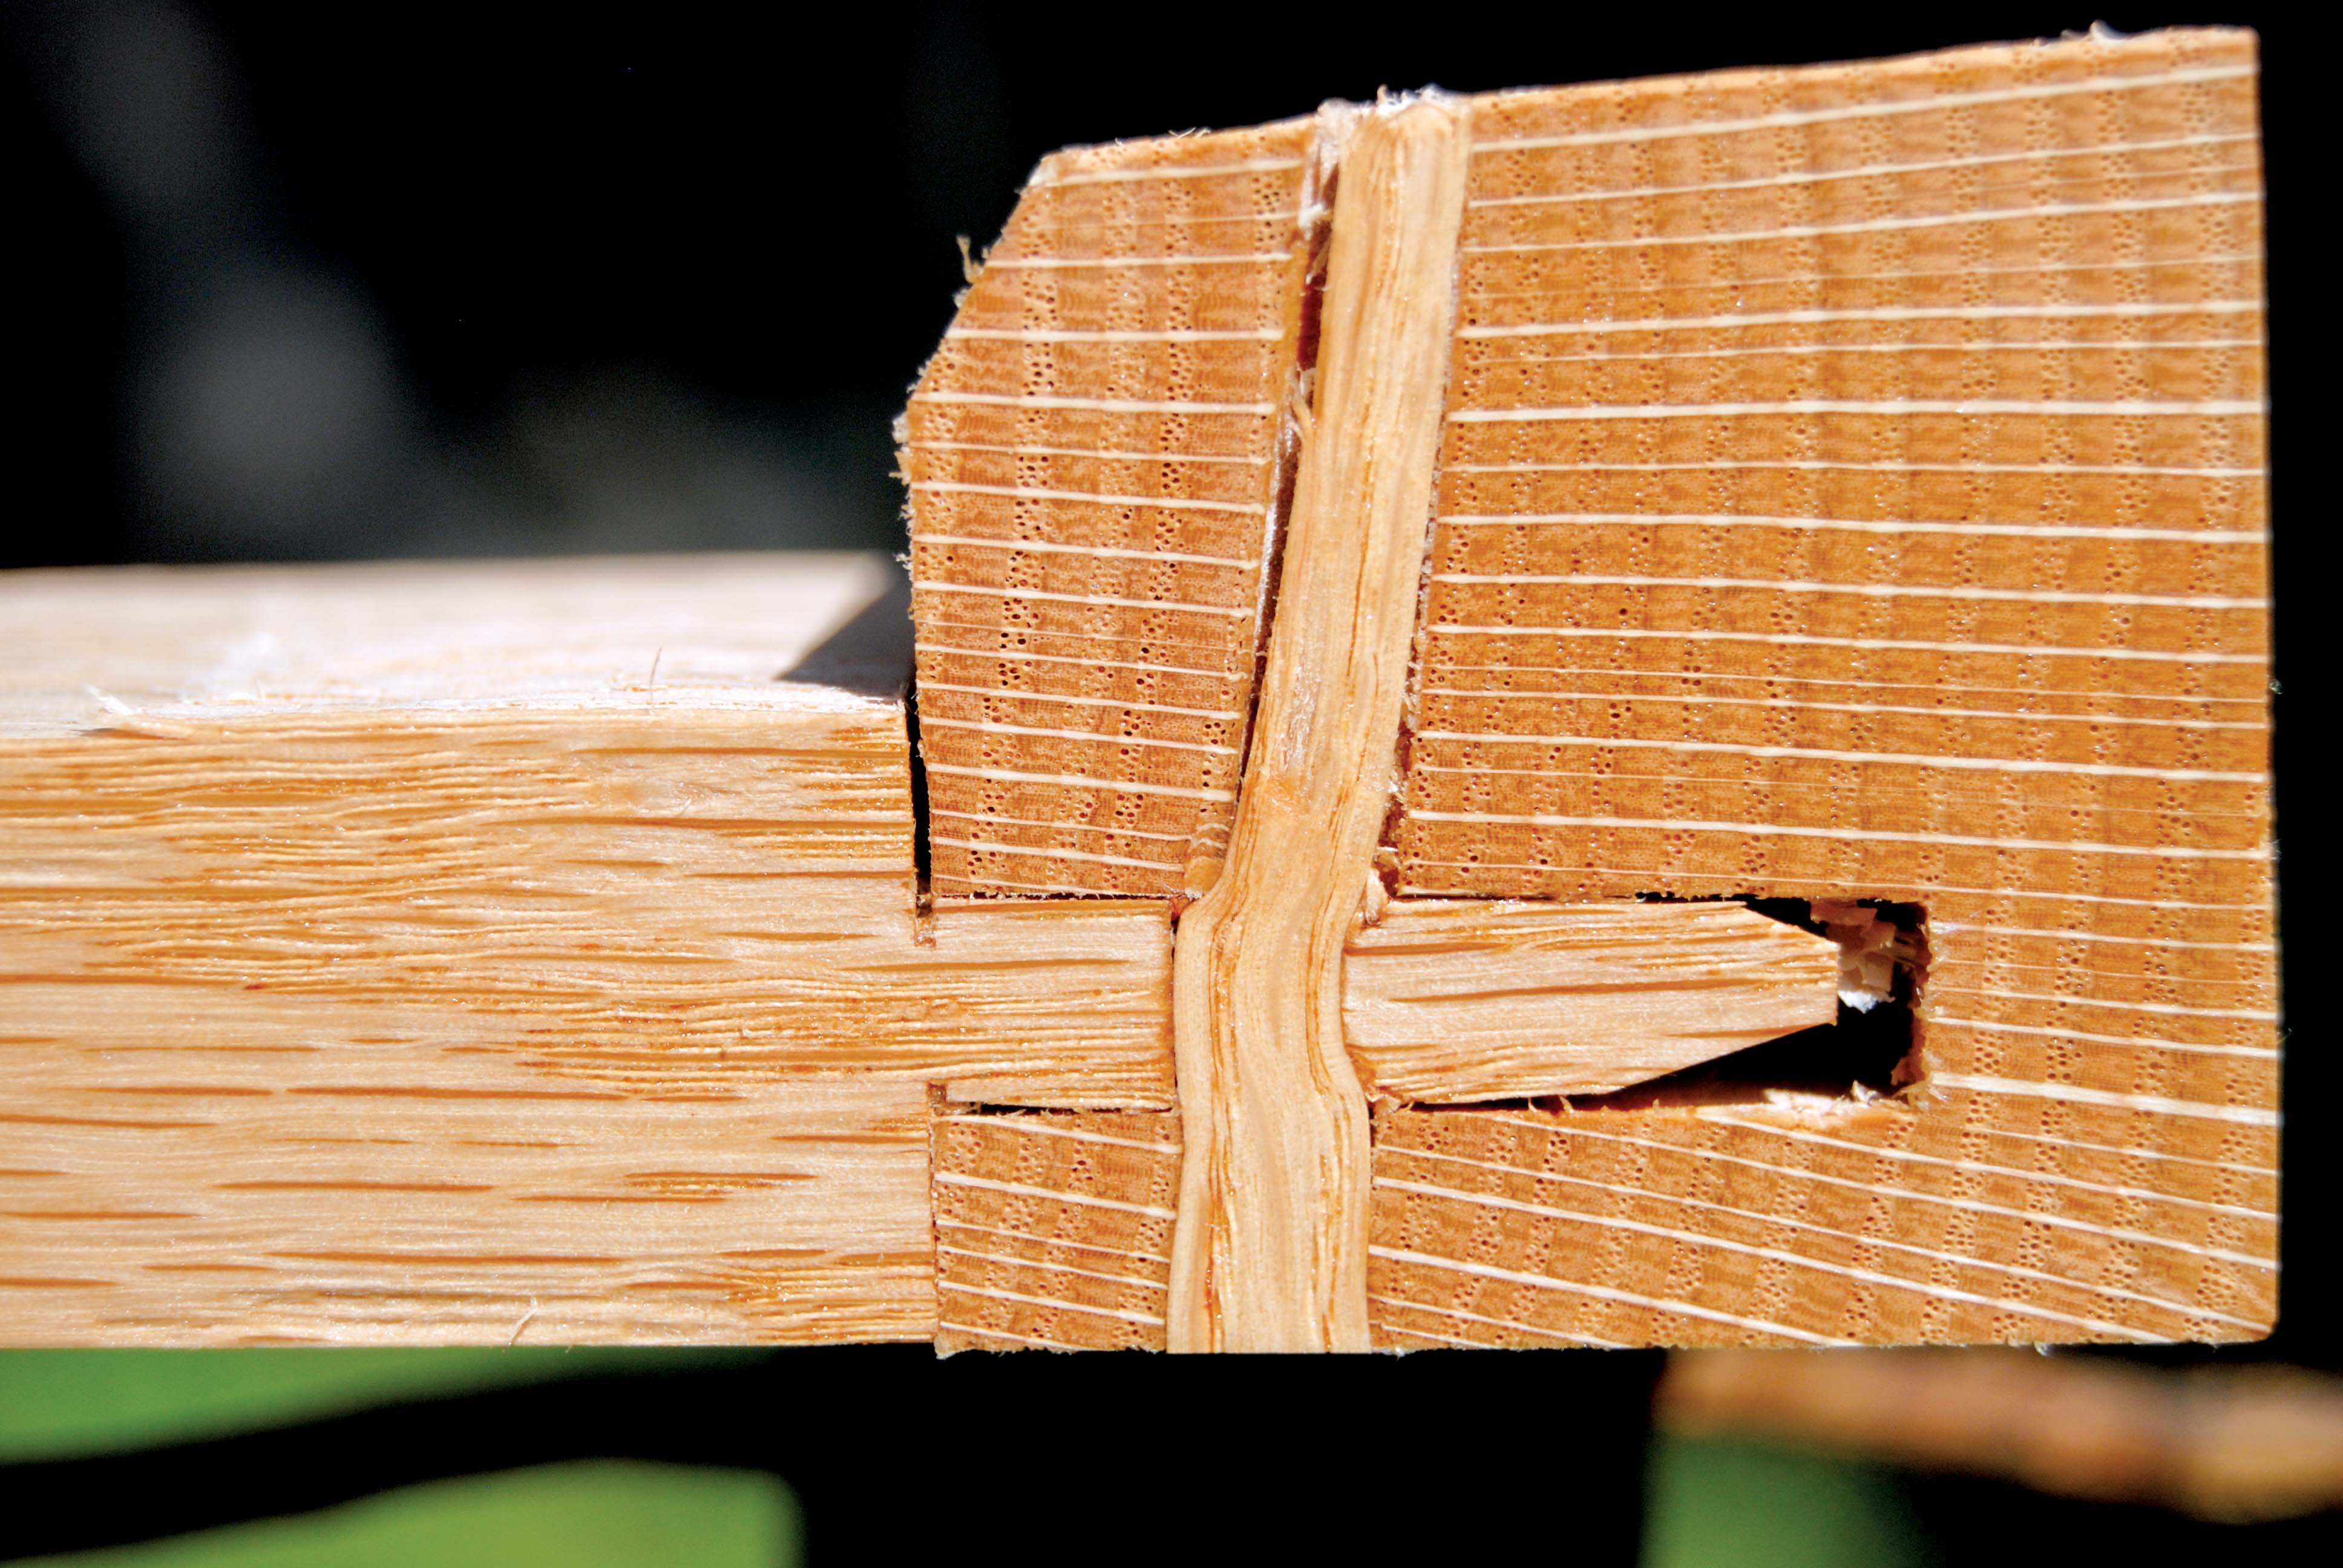
Fig. 6.8 Here is the pin, snaking its way through the offset holes. This joint is a testament to the great strength of oak – that a thin piece of hardwood like this can hold these joints together for centuries. It pulls the tenon into the mortise and never lets it go.
When people ask what sort of books we publish at Lost Art Press, my answer is simple: Difficult books.
Not all of our books experience troubled gestation periods, but many do. “Make a Joint Stool from a Tree,” was one of the most trying. In fact, it probably wouldn’t have been published if it weren’t for Peter Follansbee‘s unending patience/pigheadedness.
Peter and Jennie Alexander had been working on the manuscript off and on for years. When Lost Art Press offered to publish it, Peter went into high gear to get it completed. And after months of work, we had a finished book that was ready to go to the printer. But there was one big obstacle: Getting Jennie to sign off on the text.
After working with Jennie for many years, I concluded that she was more interested in continuing her research instead of publishing the results. We sent her printed proofs of the finished book, but she said she couldn’t read them easily. So Peter did something extraordinary. Over two evenings, Peter read every word of the book to Jennie over the phone. He took careful notes on what she wanted changed.
And, miracle of miracles, Jennie signed off on the work.
And thank goodness. “Make a Joint Stool from a Tree” is an eye-opening look at how early joinery was performed – and it’s not like how we do it in modern shops today. The book weaves historical research and practical work together with photos and drawings (made by Roy Underhill’s daughter, Eleanor!) to present a clear and complete picture.
The following is excerpted from “Make a Joint Stool from a Tree,” by Jennie Alexander and Peter Follansbee. This book is in its second printing, and we’ve updated the paper stock to a matte coated stock that prints more crisply, plus it’s now a casebound hardcover format and is printed at a different plant (the old one went out of business). As a result of these changes, we’ve lowered the price significantly.
— Christopher Schwarz
About Drawboring
Fig. 6.9 The thinnest awl in the shop is best for this. It can get right in against the circumference and transfer it accurately to the tenon’s face.
Now we come to the most exciting part of the work. Drawboring is the heart of the matter – get it right and your stool should last hundreds of years. Simply put, drawboring is an intentional misalignment of the holes bored in the mortises and tenons. These holes are bored through each component separately, and they are offset so that a tapered pin driven into them will pull the tenoned rail up tight against the mortised stile. We know this technique is a period practice because we have seen it in surviving works, sometimes in disassembled pieces, or in those worn down by misuse. Fig. 6.10 is a pin removed during restoration from a New England joined chest made about 1670-1690, clearly showing the kink in the pin resulting from snaking its way through the offset holes. In addition to this sort of evidence, we have a documentary record for drawboring as well. Joseph Moxon describes it in his section on joinery:
Then with the Piercer pierce two holes through the Sides, or Cheeks of the Mortess, about half an Inch off either end one. Then knock the Tennant stiff into the Mortess, and set it upright, by applying the Angle of the outer Square, to the Angle the two Quarters make, and with your Pricker, prick round about the insides of the Pierced holes upon the Tennant. Then take the Tennant out again, and Pierce two holes with the same Bit, about the thickness of a Shilling above the Pricked holes on the Tennant, that is, nearer the shoulder of the Tennant, that the Pins you are to drive in, may draw the Shoulder of the Tennant the closer to the flat side of the Quarter the Mortess is made in. Then with the Paring-chissel make two Pins somewhat Tapering, full big enough, and setting the two Quarters again square, as before, drive the Pins stiff into the Pierced holes.
Fig. 6.10 This pin was removed during a restoration project. The rail had been cut off at the shoulder, with the tenon still in the mortise. It took 45 minutes to successfully remove this pin intact.
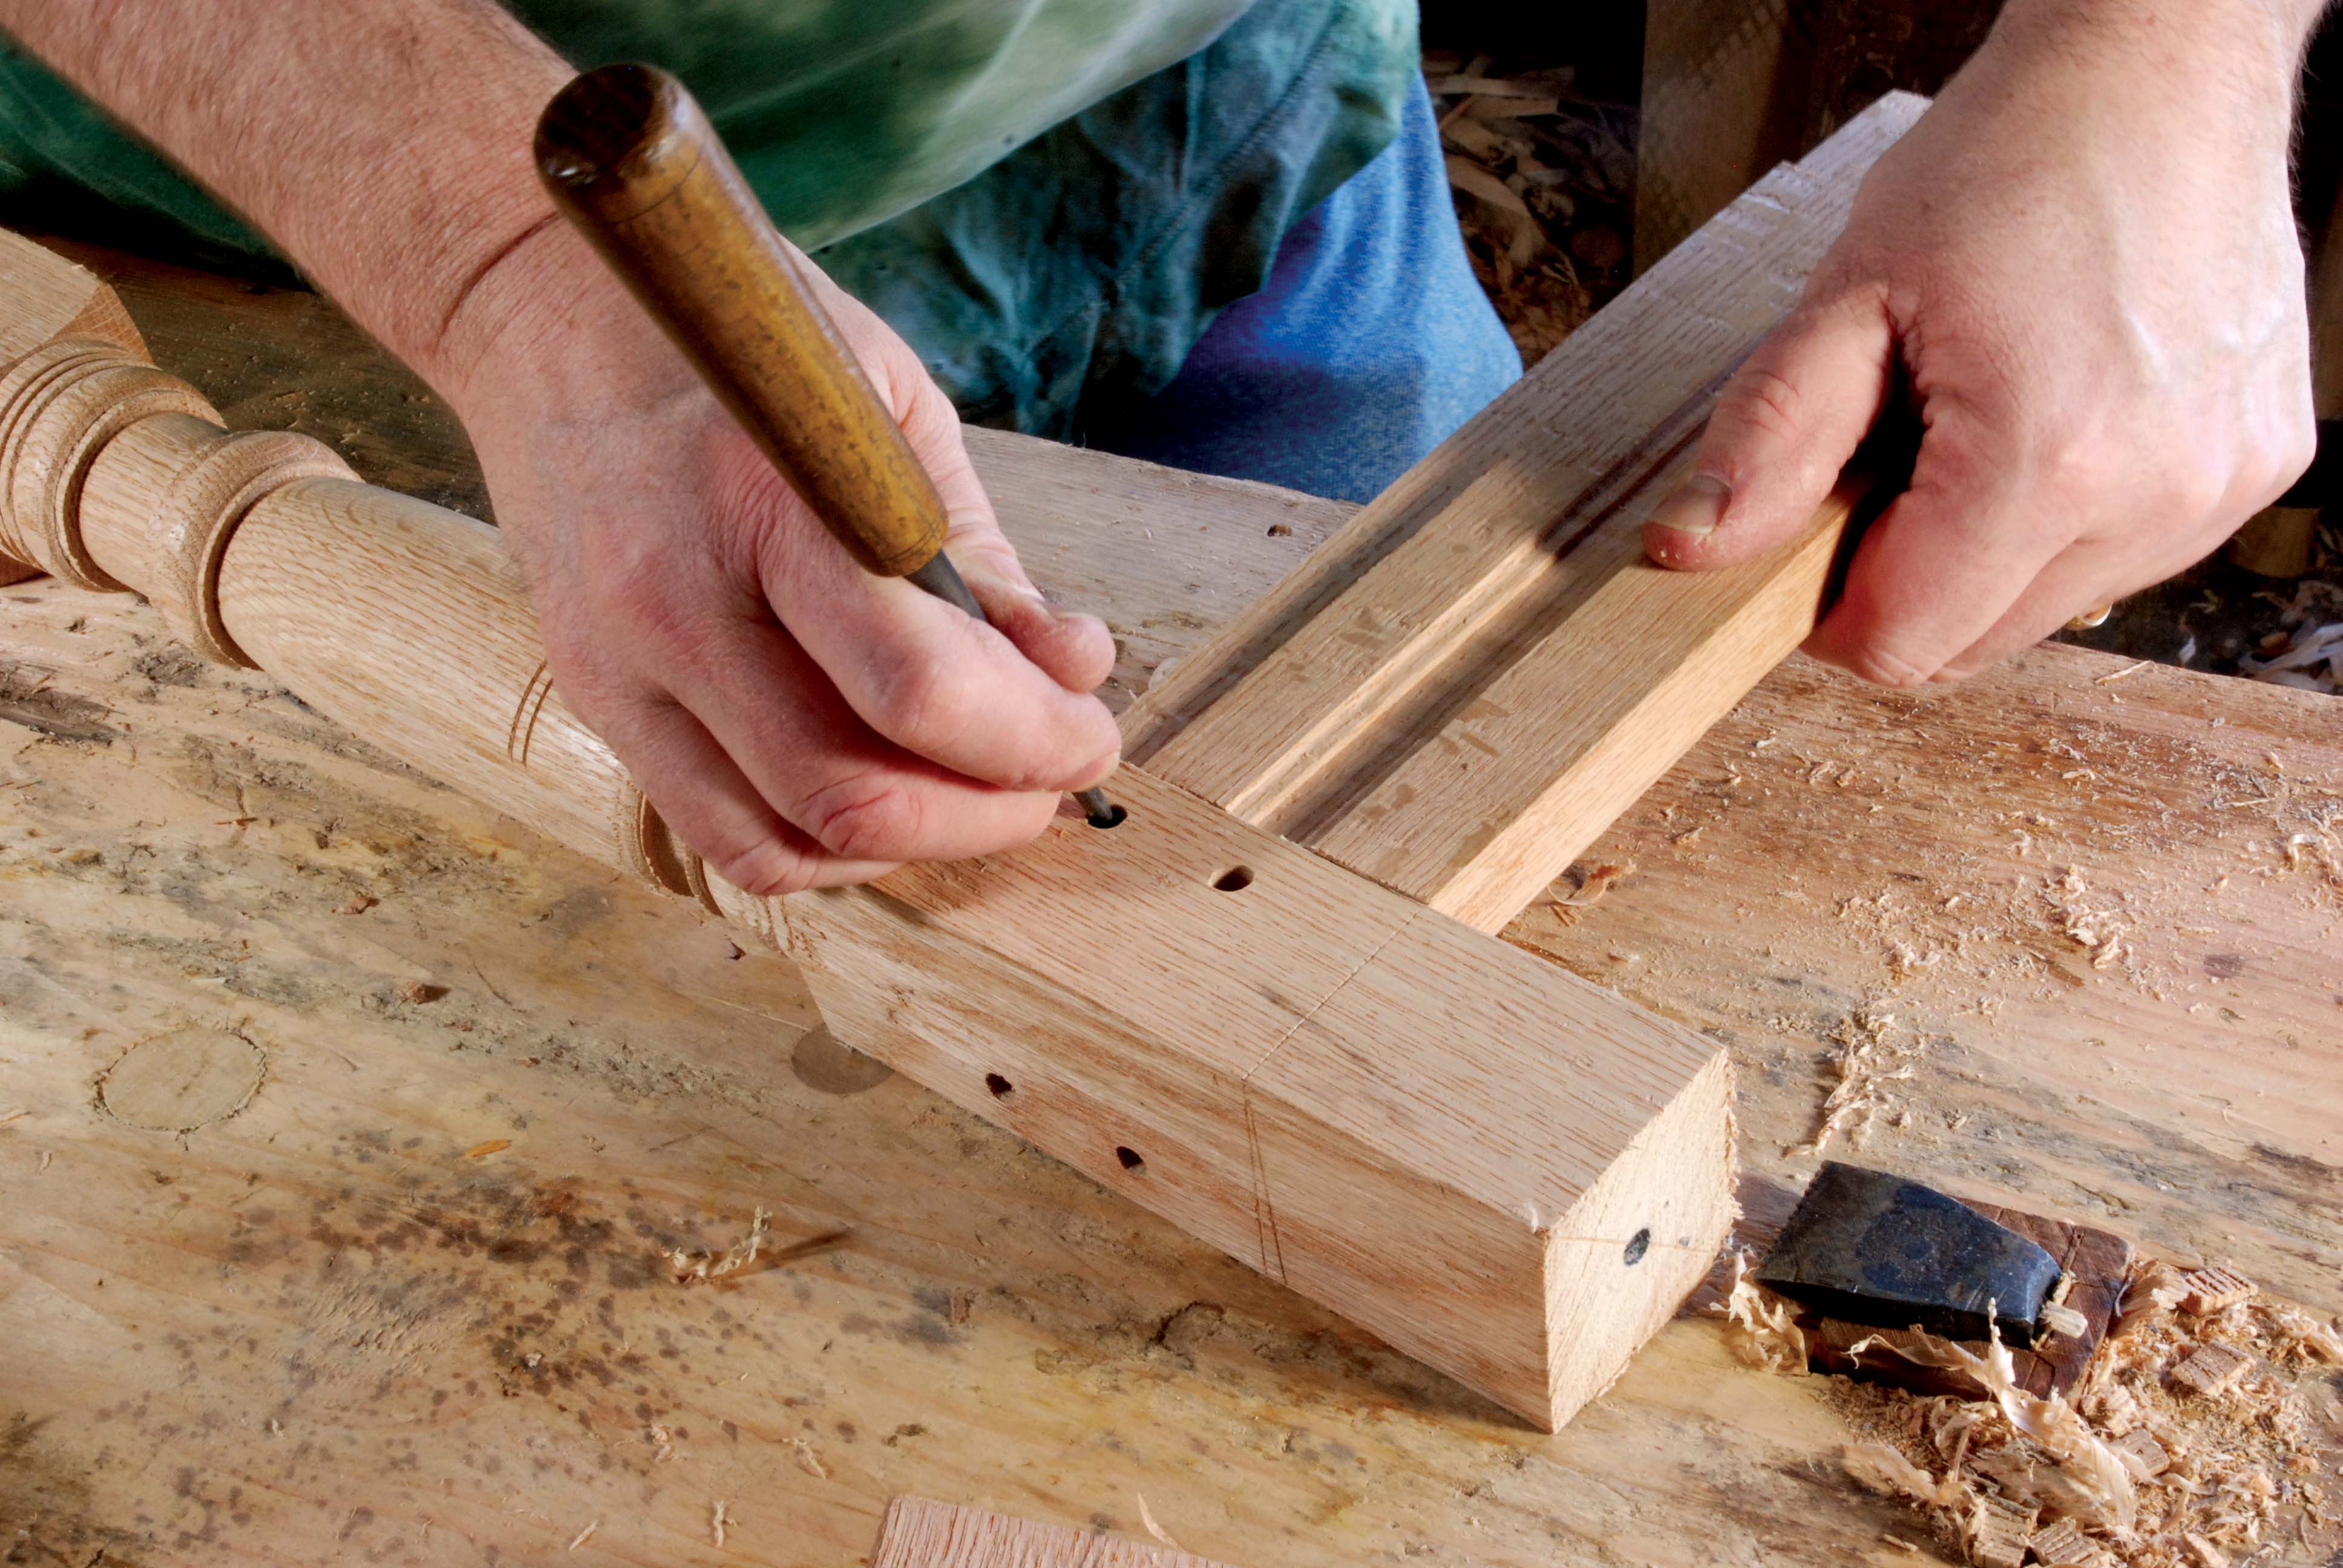
With the test-fitted frames on the bench, mark the tenons for the pins that will secure these joints for the next few centuries. The faces of rails and stiles must be in the same plane. The rails’ outer shoulders should be a tight fit against the stiles’ arrises. The inside shoulders should not touch the stiles.
Check that the apron’s upper edge lines up properly with the marks on the stiles that define the top of the stool. At the stretcher level, be sure there’s no gap in the mortise above the stretcher, where it will be visible in the finished stool. If there is a gap, bump the stretcher upward, shifting the space beneath the stretcher. You might need to check the end grain of the mortise; sometimes it intrudes into the mortise and needs to be cut back so the rail will bump up into its proper position. When all that is checked, scribe inside the hole onto the tenon face with a thin, sharp awl.
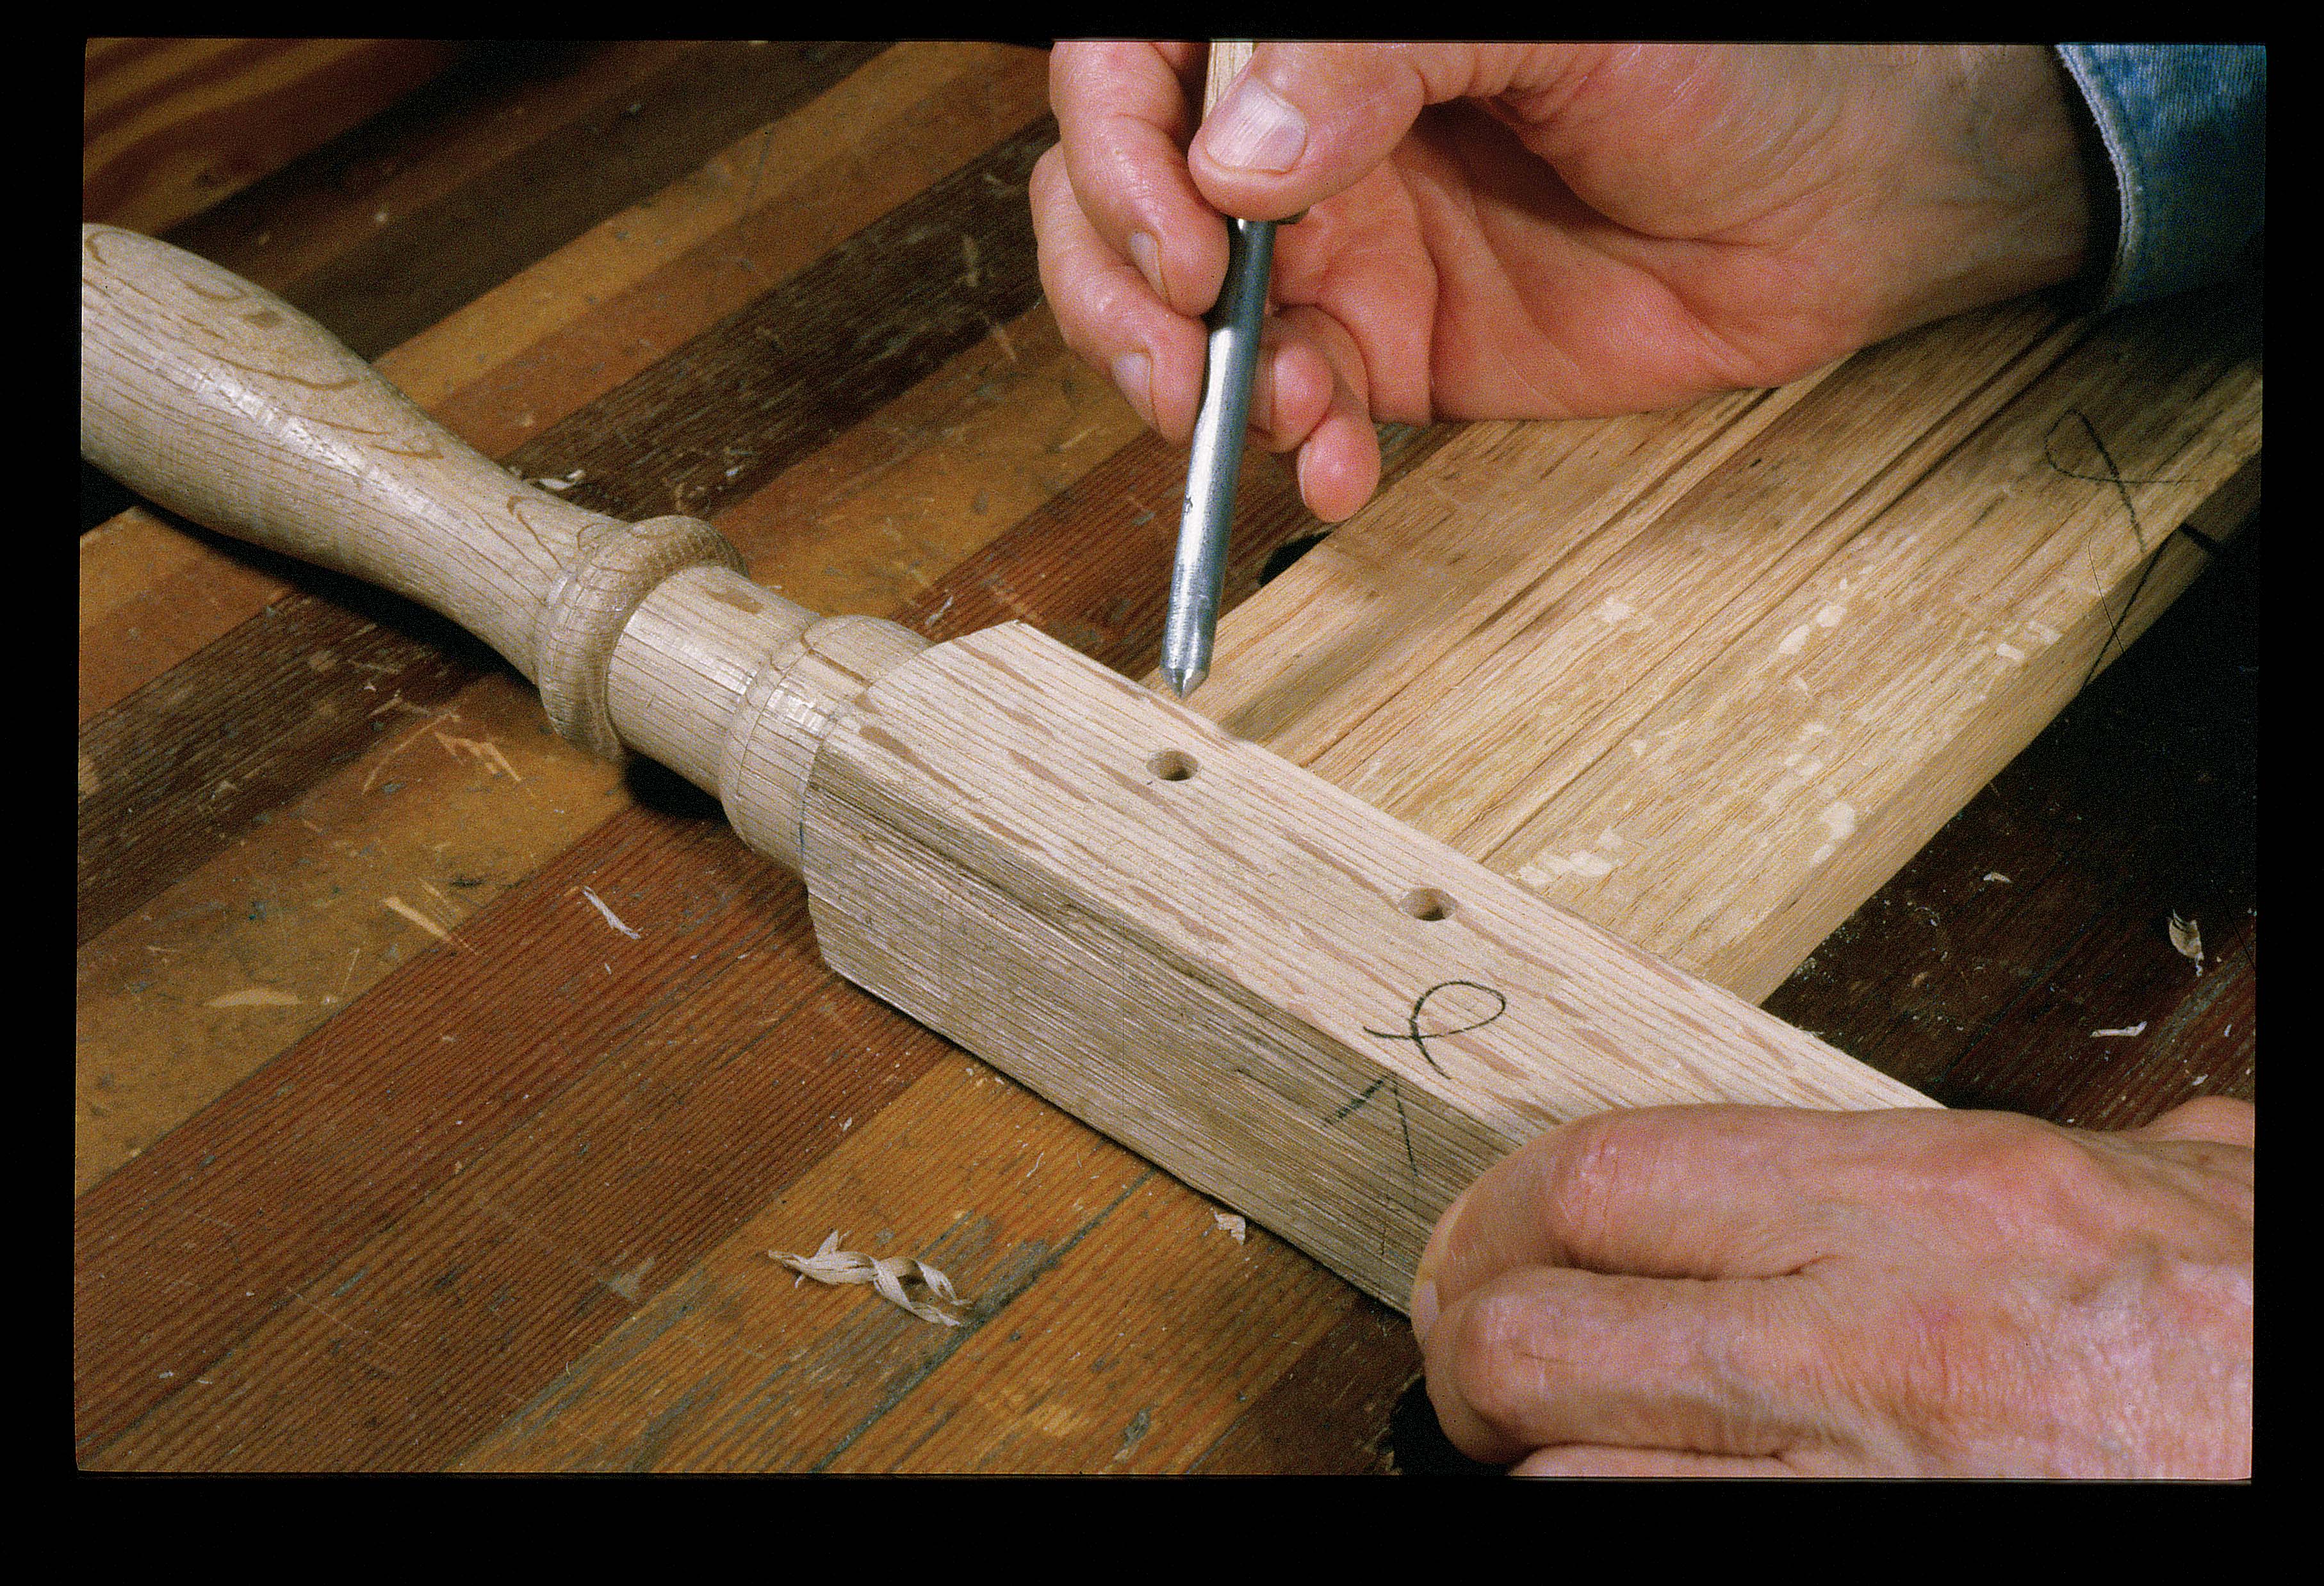
Fig. 6.11 The centerpunch needs to fill the hole completely, so make one with material chosen to fit your boring tool. It makes a very clear depression on the tenon face.
Alexander prefers lightly tapping a centerpunch into the pin hole. Make a punch by pointing the shank of an old drill bit or steel rod that fits snugly into the pin hole.
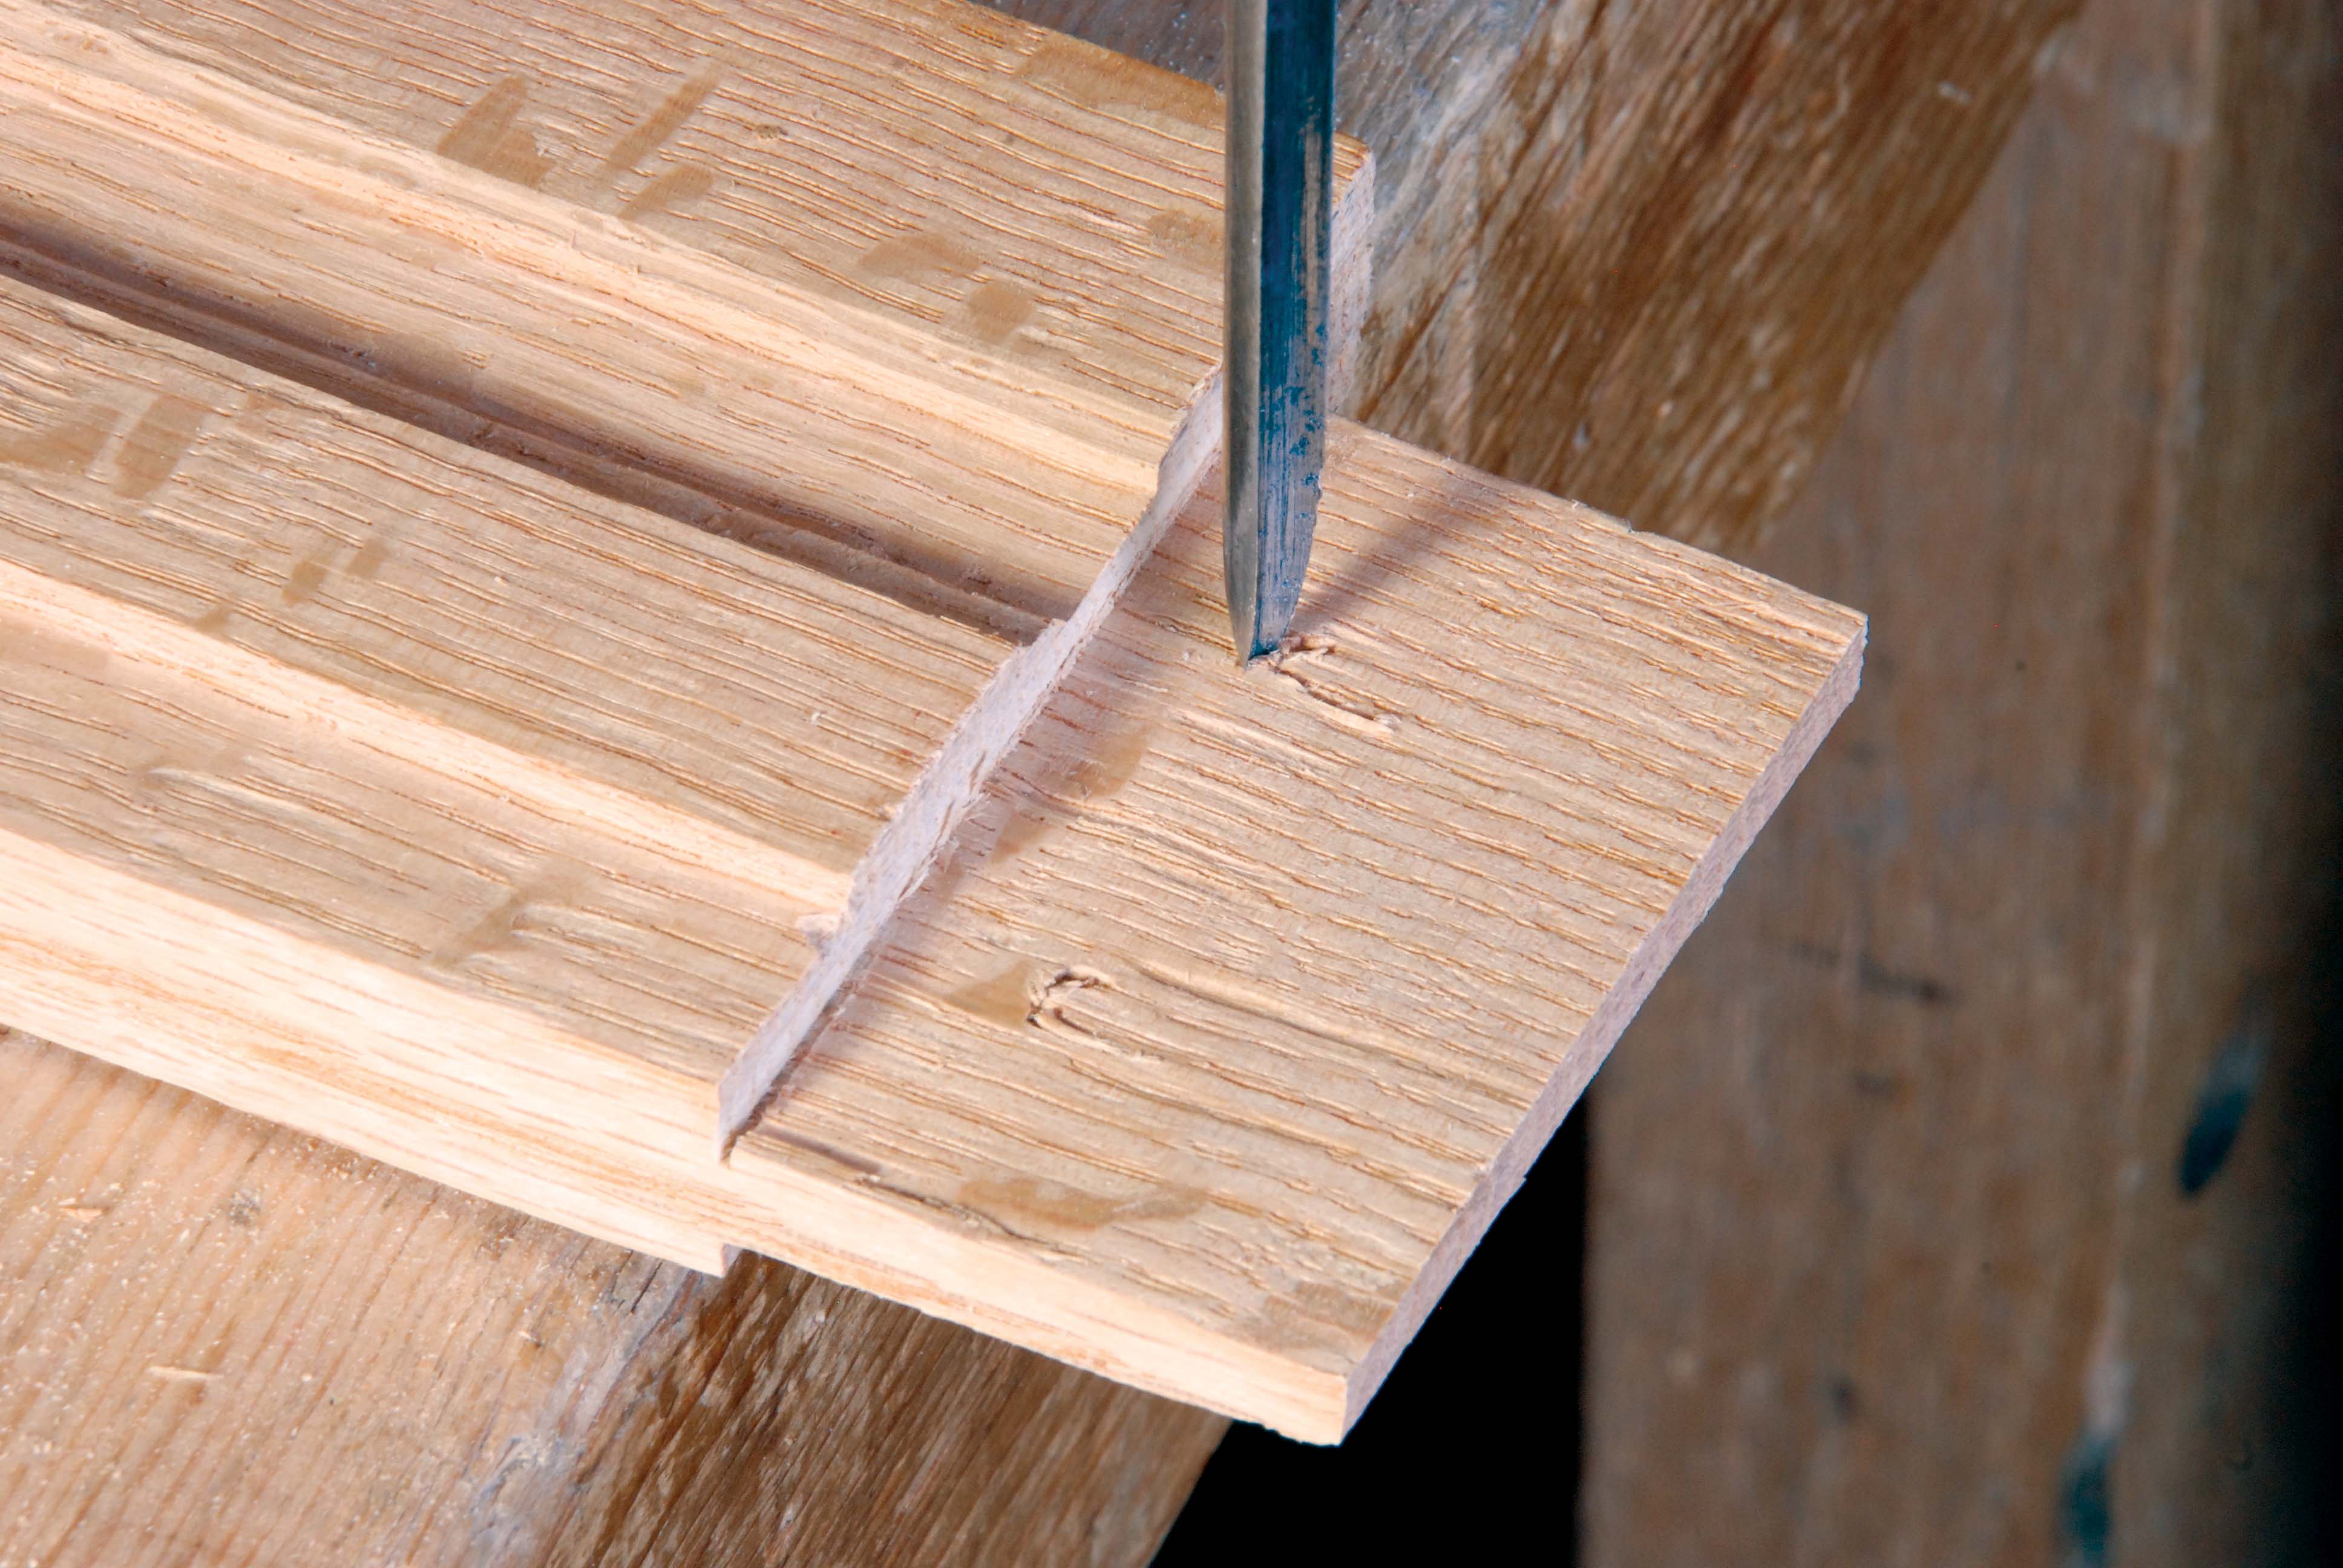
Fig. 6.12 Toward the shoulder – that’s the thing to keep in mind. Bore the hole slowly. The tenon is thin, and you don’t want to blow out the back of it. The piercer bit excels at this; it pokes through the stock very cleanly.
Disassemble the frame and bore the holes in the tenons. It is critical to remember to move in the proper direction – toward the tenon shoulder! You can eyeball this placement, or you might find it helpful to mark the center of the tenon’s pin hole. With the awl, prick the new centerpoint about 1/16″ closer to the tenon shoulder.
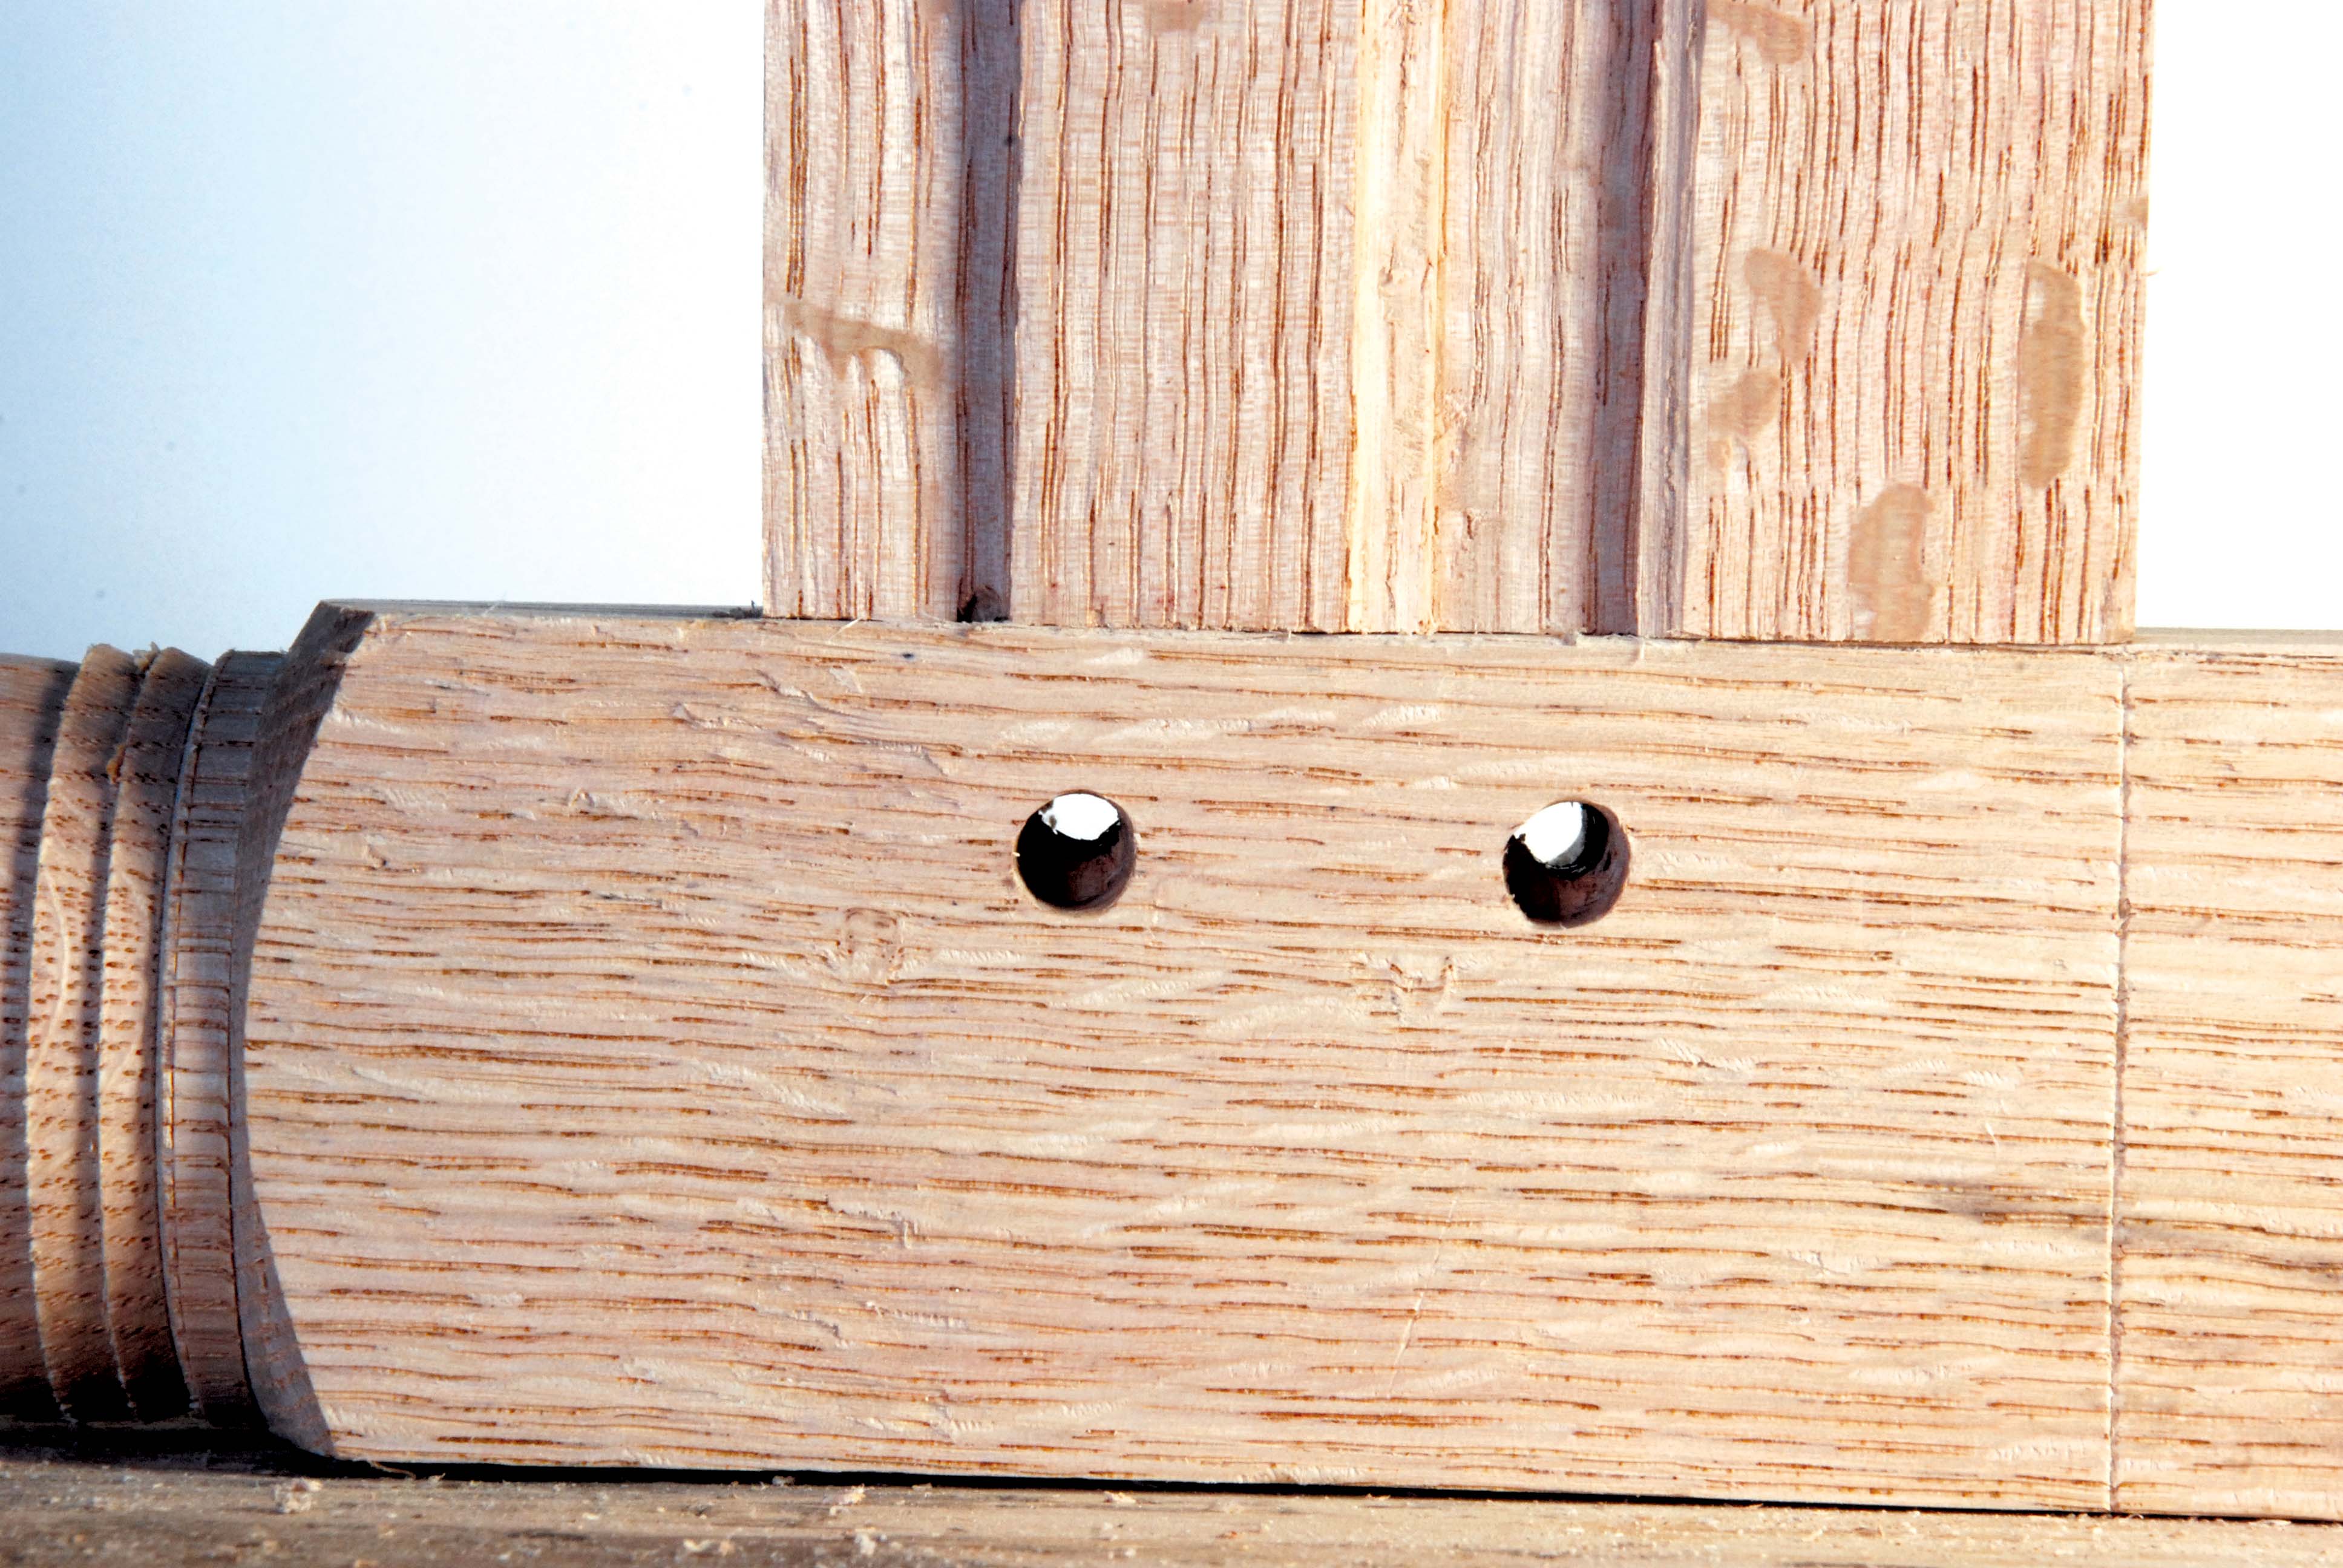
Fig. 6.13 This offset looks like it will work fine. Experimentation will help you get the hang of it. There’s leeway involved; it’s not an exact science. Too much offset can be fixed more easily than not enough.
Reassemble the joint and sight through the offset holes. Refer to fig. 6.13 for a general idea of what we’re after; the offset should take up about one-quarter to one-third of the hole. When you have bored all four tenons for one frame, you can test-assemble this frame yet again, and lightly pull the joints tight by driving in tapered metal “drawbore pins.” These pins can be easily made by adapting a machinist’s alignment pin. Any rod or awl that tapers from 5/32″ to 5/16″ along 4″ can be used. Installed in octagonal cross-sectioned wooden handles, they can be tapped in with a hammer and easily removed by hand.
If there is a question about a particular joint, remove the pin and sight through the hole against the light. If the interference is too great, use a handheld square-tapered reamer to enlarge the tenon hole. This tool is nothing but a drawbore pin that has been filed to a sharp-edged square cross-section. You are approaching final assembly. Don’t hurry. Drawboring is the heart of the matter. …
Make the Pins For the pins to pull the joints together, they must be incredibly strong. Make them from the straightest-grained off-cuts you can find. Alexander and Follansbee have different approaches to pins; we will show you both methods.
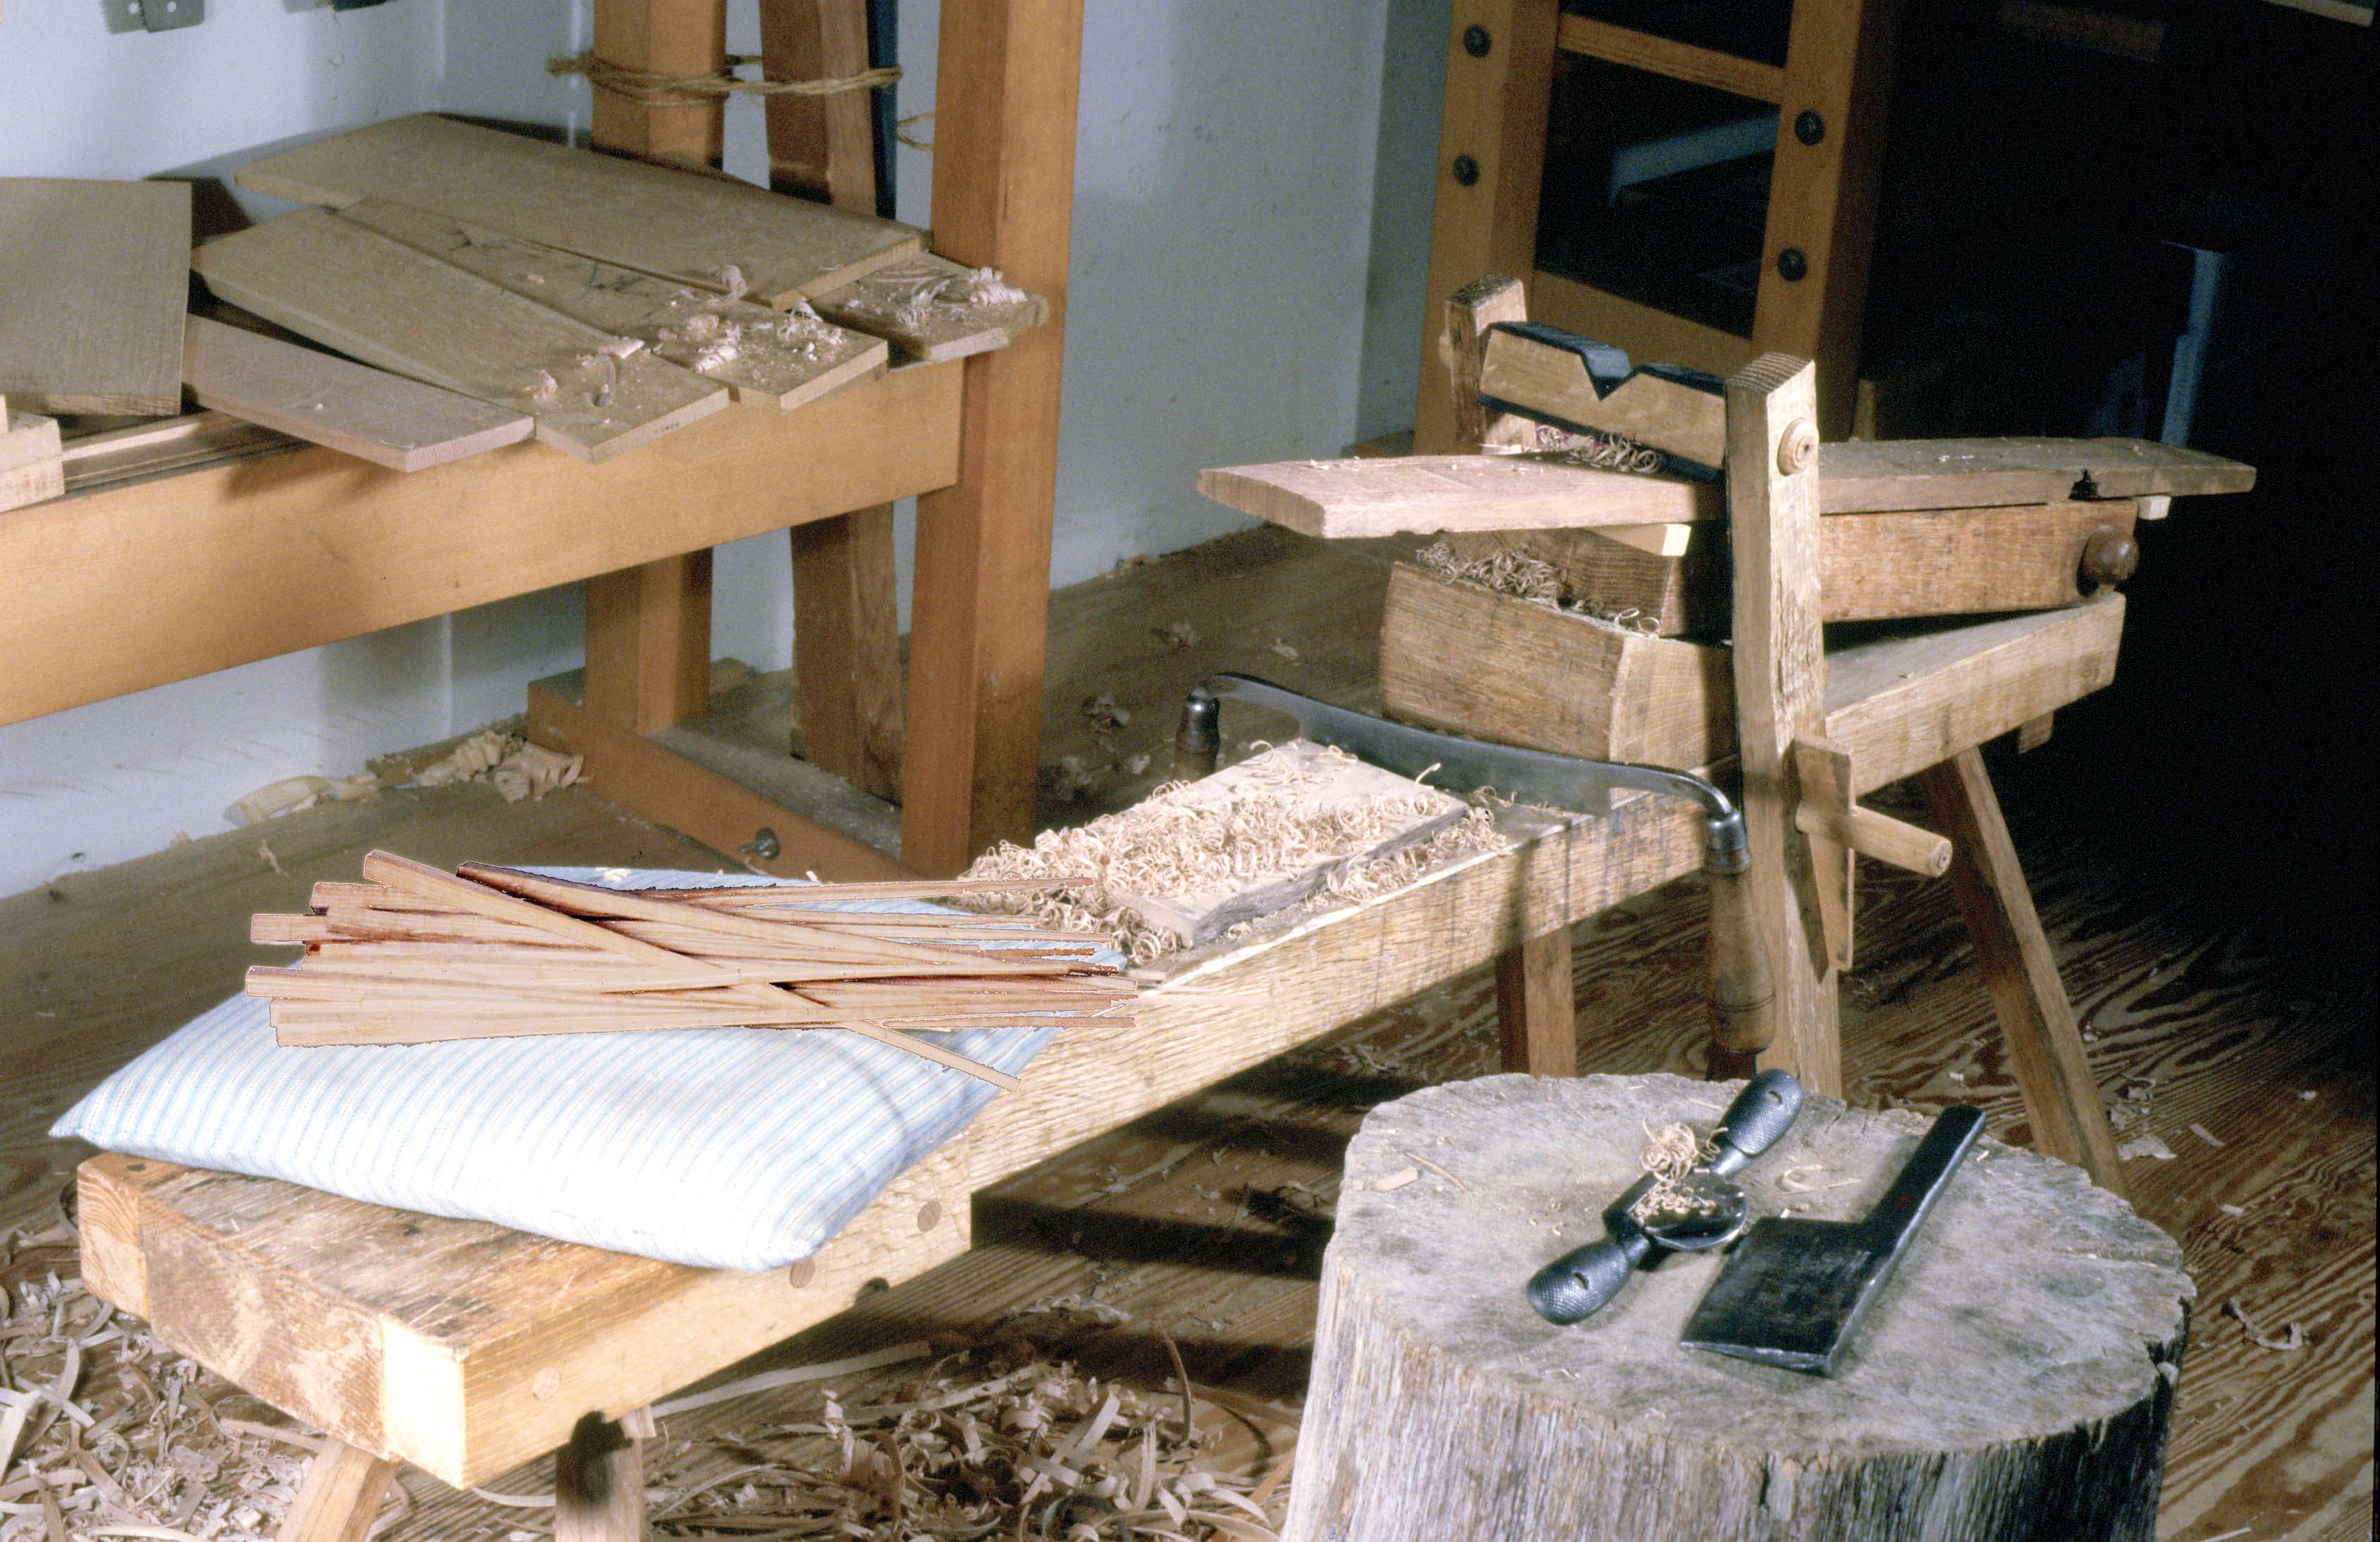
Fig. 6.17 Working long stock like this goes hand-in-hand with the drawknife and shaving horse. The extra length also lends itself to getting a long and gradual taper, the best form for these pins.
Alexander uses a shaving horse and drawknife to make very carefully tapered long pins from riven straight stock. Select the best straight-grained 15″-long rail stock. Rive this into ½”-square sticks. Hold the stick in a shaving horse and drawknife a 5″-long square on the butt so that the shaving horse can secure the stick and register it when it is rotated 90° at a time. Support the thin stock with a narrow board held under the workpiece. Place the square butt under the shaving horse jaw and make a 10″-long taper. Bore a test hole in a thin board with your piercer bit and taper the pin until it goes halfway through. Try your drawknife with the bevel down and up to see what works best for you. After the tapered square stick is finished, slightly relieve the corners.
Fig. 6.18 Riving principles apply here, just as on larger-scale stuff. Split in halves. Straight-grained stock is key. Never throw out any perfectly straight off-cuts. Keep a large supply on hand. Further, these are the driest stock in the whole stool.
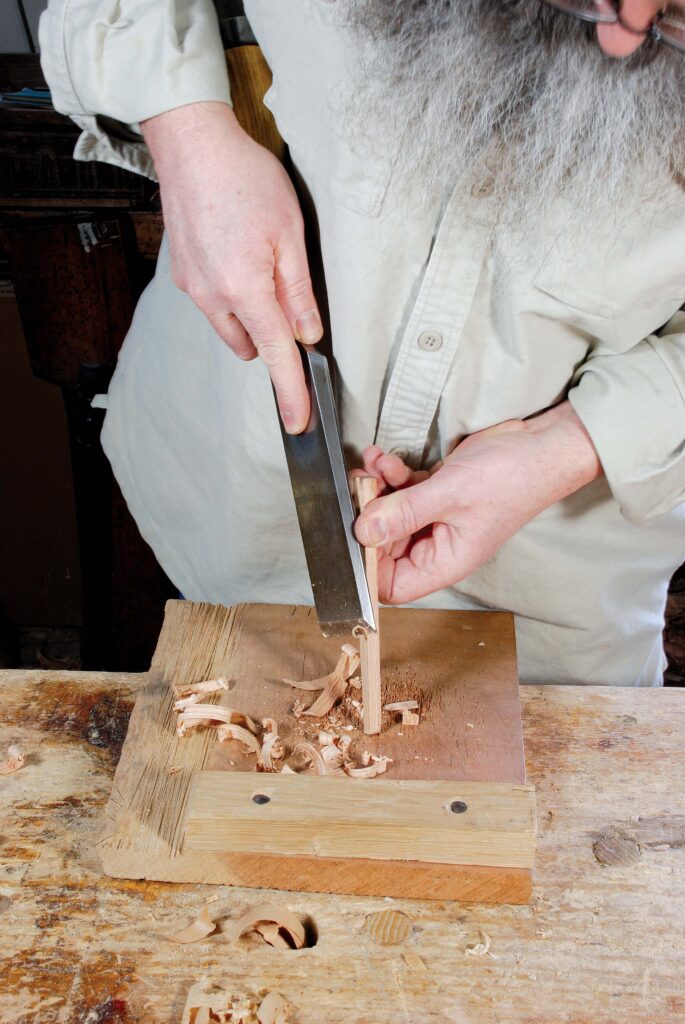
Follansbee shaves pins at the bench from short (5″- to 8″-long) stuff using a large broad chisel. These blanks are riven into sections about ⅜” square using a stout knife or small cleaver as a sort of mini-froe. Hold the blank from its top end and shave downward with the broad chisel. Position the tip of the pin on a piece of scrap wood so you don’t mark up your bench. Working each face in turn, shave them into even squares. Then taper them by paring down with the chisel, taking shavings from each face for an even taper. Sometimes you need to flip the pin end-for-end to get the right amount of taper. Once it’s tapered, shave off the corners so the resulting piece is generally octagonal. Then point the thin tip with your chisel or a knife.
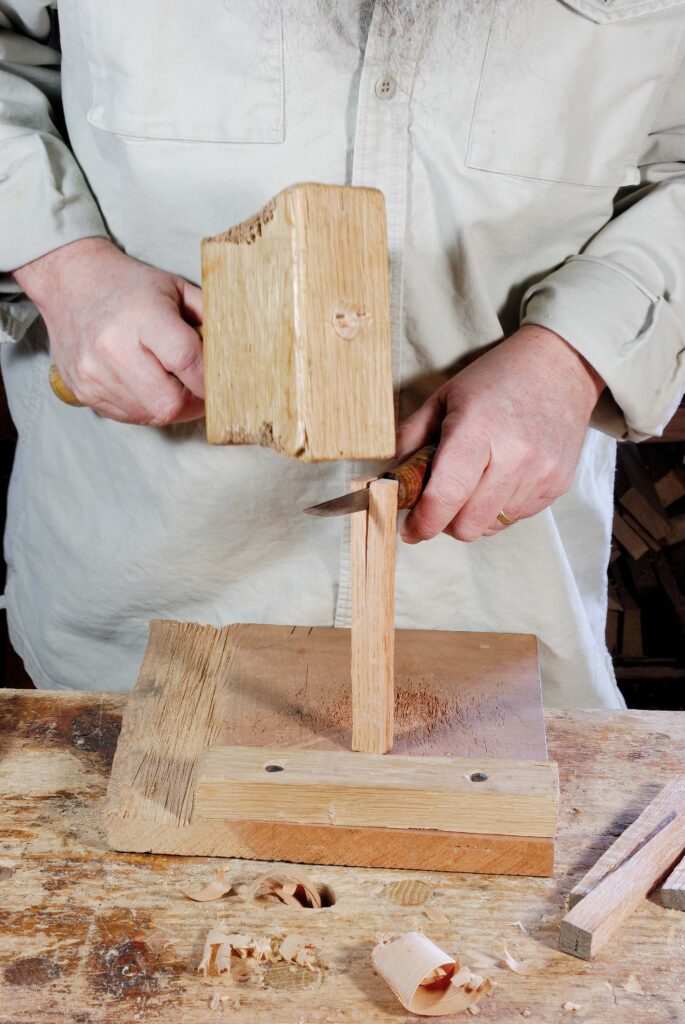
Fig. 6.19 It’s easy to think you just trim these, but there’s more to it than that. The body posture makes a difference. The left hand is braced against the torso, helping to hold the stock steady. The right hand has the chisel tucked against the body as well. Very smooth and powerful movements guide the chisel.
People are leery of shaving small stuff like these pins with a large chisel, but like many of these procedures, body position and movement make this task simple and efficient. For a right-handed joiner, hold the chisel in your right hand with the forefinger extended along the back of the chisel. The chisel is braced in your grip, and your arm is tucked against your torso. The movement comes from your legs. Rise up on your right foot and come down with the chisel in place. With your arm braced against your torso, you limit the travel of the chisel. It is quite a short stroke. This posture provides considerable power and accuracy. With some practice you will become quite accurate and able to shape pins quickly and easily.
Sadly, I can’t write about our machine room without saying something about electricity and woodworking.
Because I appeared on Roy Underhill’s show six (?) times, some people think I use hand tools exclusively. In fact, one visitor to my shop started making the sign of the cross and hissing when he saw my table saw.
So here are the words that I can’t believe I have to write.
There is only one line when it comes to our craft. Either you make things with wood or you don’t. If you make things in wood, then I am on your side – whether you use a flint-knapped piece of shale or a CNC router.
Any person’s attempts to divide us – by the tools we use, the styles we work in or the gurus we worship – are false and destructive. And that person is likely selling something.
And yeah, I’m selling something, too. But I don’t give a flying fart what tools you use.
We call our machine room the “Electric Horse Garage” because it shows up on an old insurance map about 1906 and is labeled as “stables,” though there’s no evidence any horses lived there. The building has had many uses during its lifetime. Neighbors said that two delivery trucks used to be housed there. Another said that someone tried to open a neighborhood bank there? And we know for certain that someone tried to transform the building into a single-family home until the city shut it down.
The machine room when we purchased the buildings.
When I bought the place, the building had a gable roof that I tore off, and the interior was covered in layers of paneling, drywall, plywood, bathroom tile (no lie) and probably some asbestos. There had been a fire that damaged the main beam of the building, and so Jeremy Hanson and I rebuilt it one Saturday. And when we got the electricity working to the building, we were so happy that we called it the Electric Horse Garage.
In any case, prepare to be underwhelmed. I know many readers who have nicer shops. But I couldn’t be happier with ours. It is my first above-ground workshop. It has natural light, a mini-split for HVAC and is only steps away from where I live.
— Christopher Schwarz
Part way through tearing out the interior of the machine room. It took days and days to remove all the fake walls, fake ceilings and debris. I am still surprised we didn’t find a body.
What do you get for the woman who already owns all the blue fleeces on the planet?
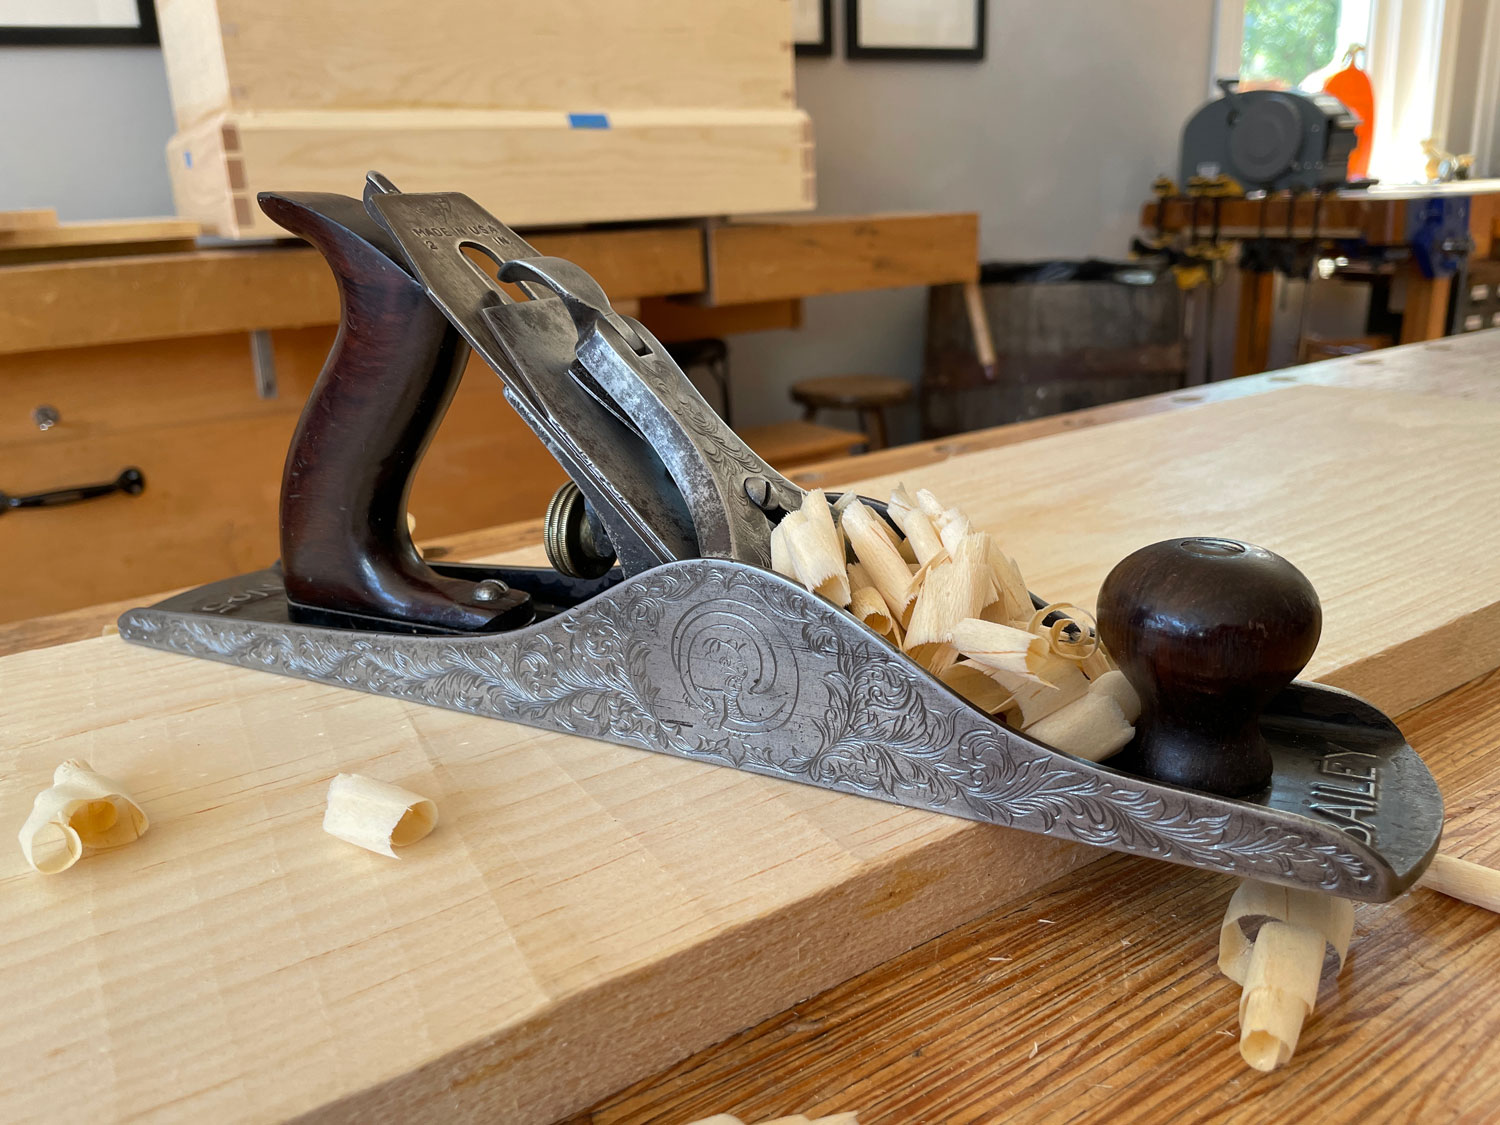
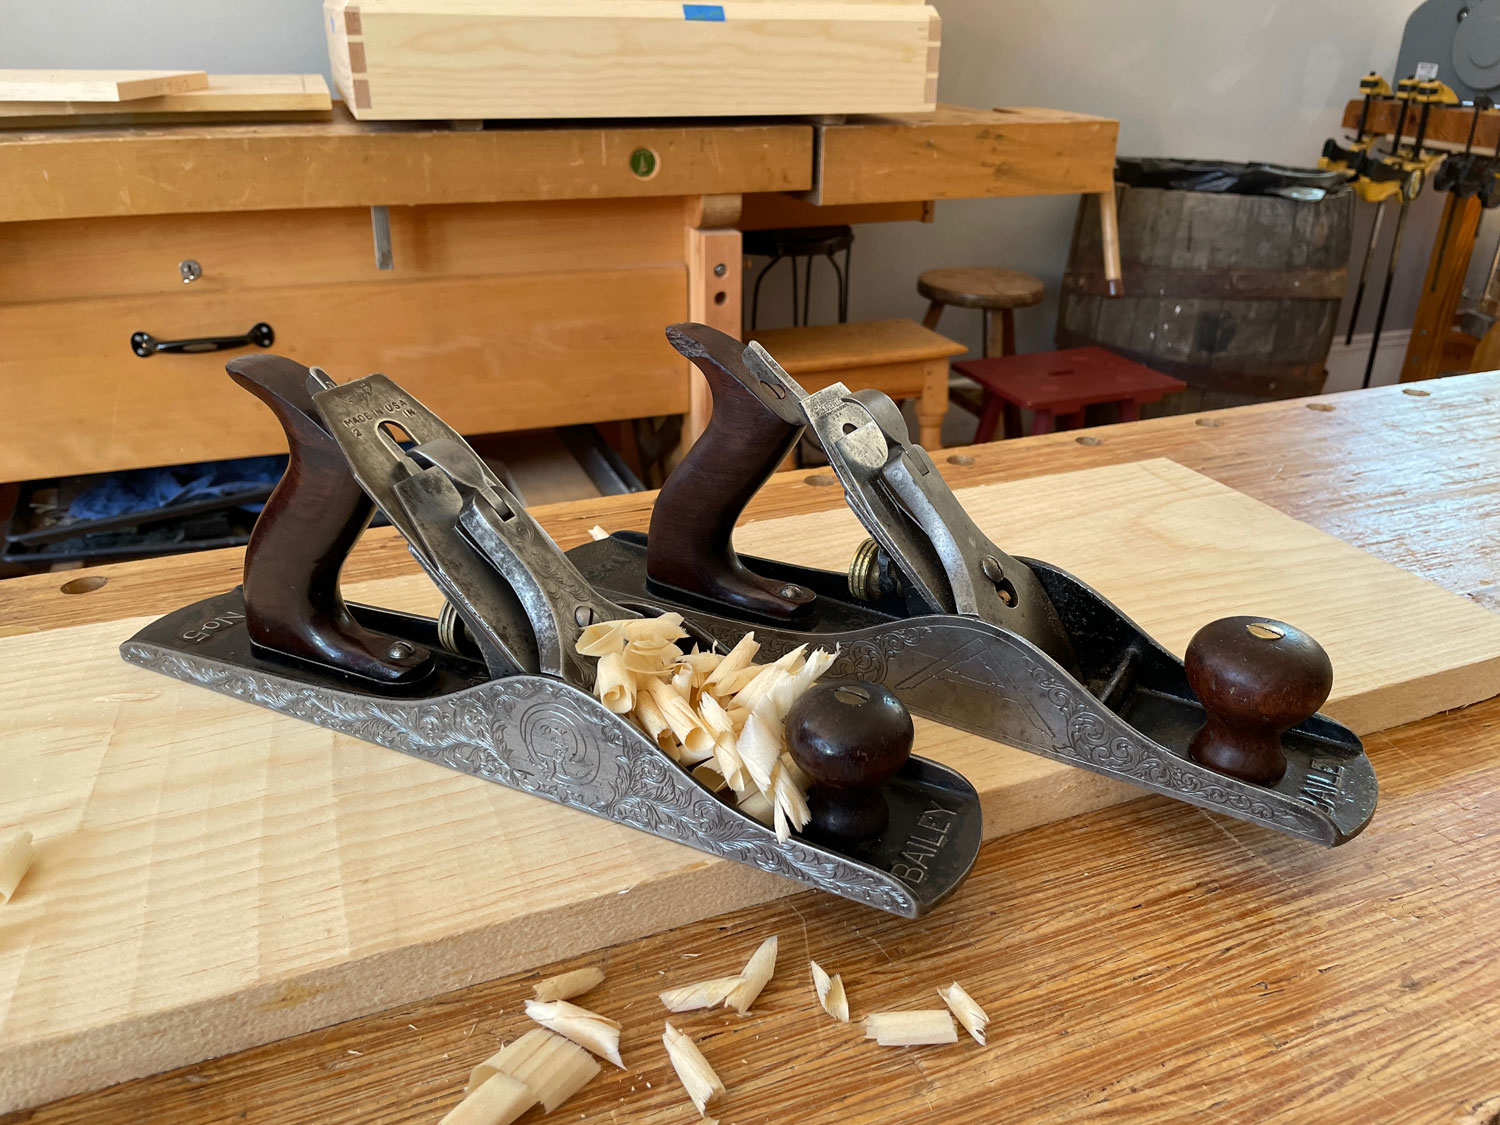
I’m talking, of course, about Megan Fitzpatrick, who celebrated a birthday on Aug. 7. After much thought, I decided to get her something that would indirectly benefit me. You see, Megan is constantly borrowing my beloved old Stanley No. 5, which I have owned since I started woodworking.
I don’t mind her borrowing it, except when I need to use it. My No. 5 is – far and away – the handplane I use the most. I bought it before I knew a lot about handplanes from a stoner at an open-air market. And it was the best $12 I ever spent.
It’s a Type 11 Stanley plane, which means it was likely made between 1910 and 1918. Stanley made tons of these planes – they aren’t rare. But they are spectacular. Rosewood knob and tote. A frog with lots of bearing surface. And – in general – superb fit and finish.
So I decided to get Megan a Type 11 just like mine, and I pieced one together from a good basic plane and some donor parts. But I decided that wasn’t enough. Megan works hard every day to keep me sane at work.
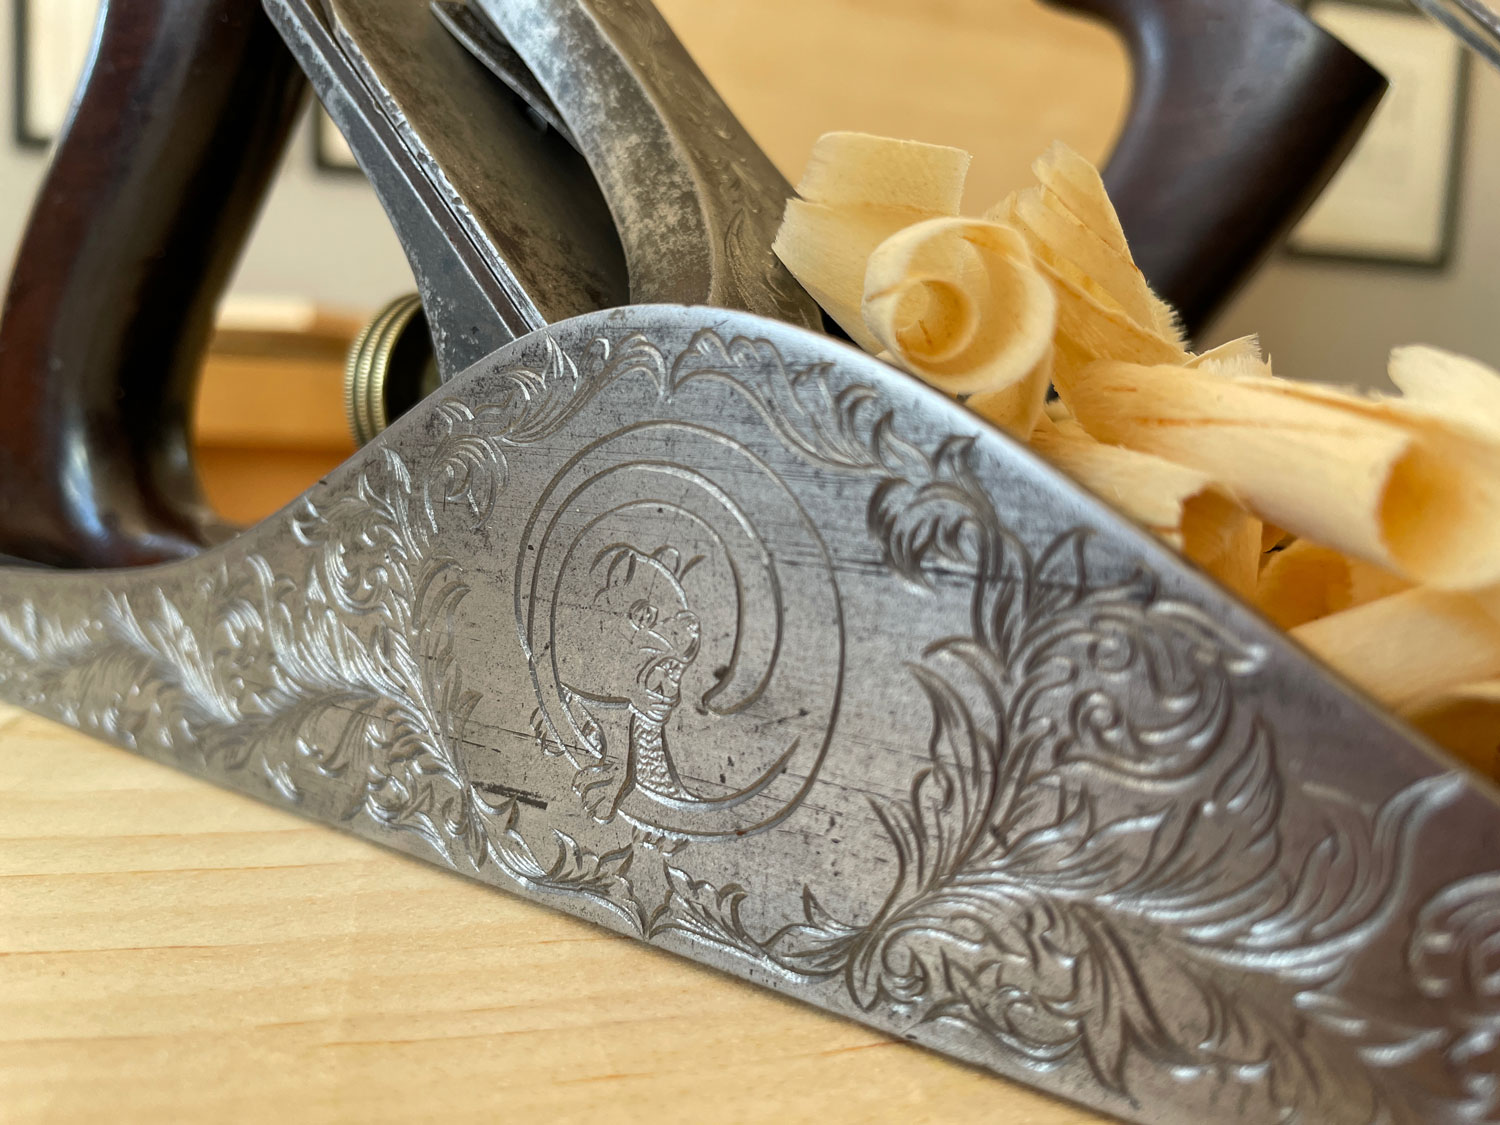
The sidewalls of my No. 5 plane are engraved with the logo for “The Anarchist’s Tool Chest,” which Catharine Kennedy engraved for me about 11 years ago (she is now retired from engraving). For Megan’s plane, I decided to ask Jenny Bower, who both Megan and I admire greatly.
Jenny agreed (yay!), but she was concerned because she hadn’t engraved the particular metals used in the old Stanleys. What if the lever cap didn’t engrave well? She was concerned she might ruin a valuable and old plane.
Then I told her I’d get another lever cap for $10. And I explained how the tool itself – while spectacular – isn’t rare at all. What was going to make the plane special was the engraving.
We received the finished plane this week, and it is better than photos can convey. Jenny is a hand-engraver, and the results are incredibly three-dimensional. If you ever have thought about getting a tool engraved, I recommend her highly. Check out her Instagram feed to see the sort of work she does (and the fun costumes she makes, too).
During the last 11 years, a lot of people have asked questions about my engraved plane. (My favorite: “Isn’t it amazing that you found an old plane that had already been engraved with the logo from your book?”) The most common question people have is: “Why did you get the plane engraved?”
Usually I make a joke at first: “Now it’s a tax write-off.” But the serious answer goes something like this: “My tools are my ticket to work for myself, outside of the corporate world. They mean the world to me. Engraving a common but incredibly useful tool forces people to regard it differently. When I’m gone, I hope a future owner will pick it up at a flea market and understand just how much this common-as-dirt No. 5 meant to its owner.”
Oh, and if you want to read more about Jenny’s journey as an engraver, woodworker and person, check out this Little Acorns profile Nancy Hiller wrote about her.
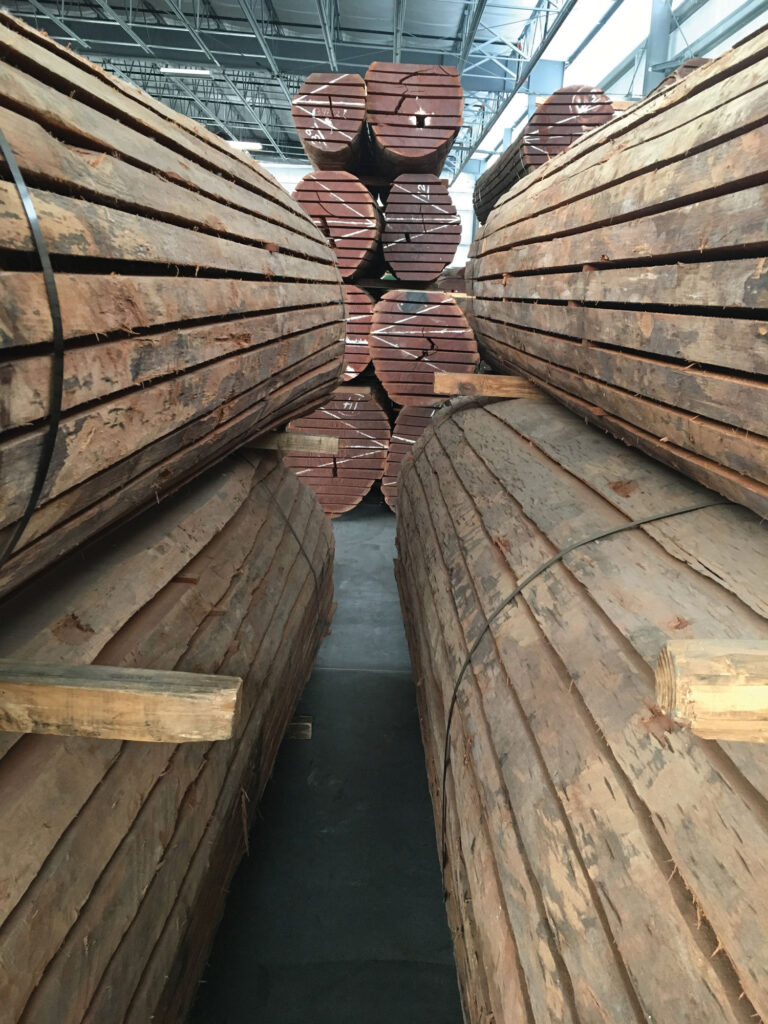
WAIT, FROM THE LUMBERYARD? You can build a stick chair with almost any wood. Yes, you can rive it from green wood. But you can also buy it at the lumberyard and get parts that are plenty strong enough.
Editor’s note: What follows is a short excerpt from “The Stick Chair Book,” which is scheduled to be released in hardcover form in early November. Until that date, you can buy an “Early Adopter Digital Package” of the book for $25. This digital package includes lots of extra goodies. When the hardcover book is released, this package will go away forever.
Most chairmakers are ridiculously worried about the wood they use in their chairs. Is it strong enough? Is it dry/wet enough? Is the grain straight enough? Can I get the parts I need from this chunk on my workbench?
But aside from those narrow concerns, there is a lot of flexibility when it comes to the wood you use to make a chair. The wood can be:
• almost any species • air-dried, kiln-dried or vacuum-dried • a softwood or hardwood • sawn or riven • ring-porous, semi-diffuse-porous or diffuse-porous • from the lumberyard, the log yard or your backyard.
Put another way, almost any wood can be used in a chair as long as it is strong enough, dry enough and the right size. What follows is how to evaluate your stock in terms of its strength, moisture and size – without turning you into an intern at the Forest Products Laboratory.
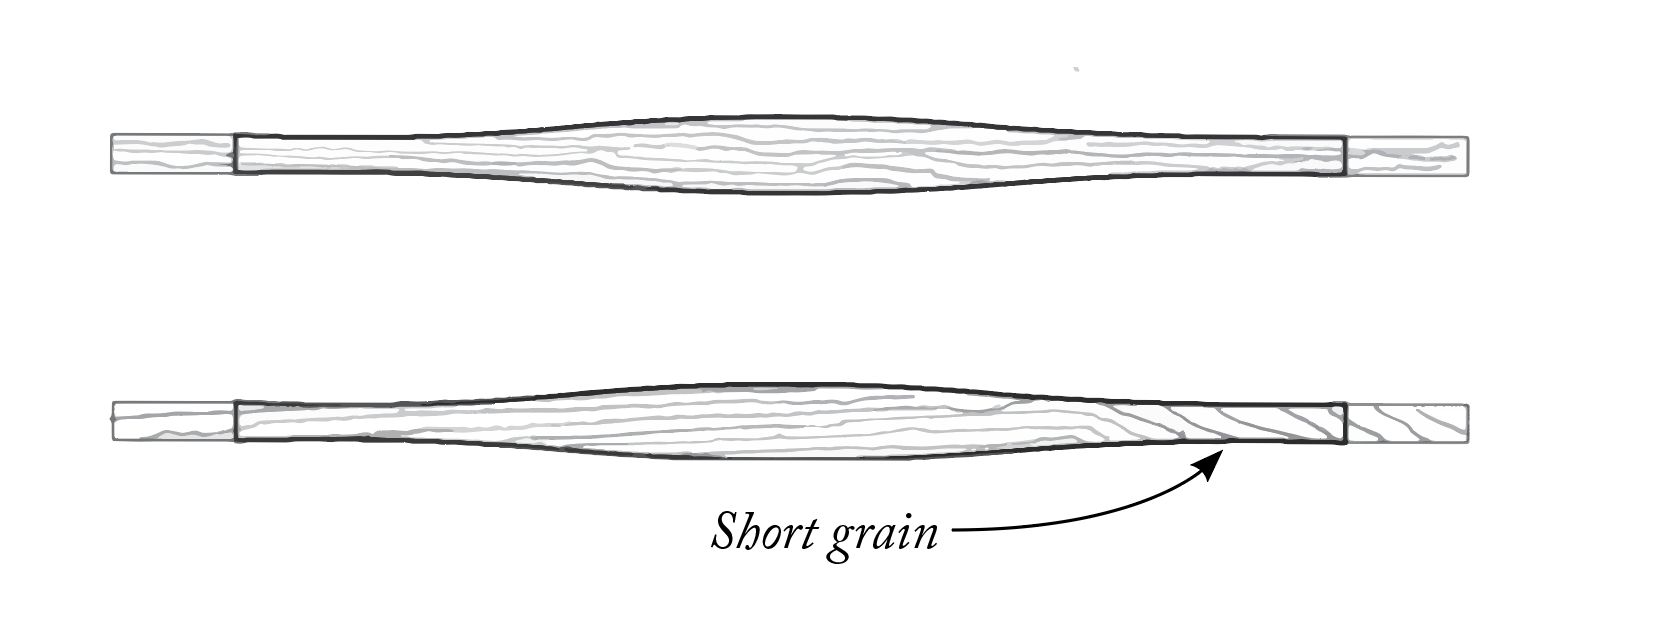
TWO STICKS, ONE DISASTER The stick at top has grain running its entire length. The one below has short grain and is doomed to snap. Training your eye to see short grain at a glance is a helpful skill.
Strength Every stick of wood is a bundle of wood fibers. If the fibers run continuously from one end of the stick to the other, that stick will take far more abuse compared to a stick where some of the fibers run across the width of the board (sometimes called “short grain”).
You can create one of these super-strong sticks using a few methods. You can rive the wood – like firewood – so it splits along its long fibers. You can saw it out by following the direction of the fibers with your saw blade. Or you can use a combination of these two methods.
Neither method is magic. As long as the fibers run straight through the stick, you have done your job. The other aspect of strength derives from the species of wood. A strong species, such as white oak, can be extraordinarily tough when it is only 1/2″ in diameter and its fibers run continuously from one end to the other. A similar stick of cherry or walnut might have to be 3/4″ in diameter (or larger) to possess equal strength.
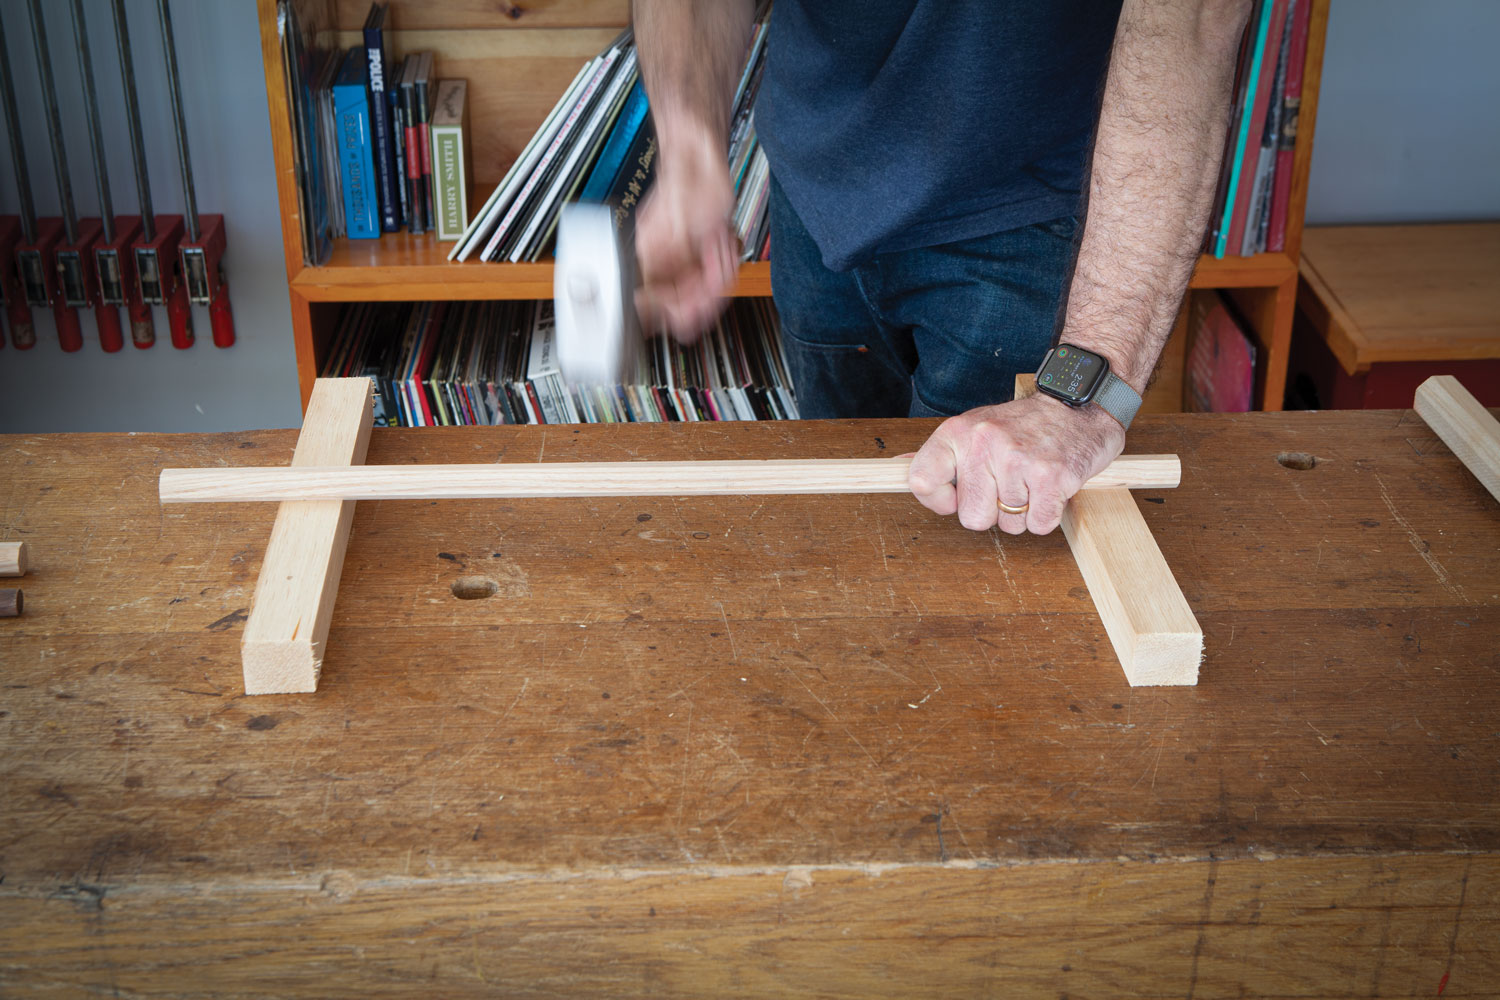
While it sounds like I am about to offer a chart, graph or equation to determine the optimal-sized chair part, I’m not. Instead, I’m going to suggest you find a sledgehammer.
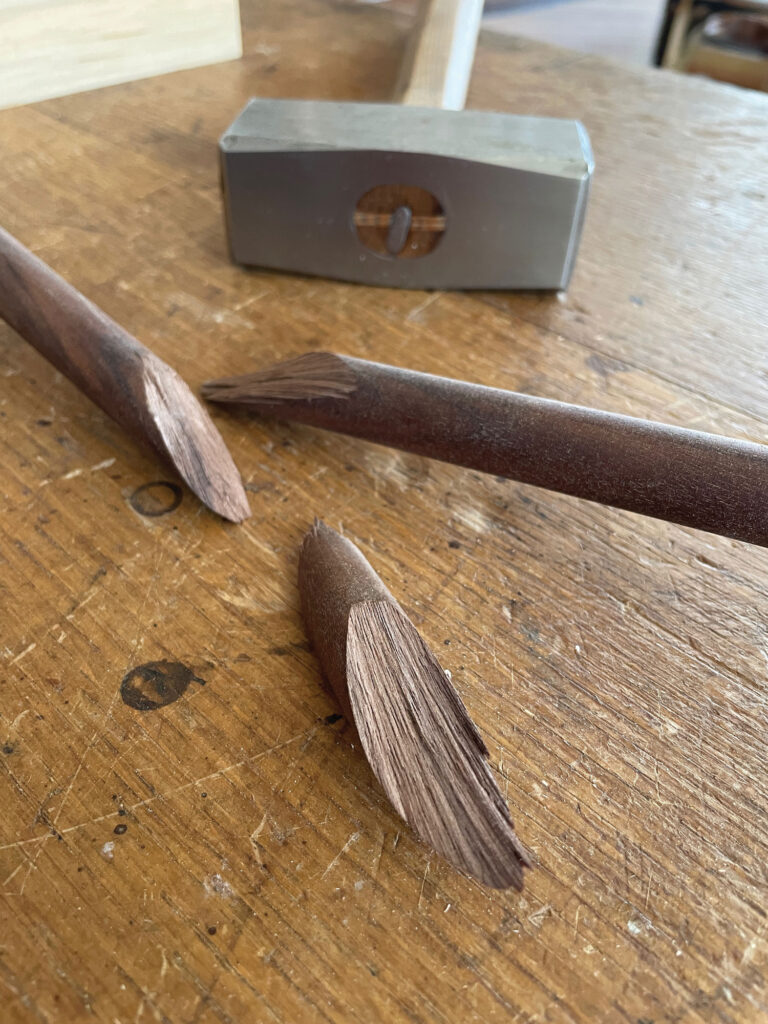
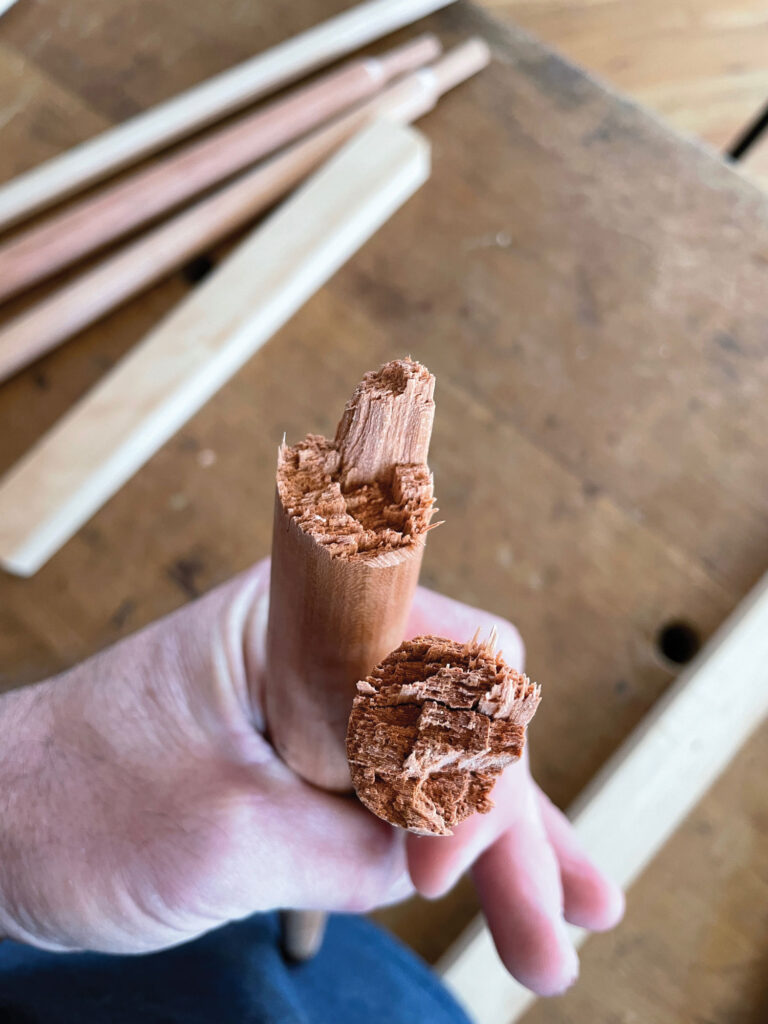
SLEDGEHAMMER TEST When I make a chair, I make a few extra sticks and hit them with a sledge. I recommend it. You will learn a lot about how wood breaks and how some species (like ash) seem indestructible. Below are two victims. Short-grain walnut and brash cherry.
You can easily test a sample chair part by propping it up on two blocks of wood, one on either end of the stick. Hold the stick in place with one hand and strike the stick with a small sledgehammer (2 lbs. or 3 lbs. will do). If the stick survives the strike, the part is strong enough. If it snaps, you should increase the bulk of the stick or find one with straighter grain.
Why isn’t there a Holy Chart of Diameters and Species with recommendations for chairmaking? Because wood is so variable. For example: Slow-growth and fast-growth oak can be radically different when it comes to strength. (Slow-growth oak is far more porous and easily snapped.) How the tree grew, how it was dried and how straight you cut it all play a part in how strong a stick is. But one way to resolve all the variables is to hit a sample stick with the sledge.
The idea for this test came from fellow chairmaker Chris Williams, who was looking for a way to test wood for brashness – a defect where the wood is so brittle it can be snapped like a corn chip. It is also a method that the USDA Forest Products Laboratory has used to test brittle woods.
How hard should you hit the stick? Like you are striking a nail. Should you use a surviving stick in the chair after you hit it? It’s your call, but I usually use them.