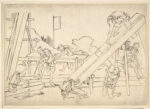
This morning I had a 15-minute video chat with Joshua Klein of Mortise & Tenon Magazine about the article I wrote for him on the low Roman workbench.
The discussion ranged from how I became interested in this form of bench to how this workbench might be ideal for woodworkers in apartments or who have disabilities.
You can watch the video in its entirety for free here. And be sure to order a copy of issue two of Mortise & Tenon Magazine, which will begin shipping in about a week. It’s only $24 but contains a huge amount of coverage of traditional work that you won’t find anywhere else. And the physical object itself is gorgeous and worth keeping.
Update on the Book ‘Roman Workbenches’
This book project has taken on a life of its own and has inflated like a pool toy as Suzanne Ellison, Görge Jonuschat and I have dug up new material that hasn’t been published outside academic circles. We have flushed a lot of money down the potty for this project. But it’s a tale worth telling.
So here’s what we’re going to do.
We are going to publish a short letterpress book – about 64 pages – about our research, bench building and conclusions up to this point. That book is already written and we’re going to illustrate it with old-school line drawings from artist Nicholas Mogley. We will do one press run of this book on the vintage letterpress machinery owned by Steamwhistle Press in Newport in February.
Everyone who wants a copy will get one, but once that press run is done, that version is kaput forever.
The letterpress book will be a bit of an odd duck. It’s a book about research, dead ends, bench building, wet wood and cow sex. And it’s written in a loose style that makes academics sneer.
Then, in March, photographer Narayan Nayar and I will fly to Naples (Italy, not Florida) to visit Pompeii, Herculaneum and climb Vesuvius. If there’s enough interest, we will publish a regular offset Lost Art Press book that greatly expands the research from the letterpress book with tons of photos, illustrations and the fire hose of research from Suzanne Ellison and Görge Jonuschat.
I think Roman workbenches have a lot to teach us. And it begins with these two words: Be seated.
I hope you will join us for this odd journey. Even if you don’t, I’ll get some great meals in Italy and climb a volcano.
1912 ad for the Pike Manufacturing Co., Haverhill, New Hampshire.
That’s a pretty good incentive don’t you think? Sharpen your tools and stop swearing.
EverybodyDoesIt – A Sharpening World Tour
“The Polisher”
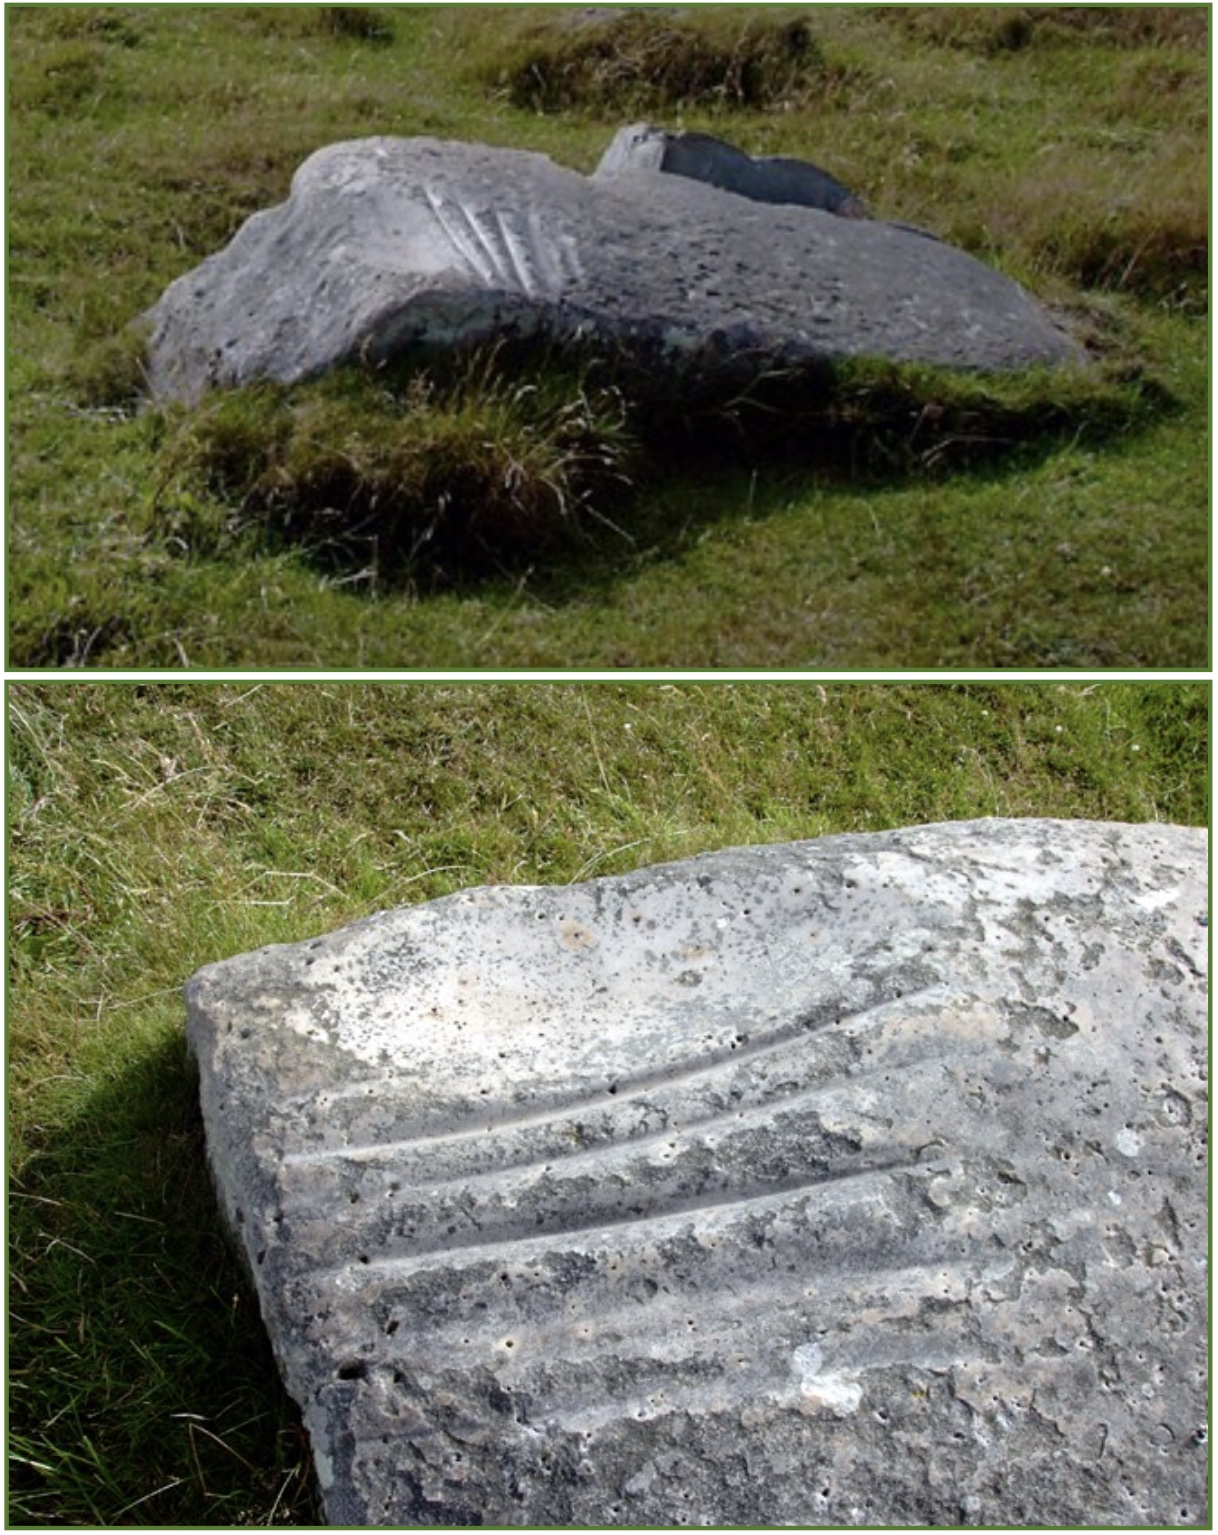
Neolithic polissoirs, characterized by straight grooves and a shallow basin, were used to sharpen axes, arrows and blades. If you encounter one you will see, and feel, that the grooves and basin remain smooth compared to the rough surface of the rest of the boulder. The Polisher in the photo above is on the Malborough Downs, Wiltshire, England. Polissoirs are also found in France.
Whakarewa.
Whakarewa is a grindstone used by generations of Maori. It sat in Mimiha stream until it was moved in the 1920s to make room for roads and other development.
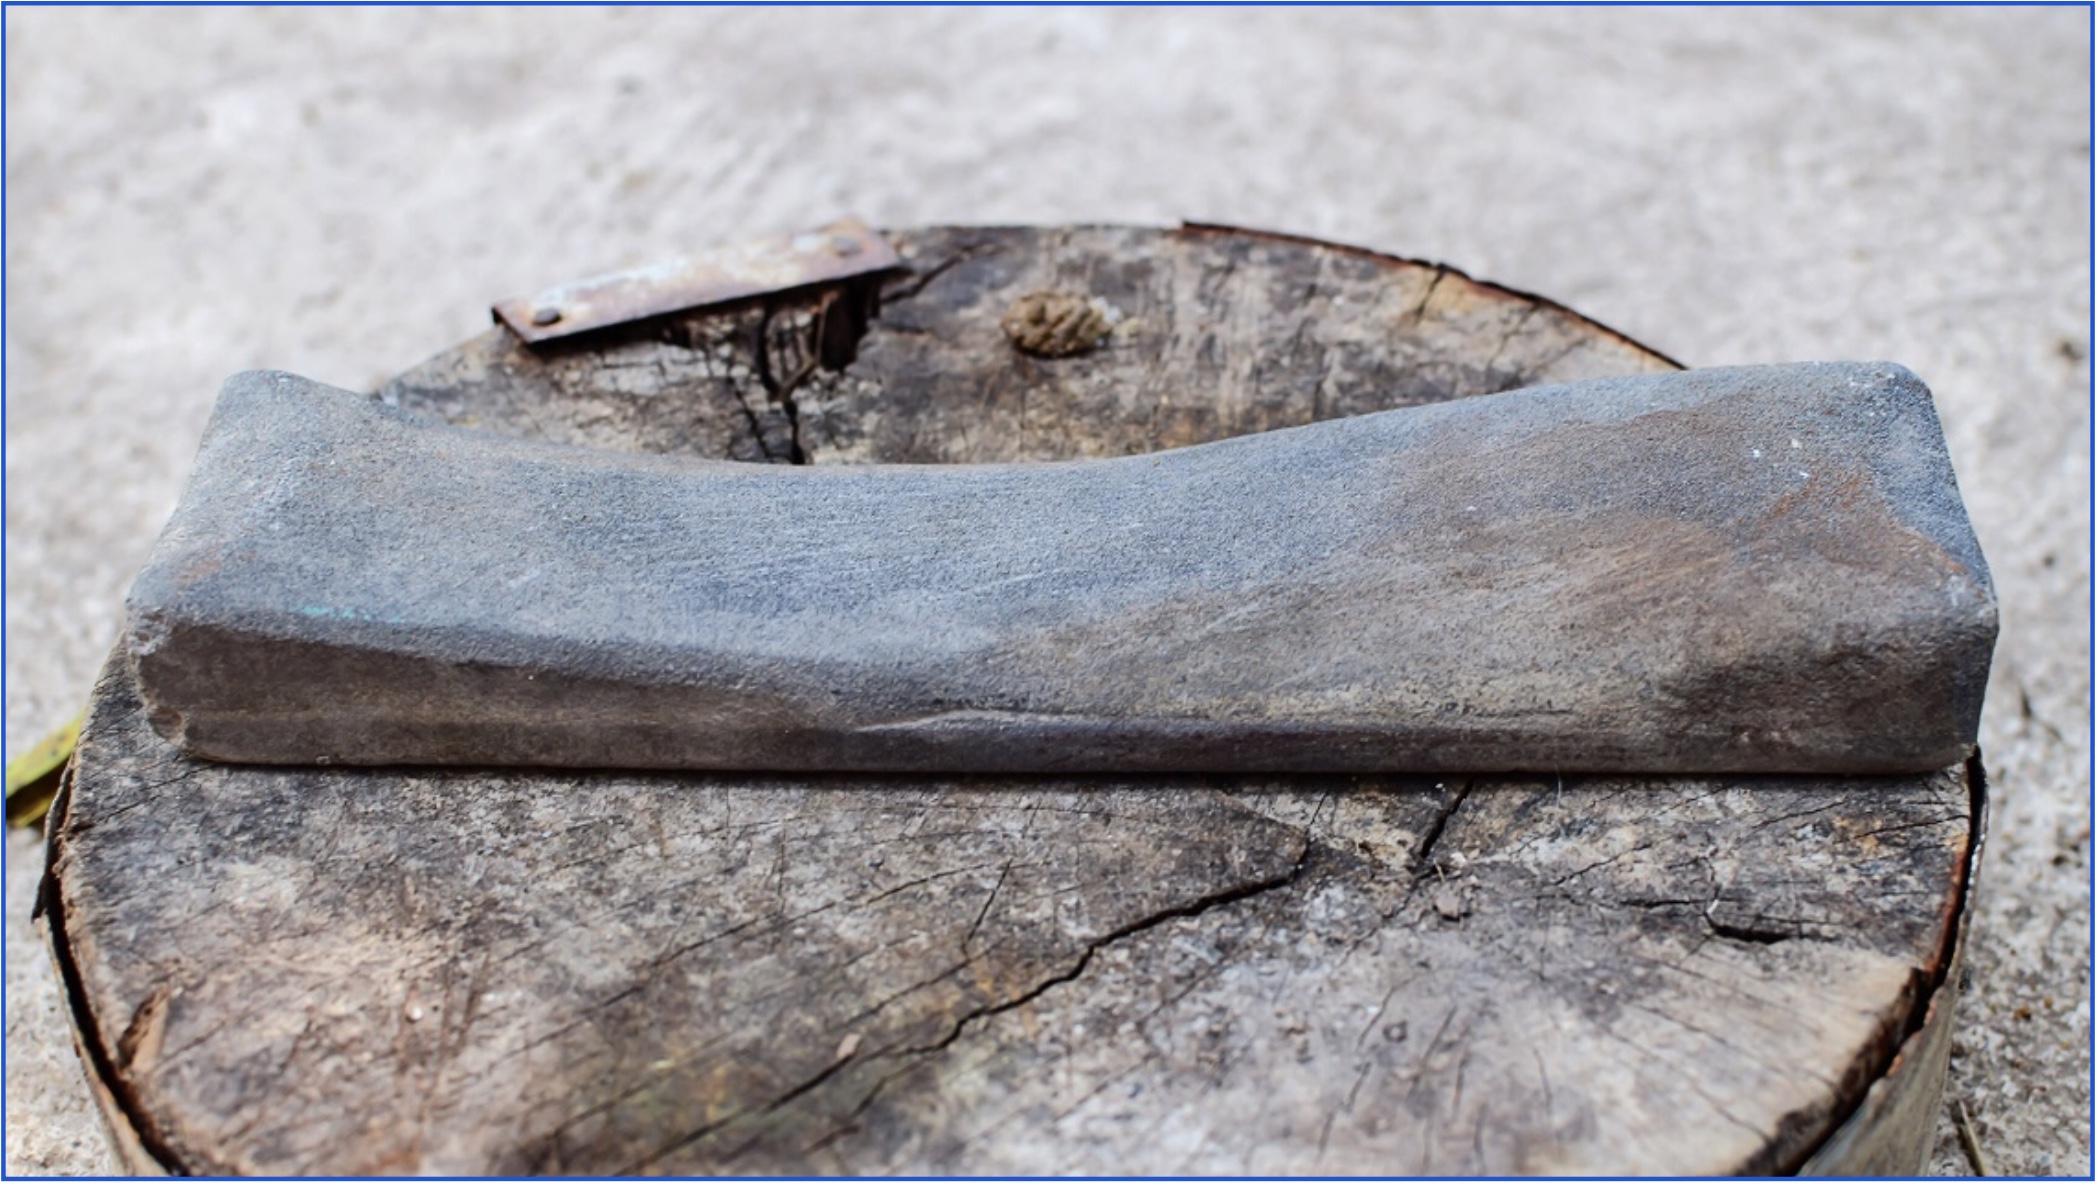
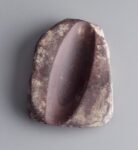
The Romans mined whetstones in North Gaul (present day Northern France and Belgium), Crete and in other areas they conquered. The whetstones from North Gaul have been found in settlements dating to the 1st century C.E.
Some of the whetstones from North Gaul, such as the one above, have been found buried beneath the main support posts of buildings. It is not known what symbolic meaning the stones had for the builders or occupants of the buildings. Did a stone taken from the earth then used to sharpen tools or weapons become a powerful protector once placed back in the earth?
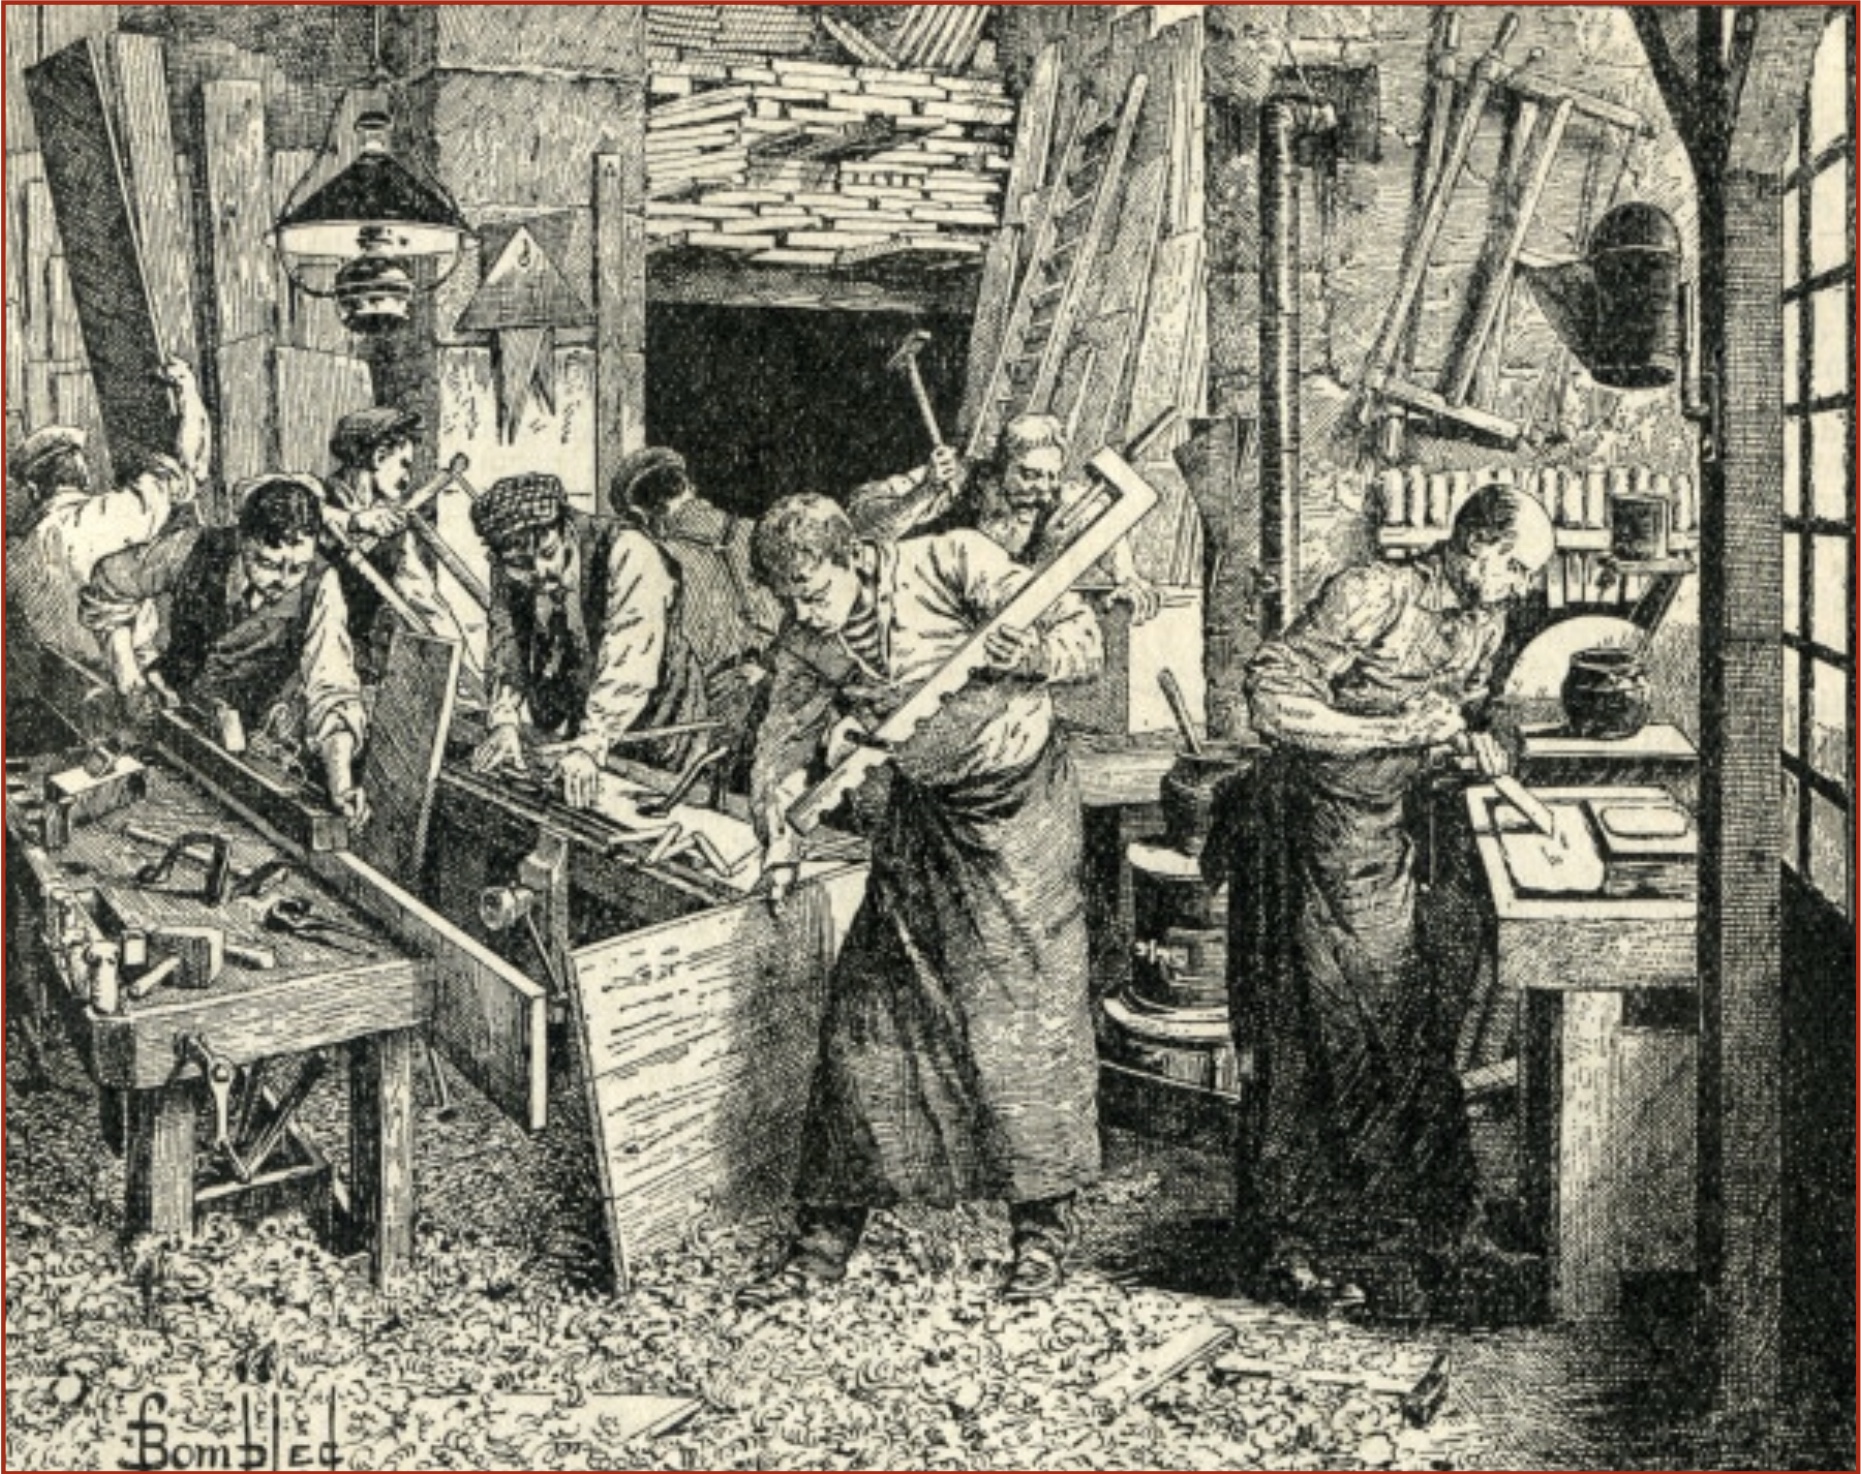
Louis-Charles Bombled, late 19th/early 20th century, Musee Jurassien des Art Moutier, Switzerland.
Roubo mentions sharpening stones as one of the necessary tools to be provided in a workshop. In Blombled’s crowded workshop, a sharpening station is right where it should be – close to the benches.
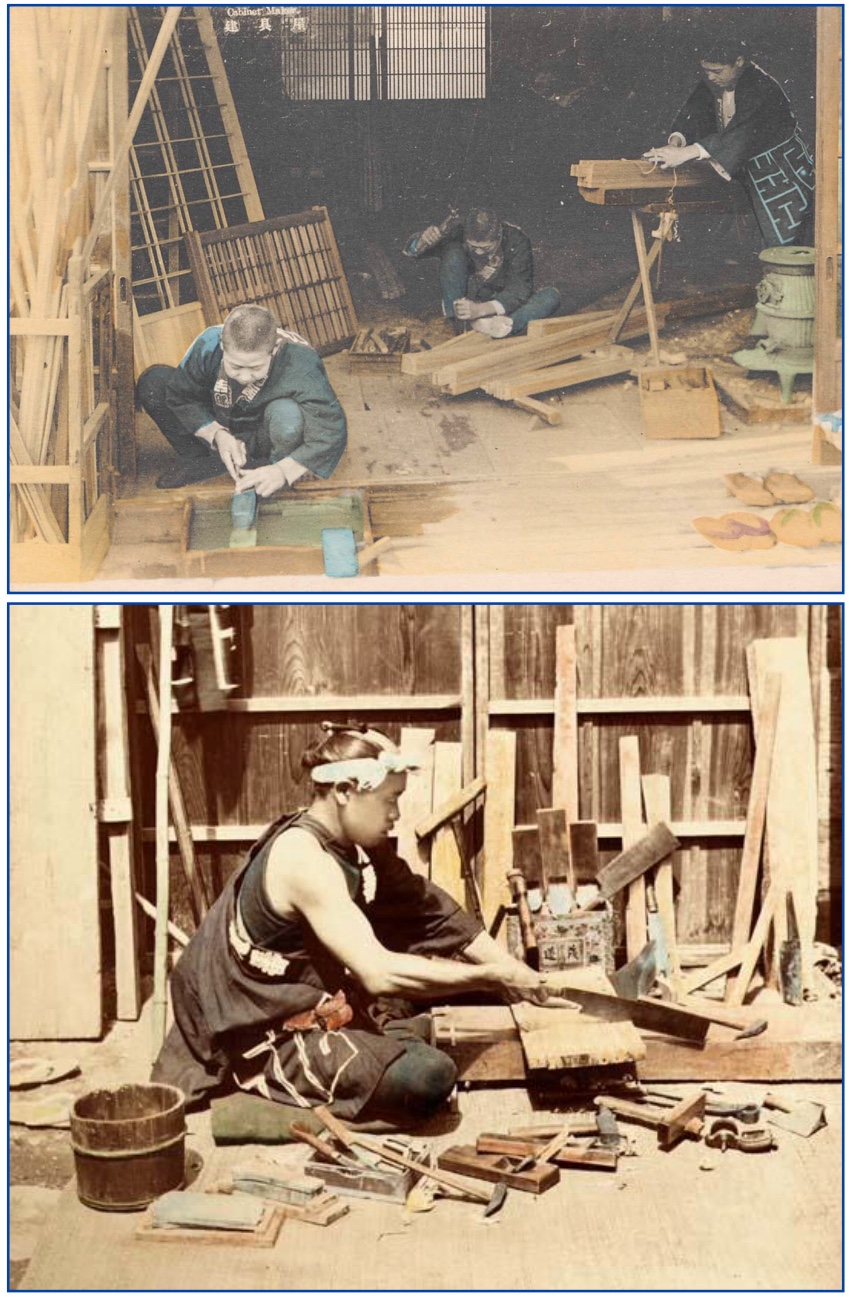
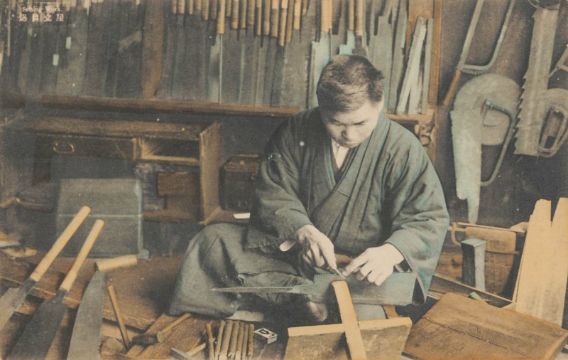
Top: collotype with hand coloring, MFA, Boston. Bottom: unattributed photo. Both are late 19th/early 20th century.
The Japanese workshops/work areas may be different from the European model, however, an area for sharpening was set up. At top, a chisel is being sharpened; in the bottom photo, (left foreground) sharpening stones and a water basin are at the ready.
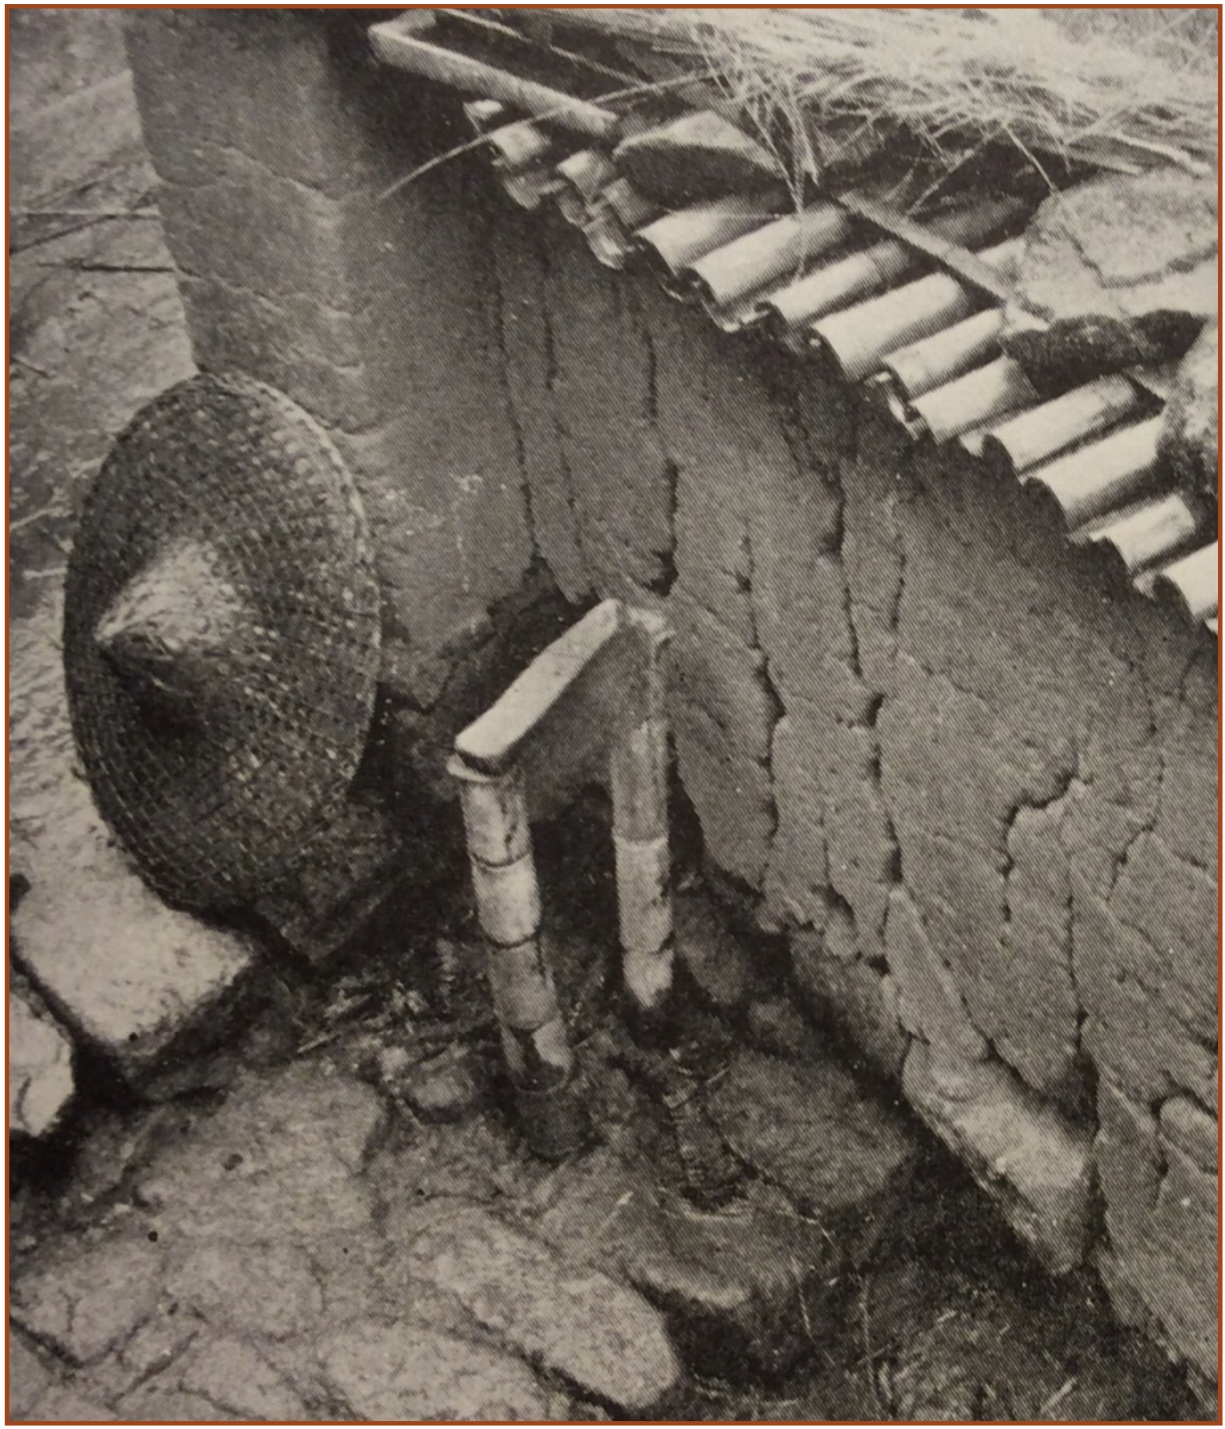
A convenient placement for a sharpening stone, 1920s from “China at Work” by Rudolf Hommel.
A sharpening stone was placed near an entrance. Whether you are coming or going, it’s a good reminder to sharpen your tools.
There is some evidence of pillars or other stone supports that were designated “sharpening spots” on large construction sites, especially when the constructions lasted decades or longer. The Cathedral of Valencia has such a spot near an entrance that is marked with deep vertical grooves.
Detail from Plate 12, “To Make as Perfectly as Possible.”
In Plate 12, Roubo illustrates the tools needed to sharpen saws. He includes a saw set, triangular file and a saw-holding vise to be secured on the workbench.
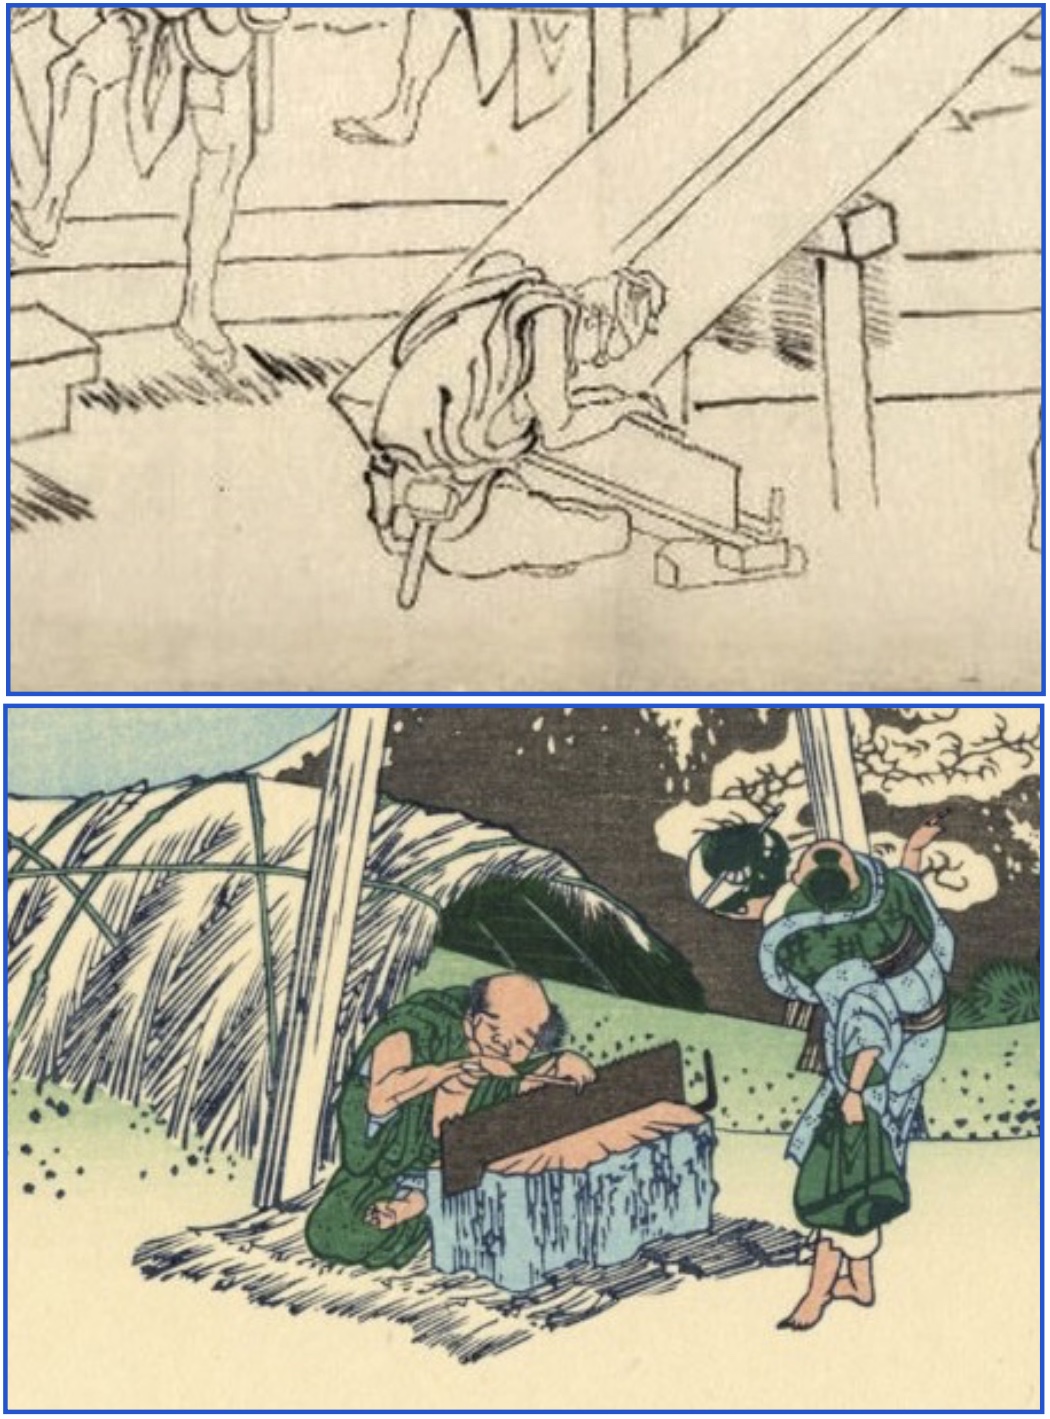
Top: detail from “Preparatory Drawing in the Style of Hokusai,” 1811, British Museum. Bottom: “Totomi Sanchu,” 1830-31, by Hokusai, MFA, Boston.
Positioned close to sawyers cutting massive pieces of lumber we find the saw sharpeners. One uses a vise made of blocks, while another has adapted a tree stump to serve as a vise. (The full-size images of the drawing and woodblock print are in the gallery at the end of this post.)
In this shop setting we see another saw vise option and it includes a stabilizing foot.
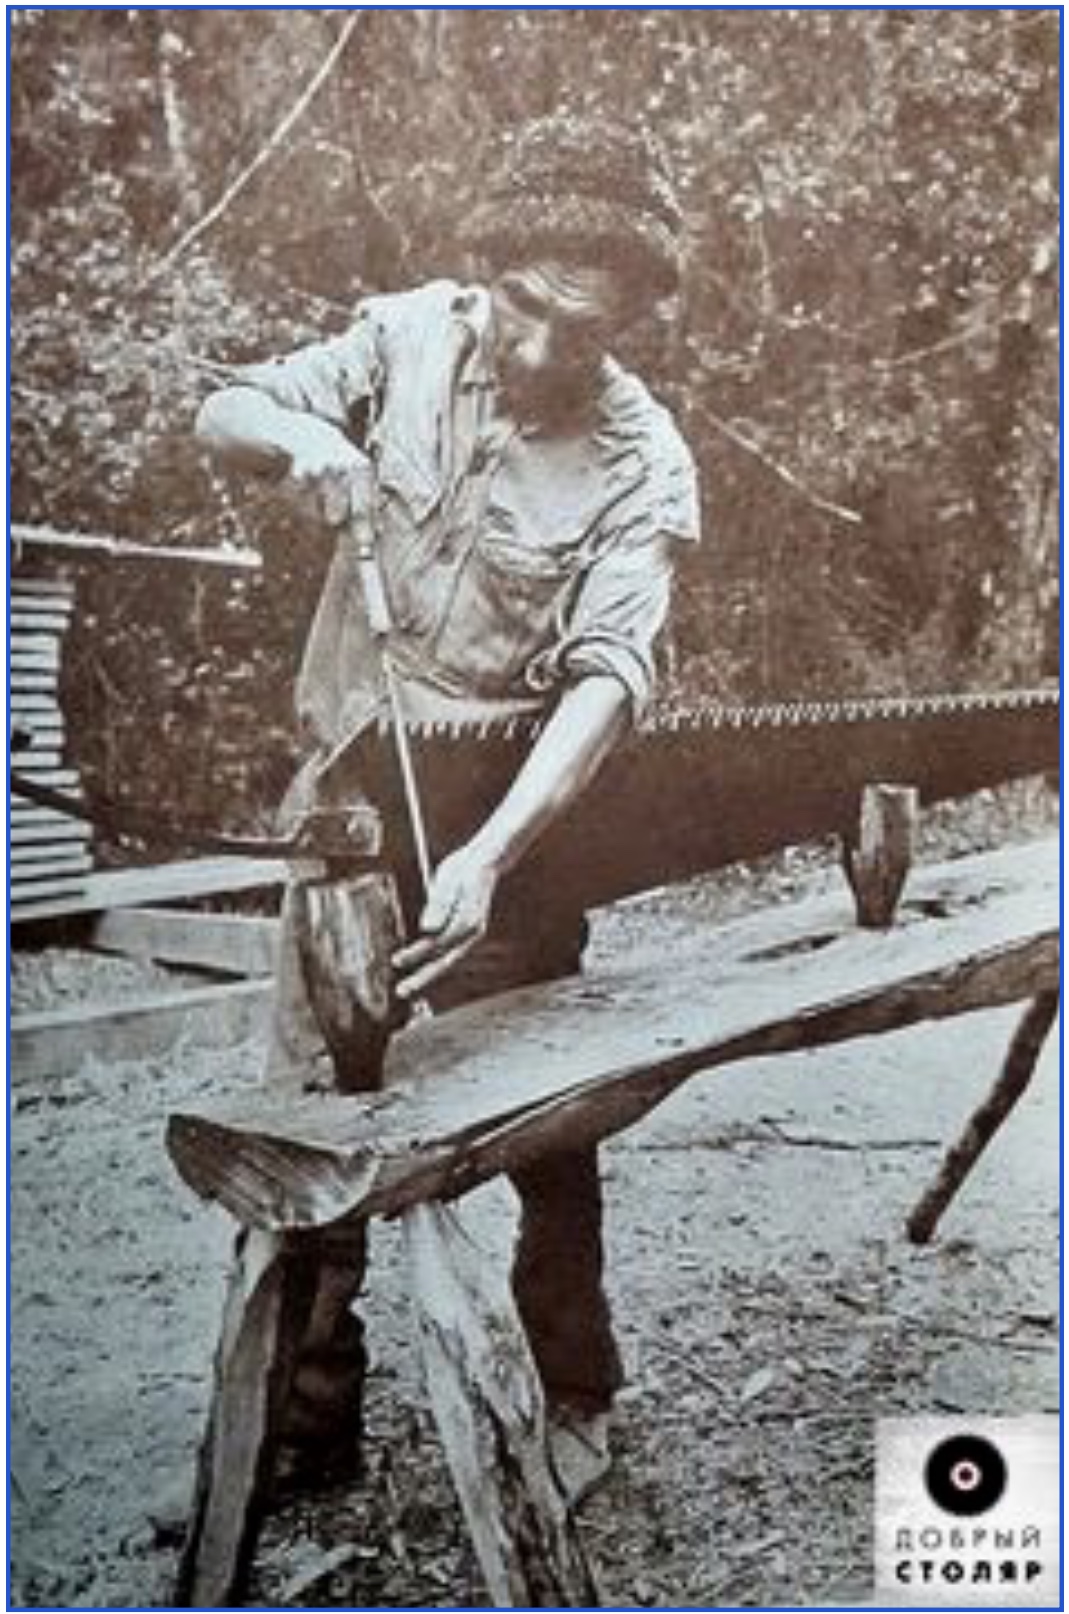
One more set-up for sharpening saws in the field (or forest). Using a low staked bench and shaped wooden “grippers” (and maybe some wedges) the pit saw is secured for sharpening. Side note: the photo is unattributed but is possibly Russian as the lower word in the logo (bottom right) is Russian for joiner or carpenter.
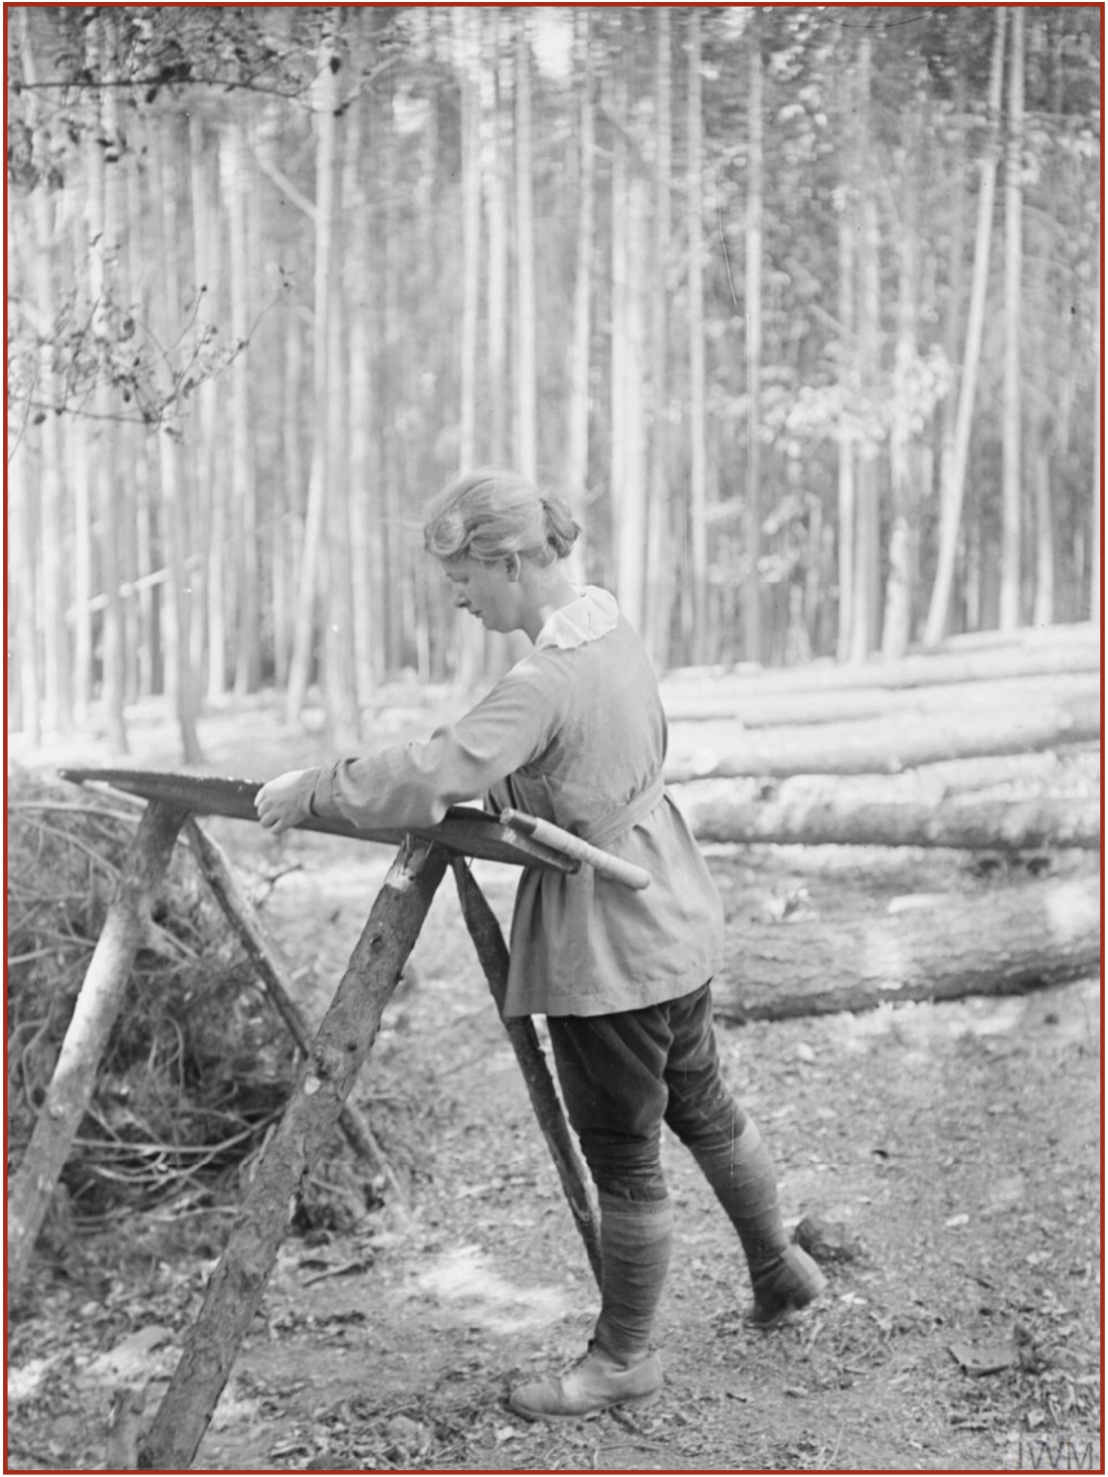
Women’s Land Army/Women’s Forestry Corps, Britain, WWI, Imperial War Museum.
Is that a woman sharpening a two-woman saw in a lumber camp? Why yes, yes it is.
Left: Ichikawa Danjuro in the Role of Soga Goro from the play “Yanone,” ca. 1790, MFA, Boston. Top right: unattributed photo, late 19th/early 20th century. Bottom right: detail from “A Book Mirror of Various Occupations,” 1685, MFA, Boston.
This composite is a reminder of how little has changed in using sharpening stones on metal edges. A domed stone in a water basin (or a nearby basin) is used by sword makers 200 or more years apart. In a kabuki play, Yanone (Arrowhead) Goro sharpens a double-headed arrow as he prepares to avenge his father’s murder.
Whetstones
From a 1650 version of “Cries of London.”
One of the great values of whetstones is their portability. Take them into the field or forest. Pack them in your tool box for the trip to the next job site. Whetstone quarries abound with some in operation for centuries.
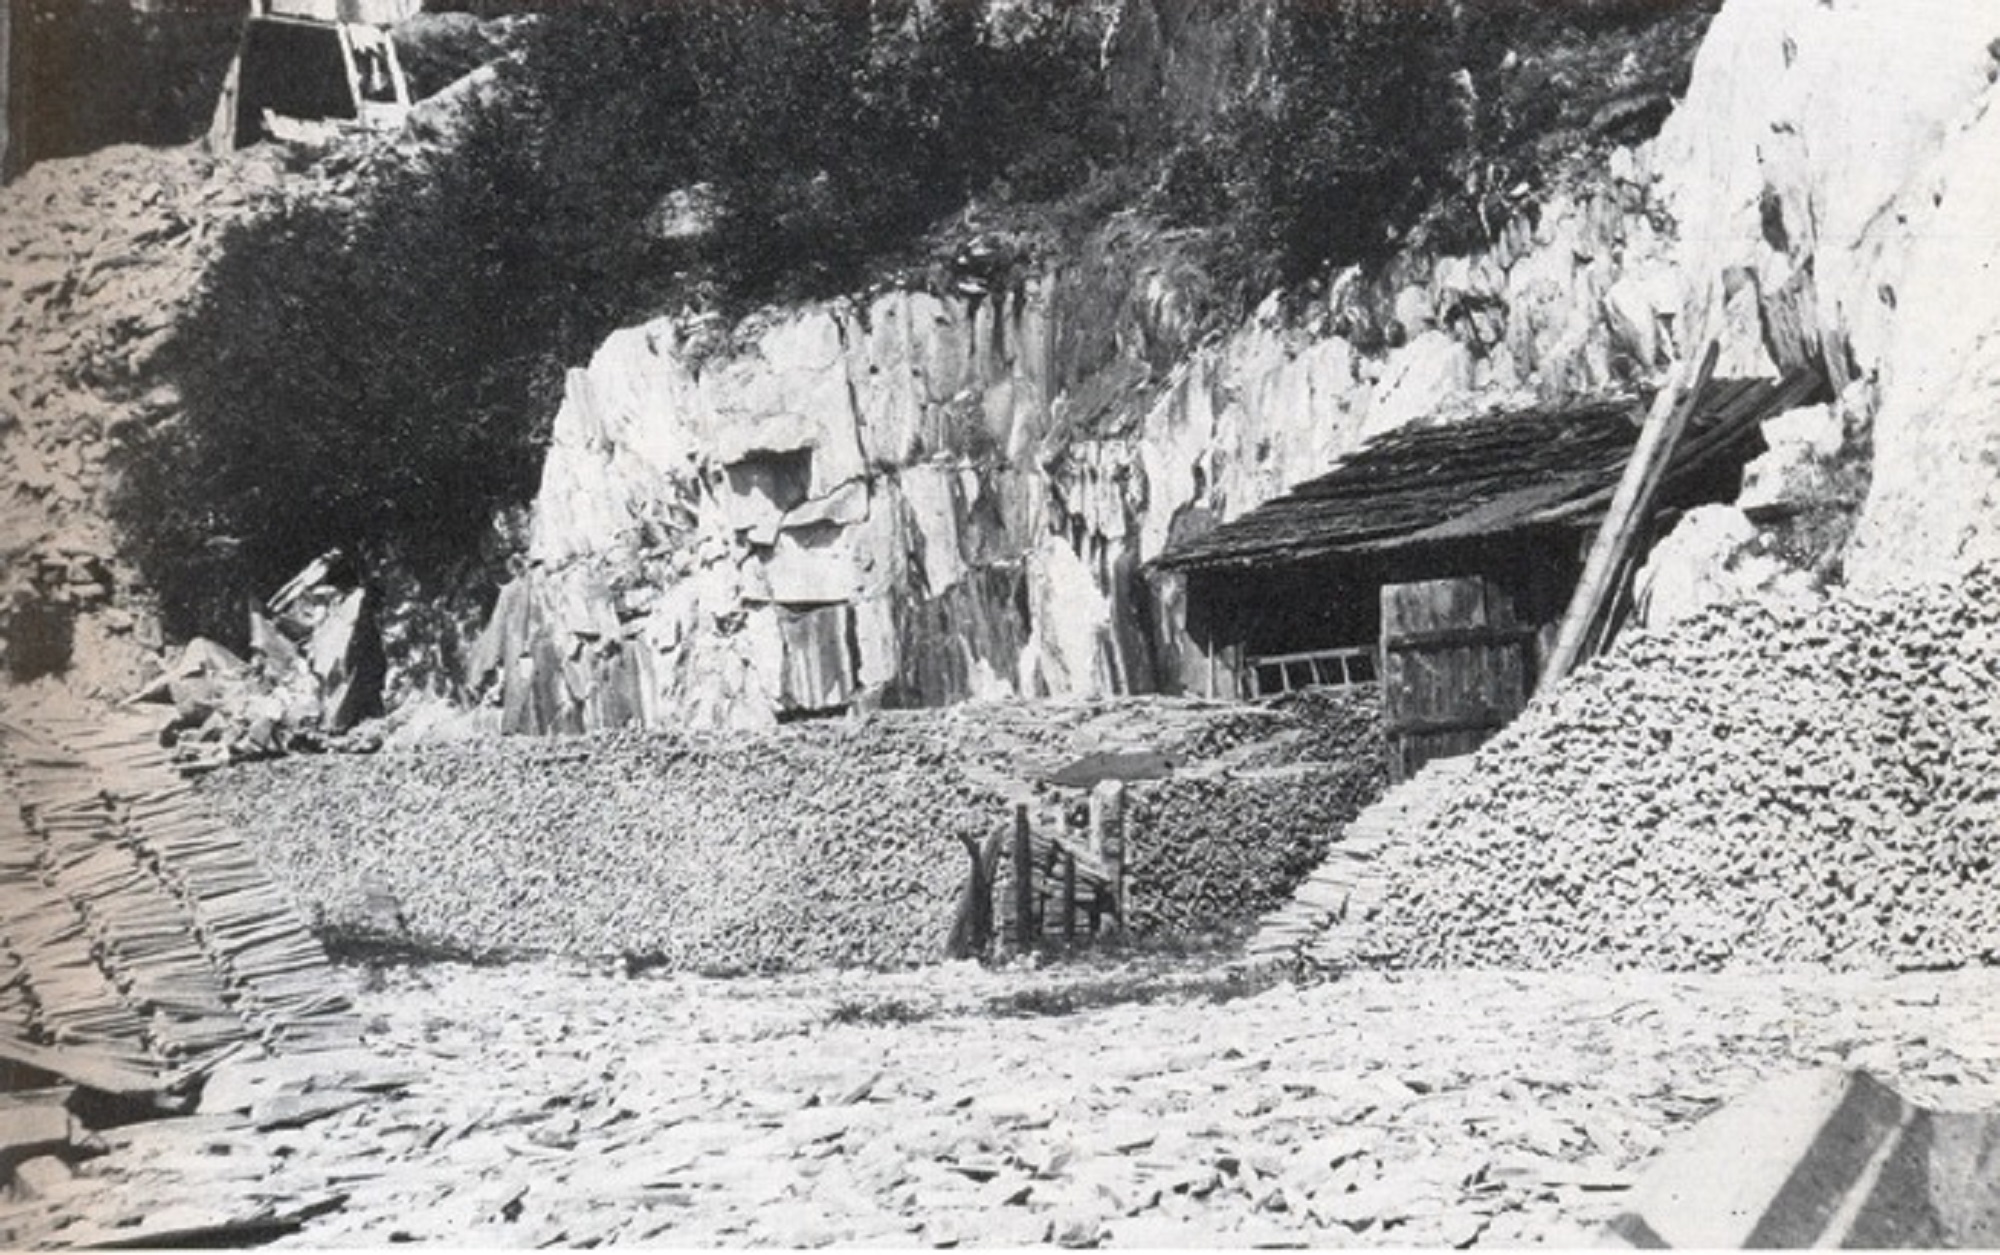
Eidsborg Whetstone Quarry, Norway.
The Eidsborg quarry in Tokke, Telemark, Norway, was in operation from at least the 8th century until 1970.
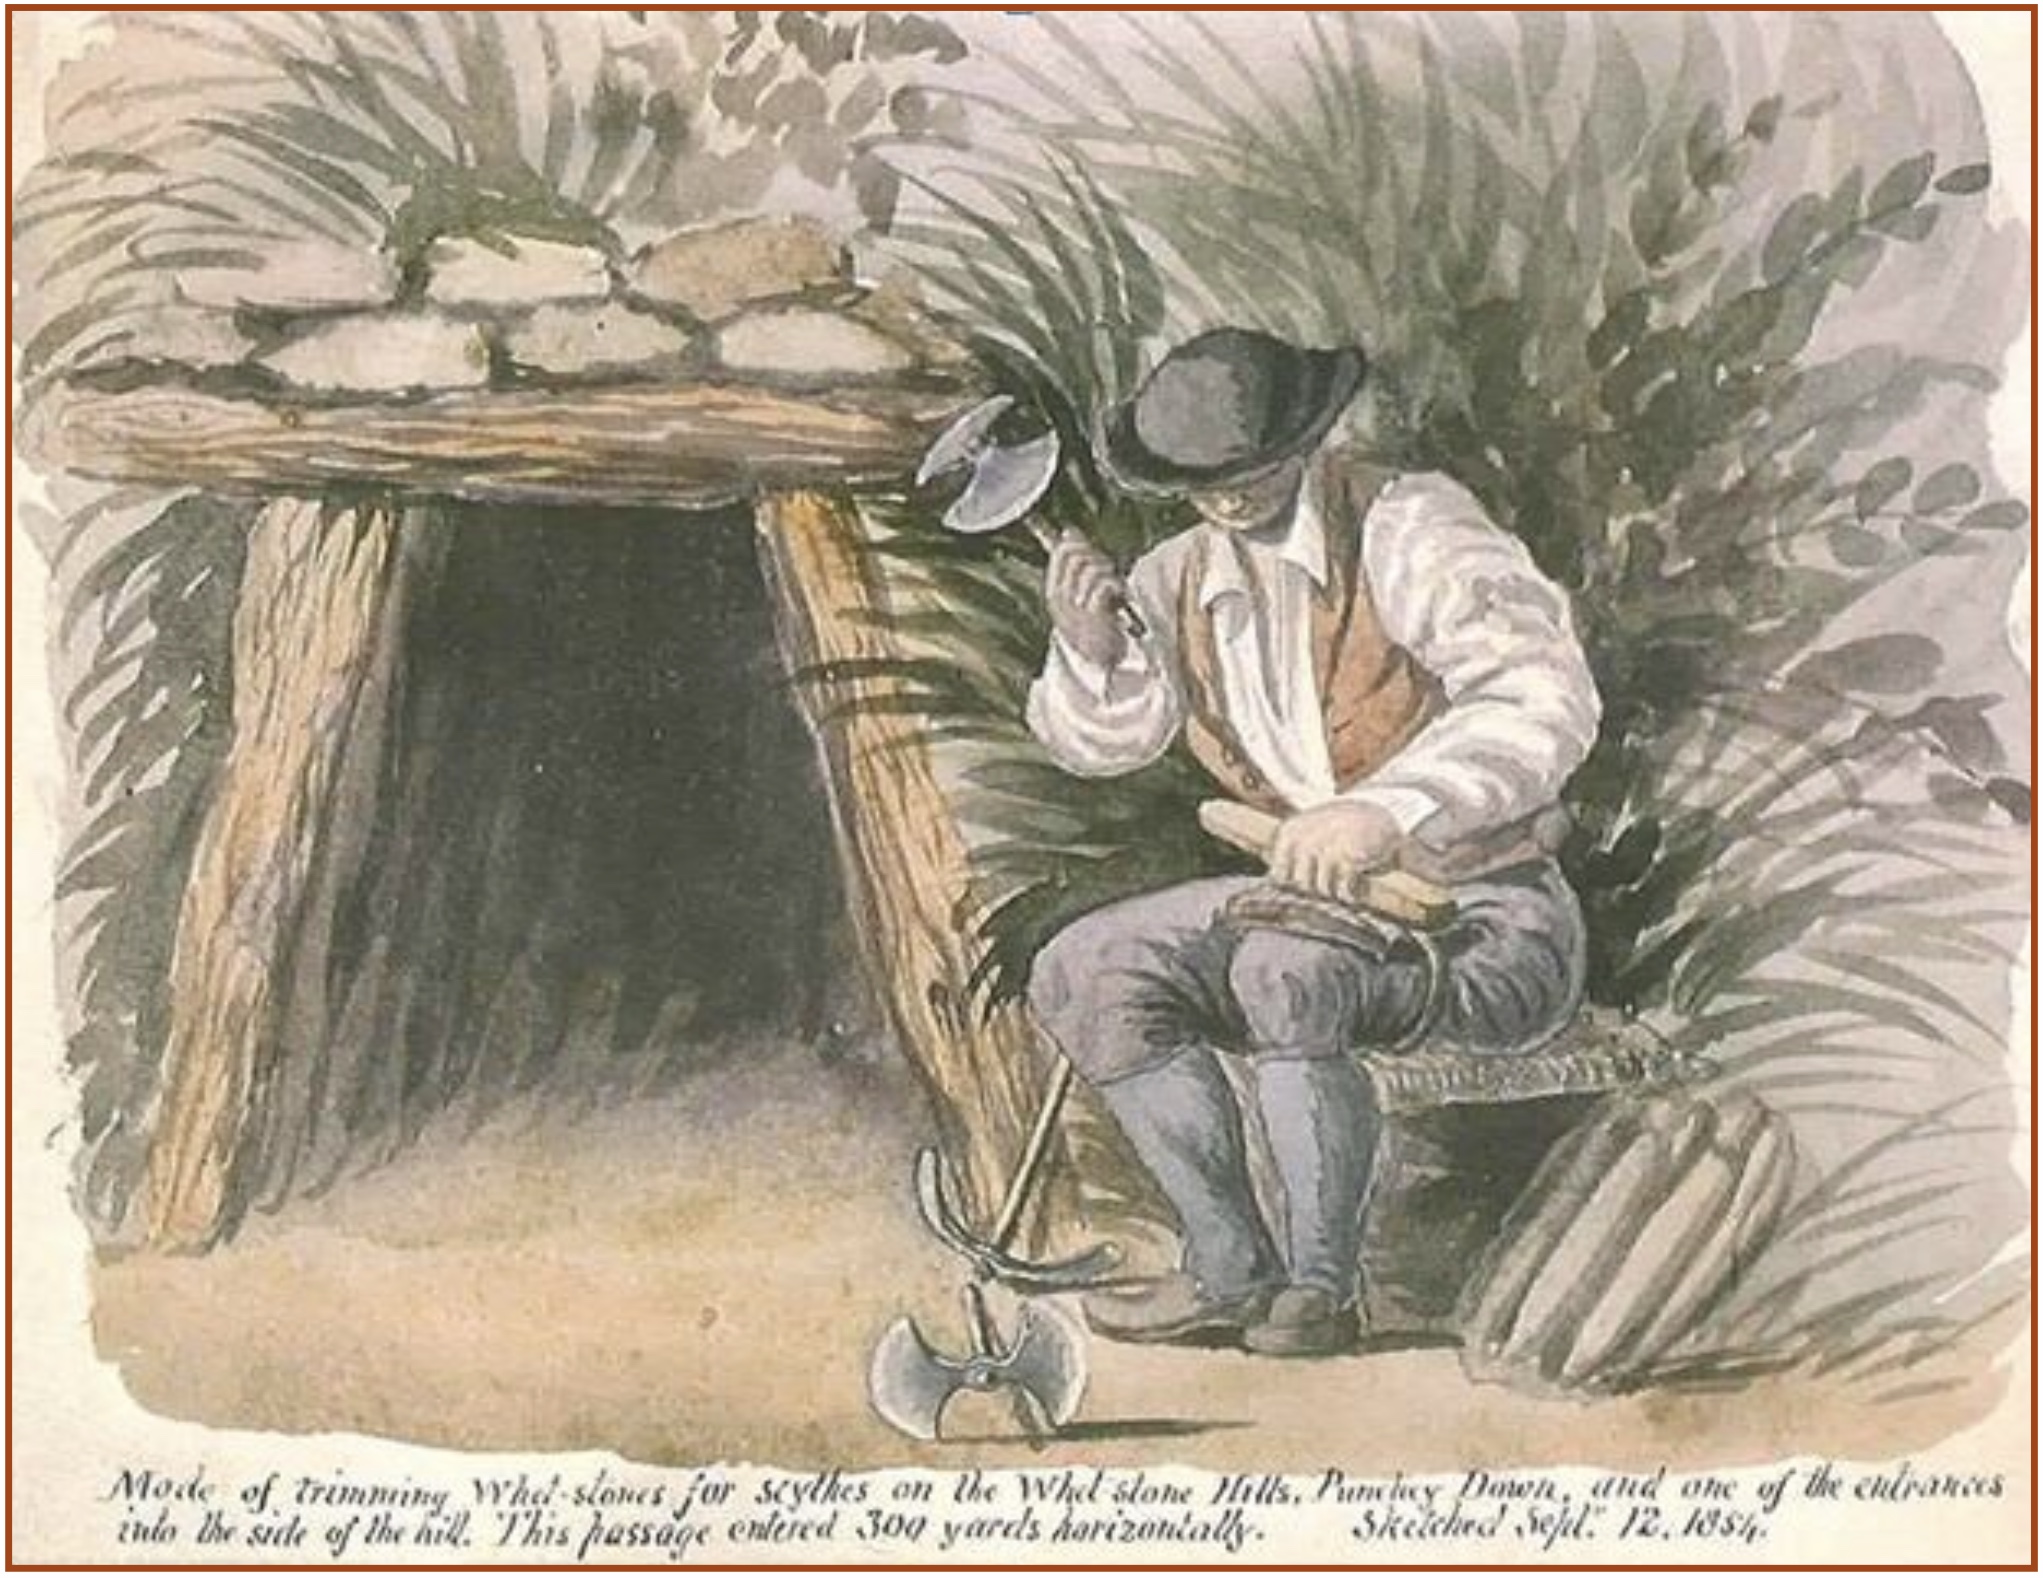
Initial trimming of a whetstone. Watercolor from the diaries of Peter Orlando Hutchinson, 1854.
In the Blackdown Hills near the Somerset-Devon border in southwest England whetstones were mined from the 17th century to the early 20th century. Miners had small individual stakes on the side of a hill. The men of the family (father and older boys) dug the mine shaft, hewed out the stone and did the initial shaping with a basing axe. The wife and small children of the family did the final shaping. It was a hard way to make a living and exposure to fine stone particles and dust affected the health of the entire family.
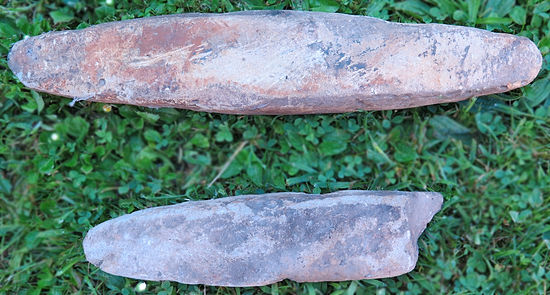
Blackdown Hills whetstone “batts.”
Whetstone batts from the Blackdown Hills were used to sharpen scythes and other farm implements and tools.
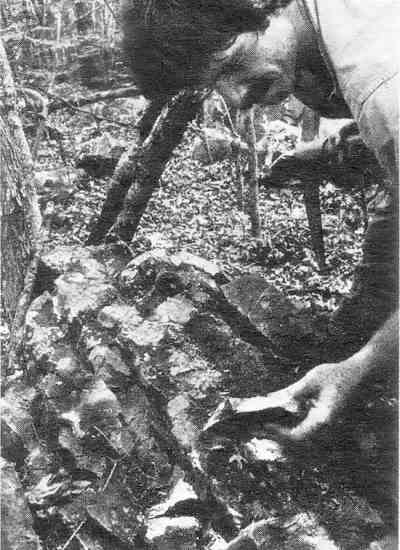
Roy Underhill at a played-out whetstone quarry.
One of the many explorations undertaken by Roy Underhill was to locate an old whetstone quarry near Chapel Hill, North Carolina. His trip, and what he found, is in a chapter of his book “The Woodwright’s Companion.”
RotatingGrindstones
Psalm 63, “Utrecht Psalter,” Universiteitsbibliotheek, Utrecht. Digital image from the Warburg Institute Iconographic Database.
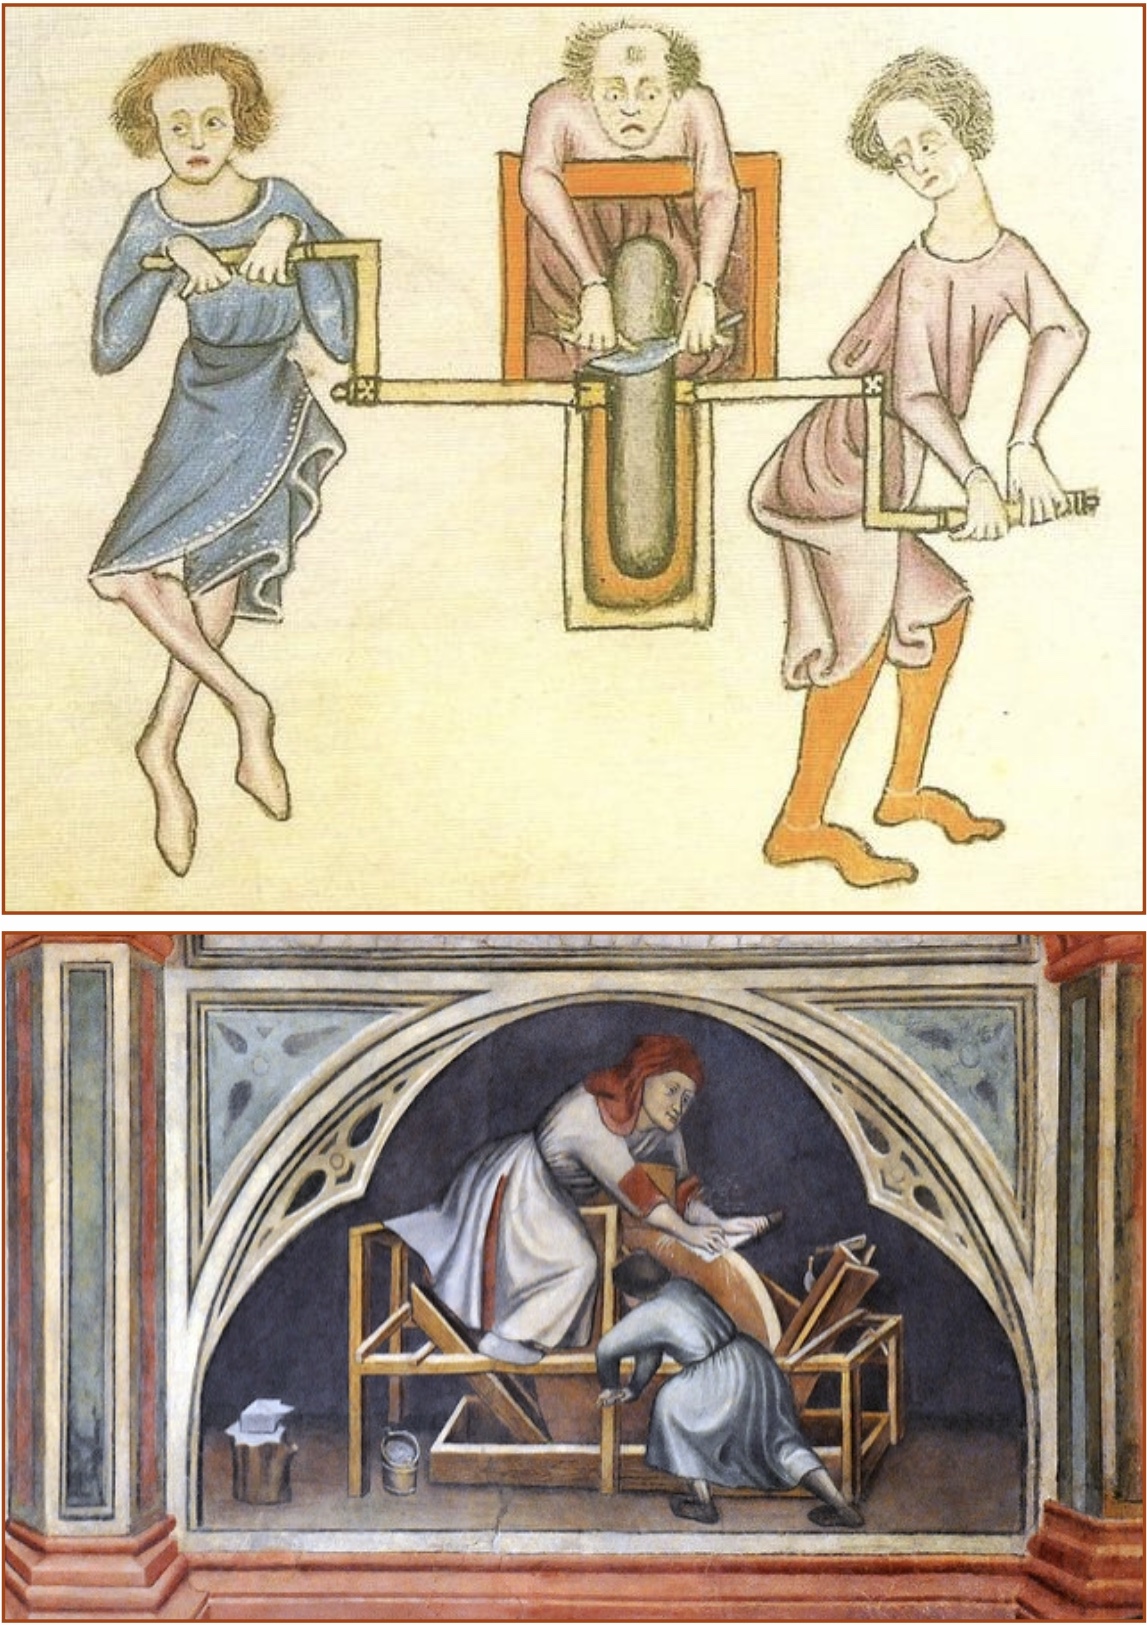
The earliest (so far) illustration of a rotary grindstone is from the 9th century “Utrecht Psalter.” It is supposedly a metaphor for “They sharpen their tongues like swords…” The grinder (grinding master?) sits high above the grindstone and to the side his minion turns a crank. Later manuscripts give us a better idea of the arrangement of this type of grindstone.
Top: “Luttrell Psalter,” 1340, British Museum. Bottom: fresco, 1425-40, Palazzo della Ragione, Padua, photo by Renzo Dionigi.
The top image provides a variation on a bird’s-eye view of this stationary grinder. The fresco below provides a much better view of how the grinder sat above the rotating stone. The lower half of the stone sits in a well of water and the minion turns the crank. This type of set-up could be found where large amounts of metal might be wrought, such as a large farming estate and shops making armor and weapons. The hand crank gave control over the speed of the grinding wheel.
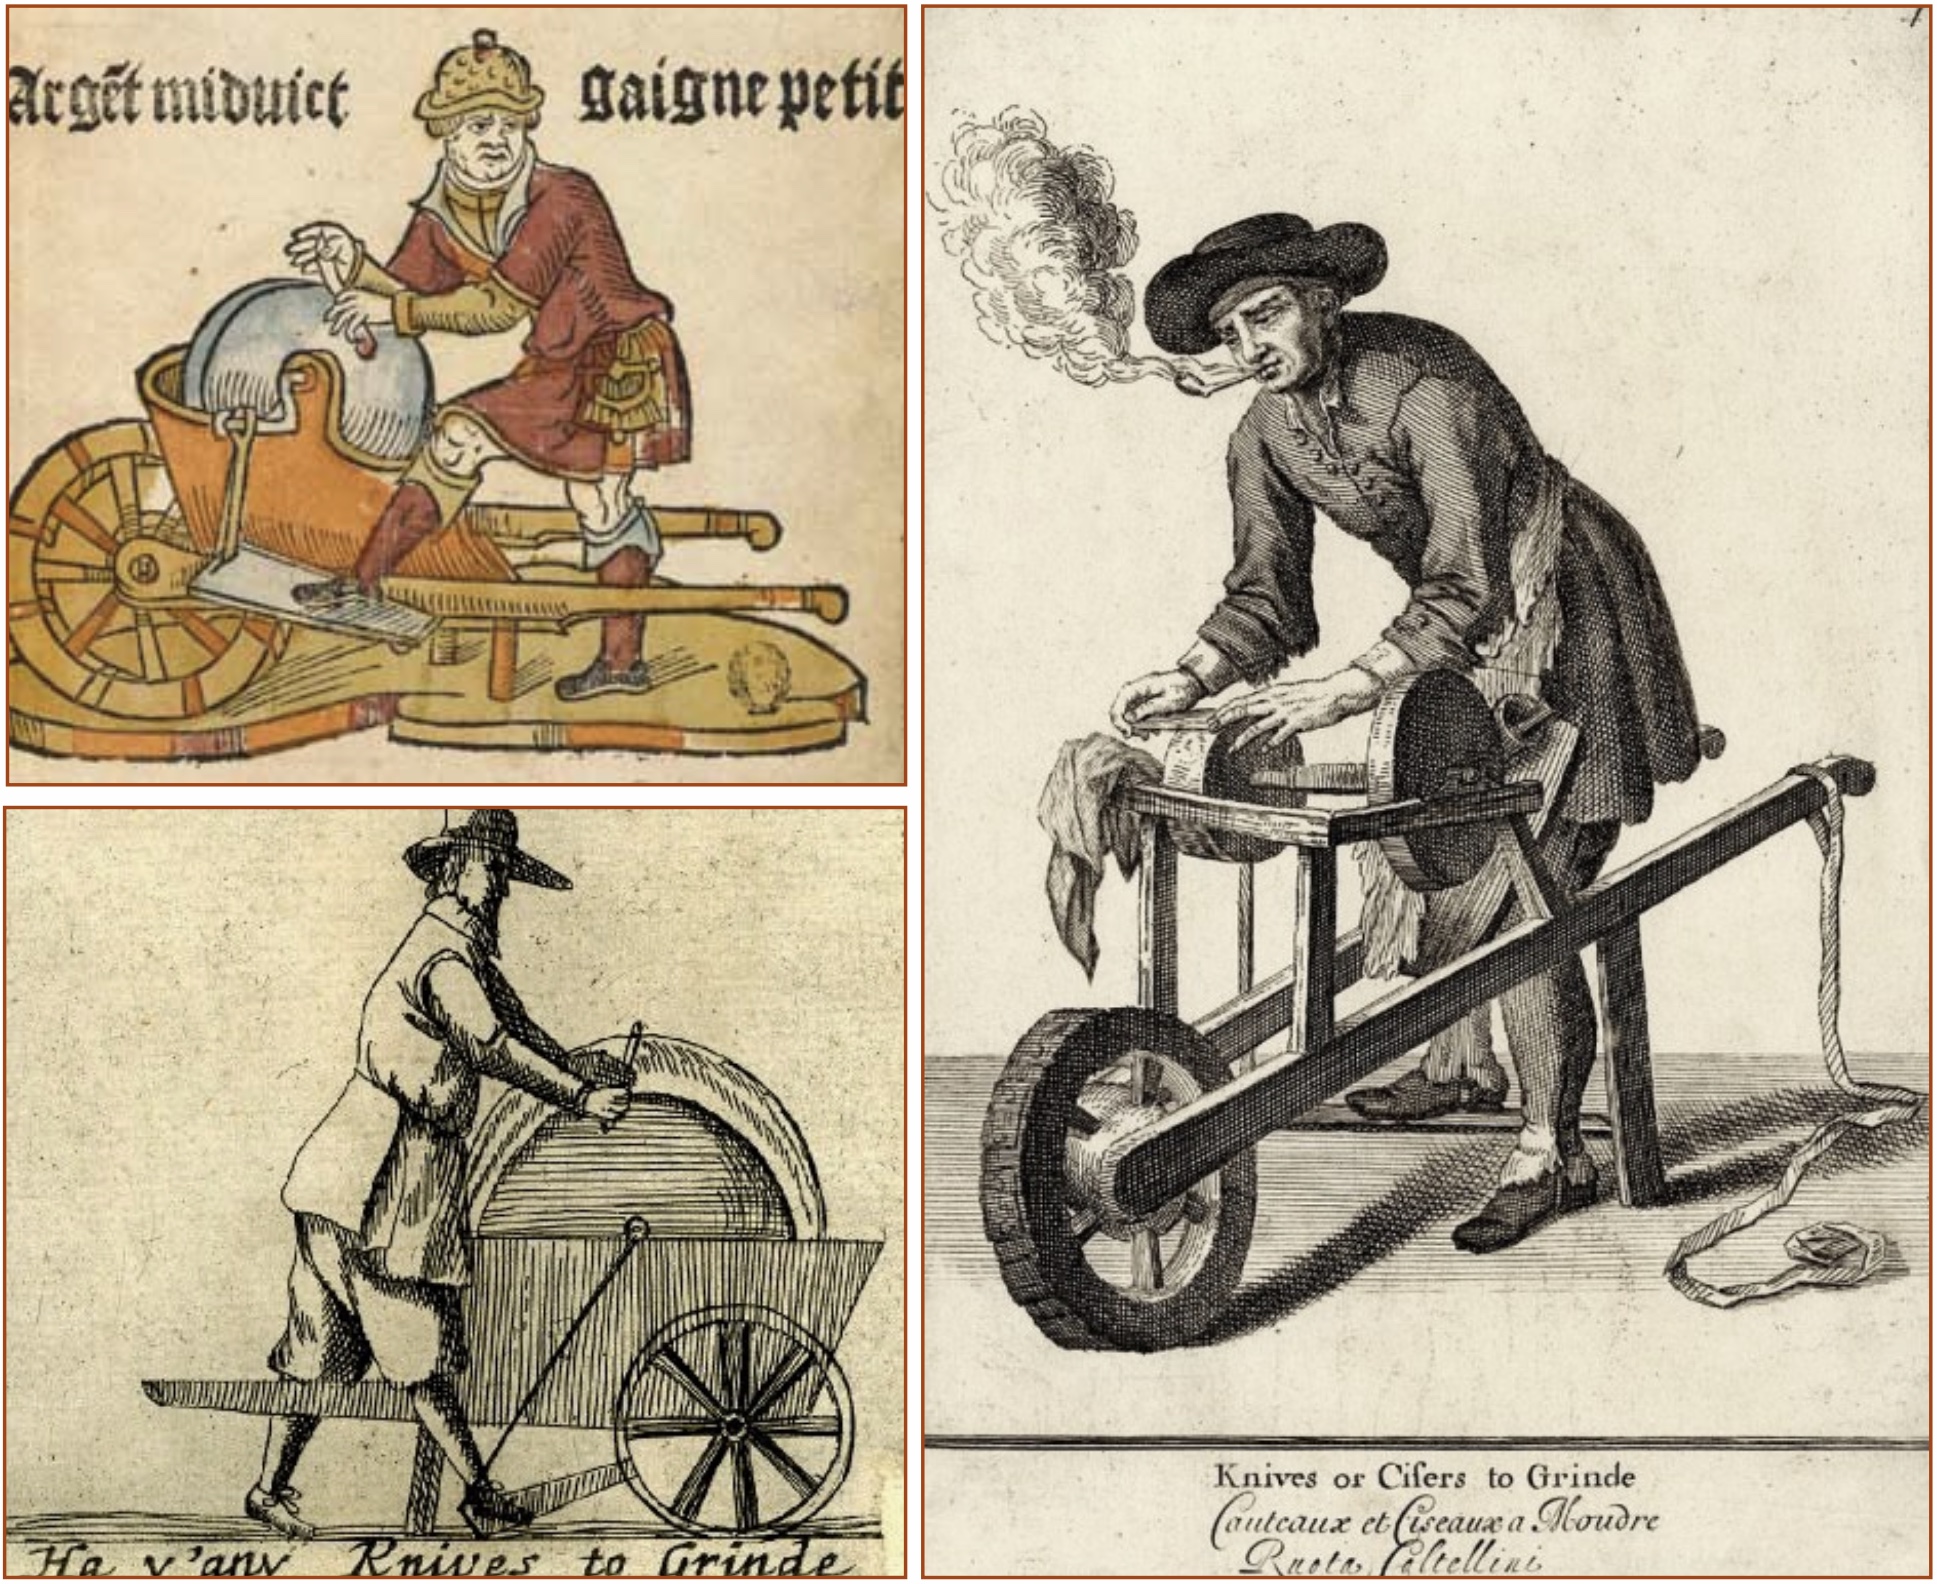
Top left: “Cris de Paris,” 1500, BnF, Arsenal. Bottom left: “Cries of London” (source unknown), 1655. Right: “Cries of London” (source unknown), 1688.
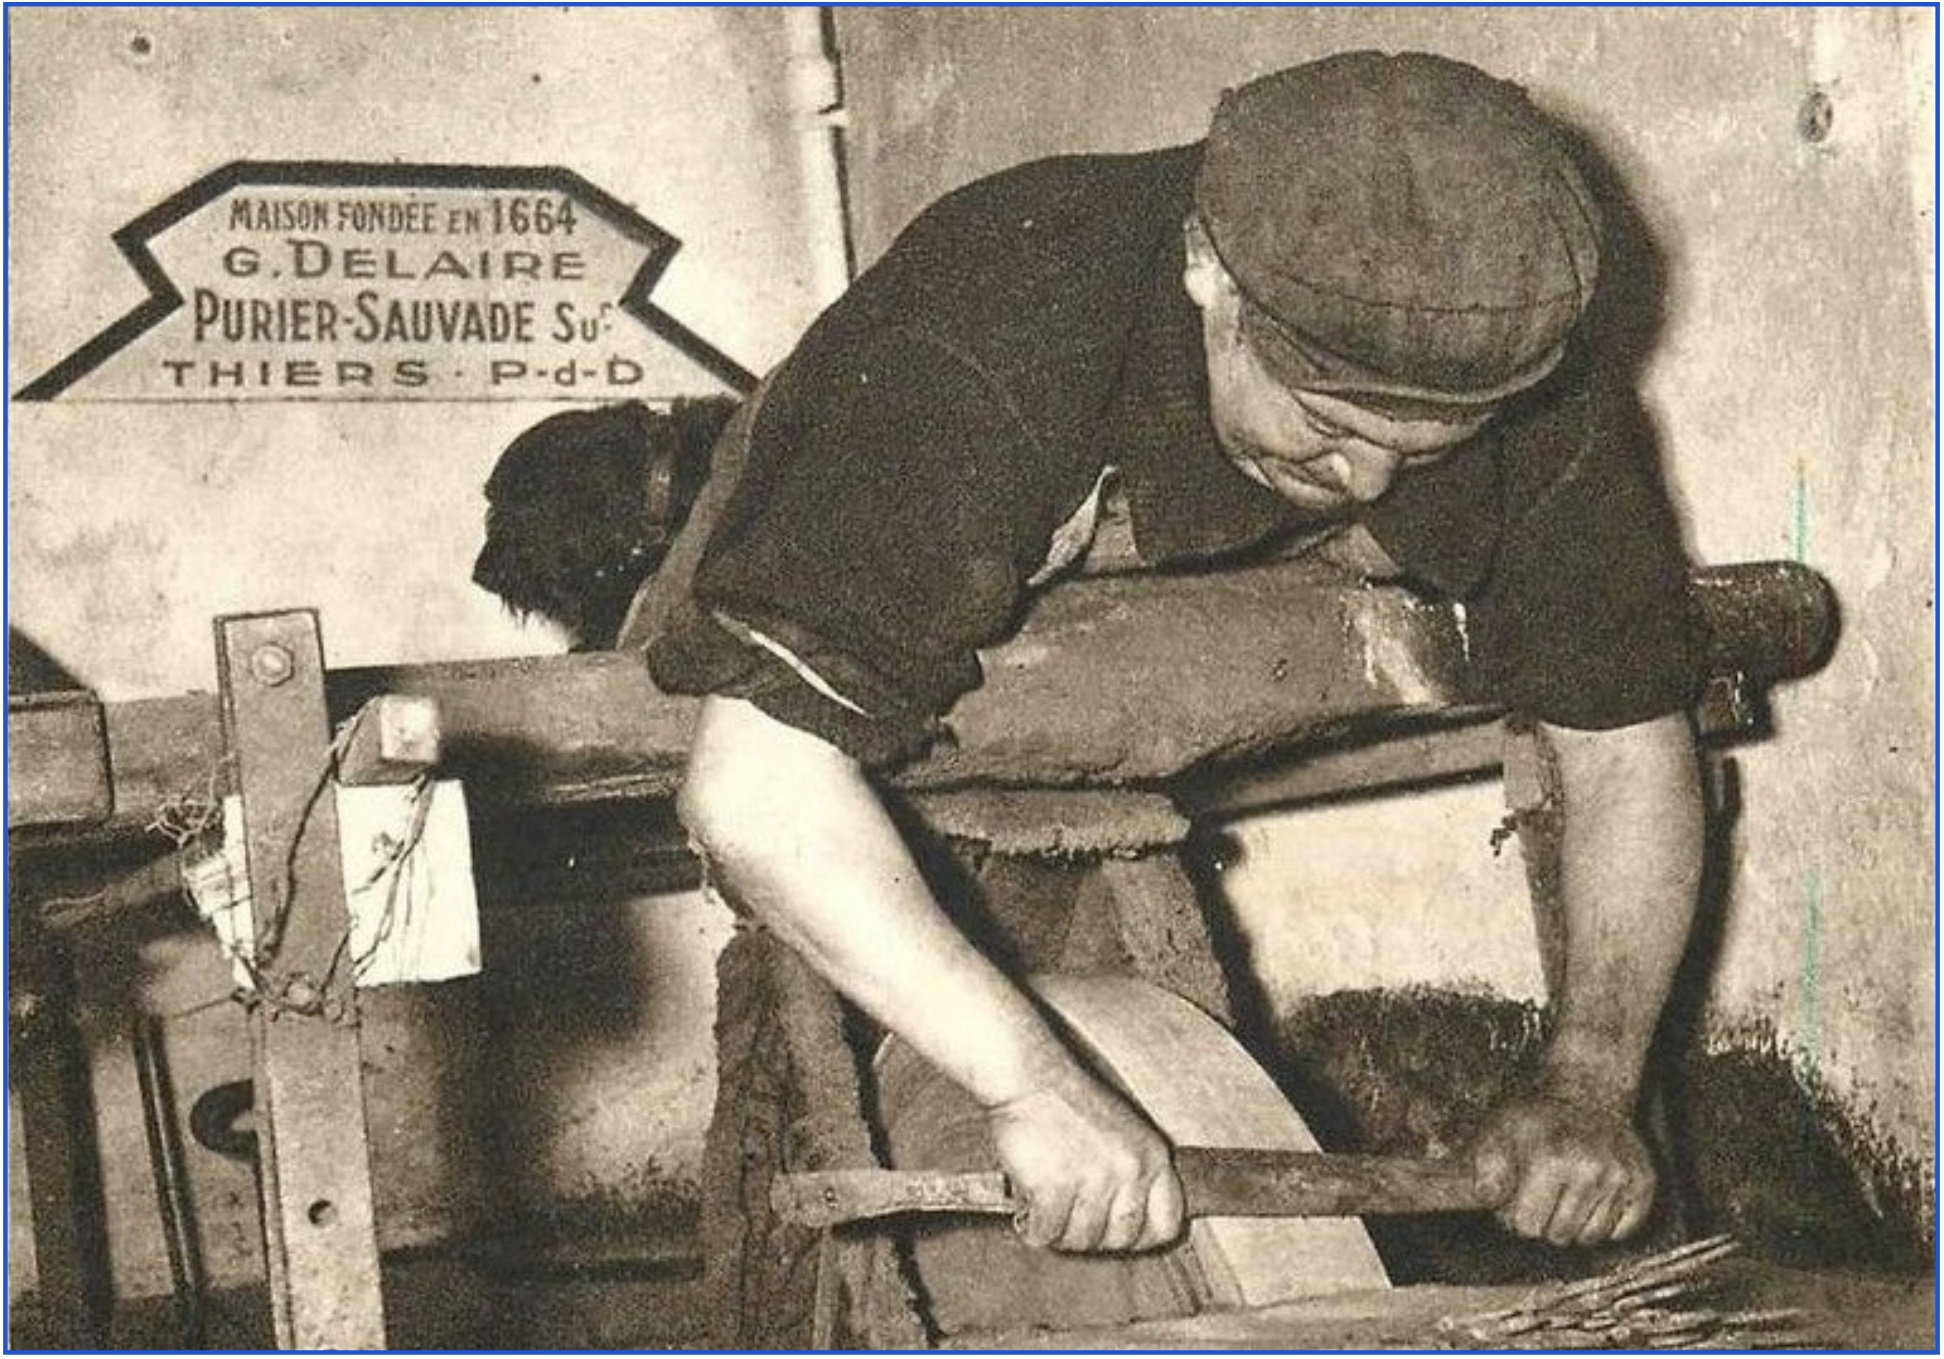
If you lived in a city and had knives and scissors (or sciffars, or cifers) that needed sharpening a street vendor with a grinding wheel was readily available. The grinding wheel was propelled by a foot pedal and the vendor could use both hands. The vendor on the right has a cup (behind the larger wheel) to hold water or oil and on the frame there is a rag to wipe the blade clean (Chris has christened these rags, woobies).
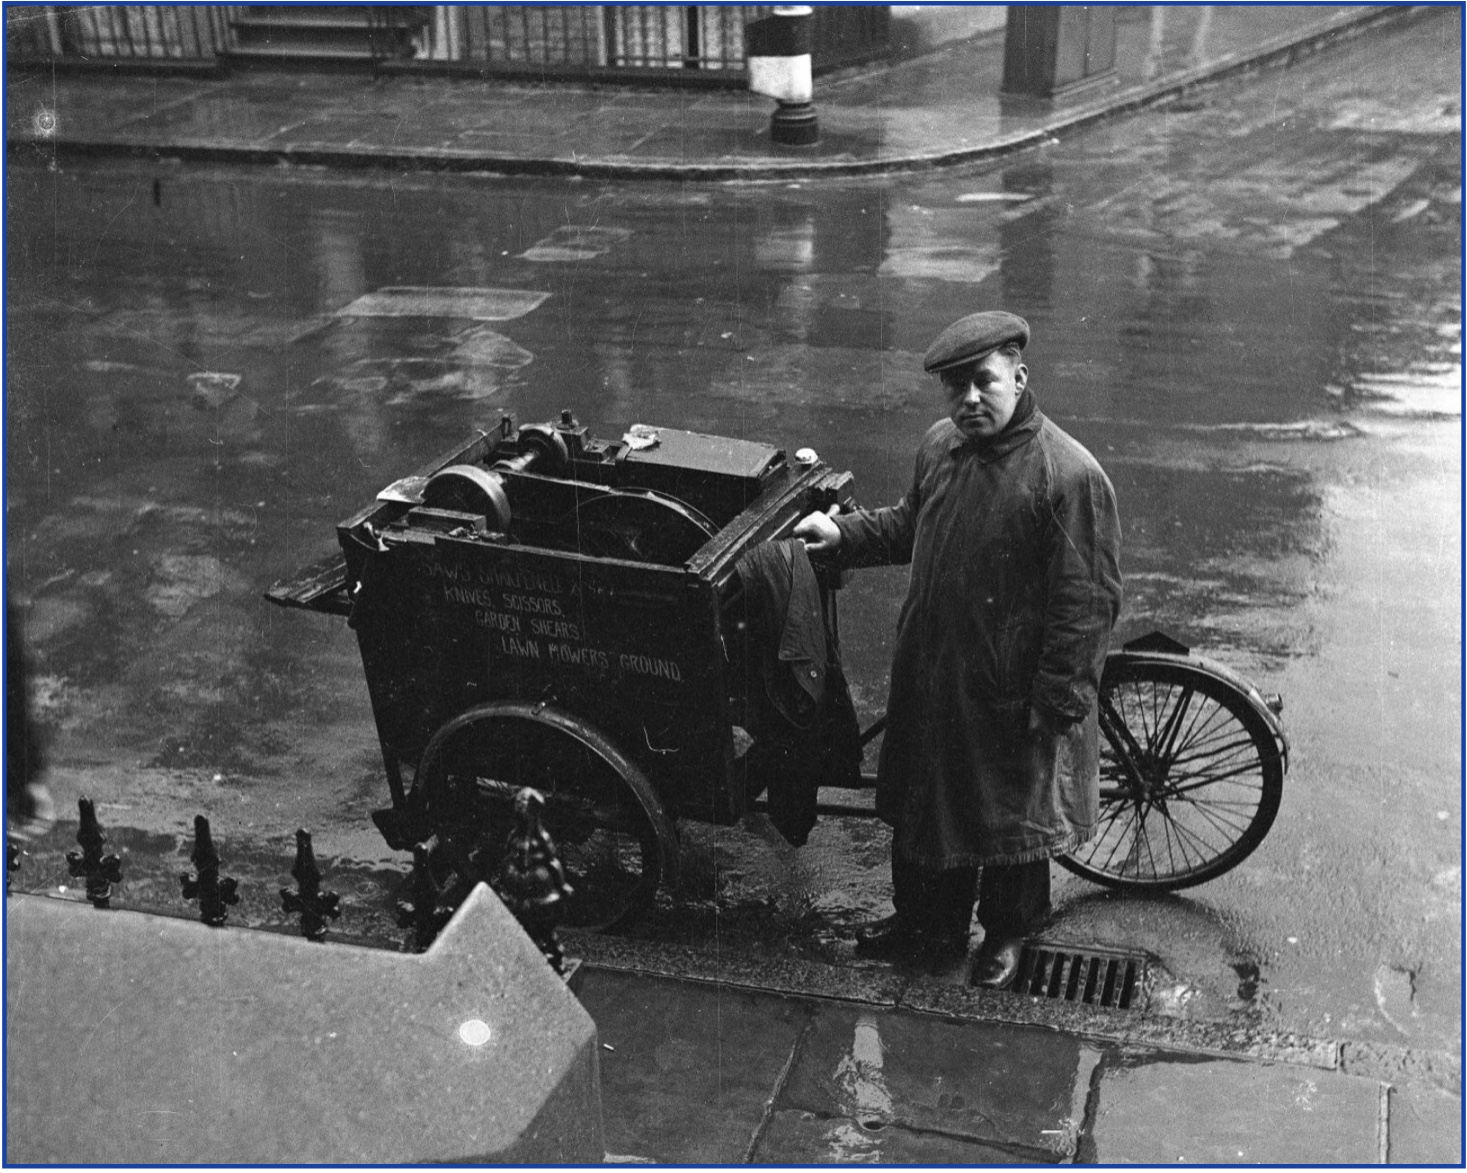
Mr. Bert Smith, Bethnal Green in East London, c. 1949-1956, photo by Nigel Henderson, collection of the Tate.
The bicycle, both to turn the grindstone and to propel the cart, was another iteration of the portable grinder. Street vendors using foot or bicycle power can still be found in some large cities, but it is more common to visit a small shop or farmers’ market to have knives or scissors sharpened. That is why having a woodworker as a friend is a bonus.
Smaller versions of the stationary grinder became an asset to both large and small woodworking shops.
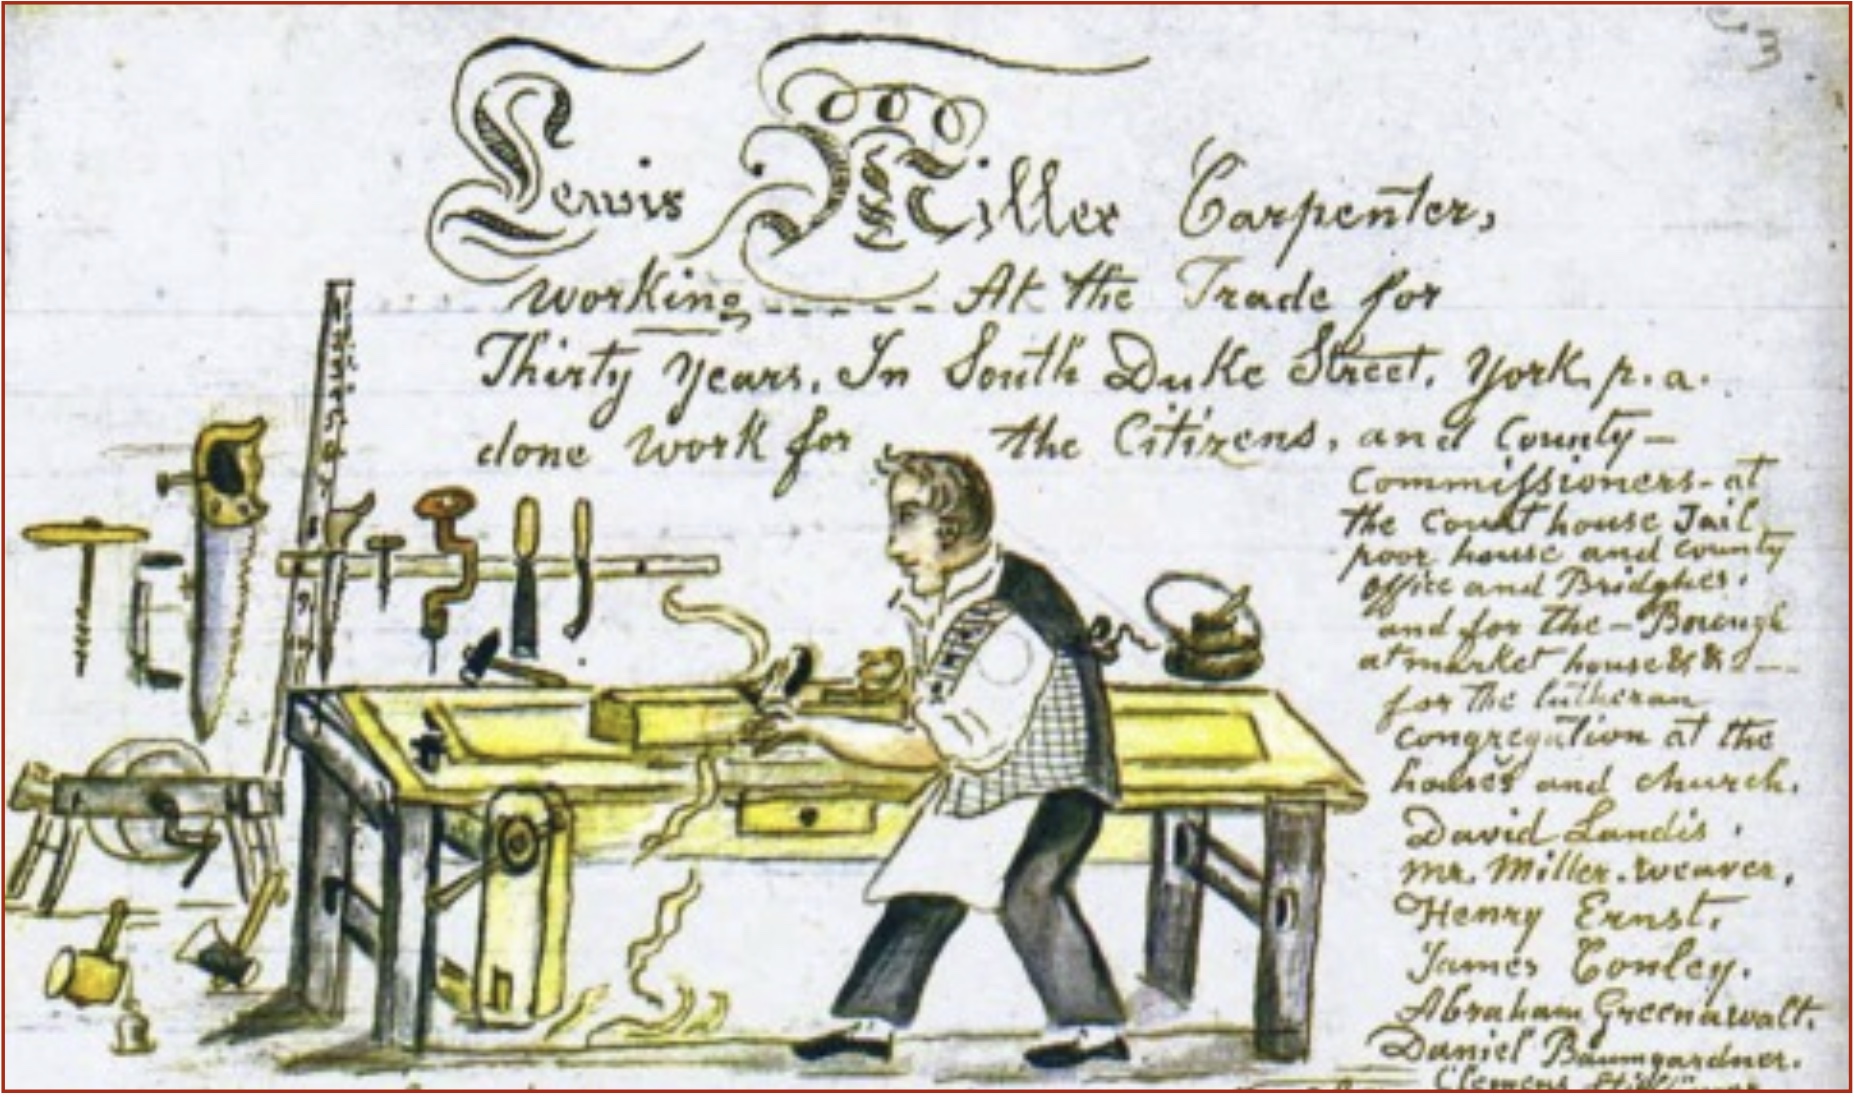
From “Lewis Miller: Sketches and Chronicles; Reflections of a Nineteenth Century Pennsylvania German Folk Artist,” 1810.
In 1810, Lewis Miller, carpenter and chronicler of York, Pennsylvania, has a small hand-cranked grinder in his shop.
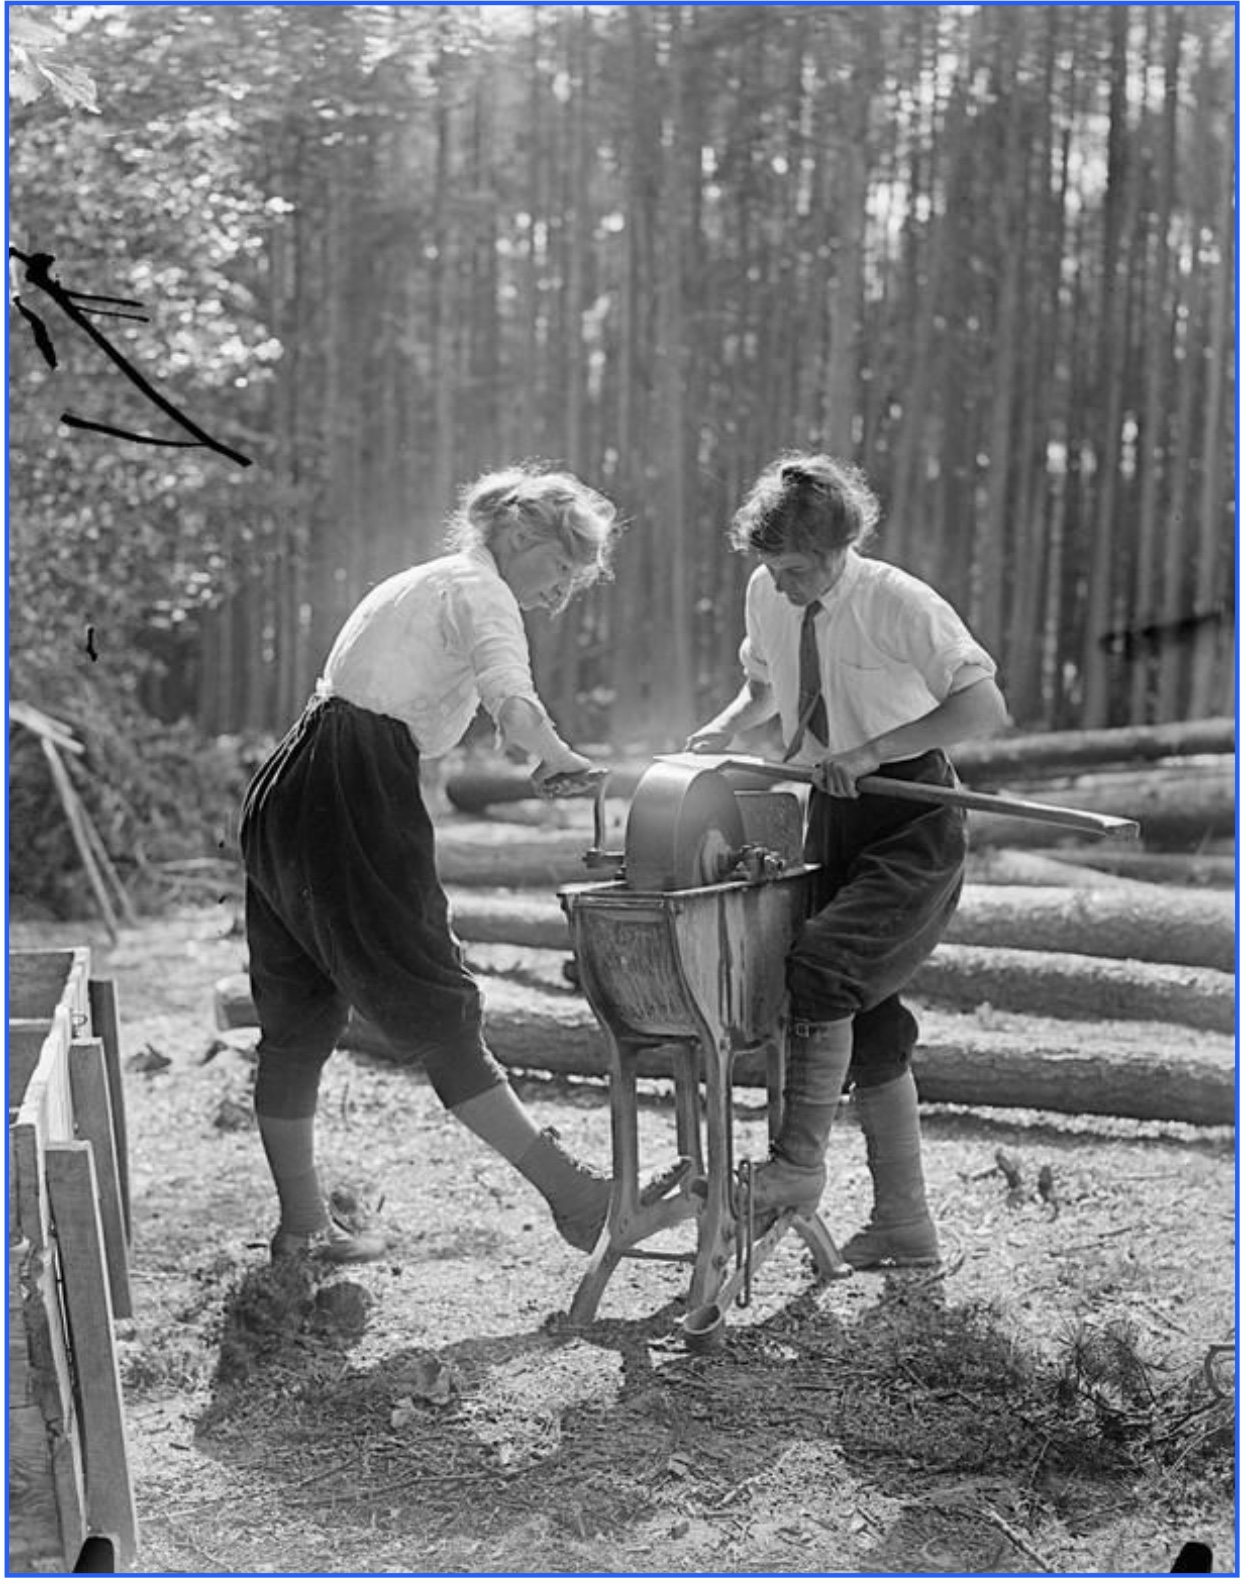
Women’s Land Army/Women’s Forestry Corps, Britain, WWI, Imperial War Museum.
And just over 100 years later hand-cranked grinders were still in use. Electric bench grinders are most often in use today and remain an important tool in a woodworker’s shop.
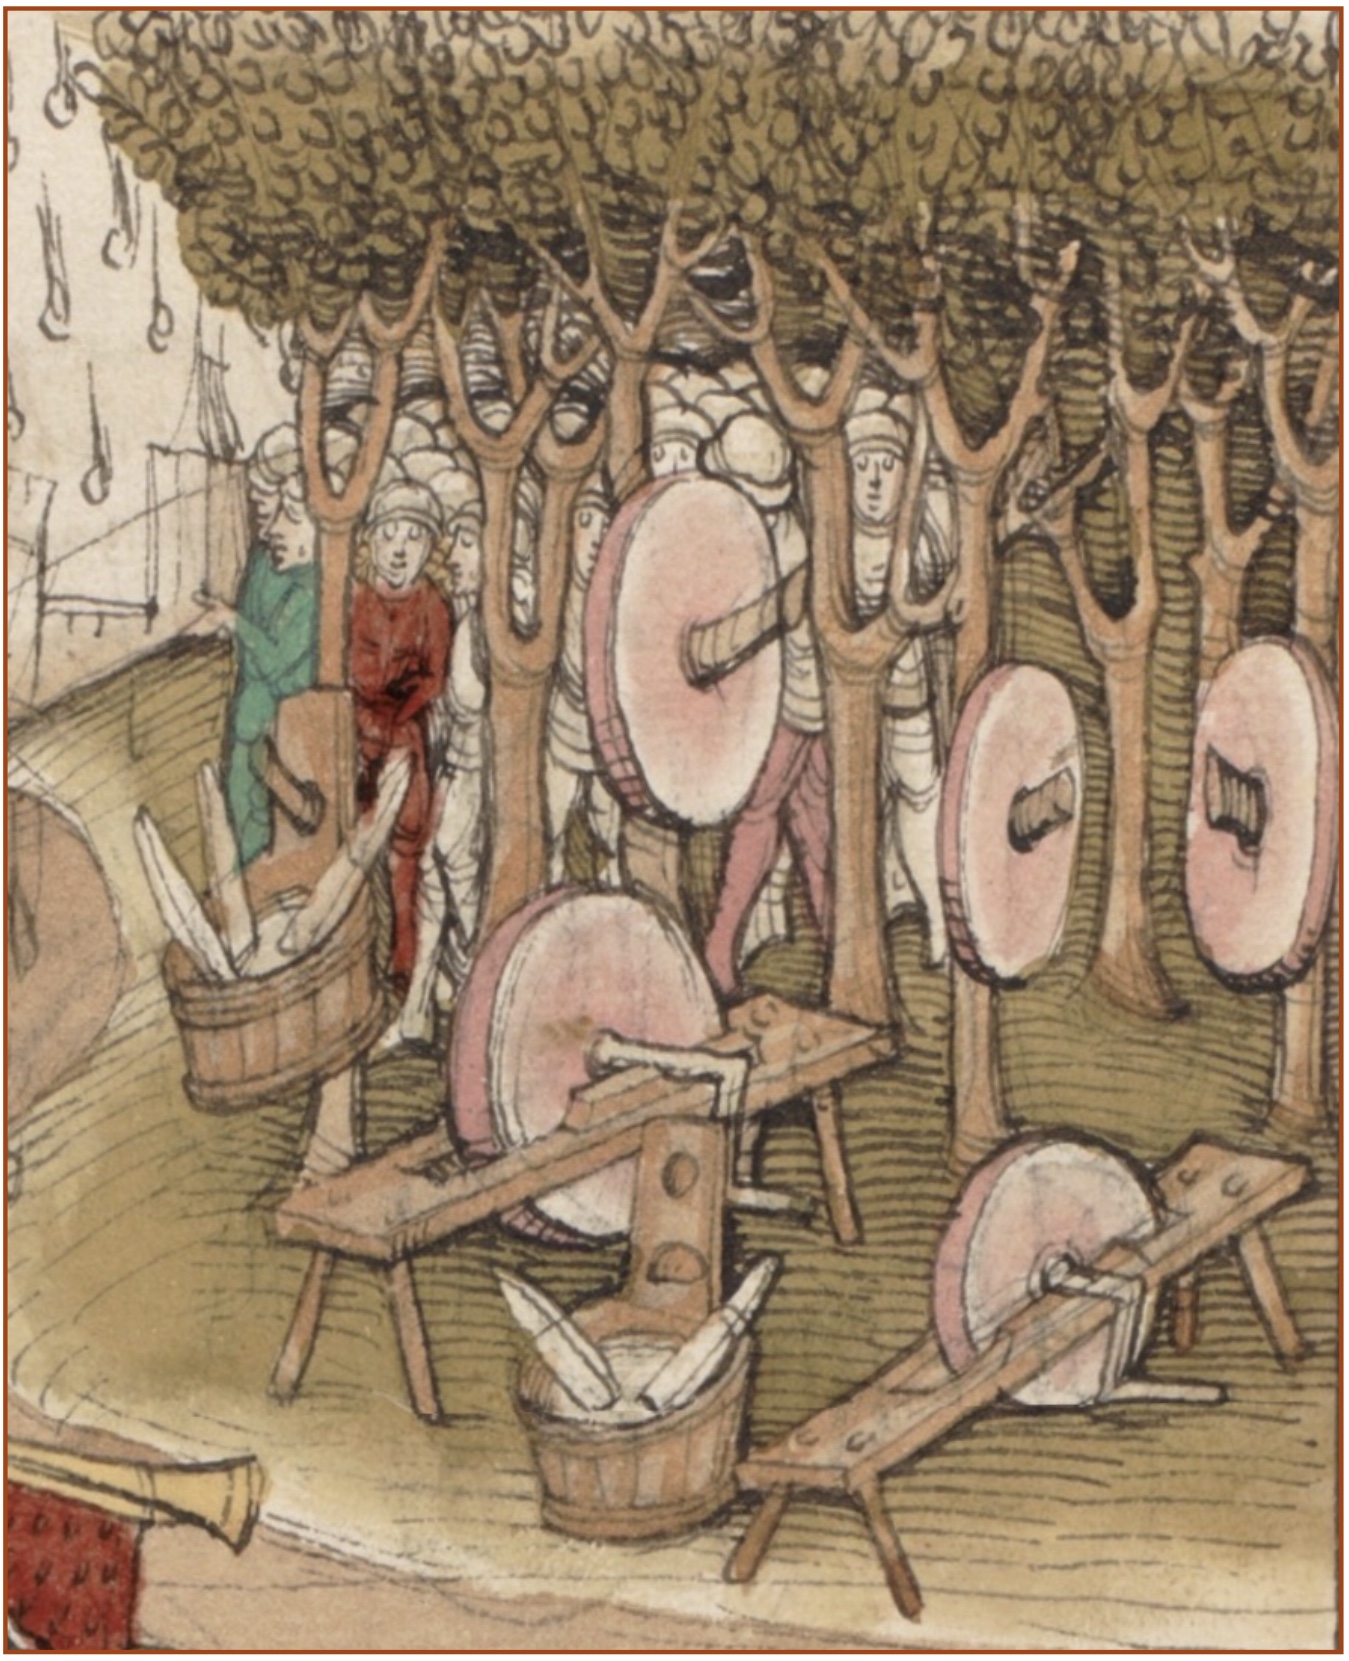
There is one more pre-electric “bench” grinder to examine and that requires a short trip to Switzerland in 1367.
The “Spiezer Chronik” was commissioned to document the history of Bern, from its founding to the mid-15th century. It was written by Diebold Schilling, the Elder of Bern. The chronicle includes a lot of action from the very-long Burgundian Wars and wonderful color illustrations.
On page 367 there is a scene at a river. On one side stands an army and on the other a forest. The explanation of the scene is: “The Bishop of Basel wants to cut down the Bremgarten forest, for which the Berners provide him with the grindstone, 1367.”
The accommodating people of Bern provided benches with hand-cranked grindstones, water buckets and whetstones. Extra grindstones are arranged on the trees. The Bishop brought the axes. Sit astride a low bench and hand-crank the grindstone, what an idea.
PickOne
If you listen to most of the experienced woodworkers out there they will tell you it doesn’t matter what system of sharpening you use.
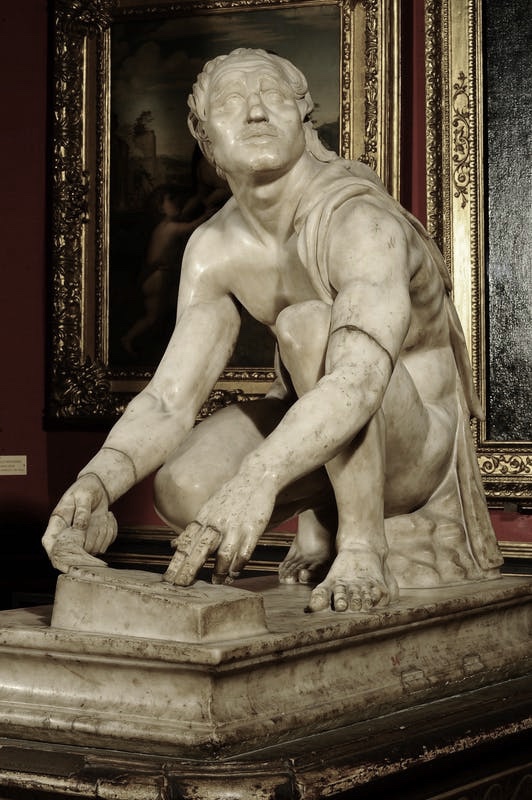
The Arrotino (with woobie over his shoulder), 1st century B.C.E, Roman copy of an Hellenistic original, Uffizi, Florence.
Use sharpening stones, water or oil. Don’t forget the woobie.
“Axe Sharpener” by Chicago-area artist and rock musician Jay Ryan. From Sebastian Foster online.
Use a file to get those burrs. And yes, bears do sharpen in the woods.
From delcampe.net.
Go old school and use the classic “head-over-grindstone”method. If need be, your dog can be a counterweight.
The point is: chose a method, learn it and use it to sharpen your tools.
Resources
On this blog go to the Categories drop down menu (on the right) and look for “Sharpen This.” There you will find Chris Schwarz’s full series on sharpening.
Many books published by Lost Art Press include discussions on sharpening. One place to start is Chapter 10 “Essential Sharpening Kit” in “The Anarchist’s Tool Chest.”
You can read about the woobie, ahem, “The SuperWoobie” here.
I wasn’t happy with the “hurricane” nuts on the Holy Roman Workbench. So I sat down with a compass and French curves this morning to sketch some new nuts.
Those weren’t working either, so I put away the drafting tools and just drew the dang things on a sheet of scrap paper. Sometimes I get too deep into decoding something when the simple solution is three quick lines on a piece of paper.
These nuts are much more presentable. Though they still look like hurricanes.
The photo above shows them in a partially finished state. I didn’t want to take them all the way to done until I was sure that these nuts were suitable.
My afternoon is shot because of this rework, but at least I won’t see ugly nuts in my dreams tonight.
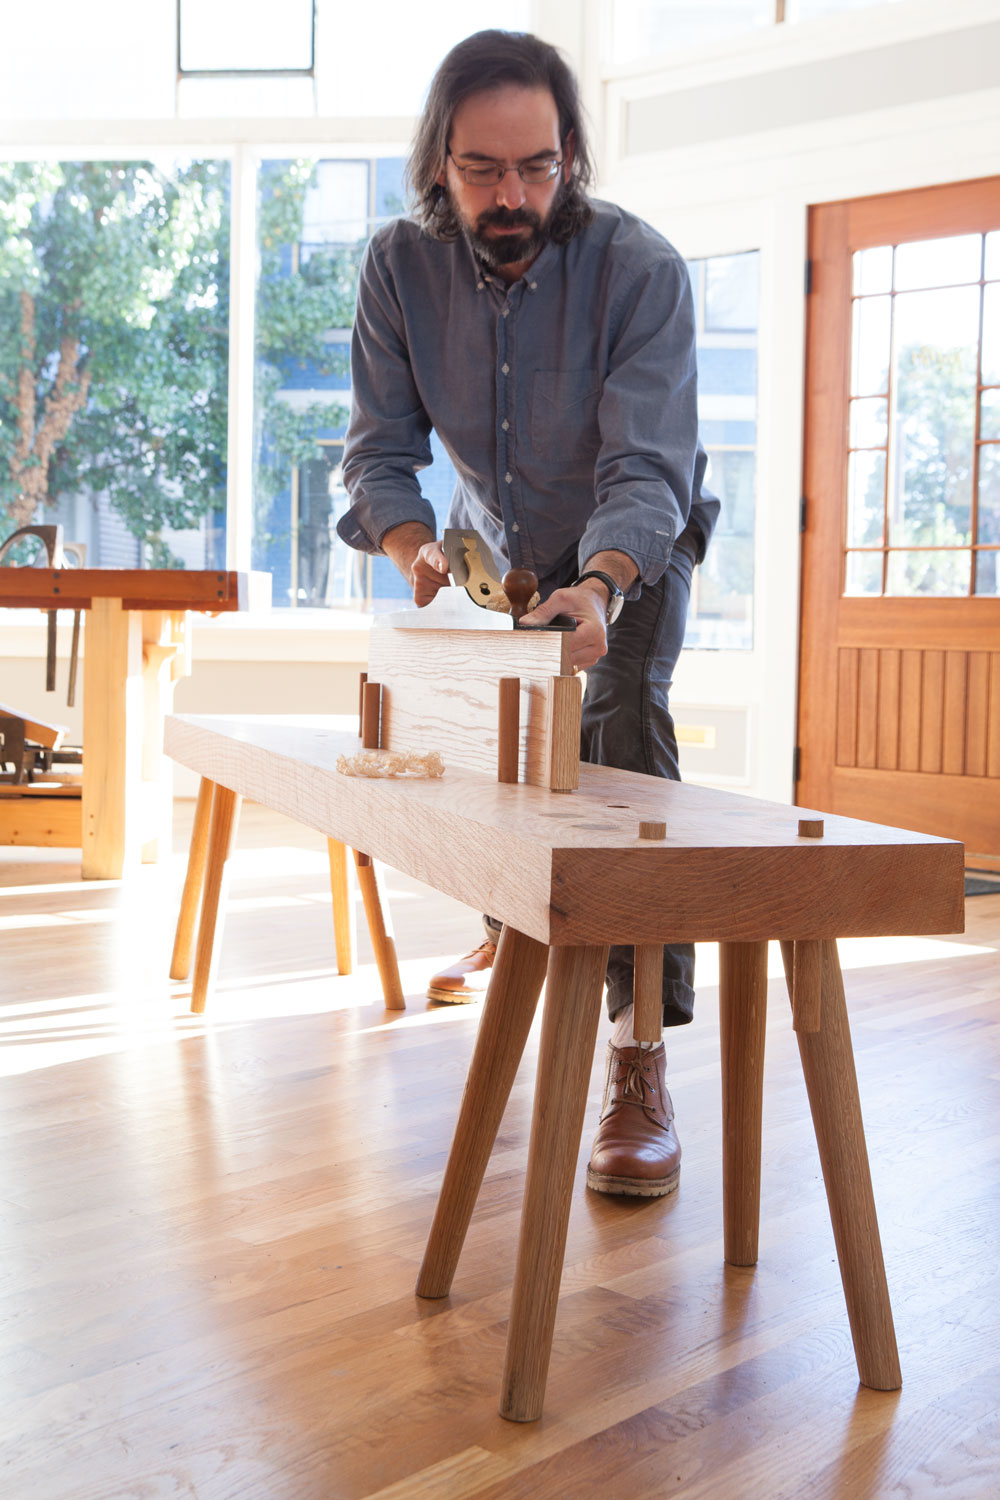
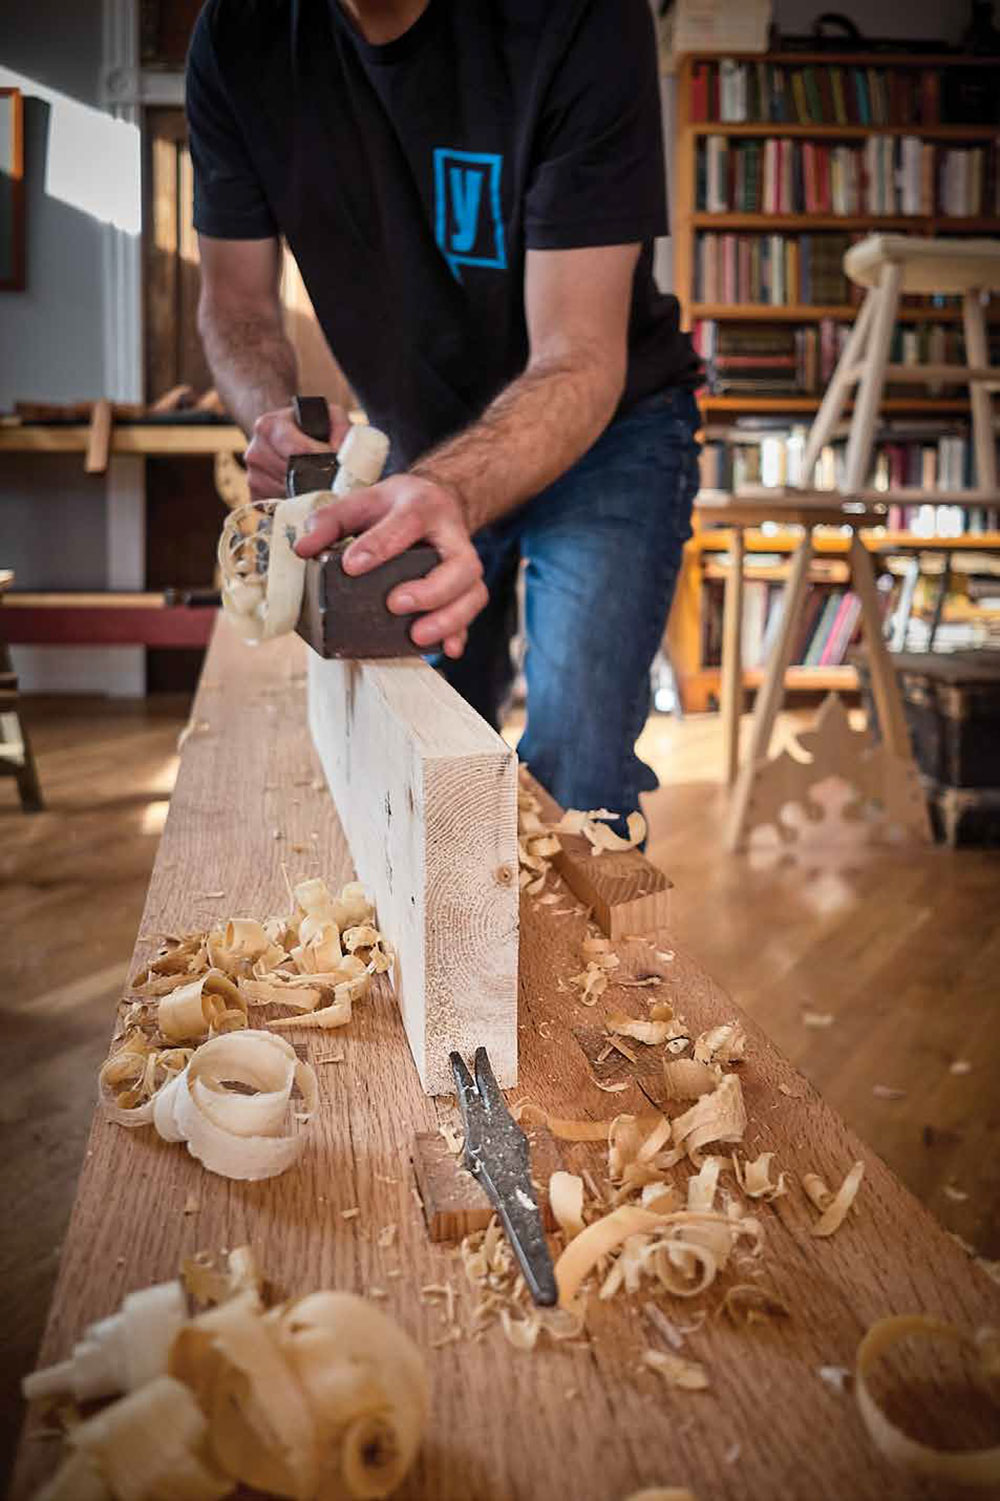
A toothed planing stop is an indispensible appliance for a low workbench. Yes, it marks your work, but many times this isn’t a problem if you consider carefully the order of operations on a board (i.e. crosscut the marks away at the end). Photo by Narayan Nayar.
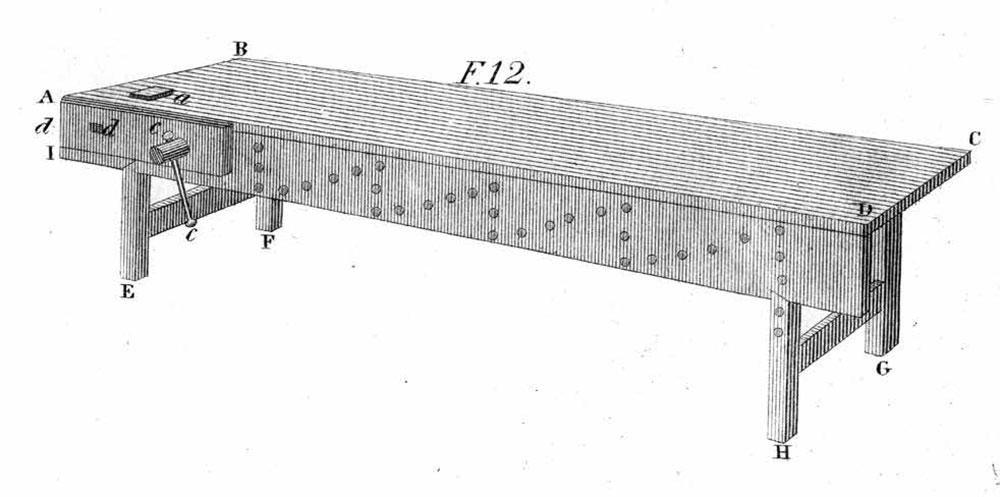
The first time I saw the bench in Peter Nicholson’s “Mechanic’s Companion” (1831), I thought: That’s not right – the benchtop has only a planing stop. There are no holes for holdfasts, dogs or other workholding devices. While the front of the bench features a screw-driven face vise, I thought surely the illustrator forgot to draw in some details.
These early workbenches have little in way of workholding. Where’s the tail vise? Do you need one? (Peter Nicholson’s “Mechanic’s Companion” (1831)).
Then I got a copy of André Félibien’s “Des Principes de L’Architecture” (1676-1690) and the workbenches shown there (below) are also stripped down. They feature a planing stop and some holes in the top and legs for a holdfast. As I worked my way backward through the visual record of workbenches in technical manuals and paintings, the message was clear: Early workbenches had simple workholding.
It would be easy to assume that early benches are simple because the screw vise hadn’t been invented. Yet, large scale screws show up in early Greek, Roman, Egyptian and Assyrian writings and drawings. And archaeologists have found evidence of screw-driven vises (likely for metalworking) at Augusta Raurica, a Roman site in Switzerland active from 44 B.C. to 260 C.E.
The workbench from André Félibien’s “Des Principes de L’Architecture” (1676-1690).
They knew about screws. Perhaps the screws were too much trouble to make for a woodworker’s workbench. Or they simply preferred to work without them.
So, I stopped using a tail vise and didn’t miss it one bit (I still don’t). I began to plane up panels with only a planing stop and became quite fast at processing stock. This small taste of success drove me to experiment with pegs, wedges, battens and notched sticks. Things that looked like they could never hold your work (such as a doe’s foot) worked brilliantly.
I am convinced there is a world of workholding out there that doesn’t require gizmos, but instead requires a little cleverness and some basic skills with the tools. The following account only scratches the surface of what’s out there. Every tradesperson, from the armorer to the shoemaker to the block builder, had simple ways of holding the work that don’t look like much to the modern eye. These are just a few of the devices that show up repeatedly in the historical record.
Planing Stop On early workbenches, the simple planing stop is the foundation for all the other bits of workholding for woodworking. In fact, some benches are equipped with only a planing stop. There’s a lot you can do with a planing stop and a little skill.
Most planing stops are comprised of a square piece of wood that is long enough to penetrate the benchtop and give the woodworker a lot of height for planing boards on edge – 3″ x 3″ x 12″ is a typical size.
Add a thin batten in front of your planing stop and you’ve made an effective planing stop for wide panels.
The stop is adjusted up and down with hammer blows so it needs to be a durable wood – oak is typical – and dry.
You might think that fitting the planing stop requires you to consider how wet the benchtop is and the current season. Will the stop and benchtop (or both) shrink as they dry? Or, if the stock is bone dry, will that component swell during the humid season? Most bench builders have a slab that is somewhat wet that might take years to acclimate to the shop, plus stock for a planing stock that is at equilibrium with their shop.
There are formulas and lots speculation for how tight or loose to make things. I ignore it.
When I fit a planing stop, I assume that I’m going to have to adjust it later on if it becomes too tight or make a new one if things get too loose. So, I focus on getting a good snug fit that day. I want the stop to move about 1/8″ with each heavy mallet blow.
After I get that fit, I simply pay attention to how it is working during the months ahead. If the stop becomes almost impossible to move, I remove it and plane it a tad. If it’s too loose you can glue some veneer onto the existing stop or make a new one. In time, the wood will settle down and your planing stop will do the same.
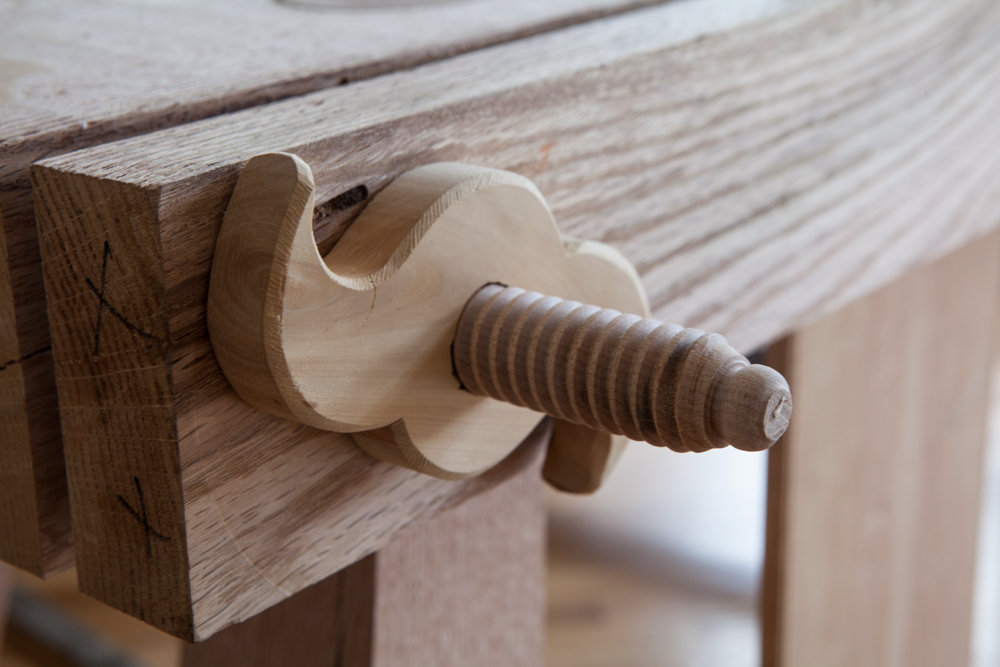
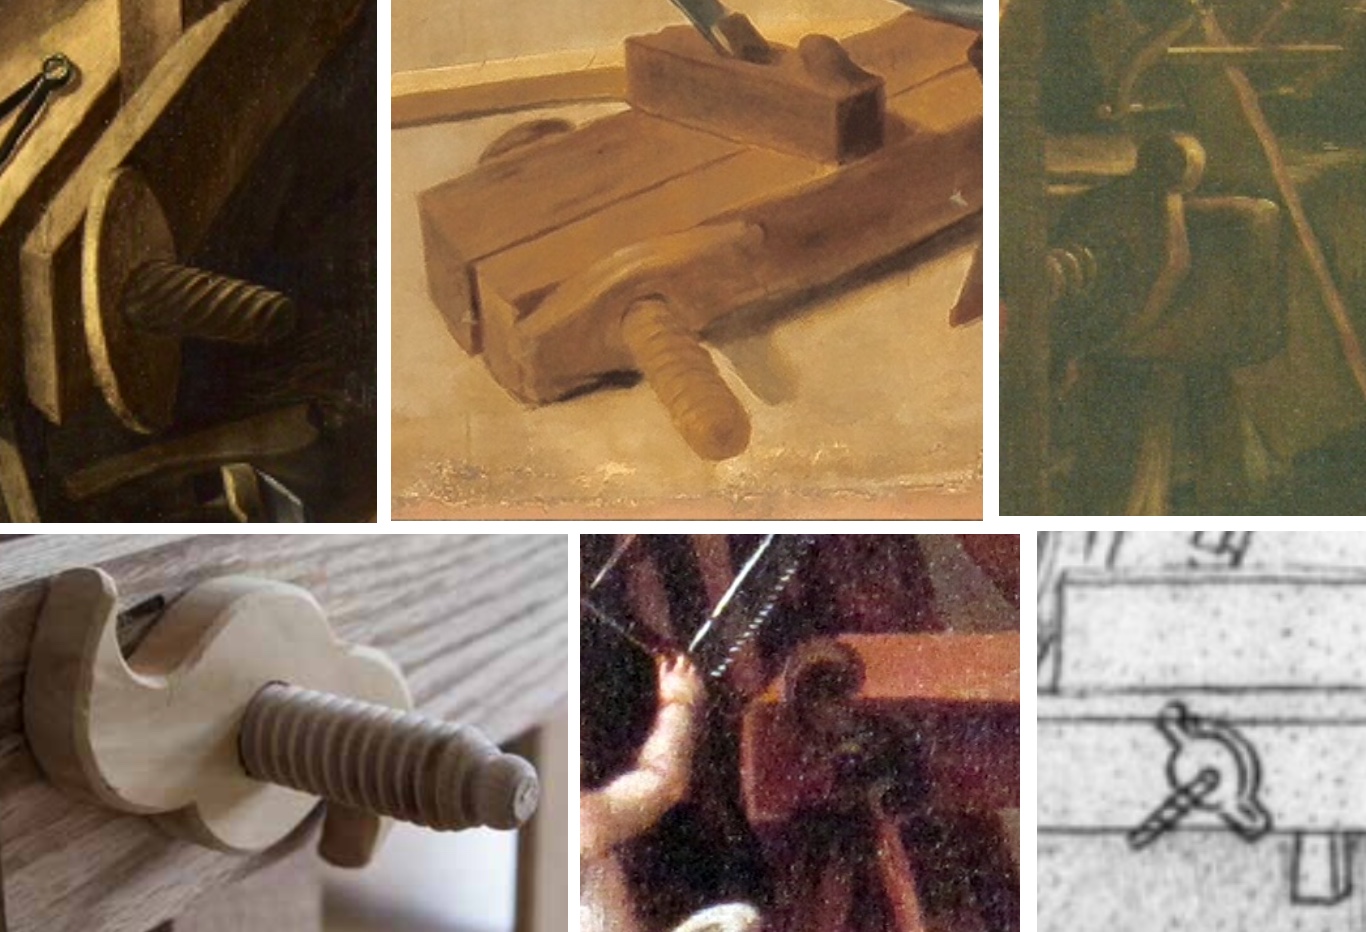
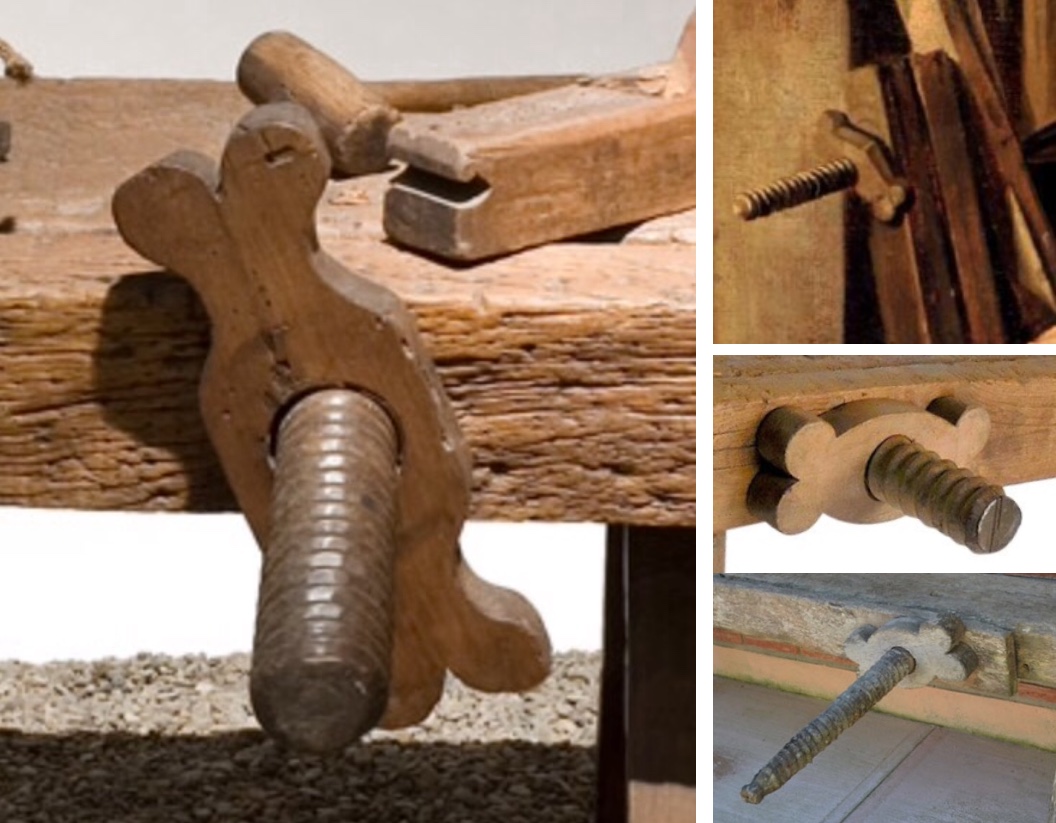
While researching “Ingenious Mechanicks” Chris Schwarz and I found many workbenches with face vises and some of them actually had vise nuts.
In the montage above there are selections from paintings from Spain, Italy and what is now present-day Ecuador. As you can see, they range from the basic steering wheel to the curvy hurricane. The nut on the lower left is the shape Chris chose for his Holy Roman/Löffelholz workbench (and he provides the pattern in the book).
My particular favorite is a form that may have originated in Spain and made its way to Spain’s New World colonies: the double-bunny ear. The double-bunny ear provides an easy grip for tighting or loosening the vise.
The top right image is from a 17th-century Spainish painting. The next two vice nuts on the right are late 19th-to-early 20th century from Guatemala and Mexico. The vise nut on the left is of a similar date and also from Mexico.
“Ingenious Mechanicks” explores a multitude of workholding methods early woodworkers devised to enable them to work more easily and efficiently. The book offers the modern woodworker options, including what form or shape you chose for vise nuts.