The Lost Art Press 2023 Holiday Open House is this Saturday (December 2) from 10 a.m.-5 p.m. at the storefront: 837 Willard St., Covington, Kentucky, 41011. Sure, we’ll have our full line of books, tools, apparel etc. available, but most exciting is that we’ll have a special guest, educator Jerome Bias, in the shop this week to teach a 6-board chest class, and who is working on a book that explores his family history through woodworking.
We’ll have cookies and holiday drinks (both adult and non-alcoholic offerings), and visitors can take home (free!) an old poster or two – long thought out of stock – from a couple boxes that magically appeared when we moved fulfillment to Covington’s Anthe Building. We’ll also have a shelf full of “blems” (books that are perfectly readable, but got a bit dinged on a corner or what have you), and a small number of beehive bottles of Piggly No Wiggly glue that we’re selling at a reduced price now that we’ve changed to cylindrical bottles. And who knows what else we’ll dig up before Saturday!
Speaking of the Anthe building, we’ll lead two tours thereof (starting from the shop on Willard): the first at 11 a.m.; the second at 2 p.m. The Anthe building is just more than a half-mile away at 407 Madison Ave., so if the weather allows, anyone who wants to can walk over (but there’s parking available if you prefer to drive).
We’ll be doing demos throughout the day – just ask if there’s a tool or technique you want to see/learn – it’s an in-person Open Wire.
Hope to see you on Saturday!
– Fitz
p.s. We won’t be doing an online Open Wire this week; it will return on Dec. 9.
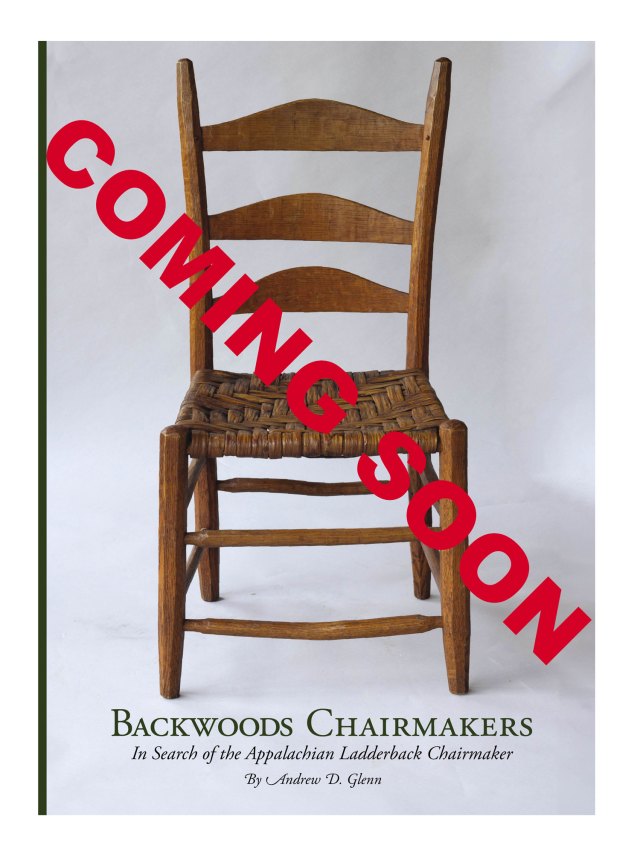
One of the many benefits of bringing our order-fulfillment operations back to Kentucky is that we can again offer pre-publication orders of our books, with a free pdf and free shipping.
So I am happy to tell you that we are now taking pre-publication orders for Andy Glenn’s first book, “Backwoods Chairmakers.” You can place your order here. The book is $47. When you do, here’s what happens:
You will receive a free pdf of the book at checkout.
Your order will ship – for free – as soon as the book arrives in Covington.
The book is currently at the printer in Tennessee, and it is scheduled to ship the last week of December. Because of weather and the holidays, that might slip to the first week of January 2024.
Why should you buy this book?
When working with Andy on this book, we had a lot of late-night conversations. This book is a massive work. Andy said to me: “If I ever do another book, you have to stop me from going to extremes. Like trying to do everything. I’m like that. I just can’t help it.”
“Andy,” I replied, “that fact that you go to extremes is why this book is so damn good.”
Andy traveled all through Appalachia for this book, putting thousands of miles on his car and talking to people far and wide to do one thing. It’s this: Give the Appalachian chairmaker their due.
For centuries, people in this region have been making chairs for their communities and for sale to others, and the skills have been handed down through generations. Thanks to the modern world, their numbers have dwindled. Andy went and found them. He documented their work and their lives.
And – this is important – he approached the work as a woodworker as much as an ethnographer.
I love the “Foxfire” series of books. I have the complete series on my shelf. But they weren’t written for practitioners. “Backwoods Chairmakers” is a must for anyone who makes chairs or is interested in the culture and spirit of Appalachia.
Andy took thousands of photos and collected archival photos from all over the region. He talked to everyone who would let him in the door. He wrote their stories with an open heart – empty of the bias that often permeates the writing about the region.
And he shows you how these Appalachian chairmakers influenced his own work at the bench. The final two chapters detail how Andy builds a settin’ chair and a grand rocker.
Like all our books, “Backwoods Chairmakers” is made in the USA to the highest quality standards. The signatures are printed on #70 matte coated paper, sewn together with thread and bound with glue and fiber tape. All that is casebound between cloth-covered boards. And wrapped with a tear-resistant dust jacket. This is a permanent book.
When saw sharpener Tom Law died in 2012, he left behind more than a thousand vintage saws that he had fixed up and filed – ready for use. Some of the rare saws went to collectors. But many of these saws would not interest a collector. They were vintage but common working saws – like the Disston D-23.
Josh Clark, the all-around-good-guy tool seller at Hyperkitten, has obtained these saws and is now selling them at user prices on his website.
If you just want a saw and not the whole backstory, go here. Don’t walk, run.
All of the saws are sharp and ready to use. And because it’s Josh with Hyperkitten, you know the tools are going to be well-packed and sold at a more-than-fair price. The saws range from $20 to $55, with most going for $30 to $40.
And did I mention they were sharp?
How did this happen? Here’s Josh:
When Tom passed away in 2012, he left behind more than 1,000 handsaws, all restored, sharpened and ready to use. For years his wife, Sandra, would bring boxes of saws to the yearly PATINA tool meetings in Damascus, Maryland. Over the years I got to know her and we’d joke about her saw horde. I always looked forward to seeing what saws she would drag out of the stacks to sell.
Tom didn’t discriminate between the rare and the common, they were all just good sharp working saws which meant there was always something interesting to discover. It was clear there was something different when I saw her this past spring. Sandra told me she was ready to get rid of all the saws and reclaim her living room. She wanted to find someone who would buy all of the saws and get them into the hands of people who would use them. It was a tough project because of the scale (500+ saws) and the fact that the collection had been cherry picked over the years leaving behind nothing collectible or sexy, just good quality working saws.
These are just the type of saw I love to sell so I committed to buying the collection. We came to an agreement on a price and she was pleased to allow me to sell them as “Tom Law” saws. Earlier this fall I rented a moving truck and brought the collection home (driving ever so slowly, dreading every pothole). Sandra was equally happy to have her living room back, and to know that these saws would be put to use again.
So if you want to do a good deed, and get a good saw in the bargain, visit this special sale page that Josh built.
We have six of these saws here in the shop, and I can attest that the sharpening is excellent.
The characteristic medullary rays found on quartersawn oak boards. Courtesy of Tim Bowen Antiques, Ferryside, Wales
The following is excerpted from Derek Jones’ new book “Cricket Tables.”
Edge jointing narrow boards to make up a wider panel is the most common way to achieve large components. The technique is a constant theme among woodworkers working with solid timber because it forms the basis of nearly every project both large and small. Though the concept is simple, execution is quite a different matter when faced with a list of the recommended dos and don’ts. Take a deep dive into the subject, and you’ll no doubt conclude that everyone else is an expert in this field, blessed with an unlimited number of boards to choose from that somehow result in the perfect panel. If only that were the case.
In the quest for the ideal panel, the best piece of advice I can offer is to take a few deep breaths first, then consider what role the panel has to play in your project. This is the most important decision you’ll make in the entire process so be clear about what you are aiming for and base everything else around that conclusion. Do not waver. You can start by asking yourself a few questions about the performance qualities of the panel. The conversation should go something like this:
– Does my panel need to be stable across its surface, i.e. not cup or bow? – Am I concerned about shrinking? – Am I more concerned about the visual impact of the component or do none of these matter because I just need to be able to work the material with the least amount of effort?
Get the answers to these questions nailed down first, and I promise you’ll be building furniture while everyone else is still making enemies down at the timber yard, pulling planks off the rack in a quest for the perfect board. It’s a fortunate paradox that the conscientious woodworker will struggle a lot less with this. They’ll have resolved all the moral issues about dismissing inferior but perfectly usable boards in favour of a better one and worked out that perfection is the enemy of progress. Now that’s not to say there won’t be some awkward conversations along the way, but a better way of framing the question is to regard it as a non-confrontational negotiation where everyone’s voice is heard and maybe even accommodated.
What is required of a panel to make a top for a cricket table? Historically it would appear that every type of board is up to the job. A single slab of elm, for example, will look stunning if you like random swirly grain, but it will twist and bow in every direction before it’s completely at ease in its surroundings. By all means make a note now if this doesn’t sound appealing – but don’t rule it out completely because I guarantee that a few years down the line it will give great pleasure to somebody. In some instances, dimensional stability is crucial to the success of a product. Wooden handplane makers covet quartersawn blanks for their plane bodies; for case furniture, cabinetmakers will select them for drawer components. Luthiers are notoriously selective in their choice of material for reasons associated with resonance and tone. In fact, every woodworking discipline has a preference. Quartersawn boards are generally easy to spot because their grain pattern is visually dull compared to other boards. On the large face of the best boards the grain will run in evenly spaced lines that are parallel to the long edge. At the end of the boards the grain will run perpendicular to the wide faces for the full width of the board. Boards that display these characteristics are your best chance of achieving dimensional stability, but offer little in the way of visual stimulation. They will, however, garner you some brownie points from the more technical observers in years to come. There is one notable exception to this rule and that is quartersawn oak. The wide faces on these boards can often feature pale translucent flecks known as medullary rays.
Perhaps the boards you are most likely to find in your timber yard are those referred to as plain-sawn boards, sometimes referred to as crown-cut boards. These are the ones that feature a large arrowhead-shaped grain pattern on the wide face of the board running along its length. The grain pattern on the edge of these boards will typically run diagonally from large face to large face. The closer these lines are to being parallel to the wide face the better in terms of strength and workability. The ends of these boards will display anything from a perfect semicircle to a gentle curve grain pattern emanating from the centre (core) of the tree. All of the above details can be applied to the species of wood most commonly used to make cricket tables in the past, and those featured in this book. They are, in no particular order, oak, ash, elm, beech and pine….
Joined Boards Tops that are made by joining boards together generally result in tops that are thinner than slab tops and require a different technique for fastening the legs. Quartersawn boards, as discussed earlier, offer little resistance to aesthetic compliance or construction. The preamble leading up to a good edge joint between boards is fairly straightforward. There’s more on this subject in Chapter 5. Plain-sawn boards, on the other hand, require some extra thought.
I’ve noticed over the years that one of the trickiest things to get right when demonstrating or teaching something, whether it’s a face-to-face delivery or written explanation, is to pitch it right. Aim too high and you risk going into detail that’s either theoretical or subjective. Too low and your audience loses interest before you can get your core message out. Somewhere in the middle is a sweet spot with carrot and stick in equal measure. The key is to never assume prior knowledge, and it’s with that in mind that I’m going to talk about board selection from the ground up in relation to plain-sawn boards.
If you want to understand how a piece of timber will react to changes in the conditions it’s being worked, used or stored, try this simple exercise. Take a ream of standard copy paper from the printer – the more sheets the merrier. Ask your bench buddy to hold it mid-air with one hand at each end so that it sags down in the middle. Now take a Sharpie or similar felt-tipped marker and draw the shape of your board as viewed from the end directly onto the side of the ream of paper. The sheets of paper roughly represent the annual growth rings of your timber displayed as arcs of light and dark grain. Now let your bench buddy relax slowly to allow the ream of paper to lay flat and note what happens to the sketch of your flat board. That’s right, inside every straight plank there’s a bent one trying to get out.
A rectangle drawn on the end of an arced ream of paper mimics the growth rings in nature of a board when seen on end (top). Flatten the ream of paper, and you see what happens to the growth rings as the “board” loses moisture – it cups (bottom).
You can try this with quartersawn boards, too, and even boards that have irregular grain to give you information about how your board wants to react. The results may be extreme and a little exaggerated, but at least now you can see in what direction the faces and edges are likely to go as the board loses moisture. The opposite happens when a board takes on moisture. Now apply this information to the orientation of your boards and note the directional forces that come into play as the edge joints are aligned. Assuming that joint integrity is your primary concern over that of flatness, then orientating your boards in a repeating pattern of arcs up and then down will give you a joint with the least stress. In fact the stresses are working in your favour. If you’re one of those people who see data and convert it into probability this is your algorithm of choice. But there’s a downside – you’ll never have a truly flat top.
Top: A panel made from crown-cut boards the with the heart side facing the same way will stress the joints and want to cup. Middle: A panel made from the same boards laid up alternately will still distort but the joints won’t be stressed. The direction of movement is complementary. Bottom: Quartersawn boards will expand and contract but the stress is even across the joint.
Earlier when I explained how to identify plain-sawn boards I mentioned that the grain on the edge of the boards runs diagonally from face to face. In finishing terms this could be problematic as planing toward grain that is poking up is likely to leave behind a rough surface. The fix should be quite simple, just turn the panel through 180° or plane in the opposite direction. But what if the adjacent board or boards now have grain exiting the face up toward you? Again the fix is quite simple but not always effective – first try skewing your plane as you pass over the offending area. If that doesn’t work consider localised planing in the safe direction with a shorter plane; if that fails, reach for the card scraper. When this happens you’ll immediately start to question your decision-making process and wonder if it could have been avoided. The answer is almost certainly not.
The final conundrum in selecting boards for a panel is the way they look. This is often where people get sidetracked from what is important and it’s completely understandable. If wood were uniform in grain structure, density and direction, you could align your boards and therefore avoid difficulties in processing by following a strict set of rules. The reality is that there aren’t any, apart from the one where you actually look each piece of timber in the eye and read the grain. There’s really no substitute. In the likely event that you will end up with boards that can only be planed in one direction without tearing out you’re going to need a repertoire of reliable techniques to deal with them. Some of these include adjustments to your plane setup like creating a back-bevel on the back of the blade to increase the working angle (pitch) of the blade. Increased angles behave more like a scraper and therefore are less likely to tear up the surface of the board. They also require more effort to produce a cut, which can be counter-productive in some cases. The most common school of thought related to this is to set up the plane with the finest mouth aperture possible, although I know of one planemaker who eschews the idea.
It’s fairly obvious by now that I’ve never found logic to be a particularly helpful resource when it comes to selecting boards for a panel. In theory it’s feasible to join boards of the same thickness together edge to edge without creating lips but it’s more common not to – even those prepared on a machine.
Typically when the clamps are removed you’ll have some leveling off to flatten and smooth the panel. If you do carry out your timber prep with machines, you’ll need to do something to remove the compression marks from the cutting edge. Although the board will appear flat, straight and square, the surface is a series of ripples that alter in size depending on the depth of cut with each pass and the speed at which the board was fed through the machine. If not dealt with, the crests of these ripples can show when you add a finish to your work. Taking to the surface with a coarse abrasive is one way of removing them, but as the ripples are caused by compression and not just a cutting action, you’ll need to do a lot of sanding. With the exception of some hard waxes, all finishes have a degree of moisture in them, whether it’s oil, alcohol, water or any other solvent. As soon as it comes into contact with the compressed area at the bottom of the ripple, the fibres begin to swell, causing the peaks to rise up again. If you have just laid down your first coat of finish this can be a real pain. Sanding the surface now will clean the peaks of any finish, leaving stripes of bare wood. If sanding is your only option, a good way to avoid this happening is to wet the surface with a slight mist of water or a damp cloth to raise the grain and allow it to dry. (If time is limited, a 50/50 blend of water and alcohol dries slightly quicker.) The effect is to neutralise the compressed areas and make the surface stable. When it’s dry you can sand to your heart’s content knowing that when you apply your first coat of finish it could possibly be the last. A good alternative to this is to treat every surface to a light pass with a smoothing plane.
The amount of work required to improve the surface of your panel after gluing up varies from project to project and to a large extent success depends on the tools you have at your disposal. But first of all let’s not measure success in terms of quality; instead try using efficiency as your benchmark. For example, if a lot of material needs to be removed then you’ll want to be using a plane with a cambered blade. You’ll also want to be traversing the panel diagonally from corner to corner to save time and minimize the chances of tear-out. You’ll want to follow up with a shorter plane that also has a slightly cambered blade to dress the final surface. And you’ll want to have a well-tuned card scraper on standby for when a plane just isn’t cutting it.
None of the above requires specialist equipment. You probably have a number of these tools in your armoury already: a jack plane, a smoothing plane and perhaps even a regular block plane. It’s worth mentioning that all and none are indispensable when it comes to wasting away unwanted material. The only advantage in owning all three is that you might be quicker – that’s it.
To put this in perspective and to stop you fretting over the way you lay out boards consider this comparison: If two eight-studded LEGO bricks can be assembled in 24 different ways, how many ways are there to join three boards of timber to make a perfect panel? Answer: Who cares? It’s a rhetorical question because my point is that the panel you end up with is the perfect panel. So here’s the deal, work with what you have to get you building quickly, and spend your time developing strategies for coping with some of the less desirable features. Sorry, I said spend your time; what I should have said was invest.
If there’s an underlying theme to this book it’s to encourage you to recognise and embrace naivety, and for good reason. At no other time in your quest for knowledge and proficiency at designing and building furniture were you more exited and driven than when you first got the bug for it. Return to that headspace as often as you can because if you’re not careful you’ll acquire so much knowledge that it makes progress impossible for a while. My advice here is not to confuse theoretical knowledge with real-world experience. Make mistakes, learn how to correct them or, better still, learn how to spot them before they happen.
All our videos are 50 percent off until midnight on Saturday, Dec. 2. Get into chairmaking, learn to turn or build a massive Roubo workbench. We do everything to keep our videos tightly edited, entertaining and shot from a woodworker’s perspective (no romantic pans of tool walls – promise).
You might have noticed we are slowly edging more into making videos (books will always be our first love). For our video plans for next year, we need to upgrade our sound and video equipment. Plus buy professional editing software.
To help fund that, we decided to put our existing videos on sale.
All our videos can be downloaded to any device or streamed from our site. There’s no digital rights management (DRM) for you to endure. The videos don’t need passwords or keys to open.
So what’s on the video release calendar for next year?