After Open Wire Live last week in Amana, Iowa, we are happy to be back to the electronic question-and-answer format. (Yes, we loved hugging you in Amana. No, you didn’t smell too awful. And it’s OK about the drool.) Also, people tended to duck every time I yelled “Open Wire!” when I was asked a woodworking question.
So here we go.
Here’s how it works: Type your question in the comment field. I will post my answer. It is that simple.
Note: Comments are now closed for this session!
— Christopher Schwarz
I’m building my first workbench. I have been woodworking for our homes, doors, windows trim etc for 30 years but now feel the need for hand tools. I’m currently in Italy. I’d like a crisscross but it would be wildly expensive. Does a board drilled and pegged as an alternative have any drawbacks other than inconvenience?
We have parallel guides on two of the shop’s benches, and I don’t find them terribly inconvenient. As long as you get the peg in the right hole to tip the top of the shop forward a hair, they work fine. They don’t hold quite as tightly, but they hold tightly enough.
Nope! I used a parallel guide in my leg vise for many years with no complaints. Just use a stout wood that isn’t easily rived, such as beech or elm.
For what it’s worth I was planning on building a parallel guide on my bench, but for 5 years now have just put a piece of scrap of about the same thickness or a little thicker than the work piece (usually just a rough off cut of the same board) between the chop and leg down at the floor. Works great!
Any ideas on how someone who only has an apartment workbench to do woodworking with could effectively do long rip cuts with hand tools?
Jumping in here uninvited as I just happened to watch Shannon Rogers’ video on his saw bench technique: https://www.renaissancewoodworker.com/rip-sawing-technique/
Personally, I’d just get a good battery-powered jig saw and rip with that using a straight guide, but if that’s not an option and/or you have the stamina and patience to do it by hand, my hat’s off to you.
With a sharp saw and the right technique you don’t need stamina. Let the saw do the work and maintain your line.
At the bench, I do overhand ripping. Lay the board flat on the benchtop with the waste edge off the front. You can move the board if the board is longer than the bench. Google “overhand rip” for details.
I’m getting stock ready (finally) for an anarchist tool chest. I have a huge stack of eastern white pine that’s been loafing in the loft of my shop for many years. It’s 4/4 x 10” x 12’. What’s the best way to arrange the odd 4” pieces for the carcass sides?
If I had that stock and there was enough to get away with it, I’d rip 7″-wide pieces, do the glue up, joint one edge, then rip off the remaining overage to get 24.” If you don’t want to do that, put the narrower piece wherever (but still make it 1″ oversize, so you can joint/rip after glue-up for squared panels).
White pine doesn’t move much. So you really don’t have to worry about where you put the odd 4″-wide piece. And you don’t have to arrange the annular rings to avoid warping. Because the chest is painted, placement isn’t critical.
If you aren’t going to paint the chest, put the narrow stuff at the edges, so it will be covered by the skirts.
I hope this answers your question?
Yes, it does. Thanks. ELF
Hi
I am building a low back stick chair. I am building the first one out of southern yellow pine. Two questions. Should I use Hyde glue of yellow. For finish I am thinking of either using milk paint or experimenting with the Belligerent Finisher technique. Any suggestions would be welcome. Thanks
jumping in here. LAPs The Stick Chair Book is free to download in PDF and has great info on glue. Give it a read (or at least a CTRL/CMD + F 🙂 ). I have a feeling it would answer this as well as many other questions you might run into during your build
Hi Tom,
I prefer liquid hide glue for chairs because of the long open time and the reversibility. If you use yellow glue, use something with a longer open time, such as Titebond Extend.
As to finishes, milk paint is great, as are John Porritt’s techniques in his book. If you want to learn milk paint, I recommend Peter Galbert’s video series.
Thanks
How do you feel about white pine for drawer sides for finer work? Does it really wear down?
Historically, white pine was used for drawer sides in fine work in the USA. Yes, it wears down, but it can be repaired after 200 years of service….
British woodworkers would use quartersawn oak for drawer sides for its dimensional stability and its wear properties.
A third alternative: Laminate small oak strips to the pine drawer sides for the best of both worlds.
Use the white pine and drawer slips, rather than grooving the sides for the bottom. The wider bearing surface increases resistance to wear.
Any particular casters you recommend for a new ATC build?
For what it’s worth, I used the “low profile polyurethane casters” from Lee Valley. (Item 00K2230) on my plywood ATC. About 2” tall… they’ve held up well so far.
I have the same casters. They’ve held up great. I also drop the skirt about an inch below the carcass sides. The casters are almost completely hidden.
Lately, I’ve been using these as a lower-price choice: https://www.amazon.com/gp/product/B07V9Q18V1/ref=ppx_yo_dt_b_search_asin_title?ie=UTF8&th=1
If the budget is a bit higher, I like these: https://thecasterguy.com/product/3-solid-polyurethane-swivel-caster-w-total-lock-brake-15338/
Basically, a 3″ polyurethane locking wheel with at least 200 capacity.
I don’t like new casters. When I built chests for sale I used vintage ones from this seller.
https://www.instagram.com/iconicironandoddities/
They are fantastic.
I worry about scratching the floor w/the iron ones. But they do look cool.
Hi Chris. The traditional Roubo has a through tenon and sliding dovetail. In what way is this an improvement over joining legs to to top with a simple M+T or even a few dominos?
After making dozens of benches both ways, I prefer to use a simple mortise-and-tenon joint to join the legs and top.
The dovetail is beautiful, but it causes more trouble than it’s worth as the top shrinks down around the tenons. You end up flattening the dovetail a lot.
So do it if you want to show off….
Any tips on estimating amount of stock need for a project. I understand board feet and it is all just simple math however I frequently come up short. Then there is the challange of rough cut lumber, some times its wide some times a little narrow. Specifically I’m cyphering on the cut list for a couple of Gibson chairs. Thanks
Unlike meat, wood does not go bad.
So I always buy 30-40 percent more than I need for a project. I go tot he lumberyard with my cutlist and source first the difficult stuff. If I’m building a table, I make dang sure I have the right boards selected for the top. The legs need bastard grain, so I look for those. Then I buy a bunch of extra for aprons, and extra leg or two and the inevitable errors.
So I always end up with wood left lover at the end. It’s great to have stock on hand for small projects or home repairs.
So, bottom line, buy what you need. Then add a few more boards.
After working with your Anarchist workbench for a while, are you satisfied the height and width of the bench? Would you change anything ?
Nope! It only took me 22 years to come to this design. But it is fully realized (for me, at least).
Any plans for Vol 2 of the Stick Chair Journal this year?
It is about half done. Unfortunately, the Anthe building is sucking up the time I had planned to spend working on the Journal. It will come. Promise.
Really liked the Irishy curved back chair on IG from 8/31. Two questions: was the changes to the backrest primarily shape or also the curve? How different does the more complex saddling feel compared to simpler seat in the book?
Thank you.
The change to the backrest was only the decorative curve on its ends. The curve is a 3″ radius. It begins 1-5/8″ from the outside sticks.
The only difference with the saddle is the addition of a pommel. Doesn’t feel that different, unless you sit weird….
A week or so ago, Popular Woodworking published a post on striking knives and showed the dimensions of one that Chris has. I spent few hours looking for a similar one online with little success. Since I don’t have a local blacksmith to make one for me, I wondered if Crucible Tools had ever considered making this kind of tool for sale? The scribe end seems like the most involved part to get right, the knife end is something I could probably do myself without a lot of time invested.
I seems like a useful tool.
Striking knives are great. I used one for many years. And no, I never poked my eye out….
It’s not a tool on our radar. We have plans for a knife that are far different. If you want a striking knife, reach out to any blacksmith online, such as Tom Latane or John Switzer at Black Bear Forge. It is simple work.
Thanks, it’s great to have a reference for a trustworthy source!
I teach 200+ elementary/middle school students each week. I have about 15 plane blades to sharpen/repair each week. I sharpen by hand and it takes me about an hour. Does that make me a crazy person? Would you recommend a basic tormek setup (my school would foot the bill).
i borrowed a tormek and found it slower than grinding and honing by hand. only advantage i see is that it takes less energy since you just hold it. if you want speed, dry grinder for the repairs and then freehand is quite fast. or….. why not teach the kids to sharpen? get a bunch of inexpensive diamond stones and eclipse style guides. you might have to burn a whole period on the initial sharpening lesson but after that just save the last 5-10 ish minutes of class for sharpening and cleanup. once the kids are doing the sharpening it will teach them to be more careful with the tools and not damage the blades in the first place.
I’d love to teach sharpening, but 15 3rd graders moving around the room with saws while some kids are feeling for a bur on a razor sharp blade sounds like a recipe for disaster haha! I do demo the sharpening process for them, they get excited to see the “diamond” stones……
If you want speed for repairing blades I have found nothing better than the Robert Sorby belt grinder. It is a versatile tool. The belts are inexpensive and last a long time. It has a lot of accessories to make getting the initial edge easy and repeatable. They ise it in their shop. Also I discovered that a famous chairmaker uses one. It is also at a lower price than the Tormek I believe.
The Tormek is an amazing machine. But it won’t speed you up. And you are getting pretty fast at sharpening – 15 blades would take me about 45 minutes. (And it would take me longer on the Tormek.)
So I wouldn’t change a thing. Have your school buy you some nice stones and honing guide instead.
I have to disagree that a Tormek does not speed things up. I bought a Tormek to help me regrind edges. That used to take me about 2.5 hours with a side clamping jig on coarse sandpaper, now it takes me 5 minutes on the Tormek. No idea what I am doing wrong by hand, but I am absolutely in love with the machine ☺️ For maintenance sharpening, I just use diamond stones, that’s of course a lot faster than on the Tormek.
Well sure. Compared to sandpaper, a Tormek is faster. The Tormek is also faster than relying on erosion.
Compared to a dry grinder and stones, a Tormek is much slower.
Currently I’m learning to regrind on a hand grinder. I see more chips in blades working with kids than you would normally see.
Just an idea, maybe a few kids with shining skill set and some maturity & desire could help out & also get the advanced skills?? Extra credit etc…. But I get all the rules & protocols in school settings could make it difficult to pull off. BTW, an hour seems fairly efficient for that many, assume your using oil or waters stones?
My school is great, they let me do pretty much whatever I want. Unfortunately my class size/age/time is not conducive to teaching sharpening. I do show them how I sharpen with diamond stones (which they are excited to see…until they see they don’t look like diamonds!)
Chris, what finish, if any, did you put on your wood kitchen counters? Does it require regular maintenance?
Soft Wax 2.0 (I just added another coat the the downstairs counters, and they look brand new.) https://blog.lostartpress.com/2023/06/26/soft-wax-2-0-is-back-yay/
Soft wax 2.0. I reapply one a year. I love it.
How does it handle stains like from tomato sauce? Do you have to be careful about water near the sink?
It’s fine on both counts. We wipe up regularly.
If we have butcher block with food grade finish on it already, would we need any prep to swap to Soft Wax 2.0?
I don’t think so. It seems to go just fine over any non-film finish. If there’s a hard film (from varnish or whatever), that will need to be removed. Otherwise the oil will just sit on top of the film.
Thank you very much!
I am planning to re floor and build new railings for my outdoor deck next year with cypress wood. What brand of marine spar urathane would you recommend or any other finish that would hold up to the elements for longer than a year.
Bob Flexner always says to get your marine varnish from a boat building store; it’ll be better quality (and I’d ask the boat supply store, but I know a lot of folks swear by Epifanes.)
Epifanes is a great varnish for marine spars. It stays slightly soft so that it can move a little bit with the wood and not break down. It would probably be great for railings, but I’d be hesitant to try it on a deck where you might have furniture getting moved or people walking with shoes.
The boat supply store people will probably have good advice and can point you to something slightly harder.
I’m not an expert on marine varnish. But the people at the Wooden Boat Store can offer a recommendation. For outdoor wood, I prefer deck stain, either translucent or opaque.
I don’t usually chime in here, and I’m sorry to, but I feel like I need to save you a ton of money, time and heartache. Don’t use marine varnish. Megan is right, epifanes is the one, but still, don’t do it. The wood on your deck and hand rail don’t need that level of protection at the expense of serviceability. Five coats of clear epifanes followed by two more coats of satin or whatever you choose for sheen is enough to break anyone. Just apply an exterior rated penetrating finish like sansin or penofin SDF and keep it up. It won’t flake off and doesn’t require scraping and sanding for further coats. It’s cheaper and better. A rare combination these days.
I’ll second the caution re: Epiphanes. I put 6 coats ( ! ) on windows and frames some years ago. The areas that had the greatest exposure to sun and moisture deteriorated after a couple of years, while areas with less exposure still look good. Last year I applied several coats of C2 Guard Waterproofer to an oak handrail which is fully exposed to the elements. It was easy to apply and looked good, so this year I’ve cleaned up the window & frame areas that get the most exposure, and applied the same product. Ask me what I think a couple of years from now…
Hi Chris! The WWG Chair video looks wonderful. Id like to purchase it but I don’t have a bandsaw – what could I use instead?
A good bowsaw will be your friend. I used a European bowsaw with a Japanese Turbocut blade for my first chairs. Mike Dunbar did an article on bowsaw use for Popular Woodworking while I was editor that was excellent. You might try to Google that.
Dunbar has a short video on youtube demonstrating their use.
Hi Chris,
Any thoughts you want to share on how you line up that back slat on those hobbit chairs? I’m mostly curious about how you cut the notch into the arm rest at the angle of the back slat and at the right depth. I think I have a math way but just curious if there’s a more no nonsense way. Thanks a bunch!
No math.
Mortise the backsplat into the seat. Then set the arm on the drilling jigs (shown in the book for all my chairs). Show the art to the splat. Trace the shape of the splat on the arm with a half pencil. Saw and chisel out the notch (shallow is fine). And then fuss around until it fits.
What hobbit chair? Haven’t seen that one
https://blog.lostartpress.com/2021/03/15/hobbit-chair-against-my-better-judgment/
Boy that is an ugly chair! No offense Chris!!
That’s not the one I’m referring to.
https://blog.lostartpress.com/2021/09/26/for-sale-hobbit-ish-stick-chair/
what material would be best for 1/4″ diameter drawbore pins: pine or walnut? tenons are 3/8″ thick x 2″ wide x 1 1/4″ long on rails made of white pine. finished project will be painted and live outside.
Can you get oak? If not, walnut. Straight-grained, bone-dry hardwood is almost always the better choice.
Neither. Pine is too weak. And both woods will deteriorate quickly outside.
I would use white oak. Strong and weather-resistant.
Morning, I just got a no48, never used one before. How the heck do you get a tongue and/or groove on end grain without tearing the wood up on the far side? I’m also a lefty. I have been just crossing my right hand over and holding the fence flush with my right hand. Do you think this is the best approach? Have you talk to any left-handed students with this tool? Thanks!
I assume you are having problems working across the grain? Two solutions. Start with the parts over-wide by about 1/2″ and rip the spelch away. Or clamp a waste piece on the exit side to absorb the spelch.
I’m afraid I don’t have tips for lefties…. maybe someone else here does?
I just learned how to use it right handed, there’s no easy solution
Have you pinned the tenons on the Shaker side tables you’ve built (i.e. the one you cover in the L-N video)? There isn’t much tenon there to pin, and I was wondering if the ones you have built have held together well without pins.
I’ve built two of those tables so far in Cherry and I’m working on a third in Maple but it’s a gift for my daughter. It’ll have to last!
And thanks for doing these open questions, and for all of the stuff LAP produces. Really helped me step up my game.
I’ve done it both ways, and both ways are still sturdy. Many of the traditional ones are pegged, though.
Megan and Chris: Favorite bottle of adult beverages?
Depends on my mood, but in the fall, generally cider or bourbon (or hot cider with bourbon!).
If I can get it: https://jksfarmhouseciders.com/scrumpy
And for bourbons that aren’t stupid expensive and still tasty: Bulleit 10 year
I like good beer. I like all styles, from crisp pilsners to sours to stouts.
In general, I like a balanced West Coast IPA, about 7 percent ABV. IBUs in the 80s or so. Lots of great beers fall into this category. One of my faves is Zombie Dust on draft.
What are your thoughts on adapting your boarded bookcase to a floor to ceiling unit? Do you think the sides would hold or should be beefed up somewhat?
It’s working great in my downstairs bathroom (I used 3/4, but it’s captured between walls, so no need to go thicker). If I were making a dadoed floor-to-ceiling unit, and it wasn’t supported by walls, I’d either add a face frame or use thicker stock. Mind the width, though. The units I built in my study…I put too much weight on the shelves, and need to make new, thicker shelves. One of these days.
Do you have thoughts on using a “round both ways” plane (a la Welsh Stick Chairs) vs other seat carving tools?
My suspicion is that Chris will say, why? The scorp is more versatile, in that you can change the geometry and angle of the cut to suit the wood and your needs; and a travisher is a plane of sorts. A round plane is limited to some degree by the curve of the sole.
I’ve used them. And surprisingly (because I’m a plane user) I’m not a big fan. Just never got the results from a scorp and travisher.
I’ve been using a crock pot Little Dipper—a sixteen ounce crockpot with only one temperature setting—the warm my hide glue. I’m new to using hide glue, but it seems to me like it’s working just fine. I put a little round hole-saw offcut in the bottom of the pot to protect the plastic bottle and a few inches of water to transfer the heat and then I just squeeze out what I need into a little cup and make sure the bottle ends up back in the crock pot. I have no idea what temperature the glue is at, but it’s a cheap, relatively clean way to get glue above room temperature. Am I missing something about getting the glue to a particular temp where my experience will be vastly improved if it’s a bit warmer or cooler?
Am I correct in thinking that hide glue applied cold still adheres, it just doesn’t run and spread well, or does the heat actually contribute to its adhesion as well?
Thanks!
If you get it above 145°F, the proteins start to break down, and it will lose strength. So I’d test the temp of the water. You need it to be runny enough to get into all the crevices, and I think on traditional hide glue, the open time starts to drop if it’s below 135°. We’ll have to wait for Chris to weight in on lower temps for our new Death Grip; I don’t know,
A Crock Pot is at the right temperature.
Warming doesn’t improve adhesion, just flow.
Thanks Chris and Megan. Could you please describe the process by which you come up with the topic for books? Are there ideas you’ve considered and then decided against?
We write about the things that excite us, and that aren’t already available. (In other words, why write about a subject if there’s nothing new to say or no new engaging way to say it?) And that’s tempered of course by if we think enough other people will want to read it.
On books from outside authors, it’s much the same. The author must qualified and excited to write something new on a given woodworking subject, and that subject/approach to a subject must be something we think enough people will want to read. Or that we feel is so important that it’s worth a risk.
We sometimes get queries on subjects tangentially related to woodworking, and while we’d love to read some of those books, we’re not the right publisher for them. (Usually blacksmithing.)
For interior dividers (for bench planes and such) on the floor of a tool chest you mention brads as a method of attachment. What size brad are you using? 18ga trim brads from a nail gun? Or something else?
Sure. 18 or 23 gauge pneumatic fasteners are fine. Or cut headless brads from Tremont.
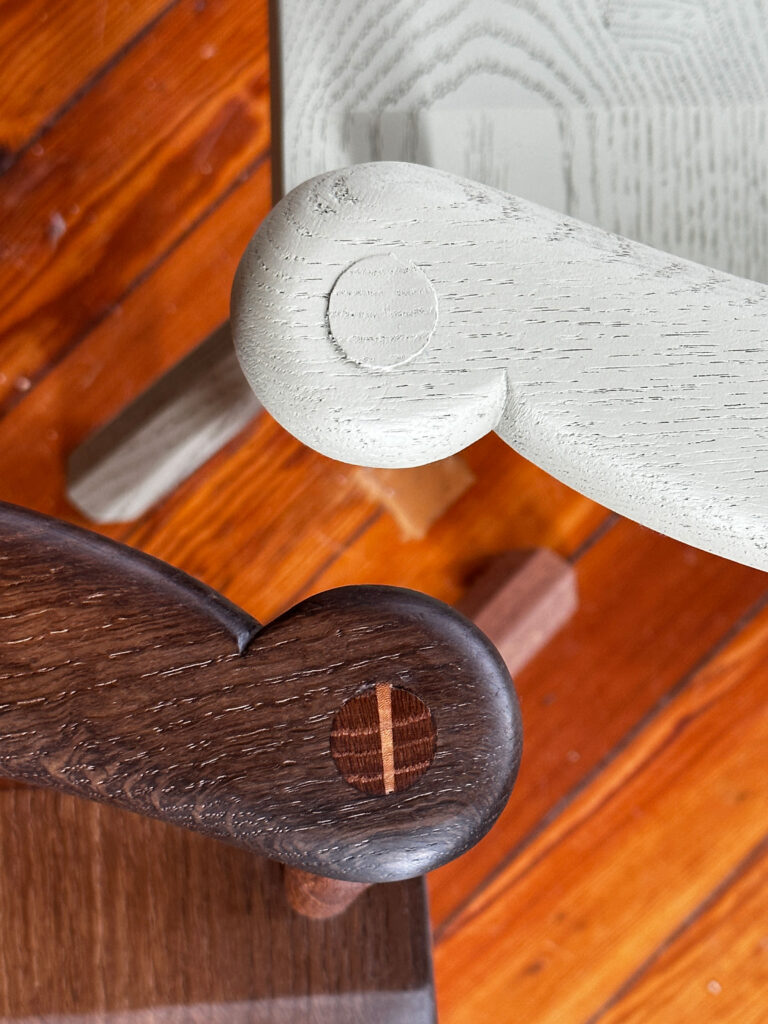
I’ve built a handful of Welsh stick chairs after taking your class. I’ve bought about 4 printed or cutout patterns of the Welsh stick chair from you to have in my shop. The last Welsh stick chair style I got (in a that pack of 4 different stick chairs that you sell) has more of a flat back side on the seat – more square if that makes sense. Is that a different era of stick chair or a design you did? I built my last chair with this “flatter” back side and personally love the look and sit. Is there a history story behind this shape?
That’s a basic Irish style – the first chair in “The Stick Chair Book.” The form is also found in Wales, Devon and other stick chair cultures. But the Irish make the majority of them.
Since I own a lathe, would there be any advantage/disadvantage to turning chair parts for stick chairs instead of hand planing?
Chris sometimes turns the tenons, but to my eye, much of the beauty of a stick chair is the subtle (or not-so-subtle) facets created by planing the legs and sticks. I’m sure this is semi-wrong…but I think once you start turning them, you’re tipping toward Windsors. And that’s OK if you like that sort of thing ;-). Seriously though – it’s your chair; build it to suit your eye and tools.
I am trying to decide on book vs video on Sharpen This. Does the PDF version of the book get updated as you add more tools like the videos do? Thank you for your time.
The book is not updated; the video series is. And gosh – we do need to add a new chapter to that video. I’ll bug Chris about it 🙂
FWIW, I have both and the video is a lot better for the way my brain works. It’s a lot easier than trying to visualize actions from words and still photos. But not all brains work the same so it may be different for you.
Do you plan to restock the Crucible pencil gauges?
Can one use pinch dogs instead of pocket screws, to clamp the arms to the middle arm during glue up (before the shoe goes on top)?
Many thanks.
Possibly – but they won’t be quite as rednecky.
And on pinch dogs, to quote Chris: “We have a pocket hole jig, which was a free cast-off from someone else’s shop. It’s more reliable than the pinch dogs, which can slip. But if I didn’t have the pocket hole jig, I’d use pinch dogs or a dowel or whatever. Hell, I’ve used a domino. I’ve used a loose tongue-in groove. There are 100 good ways to do it.”
Hi guys, thanks again for hosting this! I’m really curious about how you first got started selling furniture (chairs or casework)–did you make a lot of different pieces then shopped them around? Did people approach you? Was yr work at the magazine helpful in making those initial commissions/sales? Beyond making chairs for friends and family, it just seems so daunting to learn how to begin the process of crafting a business. Really appreciate all you do!
Jake
I began selling pieces on eBay – reproductions of Arts & Crafts pieces. My work at the magazine didn’t help me – nobody knew who I was.
From there, I started selling to friends of friends, basically. I specialized in one kind of Morris chair that was made here in Cincinnati (Shop of the Crafters). It grew mostly word of mouth. It was a side gig, so I wasn’t aggressive about it. Mostly I was trying to get my shop set up for going pro when I would be inevitably fired.
I then used my books to generate business. “Campaign Furniture” brought more commissions than I knew what to do with. In fact, I could still make a career out of making that stuff alone. Furniture customers found me through web searches. They didn’t really give a poo that I was an author. They just wanted a Roorkhee or a campaign secretary.
Writing books to generate business is one model. A hard one. But that’s what I know. Other people do craft shows and gallery work. Still others works for someone else, then go one their own.
Lots of ways to do it. But here’s the common thread: You have to put yourself out there. Use the internet (it’s free). Work with others on collaborations. Enjoy selling as much as making. Enjoy business as much as woodworking.
Thanks, Chris! I appreciate the response.
Jake
I’ll let Chris answer for himself on how he first began selling his work. But I had it easy – I was able to take the commissions Chris didn’t have time for that were in my wheelhouse (tool chests) – so there were already buyers for them. These days, I take commissions via email inquiry (if time allows)…and I still mostly build tool chests. (If I built one in a class, I offer it up on the blog.)
A friend is restoring a 1911 National Cash Register that is mounted on a oak cabinet with drawers. One brass knob (1/2 in.) drawer pull is missing. Can you recommend any possible source of a replacement or anyone who could cast one using one of the existing pulls as a pattern?
Try contacting Orion Henderson at Horton Brasses. He knows hardware and how to get what he doesn’t make.
When I lived in the Seattle area, Hardwicks https://hardwickandsons.com/collections/hardware was always worth checking if you want to look for a match. They seem to have improved their website. Hippo Hardware (Portland, OR) has a decent selection but I don’t know if their website covers everything that is on hand, https://www.hippohardware.com/ There are probably lots of other sources of new/reproductions and used hardware too.
I have the original stick chair book. I saw a Gibson chair video and a stick a chair video on your website.
What is the difference between those? For a newbie Chairmaker they both seem adequate. There must be a reason that you made two. There must be some difference, right?
Some people learn better through video. The Gibson chair and comb-back are very different forms that require different techniques (especially for drilling).
Plus, people requested those them most. So we made them.
The book gives you enough information to build those forms, as well. No need to buy the videos.
I want to make a Gibson chair or two but I don’t have any tenon or plug cutters. Would you recommend 3/4” and 1” power cutters from Veritas or copy your setup in the video (one Veritas, one CMT)? I don’t know what else I’ll use them for.
You don’t need any tenon cutters if you want to make a chair or two. Use a block plane or rasp to make the tenon. It’s a bit slower, but it’s definitely cheaper!
What keeps the drawers on the Mule Chest from the Design Book from falling out if pulled out too far?
Experience in pulling them out not too far. (That chest is in my house!)
In the blog entry recommending the Allan Williams travishers, there is a PS in which you also recommend the James Mursell travisher.
However, you advise that a separate blogpost would be required to explain why.
Has this blog post ever surfaced, and if not, are there any plans of it doing so?
PS i have bought two LAP titles and both times new versions of the book have been released within six months of purchase.
Why do you hate me?
The Mursell travisher is ideal for someone who wants only one chairmaking tool for saddling. It can be set for heavy and light cuts – no scorp, adze or inshave required.
Well, I don’t think he hates us but I’m also curious, and wonder if we could get an extra chapter in the stick chair video (similar to the approach for the sharpening series) demonstrating the Mursell travisher.
A while back Chris posted a note about canvas tool totes made I think in Japan. They look nifty and the U.K. seller had loads of other interesting shop gear and wear for sale—thanks! There is an American source for a similar line of all-canvas tool totes and gear. Apparently big with linemen and boat riggers/sailors—light, washable, don’t hold moisture and no metal=no scratch the nice woodwork. Company is Green Mountain Products based in Vermont, looks like their products are made in USA. Another option to consider. Cheers and enjoying Open Wire Saturdays!
https://www.greenmountainproducts.com/new-products
Those look nice, too.
I’ve had one for 10+ years—they’re well made and hold more than you’d think. And go great with those Klein tool pouches 🙂
The legs for the Gibson chair call for a 1” straight tenon. Could I get away with a 5/8” tapered tenon in beech?
Is there a rule of thumb for converting between sizes for straight/ tapered tenons?
What kind of watch is Chris wearing in the Gibson video?
Thanks as always for taking time to answer questions!
Yes. Both those tenons are fine for any chair. The rule of thumb is (for me): Use straight for chairs that are vernacular. Use tapered for fancier/modern chairs – or when teaching people to make chairs (the tapered joint is more forgiving).
Hi, thanks for doing these!
I’m building an anarchist bench for a small shop space, the top will be 5ft long. I’d like to maximize usable length while not compromising the long term integrity at the end where the plane stop and holdfast hole are. What would you recommend as the minimum inset from the end of the table for these? If it matters the top is western maple. I really appreciate your advice
With short benches, I shift the base so I have 12″ or so overhang and one end and a few inches at the other. This allows you to do all the traditional stuff on the planing stop end. And have a long-enough base for stability (and storage).
How can I stop all this rubbing from blowing a hole in my pants when I’m seated on work (rip cuts or planing on a low sawbench etc)? The arras on rough work seems to do in a pants-crotch in about 6 hours of stock prep.
Where can I find a new saw set? The usual candidates don’t seem to stock this essential tool and I think I’m running out of set after a few destructive-ignorant-newbie sharpenings…
Thanks!
My pants have two layers of denim or canvas. The gold standard is Filson.
https://www.filson.com/bottoms/oil-finish-double-tin-cloth-pants.html
I’m sure other can chime in with other solutions.
On saw sets, I’ve only bought used Stanley 42xs my whole career. I’ve played with the Eclipse and Somax, they seem fine.
https://www.highlandwoodworking.com/eclipse-saw-set.aspx
Good afternoon and thank you for your time.
I’m looking to upgrade my not-so-good dovetail saw and my question comes from an article I read and would like your take on their suggestion. And that is to not buy a dovetail saw at all. Instead buy a smaller tenon saw. It’s heft provides a more accurate cut, especially on thicker material, the example saw is a Pax 1776 tenon saw.
The reason is that the dovetail blade is thinner and provides a smoother, more accurate cut.
Your take?
Thank you.
Sorry, the comment above did not reflect my login info.
Submitting again.
Good afternoon and thank you for your time.
I’m looking to upgrade my not-so-good dovetail saw and my question comes from an article I read and would like your take on their suggestion. And that is to not buy a dovetail saw at all. Instead buy a smaller tenon saw. It’s heft provides a more accurate cut, especially on thicker material, the example saw is a Pax 1776 tenon saw.
The reason is that the dovetail blade is thinner and provides a smoother, more accurate cut.
Your take?
Thank you.
That’s not my take on it, I’m afraid. Though I’m sure that’s workable.
I say buy a good dovetail saw if you are going to cut a lot of dovetails (the Pax is not great I’m afraid). If money is a problem, buy a good but cheap dozuki (like the Z-saws) for dovetails. If you are going to cut dovetails only occasionally, get a Zona saw.
If you are going to cut a lot of tenons, get a good tenon saw.
And a carcase saw for crosscuts.
If there is any crossover/tool sharing in the saw world, it’s historically found in the carcase/tenon category. Many woodworkers would use one saw to do both jobs. When hand-filed for rip, it does a serviceable job at crosscuts. I don’t use hybrid filings (though they are fine).
By bias here comes from history and practice. I looked at the tool kits in the old books. I followed their recommendations. I tried other recommended practices at times – then returned to the old texts.
Thank you for your reply.
Jeff
Hey folks! Hope you’re having a great Saturday. Chris, I noticed on Aug. 13 (Instagram) that the bog oak chair seat was glued with a white glue (PVA or Gorilla?), any reason you’ve veered from hide glue for that particular chair part? Is hide glue insufficient? Thanks in advance!
Pretty sure it was because he a) forgot to heat up the gelatin glue and/or b) needed a shorter setup time to use the clamps on other seats. Or both.
Got any resources for building Japanese wooden soaking tubs, ofuro?
I do not. I’m afraid I have never even seen one in the wild.
I’m working on a 3-legged side chair for a dining room, based loosely on the side chairs in the ADB. Is there a general angle you’d recommend for the rake of the back leg?
Make it so the foot of the back leg ends up under the sitter’s back. Typically I use a 20° – 25° resultant for the back leg of a three-legger.
Have you ever used a V tool to outline the seat before shaping it? Was thinking of going the route instead of the router thing. The router way worked but I would rather use the V tool I think.
I sure have. Gutters aren’t typically found on stick chairs, but they do show up occasionally. John Brown put them on some of his chairs, and you can, too.
Hi Chris. Any suggestions on a setup for recording woodworking videos? There are guides online, but wondering if there’s a setup you’d suggest for woodworkers. I’m wanting to record process videos for my Instagram page. What setup do you use or have you seen others using? Any other tips for recording instructional videos? Thanks!
We use our iPhones secured to a tripod. For sound, we currently use the Rode wireless hardware, which is pretty good (until you use a bad cable…. my fault). I can control the phone with the watch, which shows me what’s in frame.
We have used fancier setups in the past (digital camcorders). But phones have come a long way.
Chris,
I’ve wondered for years whether the way you run your LAP is at all influenced by hardcore punk or indie rock record labels of the 80s and 90s. I could point to many apparent similarities in your ethics. In other words, are you the Ian Mackaye of craft publishing?
Merge Records/Superchunk are my guiding star for how to run a creative publishing house. You have to be a musician. You have to help other musicians. And you have to try to do everything you can in-house.
So basically, yes.