“I’ve just received this crate of Triton tools to review. They’re awesome and…” Click. Unfollow.
“This is the first in a series of unboxing videos on my latest acquisition. I can’t wait for you to…” Unfollow.
“Here’s a tiny detail of my latest project. I don’t want to spoil the surprise. Any guesses as to what it is?” Nope. Unfollow.
“To bring you more fantastic content, I’ve started a gofundme page…” Unfollow.
“There’s only a few more weeks left until the BIG REVEAL where I get to show you the beautiful project I’ve been working on all these weeks. I’m so excited to…” I am excited as well. To unfollow you.
“I hate to tease you, but…” Unfollow with extreme prejudice.
“I can’t wait to show you what I’ve been working on. But I have to manufacture some false drama first because I am otherwise completely out of things to say. And my business sensei (the Money Chicken Wizard (TM)) says I have to post something on social every day or people will forget I exist. So here’s a confusing photo of something really close up that will only confuse you. Feel free to leave a guess in the comments if you are as helpless as I am.” Thank you for your honesty. You may stay in my feed.
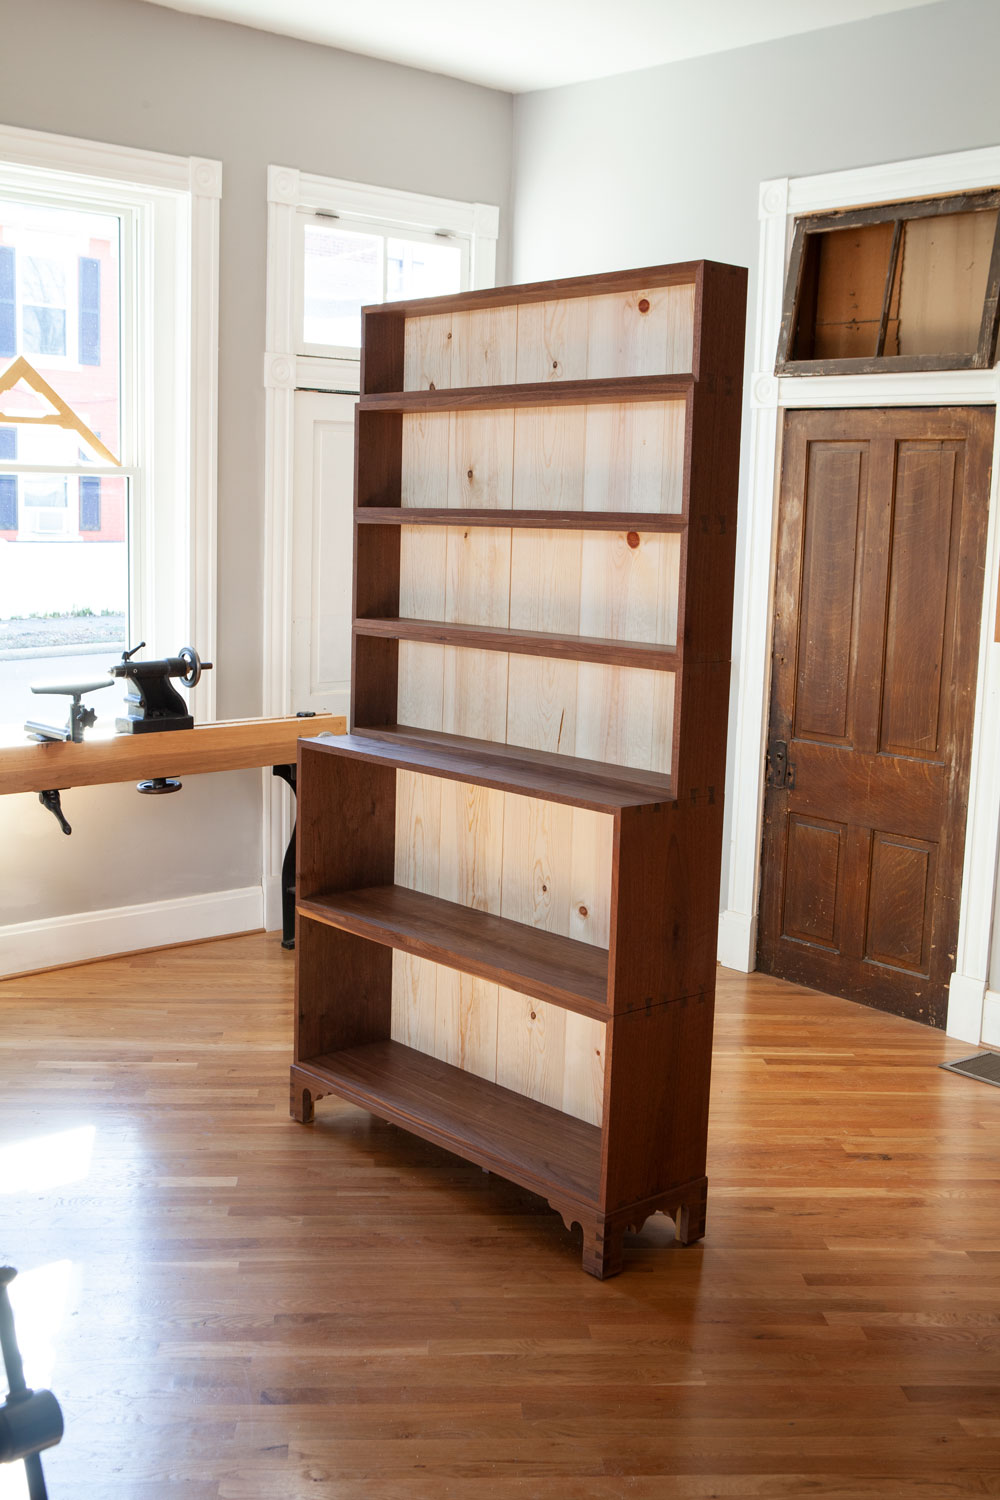
These bookcases are similar to a set I built for the June 2011 issue of Popular Woodworking Magazine, which has the complete plans with step photos and instruction. You can download a free SketchUp model of the bookcase here.
The Story Behind the Shelves
I’m allowed to quote myself, right? Here, then, is the backstory on these shelves. Read it before I issue myself a cease-and-desist letter.
I like to think of Thomas Jefferson’s personal library as America’s first “Bookmobile.”
When the British burned down the nation’s capitol in 1814, the inferno took with it many of the books owned by the government of our young nation. Lucky for us, Jefferson had a personal library of about 6,700 books – an astonishing accomplishment for the time.
And after some negotiations, Jefferson agreed to cede his entire library at Monticello to Congress for the sum of $23,950. The question was, how to transport 6,700 books from Virginia north to Washington, D.C., with horse-drawn wagons.
Lucky for us, Jefferson was a clever man. He stored his precious library in pine boxes that were designed specifically to travel. While it isn’t known if Jefferson designed the book boxes (or “book presses” as they are sometimes called), they do bear the mark of his cleverness.
For when the day came to transport this massive chunk of knowledge, the process was straightforward. Scrap paper was stuffed among the books to protect them, then a lid was nailed over the front of each unit and it was loaded onto a wagon and carted to Washington.
Jefferson’s collection of books (which continues to make headlines even today) was the foundation for our Library of Congress. His method for organizing his books (memory, reason and imagination) pushed us into a more modern classification system. Until that time it was common to organize books by height or color.
But What About the Boxes?
While a good deal is known about the books in Jefferson’s collection that he sold to Congress, far less is known about the stackable boxes that he used to store his library at Monticello. By examining the written records, officials at Monticello built six bookcases for the museum in 1959 that are a good guess at what would have housed Jefferson’s library (though he could have had as many as 20 of these units, if you do the math).
Since the day I started woodworking, I have been concerned about amassing information on the craft. For me, the written word enhances my personal experience in the shop, and it is a way to stay in touch with the craft while I am on the road, in bed or sitting on the couch.
As my library got out of hand sometime about 2005, I decided I needed to build something to store all my woodworking books. I also wanted something that would allow them to be easily transported when my wife and I leave our house after the kids are off to college, and we launch the next phase of our lives.
And so I became interested in Jefferson’s book boxes. I read the original letters that describe how the books were transported. I used the standard measurements for books of the day to help fill in the blanks when it came to designing the three different case sizes Jefferson describes in his correspondence.
Oh, and what was the joinery on these boxes? Who knows. Perhaps the boxes were nailed together, as there were as many as 150 individual book boxes to hold the nearly 6,700 books.
But I prefer to think that our third president, who was familiar with the principles of joinery, would insist on something more substantial. And so, despite the fact that no surviving examples of these book boxes exist, I built each of these units using through-dovetails with mitered shoulders at the corners. (Here’s a video showing how to do it.) The backs are shiplapped and nailed on to the carcases.
This approach to building a box is typical for the time, and I bet that my modern book boxes would easily survive a wagon journey from Monticello to Washington, D.C.
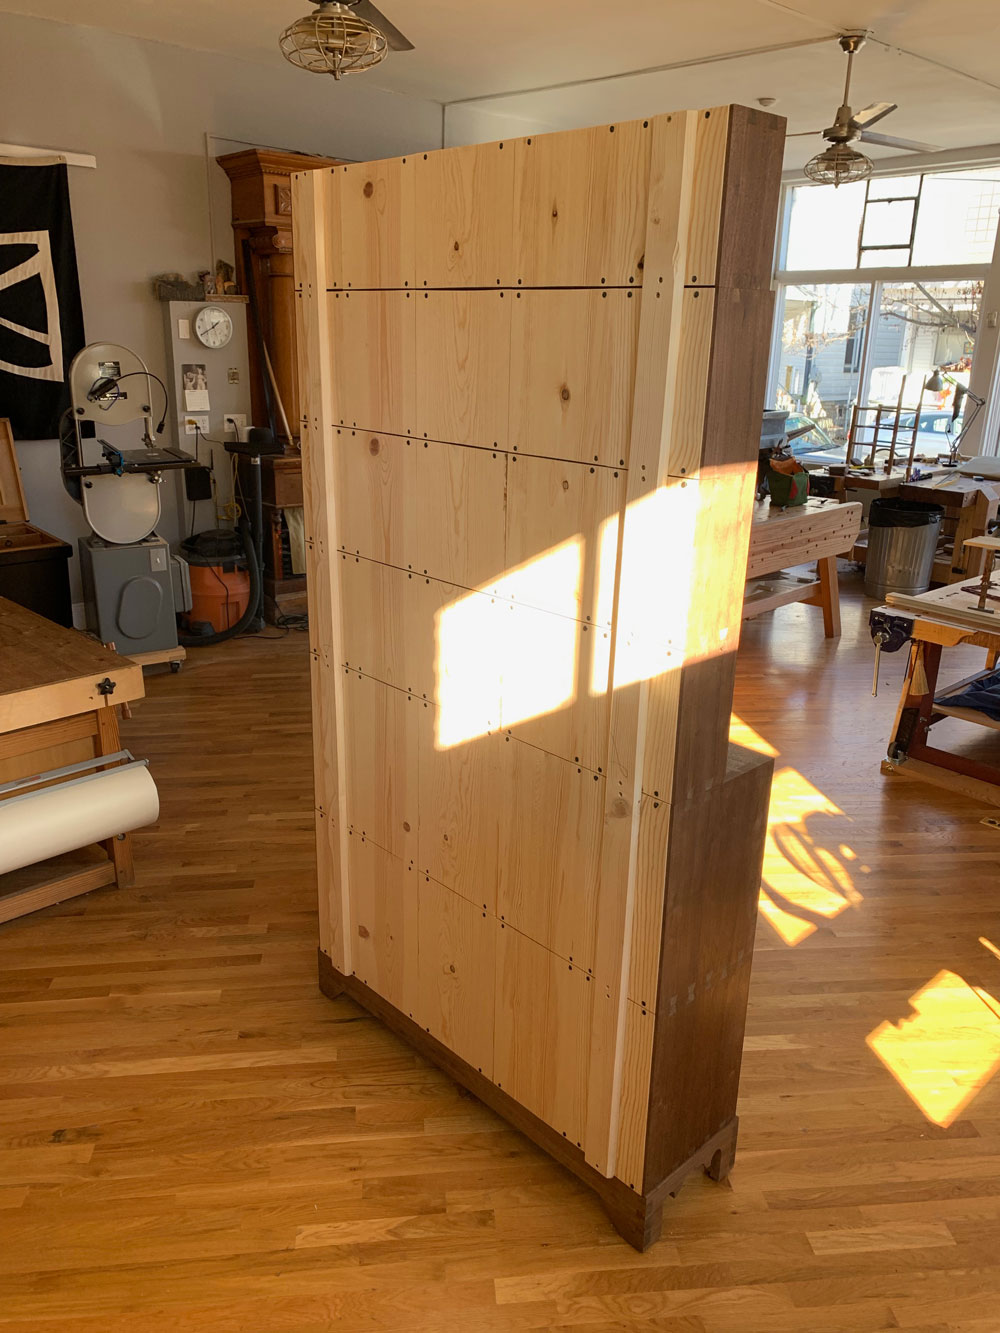
The bookcase from the back. Here you can see the battens that keep all the components in line.
About This Set of Bookshelves
As I’ve gotten older, I’ve become more OCD (apologies to poor Brendan and Megan, who suffer my wrath when the shop’s coffee mugs are unwashed). So when faced with making a new set of these shelves, I decided to ratchet up the insanity.
At the customer’s request, all the visible boards are full-width (I hid a couple glue-ups and buried the seams below the tailboards). At my stupid brain’s request, I made the ends of the cases all one single board with the grain matched all the way up the 7’2” case. It took months (and cash) to find the right 14”-wide walnut boards.
To make it harder, I made the dovetails line up all the way up the case sides, a detail I cribbed from Jameel Abraham when he built his version of these bookcases.
Then, because that wasn’t hard enough, I made the backboards match all the way up the case. Yesterday I juggled 30 pine backboards that had to all line up or it would look like crap. Also, the way I staggered the widths of the backboards was a math equation. Let’s just agree that I made this harder than it should be.
The bookshelves are finished with shellac. The backboards are finished with two coats of super blonde shellac. The cases and plinth are finished with three coats of garnet shellac.
And now I just have to build the crate. This sucker has to go on a truck bound for Michigan at 8 a.m. Friday. This weekend, I’ll take it easy and complete a couple small projects for a customer in California. Then, on Monday, I start the most difficult and involved project so far (besides my kids). It’s a massive three-tiered campaign chest with three transit cases that store the disassembled chest components and then stack as a wardrobe.
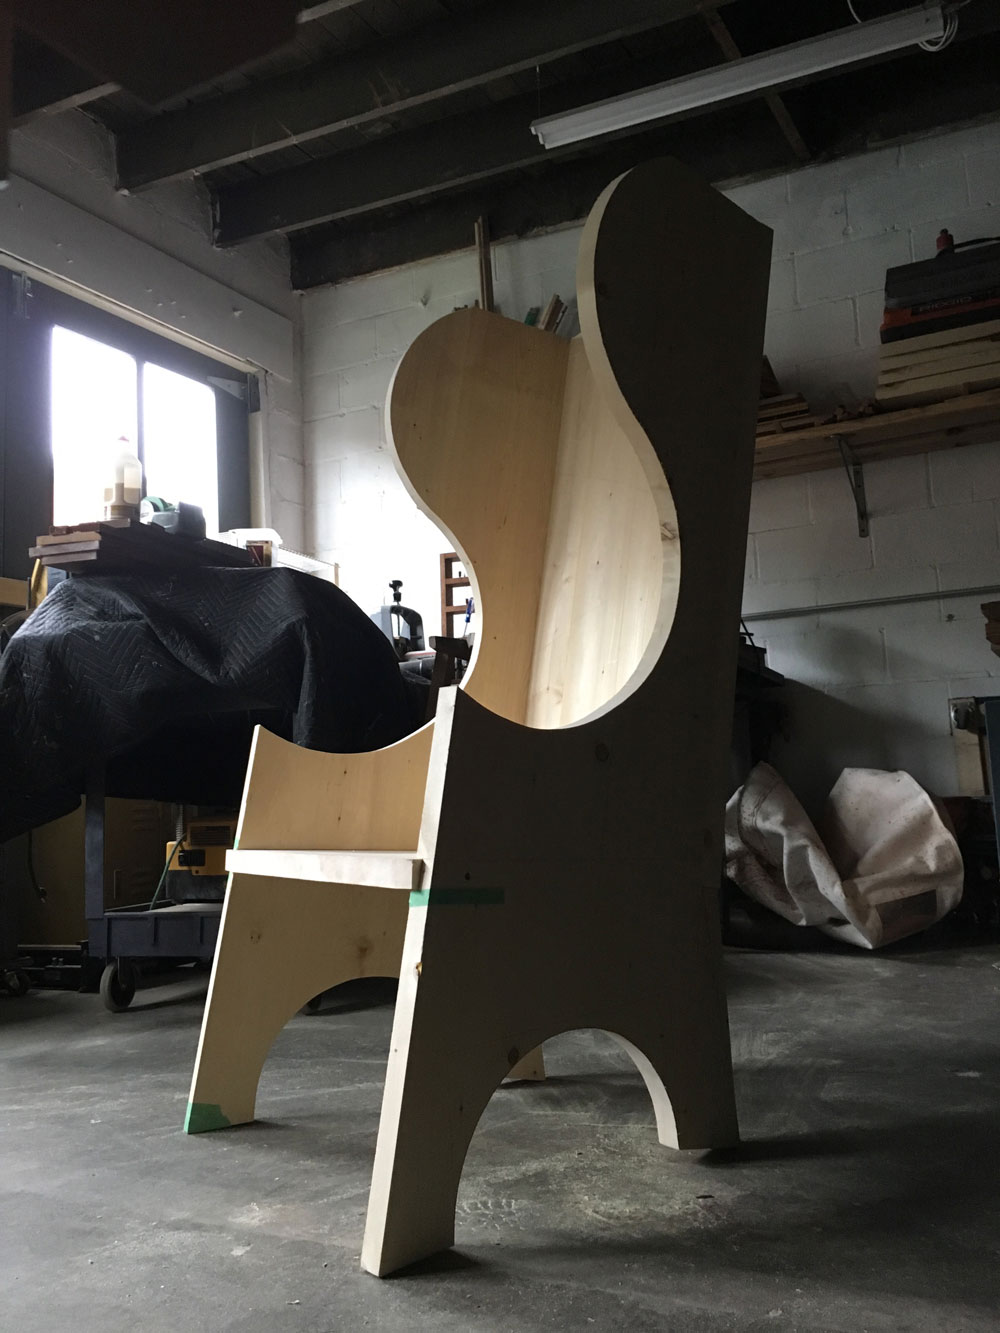
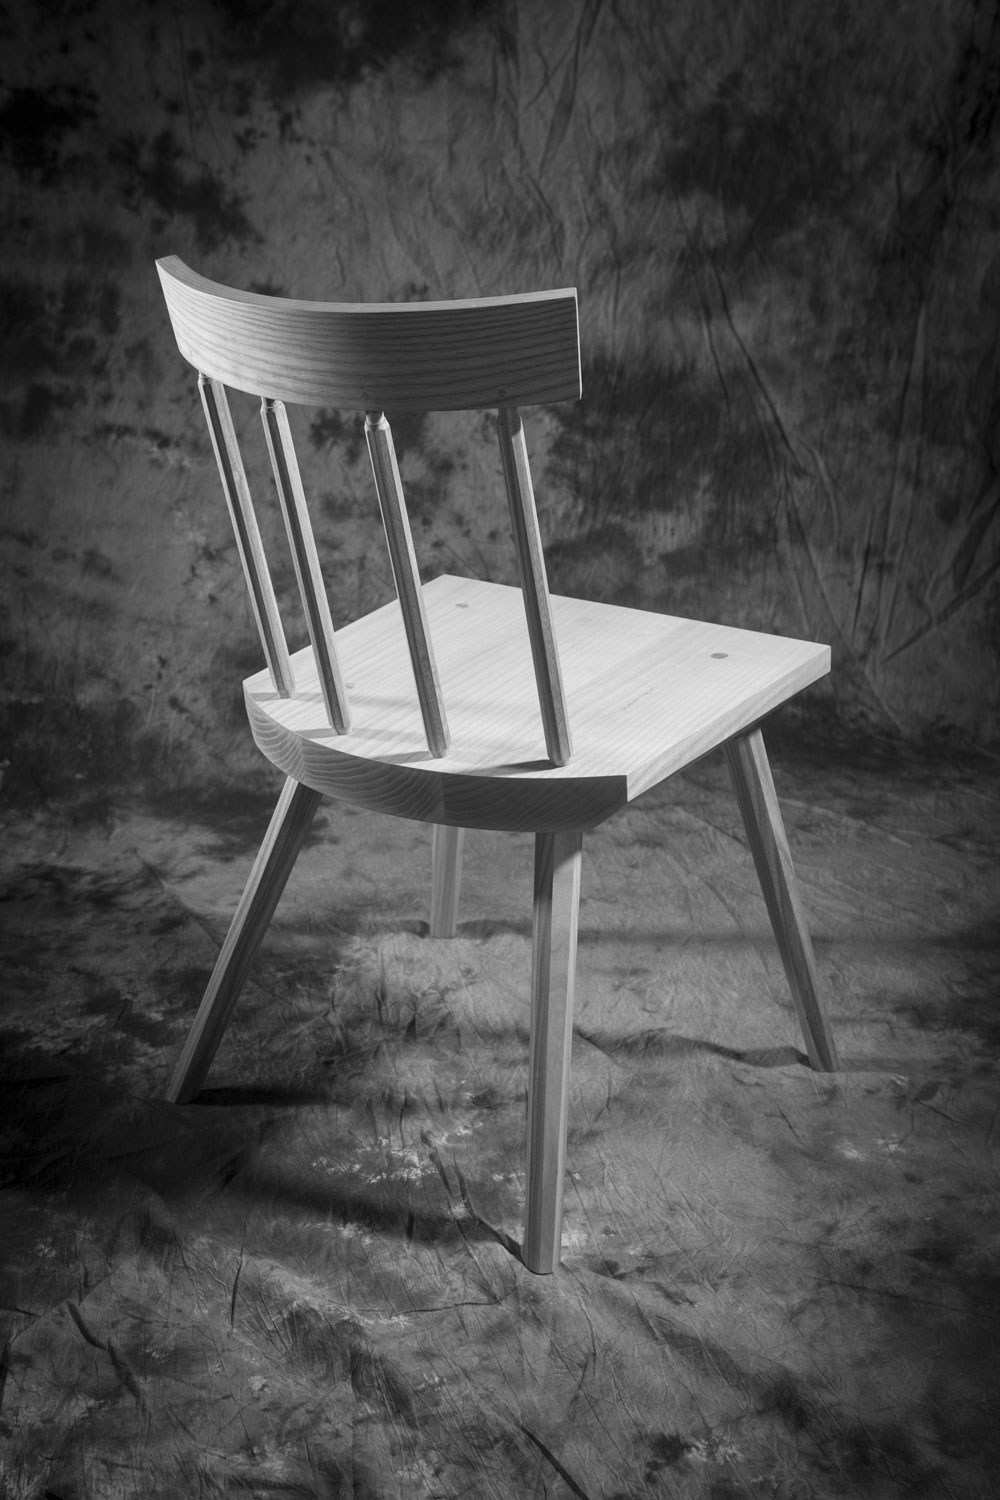
One of the furniture forms I’ve had a long obsession with are settles. These high-back benches were common in early homes and were handy for keeping warm by the fire. One of their variants, the settle chair – is somewhat less common. But it is just as delightful.
These boarded chairs are made from four planks that are nailed or screwed together. And – if you take what you know about stick chairs and apply it to a boarded chair, it can be pretty comfortable. Much more comfortable than the crate or coffin that it resembles.
The trick is to angle almost every joint so the backrest leans back, the chair leans back and the giant boarded sides open up to the sitter like the arms of a mustachioed aunt with boundary issues.
There are 100 ways to build this chair that are difficult. For the last several months, I’ve been tinkering with the construction process to make it as simple and foolproof as possible. Finally, on Friday I decided that drawings and CAD could take me no further. I had to build it.
This chair will be the next new chapter for “The Anarchist’s Design Book” expansion. If you have questions about the expansion, here is an FAQ.
I started with No. 2 common white pine 2x6s from the home center and glued them up into four panels:
1 Seat: 1-1/4” x 26” x 19”
1 Back 1-1/4” x 21-1/2” x 41”
2 Sides 1-1/4” x 19 x 49”
It’s a lot of wood, I know. But 2x6s are cheap. I also knew I was going to cut the side pieces with a decorative pattern, but I wasn’t sure what the pattern would be. Had I known the pattern, I would have glued up the sides in a way that greatly reduced waste.
I could bore you with all the mental gymnastics that came up with the steps to build this chair. If you come up with an easier way to do it with simple tools, I applaud you.
Let’s hit the highlights.
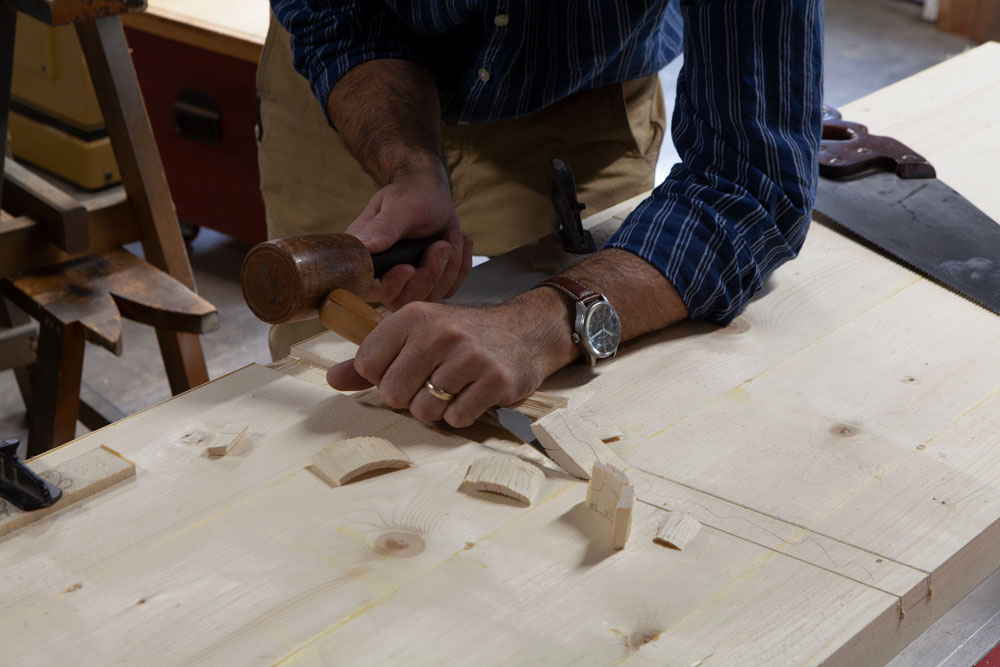
Cut the dados in the side pieces that will hold the seat. These dados are angled 97° off the back, which creates part of the “lean” to the back. The dados are 1/2” deep and start 15” up from the bottom of the side pieces.
Cut or plane a 9° bevel on the back edge of the side pieces. This bevel makes the sides open toward the sitter (remember the aunt joke?).
Screw the back to the sides with No. 9 x 3-1/8” screws. No glue. You will want to disassemble the chair to make things pretty. You can glue it up later if you like.
Glue 5”-wide blocks to the back edge of the sides, creating the back feet. You’ll have to cut the 9° bevel on one long edge of these blocks. Note that I’ve already cut an angle on the bottom of the sides to add some more lean. I recommend you do this at the end of the construction process.
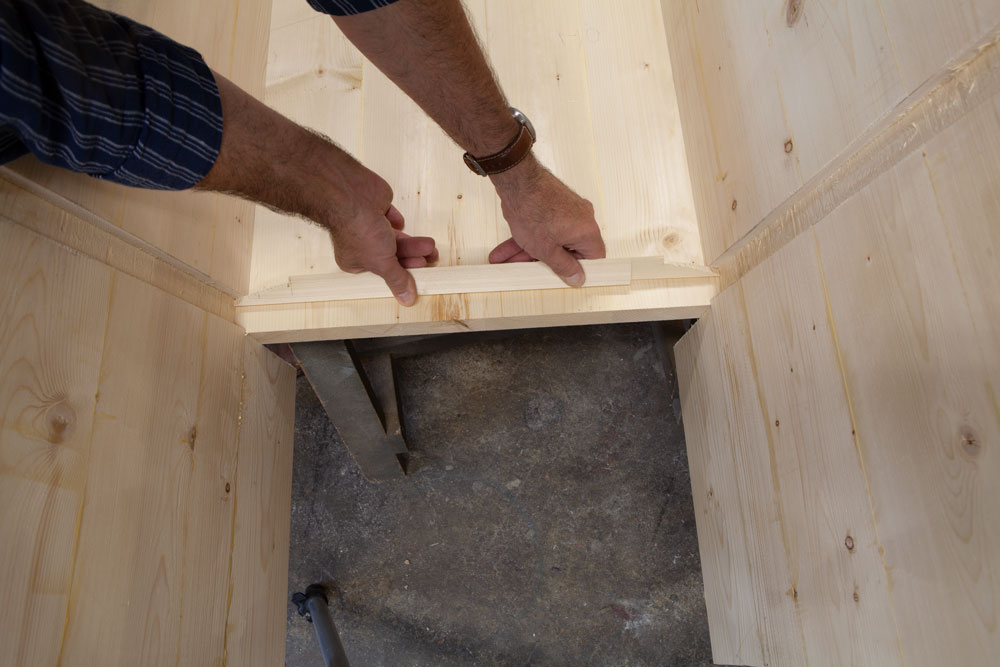
Make the seat fit its hole. Here I’m using pinch sticks to get the measurement of the seat at its narrowest point. Cut the seat to size and fit it in the dados. Screw the sides to the seat.
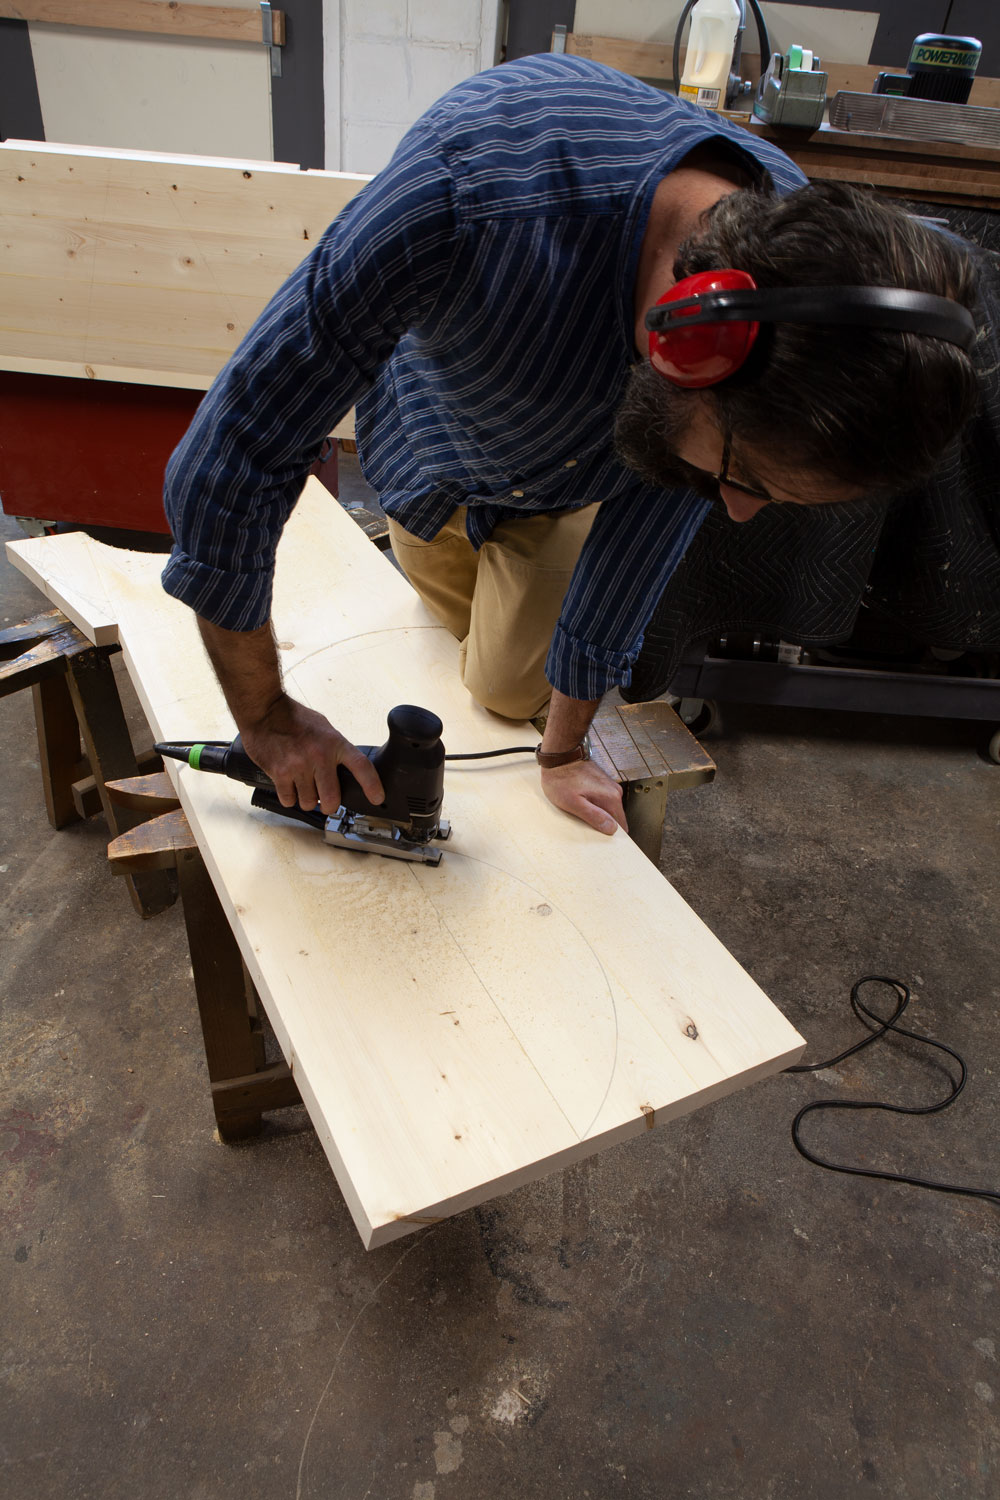
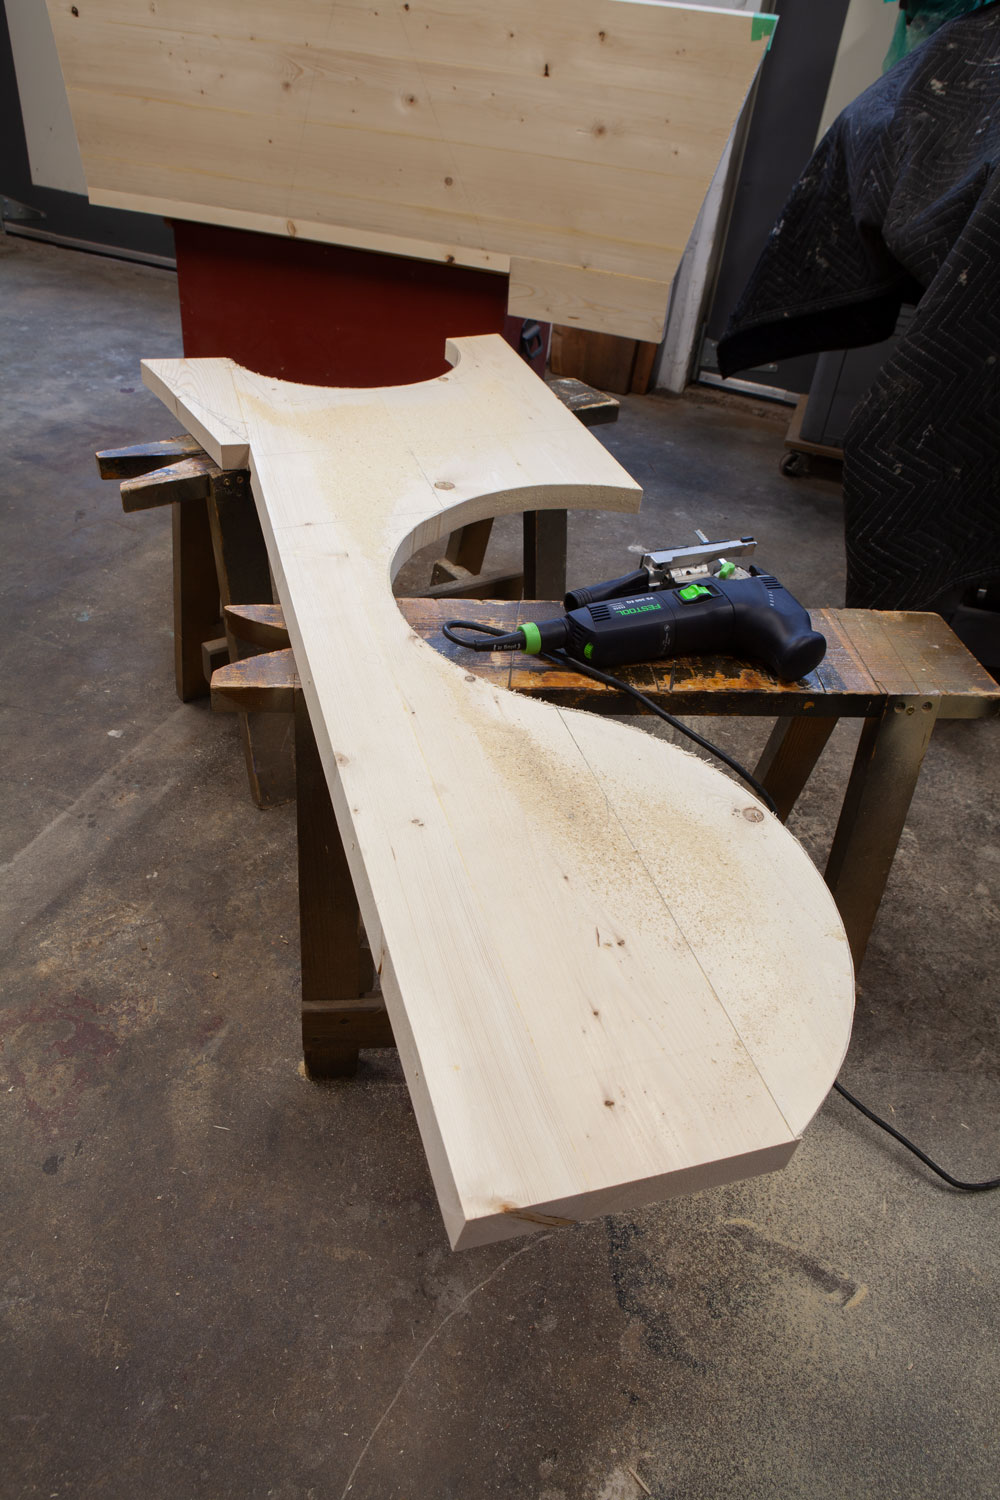
Cut the decorative profile on the sides. I drew mine with trammel points. The three arcs for the top curves are all a 9-5/8” radius. The curve for the bottom is a 7-1/2” radius. I was trying to imitate the traditional wingback chair with these curves and exaggerated things to make it look more “ersatz hillbilly.”
Clean up the edges. Screw it back together and then see if you like it.
I’ll build a couple more of these chairs with different profiles and then get to work on writing the chapter for the book. This prototype is good enough to get cleaned up and finished. I’ve asked my daughter Katy to paint it – perhaps we’ll offer it for sale here if we’re both satisfied with it.
Want to ruin a secular or religious day of observance? Have a sale to celebrate it.
At my last job, the Internet marketing lickspittles took every opportunity to inject commerce into something otherwise beautiful, grave or important. A few of their gems:
Don’t Let These Deals “Pass” You Over – Our Passover Sale!
Kiss These Deals – They’re Irish – St. Patty’s Day Sale!
TGIF – Our Good Friday Sale!
It’s Cinco de Deal-o!
Of course, all of these pale in comparison to department stores that have “white sales” on Martin Luther King Day. Think about that. Without any irony they’re selling white sheets on a day remembering a slain civil rights leader.
At Lost Art Press, we refuse to pair commercial activity to holidays, patriotism or national symbols. In fact, our only complaint about any of our suppliers is that the supplier for our hats puts an American flag on the back of the hat. I always cut it off when I see it.
Today is Memorial Day. Instead of shopping, I’m in the shop building a crate and thinking about my father, who served in Vietnam, and all my friends who served in the Gulf wars, Iraq, Afghanistan and elsewhere. I’m listening to some of the music my dad took with him to Vietnam for his TEAC reel-to-reel – Led Zeppelin IV and the Beatles white album – and hoping the (unlikely) day comes when war is obsolete.
(Below is a paragraph that ended up on the cutting room floor of “The Anarchist’s Design Book.”)
When describing the furniture of necessity, I avoid negative sentence constructions such as: It’s not ornate. That sentence tells you what the furniture is not; it doesn’t tell you what it is.
To put it a different way, my best friend in high school once described my girlfriend as “not horse-faced.”
It’s a struggle to find a good word that doesn’t make the furniture sound like stuff at a craft fair (“They are simple things”) or something dreamed up by an intellectual jackass (“It is the intersection between the laconic and the cardinal”).
The best description I can muster is the Italian word puro as it was used to describe paintings and literature in the classical and Renaissance periods. The literal translation is “pure,” but when used in criticism it means something more like “plain and clear.”