Editor’s note: Our Mind Upon Mind series is a nod to a 1937 Chips from the Chisel column (also featured in “Honest Labour: The Charles H. Hayward Years”), in which Hayward wrote, “The influence of mind upon mind is extraordinary.” The idea being there’s often room for improvement. (You can read the entire Chips from the Chisel column here.)
And so we ask for submissions: After building projects from our books, what else have you thought of, tried out and improved upon?
Today’s submission is from Jay Abramovitz in Voorhees, New Jersey.
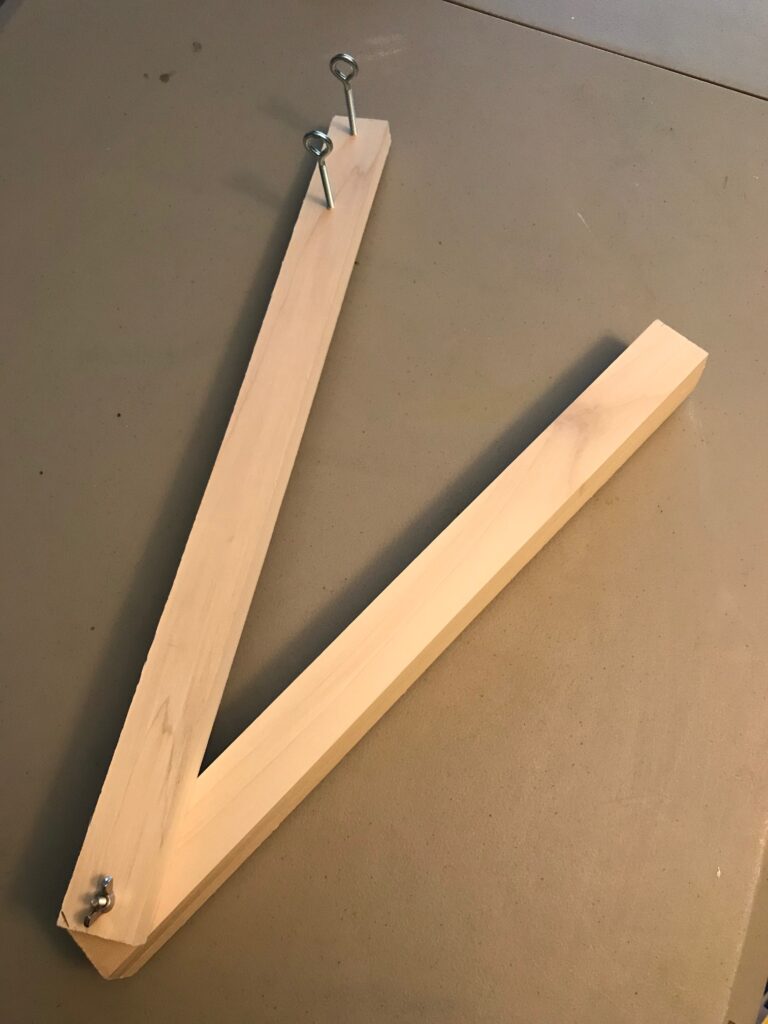
I came up with an approach for accurately drilling holes at compound angles that has worked surprisingly well for me.
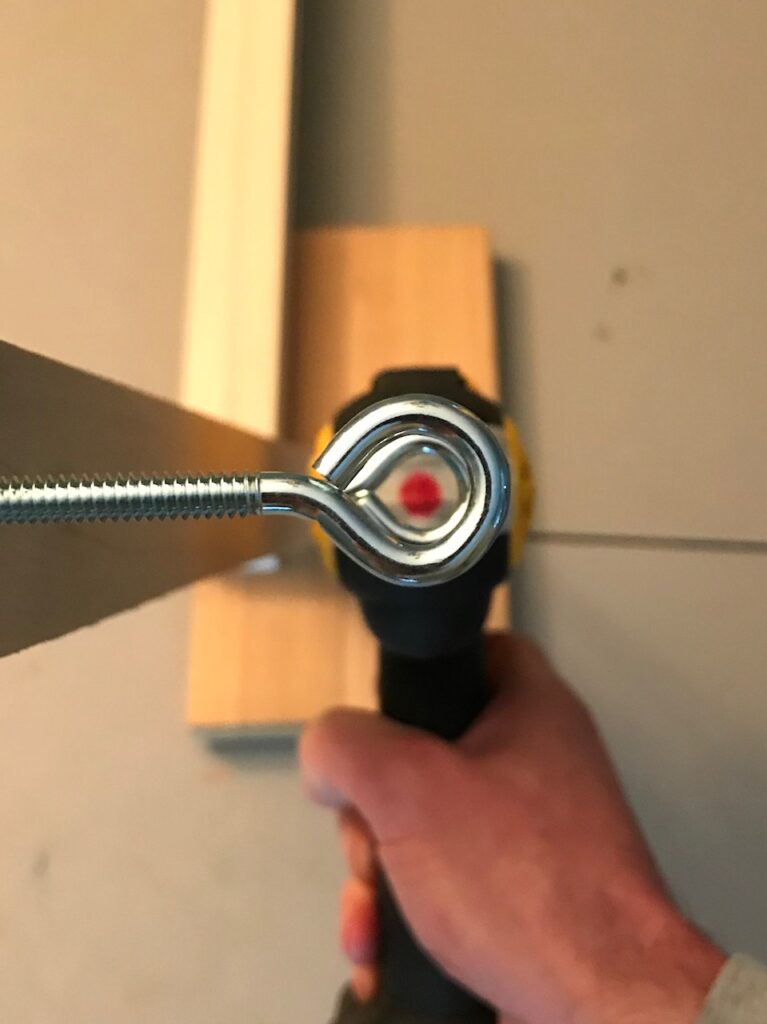
I started with three 2′ narrow lengths of pine. I glued two pieces together to form the “foot” of the jig. I attached the third piece (the “arm”) to the foot by drilling a hole through both pieces. I used a machine screw with a wing nut, which allowed the arm to rotate. I then attached two long eye screws to the opposite end of the arm a few inches apart to form a “gun sight” of sorts.
By placing the foot on my workpiece, I was able to line up the straight edge of the foot with my sightline.
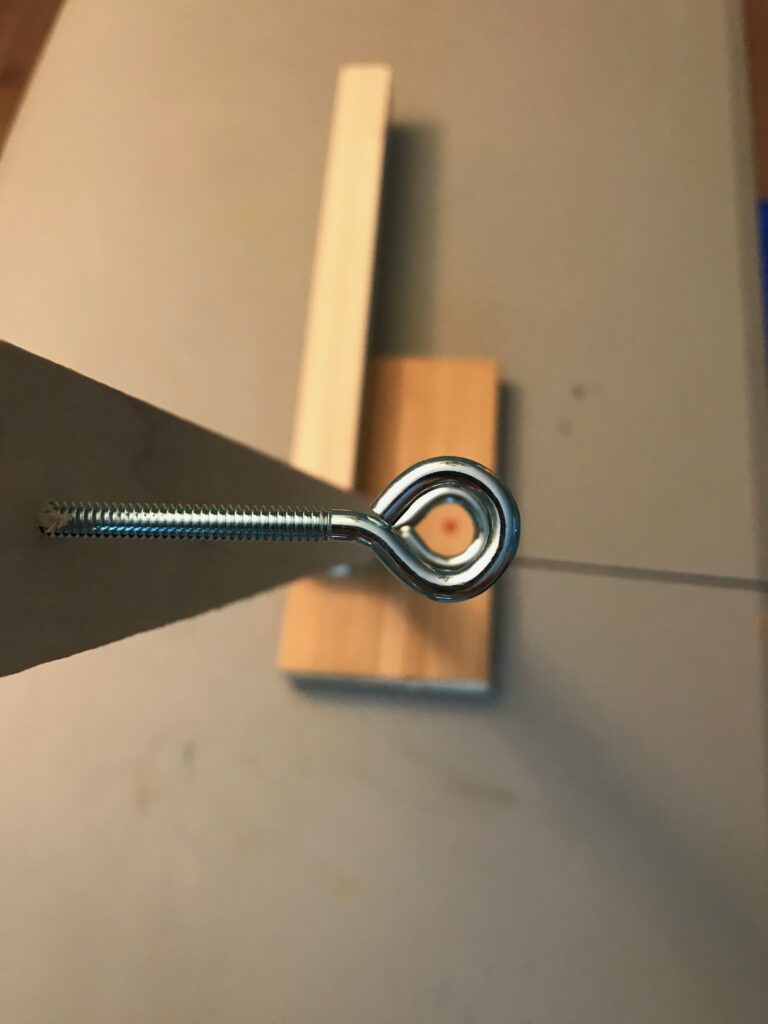
I rotated the arm to the resultant angle needed (measured with a protractor) then moved the jig forward or back along the sightline on the workpiece until the location for the hole on the workpiece (the “bullseye” if you will) could be sighted through the two holes of the eye screws.
I then secured the foot to my workpiece with a clamp to make sure it didn’t move.
I placed a piece of tape on the back of my drill and used a Sharpie to mark a large dot on the tape in line with the long axis of the drill bit.
I then positioned my drill bit on the location for the hole on the workpiece and positioned the drill so that the dot on the back could be sighted through the two holes of the eye screws. I kept the dot on the back of the drill lined up with the center of the two holes on the eye screws as I drilled (like viewing a target through a gun sight, if you will). I then knew I was drilling dead on my sightline.
Did you change up one of our projects or do you have a clever idea for an improvement? Email kara@lostartpress.com. You can read more about the submission process here.
The following is an excerpt from “The Stick Chair Journal 2.” “The Stick Chair Journal” is also still available. While supplies last, you can purchase a bundle of issues Nos. 1 & 2 at a reduced price.
Your dining chairs can be more comfortable without being redesigned. The problem is that the tables won’t allow it.
Almost every modern dining table is 30″ tall. And almost every modern chair has a seat that is 18″ off the floor. That 12″ of difference allows space for the tabletop, the table’s aprons (if it has any) and the sitter’s legs.
Here’s the problem with those standards: An 18″ seat is too dang high for many sitters. My mother-in-law is about 5’2″, and every modern chair leaves her feet dangling over the floor like a schoolgirl in an adult chair.
After 10 minutes or so, the chair becomes incredibly uncomfortable as her blood supply to her legs is cut off by the seat, which is compressing her thighs. In the 1990s, I made her a small 4″-tall footstool for her dining set that would support her feet.
The solution to this problem, however, is not to build footstools for everyone whose shins are short.
Instead, the solution is to first lower the standard seat height of dining chairs by 2″ to 3″ or so. This will allow shorter people to rest their feet on the floor like regular human beings and sit comfortably for hours. What will a 15″ or 16″-high chair feel like for a tall person? Just fine. Their thighs will be above the seat, and if they want to lower them a bit, they can move their feet forward.
I’m 6’4″ and regularly sit in vernacular chairs that are 15″ and lower. I love them.
The only problem with this plan to cut all the chair legs down is the bog-standard, dyed-in-the-wool 30″-tall dining table. With shorter, more comfortable chairs, suddenly all the sitters’ elbows are below the tabletop, and everyone sitting around the table looks like a small child.
So, we also need to reduce the standard height of dining tables to 27″-28″ or so. That’s easy to do with a regular four-legged apron table – just cut down the four legs. Problem solved. But what if you own a pedestal table? Or a trestle table? There are solutions that involve trimming a little off the top and bottom of the trestle and pedestal. But some table designs won’t let you remove the full 3″ without making the table weak or weird-looking.
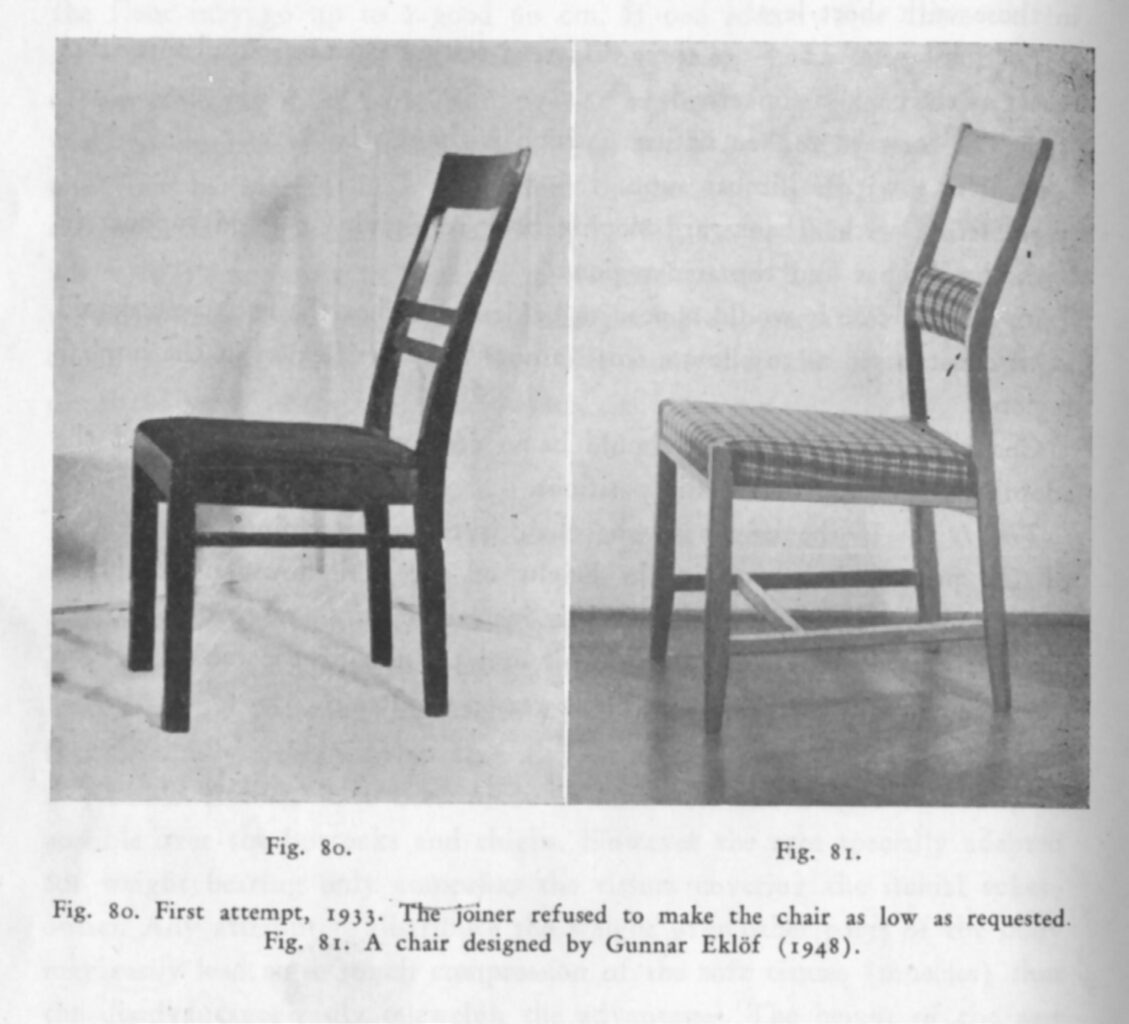
In 1933, Bengt Åkerblom asked a joiner in Sweden to build a chair to his specifications. The joiner refused to make thechair lower than the standard chair height. That’s how ingrained these standards are.
The only good solution is to start building dining tables that are 27″-28″ high. Then the chairs will come in line with lower seats. I don’t know why tables get to wag the dog, but that has been the case for more than 100 years.
Bengt Åkerblom wrote about this problem in his landmark “Standing and Sitting Posture” (1948). According to Åkerblom, here are the guidelines for a comfortable chair:
• The sitter should be able to shift position easily in the seat to use different resting positions.
• The height of the seat should not compress the thighs. He recommends a standard chair height between 15″ and 16″ .
• The seat should not be too deep. He recommends a seat should be no deeper than 15-3/4″. Seats can be as shallow as 8″, but this gets in the way of guideline No. 1 – the sitter needsroom on the seat to shift positions. A shallow seat does not allow this.
• The seat should slope backward by 3° to 5°.
• The seat should not be flat. It should be hollowed out a bit. Or it should have a thin cushion that is firm.
• Lumbar support is ideal. Having lumbar support and a backrest above can be very comfortable. The back can be inclined by as much as 25° to 30° off horizontal.
• Finally, and this is worth quoting Åkerblom directly: “In general, the height of the table must clearly conform to that of the chair and not vice versa.” He then goes on to recommend a table height of 27-1/2″.
At left, a sitter in an 18″-high chair at a table that is 30″ high. At right, the sitter in a 15″ chair. It is not the chair’s fault.
So today I opened my copy of “Human Dimension & Interior Space” (Watson-Guptill, 1979). This book is used by furniture designers and architects to construct interior spaces. I’ve used it for many years to figure out how tall a sideboard should be, or how long a table needed to be to seat eight people.
I turned to page 147-148, the section that deals with dining tables. It’s time to deal with “Line Item F,” which is the height of dining tables. I crossed out 29-30″ and wrote 27″.
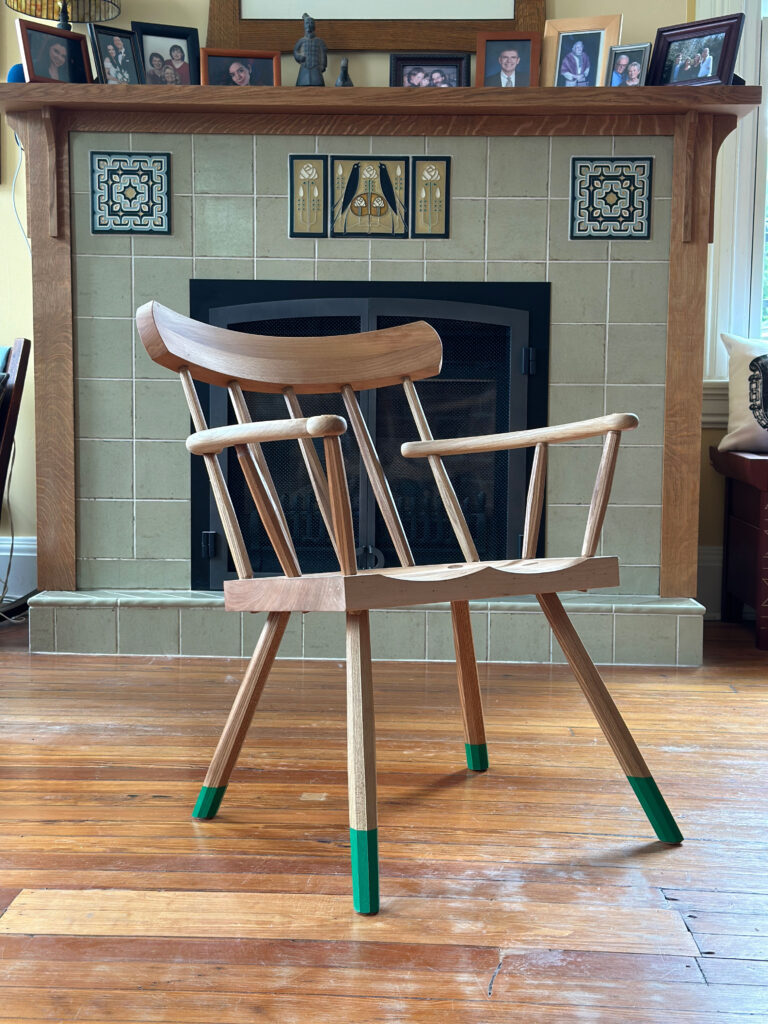
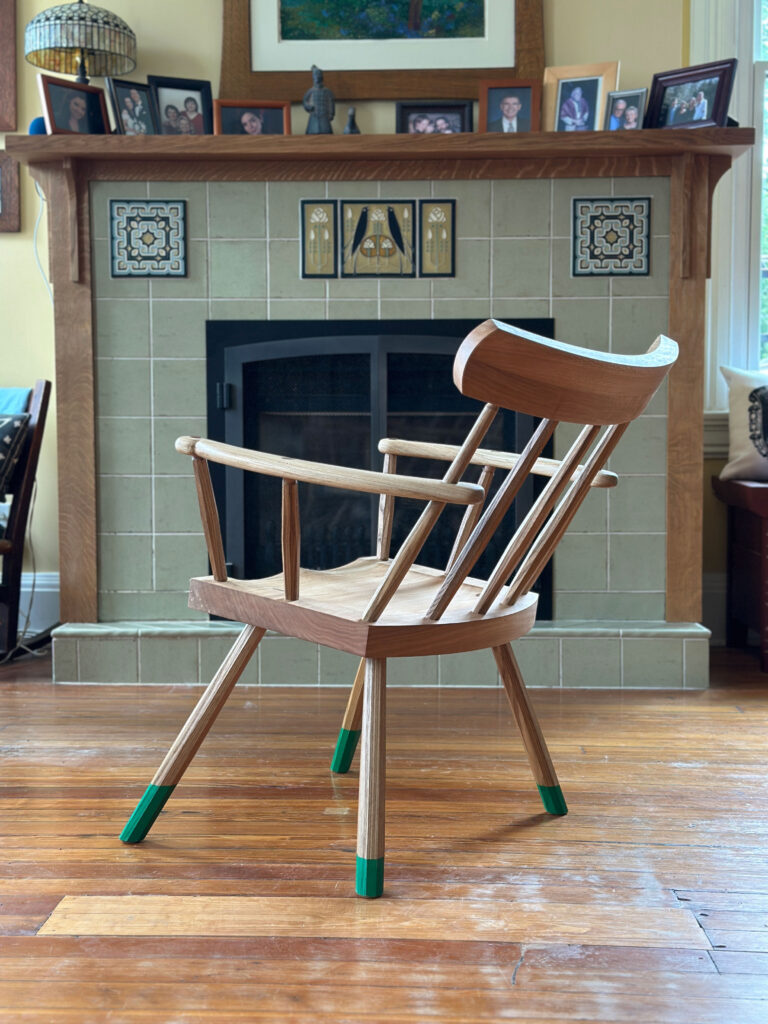
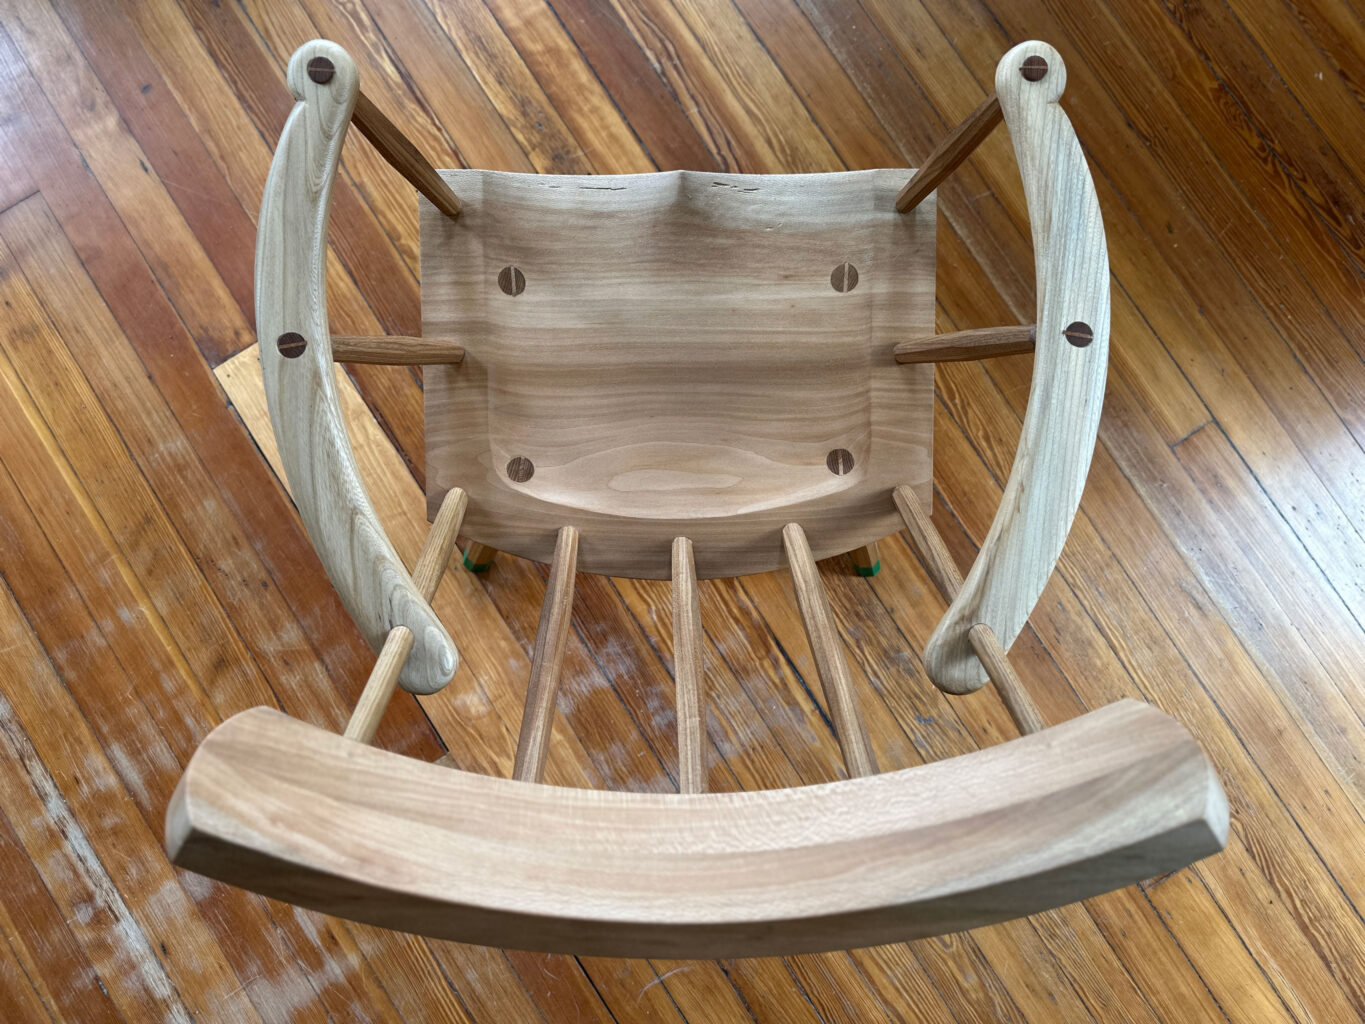
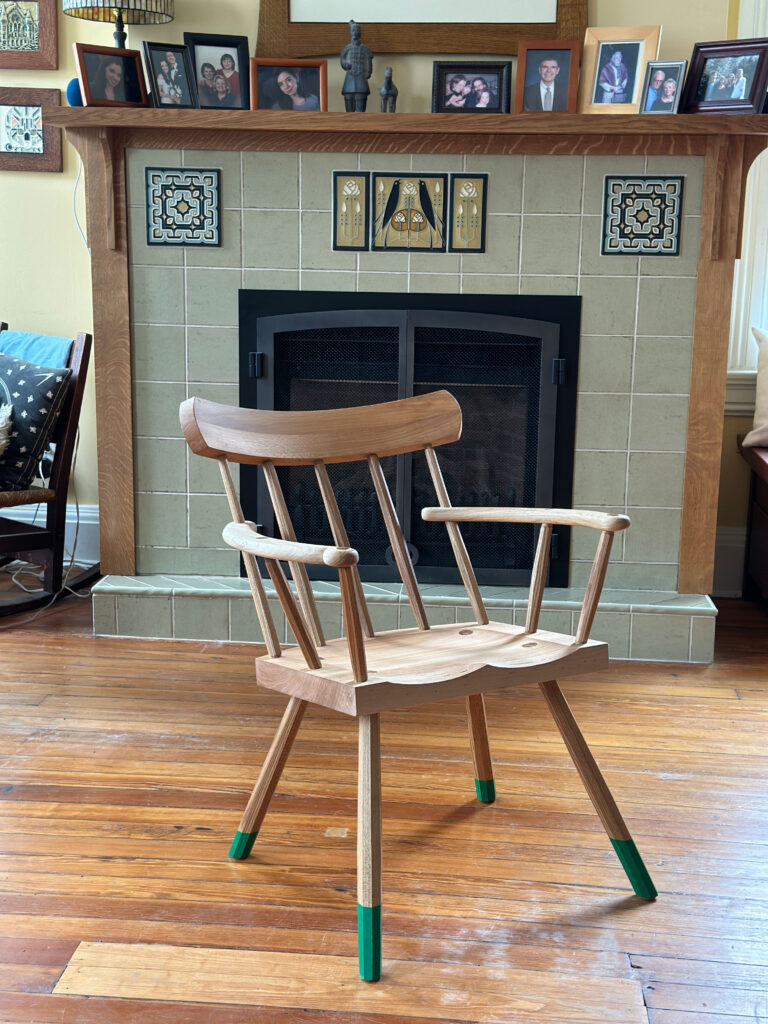
This Irish armchair is one of the most comfortable chairs I make, and I built this particular example in elm and sycamore for an upcoming revised edition of “The Stick Chair Book.”
This chair is an original design of mine, but it borrows heavily from the Irish chairs I studied in person during 2019 and countless other examples from auctions and antique dealers. It is ideal for relaxing or reading, with its broad backrest cradling your back just below your shoulder blades.
The seat is tilted 7.4°, with the back tilted another 25°. Yet the chair doesn’t try to put you in a horizontal position like a chaise-lounge. The seat is 16-3/4” off the floor, which makes it comfortable for a wider range of sitters than most modern chairs.
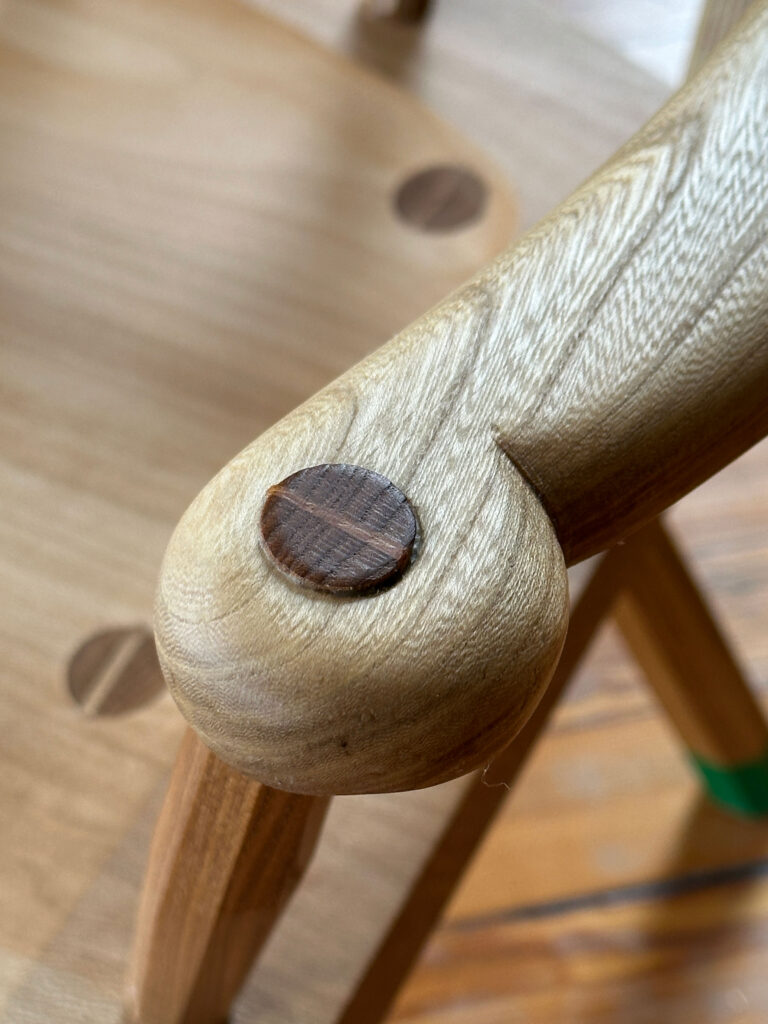
The backrest and seat come from a single board of American sycamore from Tennessee. The rest of the chair is elm. These two woods are ideal for chairmaking because they resist splitting. So the joints on this chair are hammered and wedged particularly tight. All the joints are assembled with hide glue, which we make here, and are wedged for durability.
The chair is finished with a soft wax (also made here). It offers a low lustre and looks better the more you use the chair. The finish isn’t terribly durable, but it is easily repaired (just add more soft wax). The legs have painted green “socks” on the feet. This is a traditional touch that protects the feet from scuffs (and looks good).
How to Buy the Chair
The chair is $1,800. That price includes shipping and crating to anywhere in the lower 48. If you wish to buy the chair, send an email to lapdrawing@lostartpress.com before 3 p.m. (Eastern) on Friday, May 30. Please use the subject line: “Irish chair.” In the email please include your:
U.S. shipping address
Daytime phone number (this is for the trucking quote only)
If you are the “winner,” the chair will be shipped to your door. The price includes the crate and all shipping charges. Alternatively, the chair can be picked up at our storefront. (I’m sorry but the chair cannot be shipped outside the U.S.)
After learning the epoxy has enough gap-filling properties to make a great edge joint with “factory” edges, we decided to see if Elmer’s Glue Max could also do the trick. James Wright of Wood by Wright has been testing glues for years and has some nice things to say about the Elmer’s Glue Max.
Spoiler alert: It works great.
We don’t use Elmer’s much, so this is good information to know. And if you are a beginning woodworker who doesn’t have the tools to make flawless edge joints, this glue can take away some of the worry.
The reprint of all four volumes of our Charles Hayward collection arrived this morning; as I write this they are on our driveway. Good thing there’s no rain predicted until much later today!
In late February when we got our new Hayward four-volume collection in stock, we offered a $100 special on the set with free domestic shipping through April 30. But we ran out of books two weeks before the end of the special offer date. Now, we have a new print run in stock of all four volumes (it will be inside the warehouse instead of on the driveway by the time you read this…I hope). So, we’re extending that special offer for two weeks from today, through June 4. Order by 11:59 p.m. Eastern, June 4, and you can get all four volumes for $100 with free domestic shipping. That’s $39 off. Plus the free shipping.
Here’s the link to the page. The books are also available for sale individually.
These four books are the backbone of a complete education in handwork. A team of six people (including some extra helpers) worked for eight years to read, organize, scan, design and produce these four books from the articles written and edited by Charles H. Hayward.
As editor of The Woodworker magazine from 1939 to 1967, Hayward oversaw the transformation of the craft from one that was almost entirely hand-tool based to a time where machines were common, inexpensive and had displaced the handplanes, chisels and backsaws of Hayward’s training and youth.
Our massive project distilled the thousands of articles Hayward published in The Woodworker. This is information that hasn’t been seen or read in decades. No matter where you are in the craft, from a complete novice to a professional, you will find information here you cannot get anywhere else.
The books have 1,492 pages total, with thousands of hand drawings and photos. The books are printed in the USA and are designed to last decades. The sewn bindings will lay flat on your bench. The uncoated paper is easy on your eyes.
For more information on the project, including a complete list of all the articles in the books, click here.