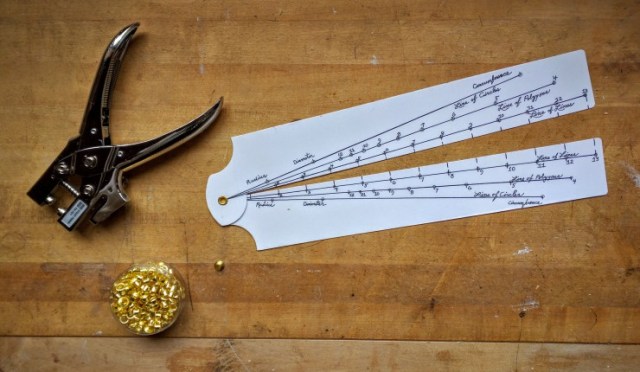
The highlight of the Lie-Nielsen Hand Tool Event in Covington, Ky., last weekend was finally getting to meet planemaker Steve Voigt and try out his tools. His double-iron wooden-bodied planes are fantastic – nimble, responsive and quite well-made.
They also are different than what most modern makers are producing. Voigt uses double irons, and he has just started a blog series about the history of the double iron that is very much worth reading. The first installment is here.
Check it out. And check back for the rest of the story, too.
One of the things I miss the most by not teaching is the hand-tool immersion classes for younger woodworkers. These low-cost classes are a fantastic way to jump-start the woodworking skills and tool chest of young adults.
After I canceled my teaching schedule, Mike Siemsen picked up where I left off with the hand tool immersion class. Mike will be teaching a discounted class in June 2016 for young adults at his school north of Minneapolis. He has received many offers of assistance – everything from cash to tools to food.
Below is his Mike’s note on how you can help.
— Christopher Schwarz
First off: Thank you. Your generosity is much appreciated.
Here’s how you can help
Tuition: If you wish to sponsor a student taking the class, you can send a check made out to the Mike Siemsen’s School of Woodworking. You can send the check to Mike at:
Mike Siemsen
9912 Green Lake Trail (County 23)
Chisago City, MN 55013
Simply write in the memo section of the check that the donation is for the Hand-tool Immersion Course. Sorry but this donation is not tax deductible. If you have any questions about donating tuition money for students, call Mike at 651-257-9166.
Tools: If you would like to donate some of your tools to the class that will be given to the students, you can send them to Mike at the same address above. Below is a list of the tools we hope to supply for all 16 students with details of what we are looking for in the tools.
Tool Kit for the New Anarchist
Planes
No. 5 jack plane, such as a pre-war Stanley with a clean iron (no rust) and a tight chipbreaker.
Low-angle block plane, such as Stanley 60-1/2 with a clean iron and movable toe piece.
Wooden rabbet plane (skew or straight iron). Wedge needs to work.
Large router plane, such as Stanley No. 71 or No. 71-1/2.
Card scraper.
Boring
Hand drill, sometimes called an “eggbeater,” such as a Millers Falls No. 2 or 5 with a 1/4” chuck and intact chuck springs (i.e. the jaws are spring-loaded and work).
Brace with a 10” sweep. Good chuck with its springs still intact and a tight pad.
Striking
Bevel-edge chisels with wooden handles (1/4”, 1/2” and 3/4”).
16 oz. hammer with a wooden handle. Striking face should be smooth and slightly crowned.
Square-head joiner’s mallet.
Marking/Measuring
12” combination square that is square, locks tight and has clear markings.
Marking gauge. The metallic ones, such as the Stanley No. 90, are preferred.
Sawing/Rasping
Backsaw with a 10”- to 14”-long blade. Straight sawplate, comfortable wooden handle and little or no rust.
Coping saw that takes pin-end blades and locks tight.
10” cabinet rasp (older and sharp is better).
A few people have asked if they can donate food or tutoring assistance during the class. I’m going to try to come up with a plan for those aspects of the class early in 2016. So stay tuned.
If you have any questions about helping out with these classes, drop me a line at:
Mike Siemsen
9912 Green Lake Trail (County 23)
Chisago City, MN 55013
651-257-9166
Before my dear friend Carl Bilderback passed away, he had one suggestion as to how I should change my life: Sign my name more neatly.
Today I was so glad I rejected that advice.
I drove to our Indianapolis warehouse in the morning and spent the day unpacking 1,000 books, examining them for damage, signing them in red ink and repacking them. If I had taken Carl’s advice, I’d still be at the warehouse making beautiful “S” shapes.
As we examined every book, here are two things we noticed:
The pages appear to be stuck together on some volumes. This is a result of painting the edges black. The black paint protects the pages from moisture and dirt. But the pages also need to be separated before you read the book. Simply fan the pages and they will separate without tearing.
The smooth cover appears a bit burnished in places in raking light. This is also a result of the manufacturing process. We used a smooth cloth for this cover. When the cloth is glued to the boards of the book it can look a little burnished in some light. It’s not noticeable except in some light and after someone points it out to you.
I finished up signing the books late Monday afternoon. Our warehouse guy said they expect to have all the books in the mail by the end of the week – Monday at the latest.
Since the release of “The Anarchist’s Tool Chest” book in 2011, customers have asked for a DVD that explains how to build the English tool chest featured at the end of the book.
To be honest, we resisted making this DVD for one reason: It’s a complicated project to film, and we didn’t have the equipment, personnel or skills to produce the DVD to a high level of quality.
With the fifth anniversary of “The Anarchist’s Tool Chest,” however, we decided to make it happen with a production crew from Popular Woodworking Magazine. It was an excellent partnership. I could focus on how to present a lot of complicated woodworking tasks to the viewers, and the crew could figure out how best to translate my ideas to video.
The result is the new “Make a Traditional English Tool Chest” DVD, which presents the construction process for the Anarchist’s Tool Chest exactly as it is drawn in the book. During the last five years, I have built dozens of these chests, and I have collected a lot of small tricks to make the construction process a lot easier for new woodworkers.
The DVD begins with dovetailing and ends with outfitting the interior of the chest. It is designed for a woodworker who has already built a couple projects. We don’t cover basic stock preparation, but we do cover dovetails and all the other joinery with detail that is suitable for a beginner.
Here are some of the operations we cover on the DVD:
Cutting through-dovetails
Cleaning up and assembling large carcase work
Adding dovetailed skirting to a carcase
Making tongue-and-groove bottom boards
Affixing cabinet parts with traditional nails
Shooting pieces to perfect length
Making through-mortises and tenons
Creating a traditional raised-panel lid
Installing butt hinges and fitting a lid
Building sliding tool trays
Making tool racks and saw tills
The DVD is 3 hours and 40 minutes and is on two all-region DVDs. It is $30, which includes free domestic shipping.
An intricate tool cabinet filled with woodworking tools has recently gone up for sale through the M.S. Rau Antiques company in New Orleans.
The cabinet bears some thematic similarity to the famed H.O. Studley tool cabinet in that it seeks to display a stunning array of woodworking tools in a visual, multi-layered composition. I’ve asked the antique dealer for some more information on the provenance of the cabinet, but until we have more information, all we have are these photographs and description to study.
Unlike the Studley cabinet, this collection appears to be more suited to a cabinetmaker than a piano maker or organ maker. This cabinet includes some joinery planes, turning tools, mortise chisels and other tools not included in the Studley cabinet.
The tools in this recently listed cabinet also appear more modern than Studley’s. The handsaw and several of the other tools are clearly of a much later vintage.
I’ll post more information and analysis as it becomes available.