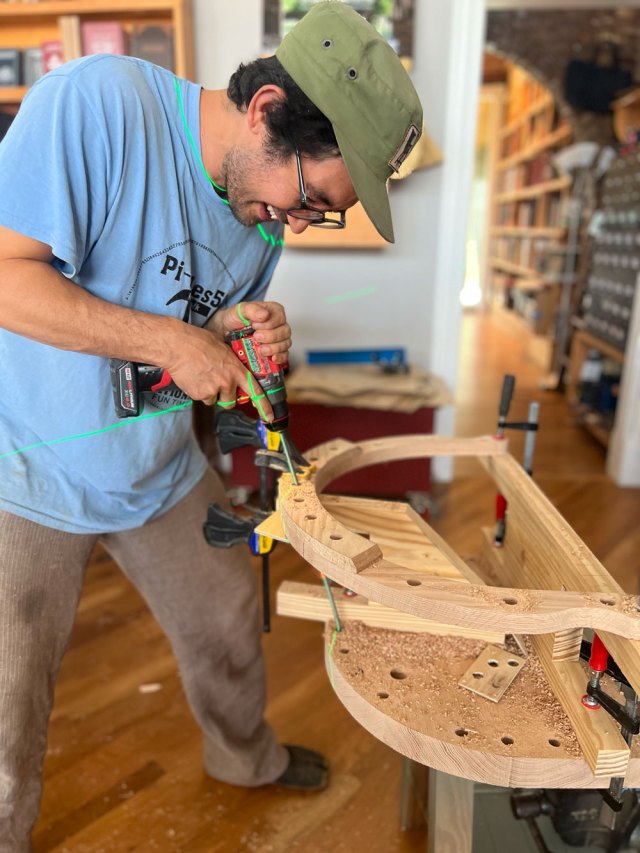
Megan and I are teaching two scholarship classes for The Chairmaker’s Toolbox this fall. I’m teaching a chair class (surprise) Sept. 15-19. Megan is teaching a Dutch toolchest class (double surprise) on Oct. 17-19.
For these classes, we supply all the materials, plus lunches, morning pastries and a yay-you-did-it dinner for the students. If you would like to contribute a little something to offset those expenses, we have created a link that allows you to do that.
Note that these contributions are not tax-deductible. If by some chance we collect more money than we need, we donate the excess to The Chairmaker’s Toolbox.
Thanks to everyone who has contributed to help these classes in the past. The Chairmaker’s Toolbox is absolutely creating the next generation of woodworkers. We’ve had some amazing students who are now professional woodworkers and are teaching others. So it’s working.
My beloved Philly Planes 3/16″ beading plane and a piece of white pine. (Thank you Chris for the picture.)
Most of the classes I teach involve at least one moment of fear for me, and that’s when I lend students my 3/16″ Philly Planes beading plane. I love this plane, and love to put a bead on just about everything. Once you try one, you can’t stop! I’d be bereft without this tool.
A bead not only dresses up the edge of the board, it creates a shadowline and makes a small gap look intentional (think backboards). And, it helps to protect a fragile corner by removing a bit that might otherwise break off (say, at the top edge the top skirt of an Anarchist’s tool chest, where the lid drops down over and over).
But a beading plane is a bit of a delicate tool. If you don’t drop the plane back into the cut properly, it’s easy to snap off the boxing. And it’s best to use a light and gentle touch. In my experience, both of these can be difficult for new woodworkers; the tendency is to push too hard (think starting a saw cut) and to attack the work.
But I want students to experience the joy a simple bead can bring; a few passes with the plane, et voilà – now your project is fancy! So I demonstrate the use several times, make sure the plane is properly set, issue dire warnings about what will happen to a student if they break my plane (1), then clench my teeth and hand over the tool.
So far, I’ve been lucky – no breaks. And lots of happy faces when the students cut their first beads. (And I hope a run of sales on beading planes.)
A bead down the bottom center of a walnut Shaker tray.
Sure, I have other beaders (because you can’t have just one – and beading planes lead to the acquisition of more moulding planes, then a few hollows and rounds, then…), but this is the tool amongst them that I like the best – not only because it was my first, but because it gives me the least trouble in a classroom setting, usually keeping its setting through six new users. (Note: Other beaders – Bickford, Old Street Tool, Caleb James, Red Rose, Clark & Williams – are excellent; this particular Philly Planes tool is simply the one with which I’ve had the most success while teaching.)
Below are a few paragraphs and photos from my book “Dutch Tool Chests” on how to use this plane, in this case for the bottom lip of the chest, onto which the fall front gets dropped over and over.
A beading plane (and all moulding planes) work best on only one corner of a board: the corner on which the grain is rising out on both faces in the direction of the cut (the plane cuts in only one direction).
Moulding planes also work better in softwoods.
But know that you can often get away with breaking the bead rules – especially in mild grain and softer hardwoods, such as walnut and cherry.
So give it a go no matter your species – and if it looks terrible (i.e., it tears out), turn that ugly bead into a nice chamfer with a block plane. Or just start (and finish) with a chamfer if you’re going for a more utilitarian look (or don’t have a beading plane).
The grain lines are a bit difficult to see on this piece of linden, so I penciled in a few of them. The grain is rising out in the plane’s direction of cut on both the face and edge at this corner only; this is the best corner on this board on which to cut a bead.
Identify the lip’s best corner (if you’re beading), then clamp the workpiece to your bench in an end vise or wagon vise, or use a sticking board. Bead the edge.
Hold the plane perpendicular to the work, with the iron on the wood and the fence pressed to the edge of the workpiece (it’s easy to get the position wrong and push the plane’s fragile boxing into the wood). Your right hand’s job is to push forward. Your left hand’s job is to hold the plane at the correct angle, and in contact with the workpiece from above and below the tool.
Note the hand positions. My right hand is pushing forward at the back of the plane; my left hand is pushing down and in to keep the plane in contact with the workpiece.
Push forward, following through on the cut. Keep the plane in the cut (2), pull straight back, then push forward again. Repeat until the depth stop contacts the wood and the plane stops cutting. Be careful as you pull back; that boxing can easily break off if you stress it by pulling sideways.
The beading plane’s shavings are good at removing any fuzzies. But be wary – you can easily get a splinter under a fingernail while doing this. Make sure you have a handful of shavings to protect against it.
After the plane stops cutting, you might notice some fuzzy bits in the quirk; grab a handful of the plane shavings to burnish those away.
– Fitz
(1) They will have to watch me cry; no one wants that. (2) Once you have a few beads under your belt, it’s OK to lift the tool and reposition it at the start of the cut…but make sure you get the fence in the correct position so as not to A) break your plane’s boxing and B) ruin your bead.
This year has been a good one – maybe our second or third best since we started in 2007. I won’t have all the numbers for a couple weeks, but to close out the year, here are our top 10 books in terms of unit sales. There are some surprises.
The Anarchist’s Tool Chest: This book topped the list because we printed the last press run of the current edition in an original tan cover. (If you want a copy, you better snatch it because we are almost out.) I’m working on the revised edition, which will be in color and will be released in 2025.
The American Peasant: We sold out the first press run and we are now into the second.
Principles of Design: We printed (and sold) 3,000 copies in three months. We weren’t planning on doing a second run, but y’all changed our minds. This book will be back in stock in January.
Set & File: Not a surprise. This book sold well right out of the gate and has long legs.
Dutch Tool Chests: A surprisingly strong showing for a book that was released so late in the year (October). The book sold more copies on the first day than any book in our history.
If access to wood (or lumberyard anxiety) is what’s holding you back from making a stick chair or Dutch tool chest, here’s an excellent solution: Alexander Brothers is now offering full kits for several types of stick chairs (in a selection of species), as well as blanks for legs, seat and more. Plus, there’s a new kit for the Dutch tool chest in pine, cherry or walnut (and the parts come ready .
We’ve ordered from Alexander Bros a number of times now, and are always impressed with how carefully Shea Alexander and his employees pick the chair stock for straightness of the grain and overall beauty. And I am impressed with how lovely the pine was for a recent Dutch tool chest class. In other words, you can trust that you’ll get good stuff.
NB: We do not receive any royalty or kickback on the sales of these kits – we’re just happy Shea is willing to do them. It’s a nice service for those who need help sourcing/choosing/milling wood. (Heck – I’m buying DTC kits from Shea for my February 2025 class, because I’m not going to have time to make them myself – one less worry for me. Thank you, Shea!)
Order “Dutch Tool Chests” (by me!) by 11:59 p.m. Wednesday, Dec. 11, to get a free pdf with your book order. Until then, the book and pdf is $39. At midnight on Wednesday, the pdf will cost $9.75 extra if ordered with the printed book.
“Dutch Tool Chests” gives you the in-depth instruction you need to build your own slant-lid tool chest (in two sizes) – from choosing materials, to the joinery, the hardware, the interior parts that hold your tools and the paint. Plus, plans for a mobile base that provides more storage and helps you move the chest around your shop. (Oh – and a brain dump on how to cut through-dovetails – the thing I most often teach.)
My goal in this book is to not only help you make a place to put your stuff, but to help make you a better hand-tool woodworker.
But my favorite part of the book is the gallery, which includes 43 chests from other makers, with ingenious ideas for using the chest’s tool bay (or bays). Clever rolling bases. Oversized (or undersized) chests. Imaginative uses of the back of the fall front and or/underside of the lid. And other unique storage solutions and uses that set them apart.
Like all Lost Art Press books, “Dutch Tool Chests” is printed in the United States. The pages are folded into signatures, sewn, glued and reinforced with fiber-based tape to create a permanent binding. The 192-page interior attached to heavy (98-pt.) cotton-covered boards (blue cloth, of course!) using a thick paper hinge. The cover and spine are adorned with a foil die stamp (which won’t help you build a tool chest – but it looks pretty nice, if I do say so myself!).
– Fitz
p.s. If you buy “Dutch Tool Chests” from Lost Art Press, you might wonder about that scribble on the half-title or title page. That illegible scrawl really is my signature – I’m signing every copy that ships from our Covington warehouse.