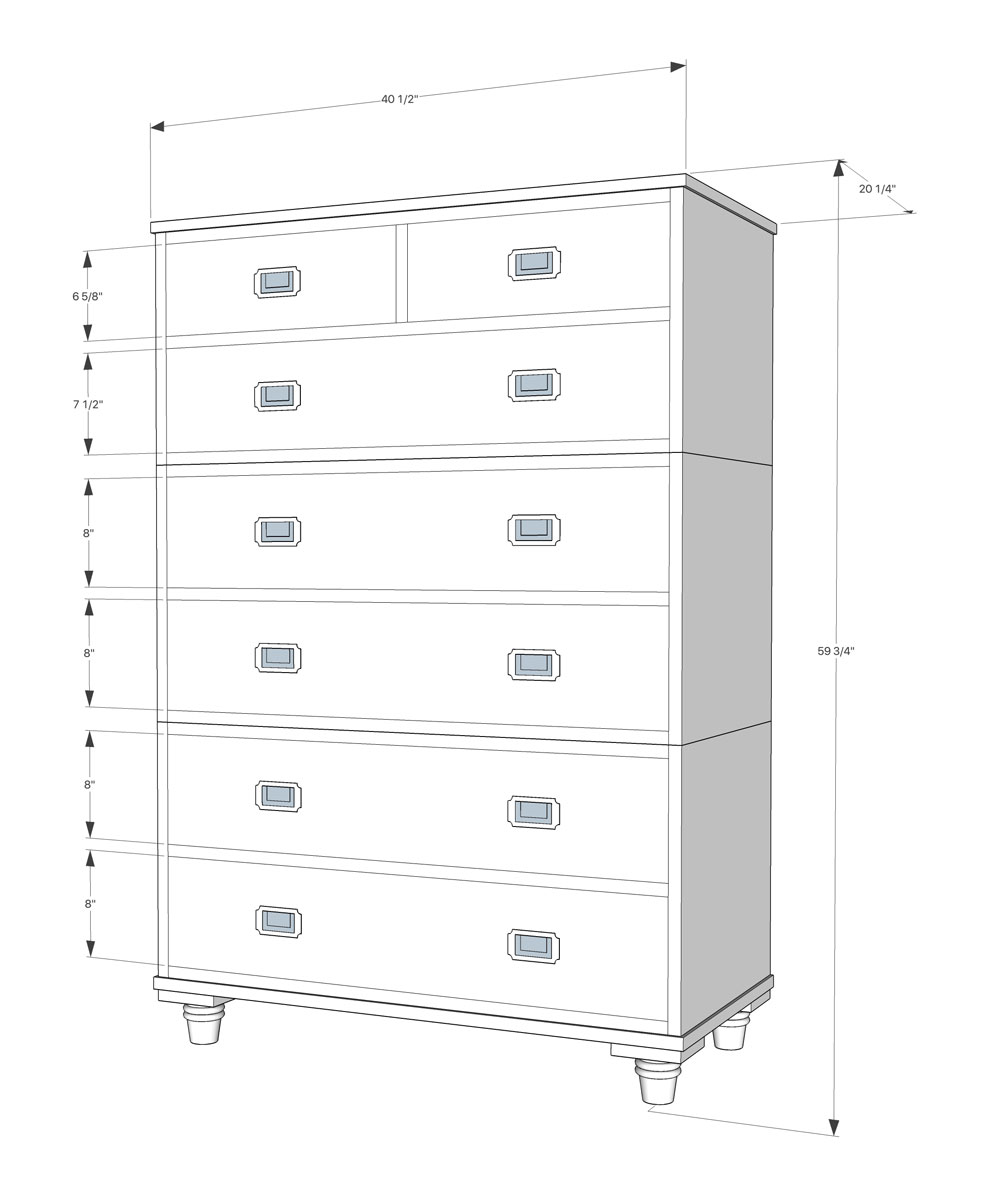
Several people have asked for drawings of the three-tiered Nicholson campaign chest I’m finishing up this month.
The bad news: I don’t have detailed drawings.
Good news: You don’t need them.
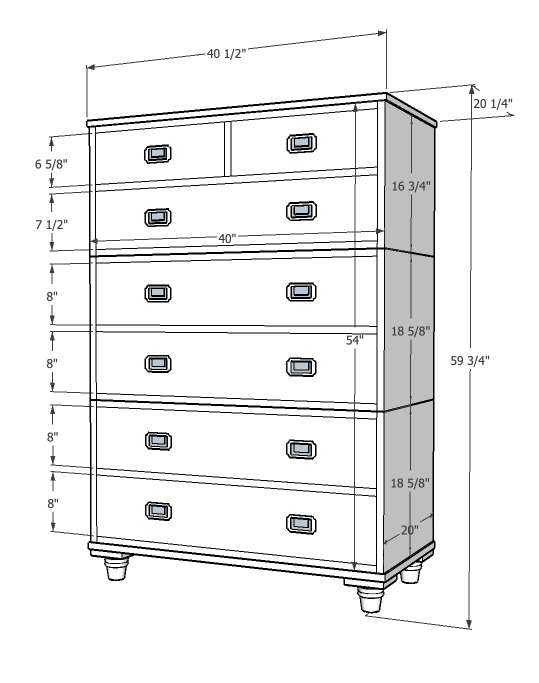
The chest is built using the same techniques shown in “Campaign Furniture.” The only differences are the drawer graduations and the fact that there are three cases instead of two. I suppose that the feet are a bit different, but I just made those up and you can do that, too.
Below is a zipped SketchUp file of my working drawing. It is just a box with some dimensions on it – nothing to get excited about (there’s a reason they have “sketch” in the name of the program). If you don’t own SketchUp, you can open the file in the free SketchUp viewer.
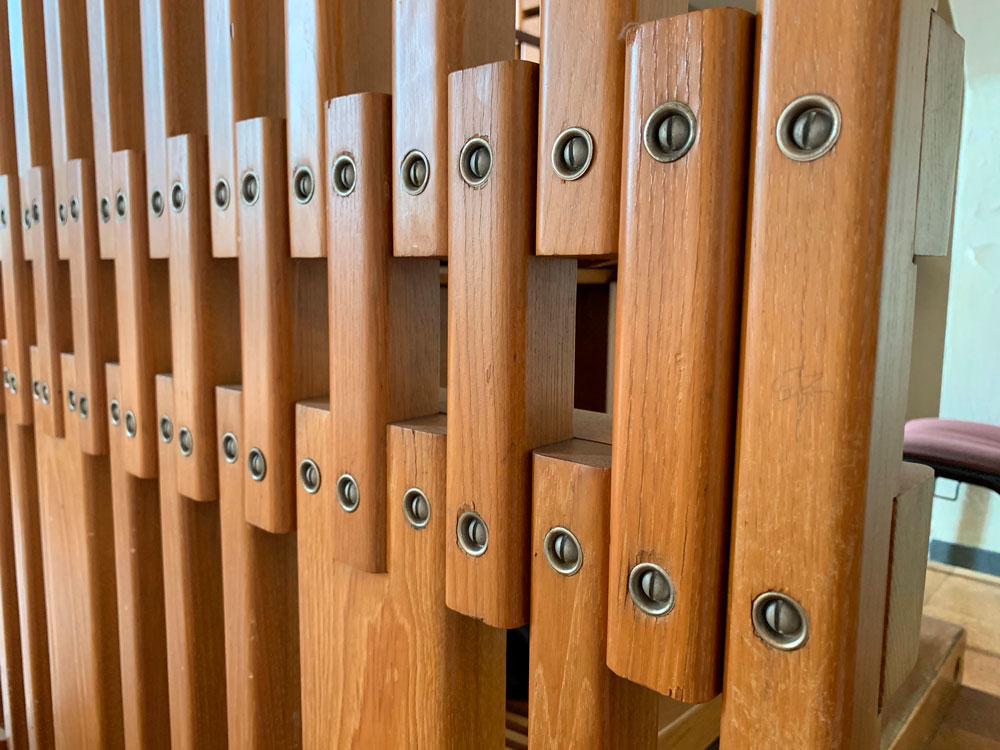
I clock my screws, meaning I orient the slot in the screw heads so they are all vertical or horizontal. But I don’t think it’s a mark of superior aesthetics. It’s just something I do, like lining up the silverware on the dining table just so. I can’t help it.
Some people who don’t clock their screws, however, take perverse glee in sending me photos of beautiful antiques with their screws un-clocked. And the images come with a note saying something like: “I guess James Krenov was a moron and didn’t clock his screws, you elitist meat wrapper.”
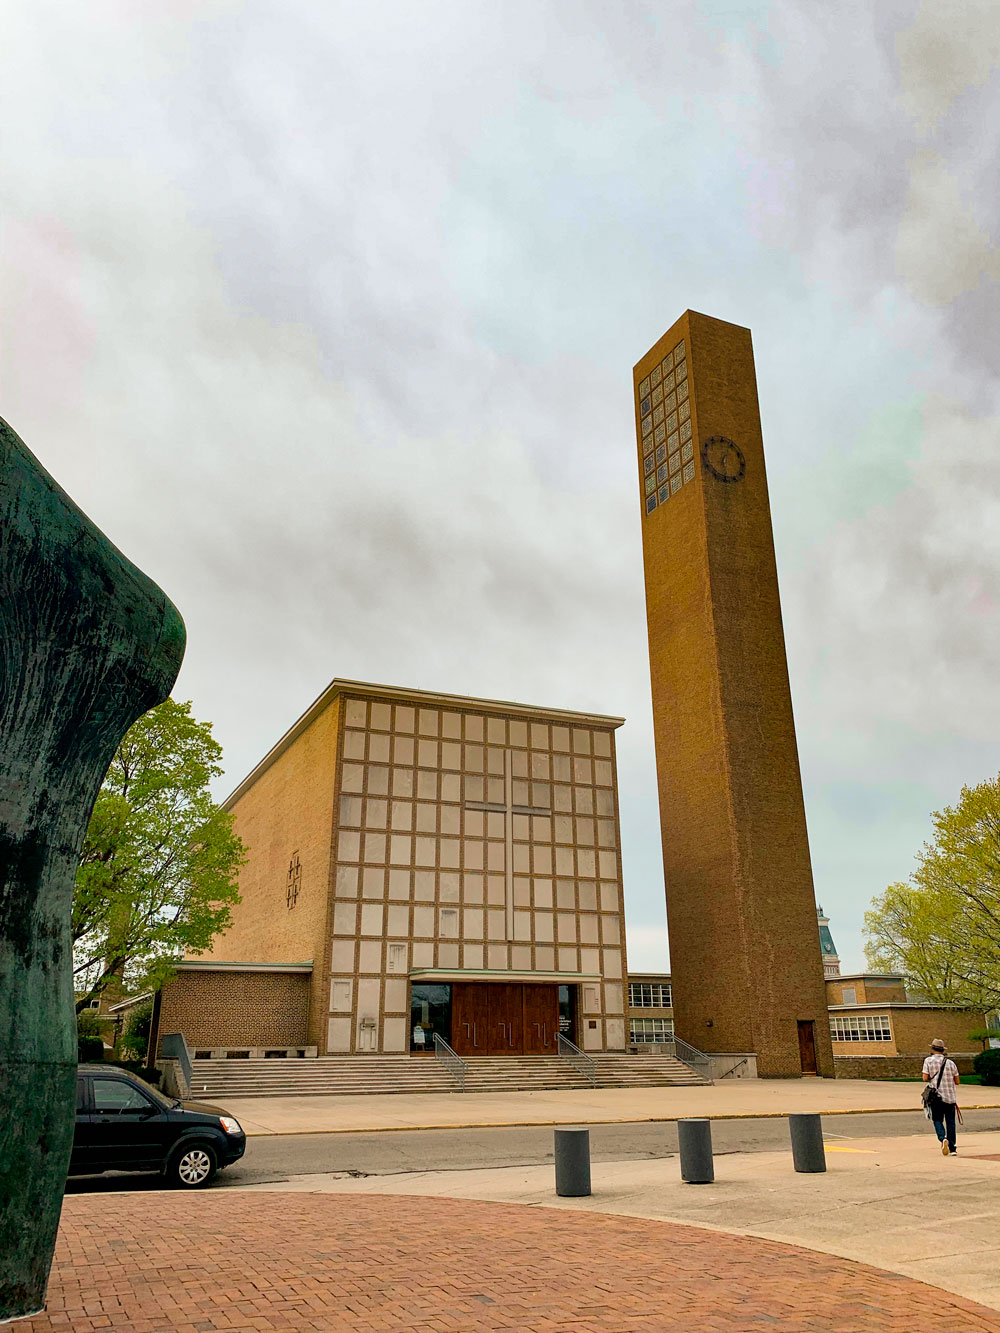
Yesterday I took a drive to Columbus, Ind., one of the country’s repositories of excellent post-war architecture. Check out the Wikipedia page. Or the NPR story on the town. Or the great Kogonada-directed movie, “Columbus.”
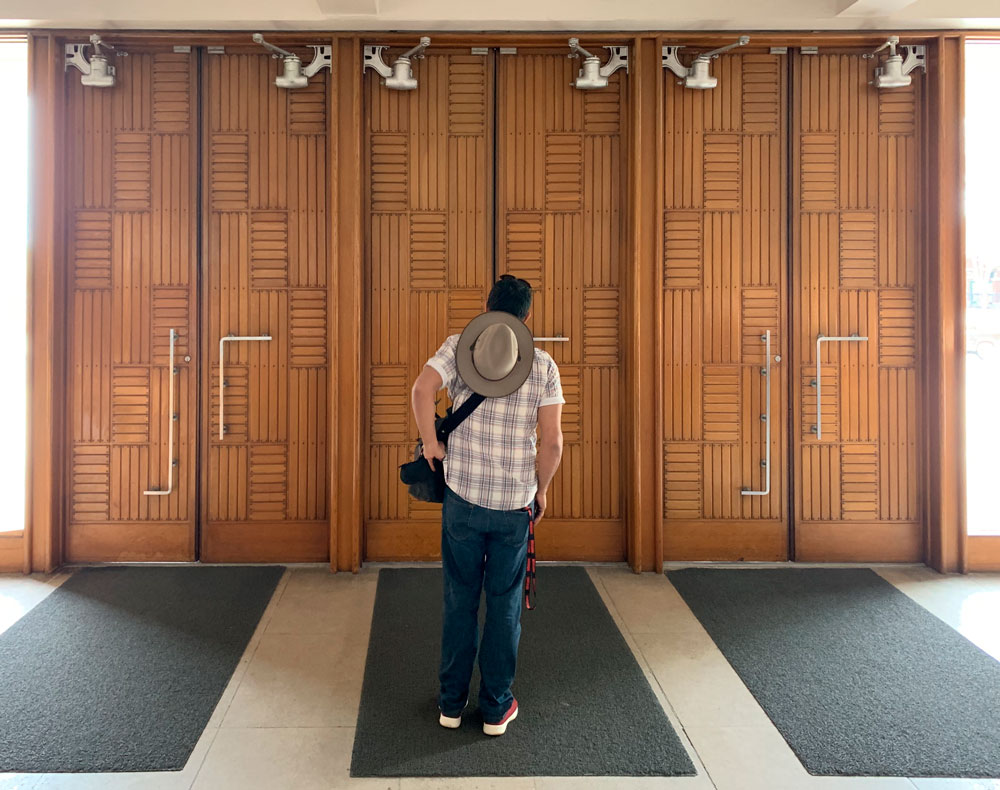
My favorite building we toured was the First Christian Church, designed by Eliel Saarinen. Considered one of the first modern church structures in America, the building offers nod after nod to the cathedrals and churches of Europe. Yet the building, completed during World War II, is a complete break with the Old World. Even after 75 years, the church feels a beacon of hope, optimism and light.
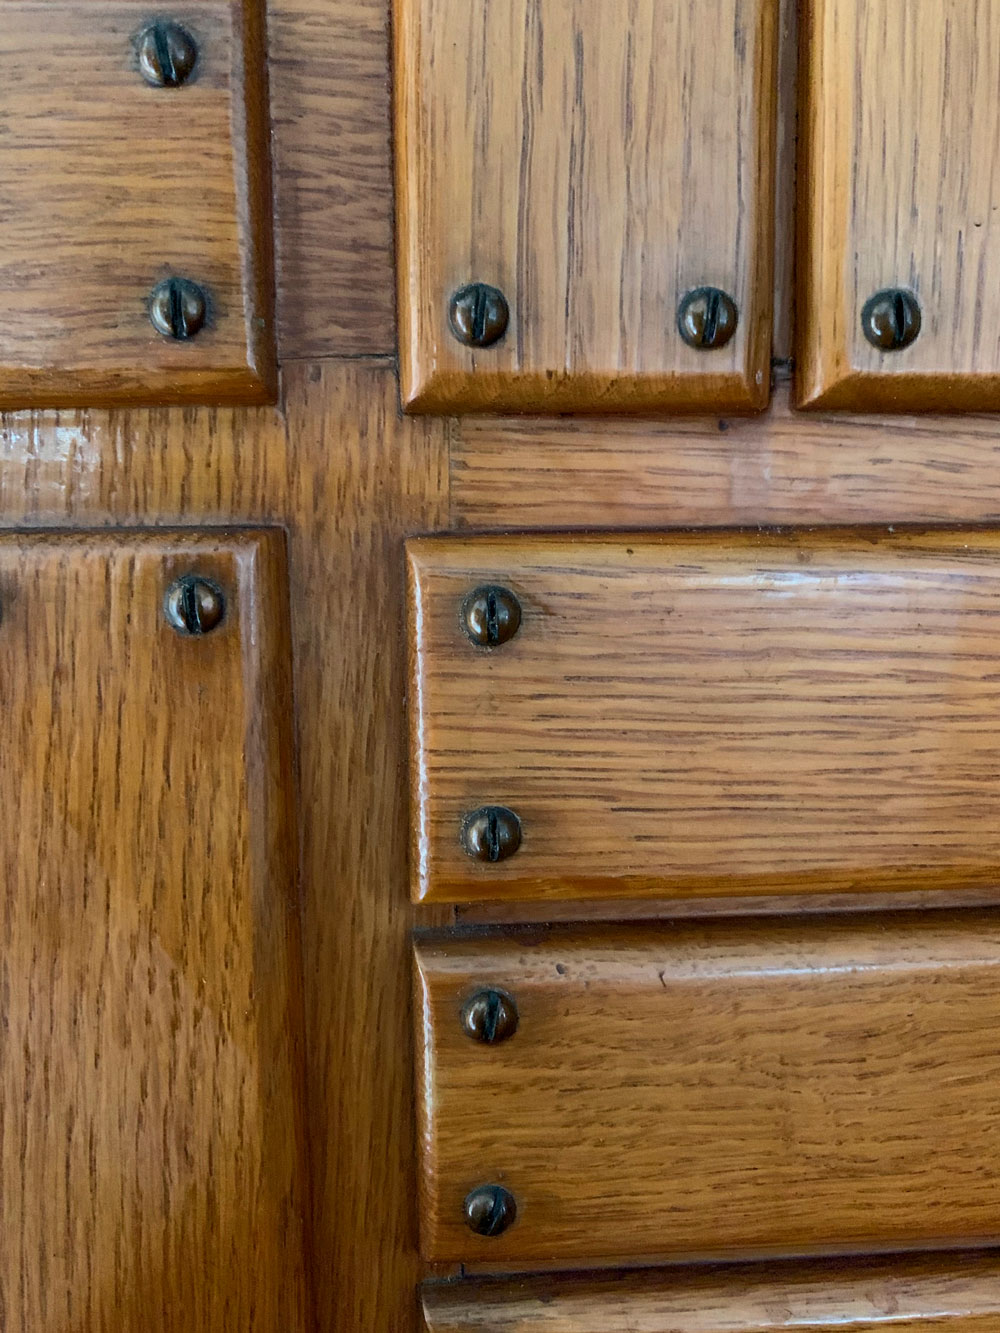
One of the prominent features of the interiors is the extensive wooden lattice work, which is affixed with tens of thousands of perfectly clocked screws.
One of the women on our tour gasped when this was pointed out. “How,” she asked, “did they do this?”
I opened my mouth for a second and then shut it.
Clocking screws is not a matter of over-torquing or under-torquing screw heads. It’s a simple matter of thinking about the problem for two seconds and devising a simple solution.
Screws are mass-manufactured items. The slot and the worm of a batch of screws are consistent across all the screws in a box. Now add to the equation a pilot hole (or counterbore) that is the same diameter every time. How can we use these consistencies to clock the screw?
If you don’t know the answer yet, try this experiment. Drill a pilot hole in a scrap of wood. Start a screw in the pilot with the slot facing 12 o’clock and 6 o’clock. Screw it down until it is snug. Note where the slot ends up. Let’s say it ends up at 1 o’clock and 7 o’clock.
What would happen if you started the next screw with the slot pointing to 11 o’clock and 5 o’clock?
I love building campaign chests. There are so many variations on the form that I have yet to build two that are even similar. This week, I start on the most involved set of campaign chests yet.
It’s a three-tiered version, which is based on one owned by John Nicholson (1821-1857) and now owned by the National Army Museum, London. Nicholson was first commissioned into the Bengal Infantry in 1839 and spent his entire career in India. I saw the chest in person during my research for “Campaign Furniture.”
In addition to the challenge of building three cases, the customer also requested I make the transit cases for the chests. This was a job I simply could not turn down – I have always wanted to make these transit cases.
The transit cases were used to protect the fine cabinetry when moving camp. When you arrived at your destination, the empty transit cases could be used as a wardrobe or for other storage.
The biggest challenge with this project will be to manage my time. There are a lot of dovetails in this project and acres of surface area to handplane. I’ll need to be quick if I don’t want to lose money on this one.
But I’m up for it. With our machine room and bench room fully operational and organized, there will be very little faffing.
This customer also has been quite patient with me. I had hoped to build this project during the summer, but my life was tossed in the briar patch when my father died in February, and I became the executor of his estate (I now have two trusts to manage, one estate, three attorneys and three CPAs. It’s like having a fourth job.)
I’ve recently completed a handful of campaign pieces and have some extras I can sell. All three pieces were built as part of articles I wrote for Popular Woodworking Magazine, and so I am selling them at a discount. I don’t want these sitting around.
As always, all pieces are made and finished entirely by me. No subcontractors. Even the leatherwork. All prices include shipping in the United States. International customers are welcome, but shipping will be quite expensive.
All pieces are first-come. If you want one, send me a message through my personal site. Ask all the questions you like. But the first person to say “I want it,” gets it. I take PayPal, checks and mutant chickens as payment.
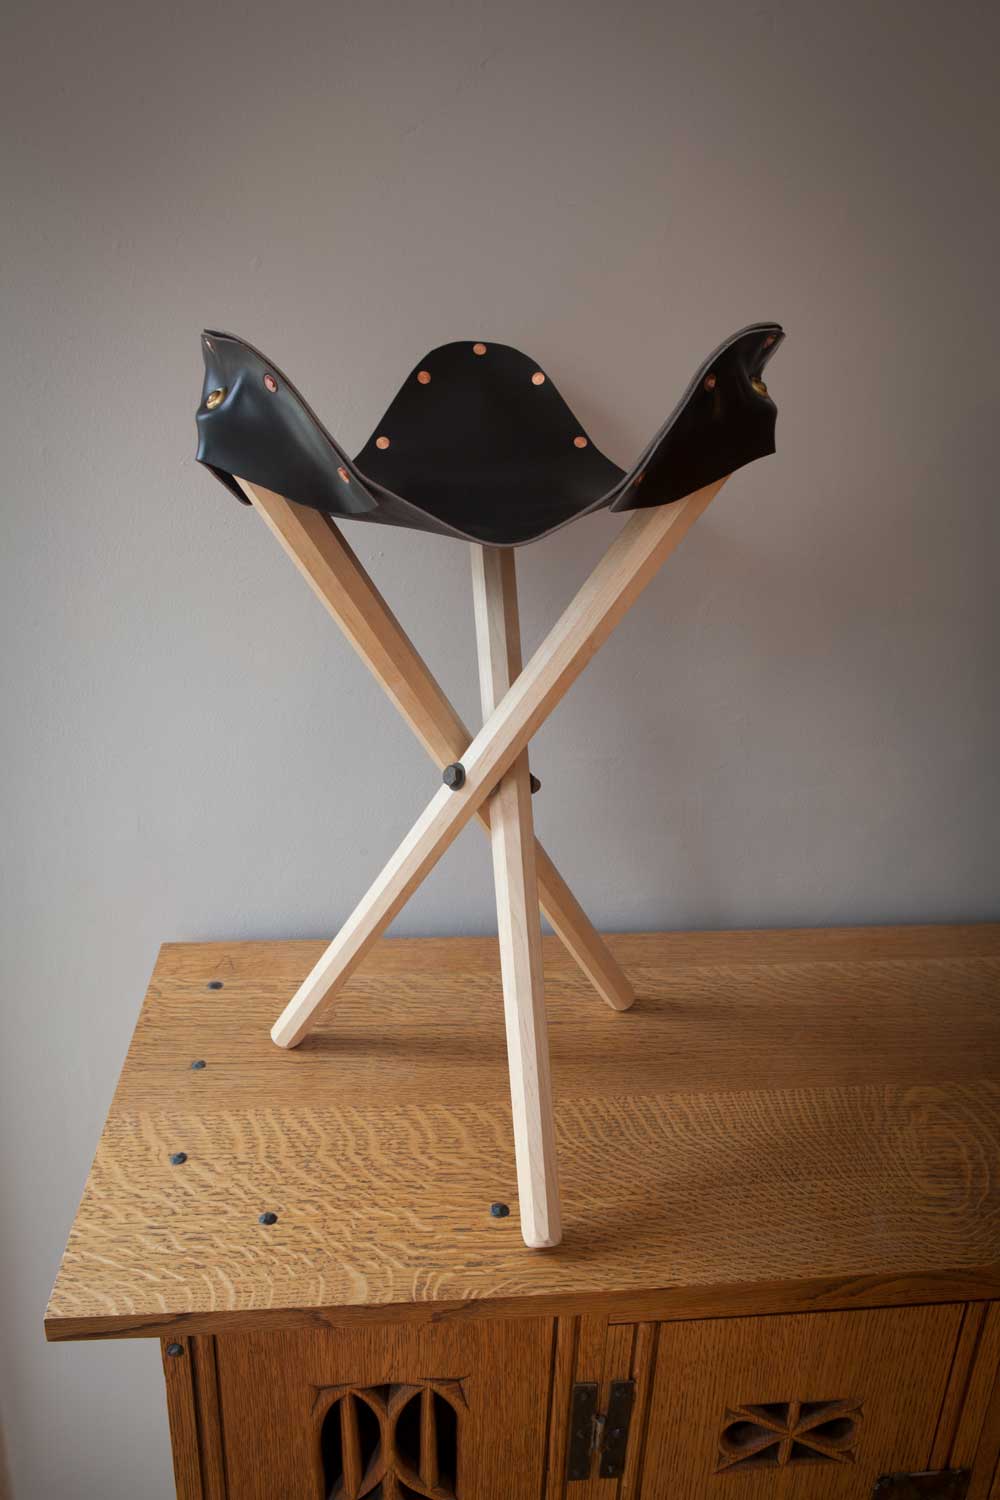
Walnut Campaign Stool, SOLD This is about as nice a campaign stool as I’ve made. The legs are turned from air-dried Tennessee walnut. The black leather is English-made bridle leather. The tri-bolt is from Lee Valley. This stool includes a black leather carrying strap, which cinches the legs when the stool is folded up. Approximately 17″ high. Shellac finish.
Maple Campaign Stool, SOLD This campaign stool was made in the flavor of my pieces from “The Anarchist’s Design Book.” It features hard maple legs that are tapered octagons. The black leather is English-made bridle leather. The tri-bolt is raw steel made from off-the-rack components. Approximately 17″ high. Shellac finish.
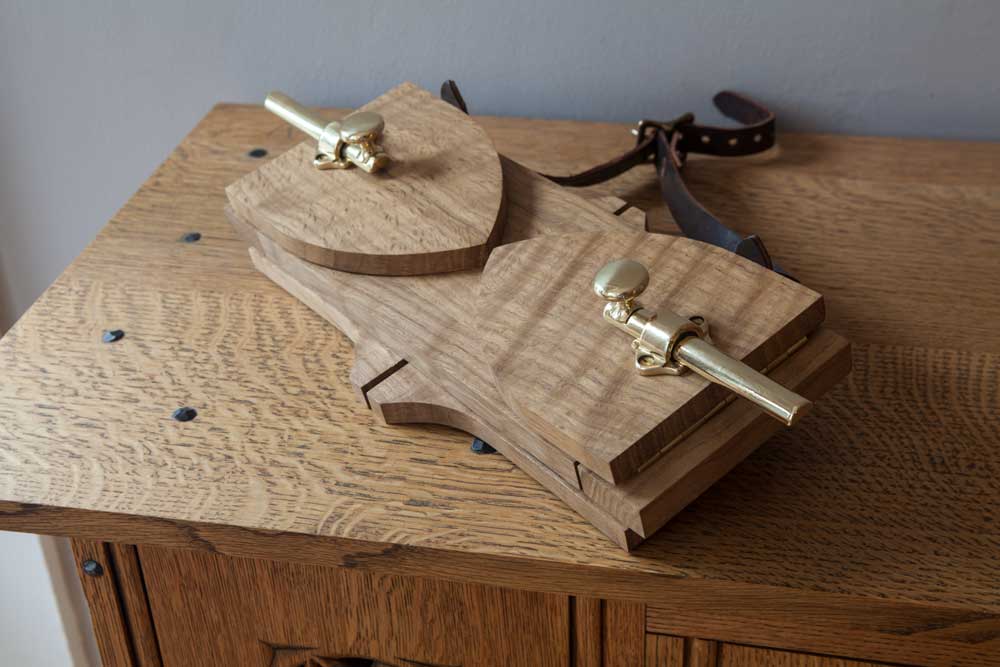
Curly Oak Bookstand, SOLD This clever campaign bookstand folds flat and telescopes open. It features solid brass hand-filed hinges and locks. The leather is brown latigo from Pennsylvania. This is based on an original 19th century piece from Mascart & Cie in England. The piece folds from about 14″ wide to more than 20″. Height (unfolded) is 14″. Finish is shellac.
You can complain about my prices (too high/too low), using this link.
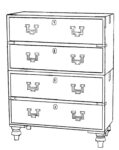
Brass-bound campaign chests that can be split into two parts are likely the most iconic pieces of the style – like the Morris chair of the Arts & Crafts movement. The archetypal British-made chest is mahogany with four rows of drawers, brass corner guards and flush brass pulls. Most chests would fit nicely into a box that is 40″ H x 40″ W x 22″ D.
However, there are lots of variants of campaign chests and details about their construction that you should consider as a maker when you plan to build your own. The following details apply to British-made chests. Campaign chests made in China or India are outside the scope of this book.
As far as dating the chests, a good rule of thumb is that earlier chests had fewer brass corner guards and used pulls that are “skeletonized.” That is, the early pulls look more like the classic swan’s neck type. In addition to the skeletonized pulls, there are also some early pulls that have pointed ends and other shapes. Early chests are also more likely to have moulding than a later chest, though the ornament is usually is more subdued than that on a high-style chest for domestic use.
Because early chests were more likely made as one-off pieces (and not in a manufactory), you are apt to see more variation in their design and construction. So you can encounter (or use) almost any joinery variant of the dovetail family.
Later chests in the mid-19th century became more standardized. More brass was added. The pulls became rectangular and fairly uniform among the manufacturers. From a builder’s perspective, these later chests are well built and are worth studying and reproducing.
Here are some other construction details of the chests, both early and late.
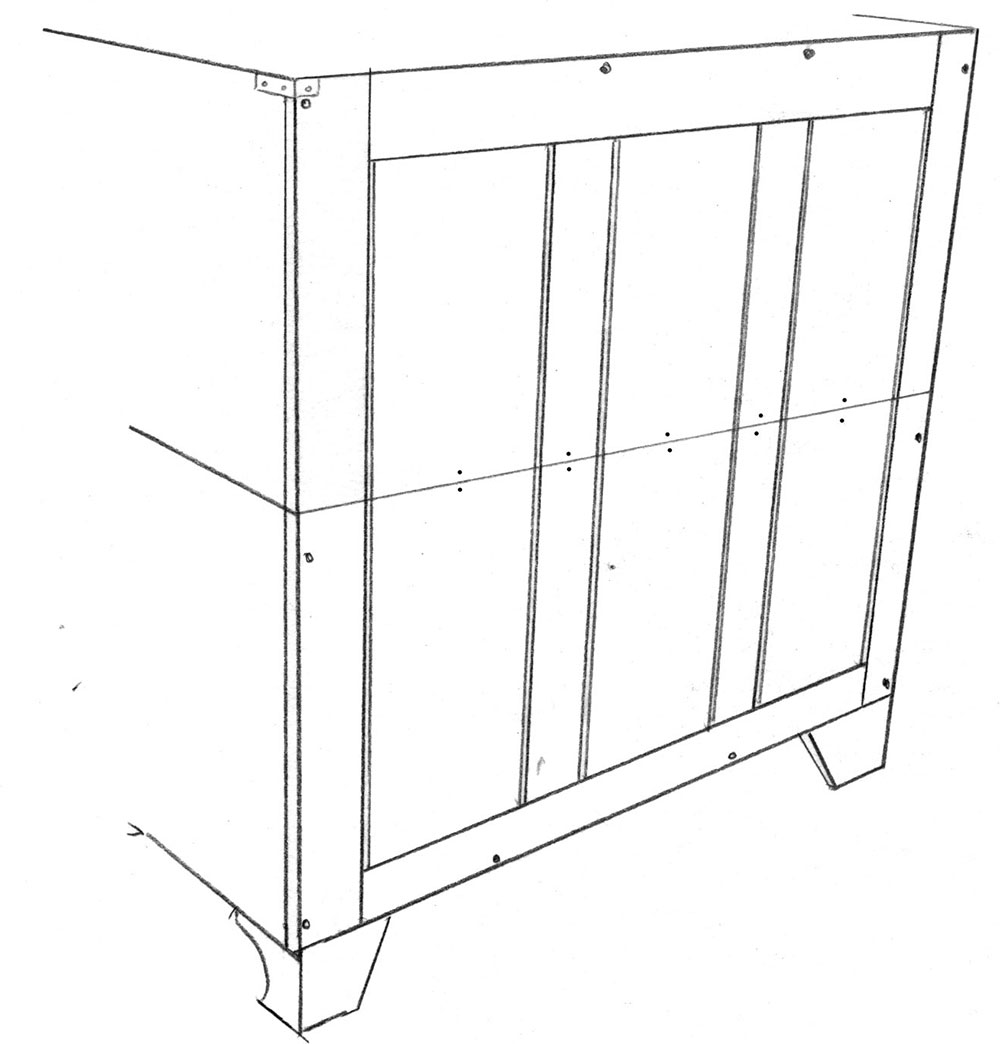
Fig. 1.21 Paneled back. The frame of this back stiffens the carcases. The thin interior panels reduce the weight. These backs are more work to construct than a simple boarded back.
Backs of Campaign Chests The backs of campaign chests can run the full gamut of techniques. I’ve seen frame-and-panel backs all the way down to backs that were simply nailed into a rabbet in the rear of the carcase.
A frame-and-panel back is by far the lightest in weight (because of the thin panels) and adds the most rigidity to the carcase, which is a frameless cabinet that benefits from the rigidity. You’ll also see backs that were paneled (usually via tongue-and-groove) and simple full panels that are inset into a rabbet or a groove. These options are preferred to a simple nailed- or screwed-on back.
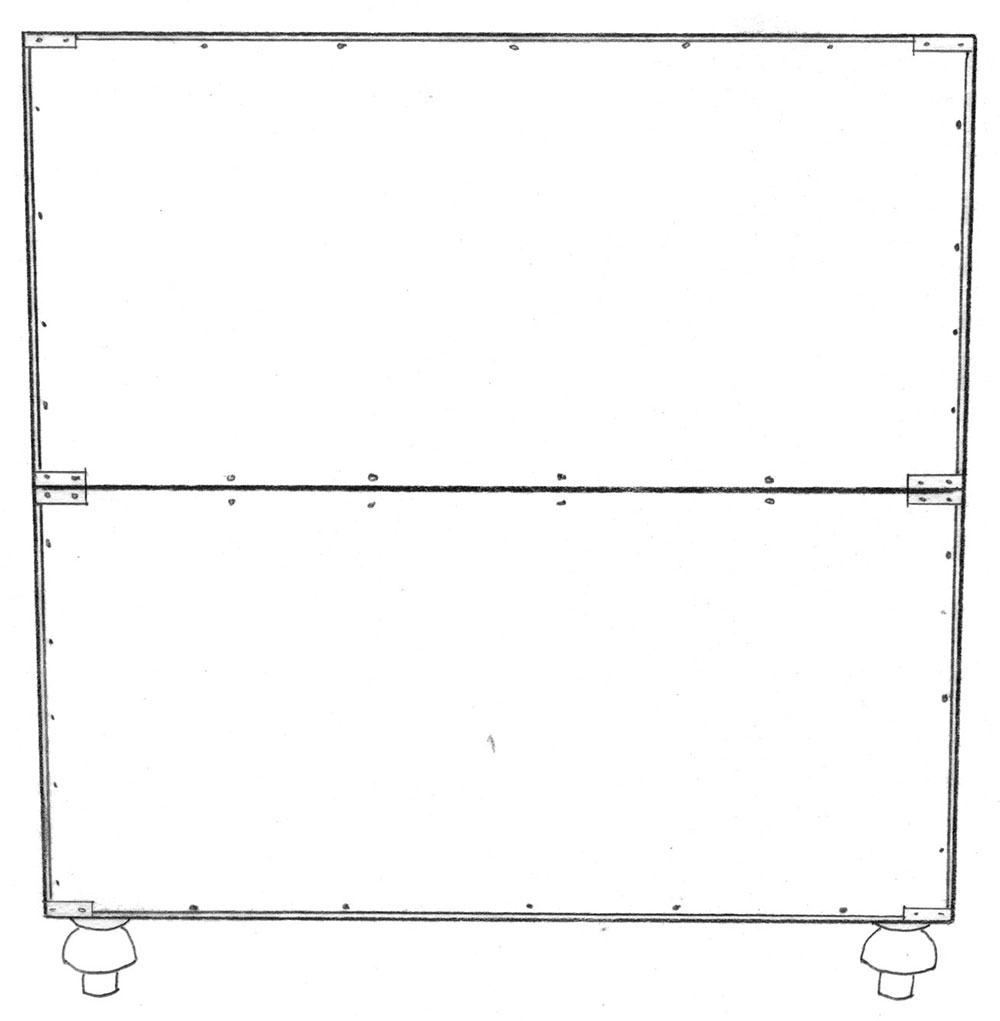
Fig. 1.22 Boarded back. This common form of back has the panels screwed into rabbets in the carcases. It is not as robust as a typical frame-and-panel assembly, but it is quick to execute. The grain typically runs horizontal on the backboards.
Corner Joinery When it comes to the joinery, most of these chests were dovetailed at the corners. Except for the very top board of the cases (which were joined with full-blind dovetails), the remaining tops and bottoms were typically joined to the ends with half-blind (also called lap) dovetails.
On all the examples I’ve examined so far, the tail boards have been on the tops and bottoms, and the pin boards are on the ends of the carcases. This violates the typical practice of putting the tails on the end boards, which makes the joints stronger for lifting.
My guess is that this is for simplicity’s sake. With the tails on the tops and bottoms, these joints are laid out and executed exactly like cutting the joints for a drawer. If you put the tails on the end boards, removing the waste in the blind tails would be a little more difficult. But most of all, it would be a less-common way of cutting the joint.
The tops of campaign chests were typically joined to the ends with rabbeted full-blind dovetails. Details of this joint are covered in the chapter on building campaign chests. After pulling the drawers out of a number of these chests and poking around with a flashlight, I’ve found that for this joint, it was typical to put the tails on the end boards and the pins on the top. (You can easily discern this in a glued-up joint by paying attention to the overcuts from the dovetail saw and if they are angled or vertical.)
Sometimes the corners of the carcases will be joined with through-dovetails, though I haven’t seen many of these in the wild or in auction catalogs. There are also a few chests where all the joints are half-blind dovetails and you can see the tails on the top.
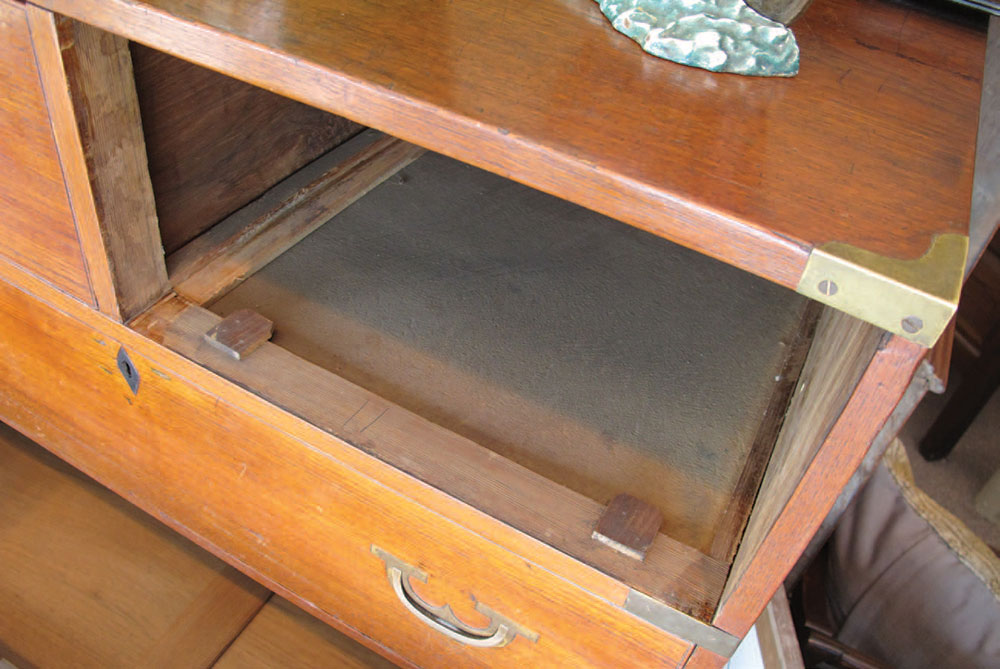
Fig. 1.26 Inside a chest. You can see the web frame and dust panel inside this vintage campaign chest. Also, note the locations of the drawer stops, which keep the drawer front flush to the frame of the carcase.
Interior Joinery Because these chests have to be strong, the interiors are usually mortise-and-tenon web frames with dust panels – again, first-class joinery. I’ve seen a few chests where the interior dividers are solid slab panels. These are simpler to build, but the slabs add weight.
The web frames are usually attached to the end boards with dados or, in some cases, sliding dovetails. You can tell which joint the maker used by removing the brass corner guards covering them.
As far as attaching the top case to the bottom case, it is typically done with two to four dowels that stick up on one of the cases and slide into matching holes in the other case. There are other methods of registering the top case on the bottom, including brass hardware that is incorporated into the corner guards, but I haven’t seen enough of these to know which other methods are typical and which are not.