After learning the epoxy has enough gap-filling properties to make a great edge joint with “factory” edges, we decided to see if Elmer’s Glue Max could also do the trick. James Wright of Wood by Wright has been testing glues for years and has some nice things to say about the Elmer’s Glue Max.
Spoiler alert: It works great.
We don’t use Elmer’s much, so this is good information to know. And if you are a beginning woodworker who doesn’t have the tools to make flawless edge joints, this glue can take away some of the worry.
The reprint of all four volumes of our Charles Hayward collection arrived this morning; as I write this they are on our driveway. Good thing there’s no rain predicted until much later today!
In late February when we got our new Hayward four-volume collection in stock, we offered a $100 special on the set with free domestic shipping through April 30. But we ran out of books two weeks before the end of the special offer date. Now, we have a new print run in stock of all four volumes (it will be inside the warehouse instead of on the driveway by the time you read this…I hope). So, we’re extending that special offer for two weeks from today, through June 4. Order by 11:59 p.m. Eastern, June 4, and you can get all four volumes for $100 with free domestic shipping. That’s $39 off. Plus the free shipping.
Here’s the link to the page. The books are also available for sale individually.
These four books are the backbone of a complete education in handwork. A team of six people (including some extra helpers) worked for eight years to read, organize, scan, design and produce these four books from the articles written and edited by Charles H. Hayward.
As editor of The Woodworker magazine from 1939 to 1967, Hayward oversaw the transformation of the craft from one that was almost entirely hand-tool based to a time where machines were common, inexpensive and had displaced the handplanes, chisels and backsaws of Hayward’s training and youth.
Our massive project distilled the thousands of articles Hayward published in The Woodworker. This is information that hasn’t been seen or read in decades. No matter where you are in the craft, from a complete novice to a professional, you will find information here you cannot get anywhere else.
The books have 1,492 pages total, with thousands of hand drawings and photos. The books are printed in the USA and are designed to last decades. The sewn bindings will lay flat on your bench. The uncoated paper is easy on your eyes.
For more information on the project, including a complete list of all the articles in the books, click here.
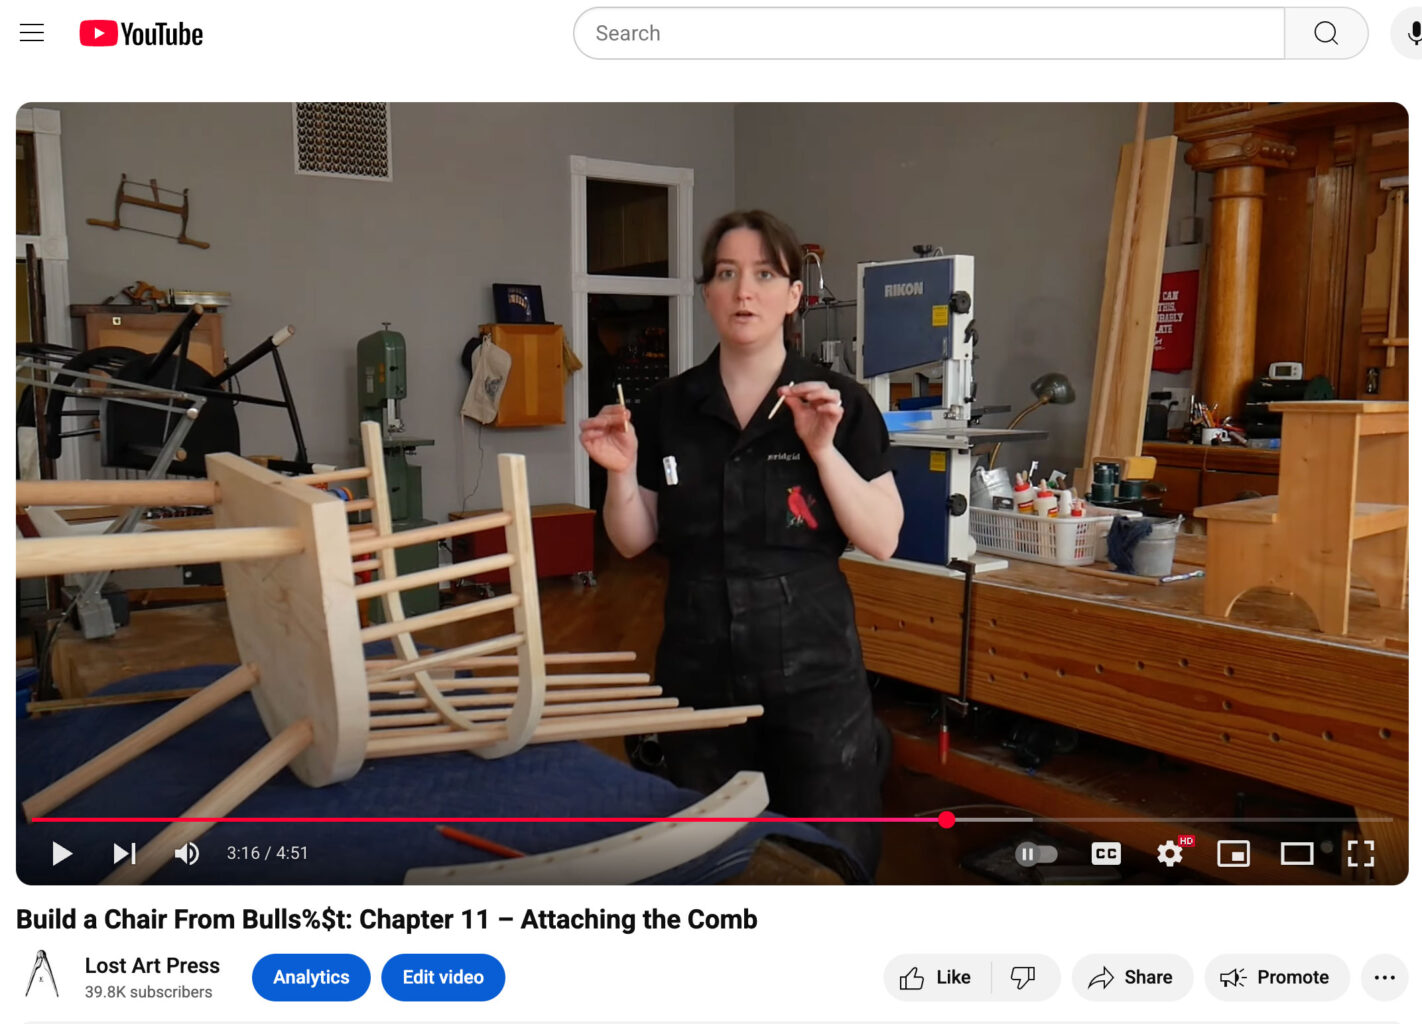
Bridgid Gruber (and Kale) are your guides through the “bulls%$t.”
We have just launched a free 12-part video series that accompanies the new book “Build a Chair from Bulls%$t” and walks you through the chairmaking project.
Filmed by Bridgid Gruber (of Dinkle’s Woodshop) and apprentice Kale Vogt, the video walks you through every single stage of the process, from collecting the materials at the home center to painting the assembled chair.
Bridgid and Kale also bring their own perspective and humor to the project. They filmed the whole thing with complete creative freedom. And they spent months editing the video, adding graphics and generally making the video fun to watch.
We’re offering this video for free forever to help make chairmaking more accessible. In addition to the free video (it starts here), you can download a pdf of the book for free here and download free full-size patterns for the chair here.
And the book itself is only $21 (but is still made in the USA to our rigorous library-grade specifications).
This project – which we lovingly call the “BS Chair” – is made from home center materials and built with home center tools. Anyone can do it. Wanna see proof? Watch Kale and Bridgid make the journey for the first time in this great video:
In the next few days, we’ll release the free video series on “Build a Chair from Bulls%$t,” which will help make chairmaking accessible for more people. The chair (and stool) in the book are built using only home center materials and tools.
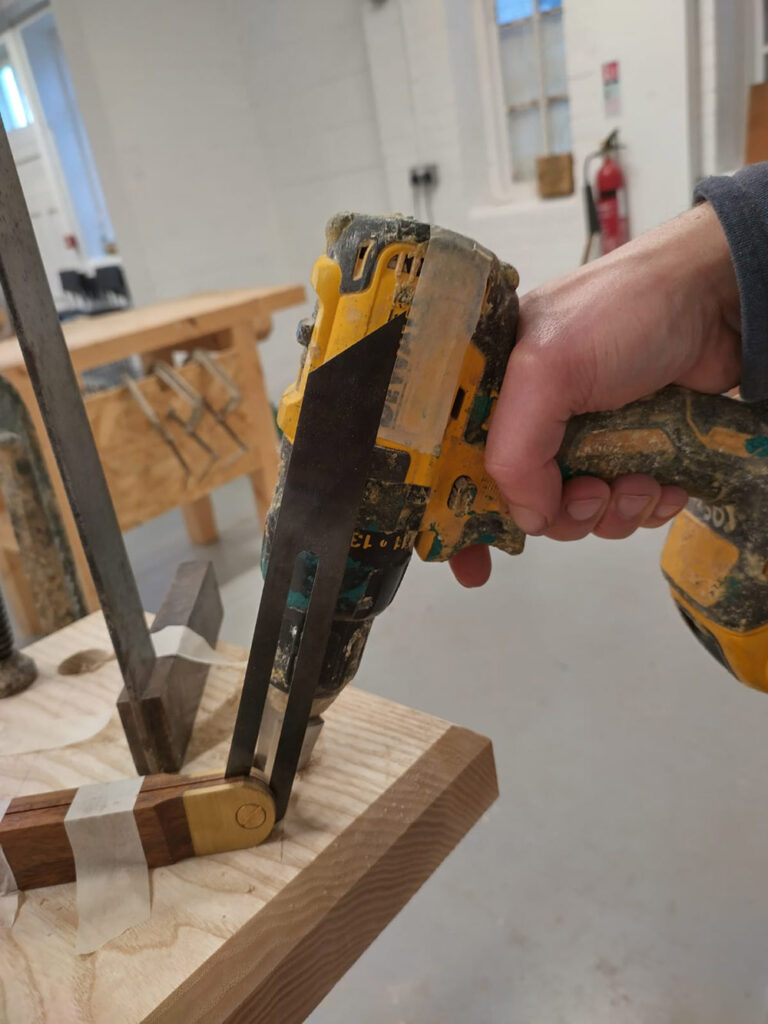
After finishing up the book and videos, my brain did not get the memo that the project was complete. One night this week, my brain came up with a way to glue up boards of construction lumber to make the seat without a good edge joint.
So we filmed this video where I join two factory edges from construction lumber with home center epoxy. Epoxy fills gaps. Does it work? Yes. Surprisingly well.
My brain is slow, but sometimes it does OK work. Check out the video for details
Editor’s note: In our new Mind Upon Mind series, we ask readers of our books, blog and Substacks what else they’ve thought of, tried out and improved on? You can read more about the series here.
Today we’re featuring an idea from Sam Robinson. In our books and blog posts, we don’t have the time or space to share every technique out there. Instead, we highlight what works well for us. Here’s a time-honored approach for reaming and drilling leg mortises, explained by Sam. Thanks, Sam!
This technique requires carefully positioning the sliding bevel gauge and engineer’s square.
The bevel gauge is positioned on a line drawn at 90° to the sightline from the center of the mortise to be drilled. You have to sight down the edge of the bevel gauge to check it’s bang on the line, as the curve at the end of the tool means you can’t just set it on the line. The bevel gauge is taped in position only 2″-3″ away from the mortise so that it’s very close to the drill when you are drilling.
The engineer’s square (the bigger the better) is likewise set exactly on the sightline.
Next, use tape to create a centerline on the back/side of the drill (such that the top of the tape aligns with the center of the drill bit/reamer). Do the same for the top of the drill if it doesn’t have a centerline on it already.
The trick is to align your eye with the engineer’s square/sightline/top centerline on the drill and keep them in alignment while you are drilling (I hold the drill against my body to resist the torque). At the same time, keep the pointed tip of the bevel gauge in line with the top of the tape on the side/back of the drill.
This means you can see everything you need to see from above.
The engineer’s square should be closer to the line and taped down, but you get the idea.
Do you have a clever idea for an improvement? Email kara@lostartpress.com. You can read more about the submission process here.