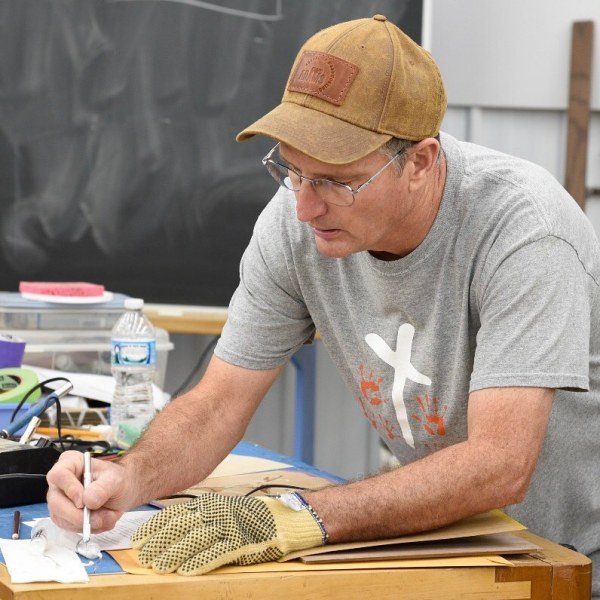
Writing a book isn’t hard. Anyone can write a book. The real trick is this: Once you start, can you stop writing a book?
That’s exactly where I am. I’ve already built four additional chairs than I had originally planned to make for my next book, and today I eyed the walnut chair coming together on my workbench and wondered about making one more chair. In cherry.
I’m old enough and have built enough things to know the source of my problem. John Economaki, the founder of Bridge City Tools, put my misgivings into words years ago when we were driving somewhere together.
“When I teach a class on design I ask the students this question: Would you rather build a project that is beautifully proportioned with a few gappy joints, or a technically flawless piece with a design that is just OK?
“The students unanimously answer: technically flawless.”
This walnut chair is a good design. It sits beautifully. It looks good from all angles. But there are a number of technical flaws that make me want to grab the Sawzall and dismember it. Three of the through-tenons have cosmetic flaws. I have small bits of tearing around the mortises for the back sticks. The saddling is good overall, but my straight lines have some tiny variations I cannot improve. When I assembled the arms, I was so happy that I didn’t crack the delicate hands when I wedged them that I forgot to check if the arms were in the same plane. They are 1/4” off at the back of the chair.
Oh, and some small (cosmetic) honeycombing opened up in one area of the seat.
I should just look past these problems and move on. I should stop building and dive into the writing full-time. But I can’t.
Several years ago I changed the way I sign my pieces. I have a big stamp and a little stamp. I mark the underside of the seat with my big stamp. Then, with the little stamp I make an additional impression for every defect that the piece has. Most pieces get one or two “little stamps.” A few get three. I don’t know if I’ve ever made a perfect piece with zero little stamps.
But as you can see from the image at the top of this blog entry, this walnut chair isn’t going out into the world. Time to fetch the cherry.
Editor’s note: Raney Nelson at Daed Toolworks has been bringing the Improved Pattern dividers back into production at his shop. Details on the tools and how to purchase a set are below.
After months of revising process and materials, the Improved Pattern dividers are back in production, at a slightly lower cost, and will be for the foreseeable future. I’ve added a batch of 40 sets to inventory today, and will be adding more sets early next week.
While it may take several weeks or perhaps even a few months to catch up with demand, I am firmly committed to keeping these available for as long as there is a desire for them.
What changed? Well, primarily there are two changes that make the tools fully viable long-term from a production standpoint. First is a change to the steel used. While I am extremely fond of the O1 tool steel these have been made from previously, it is a very demanding material for production of the dividers. After trying out a number of other steels, I’ve settled on 12L14 – a low-carbon alloy that is specifically formulated for increased machine-ability through selective inclusion of lead throughout the matrix. This method makes the steel much easier to cut and mill, with little or no effects on the actual alloying composition. The steel is tough, and has a similar chromium content to O1, making the aesthetics of the steel quite similar. The only significant difference is that 12L14 is not a through-hardening steel, and so is not conducive to forming cutting edges. If you have a need for forming a cutting leg on your dividers, you can contact me (raney@daedtoolworks.com) about a custom run of dividers in O1 or another high-carbon steel.
The second change is in the process of tuning the pivot joint. In order to hold very accurate settings, the fit between the through-bolt and pivot bore of the legs must be fitted to very tight tolerances (about .0005″ or less). By hand-lapping the bores with barrel laps in final fitting, this fit is much easier to ensure and maintain. Finally, the addition of very fine Teflon washers between leaves has made the already smooth movement even smoother, and ensures consistent tension throughout the range of movement.
In his book “The Difference Makers,” Marc Adams hand-selected 30 contemporary makers, instructors who have taught at his school, Marc Adams School of Woodworking, whose work (and life stories) are exemplary. He did not include himself.
If you ask Marc about his school, he’ll tell you that it should have never had his name on it. (After its first year with no name, Bob Flexner suggested Marc’s name and it unfortunately, in Marc’s eyes, stuck.) Ask Marc about the school’s accomplishments and he’ll say, “I could disappear and nobody would ever notice.” (Then listen as he talks passionately about the school’s students, instructors and staff.) Ask Marc about his craftsmanship and he’ll digress. (And tell you all about the impressive work he sees every Tuesday night, when instructors share slides of their work.)
But. Ask any one of the thousands of students who travel hundreds of miles to Marc Adams School of Woodworking each year and they’ll tell you about a difference maker in their life – Marc.
Marc never intended to open a woodworking and craft school. He never intended to be a woodworker period. But a great personal loss, a journey to the Middle East and a 19-year-old man in Dumyāṭ, Egypt, changed everything.
A good start
“I had a great childhood,” says Marc, who lived with his mom, dad and older brother. “I had great parents, great grandparents. So I kind of had an advantage that a lot of kids don’t have. But, at the same time, my parents had nothing.”
Marc, 8, with his mom.
Marc’s dad, John, was a builder, and Marc knew what kind of week his dad was having based on how much Maalox disappeared from the bottle. “This was the ’60s and early ’70s,” Marc says. “Back in those days a builder was somebody who built the house himself. They dug the footers. They framed it. They put shingles on. They built the house. Contractors contract somebody else to do everything for them. But he came in a different generation. He was real hands-on.”
Marc’s dad was also active in the school community. He drove the athlete busses to all the sporting events, built press boxes, and worked at every basketball and football game. (Marc grew up where his dad grew up, attending the same high school.)
“He was just a real big man in the community, which was a real inspiration as a kid,” Marc says. “Everybody liked him, so it was a good start for me.”
In his spare time Marc’s dad built things they needed for the house – bunkbeds, dressers and the like. “I always thought it was just because we were poor and we couldn’t afford anything, but in reality, now that I’ve grown up, I’ve realized it was just because he liked doing that kind of stuff,” Marc says.
Sports were important to Marc, and he was an active participant. By high school he narrowed it down to running, and he was good. For 43 years he held his high school’s mile record – it was finally broken last year.
Marc won a running scholarship to Indiana Central University (now called University of Indianapolis), a private United Methodist Church-affiliated university in Indianapolis. Even as young as junior high Marc knew he wanted to be three things in life: a coach, a teacher and a youth pastor. In college he earned a bachelor’s degree in education, ran and dated his wife, Susie.
Marc first met Susie as a young child – she attended his mom’s nursery school. Fast forward to 1978 – Indiana (and much of the Midwest) was paralyzed by a blizzard. Susie, also a runner, was a senior in high school and her school wouldn’t allow girls to run in the gym if boys were wrestling or playing basketball. So Susie and her friends used the college’s track to run, and that’s how she re-met Marc. The next year Susie attended the same college, also as an education major, and the two dated throughout. They married after Susie graduated, in 1982.
At around the same time Marc graduated, 750 teachers in central Indiana were laid off.
“I just couldn’t get a job,” he says. “And I didn’t want to relocate. So I turned around and started on my master’s.”
He enrolled at IUPUI (Indiana University–Purdue University Indiana) and then, with a 4.0 GPA and only a few credits shy of his master’s, Marc’s path in life changed course.
Great loss and a new career
Marc’s mom loved crafts. And every year, from the time Marc was 5 years old, the entire family would attend a holiday craft and hobby show in Indianapolis.
“My dad would go to that show basically because my mom wanted to go,” Marc says. “It was mostly boring for my dad. But every year at that show Shopsmith would be set up.”
Launched in the 1940s, Shopsmith was a combination woodworking tool many home woodworkers envied.
“You have to go back to that time period,” Marc says. “In that time period, nothing was imported. The only place you had to buy tools was basically Sears. So for my dad, whose goal in life was to take an early retirement, build a building out back, put a wood-burning stove in it and do nothing else for the rest of his life but create things out of wood, the excitement in going to the show was that Shopsmith would be set up there.” Every year Marc noted his dad’s ever-growing enthusiasm for the machine and rare public display of excitement.
While in graduate school, Marc attended the craft show again with his parents. By now his dad had already started building a 3,000-square-foot building as a place to store a vehicle, and as a place for him to do woodworking and Marc’s mom to do crafts. Marc knew he would soon have steady income, so while watching the Shopsmith demonstrations at the craft show with his dad he had an epiphany. He and his dad could buy the machine now and split the monthly payments. His dad could finally own something he long desired, and Marc could use it to build an occasional piece of furniture for his someday house. His dad was thrilled by the idea.
On Monday they drove to Shopsmith in Dayton, Ohio, signed a contract and loaded up the machine. On Tuesday they began putting it together. On Wednesday, his dad had a heart attack and died, and with it, his dream of retirement. He was only 52.
Marc could have sent the Shopsmith back. But he didn’t. It took him a few months before he was able to walk into the shop his dad built.
“But when I finally walked back in, I looked at the parts, exactly where they were, the last place they were when he touched them,” Marc says. “And I said, ‘I can’t. I can’t put it in a box and send it back. I can’t do that.’ So I decided to keep it. And that is where it all started. Literally. I had no idea which way the blade spun on the machine. I had no idea how to make something. Like any young guy I could make what I needed but not in a fine manner. But I kept the machine and the next thing I knew my entire life stopped and all I wanted to do, before I had made the first payment on that machine, was I wanted to make things.”
Payments were $200 a month. Marc figured out how the machine worked and started making things with a goal to make just enough money to pay for the machine. Initially he intended to finish his master’s but as Marc studied the craft and became more skilled, he began buying more tools and accessories, pulling him further into debt. He loved making things, which was good because now he couldn’t get out of it – he owed too much to quit.
“I was chasing myself, trying to figure out how to do woodworking, because I didn’t know – I had never been trained in it,” he says. “And now I love it so much, but I find that I’m getting myself so far in debt.” What little money he did make went to pay off the debt. “I didn’t know how to price anything,” he says.
But with time, things began to shift. More work led to more money which led to better equipment which allowed him to produce work more efficiently. This allowed him to take on more work, which allowed him to hire somebody. Their joint efforts brought in my more money, which led to better equipment, more work and more hires. It spiraled. In the back of his mind, Marc still assumed he’d finish his master’s. But instead, his company grew and grew.
“I never took a business class in my life,” Marc says. “I had never taken a woodworking class in my life. So to be in my 20s and think that woodworking and owning my own woodworking business would be something that I would do, I would have figured I would be an underwater explorer exploring caves before I would have thought of that. That wasn’t on my radar at all.”
Although Marc had a lot to learn, years of athletics and good coaching prepared him well.
“Runners are different than football players who are the kind of guys who like to hit people,” Marc says. “Runners are the kind of people who like to push themselves beyond whatever they can do and never give up. So I had this inward drive: I’m not going to give up. I’m not going to embarrass myself as this point in time by losing. And so I just continued to work through all that and the work just kept coming and it kept getting more prestigious and bigger without me having any clue on how to do any of it. I just had to figure it out.”
Some examples of Marc’s work from the 1980s.
And he did. By the late 1980s Marc was running a multi-million-dollar business with 35 employees, good people, he says, people who really knew what they were doing. His company had three divisions: a cabinet shop with a focus on residential and commercial kitchens, architectural millwork, and stairways and stair parts. But as so often happens, at some point Marc realized all he was doing was managing when he wanted to be woodworking.
A revelation by the Nile
In 1991, Marc was asked to become a technical consultant to the Western Wood Products Association, the Southern Forest Products Association, the American Hardwood Export Council and the U.S. government, lecturing internationally about business, industrial production and marketing.
While the oil wells were still on fire from the Persian Gulf War, Marc traveled to the Middle East along with experts from major businesses and industries worldwide, including automotive, banking, pharmaceutical, tech, textile and more. This consortium was established to help businesses in the Middle East establish connections worldwide. The U.S. sent Marc as a wood industry representative.
At each of the 13 stops local business leaders and community members would listen to presentations from CEOs and top players from business entities around the world, in large rooms with interpreters and tables with little flags representing dozens of countries. The half-hour presentations went alphabetically, so by the time it was the wood industry’s turn, everyone was always pretty tired. And yet each time Marc forged ahead, reading his U.S.-government-approved script. Once finished, everyone would be led to a large convention-room-type space with booths set up representing the different industries. Attendees would stop by booths to ask questions and network.
“At the end of the day, we’d be thumb wrestling with each other because nobody wanted to talk to us,” Marc says. “We’re talking about the Middle East. There aren’t many trees there. We were kind of the unthought-of group in the whole thing.”
They traveled from city to city on luxury buses, with military trucks filled with men and machine guns in front of and behind them.
“A lot of it had to do with show,” Marc says. “Al Jazeera was the only network on TV. And because this was a big group of very influential people worldwide, we were the only thing that was shown on national TV every single day. We were going to get them out of poverty – we were coming in to help. It was a big-time deal.”
One of their last stops was Dumyāṭ, a harbor city in Egypt. Because Marc and his companions had been on TV for days prior to this, hundreds of thousands of citizens in Dumyāṭ lined the streets as their buses paraded around. And in this particular city, more than half of those citizens were woodworkers.
Any and all things made in the Middle East out of wood ended up finding its way to Dumyāṭ,” Marc says. “So all of a sudden the wood group I was with, we were the main people. People were actually going to listen to us.”
Every presenter had an interpreter and the one assigned to Marc was 19 years old and lived in Dumyāṭ. Throughout the trip Marc’s interpreter spoke fondly of his hometown, and was excited for Marc to see it.
At every stop, Marc and his fellow business leaders had stayed in five-star hotels and had been treated to five-star meals. Dumyāṭ was different. Lunch was served outdoors in a local park, at benches and tables under big wire netting constructed to keep the bugs out. Everyone inside the netting was on display. Thousands and thousands of people stood outside looking in, watching, just as they had been watching on TV the previous days. Food was served in baskets and everything was homemade. Fellow U.S. business leaders warned Marc not to eat the homemade food – the water used to prepare the food might make him sick.
“Eat, eat! You need to eat!” Marc’s interpreter said. Marc tried to be polite and simply kept saying he was not hungry.
After the presentations and meal, Marc and his group found a long line of people at their wood industry booth.
“It was kind of fun,” Marc says. “For the first time we were getting attention where we had gotten no attention on the whole trip. And everybody wanted to talk to me because I was the person who represented the trade.”
Everything was slow because of the number of people who wanted to talk to Marc and the time it took to interpret questions and answers. Still, Marc took the time to listen and respond as well as he could. It was well after midnight when a man and his son approached him. No one on the buses could leave until Marc was done, and Marc was ready to go home. The man and the son asked Marc if he could come back when his tour was done, and spend time with them in their shop.
Marc had already been gone from home for several weeks and he had business to attend to back home. So he politely declined, which was interpreted. The man and his son asked again. Marc came up with another polite reason. They asked again, and that’s when Marc realized he had the perfect response.
“Tell them,” Marc said to his interpreter, “I’d really like to but I have a baby daughter at home, a brand-new baby daughter who is only four months old, and I can’t wait to get back and see her.”
The interpreter, father and son talked for a while and then the interpreter turn to Marc and said, “OK, here’s what he’d like to do. He’d like to give you his youngest daughter.”
Marc was so taken aback he laughed.
“And then my interpreter looked at me, and remember, he was 19-years-old,” Marc says. “And he told me, ‘You have really just insulted this man by laughing at him.’ And it made sense. Because you see for them, daughters aren’t as respected as sons are. ‘You don’t live in our world,’ he said. ‘For him, this would be a way that he could get something for his family, to help them in their world. Plus this would give his daughter an opportunity to get out of here and go somewhere else. And you thought that was funny.’ And that was it. That was it. I couldn’t handle it.”
That night, while sitting on a luxury bus waiting to go back to a luxury hotel in a neighboring town, Marc looked out his window. The moon was full, right on top of the Nile. And in the distance stood tall guard shacks with silhouettes of men with machine guns. And Marc thought about the last thing his interpreter said, the thing that really hurt, right before Marc got on the bus.
“He said, ‘Do you remember today when we ate lunch? You didn’t eat anything. And you remember all those people standing around watching? A lot of those people had to borrow the money to make the food in honor to serve you and you didn’t touch it. And at the same time those people, whose food you didn’t touch, aren’t eating tonight and probably won’t eat tomorrow.’”
Marc cried the entire way back to the hotel.
“You know all of sudden it hits you, what really matters in life?” Marc says. “It’s not so much how big you can run your business but how much you can do for mankind. And it was a really hard hit. I had a 19-year-old kid, in literally a four-hour span of time, change the entire way I looked at life.”
As soon as Marc got to the hotel he called Susie.
“I could keep running, and add more zeros to the dollar sign of our year-end profits, but I’m not really doing anything to change anybody’s life.”
He told her he was getting rid of the business and starting a school. And although Marc wasn’t able to stay in Egypt and help that father and son grow their business, he did hold true to his personal promise. He sold his business and built a school, one that has helped educate thousands of students.
Building a school and a new way of life
“Ultimately,” Marc says, “whether it was something that I did see or didn’t see, God had it all planned. Those years when I was in college learning about education and organization – all that was for a reason. Those years when I ran my business, the learning that I had to go through on my own, that was all to prepare me for what I needed to do to make the school run. So everything that happened along the way was predestined. And I believe that’s why we are where we are today. It’s a gift from God. I just keep hoping every day that I don’t screw it up.”
Marc Adams School of Woodworking
Today the Marc Adams School of Woodworking, on Marc and Susie’s property, offers up 40,000 square feet of space, including six workshops, four large bench rooms, three tools rooms, a dedicated turning center, outbuildings for special classes, a multimedia room and a cafeteria that serves 100. Each student has access to a custom-made Lie-Nielsen workbench. At each instructor’s bench is a digital camera system allowing the entire class to easily see demonstrations, and a specially designed sound system is available for those who struggle with hearing. The lineup for 2021, with COVID precautions in place, includes 245 courses in woodworking, metalsmithing, glass blowing, mosaic work, painting, CNC technology, instrument making, blacksmithing, paper sculpture, leather work, upholstery, calligraphy and even chocolate making.
Marc teaching a joinery class, June 2018.
When Marc returned from the Middle East, he sold his business and started building the school. His daughter, Markee, was born in 1990 and his son, John, in 1993. Marc spent a lot of time lecturing, for businesses, universities, clubs and at woodworking shows, all the while meeting people and making connections. Although this required traveling almost every week, once home and without a business to run he was able to spend time with his family and work on personal projects – woodworking has always remained a loved hobby. And even today, because the school is seasonal, Marc always finds bits of time in the winter months to make things. Every piece he makes has 800 to 2,000 hours of work in it, and for years it’s all had a Disney theme.
“The interesting thing about the Disney stuff is that it’s never drawn the same way twice,” Marc says. “So when you see a clip of it in the movie, and it comes back to it later in the movie, they are not drawn in the same way. So I would take all the images from the movie that I could and try to conceptualize how it would have been done.”
Two of Marc’s marquetry lobby cards.
For the last 15 years he’s been making marquetry images of lobby cards (posters) that were released to movie theaters from 1928 to 1935 that feature Mickey. Each one takes a year to complete. He’s also reproduced front covers of Dell Comic Books, particularly the Uncle Scrooge series published in the 1950s through the early 1970s.
Marc grew up watching Walt Disney’s Wonderful World of Color, but he was never really into cartoons, even as a child. In the mid-1980s he completed a commercial job and for the first time in his life he had some real extra money. So Marc and Susie decided to go to Disney World.
“The whole time I was there I was so blown away by the detail,” Marc says. “It was the detail that they put into everything that they made. And I realized that in my personal work, when I was making things, it didn’t have the detail. Every woodworker wants to find something that can be their own voice and for me, what hit me was detail.”
When Markee was born, Marc thought it would be fun to make something for her with Disney characters on it.
“I thought it would be unique,” he says, not realizing how ubiquitous Disney was with anything made and sold for kids. Turns out it was unique, in the time and talent Marc put into it and everything else Disney-themed since.
Many would say this level of detail is evident in every aspect of his school, too. Marc insists that’s only because of his employees plus the varied experiences every student and instructor brings. Teaching woodworking is not Marc’s first or second priority.
“We’re a vacation destination,” he says. “It’s our job to make sure people have a really good experience, whatever it is they come for. If, by chance, in their experience they learn a little bit about craft and making things, that’s great. But that’s not our focus. Our focus is on making sure people have a great time while they’re here. And I think that’s what a lot of these craft schools miss. They think their priority is showing somebody how to cut a dovetail. But our priority is showing somebody how to have a great time cutting a dovetail.”
Not a woodworking school
One of the many people Marc credits the school’s success to is his longtime friend and employee, Zane Powell. Marc and Zane grew up together. When they graduated high school, Zane got a job in a cabinet shop and Marc went to college. They drifted apart until one day Marc was making something for a client and noticed something else the client had, made out of wood, with the name Zane on it. Marc contacted the maker and it was as he hoped, his old friend Zane. Marc told Zane about his woodworking business and asked if Zane would work for him. Zane agreed and eventually ran the cabinet shop division.
Roger Cliffe and Marc, Baltimore, 2001
When Marc sold his business, the new owners moved it 60 miles north. That was too far of a commute for Zane so he got a job in a factory. After work and on weekends he’d show up at Marc’s house, helping him remodel the business’s buildings into space suitable for a school. Zane helped Marc for three years until Marc was able to hire him full-time. In the early years, Marc asked Zane to teach, but Zane resisted. Instead he assisted Roger Cliffe, a well-known woodworking instructor. Roger had a heart attack and died unexpectedly, three weeks before 9/11. Suddenly Zane had to take on Roger’s role and Marc says he did so admirably.
Zane Powell
“The thing about Zane, he was the funniest person in the room, but he never told a joke,” Marc says. “He has this incredible sense of humor. He was also incredibly gifted. And so not only was he a brilliant craftsman, he had a great humorous personality. And everybody who met him was touched by him.”
When Zane disclosed his liver cancer diagnosis in 2018, a GoFundMe page was created to help financially, and students at the school jumped at the opportunity to give back to someone who had given them so much. Zane died in 2019.
“Losing Zane was a really difficult thing for us,” Marc says. “He was an incredible person. An incredible craftsman. Everybody loved him. Nobody ever said anything bad about him in any way. He was just an outgoing kind of guy. And all those years we never, ever, ever had any issues. No differences and the amazing thing was, in all those years, he never asked me for a raise or more money or time off, ever.”
Marc and others still find messages from Zane around the school.
“He was a great artist. So you might be working on a machine and underneath you’ll see some kind of stupid drawing he did of something somewhere and it is always so funny.”
While there is an advantage to being able to grieve with employees, instructors and students who all knew and loved Zane, constantly being in the public eye, during good times and bad, can be trying.
“Being that the school is 30 steps from my house you learn to give up your personal life,” Marc says. “Because there is no privacy. Everything you do is public. Everything you say, everywhere you go. Trying to raise kids in that environment is a really hard thing to do. When my son was 5 years old, I wanted to go out and start playing basketball with him. And so I did and I’m working with my son and I’ve got guys standing at the front door of the shop laughing every time I miss a shot. So your kids can’t be normal kids because in the course of a summer we’ll have thousands and thousands of people on our property. And they can’t go out and make too much noise or they’ll disrupt a class. So it’s really hard. You just kind of get used to it, knowing that everybody knows what you do and you also get used to knowing that people are sometimes going to criticize you before they pat you on the back. So losing Zane – we all had it tough. We all just grieved in our own ways and dealt with it as we could.”
In 2020, Marc had 112 instructors from around the world slated to teach 245 workshops to more than 2,500 students. And then the world shut down, including the school. Shutting down even two months (April and May) meant postponing 64 workshops and refunding more than 700 students – doable, but tough for a school that relies solely on tuition. But then came the emails, hundreds of them. Almost everyone chose to roll their deposit into a future workshop or gift it to the school. And then, after working with an advisory board of physicians with expertise in the coronavirus from around the country, and working overtime to reconfigure the school, Marc reopened on June 1, 2020.
“I chose that week specifically because that was the week we were doing a memorial for Zane,” he says.
Last year about 1,200 students came along with 39 instructors.
“We had zero spread of COVID through our facilities, which is phenomenal,” Marc says. “And all of those people who were here, they needed to be here. It relieved a lot of stress they had in their life. We had more people this last summer come to one of our key people crying, literally crying, because of the emotions of what they were going through in their life. And they were able to get away from it and come to a place with less burden. We tell people that last summer we were all counselors moreso than anything else because people needed to get away from what they were going through and they were able to do that here. And we had more of an emotional responsibility to people last year more than anything.”
Marc talks a lot about the emotional ties people have with the school, and credits the active building of friendships among staff, instructors and students.
“They develop these incredible relationships, and Zane was a bit part of why all that happened,” Marc says. “He would have been an incredibly big part of helping people through these times.”
These relationships are also why Marc has no interest in offering online classes.
“It’s hard to laugh out loud when you’re at home looking at a computer screen,” he says. “Our investment is here where you actually get to smell the dust. You get to ask questions at any time. You have a panoramic view of everything. You have interaction with the instructor all day instead of just for a few hours at a time. The entire body of learning has to involve as many senses as possible and you just don’t get that through a computer screen. That world isn’t for us and it isn’t the world we’re in. People will always seek our world. We’re in a phase now because of the pandemic but that phase is going to go away.”
In the meantime, Marc is continually looking for new ways for students to build relationships through craft. And the word “craft” is important here. In fact, “time honored crafts” is a phrase Marc has slowly been adding to the very name of the school.
“My goal from the beginning was not for this to be a woodworking school,” Marc says. “I wanted this to be a craft school. But my income and my world at the time I started the school was woodworking and you have to get something established first before you move on to other things. You have to have the facilities and resources.”
Marc started offering breakout classes 20 years ago, and they are some of the first to sell out. Running six classes at a time also serves as easy advertising. Students can take a break from what they’re doing and sit in another class for a short amount of time, as if watching a trailer for a feature film. Although while Marc is committed to a continual broadening of horizons, some of these experiences, such as chocolate making and glassblowing, require a significant investment in equipment.
October 2020 glassblowing class
“But see, the thing for me, from a business standpoint, I never look at whether a class makes money or not,” he says. “I really don’t. I look at each week. How did we do this week? Well, we offered six classes and we did well.”
Staple woodworking classes have long carried light-attended classes and costly breakout classes. But Marc has been careful to introduce them slowly, establishing new markets while existing markets foot the bill.
Daily, Marc regrets not being able to personally take more classes. He’s tried, but is easily pulled in different directions. (It’s why he loves the bottle magic class, a class where you learn how to stick things in bottles. It’s secretive, behind closed doors, so he hid in that room for a week taking the class with little interruption.) As the school becomes more of a team-led effort, Marc hopes to take more classes in the future.
“You reach a point where you don’t work for money.” – Walt Disney
These days Marc enjoys spending time with his grown children and being a grandfather. His daughter, Markee, married Pat Murrin, who she met at her dad’s school. Pat started out as a student while in college, eventually earning his Master Woodworker Certificate at the school. He now owns Murrin Woodworking Studio, five miles down the road from Marc and Susie. Markee is an elementary school teacher. Together they have a daughter who recently turned 2, and they’re expecting another. Marc’s son, John, works with diesel engines in the trucking industry. Early 2020 John was in northern Italy for work. Marc and Susie dropped everything school-related for several days trying to get him out before the country shut down to the coronavirus. He was on a plane three days before international travel was banned.
Marc, Susie, Markee and John
Markee and Pat Murrin
Marc still runs, almost every day, typically about 3 miles. “It’s my big getaway and I really, really enjoy doing that,” he says. Susie will often ride her bike while Marc runs.
“You kind of hate to call this a hobby but we also really like to mow,” he says. They own several houses around the school where students can stay, and mowing helps gets them away from the school during the busy spring and summer months. Susie also enjoys tending her many wildflower gardens.
It should also be noted that Marc’s home and school sits on 17 acres.
“There’s always something that needs to be done there,” he says. “And so instead of looking at that as work, I look at that as sort of my other hobby. I really enjoy getting out and taking care of my pond or cutting branches off of trees or whatever needs to be done.”
They don’t sit around and watch TV Marc adds, laughing.
“You know the saying ‘if you like what you do you’ll never work a day in your life’?” Marc asks. “I totally disagree with that. That’s an incorrect statement. The statement should be, ‘If you enjoy what you’re doing you’ll want to work every day in your life.’ And so for me, that’s kind of where we are.”
The straight cupboard lock is screwed directly onto the inside of the door with no preparation, hence no description of the method is required. For quality work something better is required. This is the brass cut lock (Fig 447): ‘cut’ meaning cut into the door. The cut drawer lock is similar except that the keyhole is at right angles to that of the cupboard lock. In buying a cupboard lock specify whether it is to go into the right- or left-hand stile.
Prepare for marking by setting a marking gauge to the distance of the key pin (Fig 448). Mark the chosen position for the keyhole with a square on the face of the door then carry it round onto the edge. The gauge marks the distance from the edge (Fig 449). At this stage drill a very small pilot hole for the pin. Offer up the lock to the centre line and mark the length of the box on the door edge (Fig 450).
This is an essential method because on some locks the pin is by no means in the middle of the lock. Mark out this primary cavity with a square and gauge. Weaken the wood with a number of diagonal sawcuts. Waste can then be removed by chisel. Use the simple hand router to complete the process to depth (Fig 451).
Hold the lock in place and scribe round it. Remove the waste to produce the second cavity (Fig 452). The keyhole can now be shaped using a larger drill and a coping saw. It may be finished with a round and a thin warding file. The keyhold is often left like this, but to prevent wear as the key is inserted an escutcheon may be fitted. The brass insert (Fig 453) requires the opening to be carefully filed out until the escutcheon can be pressed in with a G-cramp. Alternatively an escutcheon plate can be made from ebony, rosewood, bone, ivory, etc, and let into the door, either flush or slightly proud. A great variety of shapes is possible (e.g. Fig 454).
For fitting a drawer or till lock the routine is virtually the same. The socket for the bolt must be cut into the carcase. The door is closed with the bolt out, from which the length marking can be taken. Width markings can be made with a marking gauge (generally the points of a mortice gauge will not close sufficiently). Make due allowance for an inset or outset door. An alternative method favoured by some workers now is to ink the bolt end thoroughly with a thick felt marker and to quickly make a print with this before the ink dries, either onto the wood or onto a piece of masking tape. A brass plate can be recessed into the carcase to take the bolt. Unfortunately these are not usually for sale with the lock and must be individually hand made (Fig 455). (Making one by hand is an easy job – saw a piece of thin brass, file it to shape and drill holes in it for the screws.)
We have just received seven pallets of “The Anarchist’s Tool Chest” at our Indiana warehouse. We have had a lot of inquiries from customers as to when it would arrive. So here’s your answer: today.
Like most manufacturing businesses, we have been fighting supply chain problems. We strive to never have our books go out of stock. But because of a lot of wild coincidences, this book took eight weeks to print instead of four.
This is our 13th press run of “The Anarchist’s Tool Chest.” It is our bestselling book and every copy sold helps make Lost Art Press stronger. So thank you – all of you.