Our ceramics supplier has just filled our entire order of Lost Art Press Beer Steins, and they are now available for immediate shipment. The mugs are $39, made in the USA by an artists’ collective and hold 20 ounces of beer, bourbon or coffee.
These mugs are handmade, dishwasher-safe and a joy to use.
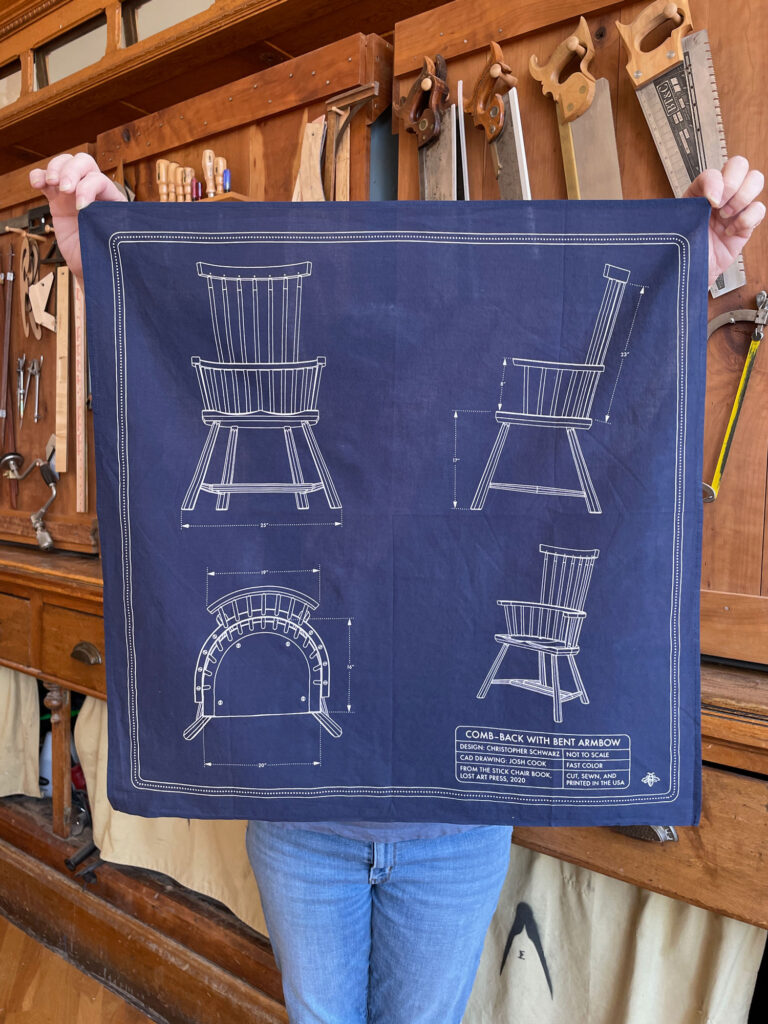
We also have a new bandana design available in our store. This bandana features construction drawings from one of the comb-back chairs in “The Stick Chair Book.” The bandana was designed by Tom Bonamici to look like a blueprint. These are printed by One Feather Press in Tennessee, which makes the nicest bandanas we have found. They are pre-washed, soft and crisp.
Please note that because of ongoing supply-chain problems, we may not be able to restock these items if we sell out of them before Christmas. So if you are considering these as a gift, act now to avoid disappointment or shipping delays (remember last year? We do).
Editor’s note: Following the success of “The Essential Woodworker” – our second-bestselling time of all time – we worked with Robert Wearing to republish a book filled with some of his best jigs, fixtures and appliances for handwork. During his career, Wearing had published two books of jigs for woodworking (both out of print), that are filled with insanely practical and simple devices.
Just like with “The Essential Woodworker,” we had to recreate the book from scratch – all of the text, photos and drawings had been long lost to the publishing machine. And once again, the royalties to this book went to help Wearing, who was in an assisted-living home, after an incredibly rich and long career.
You can read more about Wearing’s life in this lovely 2017 profile. Shortly after “The Solution at Hand” was published, Wearing died at age 99 (read our obituary here).
The following tools are selections from Chapter 3: Tools, of Robert Wearing’s “The Solution at Hand: Jigs & Fixtures to Make Benchwork Easier,” a hardbound book of our favorite jigs from Wearing’s career. The book covers a wide swath of material, from building workbench appliances for planing, to making handscrews (and many other ingenious clamps), some simple tools that you cannot buy anywhere else, to marking devices that make complex tasks easier.
In all, there are 157 jigs, all of which are illustrated with Wearing’s handmade drawings. The book is designed as more of a reference book than something you read straight through. Already after editing the book, I now find myself returning to it and thinking: I know Wearing had a solution for this problem. And he did.
— Christopher Schwarz
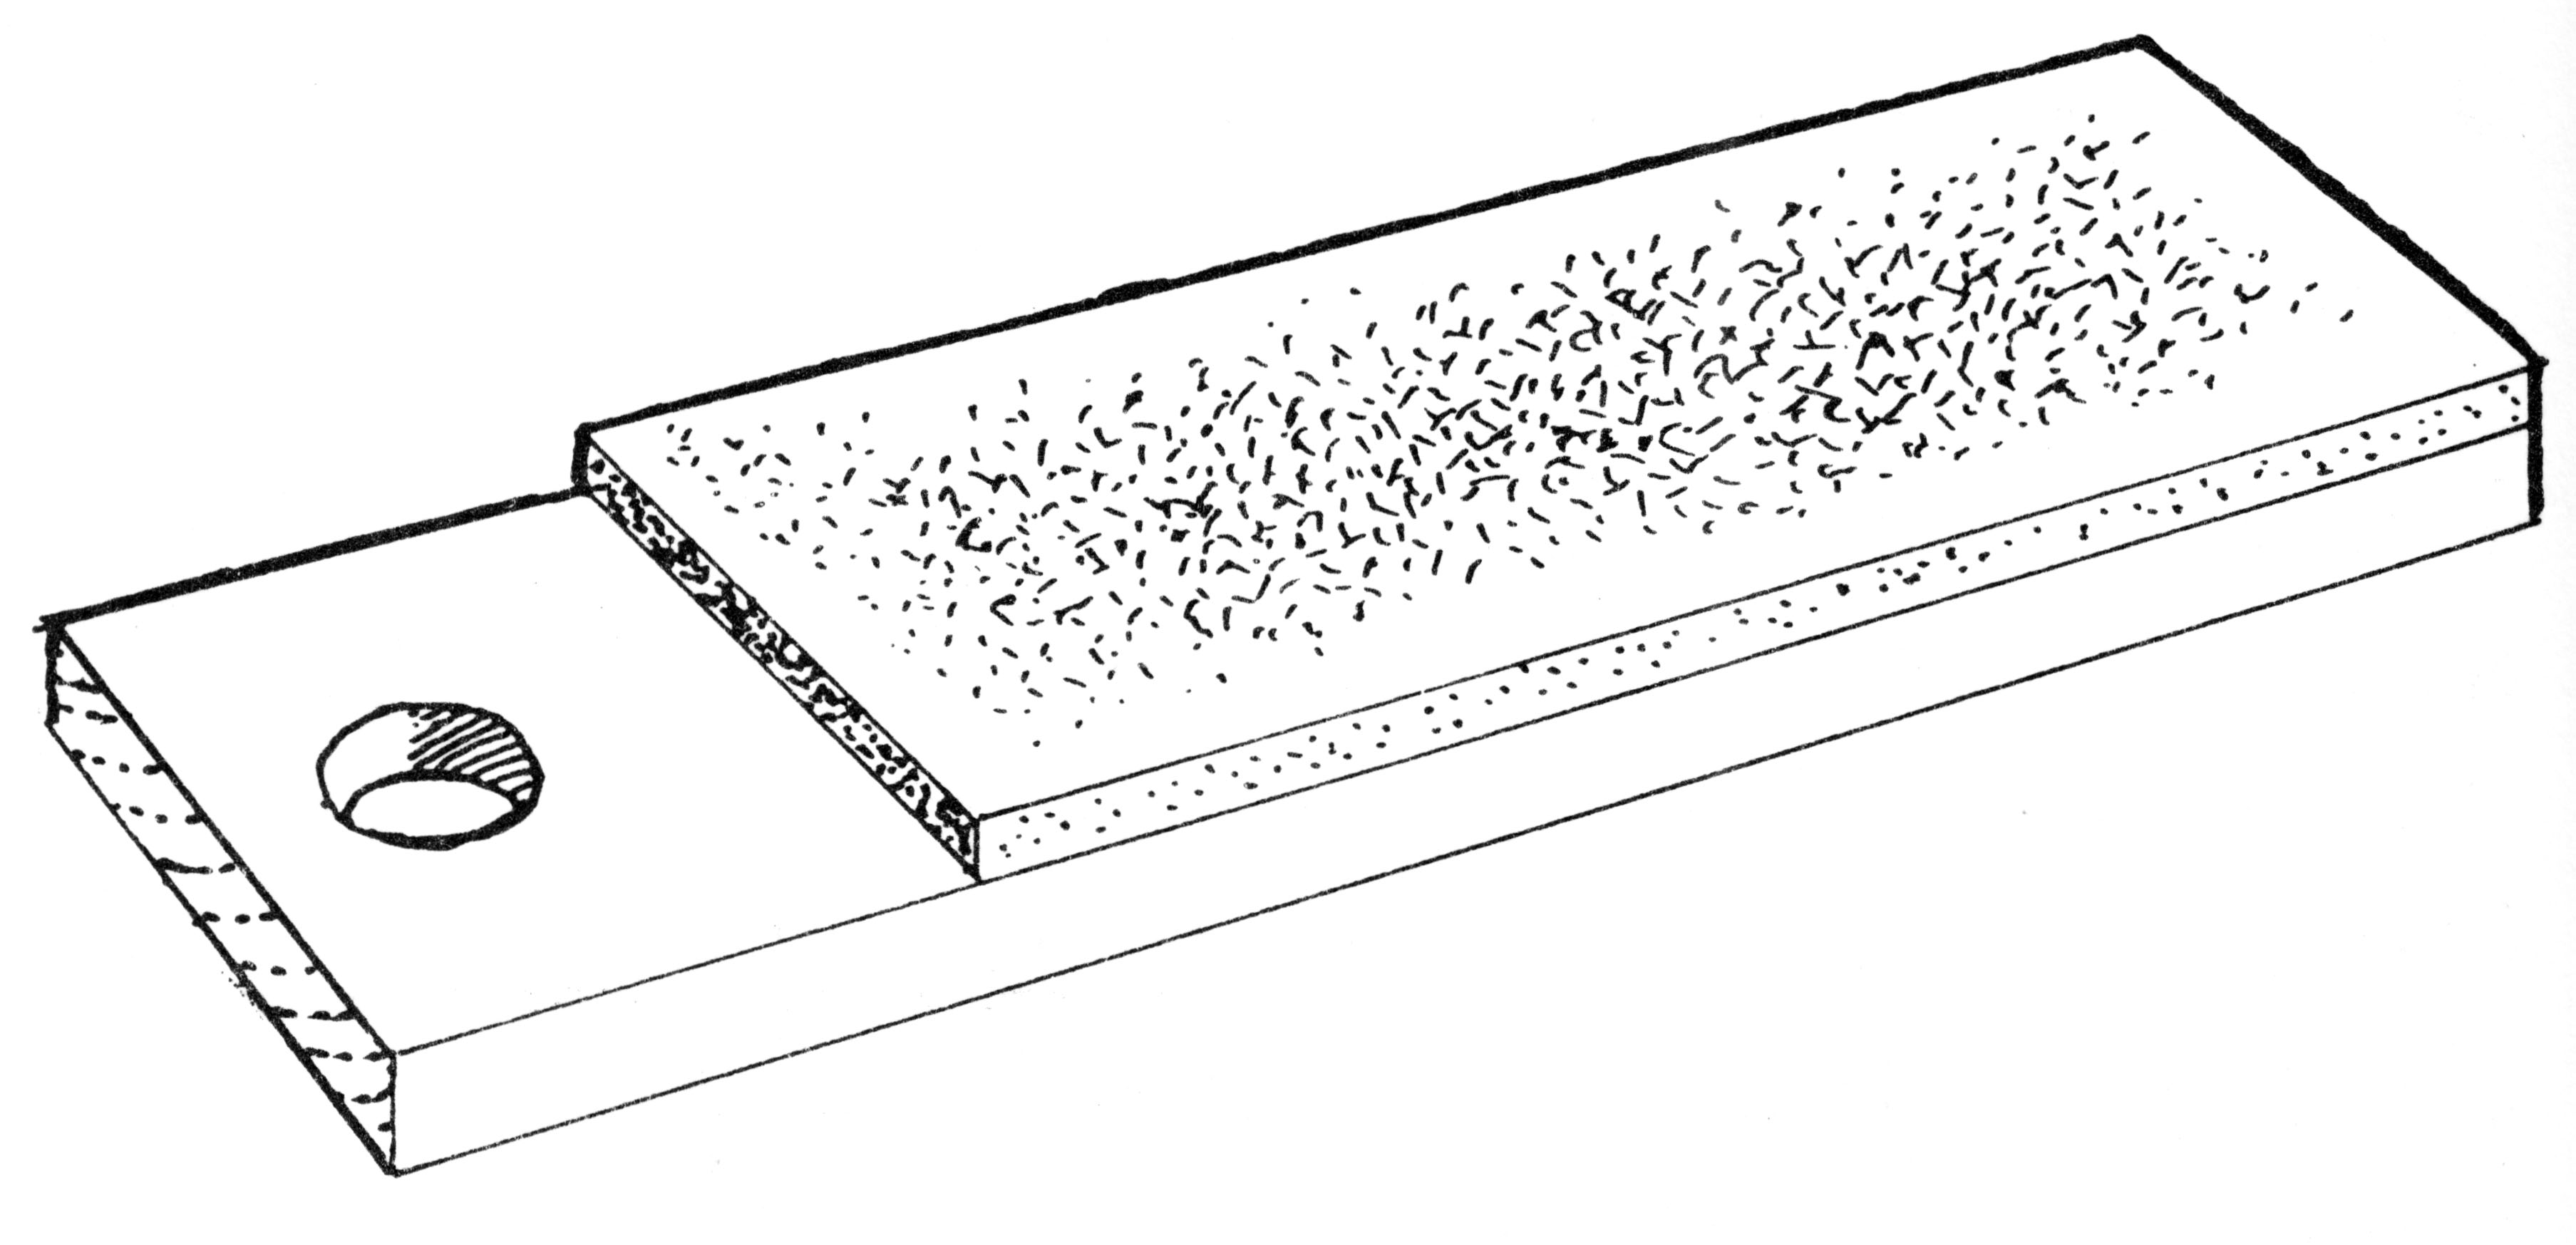
Oil Pad “Park your plane on its side lad.” This is a folk custom dating back to the age of wooden planes. The blades of these planes were firmly held by a tightly hammered in wooden wedge. Following this advice, however, will disturb the lateral setting of an iron plane whose blade is nothing like so firmly held. Instead park the plane on the oil pad made by gluing a strip of carpet to a plane-sized board [Fig. 1, above]. This is a tidy arrangement which both protects the blade and reduces friction. Very little oil is needed.
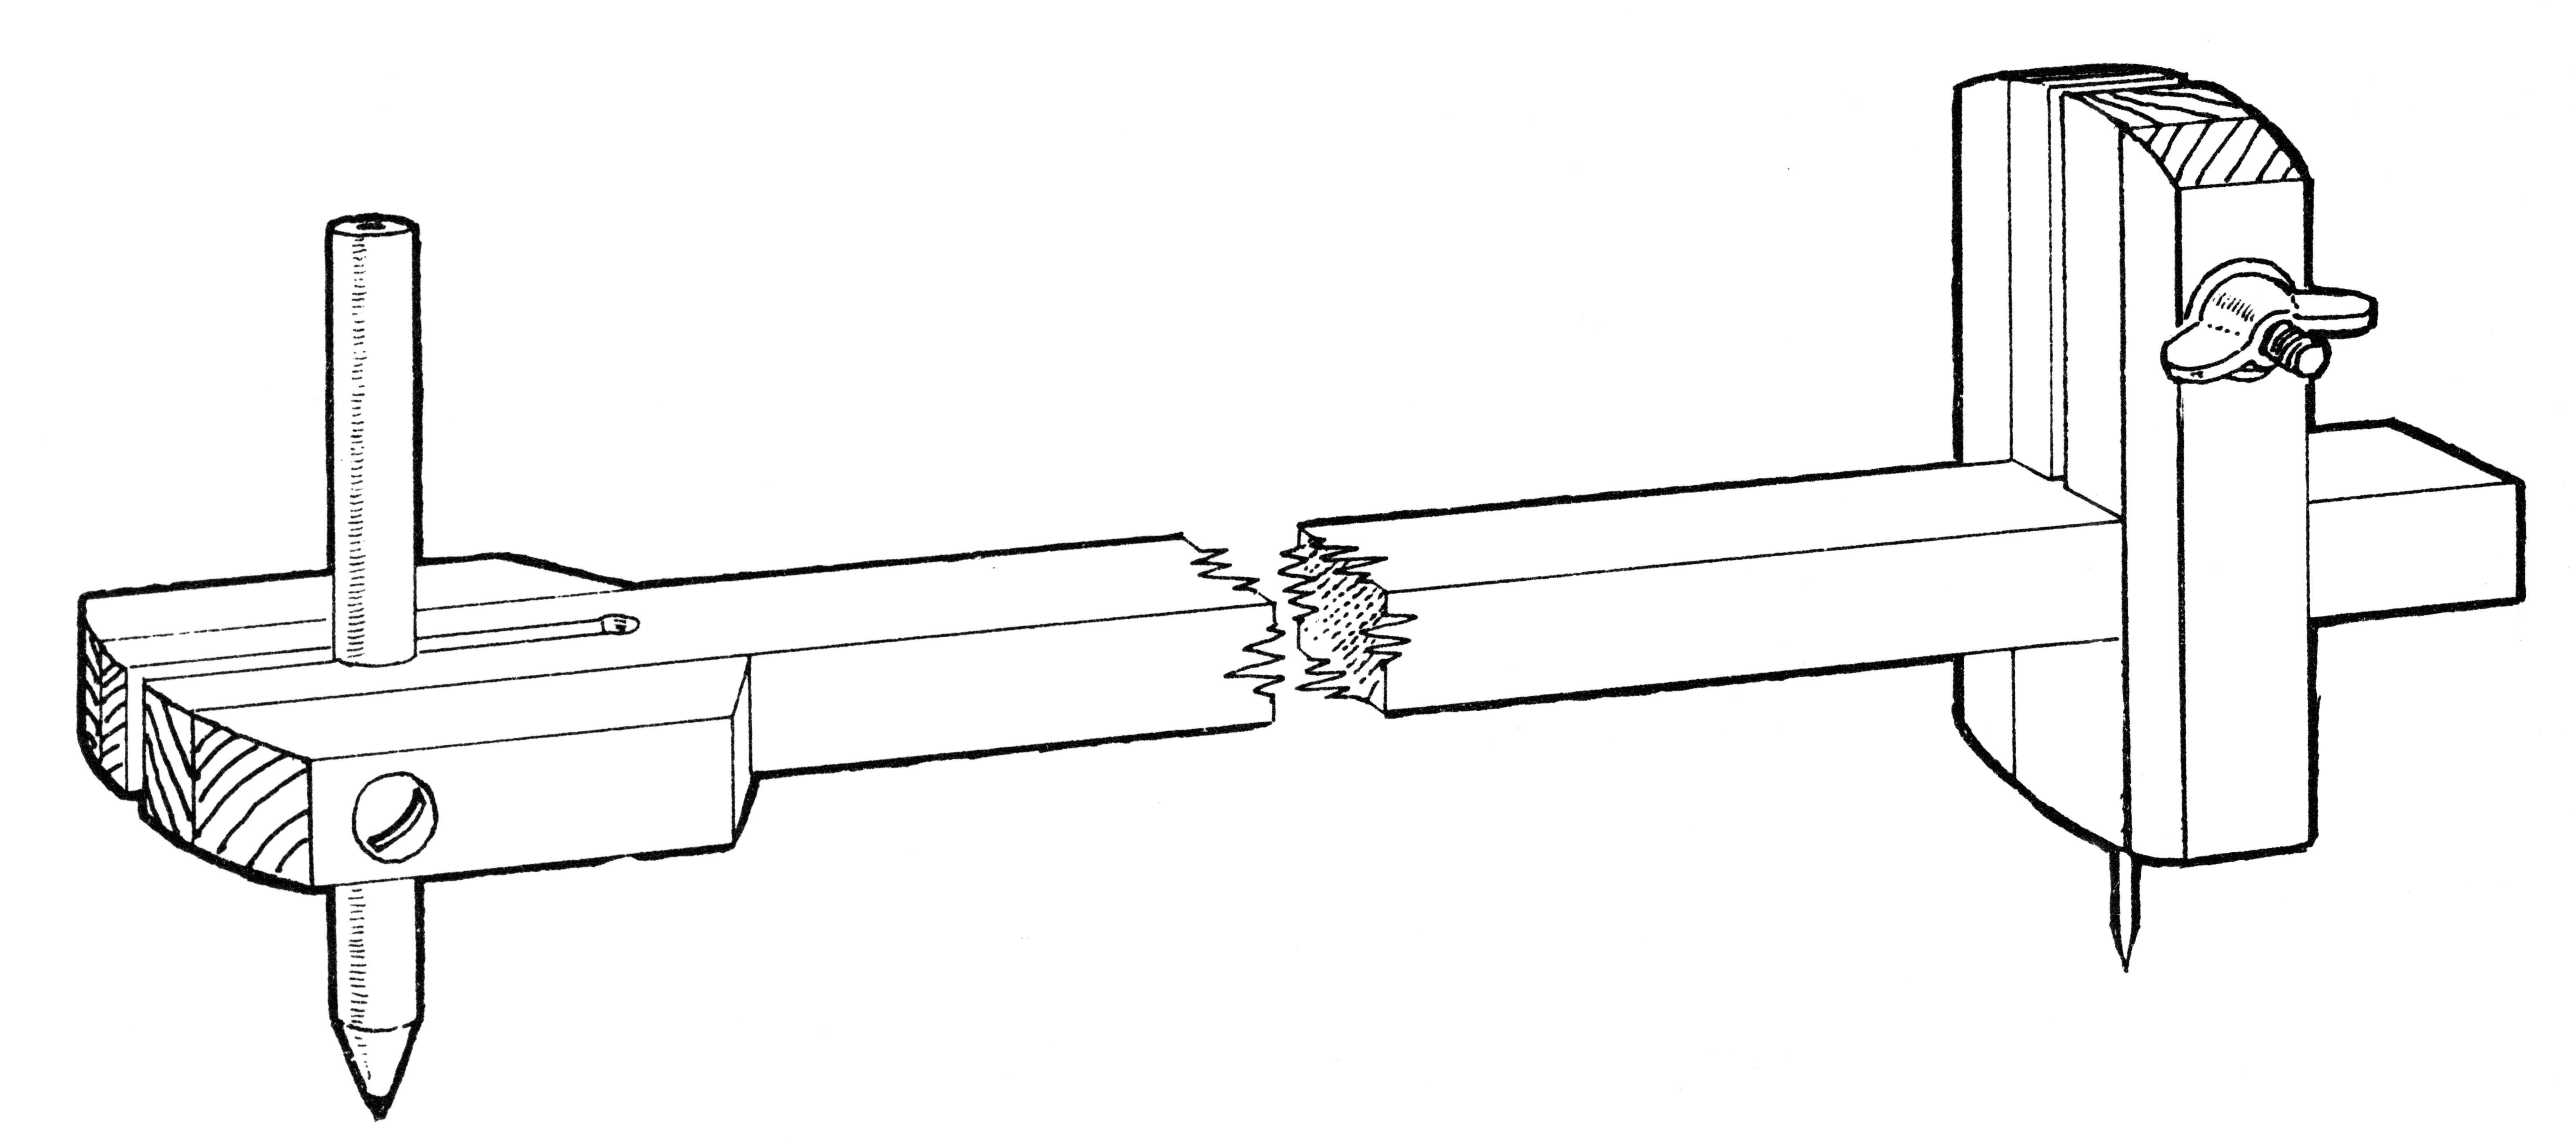
Beam Compasses This excellent and virtually cost-free tool is shown assembled at Fig. 9 A. In constructing it, first machine an overlength piece of square-section material, say 5/8″ x 5/8″ (16 mm x 16 mm). Cut off five pieces to make respectively, pieces a, b, c and d. All except d are sawn in half. The inside ends of c and d are finished quite square and all other ends are angled. Glue the a pieces to the stem and c and d between the b pieces using a short waxed block cut from the stem as a spacer. Hold the pieces together flat on a piece of polythene sheet. Drill a hole in end B for a pencil or ballpoint, the latter is often better, then drill a small terminal hole of 3 mm (1/8″) and a lateral hole for the clamp screw. A brass roundhead 12 gauge x 1-1/2″ is well suited for the cramp up. Drill halfway at 1/4″ (6 mm). Drill the remaining distance at 1/8″ (3 mm). Saw the slot with a saw having a wide kerf. Screw up and test with the chosen pen or pencil. File off any protruding screw point.
A similar routine is adopted for the sliding point unit. There are several possibilities for the clamping screw. Either put a clear hole halfway through and tap the other half 1/4″ BSW, or metric equivalent. Use a thumbscrew to tighten or make one by soldering a wing nut on to a piece of screwed rod. Or solder a wing nut to a brass woodscrew. Screw in a normal woodscrew first, then replace with the one made up. Or drill clear holes right through and use a 1/4″ (5 mm) coach bolt with wing nut.
The point can be made by grinding up a piece of silver steel of about 3/32″ (3 mm) diameter. Clean up the whole job, lightly sand and finish either with a polyurethane varnish or teak oil.
Fig. 9
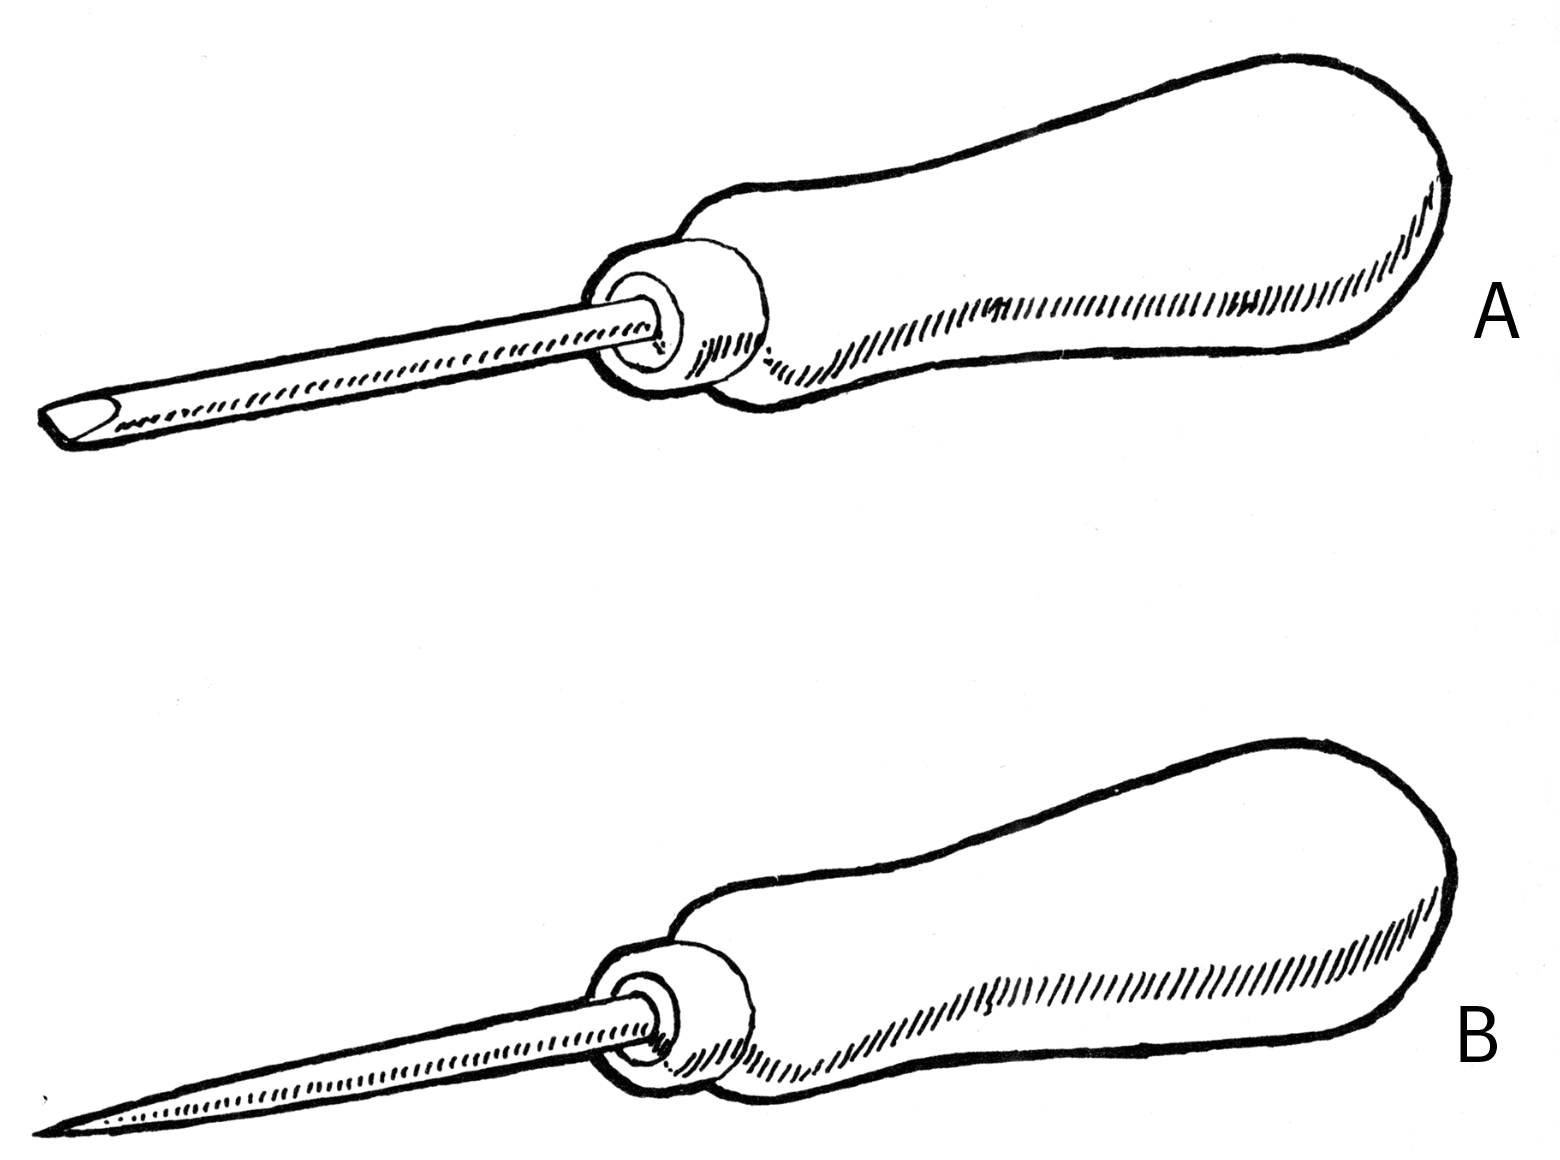
Awls Of this large family of tools from the days of handwork, only the bradawl remains in the catalogues. The convenient materials for making awls are tool steel, silver steel (commonly stocked in good tool shops) or old or unwanted screwdrivers.
The bradawl, A, is most used for screw holes and is either filed or ground on both sides and after hardening and tempering is honed to chisel sharpness on the oilstone.
Marking awls, B, are made out of thinner material ground or filed to a long, fine and round point. Small electrical screwdrivers with plastic handles convert easily. This awl is not really suitable for work other than marking as it cannot remove wood.
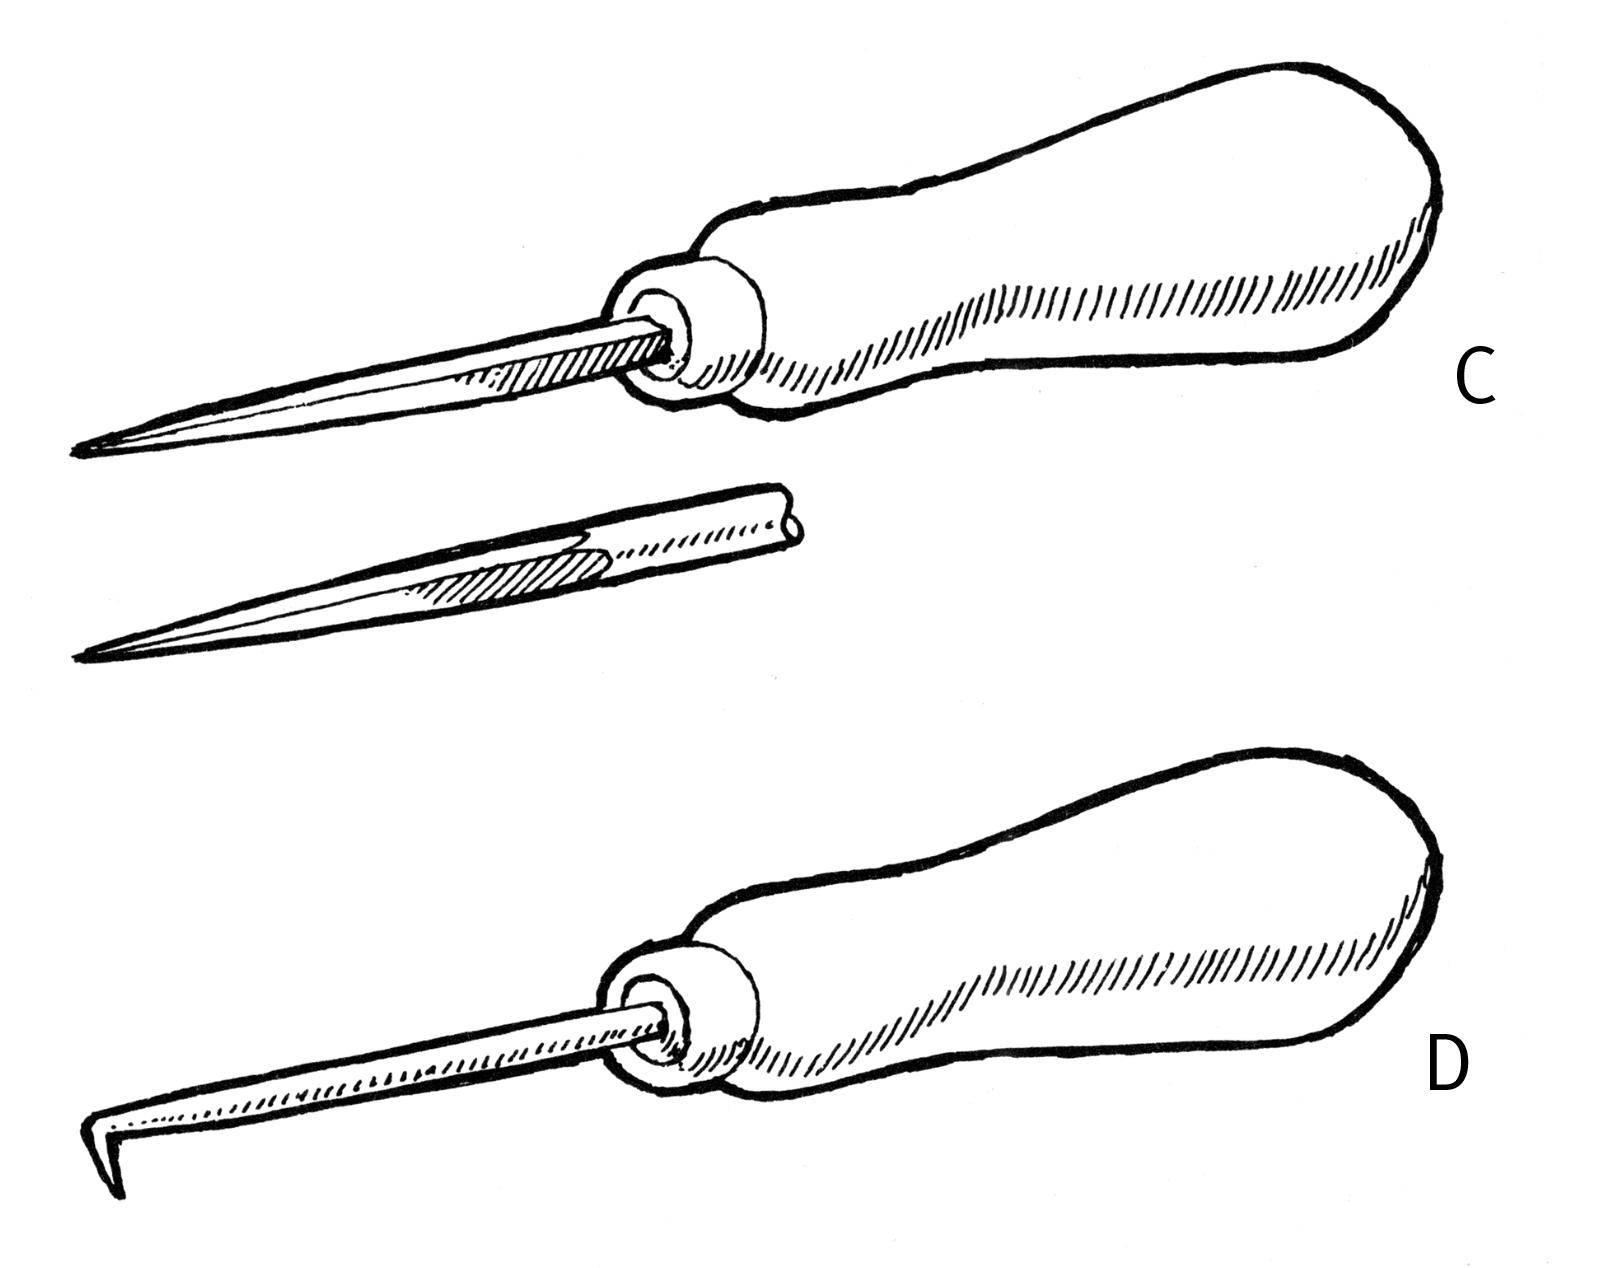
Fig. 34
The four square awl or small hand reamer, C, is useful in the bigger sizes for enlarging holes and in the smaller sizes for making pilot holes for small screws. It is filed really square in section and after hardening and tempering is carefully honed to give four keen cutting edges. It can be made from either round or square material.
The hooked awl, D, is particularly useful for marking out the second stage in dovetails. A good material for making these is old-fashioned steel knitting needles.
Turned hardwood handles with ferrules are well worth the trouble taken. Fit the blades into the handles by drilling slightly under size, filing the end of the awl to a chisel shape and then driving on in a vice. If the section is big enough the handle and blade can be drilled through and pinned.
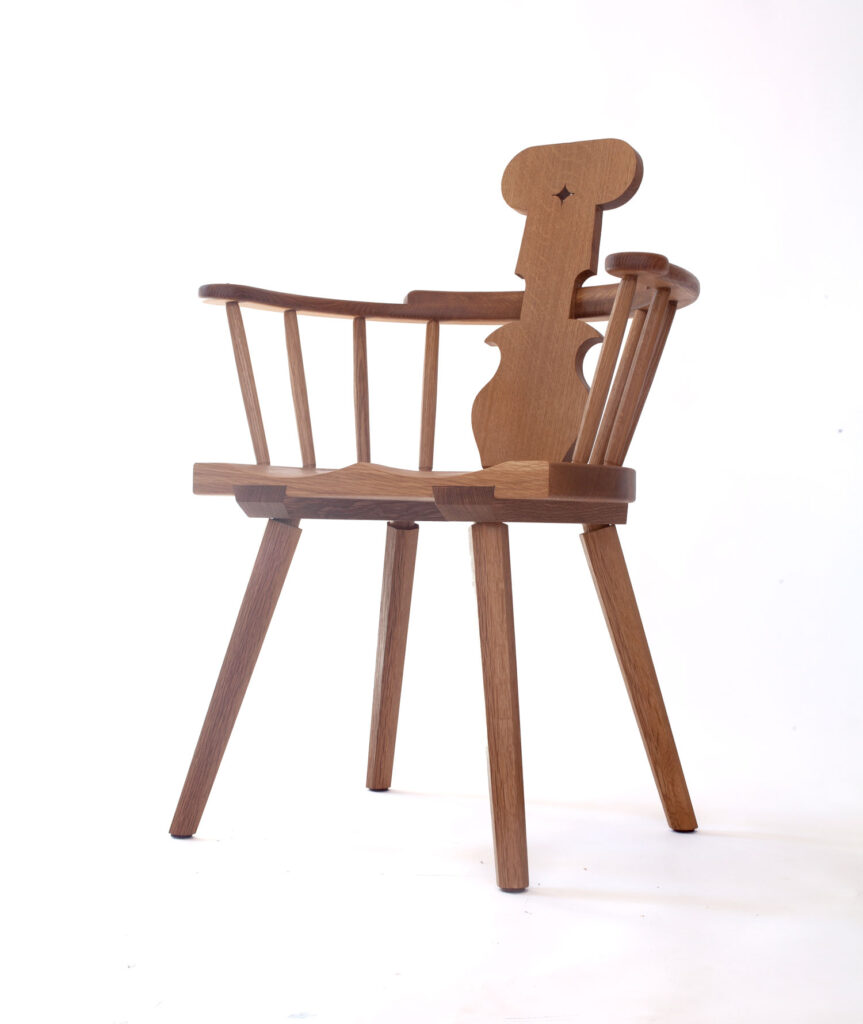
My latest chair is a white oak backstool/armchair that is inspired by the chair that Bilbo Baggins sits in during the opening of “The Fellowship of the Ring.” This full-size chair is by no means a copy of that chair, however. Read on for details.
One of the most difficult parts about writing the “The Curse of the Nannau Oak” (an illustrated book forthcoming from Lost Art Press) was being so far away from where it all took place. Time and money aside, the pandemic made a trip impossible.
Much of the story could have been written anywhere, but several scenes in the story, I felt, needed the eyes of someone physically there. One scene features detailed plasterwork in a restaurant in Dolgellau, a small town in northwest Wales. The other is a walk the main character, Cadi, takes with her grandmother.
The Nannau estate is about three miles north of Dolgellau. In our book (which I wrote and is illustrated by the brilliant Elin Manon Cooper) Cadi and her family eat in a restaurant in which there is a frightening and detailed plasterwork scene of a large tree on the wall. The waiter tells her it’s the hollow oak of the demon – the Nannau oak. This plasterwork scene is real and exists, as does the restaurant, called Y Sospan. Legend states that the plasterwork has actual branches from the Nannau oak embedded in it. From what I gather, the armorial (another plasterwork scene next to the tree, also featured in our book) was constructed as late as the 19th century, perhaps when the restaurant was used by the Dolgellau Cricket and Reading Club. The tree, on the other hand, was possibly constructed as part of the 1758 restoration of the hall, as the subjects’ clothing in the scene matches that time period. As far as branches from the Nannau oak actually being embedded into the plaster? Who knows! It’s one of the perks, I suppose, of writing heavily researched fiction.
A detailed Standing Building Report commissioned by the Snowdonia National Park Authority was instrumental in helping me describe this scene accurately, and find a place for it in the story, without actually being there.
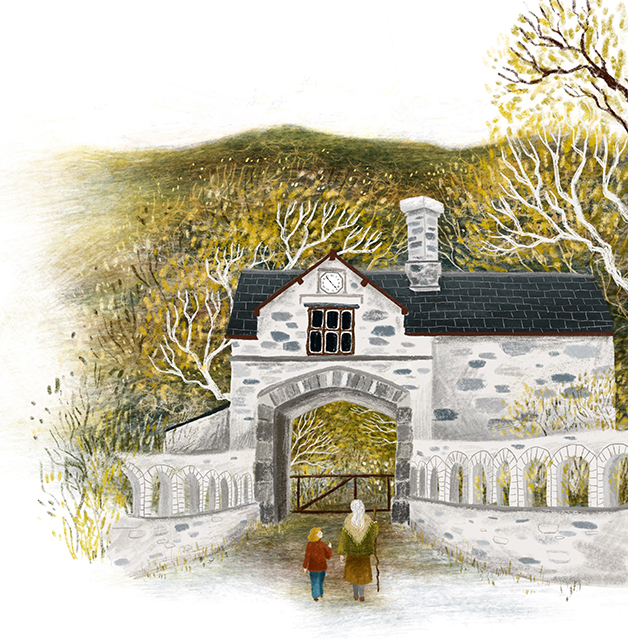
Later in the book Cadi and her grandmother walk through the Nannau Deer Park. This detailed article (and this entire website, along with the book, “Nannau – A Rich Tapesty of Welsh History” and its author, Philip Nanney Williams) were more than helpful.
I think I’ve watched maybe a dozen total videos on YouTube in my life, a fact that is shocking to my children. But I was thrilled to find the delightful Margaret Hall, who lets viewers walk with her through the Nannau Deer Park. It was the next best thing to taking the walk myself, and being able to listen to her speak Welsh while reading the English subtitles was wonderfully instructive as well.
Still.
I worried.
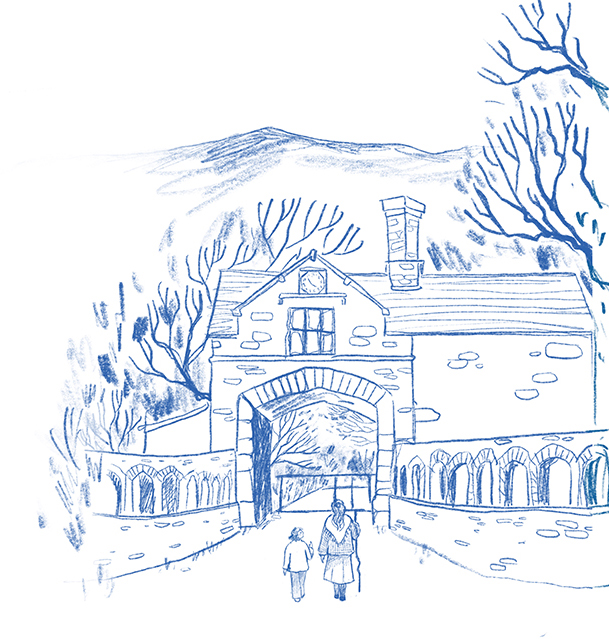
rough illustration of Coed y Moch by Elin Manon Cooper
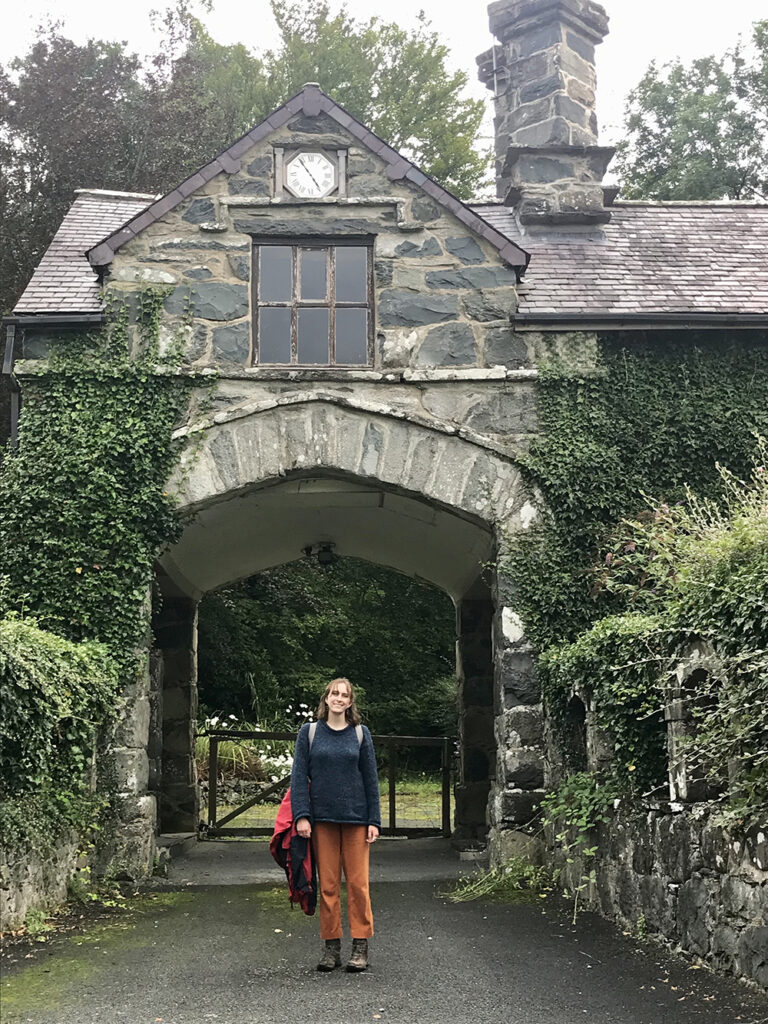
Elin at Coed y Moch, illustrated above
But then I found Elin Manon Cooper, who is now my partner on this project and who is producing the most gorgeous illustrations. This summer she went to Y Sospan. And she walked through the Nannau Deer Park. She saw Coed y Moch (a lodge on the Nannau estate); Aran Fawddwy, Aran Benllyn and Cader Idris from a distance (southern Snowdonia mountains in North Wales); and Yr Hen Ardd (the Old Garden, built in the 1790s).
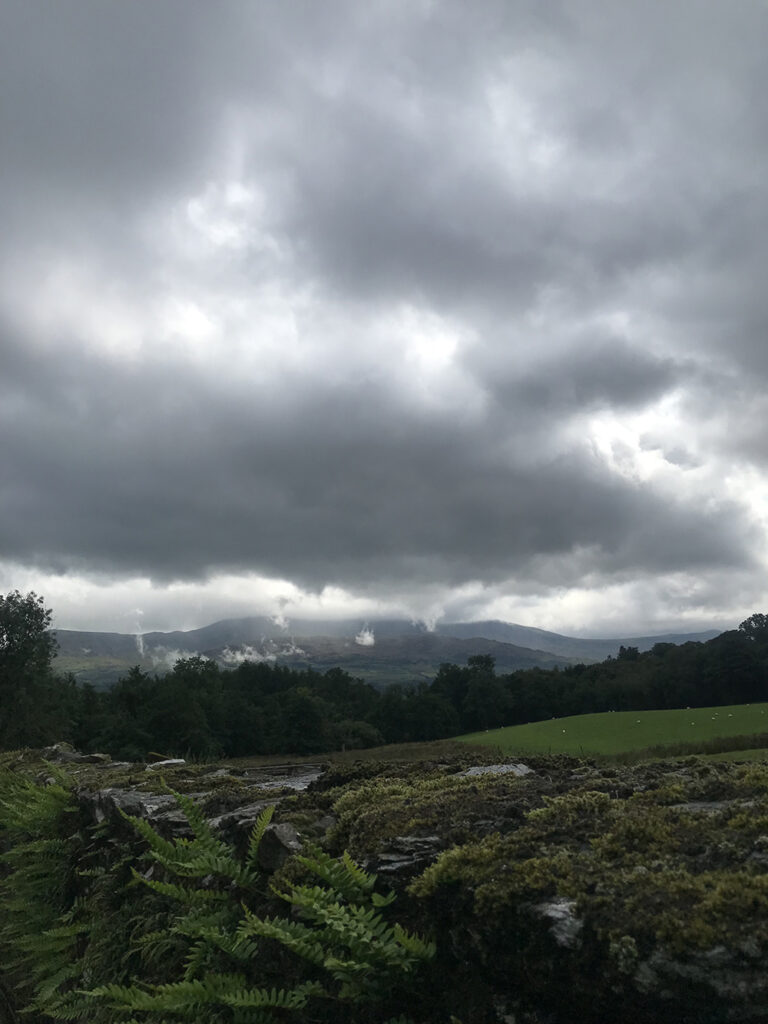
mountains in the distance on the Nannau Deer Park walk
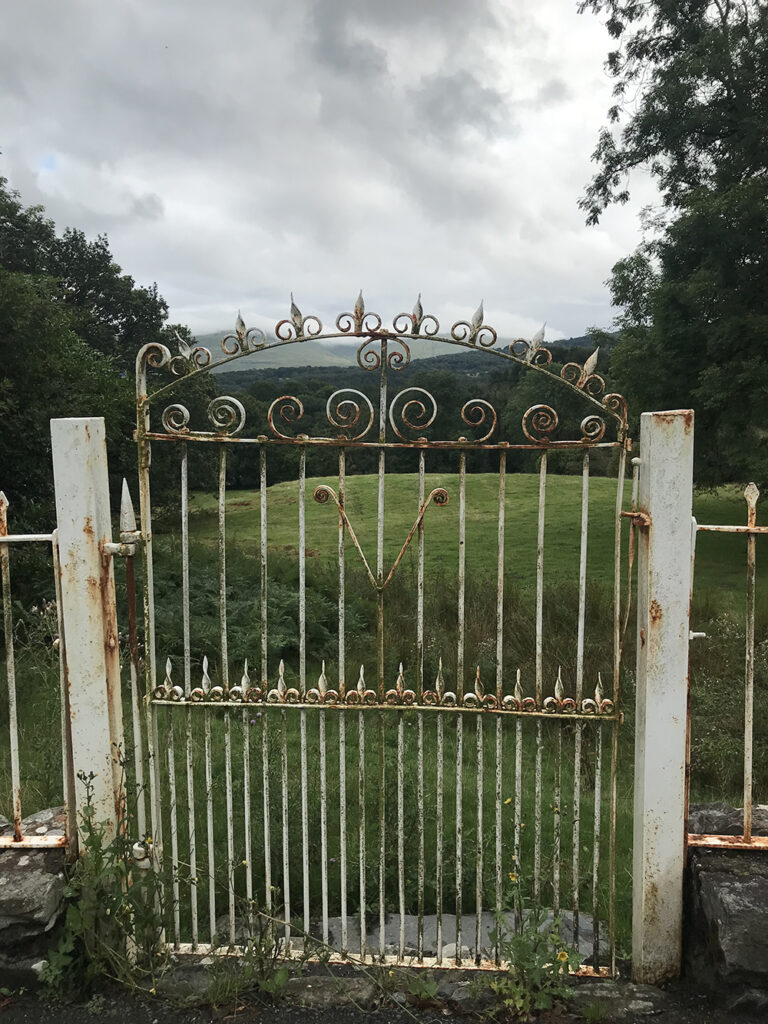
The “V” is this cast-iron gate stands for the Vaughan family.
an entrance to Yr Hen Ardd (the Old Garden), built in the 1790s
“Cadi knew this was land that held secrets and stories.”
Elin tried to find the stone pillar that marked where the Nannau oak once stood, but it’s now in someone’s private garden. While wandering, a deer jumped out right in front of Elin and her family – a magical sight, she says.
“Despite not being able to find the exact spot of the oak it was an incredible place to walk around anyway,” she says. “You got a real sense of time and story all merging, swirling and stretching together.”
With many traditional, big-name publishers, such a close partnership and collaboration between author and illustrator would have never happened. Often, a writer and illustrator never meet or speak. And so to have this experience, I’m grateful.
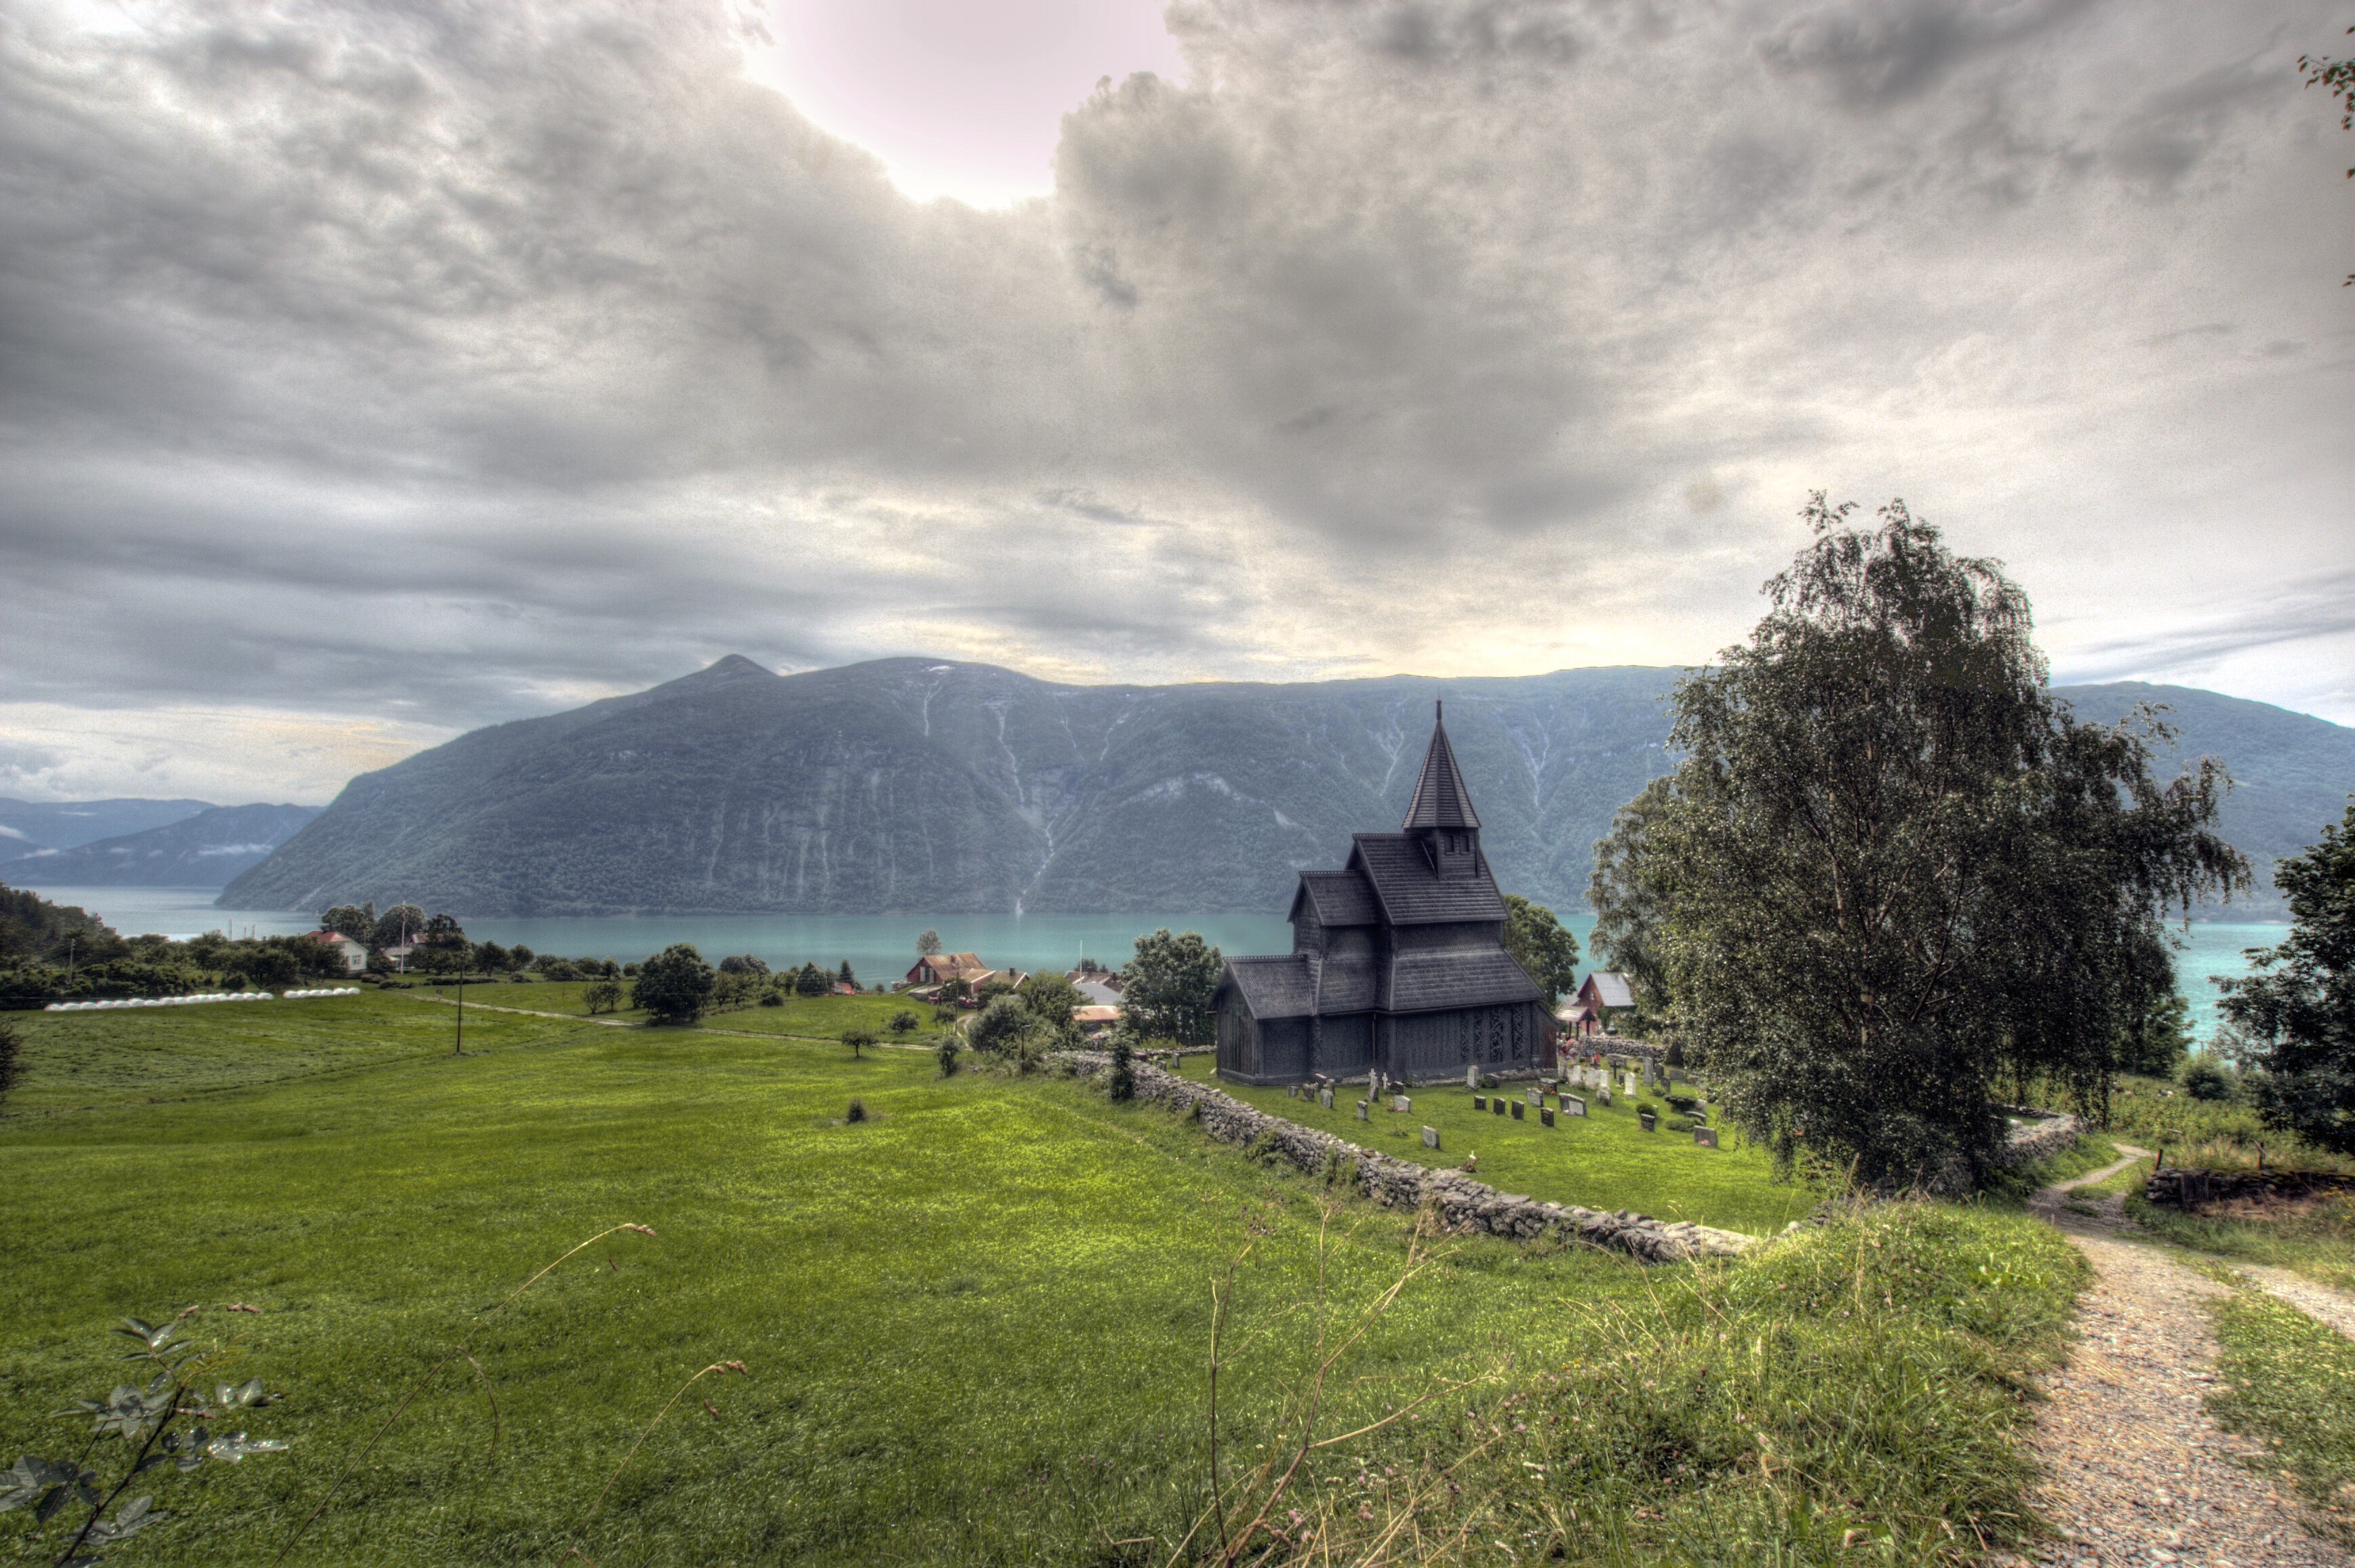
I really shouldn’t write about stave churches. First off, it’s really way too much for a blog post. Second, I’m not an expert. I’m just an awestruck fan. Also, there are doctoral theses, documentaries, articles, research projects, books, lectures, artworks and chock-full web pages that you can scroll through that will tickle your fancy for medieval woodworking. You can also find stave churches in our folklore and even fairy tales if you prefer a more mythical perspective. Then again, who needs all that when you have the Lost Art Press blog and a mediocre Norwegian chairmaker to tell you all about them? It’s just woodworking, after all!
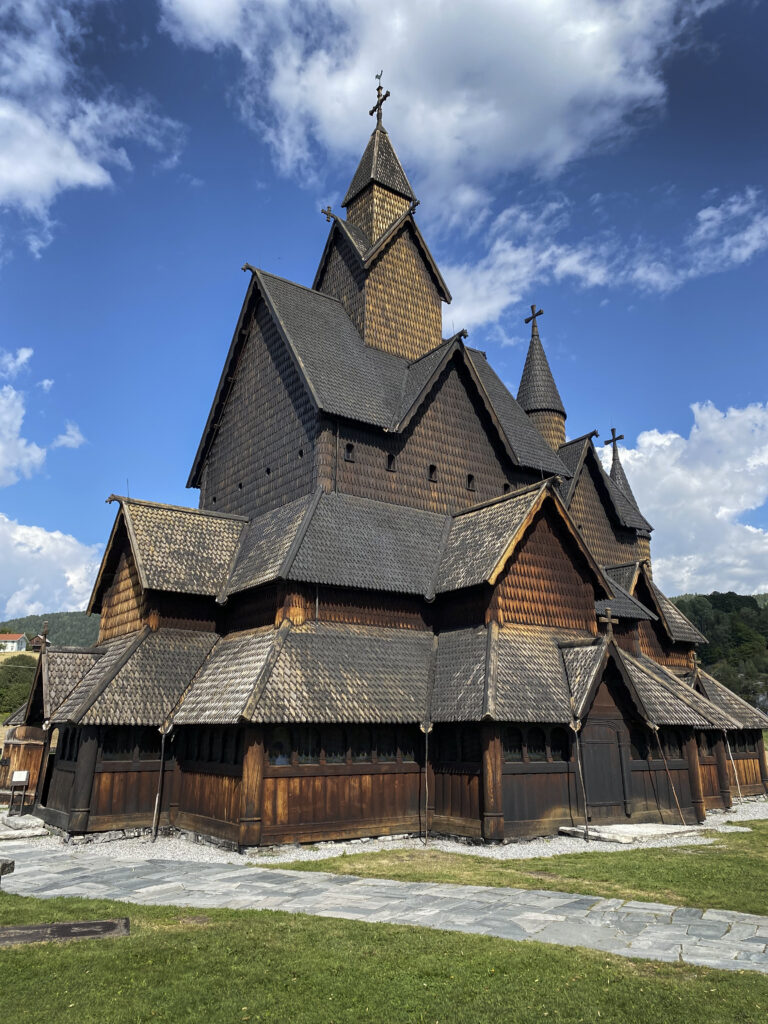
Heddal Stave Church, built ca. 1150. This is Norway’s largest stave church. Built by trolls, according to local myths.
I’m joking of course. I’m a complete moron compared to the people that built the stave churches. These buildings are all unique woodworking wonders that put on display some of the most incredible craftsmanship that existed in Europe during the Middle Ages. Along with our Viking ships, the stave churches are by far Norway’s largest and most important contribution to the World Heritage Sites. So if you ever come to Norway, forget about brown cheese and the midnight sun. Go to church instead!
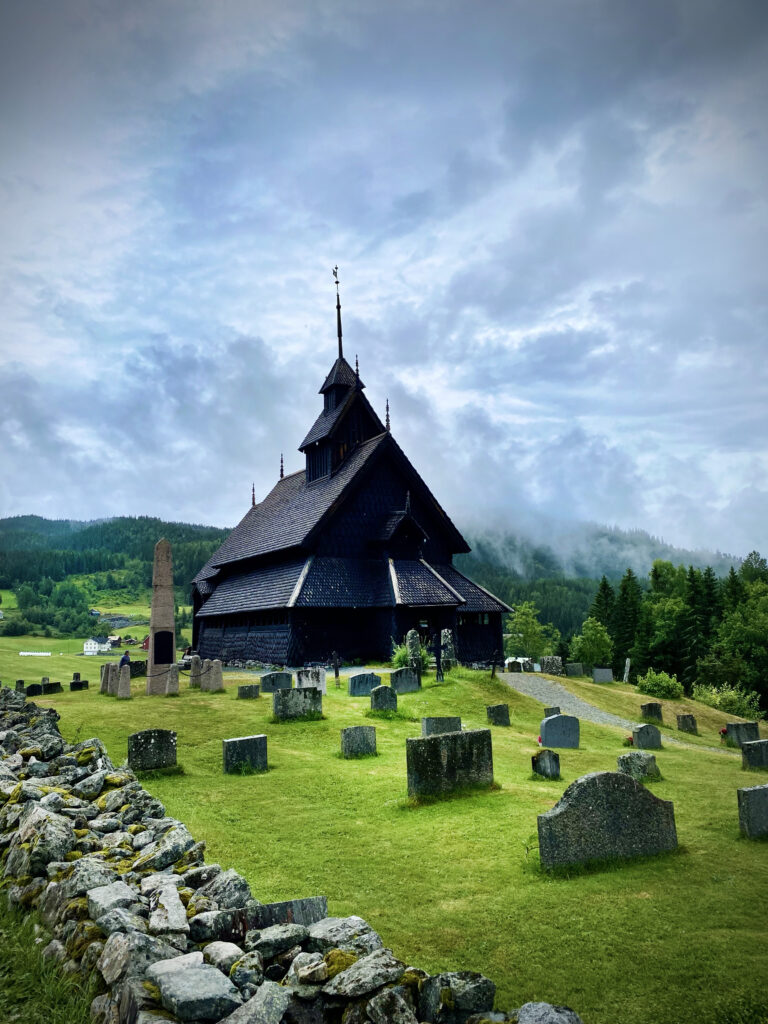
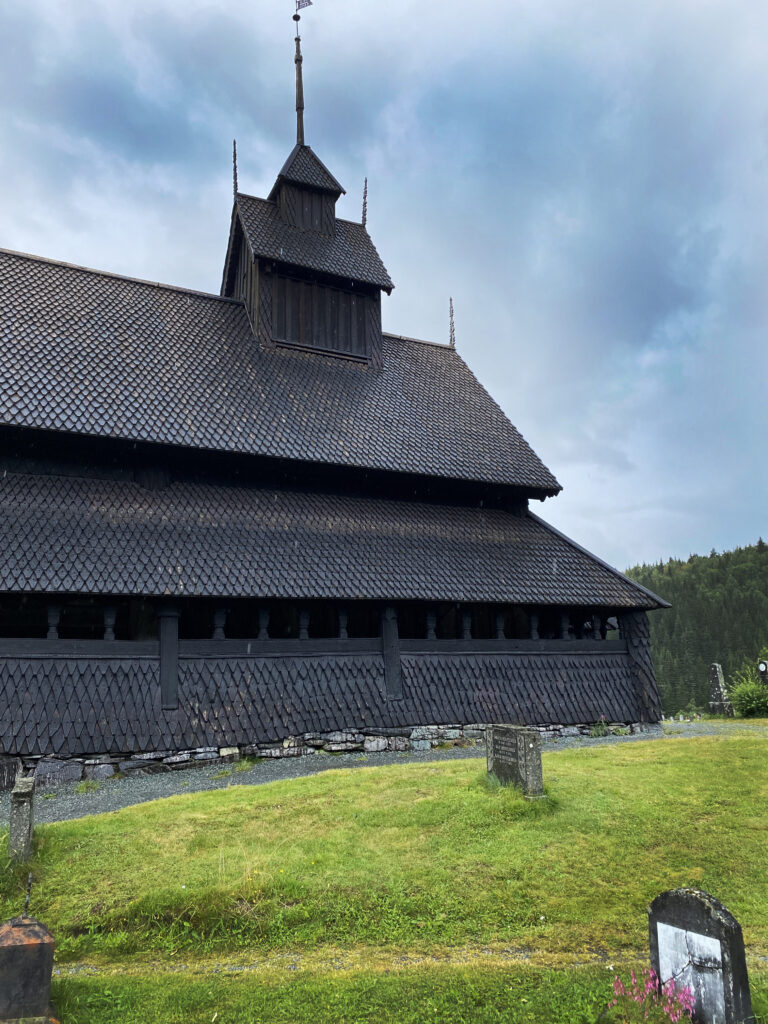
Eidsborg Stave Church. Built ca. 1250.
A Brief History of Something Very Old
Research estimates that during the Middle Ages (ca. years 500-1500), somewhere between 1,500 to 2,000 stave churches were built in Norway. They were probably also common throughout other parts of Northern Europe. However today there are only 30 left in the world. And 28 of them are in Norway. The other two are the Hedared Stave Church in Sweden and Vang Stave Church in Poland. The latter was built in the village of Vang, Norway, about 1150. In 1842 it was taken apart and transported to Poland, where it was rebuilt. And remember, this was before U-Haul.
The construction of stave churches abruptly ended in the 1400s. Most of them disappeared during the period from 1350-1650, possibly due to the Black Plague and the Protestant Reformation. The 28 churches left in Norway were all built somewhere between 1150 and 1350.
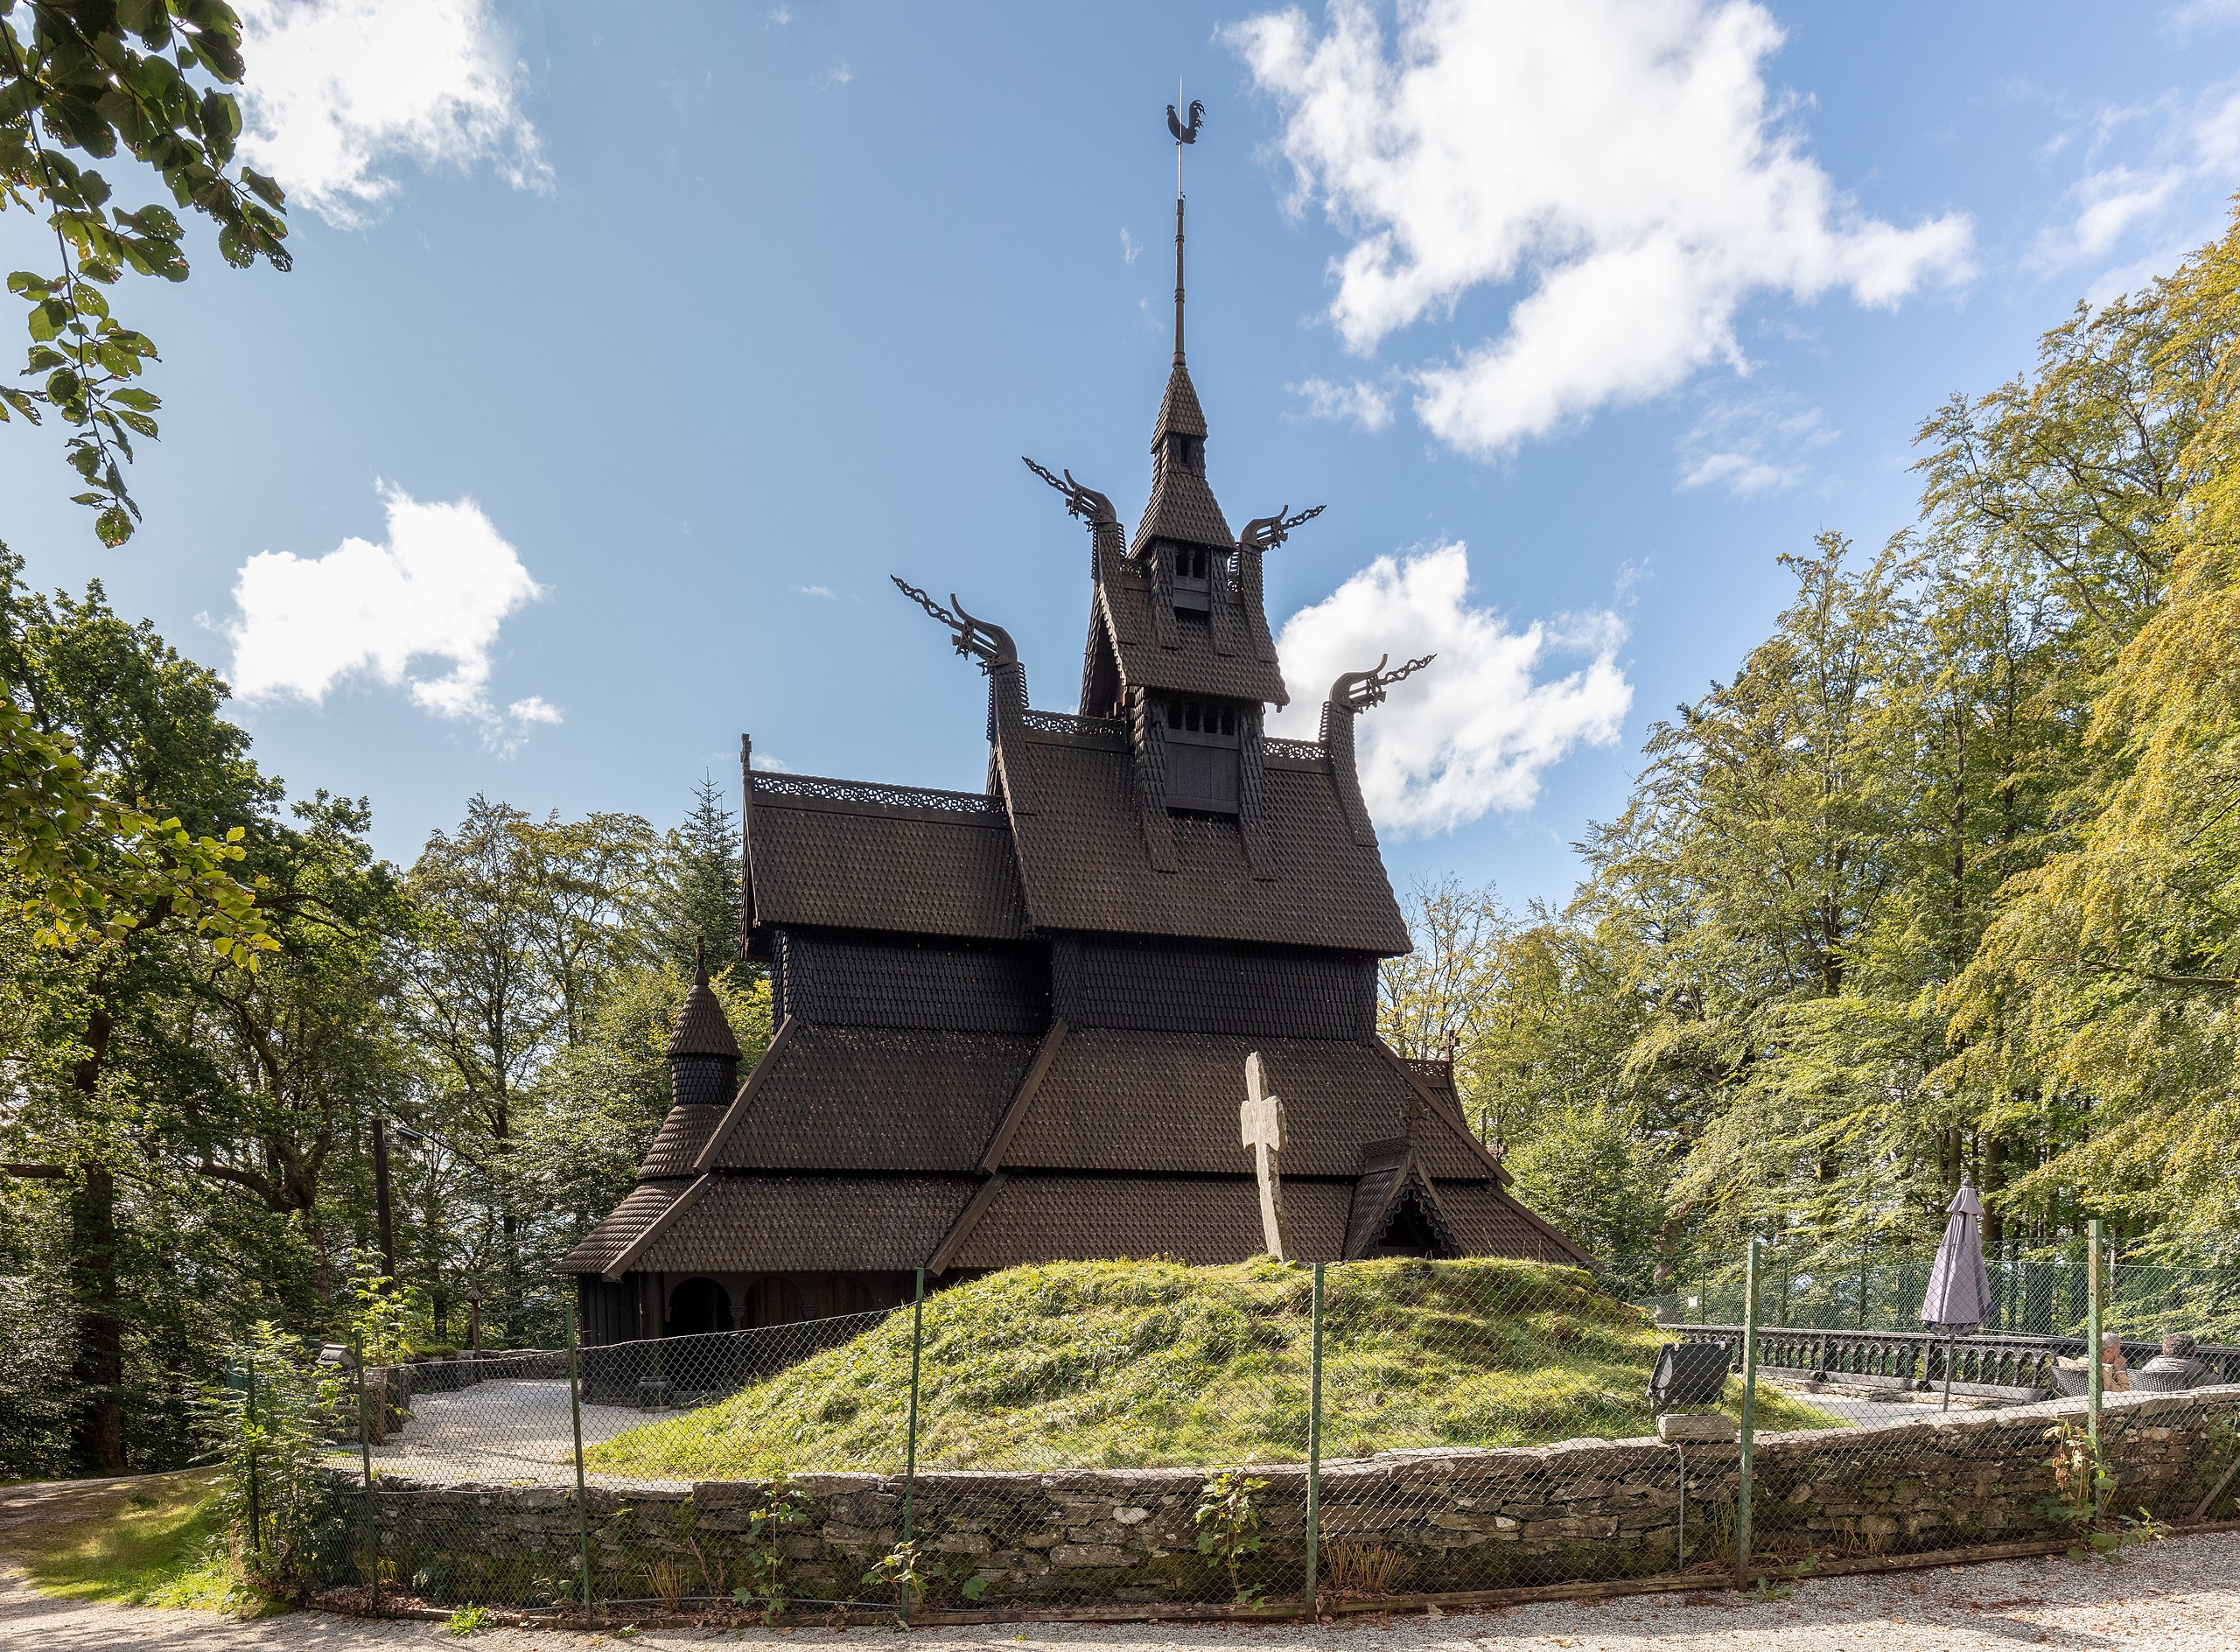
The reconstructed Fantoft Stave Church from 1997. Originally built in 1150, but was set on fire by satanic worshippers in 1992. It burned to the ground in just 30 minutes. The church was rebuilt as an exact replica, using 400 year old pine. Photo by Diego Delso, license CC-BY-SA
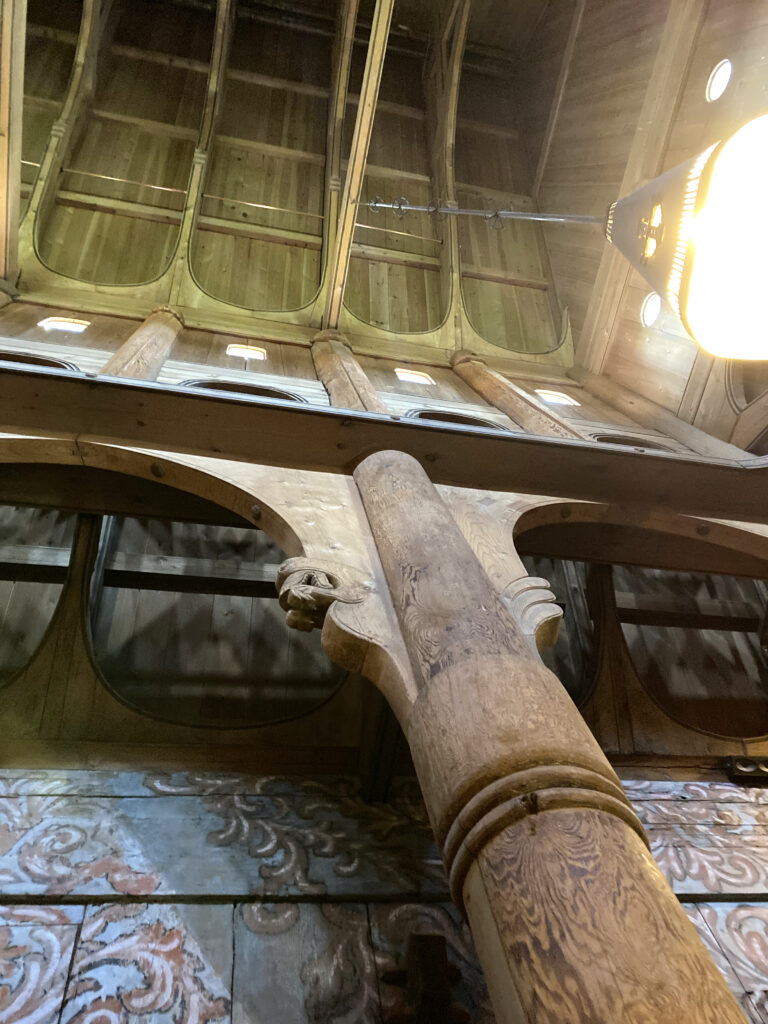
The name “stave church” derives from the wooden posts that were the load-bearing elements in these timber frame constructions. These posts were placed vertically on top of sleepers (horizontal beams) that were clamped between corners and larger posts that were placed into the ground. On top of the posts, new beams were placed. This created frames that were completed with raised boards. In the Old Norse language, a post in a timber frame construction was called a “stafr.” The name since evolved into the word “stav,” which is used today and means the same.
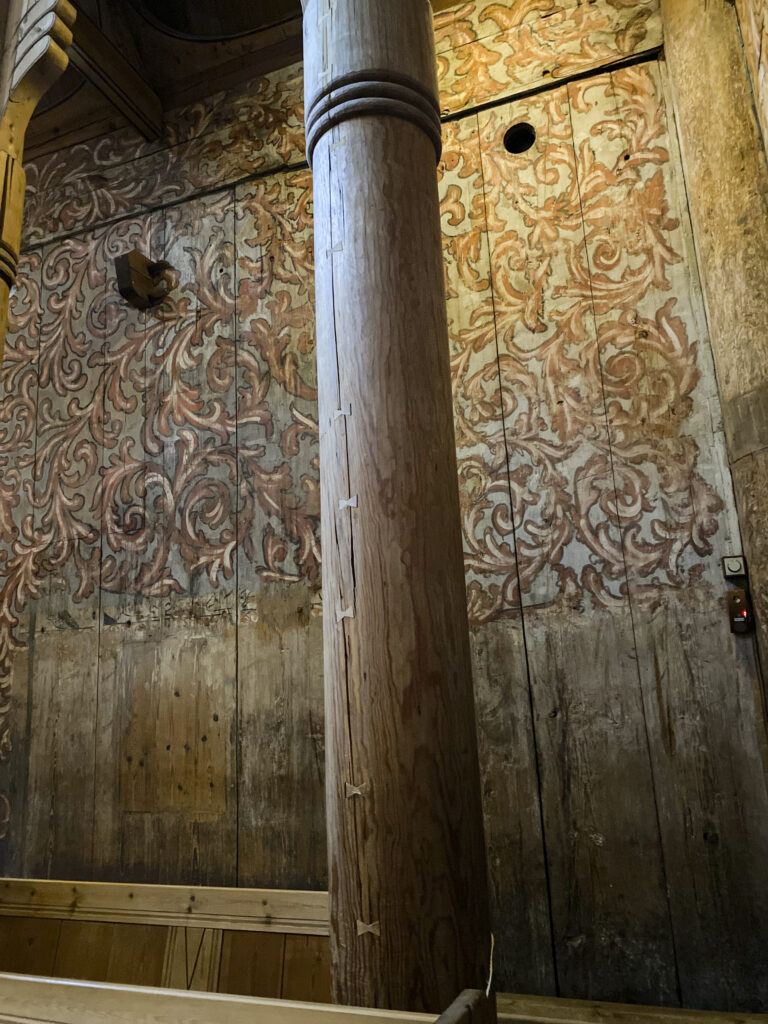
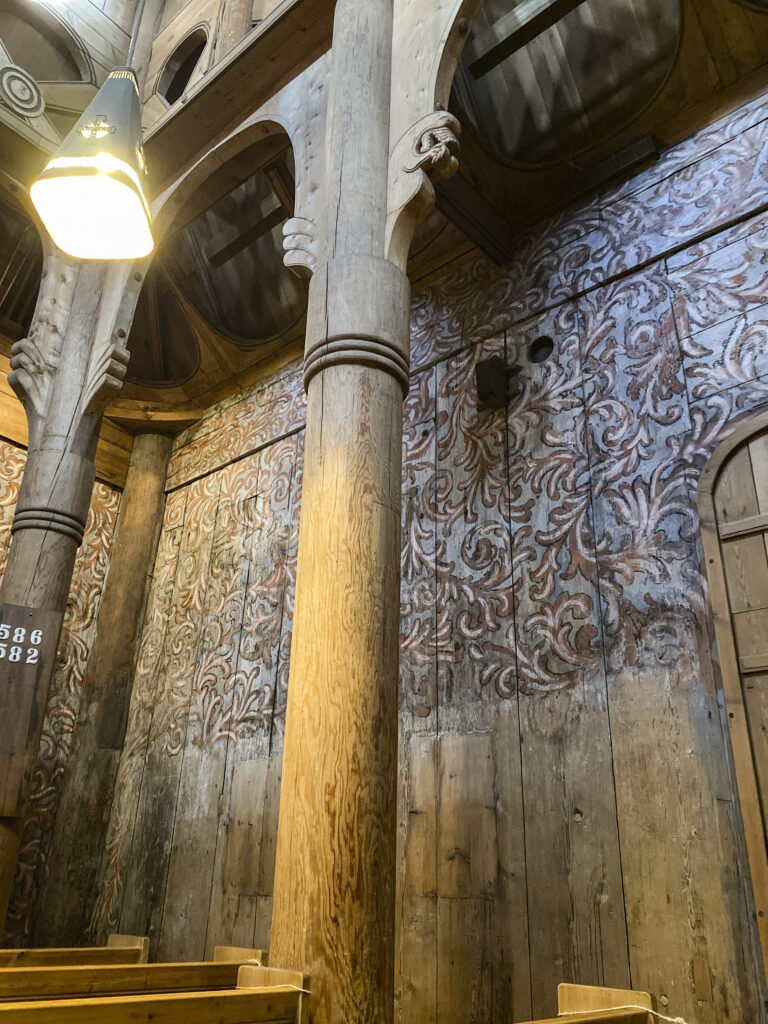
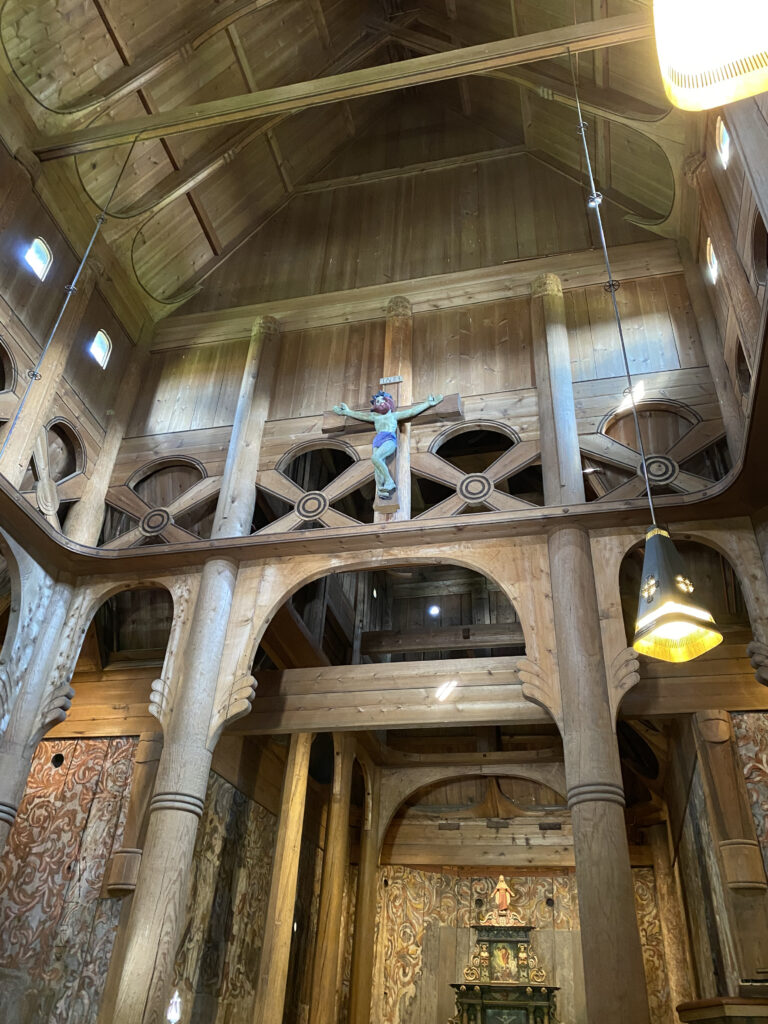
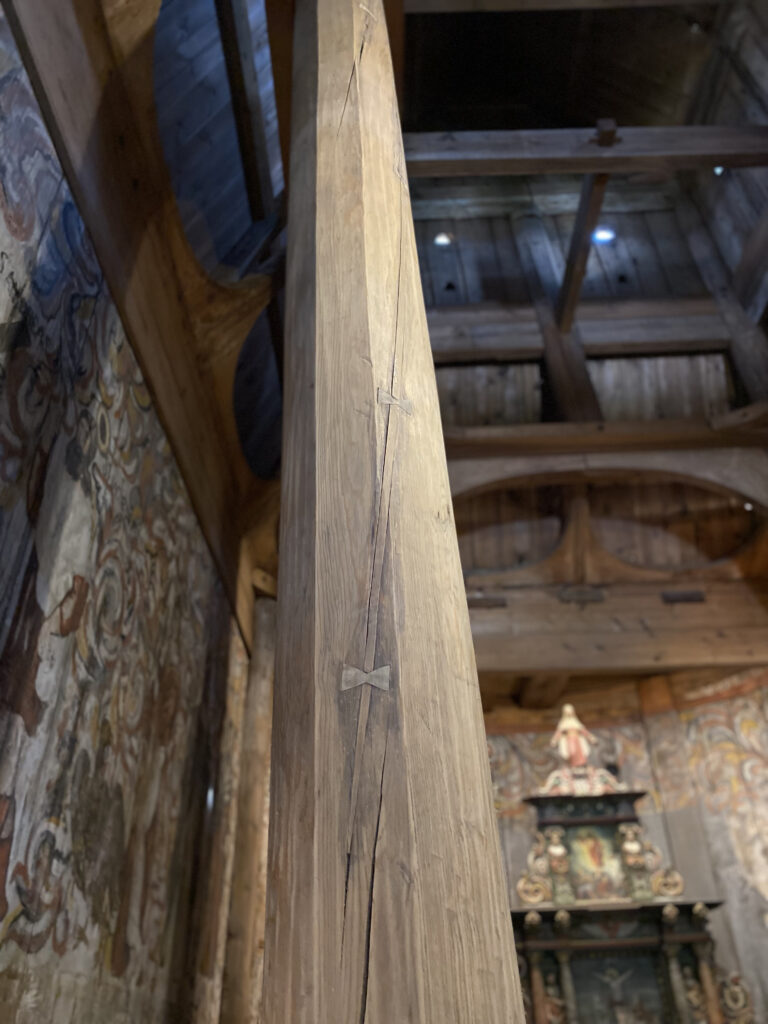
All photos: Main staves (out of 20) in the Heddal Stave Church.
Octagonal stave repaired with bowties.
Picking Perfect Pine
Pine (Pinus sylvestris) has always been abundant in Norway. In dense forest they grow straight and tall, and usually with few branches along the stem. This made them perfect for Viking ships and stave churches. On top of these attributes, the Vikings were also extremely picky about the trees they used. They had a deep knowledge of how to exploit and even manipulate the trees into becoming perfect for their intended use.
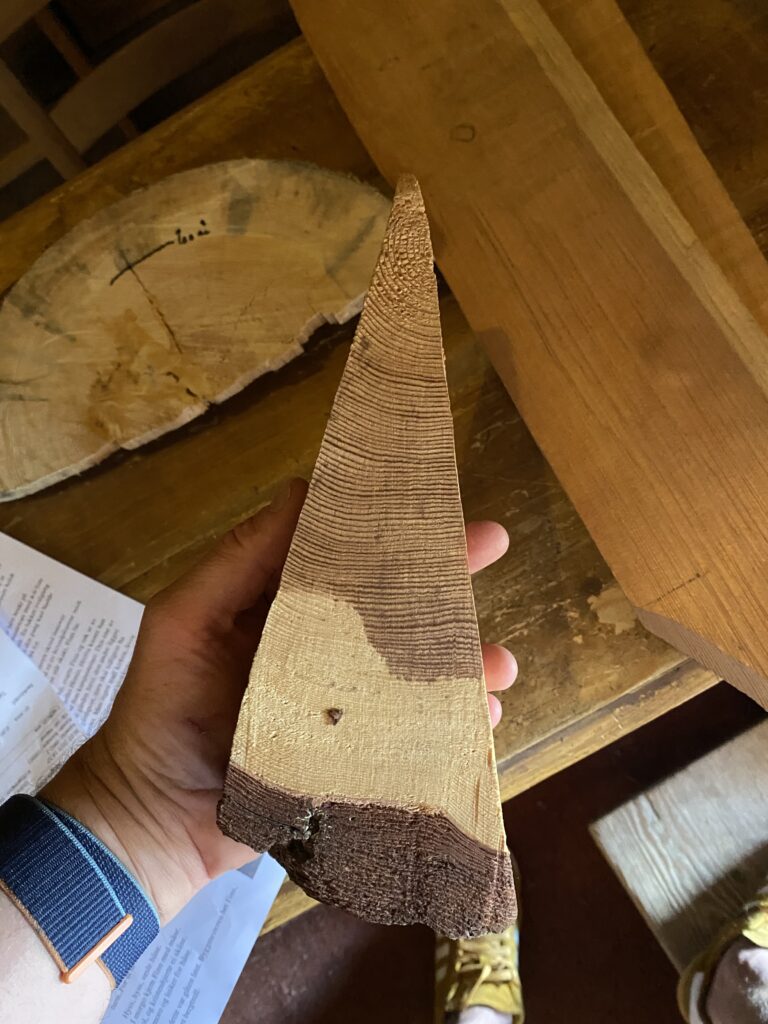
They did this by first picking slow-growing mountain pines, often in the range of 200-300 years old. These trees had a much larger amount of heartwood, with very little space between the growth rings. They were then debranched and had their top cut off, before they were left standing for another 15-20 years. The resin then seeped into the heartwood and saturated it completely. The result was a highly resinous and dense heartwood. This is called ore-pine and is virtually rot-resistant. All the stave churches were built using this technique. The ore-pine was preferred for the main staves and beams, the wall boards and the roof tiles. Ore-pine is still widely used today in Norway in house construction and other areas.
Here I’m holding a cross section of Norwegian ore-pine, showing the distinct transition between resinous heartwood and the sapwood.
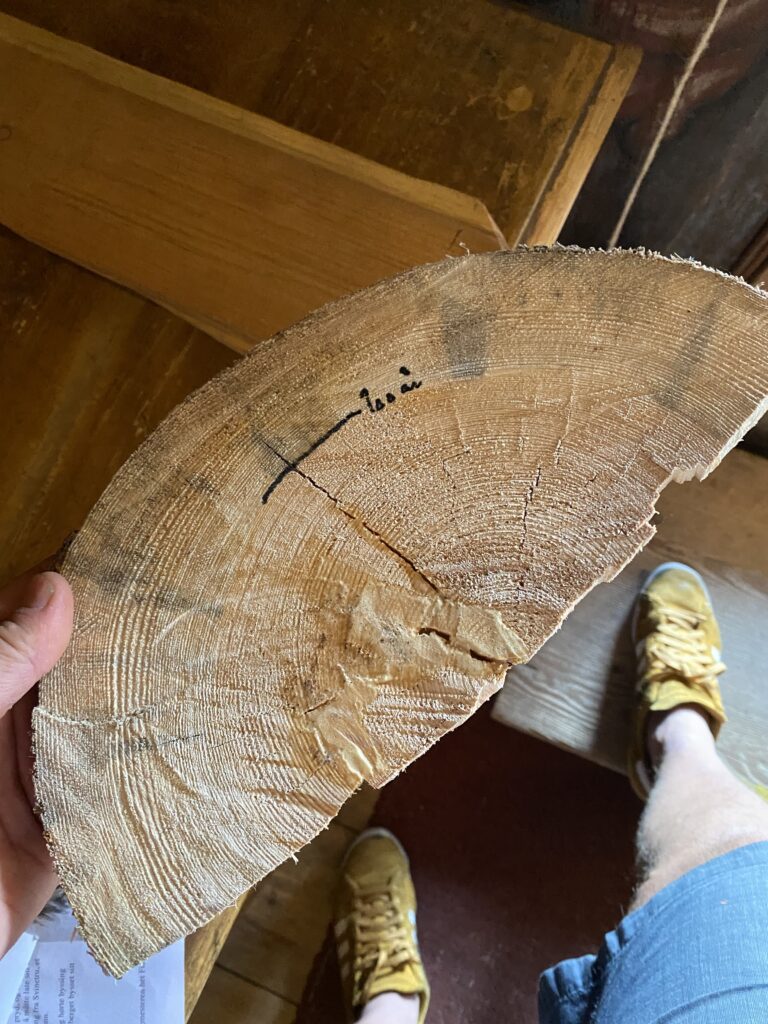
Cross section of nearly 300 years old mountain pine. Notice the very compact growth. The line marks 200 years. Please excuse my pale legs for also looking centuries old.
Another ancient Scandinavian tradition is the use of pine tar for protecting wood against harsh weather conditions. The tar was made by stacking highly resinous pine heartwood under an airtight cover of clay and other materials, and then lighting the wood on fire. After burning for up to two days, the wood was decomposed into charcoal and pine tar. This was then smeared onto the stave churches to further prevent them against rot.
By Hand & Axe
No one really knows who built the stave churches and where they learned their craft. The distinct style is also up for debate. Some think they came to life during a period of cultural vacuum here in the north. Others believe that they are a result of imported traditions and culture from Europe. Some have argued that the stave churches are inspired by the Roman basilicas. Others again thought they sprung out of the old heathen hofs, which was the Old Norse term for pagan temples. While others insisted that they were built by trolls and other mythical creatures. I’m pretty sure someone will soon claim that Hillary Clinton and a bunch of aliens were the ones who really built them.
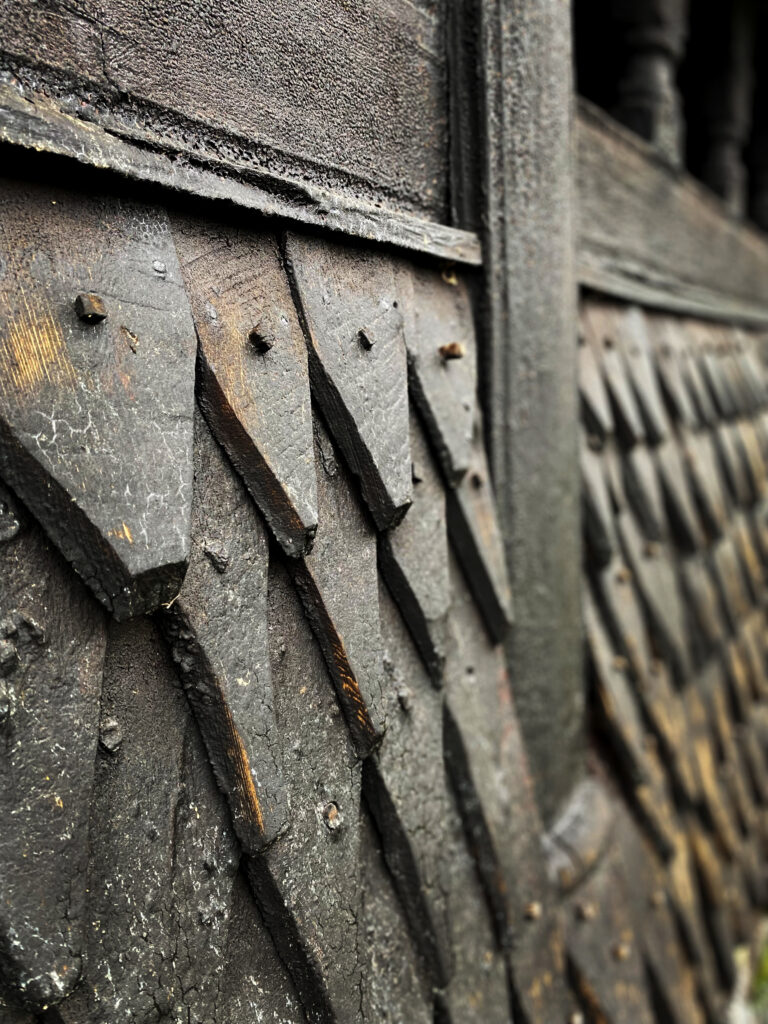
What we do know is that the churches were without nails and mostly without wooden pegs as well. Even the roof shingles were often laid without the use of pegs or nails. While some early stave churches had board roofs that were pegged, most churches built after year 1200 had tar-covered roof shingles. Using tar-covered shingles on outer walls was also a common practice.
A typical roof shingle.
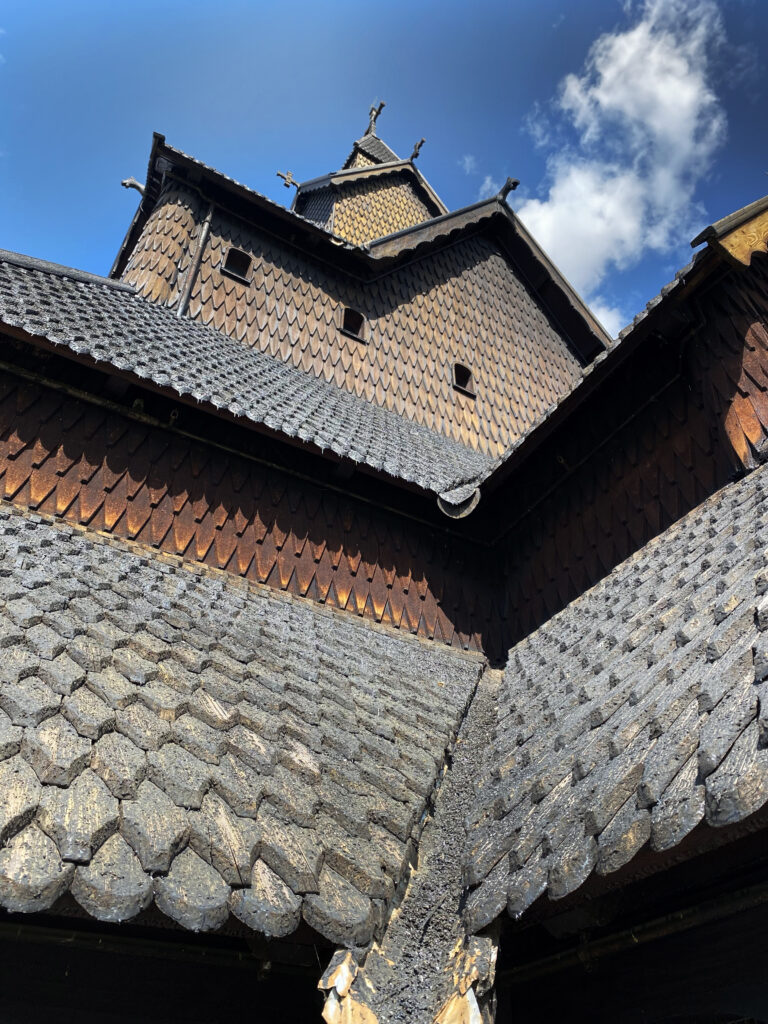
Eidsborg Stave Church. Roof and walls with tar covered shingles.
Detail from Eidsborg Stave Church. Tiled outer wall.
Pine tar covered roof shingles on Heddal Stave Church.
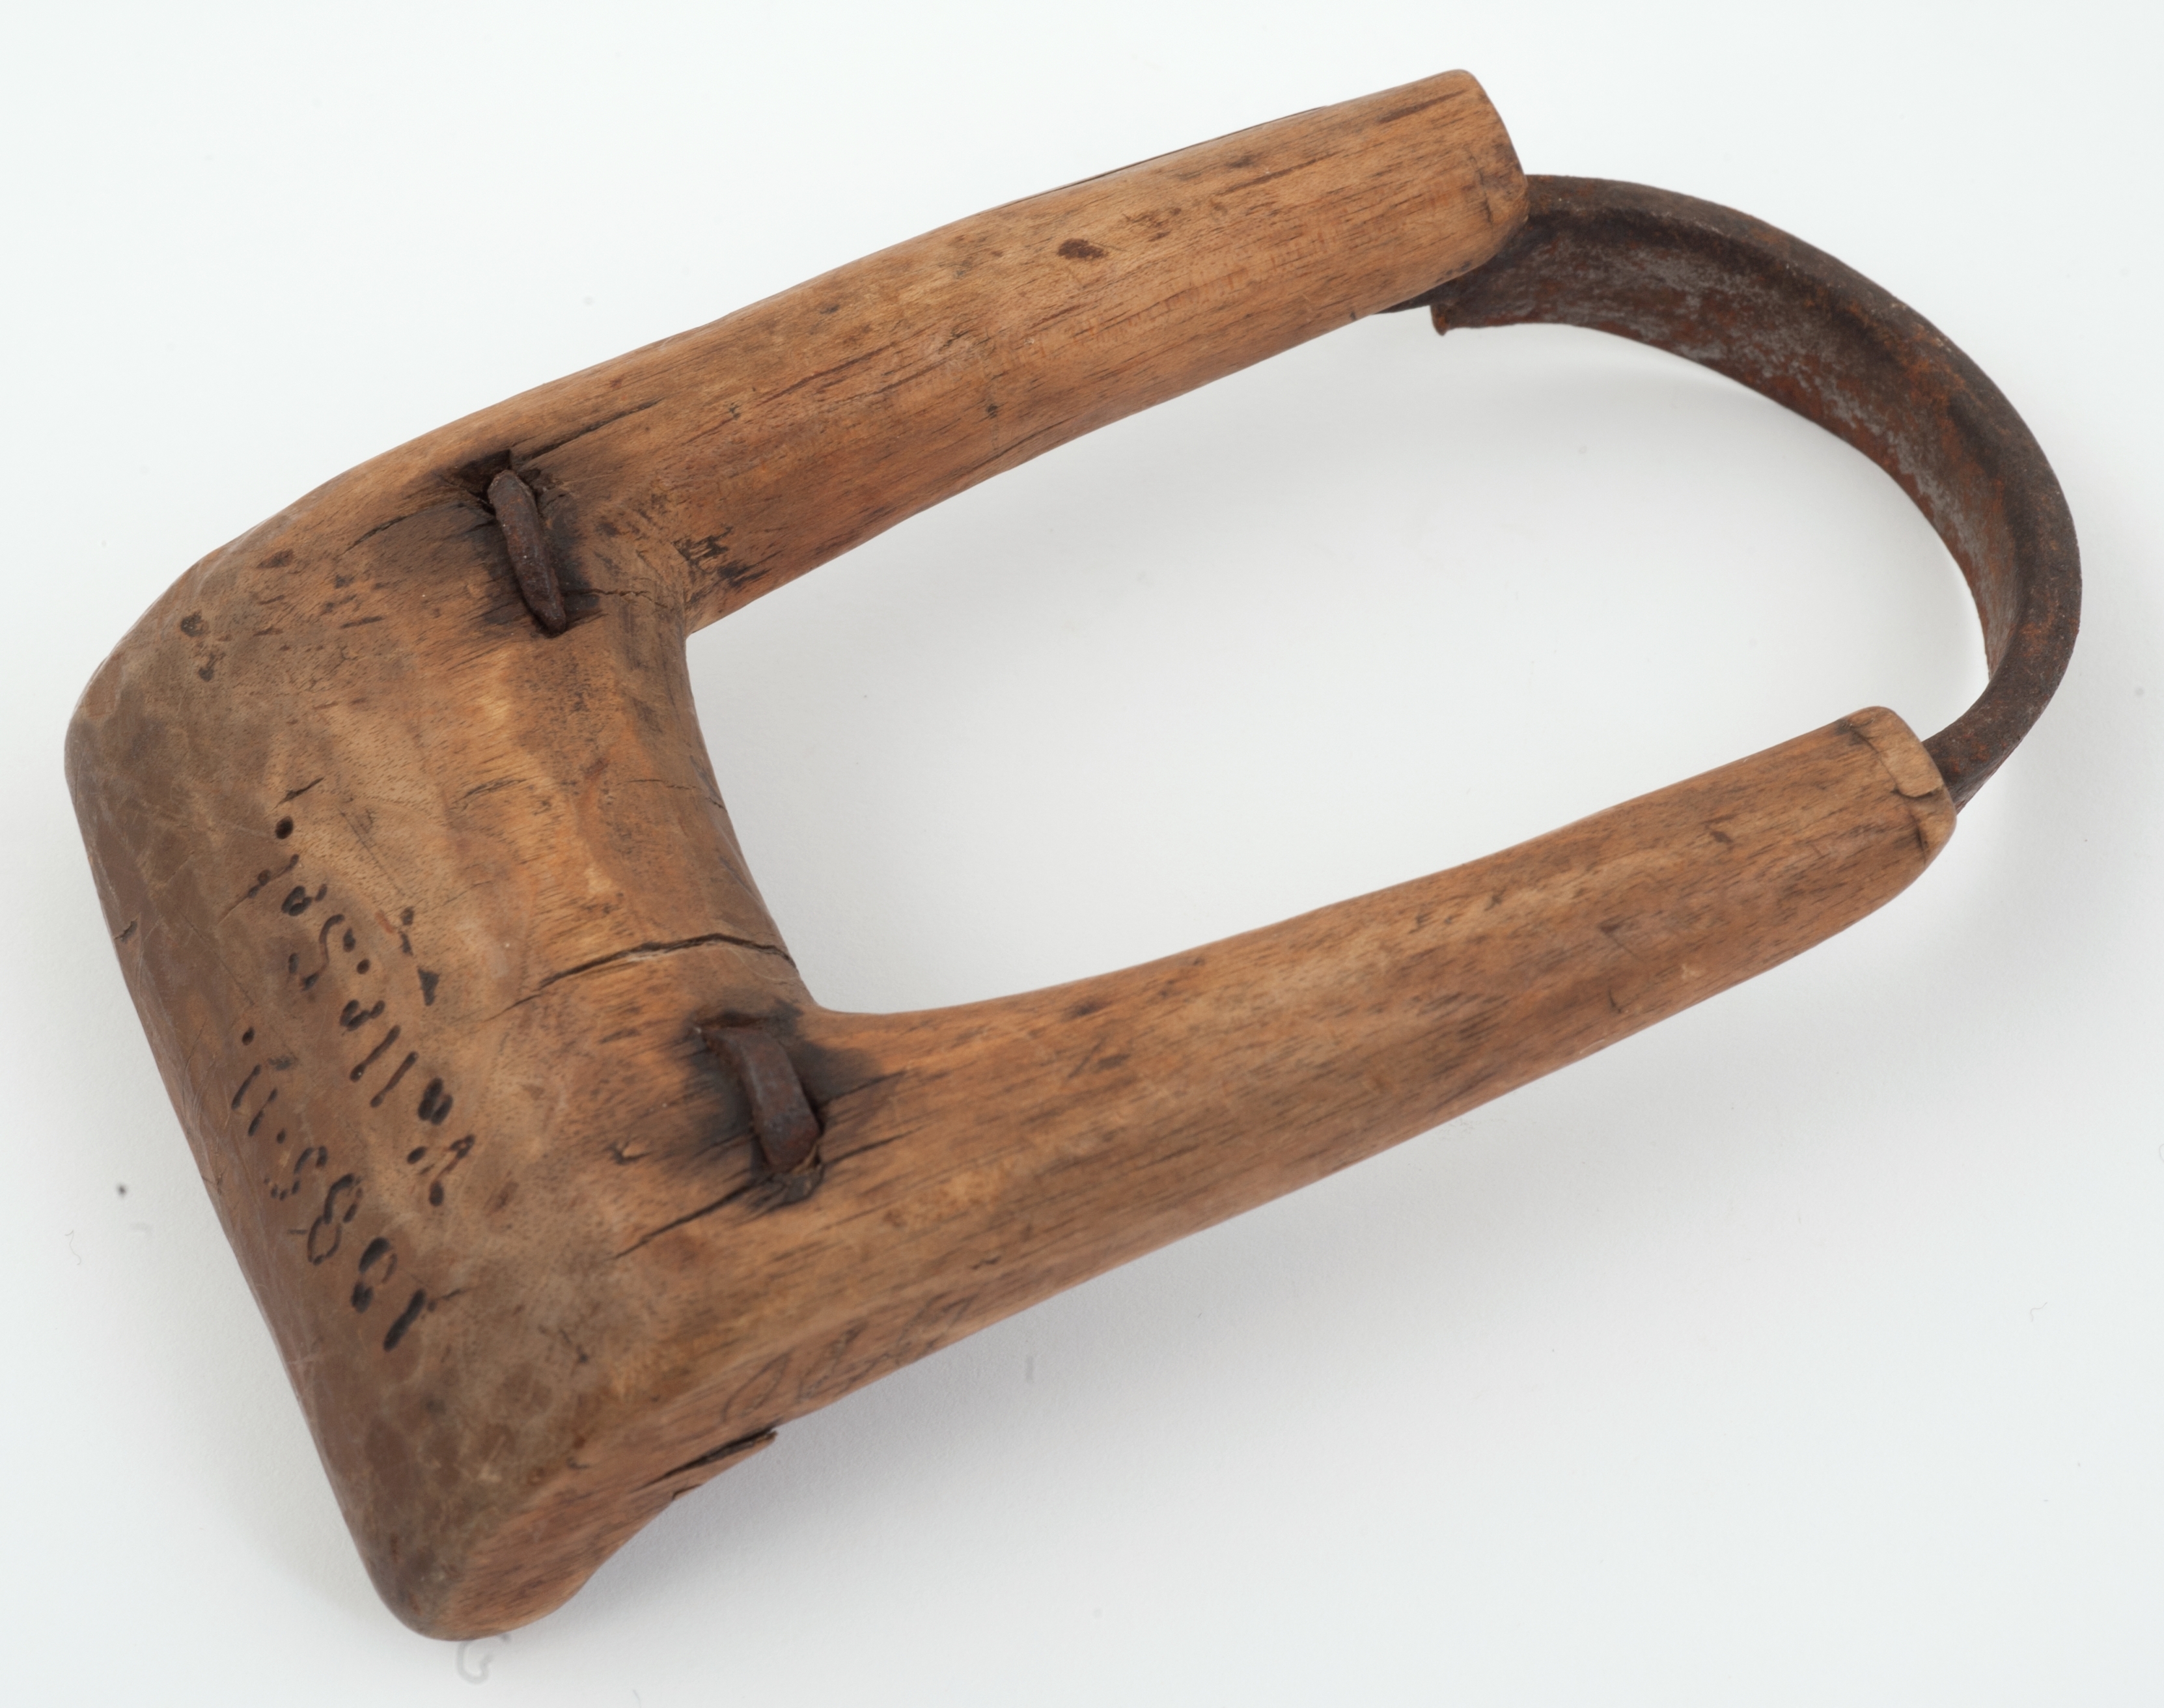
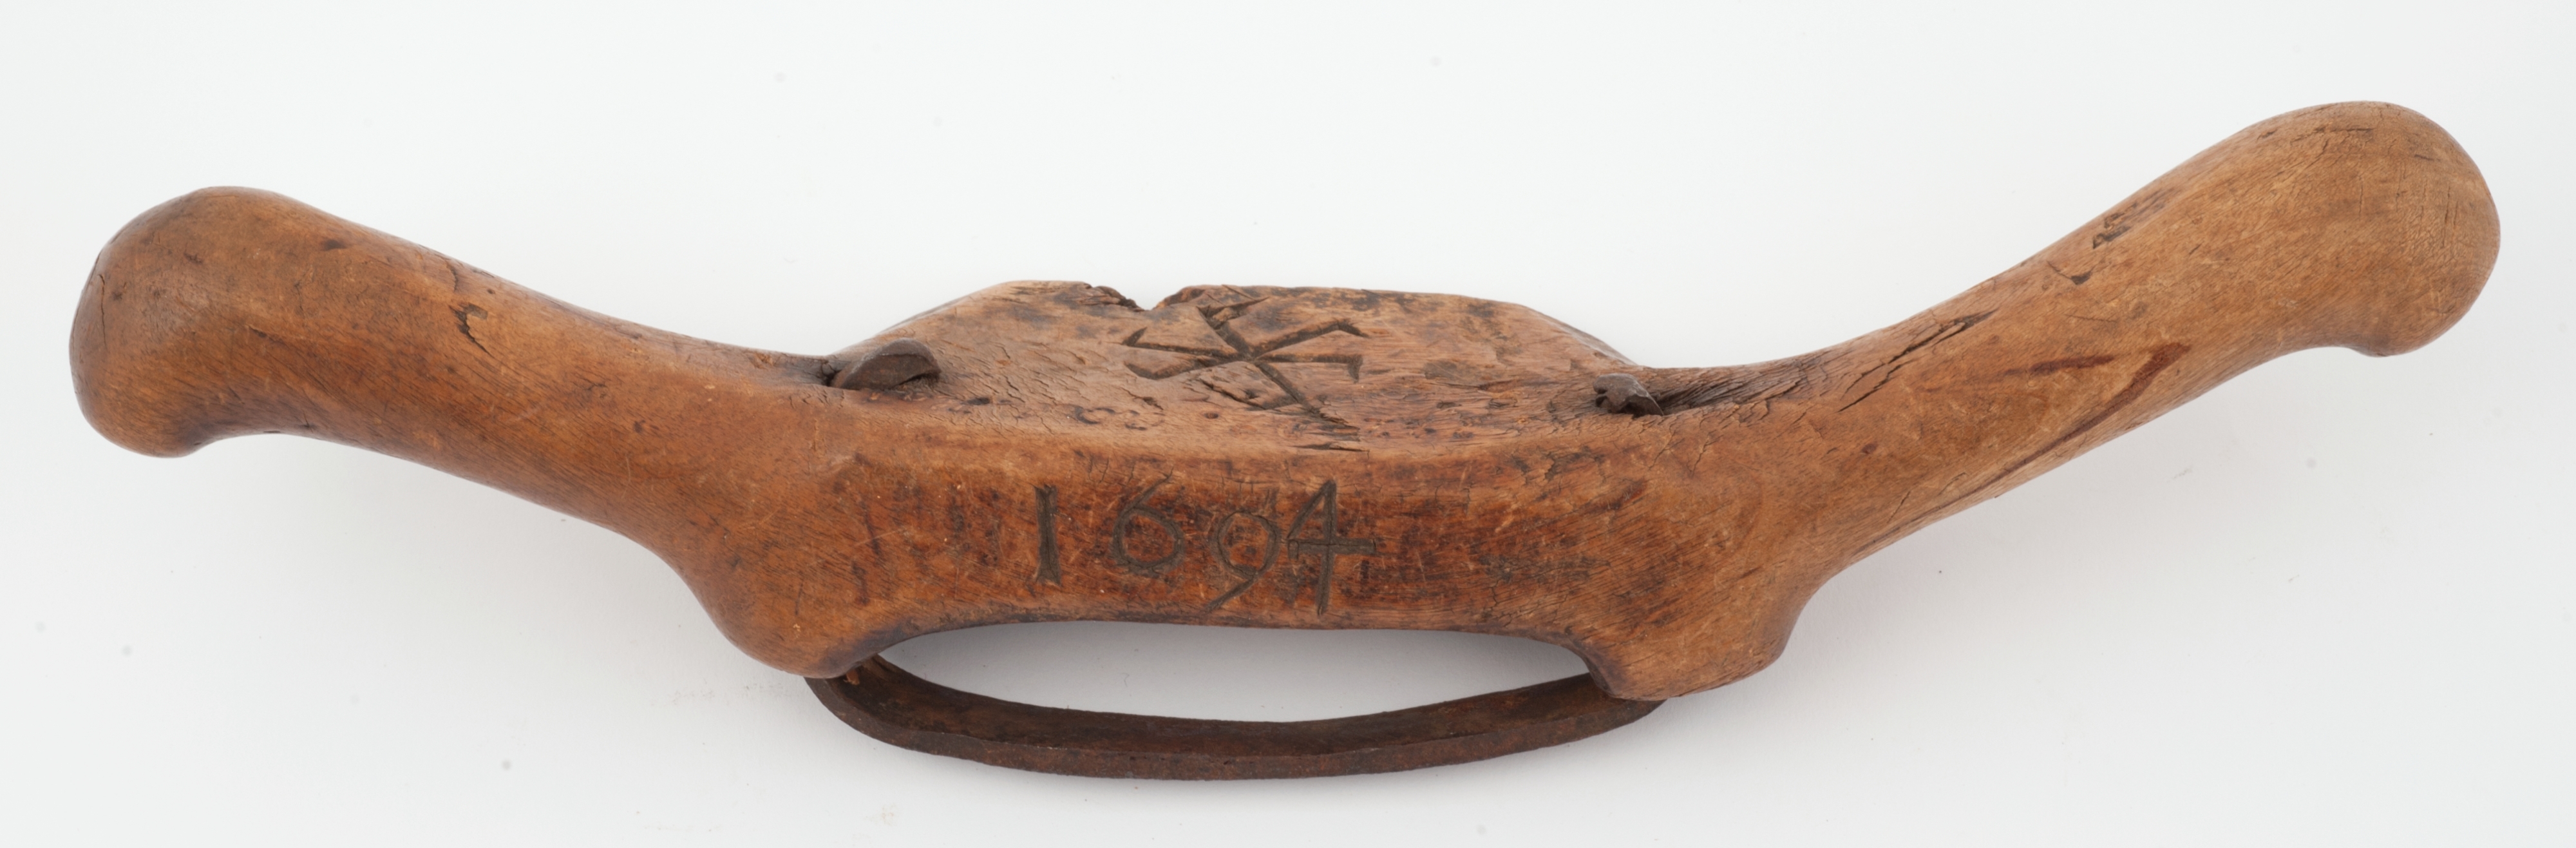
The skilled people who built our stave churches used a wide range of tools. The most important were different types of axes, augers, plumb bobs and a set of tools that I really don’t know the English words for – the pjål, the skavl and the skjøve. While that may sound like the Norwegian title of a famous movie starring Clint Eastwood, I assure you it’s not. The pjål, also called veggskave (wall scraper) was a an edge tool fastened onto a long wooden shaft and was used two-handed in a scraping action along the wall boards to joint them and smooth axe marks. There were also special types of pjåls that were used for more ornamental shaping. The pjål probably came in many sizes and shapes.
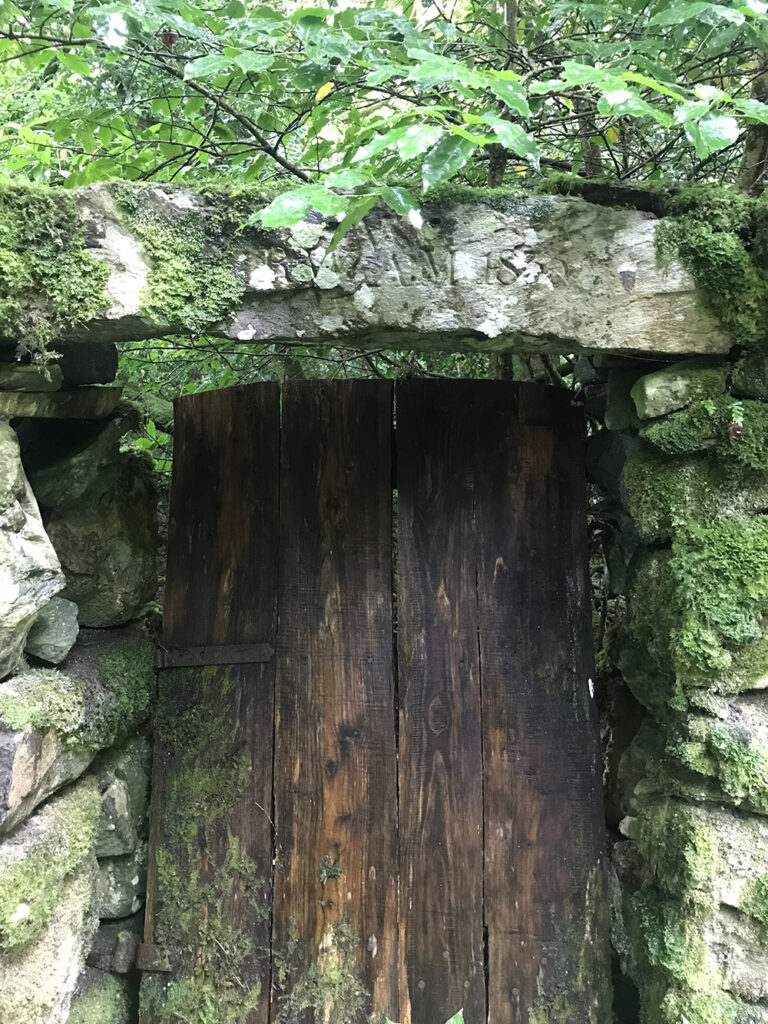
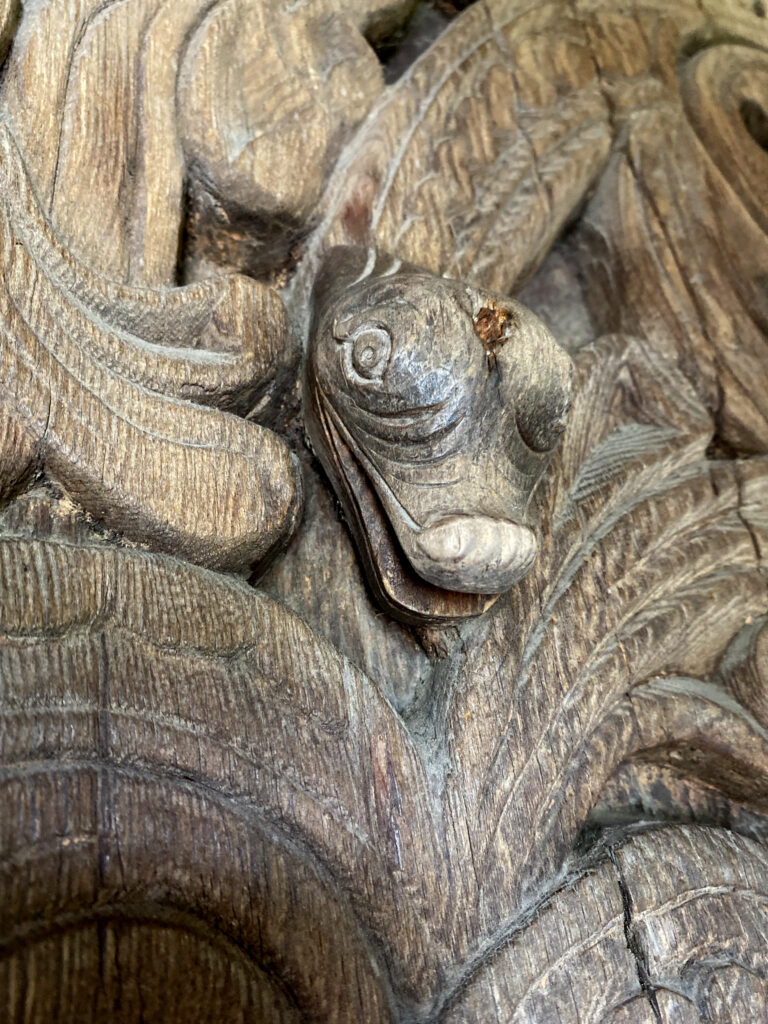
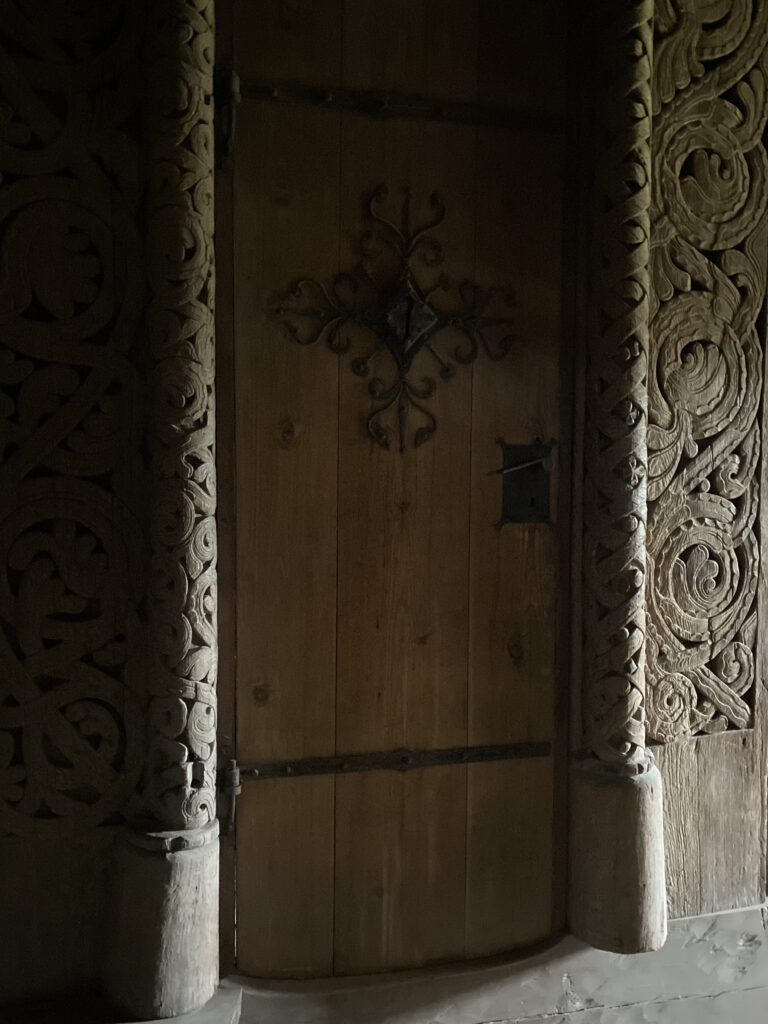
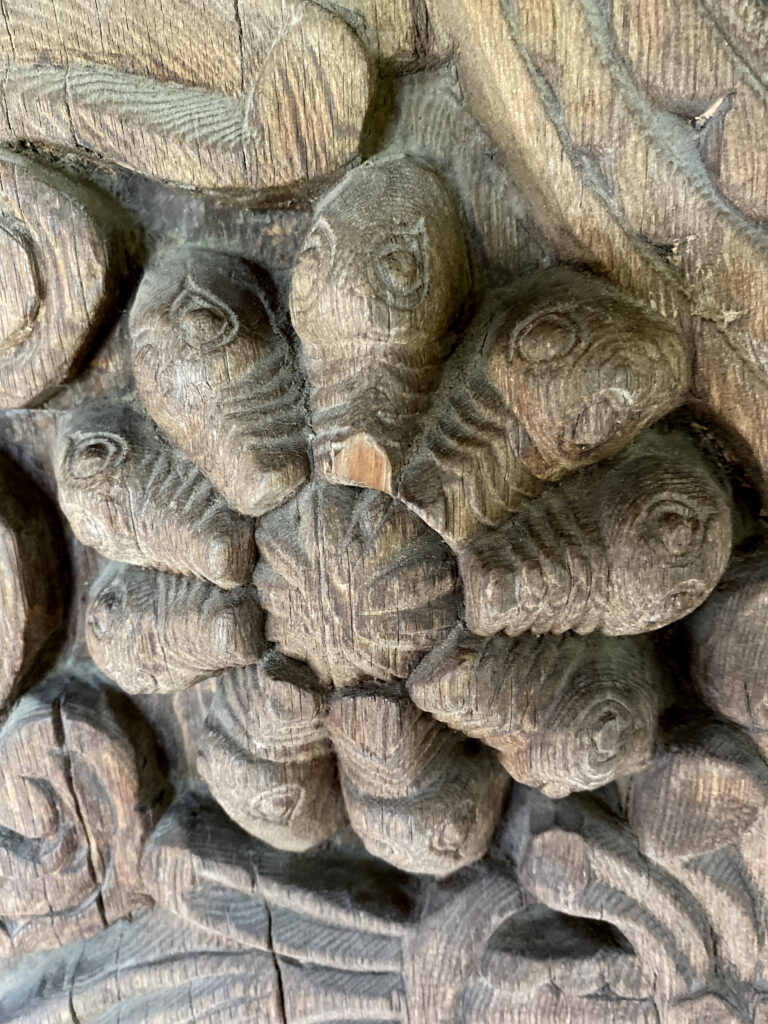
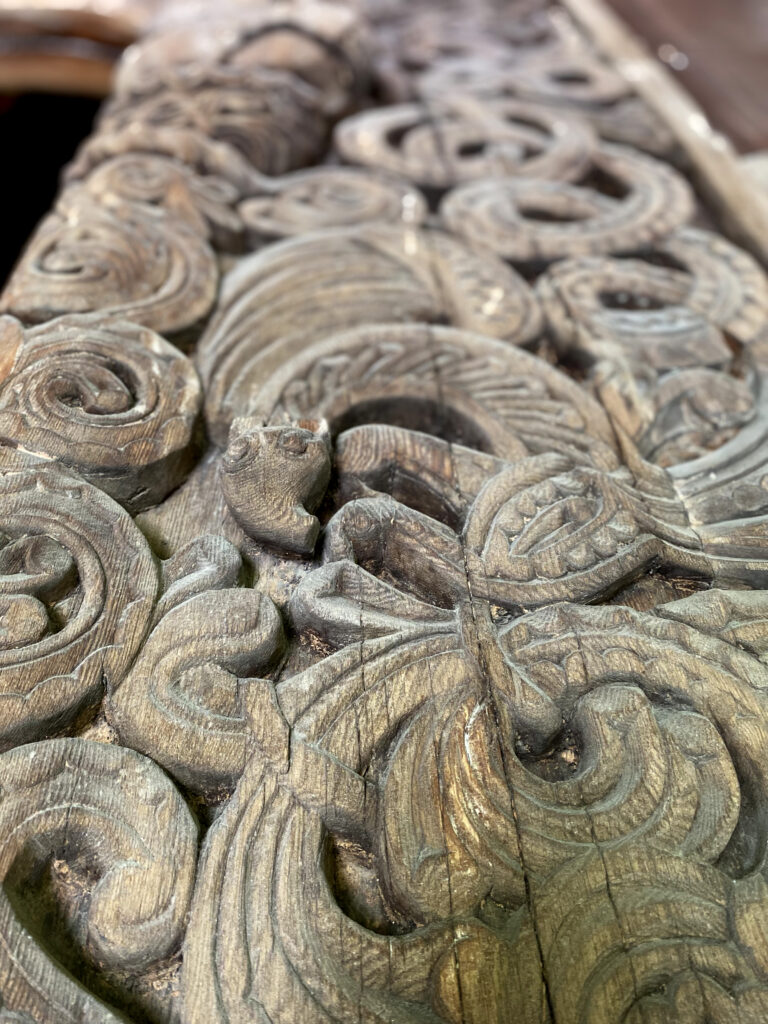
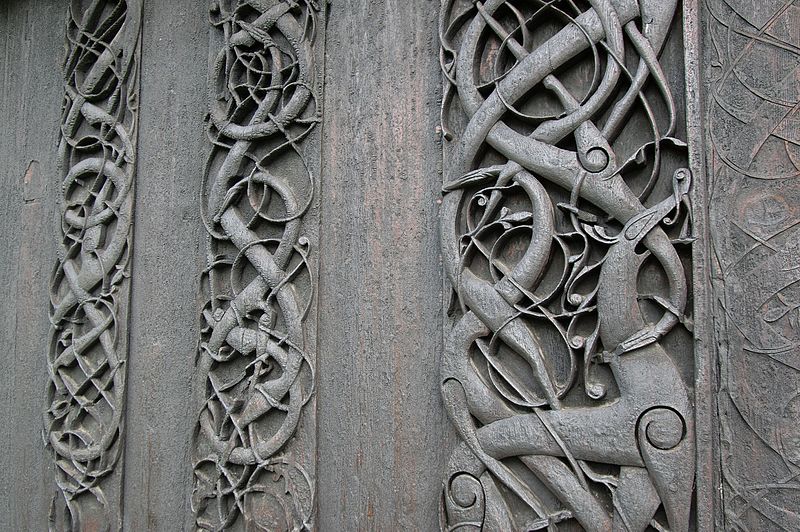
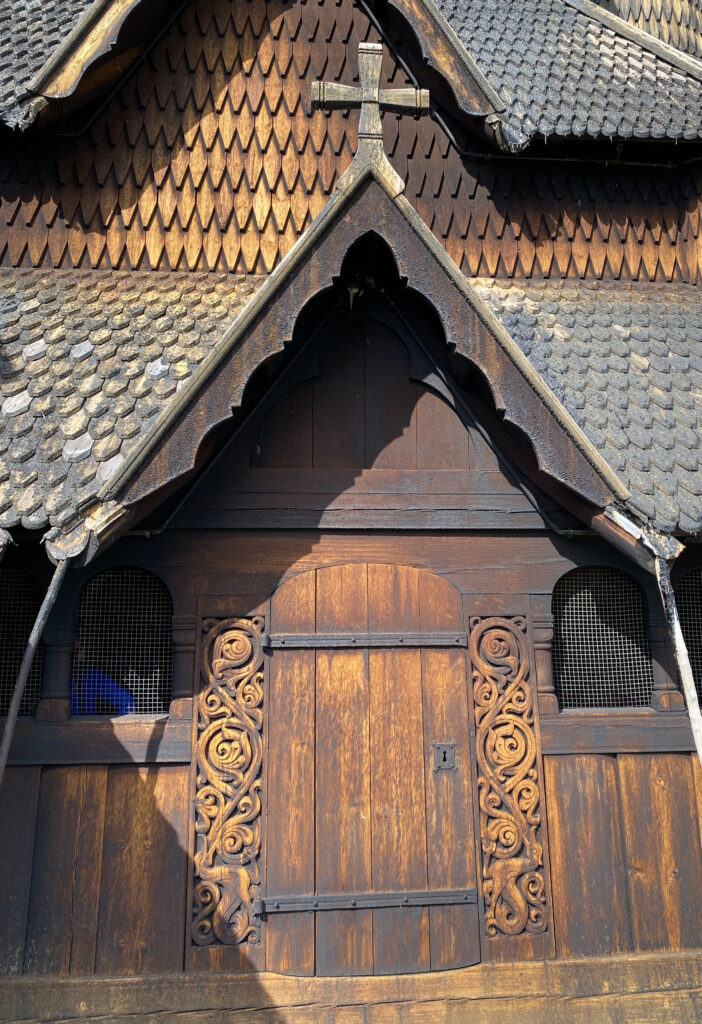
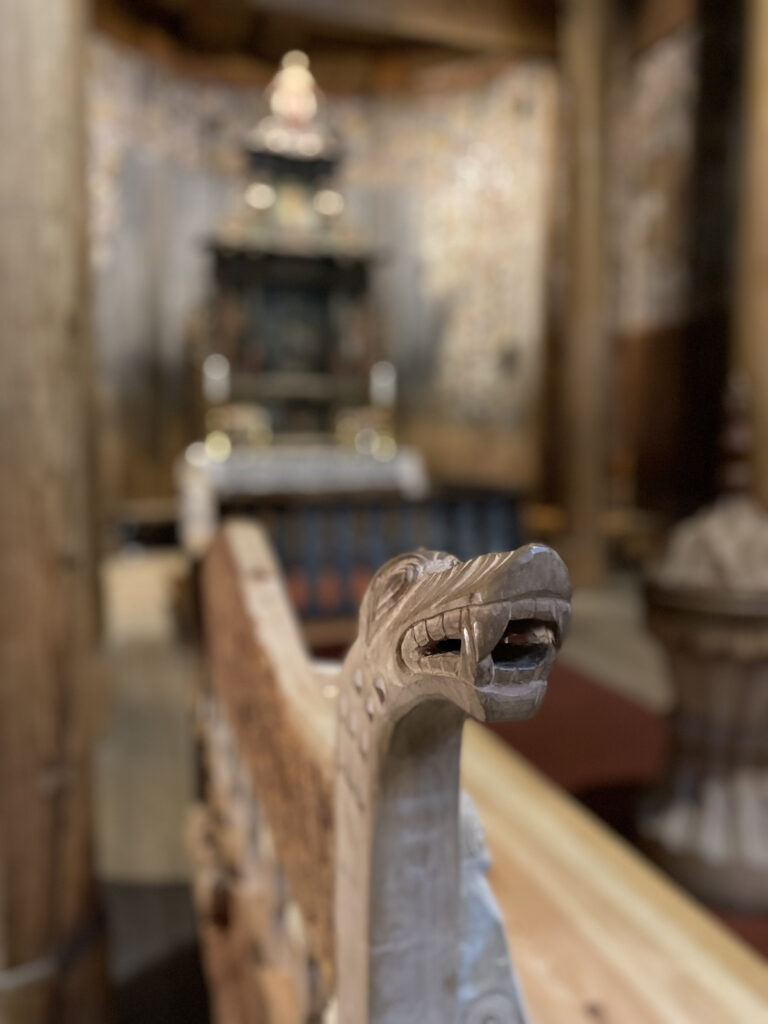
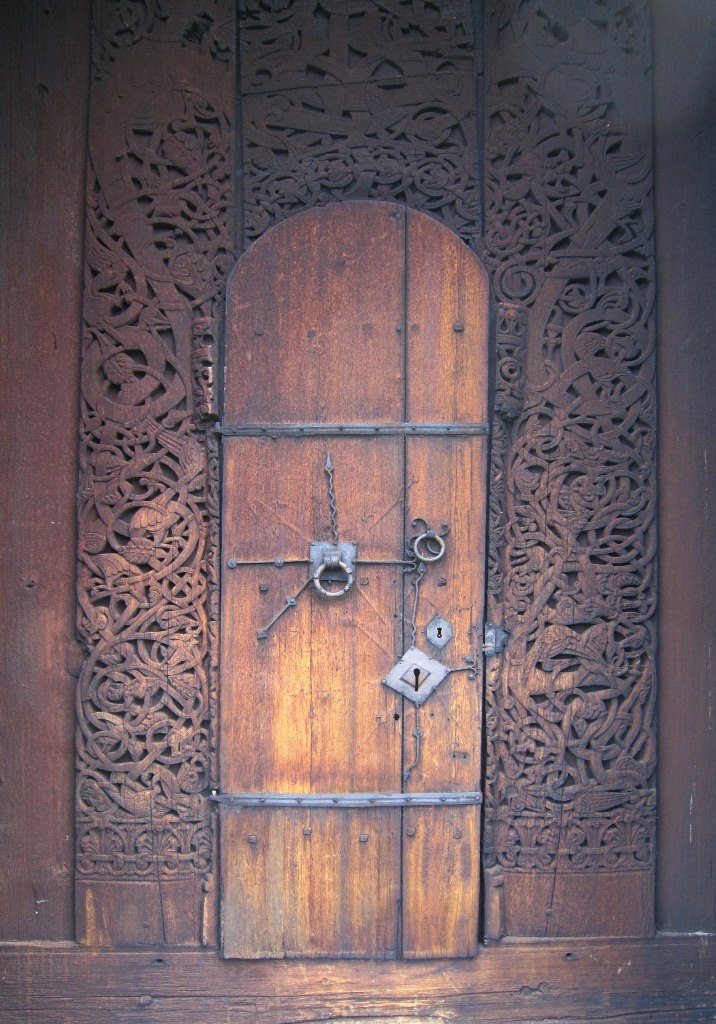
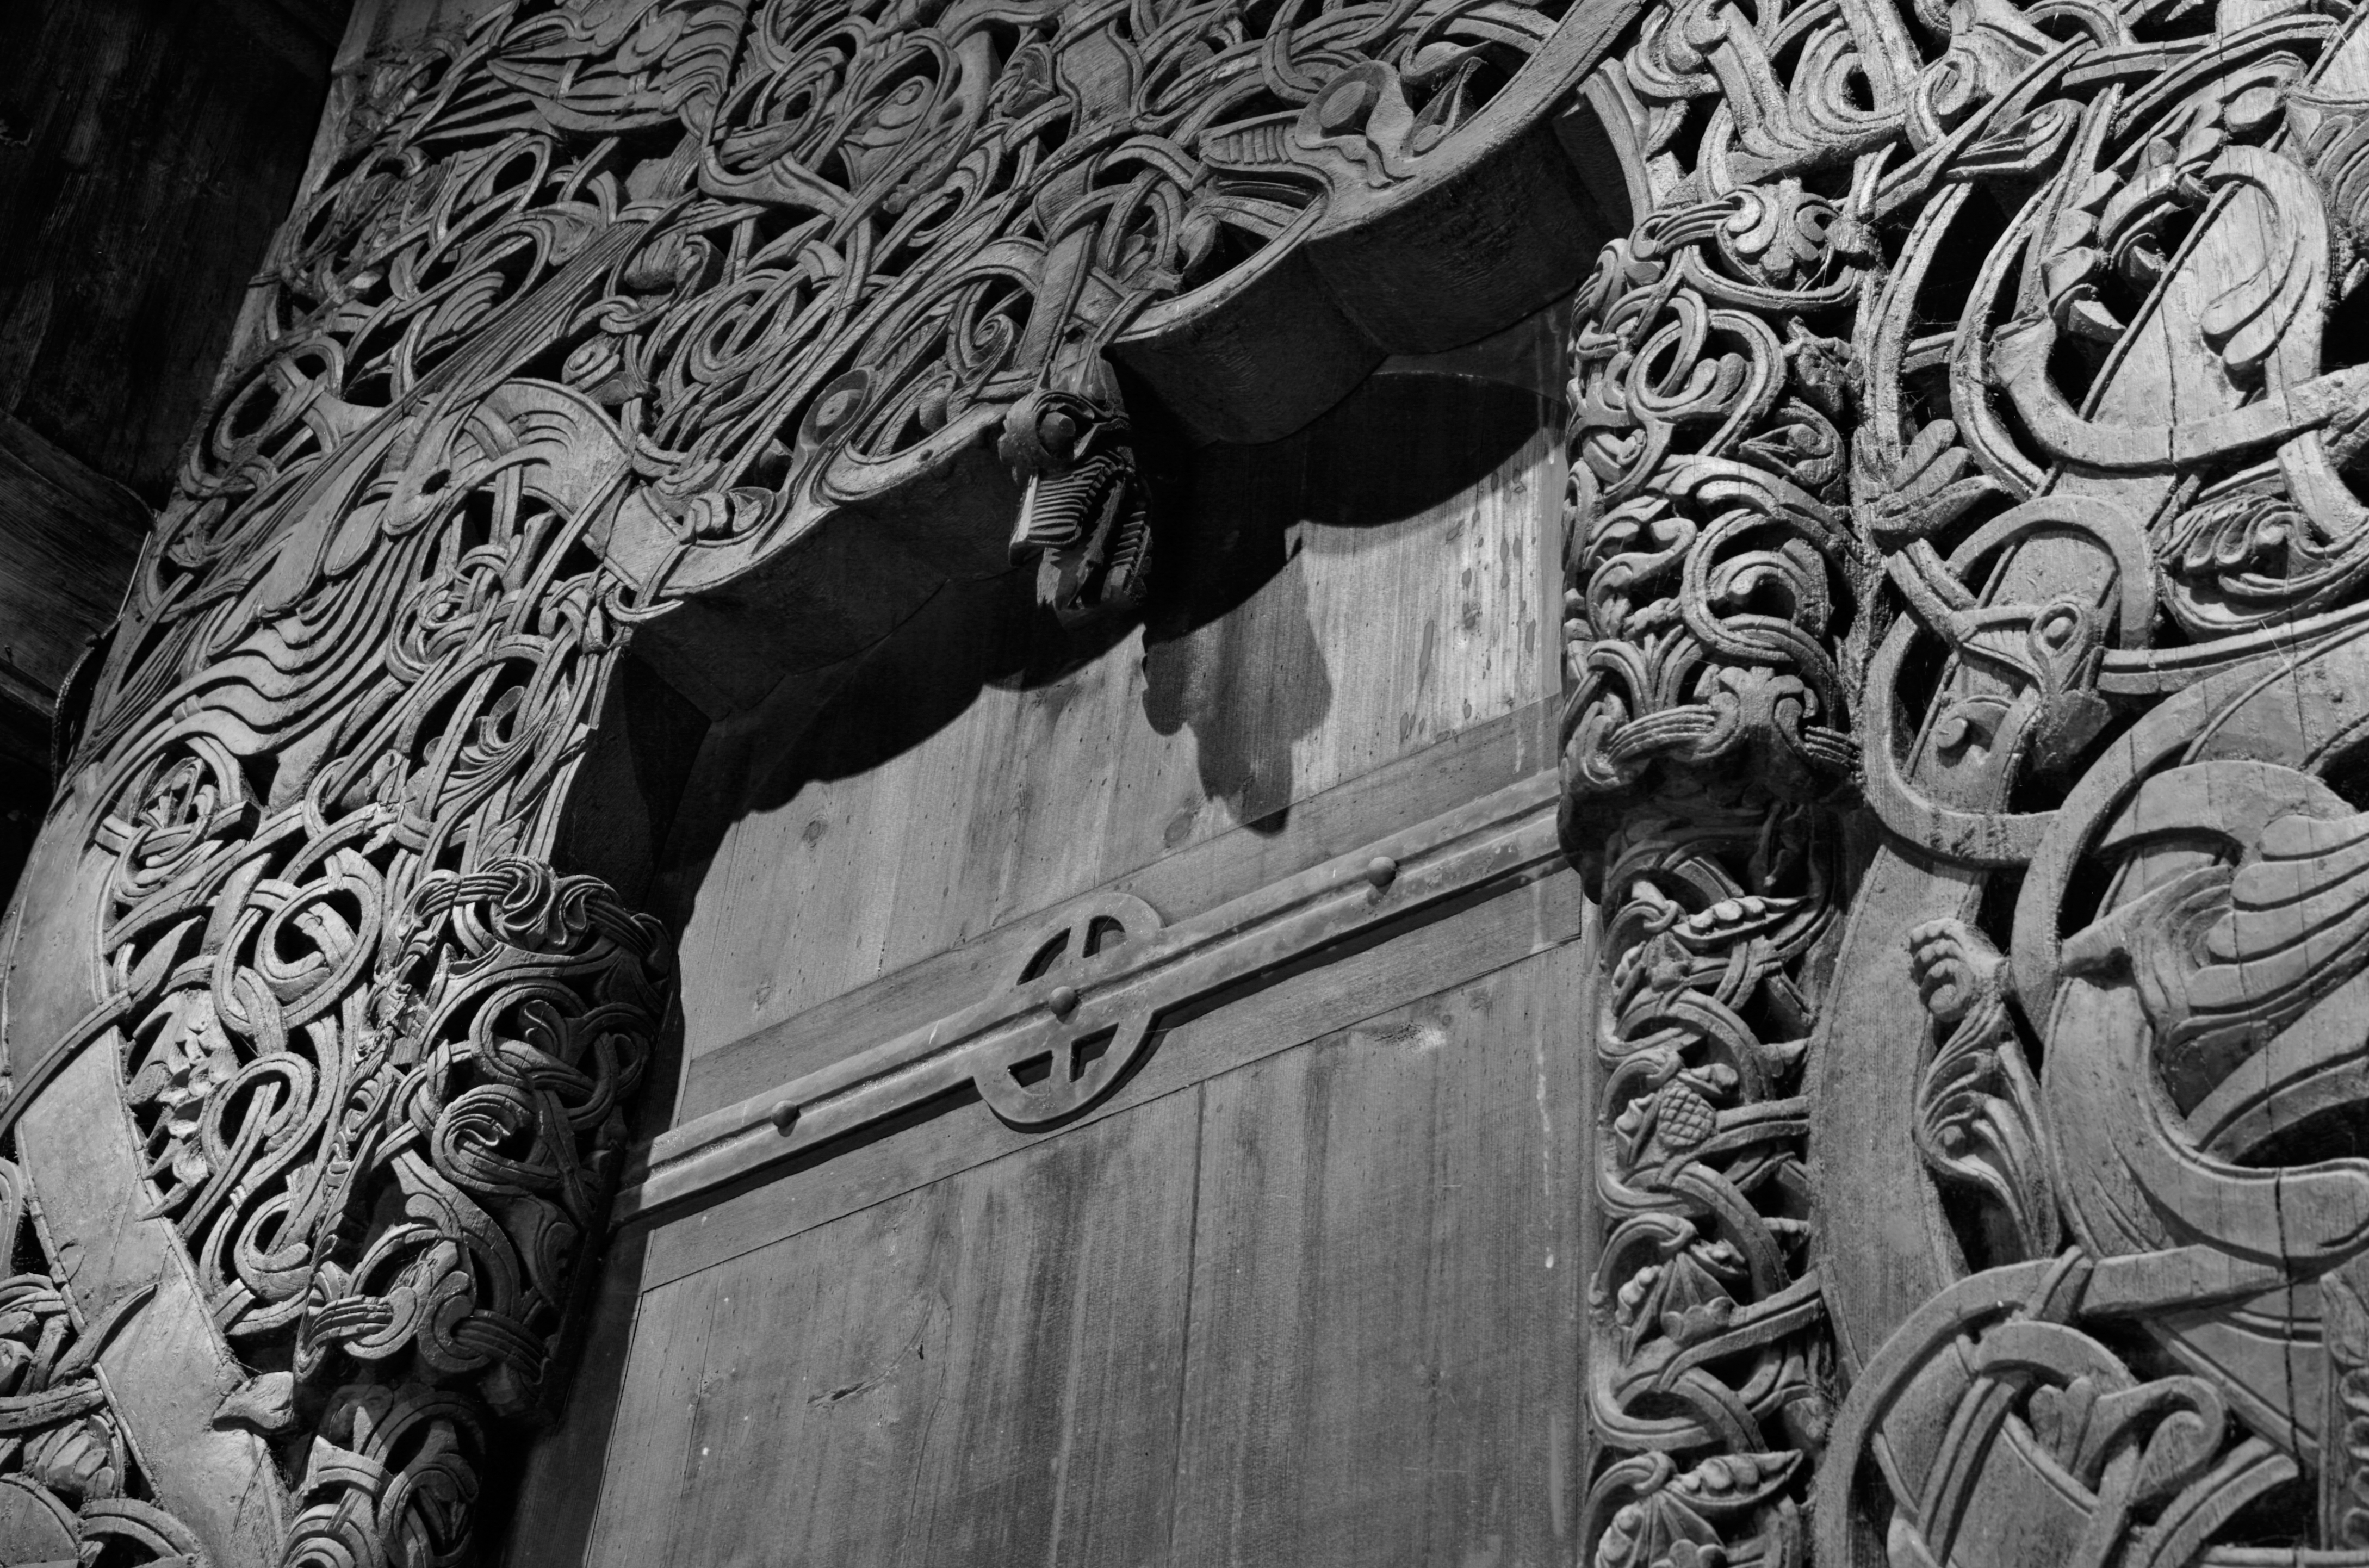
Besides some technical and architectural variations, the stave churches are generally similar in both construction and ornamentation. Each church has portals decorated with carvings, some more than others. A common theme in these carvings is fighting dragons, lions and intricate vines. Researchers argue whether this iconography is pagan or not. The carvings do not have any direct biblical references. Despite this, some think that the iconography is a pagan interpretation of Christianity, which was a new thing during the time many of the churches were built. Norway was Christianized around year 1020. In any case, they are extremely impressive. In addition to the portals, there are intricate carvings and detailed decorations to be found all over the churches’ interiors, the staves themselves, walls and all around the churches.
So, if the church builders were this meticulous about making the churches resistant against Norway´s rainy and cold coastal climate, why did so many of the stave churches disappear? According to the experts, most of them were taken down in order to build larger churches to house more people as the population grew. Fires, avalanches, storms and general decay were other reasons. In 1650, Norway had 270 stave churches left. Around 1800, the number was 95.
In 2001 most of the stave churches were in a bad state, so the Norwegian government started funding a project to renovate and preserve them better. The 28 left today are in good shape. They´re all open to visitors and some of them are still being used for religious services, weddings, funerals and other ceremonies.
So, unless you´re a satanic arsonist, suffer from ecclesiophobia or are afraid of trolls and Vikings, please come visit our stave churches. We need more woodworking tourists to counter all the ones that just want to take a fjord selfie.