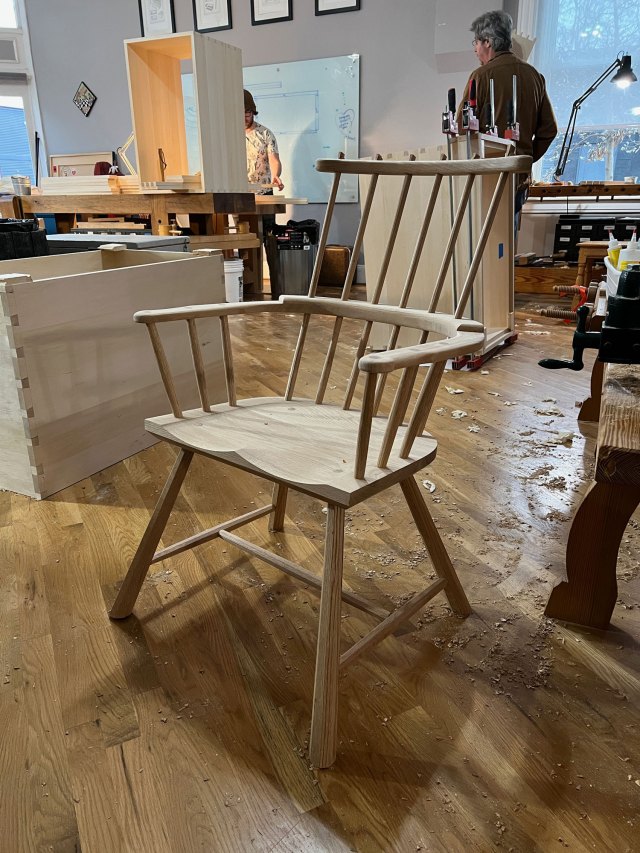
Today we are opening up the list for people who want to attend our Chair Chat™ class at the Lost Art Press storefront Oct. 10-14, 2022, with me, Rudy Everts and Klaus Skrudland.
The class is $1,300 per student (plus materials). The attendees will be determined by a random drawing on Wednesday, July 6. Here’s how you can sign up. Please read the following with care.
The class is for people who wish to build a vernacular stick chair. We’ve had several people ask us if they could take the class and instead build a ladderback, Hans Wegner chair, Windsor chair or other factory chair that involves bent laminations, steambending or factory methods.
The answer is, unfortunately, no. We don’t have the equipment, jigs or time to make one of these chairs. We would fail your expectations. We are equipped to make any stick chair (that we know of), as long as it’s vernacular.
To sign up for the drawing, send an email to: lapdrawing@lostartpress.com before 3 p.m. (Eastern) on Wednesday, July 6, 2022. Please use the subject line of “Chair Chat Class” and include the following information (incomplete forms will be discarded).
Your name(first and last)
Your phone number (this is only to contact you in case email doesn’t go through)
One sentence about the chair you would like to build. (It can be as simple as “Welsh comb back” or “Irish armchair” or “whatever.”)
How you would like to build your chair. Choose one:
Almost entirely by hand
A balance of hand and machine methods
Almost entirely by machine
This last detail is important as we need to get a mix of students so that people aren’t waiting in line to use the chopping block or the band saw.
Students will be allowed to bring their own materials. Or we can supply them for a fee (likely about $200 per chair). More details about the class and the instructors can be found here.
After the drawing occurs, don’t despair if you aren’t picked. We will keep your name handy in case students need to cancel (it happens).
Klaus, Rudy and I are looking forward to this class and sharing everything we know about chairmaking, eating too much fried chicken and drinking just the right amount of beer. It will be a fun week.
It’s a photo of a cat, ergo, Katherine (aka the Wax Princess) has more soft wax available. Last weekend, she made up a large batch, and it’s now up for sale in her etsy store.
As you can see, Funky Winkerbean has slept through this announcement. (The wax also doubles as a teddy bear.)
Notes on the finish: This is the finish Chris uses on his chairs. Katherine cooks it up here in the machine room using a waterless process. She then packages it in a tough glass jar with a metal screw-top lid. She applies her hand-designed label to each lid, boxes up the jars and ships them in a durable cardboard mailer. The money she makes from wax helps her make ends meet at college. Instructions for the wax are below.
Instructions for Soft Wax 2.0 Soft Wax 2.0 is a safe finish for bare wood that is incredibly easy to apply and imparts a beautiful low luster to the wood.
The finish is made by cooking raw, organic linseed oil (from the flax plant) and combining it with cosmetics-grade beeswax and a small amount of a citrus-based solvent. The result is that this finish can be applied without special safety equipment, such as a respirator. The only safety caution is to dry the rags out flat you used to apply before throwing them away. (All linseed oil generates heat as it cures, and there is a small but real chance of the rags catching fire if they are bunched up while wet.)
Soft Wax 2.0 is an ideal finish for pieces that will be touched a lot, such as chairs, turned objects and spoons. The finish does not build a film, so the wood feels like wood – not plastic. Because of this, the wax does not provide a strong barrier against water or alcohol. If you use it on countertops or a kitchen table, you will need to touch it up every once in a while. Simply add a little more Soft Wax to a deteriorated finish and the repair is done – no stripping or additional chemicals needed.
Soft Wax 2.0 is not intended to be used over a film finish (such as lacquer, shellac or varnish). It is best used on bare wood. However, you can apply it over a porous finish, such as milk paint.
APPLICATION INSTRUCTIONS (VERY IMPORTANT): Applying Soft Wax 2.0 is so easy if you follow the simple instructions. On bare wood, apply a thin coat of soft wax using a rag, applicator pad, 3M gray pad or steel wool. Allow the finish to soak in about 15 minutes. Then, with a clean rag or towel, wipe the entire surface until it feels dry. Do not leave any excess finish on the surface. If you do leave some behind, the wood will get gummy and sticky.
The finish will be dry enough to use in a couple hours. After a couple weeks, the oil will be fully cured. After that, you can add a second coat (or not). A second coat will add more sheen and a little more protection to the wood.
Soft Wax 2.0 is made in small batches in Kentucky. Each glass jar contains 8 oz. of soft wax, enough for at least two chairs.
Would Works trains and employs people experiencing homelessness or living in poverty. Located in Los Angeles, Would Works holds a Beginner Builder workshop twice a week teaching sanding, finishing, branding and packaging. Folks who have completed the Beginner Builder workshop move on to the Community Builders Program, where they learn machining, design and furniture fabrication. The resulting products are used in the Beginner Builder workshops and as outdoor furniture for community spaces and supportive housing sites throughout Los Angeles.
Each year Would Works hosts more than 150 workshops offering paid employment to Artisans, people who are referred to the program by employment counselors and housing case managers.
Connor Johnson founded Would Works in 2012 after working at a homeless shelter where he heard, many times over, “I would work if I could.”
For Father’s Day, Would Works is allowing folks to give the gift of opportunity in your dad’s name. When you dedicate a donation to Would Works, simply add your custom message and Would Works will send a thank you note to your honoree’s inbox. With your gift, people experiencing housing insecurity and poverty will be given the opportunity to learn new skills, be part of a creative community, and earn a living wage.
“Spread some love, sawdust and opportunity in honor of Dad.” — Would Works
Note: We are sold out of these mugs. The link below is now dead.
Apparently we cannot count, or perhaps we cannot enter numbers correctly in our inventory management system… Anyway, we found 100 more of the wrong color blue mugs – the discounted ones we thought we sold out of yesterday ($24 each). Pretty sure these are the last of them, so if you missed out yesterday, here’s another – and I trust last – chance to get one.
The following is excerpted from “The Art of Joinery,” the first book published by Lost Art Press. It was out of print and unavailable for several years until we released this revised edition in the fall of 2013. It contains:The lightly edited text of Joseph Moxon’s landmark work on joinery – the first English-language text on the topic; modern commentary on every one of Moxon’s sections on tools and techniques by Christopher Schwarz; the original plates; and more.
And later this year, we’ll be offering a beautiful hardcover reprint – with a new introduction by Chris – of all of “Mechanick Exercises or the Doctrine of Handy-Works,” which also includes smithing, carpentry, turning and brick laying (Peter Nicholson’s “Mechanic’s Companion” was an early 19th-century update to Moxon’s early 18th-century work). This important early woodworking book deserves to be in print at a price everyone can afford (about $25 for a clothbound book with sewn signatures). Plus every book sold will help benefit the Early American Industries Association, which assisted with book production.
The waving engine described in plate 5. fig. 7, hath A B, a long square plank of about seven inches broad, five foot long, and an inch and a half thick. All along the length of this plank on the middle between the two sides runs a rabbet [a raised track], as part of it is seen at C. Upon this rabbet rides a block with a groove in its underside. This block is about three inches square and ten inches long, having near the hinder end of it a wooden handle going through it [that is] about one inch diameter, as D E. At the fore-end of this block is fastened a vise, [that is] somewhat larger than a great hand-vise, as at F. The groove in the block is made to receive the rabbet on the plank.
At the farther end of the plank is erected a square strong piece of wood, about six inches high, and five inches square, as G. This square piece has a square wide mortise in it on the top, as at H. Upon the top of this square piece is a strong square flat iron collar, somewhat loosely fitted on, having two male screws fitted into two female screws, to screw against that part of the wooden piece un-mortised at the top, marked L, that it may draw the iron collar hard against the iron [that cuts the moulding], marked Q, and keep it stiff against the fore-side of the un-mortised piece, marked L, when the piece Q is set to its convenient height. And on the other side the square wooden piece is fitted another iron screw, having to the end of its shank fastened a round iron plate which lies within the hollow of this wooden piece, and therefore cannot in draft be seen in its proper place. But I have described it apart, as at M. {Fig. 9.} Its nut is placed at M on the wooden piece. On the farther side of the wooden piece is fitted a wooden screw called a knob, as at N. Through the farther and hither side of the square wooden piece is fitted a flat piece of iron, about three quarters of an inch broad and one quarter of an inch thick, standing on edge upon the plank; but its upper edge is filed round {the reason you will find by and by}. Its hither end comes through the wooden piece, as at O, and its farther end on the opposite side of the wooden piece.
Upright in the hollow square of the wooden piece stands an iron, as at Q, whose lower end is cut into the form of the moulding you intend your work shall have.
In the fore side of this wooden piece is [a] square hole, as at R, called the mouth.
To this engine belongs a thin flat piece of hard wood, about an inch and a quarter broad and as long as the rabbet. It is disjunct [distinct, unconnected] from the engine, and in fig. 8. is marked S S, called the rack. It hath its under[side] flat cut into those fashioned waves you intend your work shall have. The hollow of these waves are made to comply with the round edge of [the] flat plate of iron marked O {described before}. For when one end of the riglet [workpiece] you wave is, with the vise, screwed to the plain side of the rack, and the other end put through the mouth of the wooden piece, as at T T, so as the hollow of the wave on the underside of the rack may lie upon the round edge of the flat iron plate set on edge, as at O, and the iron Q, is strong fitted down upon the reglet [sic]. Then if you lay hold of the handles of the block D E and strongly draw them, the rack and the riglet will both together slide through the mouth of the wooden piece. And as the rounds of [the] rack ride over the round edge of the flat iron, the rack and reglet will mount up to the iron Q, and as the rounds of the waves on the underside of the rack slides off the iron on edge, the rack and reglet will sink, and so in a progression (or more) the riglet will on its upper side receive the form of the several waves on the underside of the rack, and also the form or moulding that is on the edge of the bottom of the iron. And so at once the riglet will be both moulded and waved.
But before you draw the rack through the engine, you must consider the office of the knob N, and the office of the iron screw M. For by them the rack is screwed evenly under the iron Q. And you must be careful that the groove of the block flip not off the rabbet on the plank. For by these screws, and the rabbet and groove, your work will be evenly gauged all the way (as I said before) under the edge of the iron Q, and keep it from sliding either to the right or left hand, as you draw it through the engine.
Analysis Of course, the No. 1 question you have to have about the “waving engine” entry is what the heck the thing actually does. Is it a planer? A moulding machine? Well, yes. It works like both a planer and a moulding machine to produce what are called rippled or waveform mouldings, which were all the rage during Cromwell’s reign in England.
Wave mouldings show up in many picture frames of the era and reflect light in a most unusual way – thanks to their undulations or ripples.
Moxon’s device seems complex from the description because he is writing about a thing that doesn’t exist in this exact form today. In essence, the waving engine produces rippled mouldings much like a duplicator lathe or a pattern-cutting bit in a router. A flat piece of iron follows a block with the desired pattern cut into it. This moves the stock against a fixed cutter, which gradually (very gradually) cuts away the waste to reveal the final wave shape in the workpiece.
The workpiece, by the way, is pulled through the waving engine by hand. If you are interested in this fascinating machine, I recommend you check out a 2002 article by Jonathan Thornton, who built a close reproduction of Moxon’s waving engine and shows how it developed into a fancier machine that worked with a crank. It’s available in pdf format here: https://wag-aic.org/2002/WAG_02_thornton.pdf