Peter Follansbee will spend four days with us to teach a class in carving various 17th-century designs from pieces he’s studied from museums and private collections. This class – suitable for those new to carving or those new to this style of carving – will start with basic techniques and posture, and simple gouge work. Then more gouges will come into play as students delve deeper into patterns, proportions, spacing and the relationship between background and foreground. Each successive pattern builds upon the previous example, adding more tools and concepts.
The class runs Monday, April 17 through Thursday, April 20. Class size is limited to six students – so you’ll get plenty of personal attention from Follansbee. Plus the shop cats (if they deign to visit). The cost is $1,200, which includes the stock (quartersawn oak). Tickets go on sale a week from today at 10 a.m. Eastern (that’s 10 a.m. Eastern on January 12) through our Ticket Tailor page.
You can read more, and see the tool list, by clicking here.
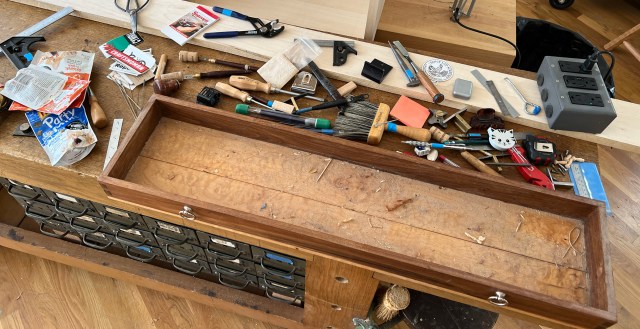
Eooouuuwww. I’m a slob, but I’m not (usually) dirty. This till is disgusting.
Chris mentioned in his Sunday post that since The Anarchist’s Tool Chest was published, he’s nailed in a few till dividers to corral small tools. After I showed my chest last week, people asked for a look at my tools and tills…so I’m scrambling to clean them and make them slightly more organized – and divest my chest of the stuff that really shouldn’t be in it – before showing what made the cut.
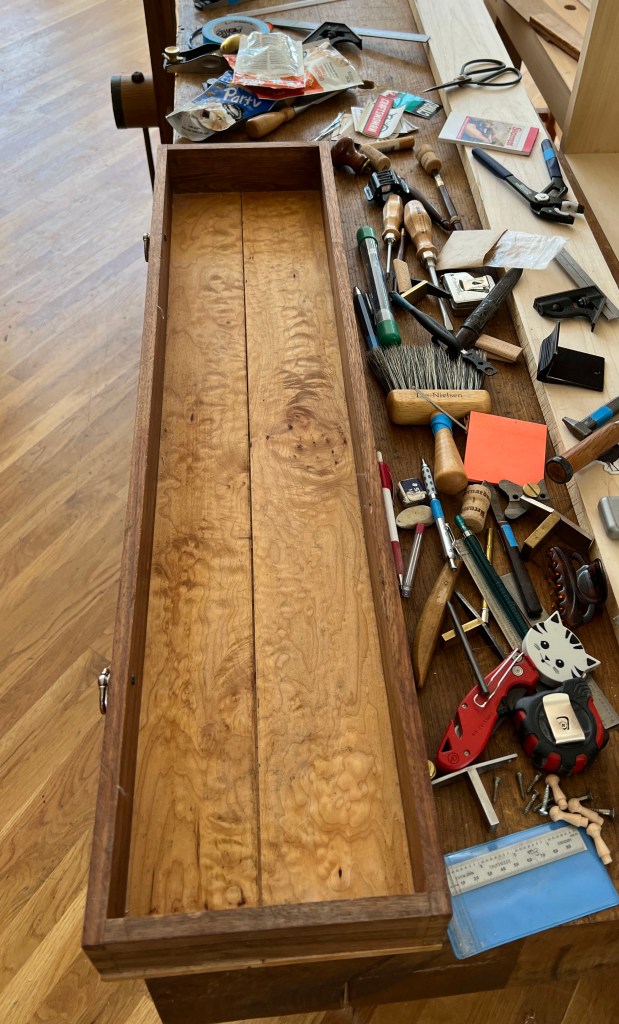
Ah – that’s better. (I’d forgotten I’d used fancy wood on the till bottoms!)
Chris cleans out the offcut bin regularly, and we’re selective about what goes into it in the first place. We have severely limited space here for storage, so we don’t save much (a contractor friend takes all the small stuff/bad stuff to burn). But I am a hoarder…so I sometimes squirrel away under my bench and on my office shelves pieces that Chris would certainly pitch. And it finally paid off. I had the perfect 3/8″-thick walnut to cut up for dividers – it was almost no work to get it ready for use. I just had to cut it to length, then shoot it for a perfect fit.
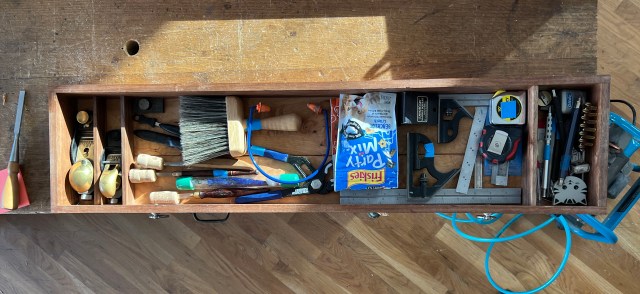
Arguable a bit too anal-retentive for a cubby wall. But I’m arguably more than a bit anal-retentive about many things.
To set the wall locations, I plopped the tool for which each was intended in place, then added a bit of wiggle room with the nearest thing to hand that seemed of about the correct thickness – a half-used Post-It pad. After marking out center lines on tape (with thin material, it’s best to be dead-on), I nailed the walls in place (two pins on each end) with the 23-gauge pinner. Yes, the walls will come out easily – that’s on purpose. And all the tool racks in my chest are screwed in place. I want to be able to easily rearrange things if my needs change (or for whomever inherits my chest to be able to easily re-arrange things to fit their own needs. If they don’t burn it or sell it for $50 at an estate sale).
A little protection for my new and already beloved No. 60-1/2. (As I’ve mentioned before, the No. 60-1/2 is a bit large to feel comfortable in my hands, but that adjustable mouth makes it worth a little discomfort.) My long-time love, a No. 102 (which fits my hand perfectly), got an adjacent cubby.
On the other end, I used a coaster to locate a cubby wall for confining pencils, a silly cat-head tape measure I won’t use (but love) and my most-used safety device – a hair clip.
That’s one down, two to go. (I’m afraid to find out how much cat hair and sawdust is in the bottom of the chest proper.)
Chris and I do have a lot of the same tools, but five years ago, our in-chest tools kits were a lot closer to identical (’cause I learned much of what I know from him). But since Chris’s uptick in chair building and my penchant for teaching all things dovetailed, our kits have diverged somewhat. I’ll clean out the rest of my chest and show its contents in full this Sunday.
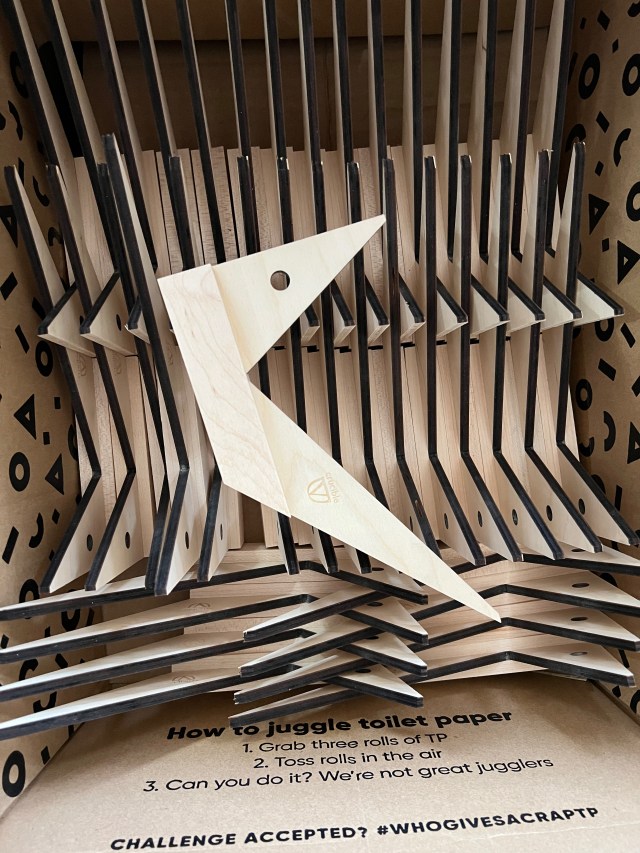
This summer we decided to redesign our bench square to make it more useful, and this is the result. The original was modeled after the square shown in “l’Art du menuisier” by A.J. Roubo. This new one is modeled on an even older European tool that marks and measures 30°, 45°, 60° and 90°.
Unlike originals, which were typically made of walnut, our version has Baltic birch blades and a maple stock. This makes the tool almost immune to seasonal humidity changes so it will stay accurate for years to come. Because of the laminated construction of the blade, the pointy tips are quite strong (we threw one to the concrete several times to prove this).
The angles on the tool are perfect, thanks to the fact that we laser-cut the blades. Then the squares are further trued when the maple stock is trimmed on a dedicated fixture.
We keep one of these hanging under the bench (or on the tool wall behind the bench) because it’s super handy for simple things like marking lines for crosscutting stock. The tool is lightweight at only 2.4 ounces so it’s a pleasure to handle.
We ship it unfinished, which is how we leave ours. A bit of wax will fancy it up if you like.
Like all our tools, this square is made in the U.S.A. The parts are laser-cut in Ohio and assembled in Kentucky.
— Christopher Schwarz
P.S. If you don’t want to buy one, the book “Euclid’s Door” has complete instructions on how to make one (and learn some cool geometry in the process).
“Icon Stand,” carved by Mary May in the Byzantine style, basswood.
In addition to her expert instruction on carving a classical leaf motif, in”Carving the Acanthus Leaf,” author Mary May also shares stories from her life, such as the one excerpted below.
The book is a deep exploration into the iconic acanthus leaf, which has been a cornerstone of Western ornamentation for thousands of years. May, a professional carver and instructor, covers carving tools and sharpening with the efficiency of someone who has taught for years. Then she plunges the reader directly into the work.
It begins with a simple leaf that requires just a few tools. The book then progresses through 13 variations of leaves up to the highly ornate Renaissance and Rococo forms. Each lesson builds on the earlier ones as the complexity slowly increases.
– Fitz
Being a student of woodcarving is not at all like being in a school program where there is a “final exam” at the end of the term to determine passage into the next level. My first woodcarving teacher, Konstantinos Papadakis, is a true master carver who specializes in the Byzantine style of woodcarving, one of the defining features of the beautifully ornate interiors of traditional Greek Orthodox churches. Stepping into the foyer of one of these churches, you are often greeted with an intricately carved “icon stand,” created to hold a vibrant painting of a venerated saint. Walking into the main sanctuary, you will be amazed by the remarkably detailed altar screens covered on every surface with carved leaves, vines and symbols of the Christian faith.
On one side of the altar will be a beautifully carved wooden structure called an Epitaphios, which holds a sacred tapestry depicting the laying of Christ in the tomb, an important symbolic part of the Eastern Orthodox Easter celebration. The annual springtime tradition is for children of the church to decorate the Epitaphios with flowers, threading the stems through the pierced carvings.The priest and several elders of the church carry it in a somber funeral procession around the outside of the church as the entire congregation follows in mourning. Their collective sadness at the death of their Savior is soon replaced when they re-enter the church for a grand celebration, rejoicing in the discovery of Christ’s resurrection.
Needless to say, when I began to learn woodcarving from Konstantinos, his teaching focused on mastering the nuances of the Byzantine style. I practiced carving what seemed like miles of continuous vines, curling and twisting along flat paneled surfaces, intermixed with grapes and symbolic images, especially the traditional peacocks and doves. This Byzantine style is easily recognizable, featuring highly stylized leaves that are splayed and pointed. Sharp “V” cuts shape the surface of leaves and vines. And the many angles and sharply defined lines create dynamic shadows. When viewed from a distance, these elements combine to decorate pieces that have a 3D, almost lifelike quality.
After three hard and rewarding years working and studying under the guidance of Konstantinos, I decided to venture across the globe to learn different styles and techniques from other master woodcarvers. It was to be much like the journeyman of old, beginning their working lives by setting out to work in various workshops to glean as much knowledge as possible from different masters. So without a formal “exam,” how could I prove that I was ready to take this next big step? I needed to design, build and carve a traditional Byzantine-style icon stand, and that is just what I set out to do.
It was finally time to bring together all of the skills I had learned in my three years with Konstantinos. I began by designing the four carved panels that made up the main body of the icon stand. The two side panels had a stylized peacock carved in the center surrounded by curling, twisting grape leaves. The front and rear panels were decorated with the same pointed, scrolling leaves around two medallions. I drilled countless holes into every tiny space between the details to prepare the way for cutting out all of the background wood. By inserting a thin scroll saw blade into the holes and patiently following each twisting curve, each little background shape finally dropped cleanly to the floor to create the pierced panels. It was a grueling week sawing out every portion of the background, but I was motivated by the knowledge that I was just preparing for the fun part.
Detail of “Icon Stand,” carved by Mary May in the Byzantine style, basswood.
Finally, after all of the drawing, drilling and sawing, I began the carving. I spent the next three weeks intently detailing all of the panels, carving the peacocks, finalizing the edge mouldings and capitals, and hand-shaping the tall spiral legs. It was a long and exhausting month, but when I proudly unveiled the finished icon stand, I was filled with a deep satisfaction, knowing that I had passed the test. I was now ready to continue my journey, working with and learning from other master carvers. I do look back fondly on those long years of practice and study, and though I have completed many challenging carving projects in the years since, the icon stand holds a place of honor in my portfolio. I have carried it with me for 22 years. These days, it may inspire me with its company in my workshop, dominate the corner of our living room or occupy a place in a furniture show or exhibit, but it will always have a special place in my heart as a representation of two major passages in my life. The first was the “final exam” that marked a major transition in my carving life, and the second was when my husband and I knelt before it humbly as we were married, the priest using it as a lectern in our beautiful outdoor wedding.
With 165 Stick Chair Merit Badges remaining, we’re extending the deadline to earn one until they are gone (we’d much rather you have a little more time than to dispose of the ones that are left). When they run out, we’ll announce it here.
The merit badges are one to a customer, and the rules remain the same:
Build a stick chair with your own hands. (Not a frame chair, ladderback chair, Windsor/Forest chair, IKEA chair, folding chair etc.) A genuine, vernacular stick chair. (A stool without a back is not a chair. A backstool, which is essentially a side chair, is indeed a chair.)
Take a picture and print it out on any paper.
Send a self-addressed, stamped envelope (SASE) to us with the picture of your stick chair. (International readers are welcome to participate; you’ll need a U.S. Global stamp on the SASE.) Here’s how to address the envelope:
Stick Chair Merit Badge Lost Art Press 837 Willard St. Covington, KY 41011
I will in return insert a badge into said SASE, seal it up (with tape if it’s not self-adhesive…I’m not licking your envelopes!) and drop it in the post box on the corner near our shop, or – if it’s raining or I’m feeling lazy – at the drive-up box at Cincinnati’s main Post Office, which is on my way home.