And there’s a possibility that Derek Jones and Chris Williams will be crossing the Atlantic to teach here…but that’s still up in the air due to travel restrictions. If they are able to make the trip, we’ll let you know about their classes ASAP.
We will require that all registrants be fully vaccinated for COVID-19 by the class date, and follow CDC guidelines on masking at the time of the class.
There are six bench spaces available in each class; a waitlist will kick in once a class is sold out. (And I beg you: Please be sure you have the class dates available before registering.)
If you’ve taken a class at the storefront in the past, you might notice that the registration is a little different this year: The full class fee is collected at registration (the instructor will still, however, determine the stock fee, which will be payable to her or him at the start of the class).
Note: While you can click on the “Register Now” buttons on the Covington Mechanicals ticketing site, sales won’t be live until May 17 at 10 a.m. Eastern.
And because it’s been a while since we offered classes, here are a few FAQs to jog everyone’s memory:
If you have questions about a class, send an email to covingtonmechanicals@gmail.com. Please DO NOT email the LAP help desk.
“Why can’t the LAP help desk help with classes?” These classes are not through Lost Art Press; I’m handling all the backend stuff and billing, and each instructor (including me) is an independent contractor who is, in effect, renting the space for the class duration. Meghan handles the LAP help desk (questions about books, orders, etc.), and she is busy enough without having to forward stuff about classes to me.
“Why isn’t the stock fee included with the registration fee?” Each instructor does her or his own stock buying and prep, and we have no way of knowing far in advance of the class how much the wood (etc.) will cost. Especially right now. So the instructor will let registrants know the stock fee at least a week before the class starts, and payment will be due to her or him at the start of class.
“What is the cancellation policy?” You can cancel for a full refund up until four weeks before the class date. Refund for cancellations within four weeks prior to the class date will be issues only if the slot can be filled.
“I tried to sign up right when classes went live, and didn’t get in. You suck!” I’m sorry. We have limited space and only six benches for students. But please see below.
“Should I bother signing up for the waitlist?” Yes! We do have cancellations – and when that happens, I notify the first person on said list, who then has 24 hours to register. And if that person can’t make it, on to the next, and so on.
“Will Chris be teaching any classes?” Nope – he’s crazy busy with publishing projects.
“I’m coming from out of town; where should I stay?”Check out this blog post, which has suggestions not only on where to stay, but where to eat and non-woodworking-related greater Cincinnati attractions.
“Will you offer a class in X?” Possibly. Send me an email, and if we think there would be enough interest, and we can find the right person to teach it, we will consider X topic.
“Will you offer more classes in 2022?” Most likely – but far fewer than we did in 2019. We’re extremely busy with other stuff, and while it’s great fun to have people in the shop, we can’t get much other work done while classes are going on.
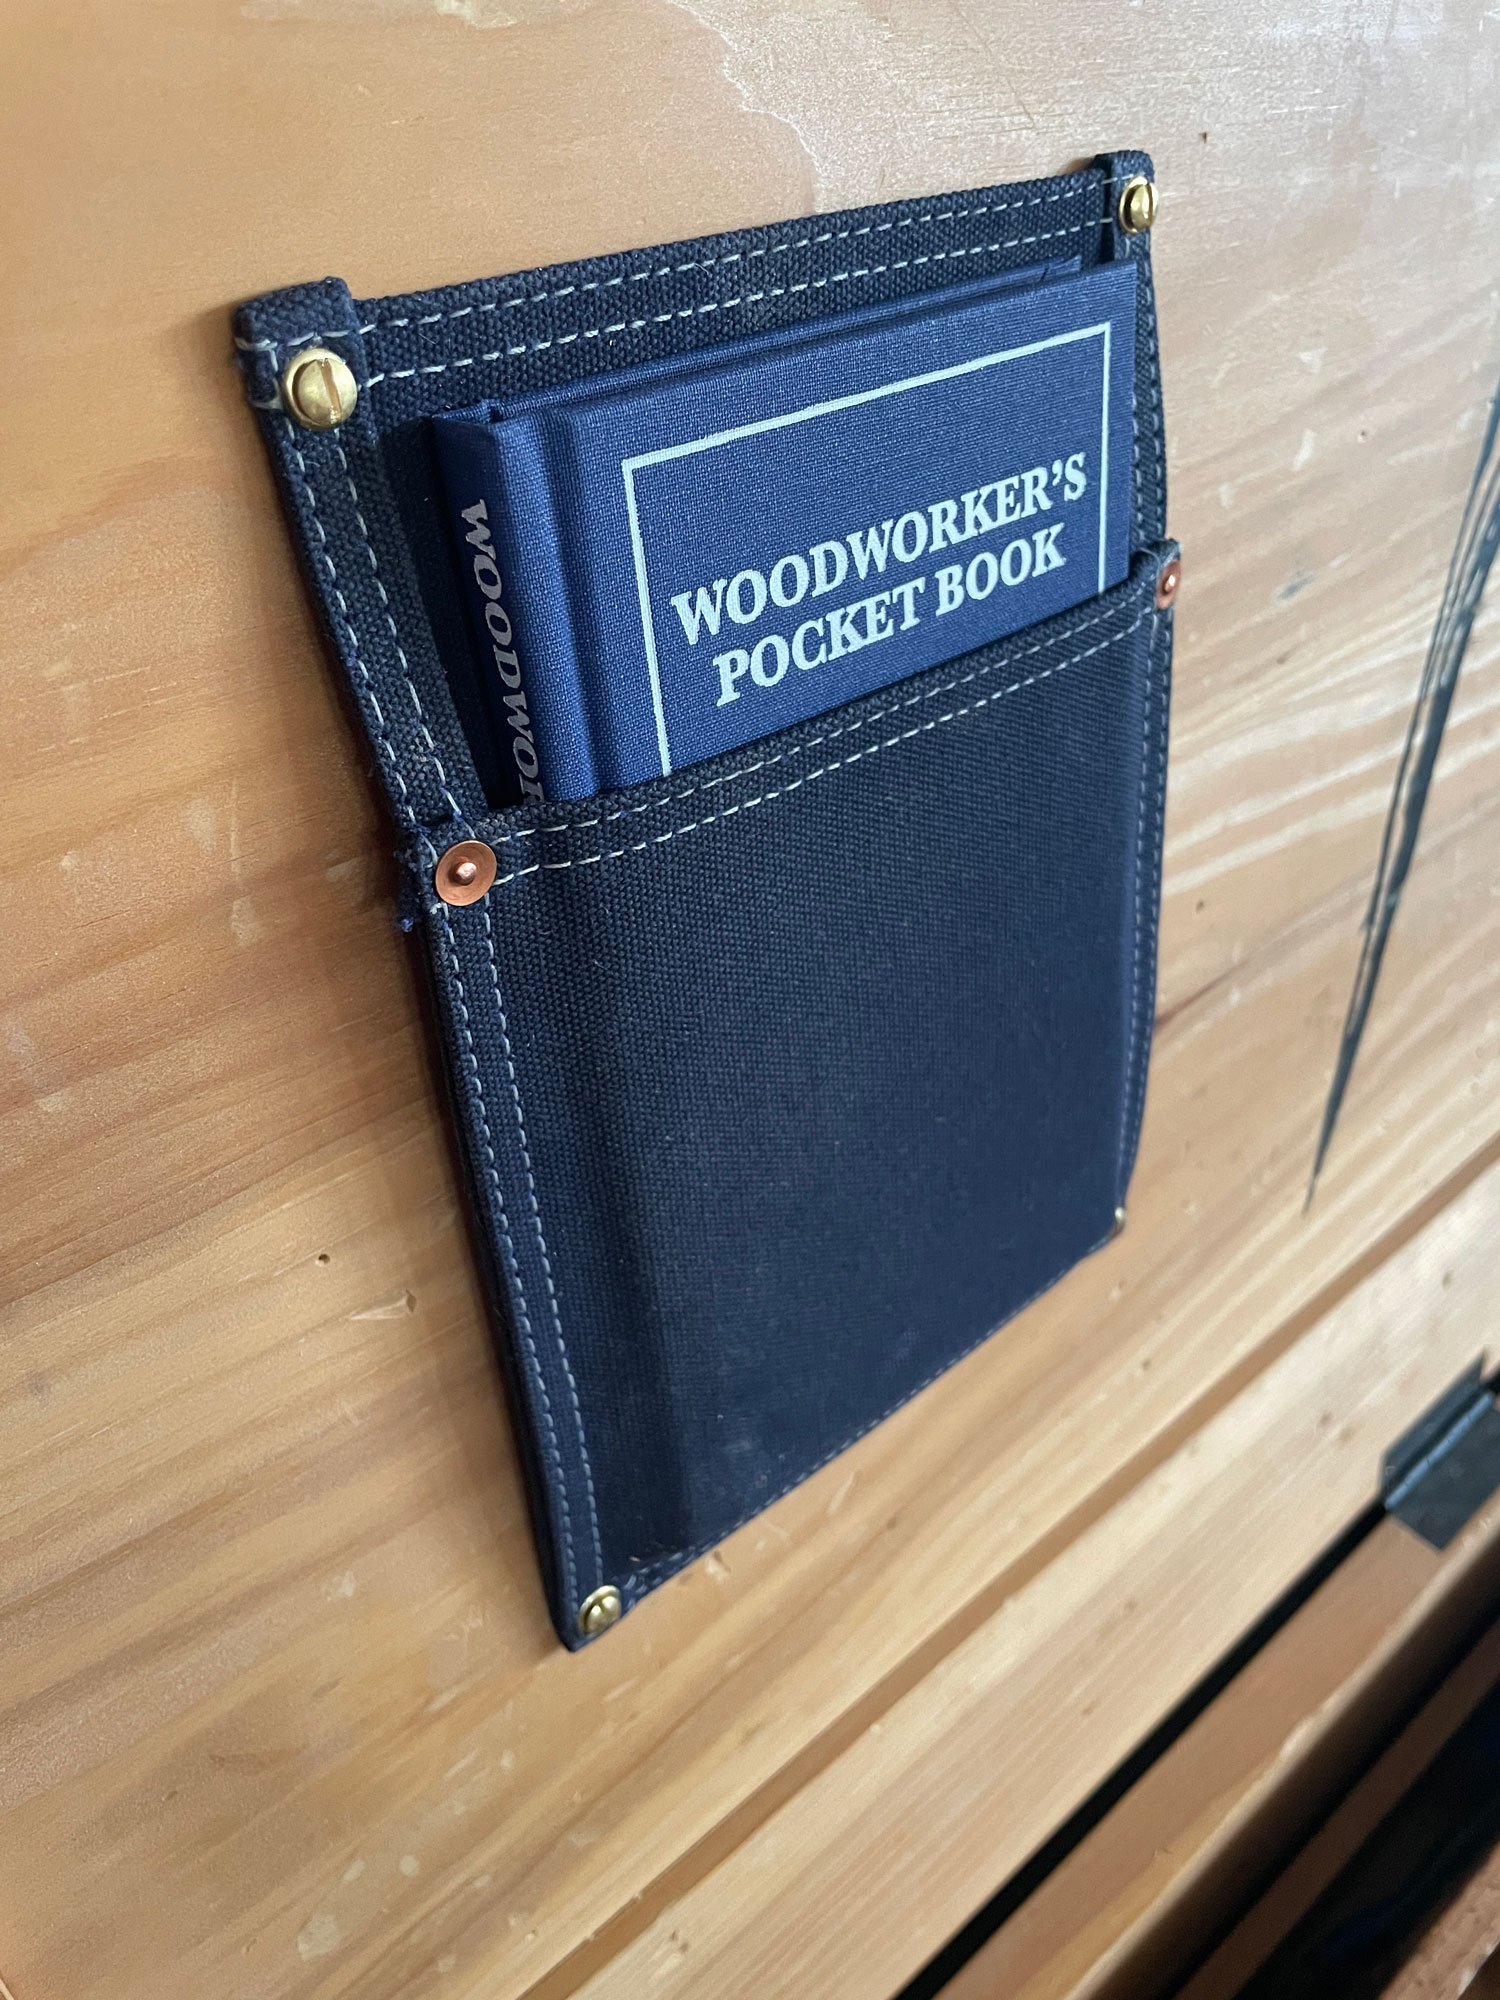
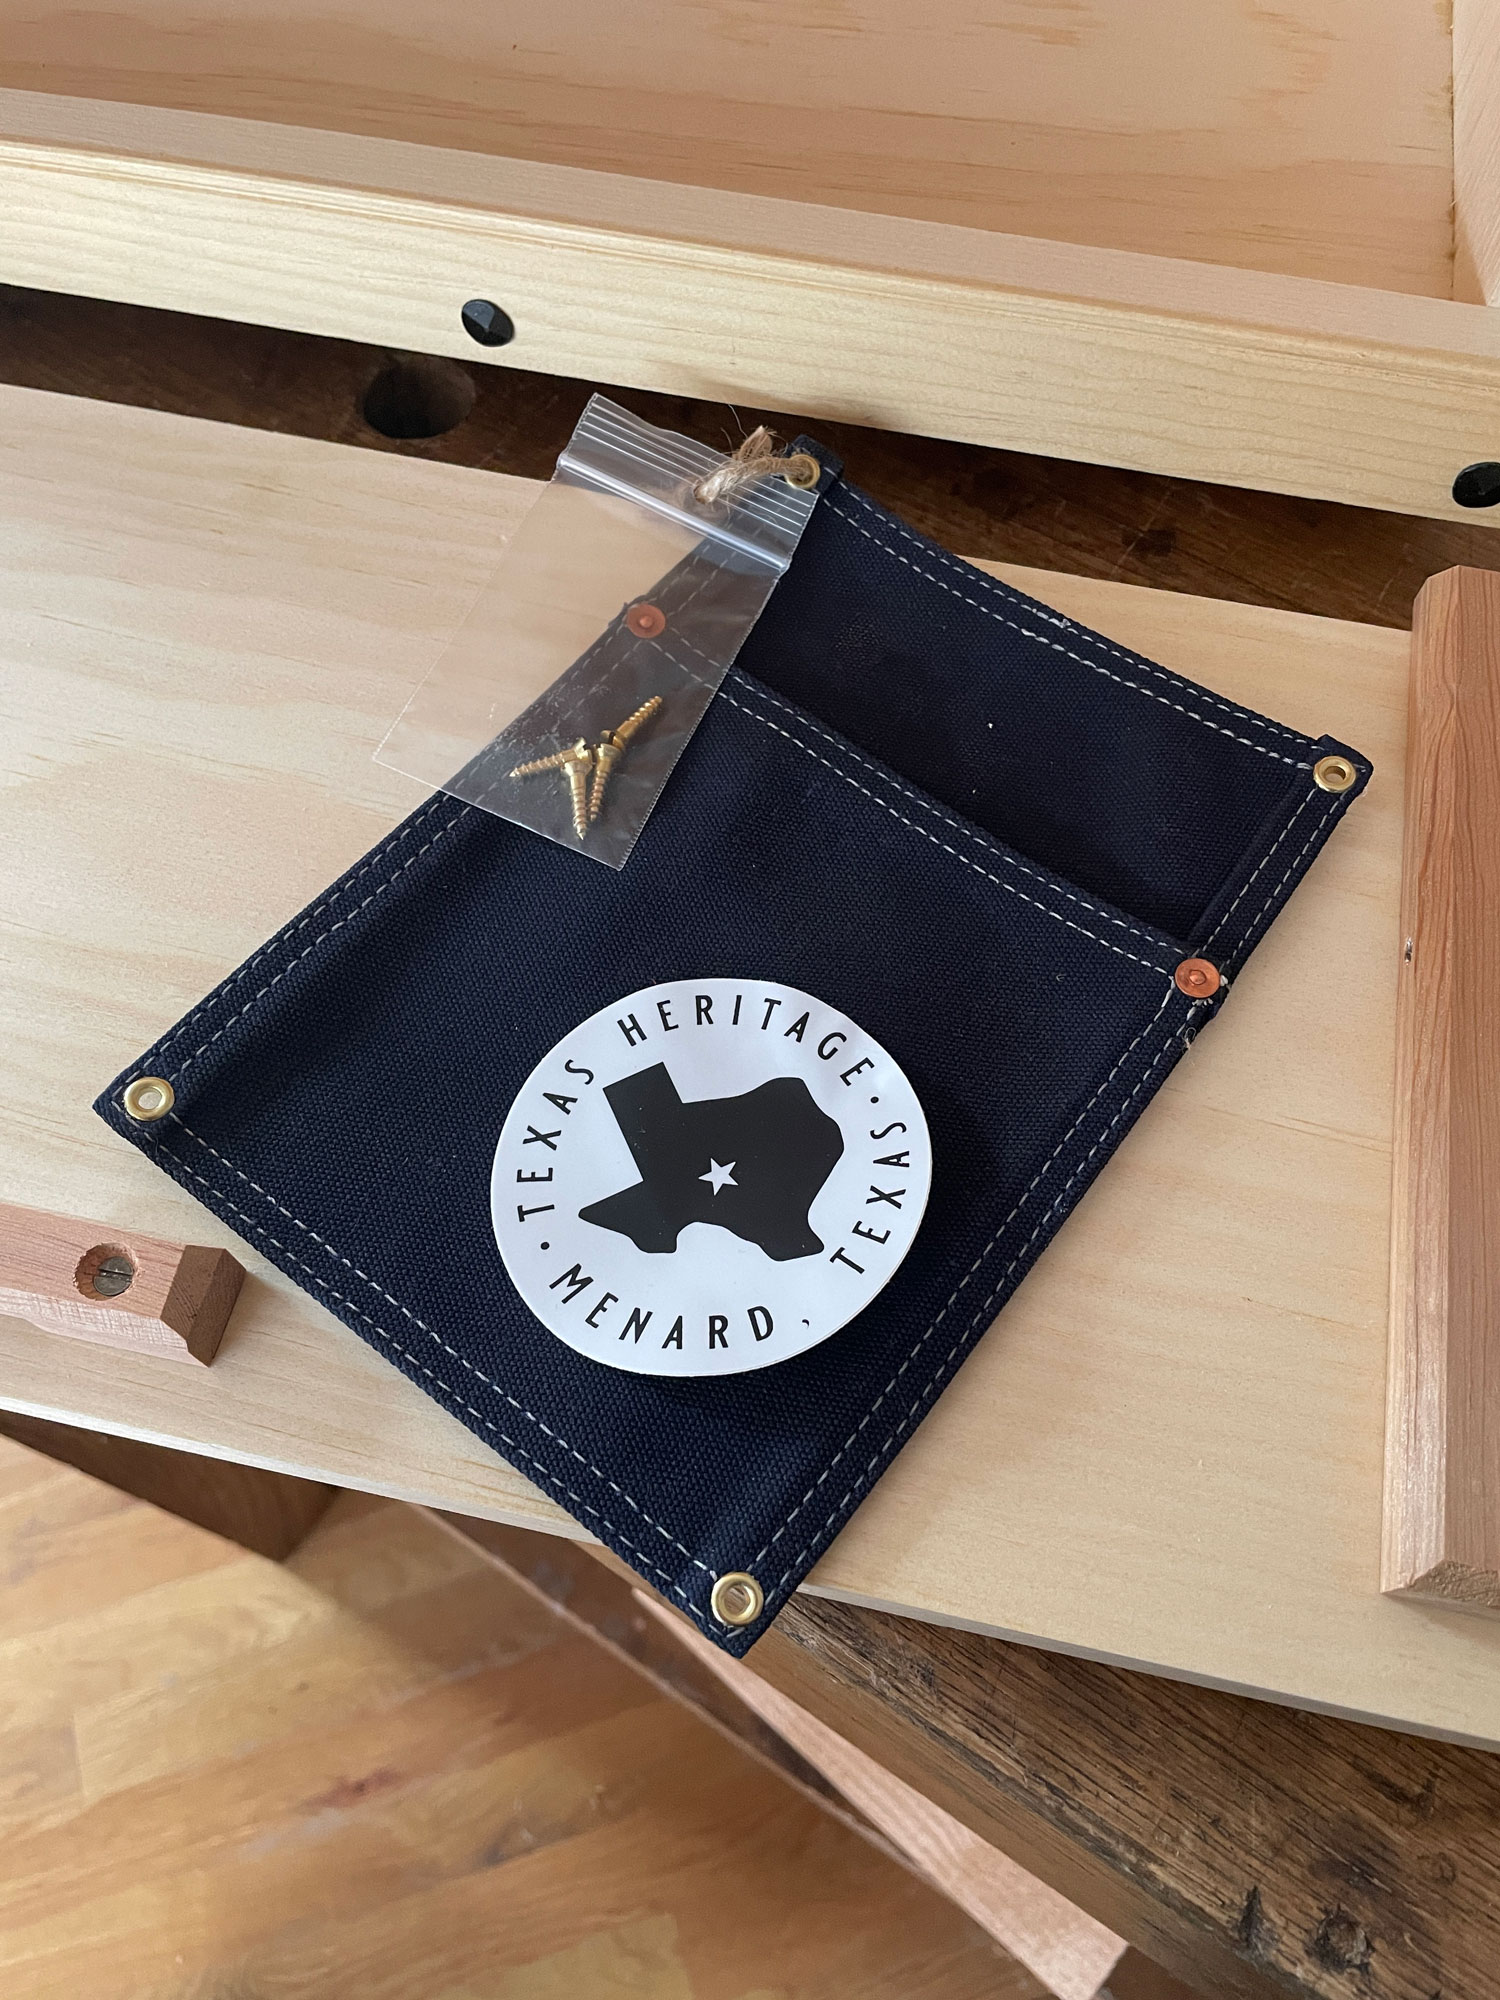
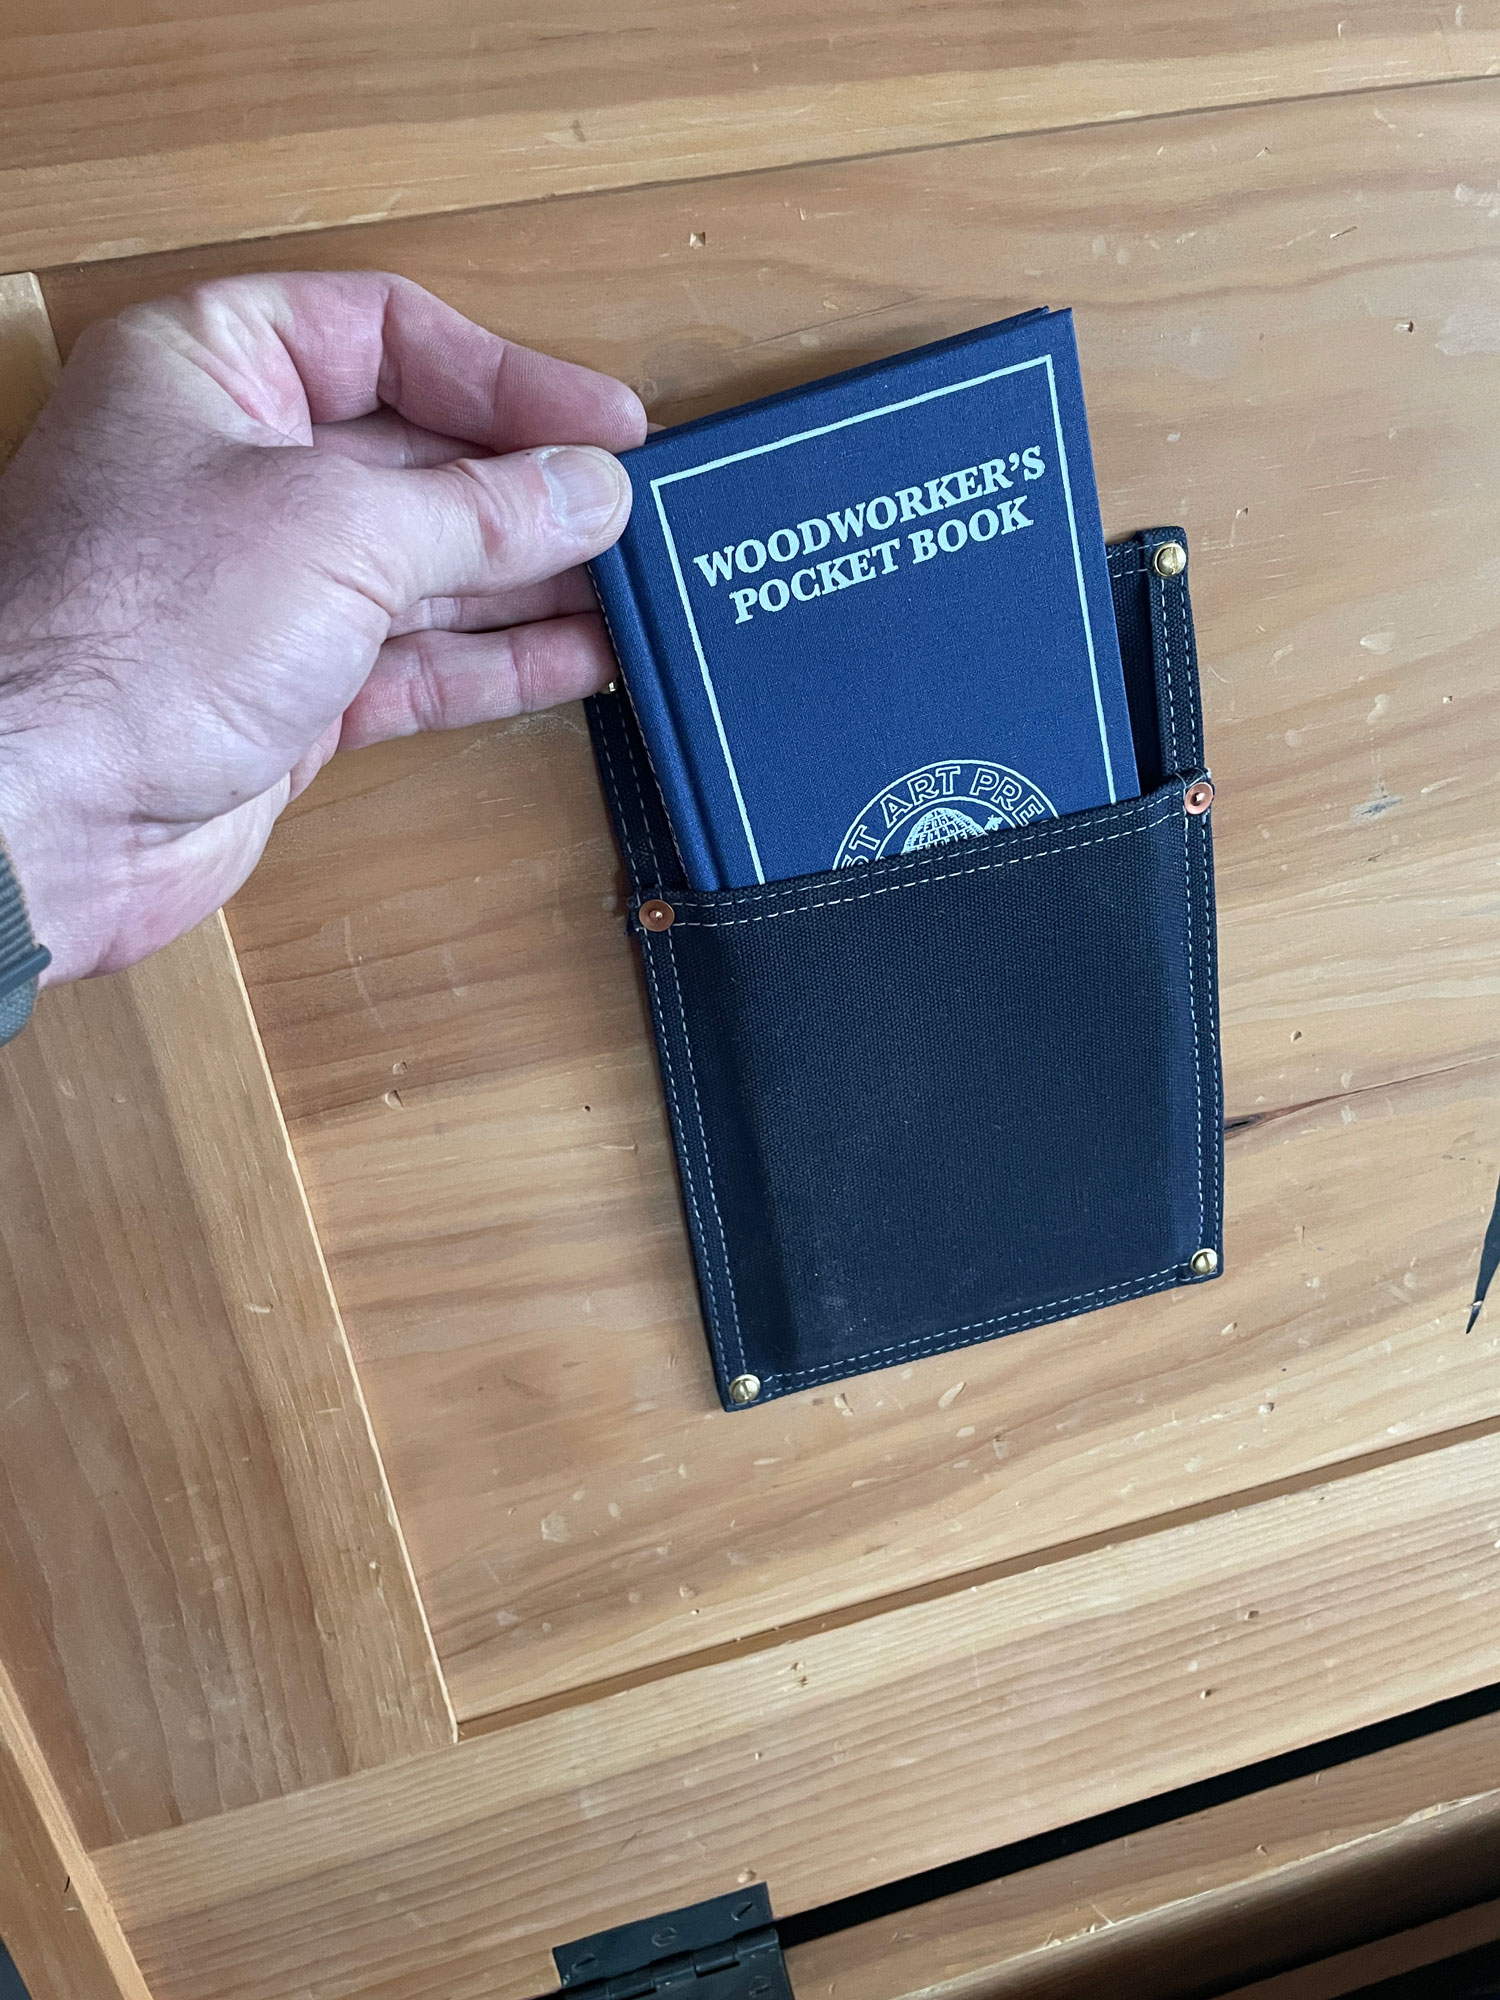
We are happy to let you know that Texas Heritage Woodworks is now making handmade slipcases that keep “The Woodworker’s Pocket Book” handy in your tool chest or tool cabinet.
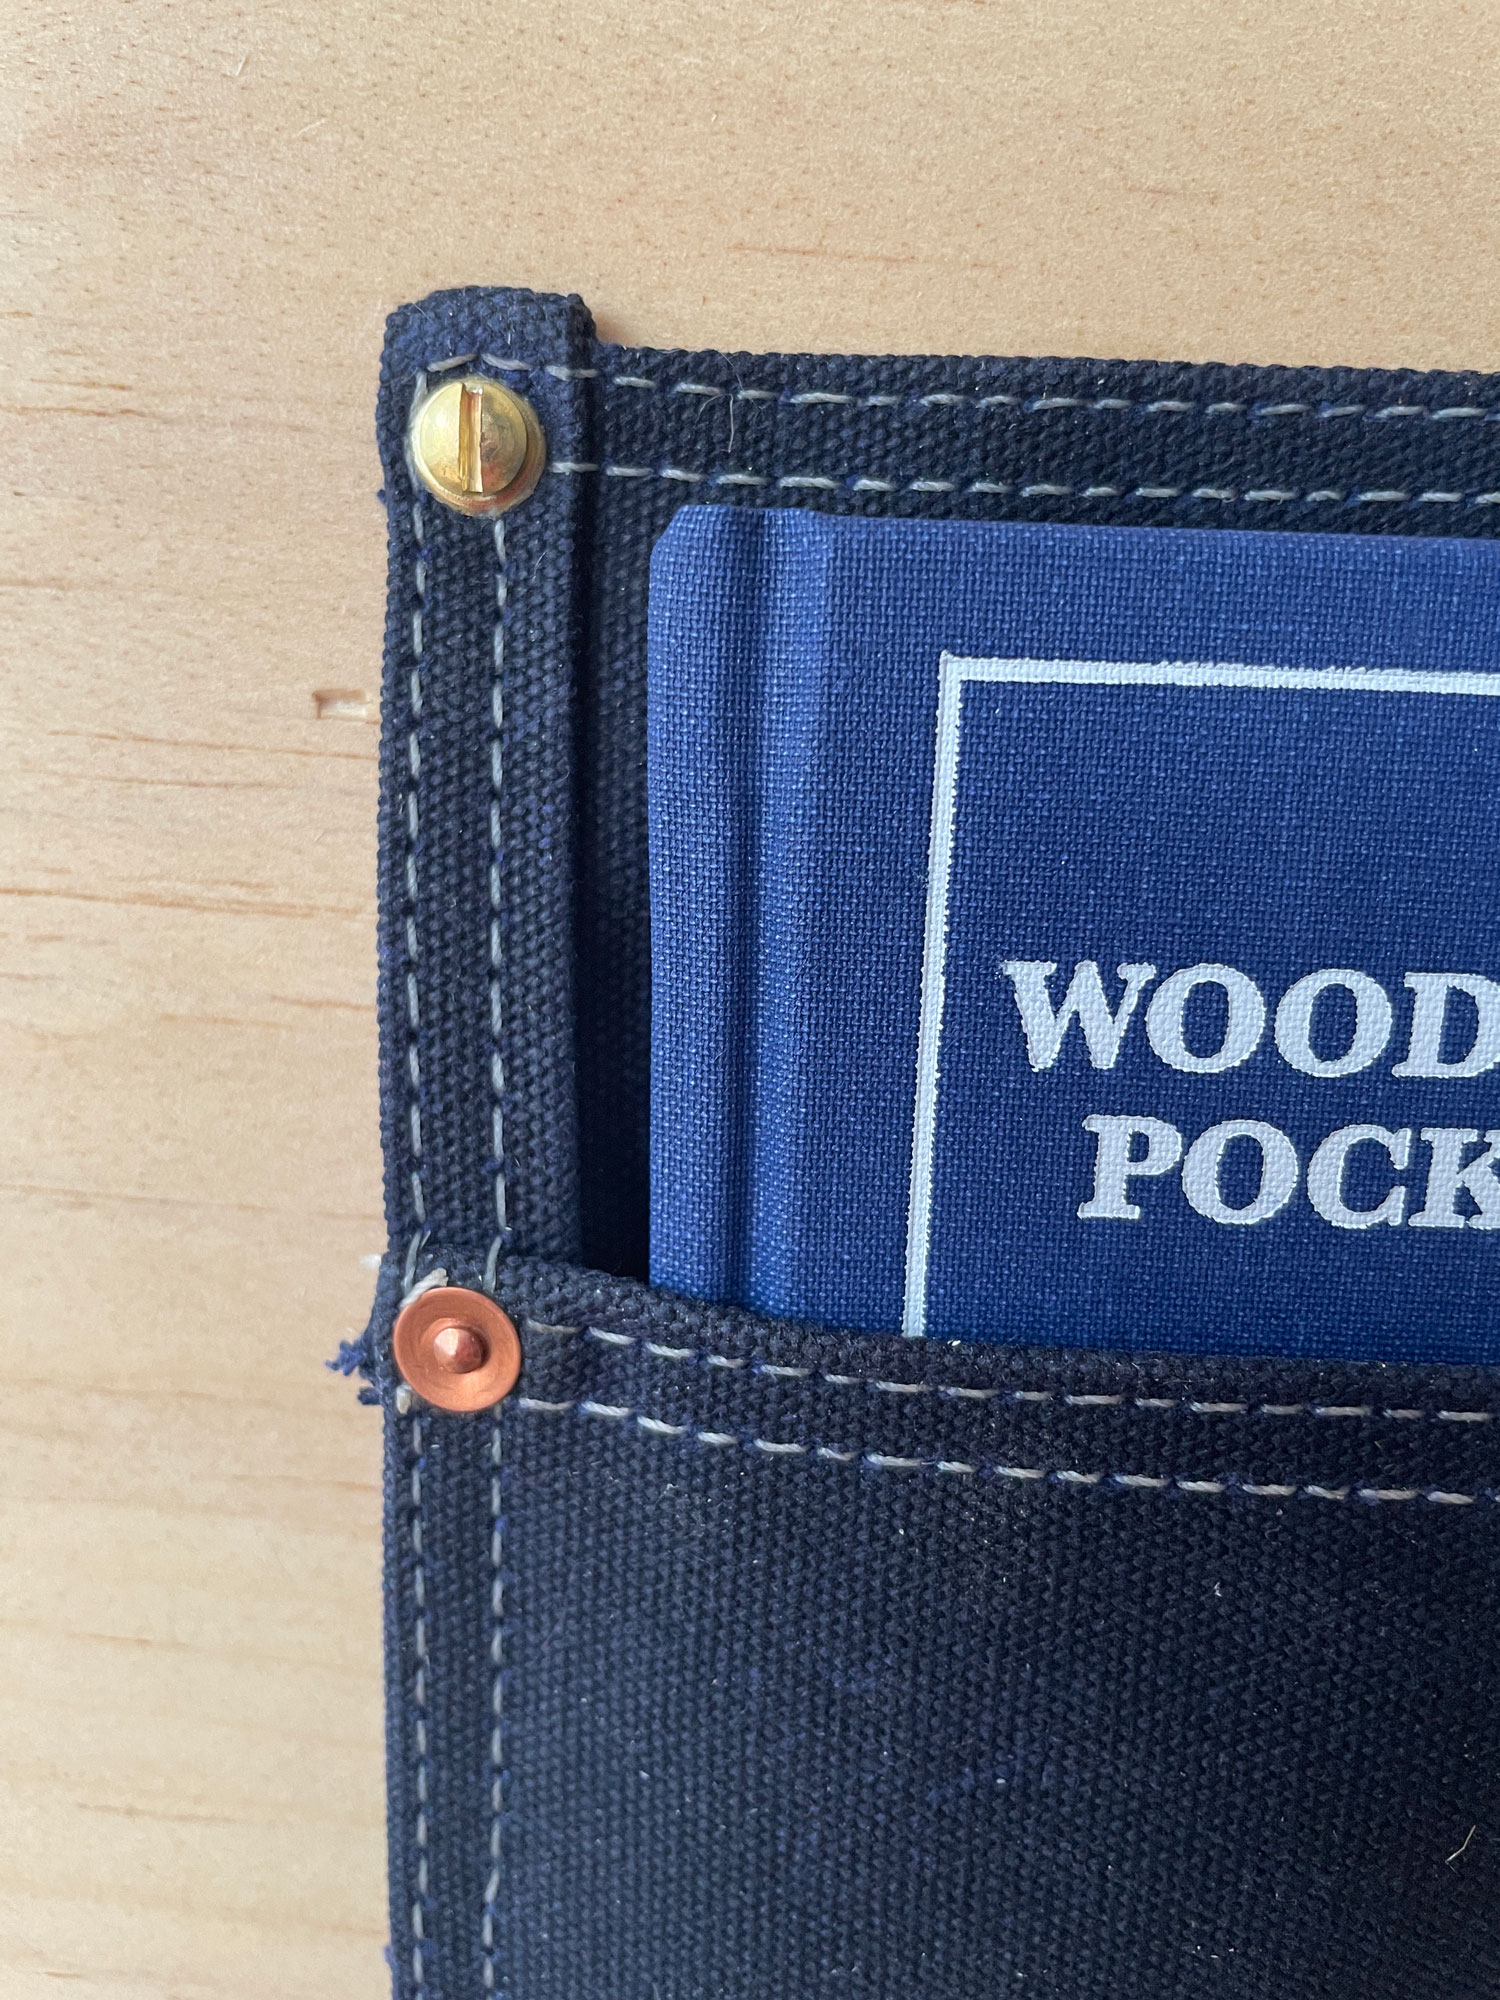
Made with 14 oz. waxed cotton canvas and #69 bonded nylon thread, the slipcases install easily on any wooden surface thanks to the four brass eyelets and included #6-5/8” slotted screws. The slipcase is designed specifically for the “Pocket Book,” which slips in and out easily, and holds it securely on a tool chest’s lid or cabinet door.
Like everything from Texas Heritage Woodworks, the slipcase is made by hand in their shop in Menard, Texas. It will easily last as long as the book and your tool chest.
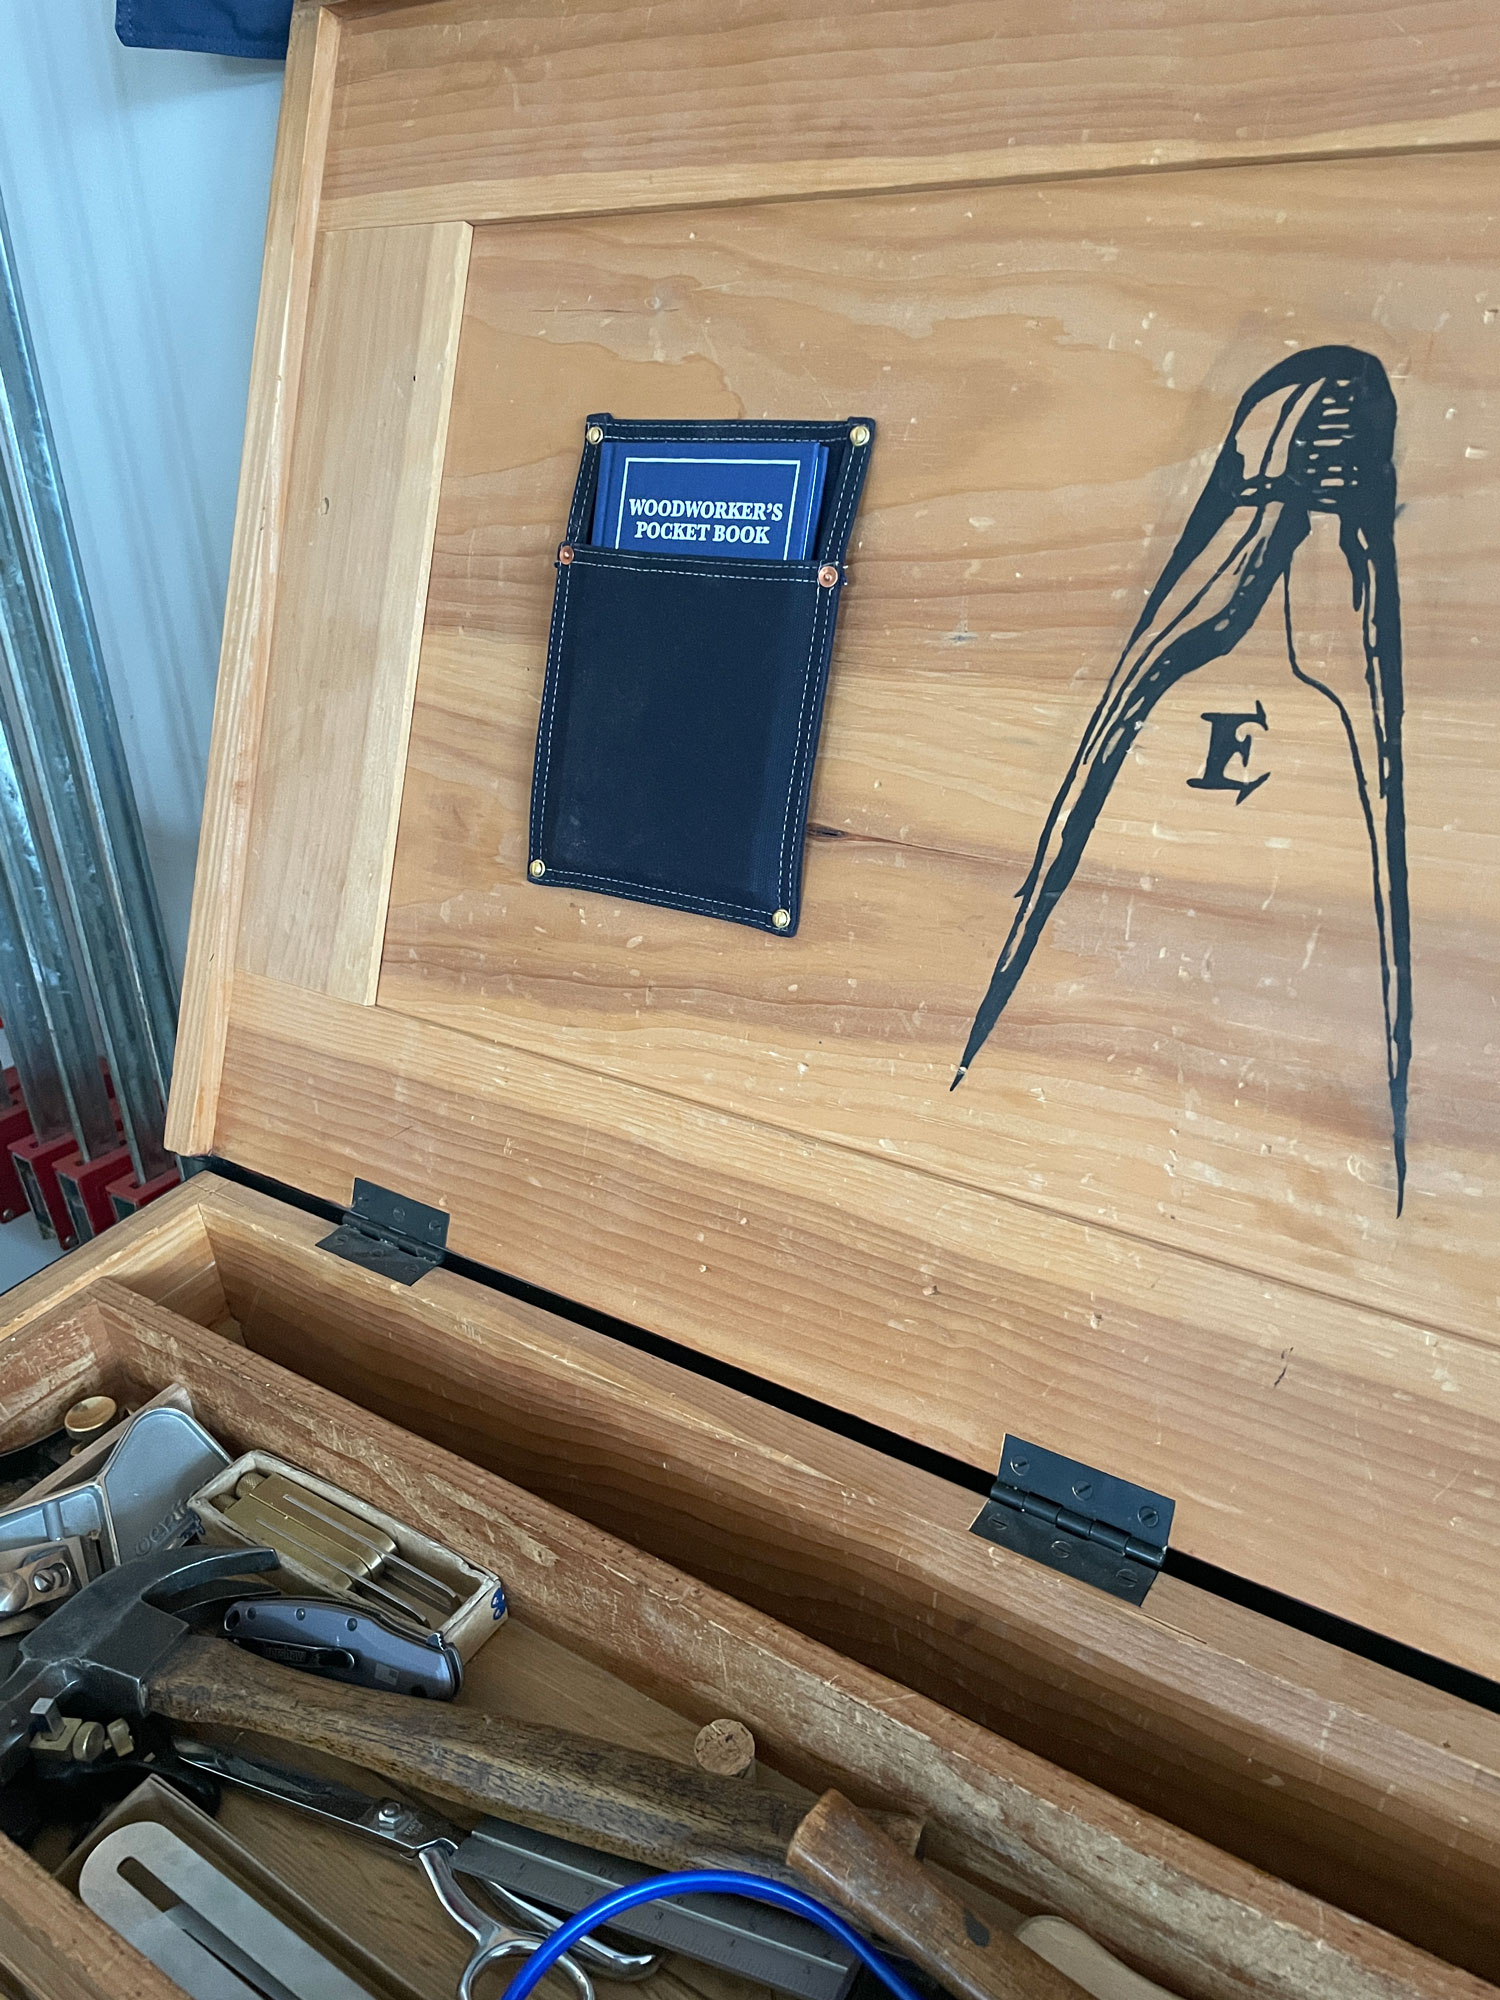
We love them. I installed one on the lid of my Anarchist’s Tool Chest. Megan installed one on the lid of her tool chest and also installed one on the lid of a Dutch Tool Chest she is constructing for her forthcoming book.
Note that all proceeds from the slipcase (which is $25) go to Jason Thigpen and his family at Texas Heritage. Lost Art Press isn’t taking any royalties. We think the world of Jason and his family and the work that they produce. Even if you don’t need a slipcase, we encourage you to check out the company’s tool rolls, aprons and leather goods.
We are currently sold out of “The Woodworker’s Pocket Book” in our store. Another press run is in the works, but we don’t expect to be restocked until mid-April. However, several of our retailers have stock, and we encourage you to support them. All of these retailers had stock or were taking pre-orders as of today.
Shortly after “The Anarchist’s Tool Chest” was released I got a nasty call from a reader.
“I’m a graphic designer. I own other Lost Art Press books,” he said. “And I have to say this new book has a terrible, amateurish design.”
“Exactly right,” I replied.
Each of the three books in the “anarchist” series takes its design cues from different points in history, reflecting something about the book’s content or storyline. (This is true for all of our books; we don’t have a house style.)
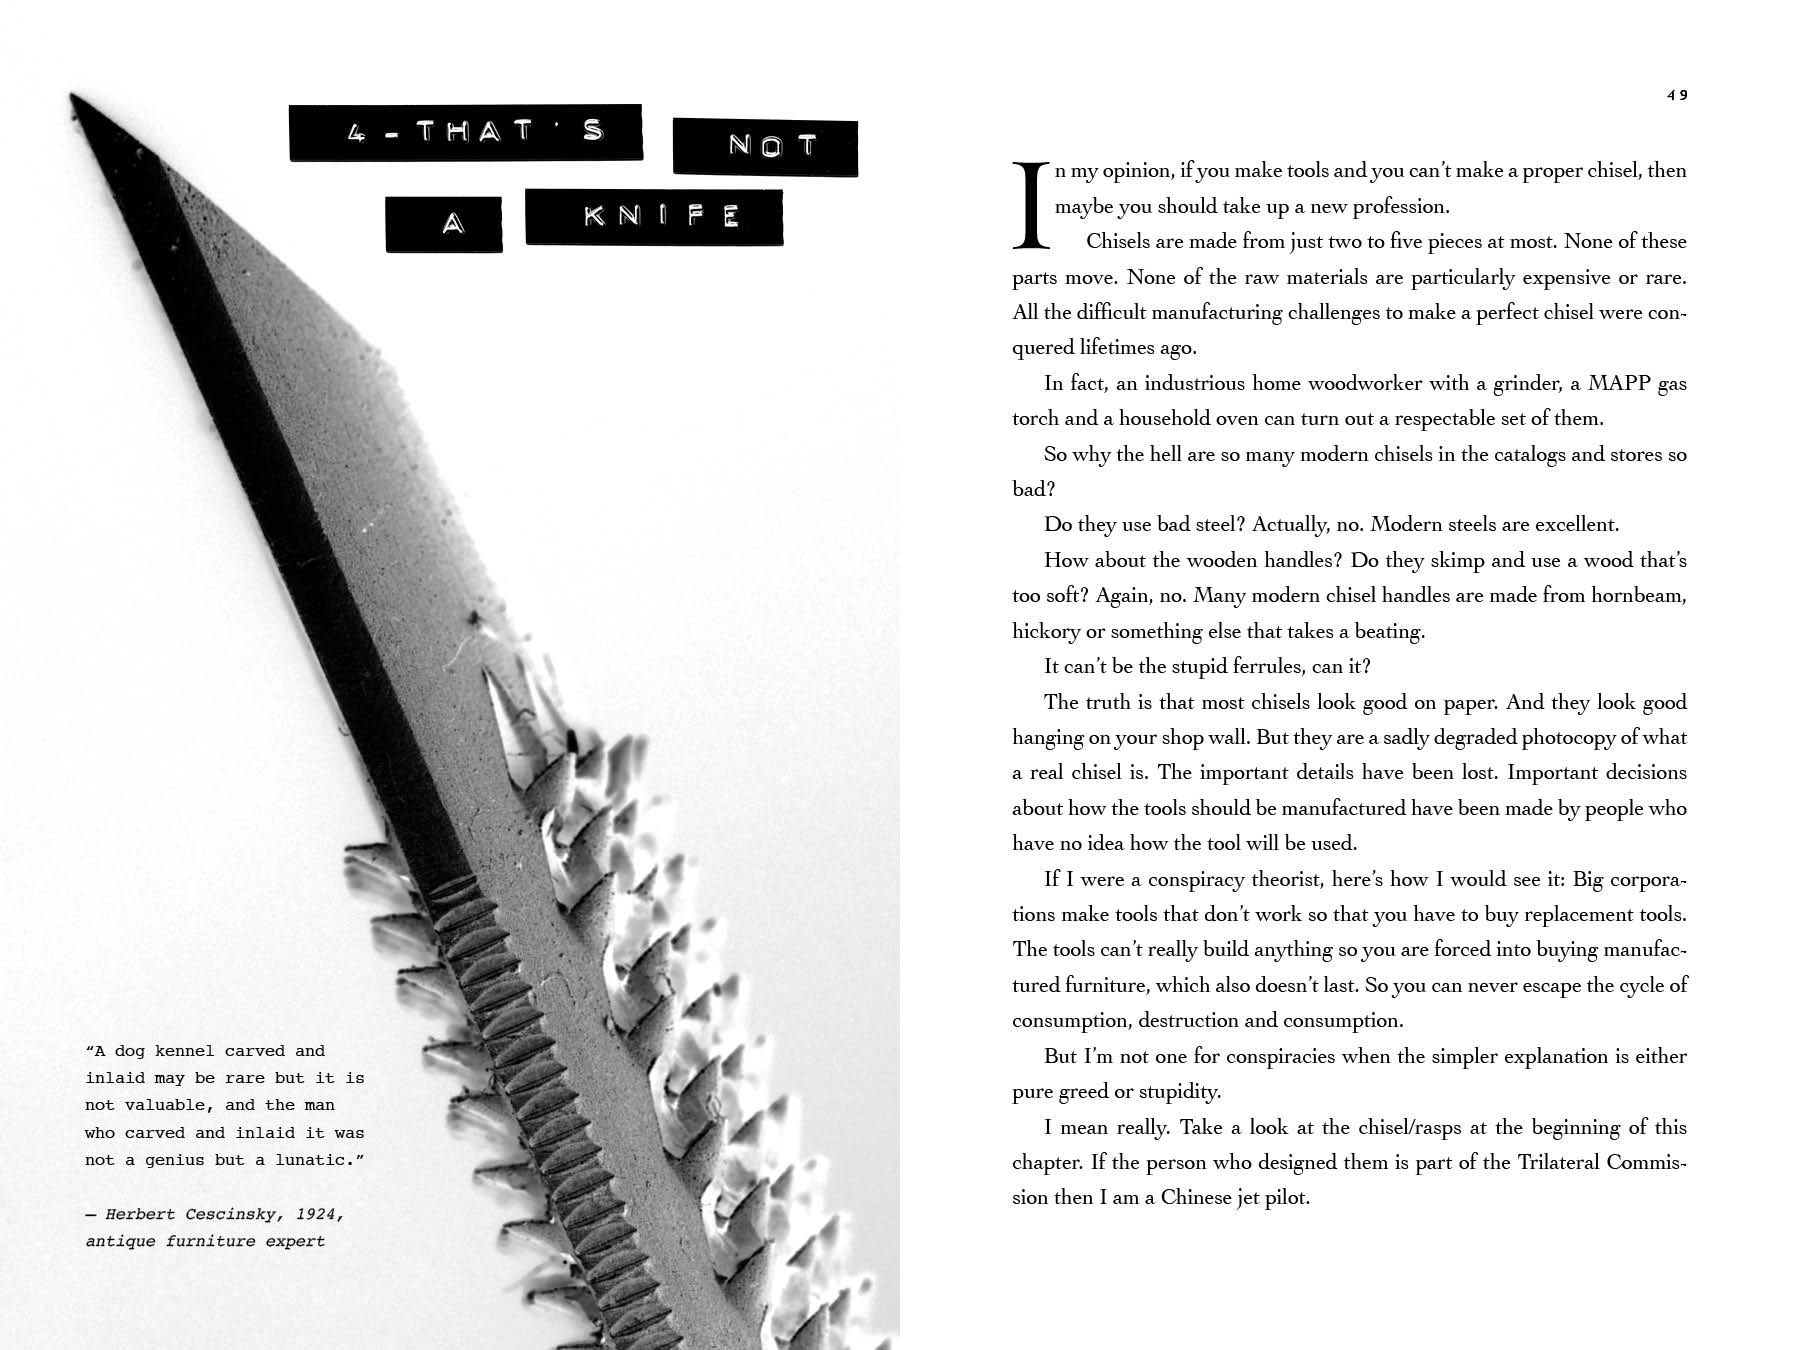
“The Anarchist’s Tool Chest” is supposed to look like a manifesto set on a Macintosh. The chapter headings were made with a clicky label maker. The body copy is 11-point Cochin, a free font, and is set on a 17-point baseline (way too much space between the lines). The font used for the quotations is Courier 8 point, another freely available font.
From a broader perspective, the book doesn’t have a formal “grid,” which is the underlying structure used by most page designers when setting columns, photos and drawings. Photos intrude into the body copy in awkward ways. Yet, the book is (I think) still readable from a typographical perspective.
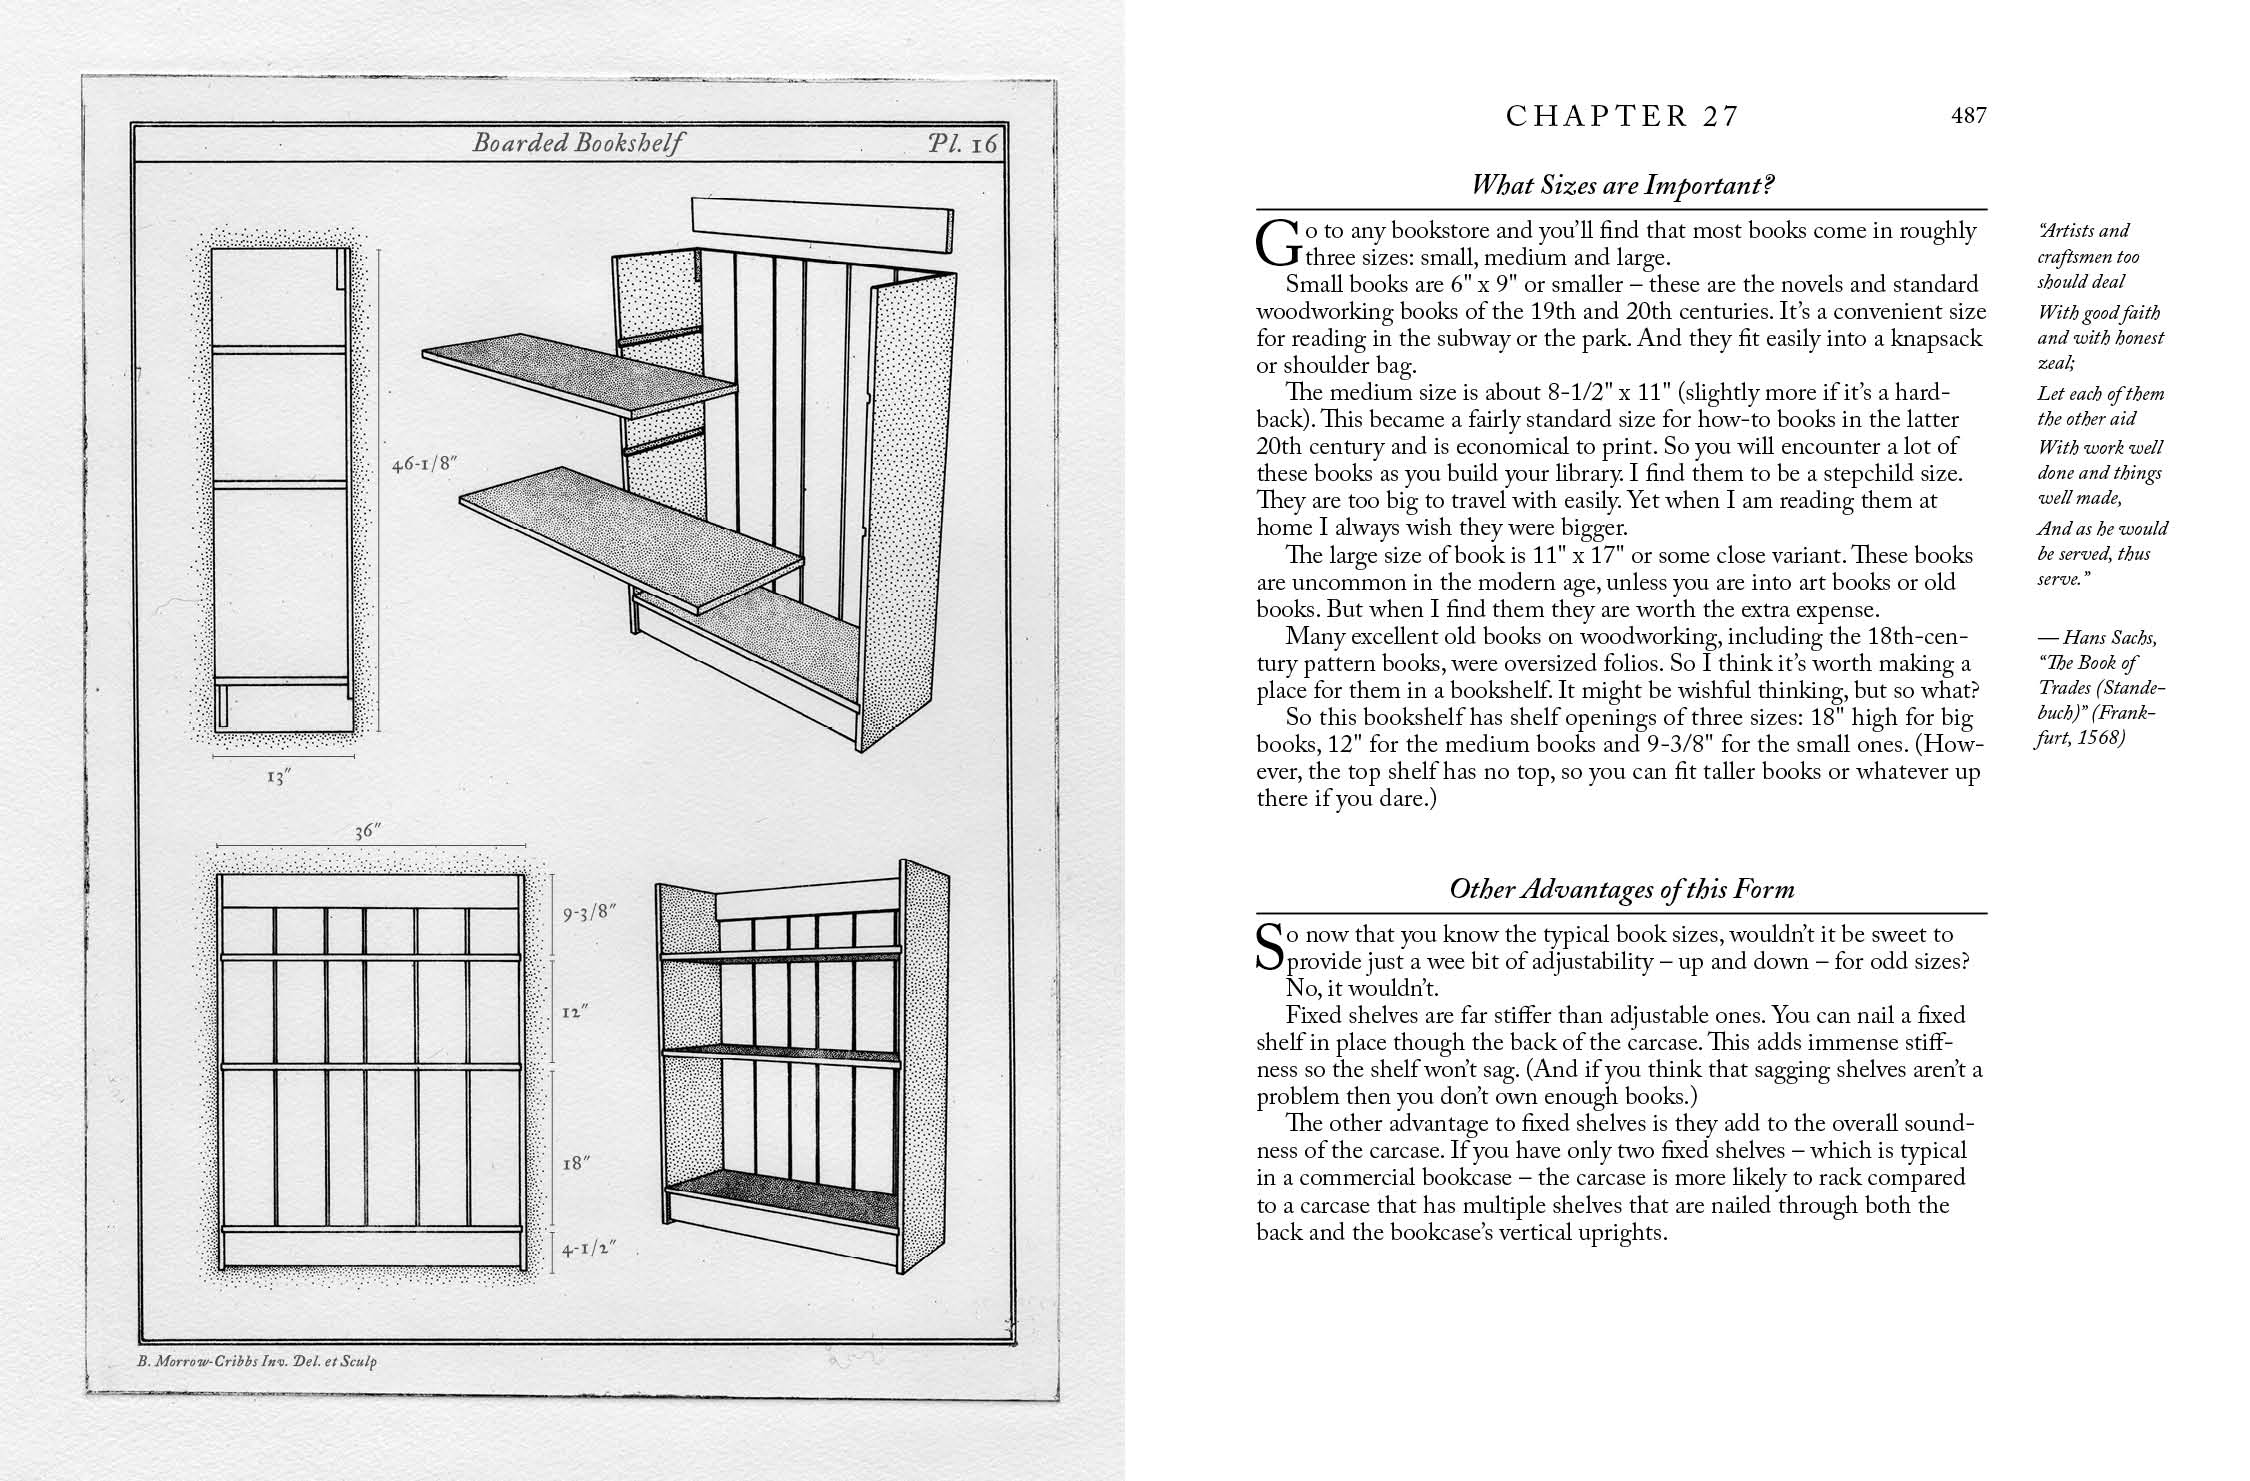
For the second book, “The Anarchist’s Design Book,” I looked to 18th-century pattern books and 17th-century texts. The book’s physical size is the same as Andre Felibien’s “Des Principes de l’Architecture…” The body copy is Caslon 12 point (on 13-point leading). Caslon is from the early 18th century (circa 1722). The style of the subheadings, the drop capitals and even the running heads on the pages are all ideas swiped from early books.
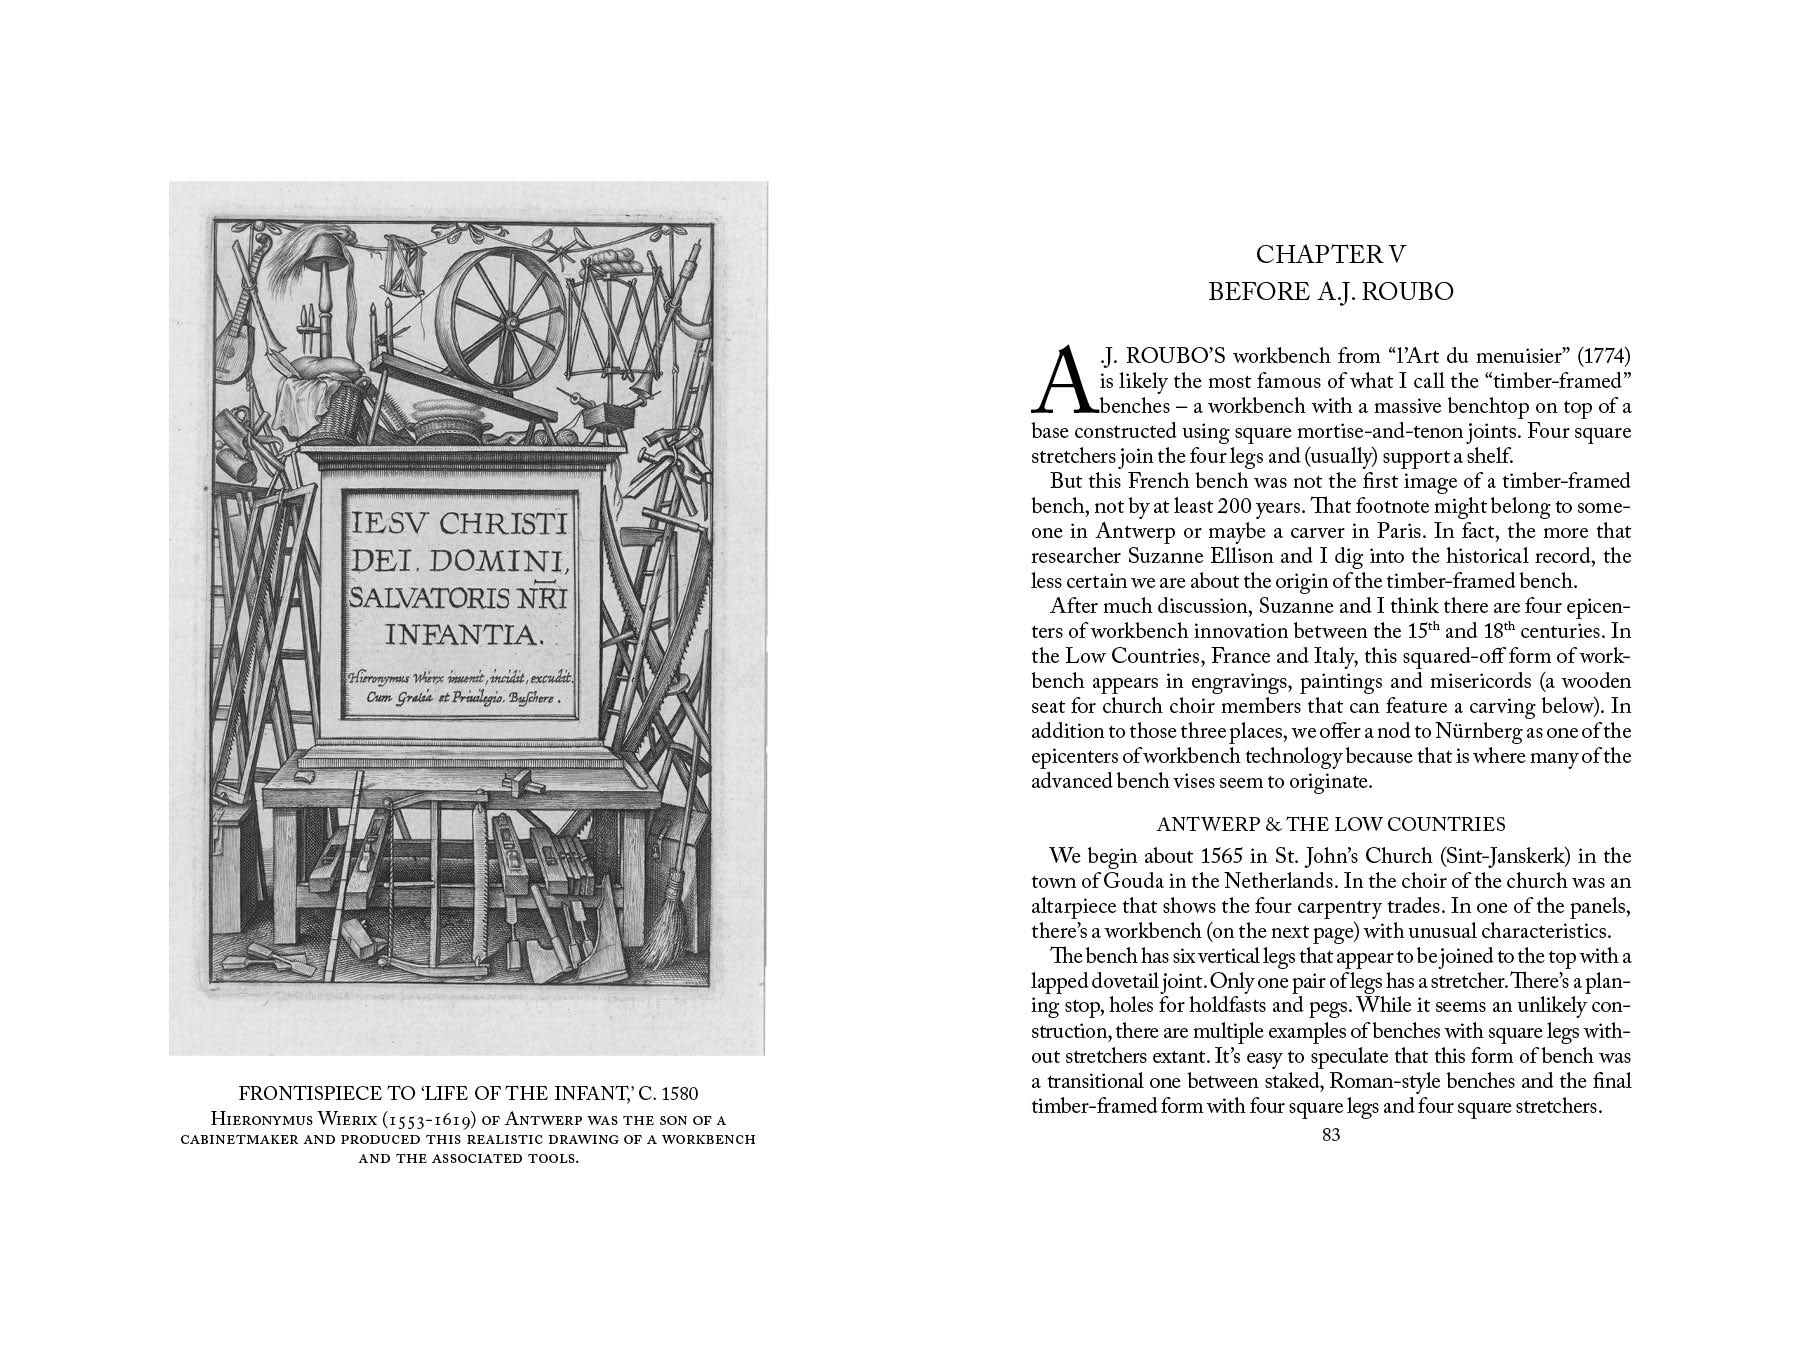
Plus, of course, the book’s copperplate etchings by Briony Morrow-Cribbs add to the overall older feel to the book. The idea behind the book design (and the book itself) was to treat vernacular furniture with the same respect as the high-style stuff.
The third book, “The Anarchist’s Workbench” (download it for free here), is from an entirely different place. It is meant to echo the books of the early 20th century that were set with Linotype machines. The body copy is, again Caslon, but the letters are set tighter. The type is 10.5 point on 12-point leading. In fact, all of the text in the book (except the data page at the front with the ISBN) is set in some form of Caslon – a common feature of books of this time.
Unlike the other two books, the text is carefully justified to look more formal and present letterspacing that looks like it was done by a real designer. The images and text are locked to a rigid grid system. The design is (supposed to look) mature. And that mature design is supposed to reflect the ideas in the book (poo jokes aside).
Apologies for the “behind the scenes” content. I get asked sometimes why our books look so different. This is why.
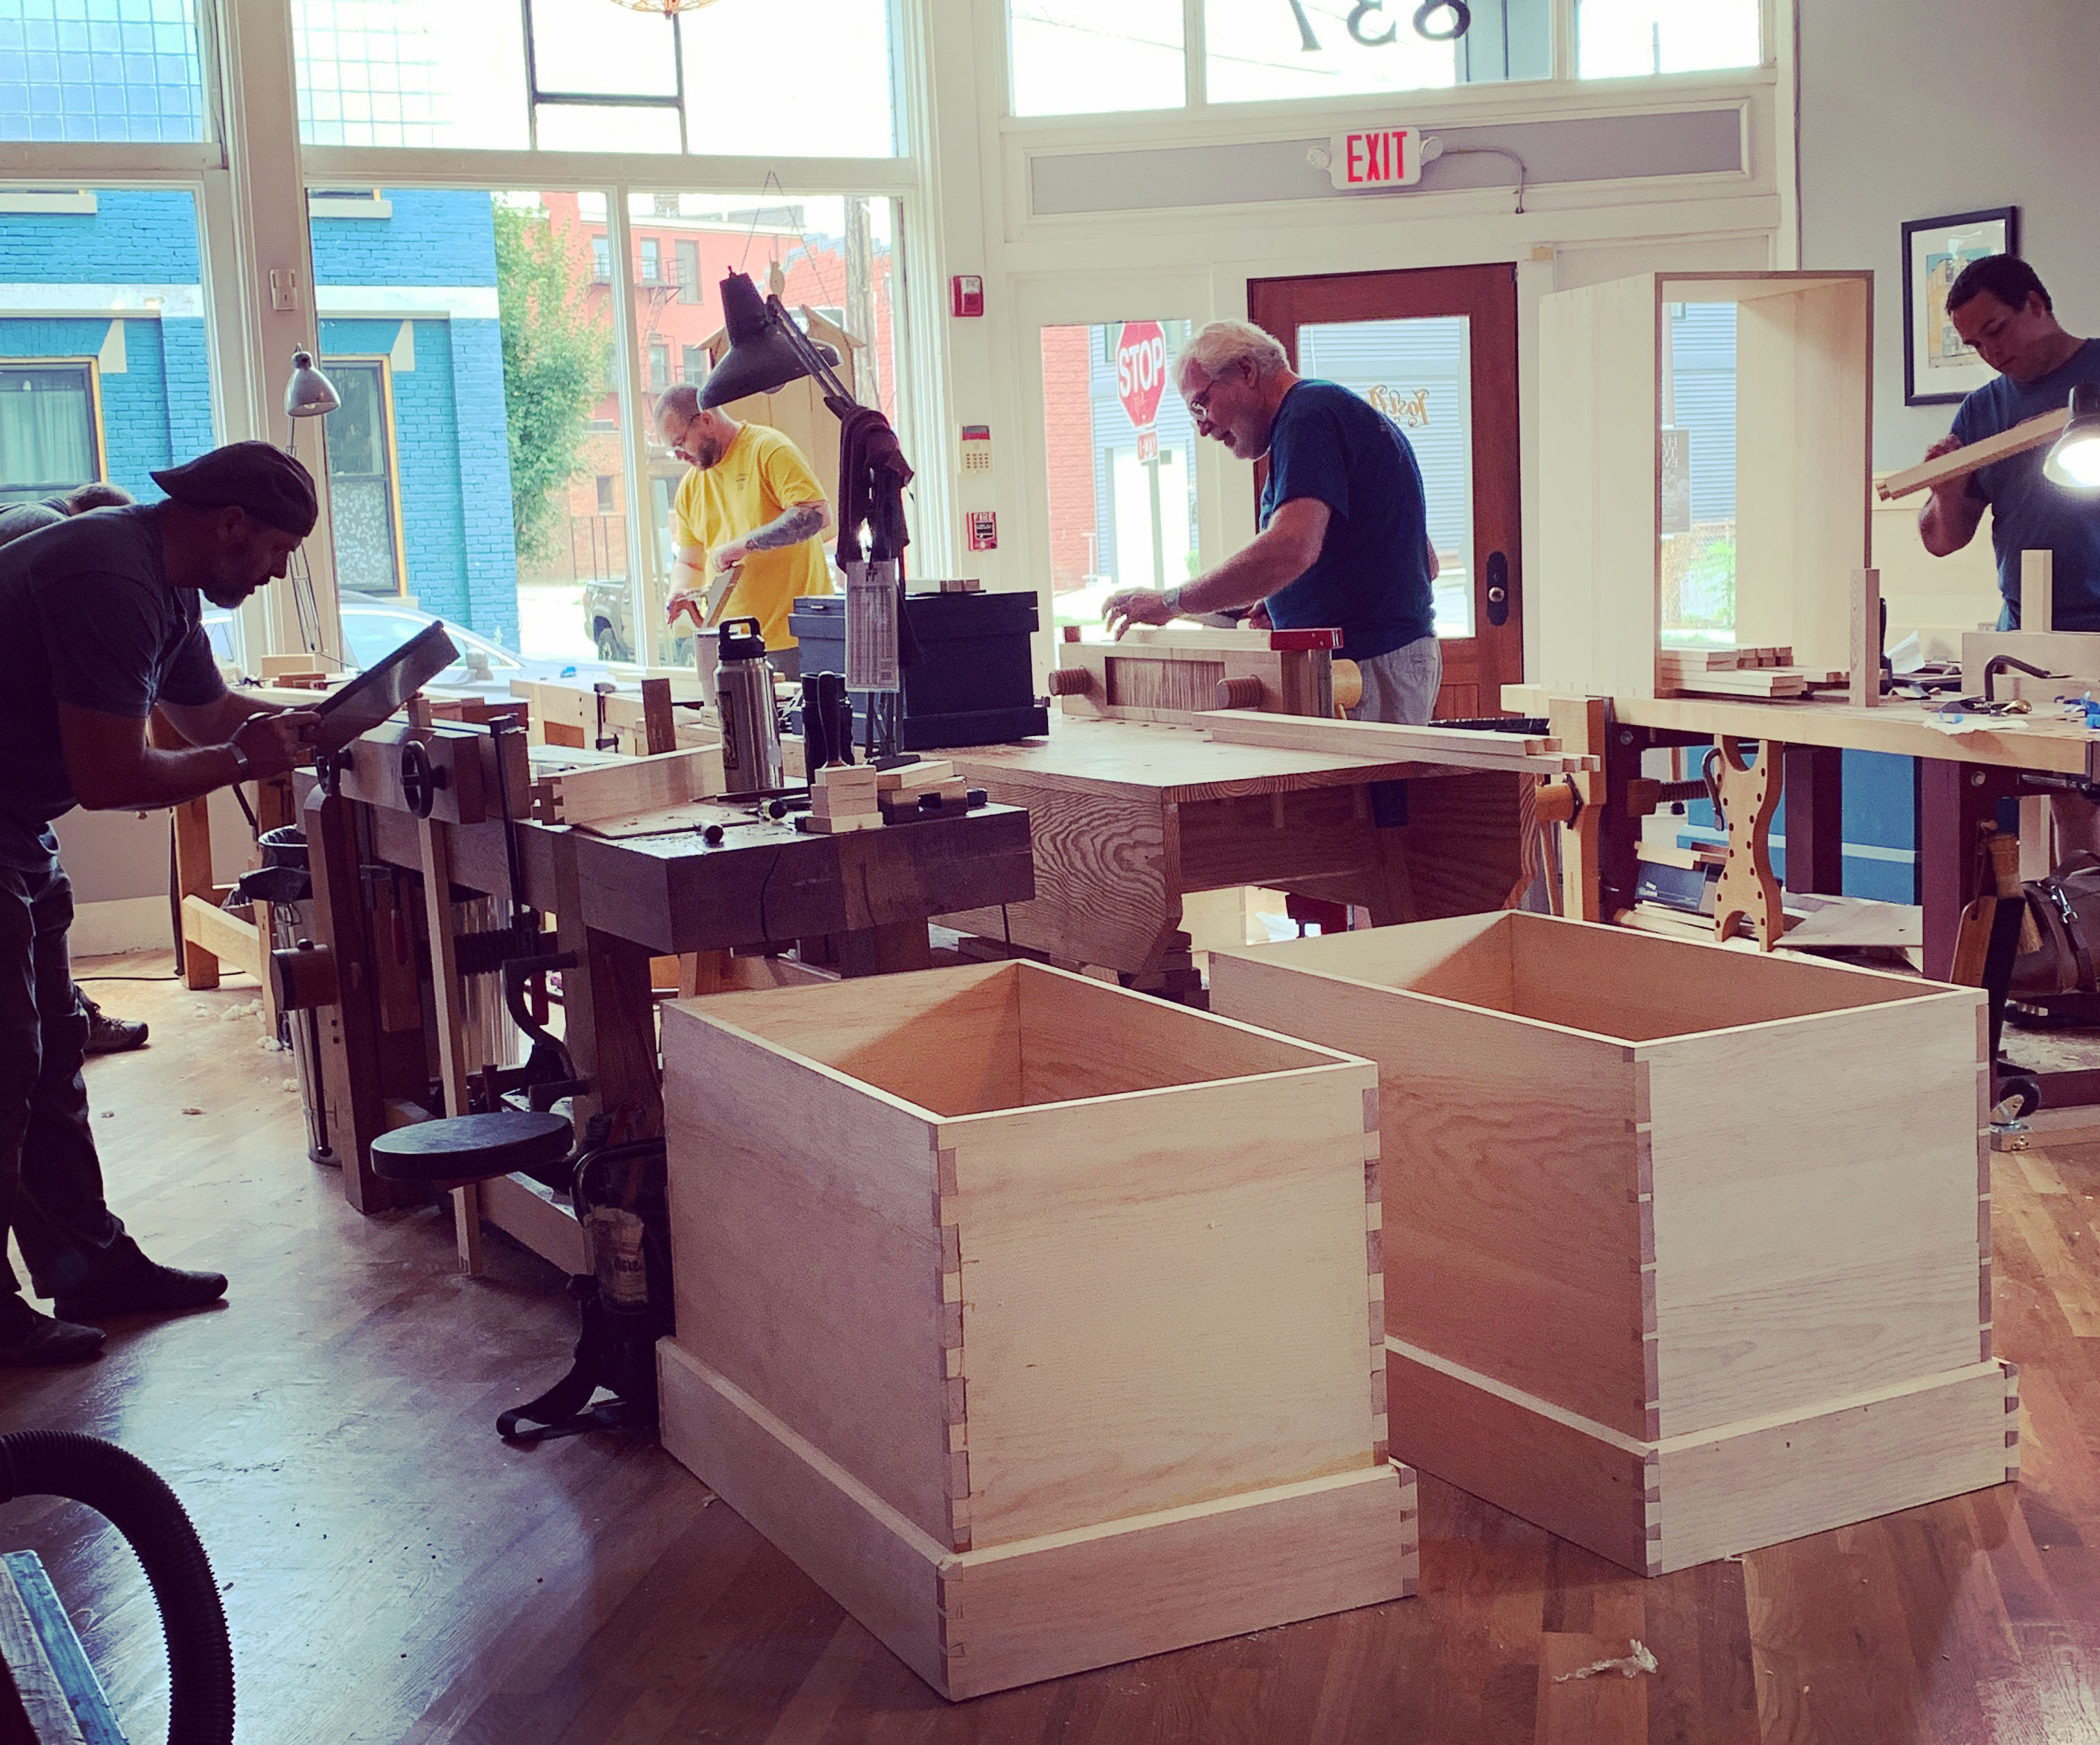
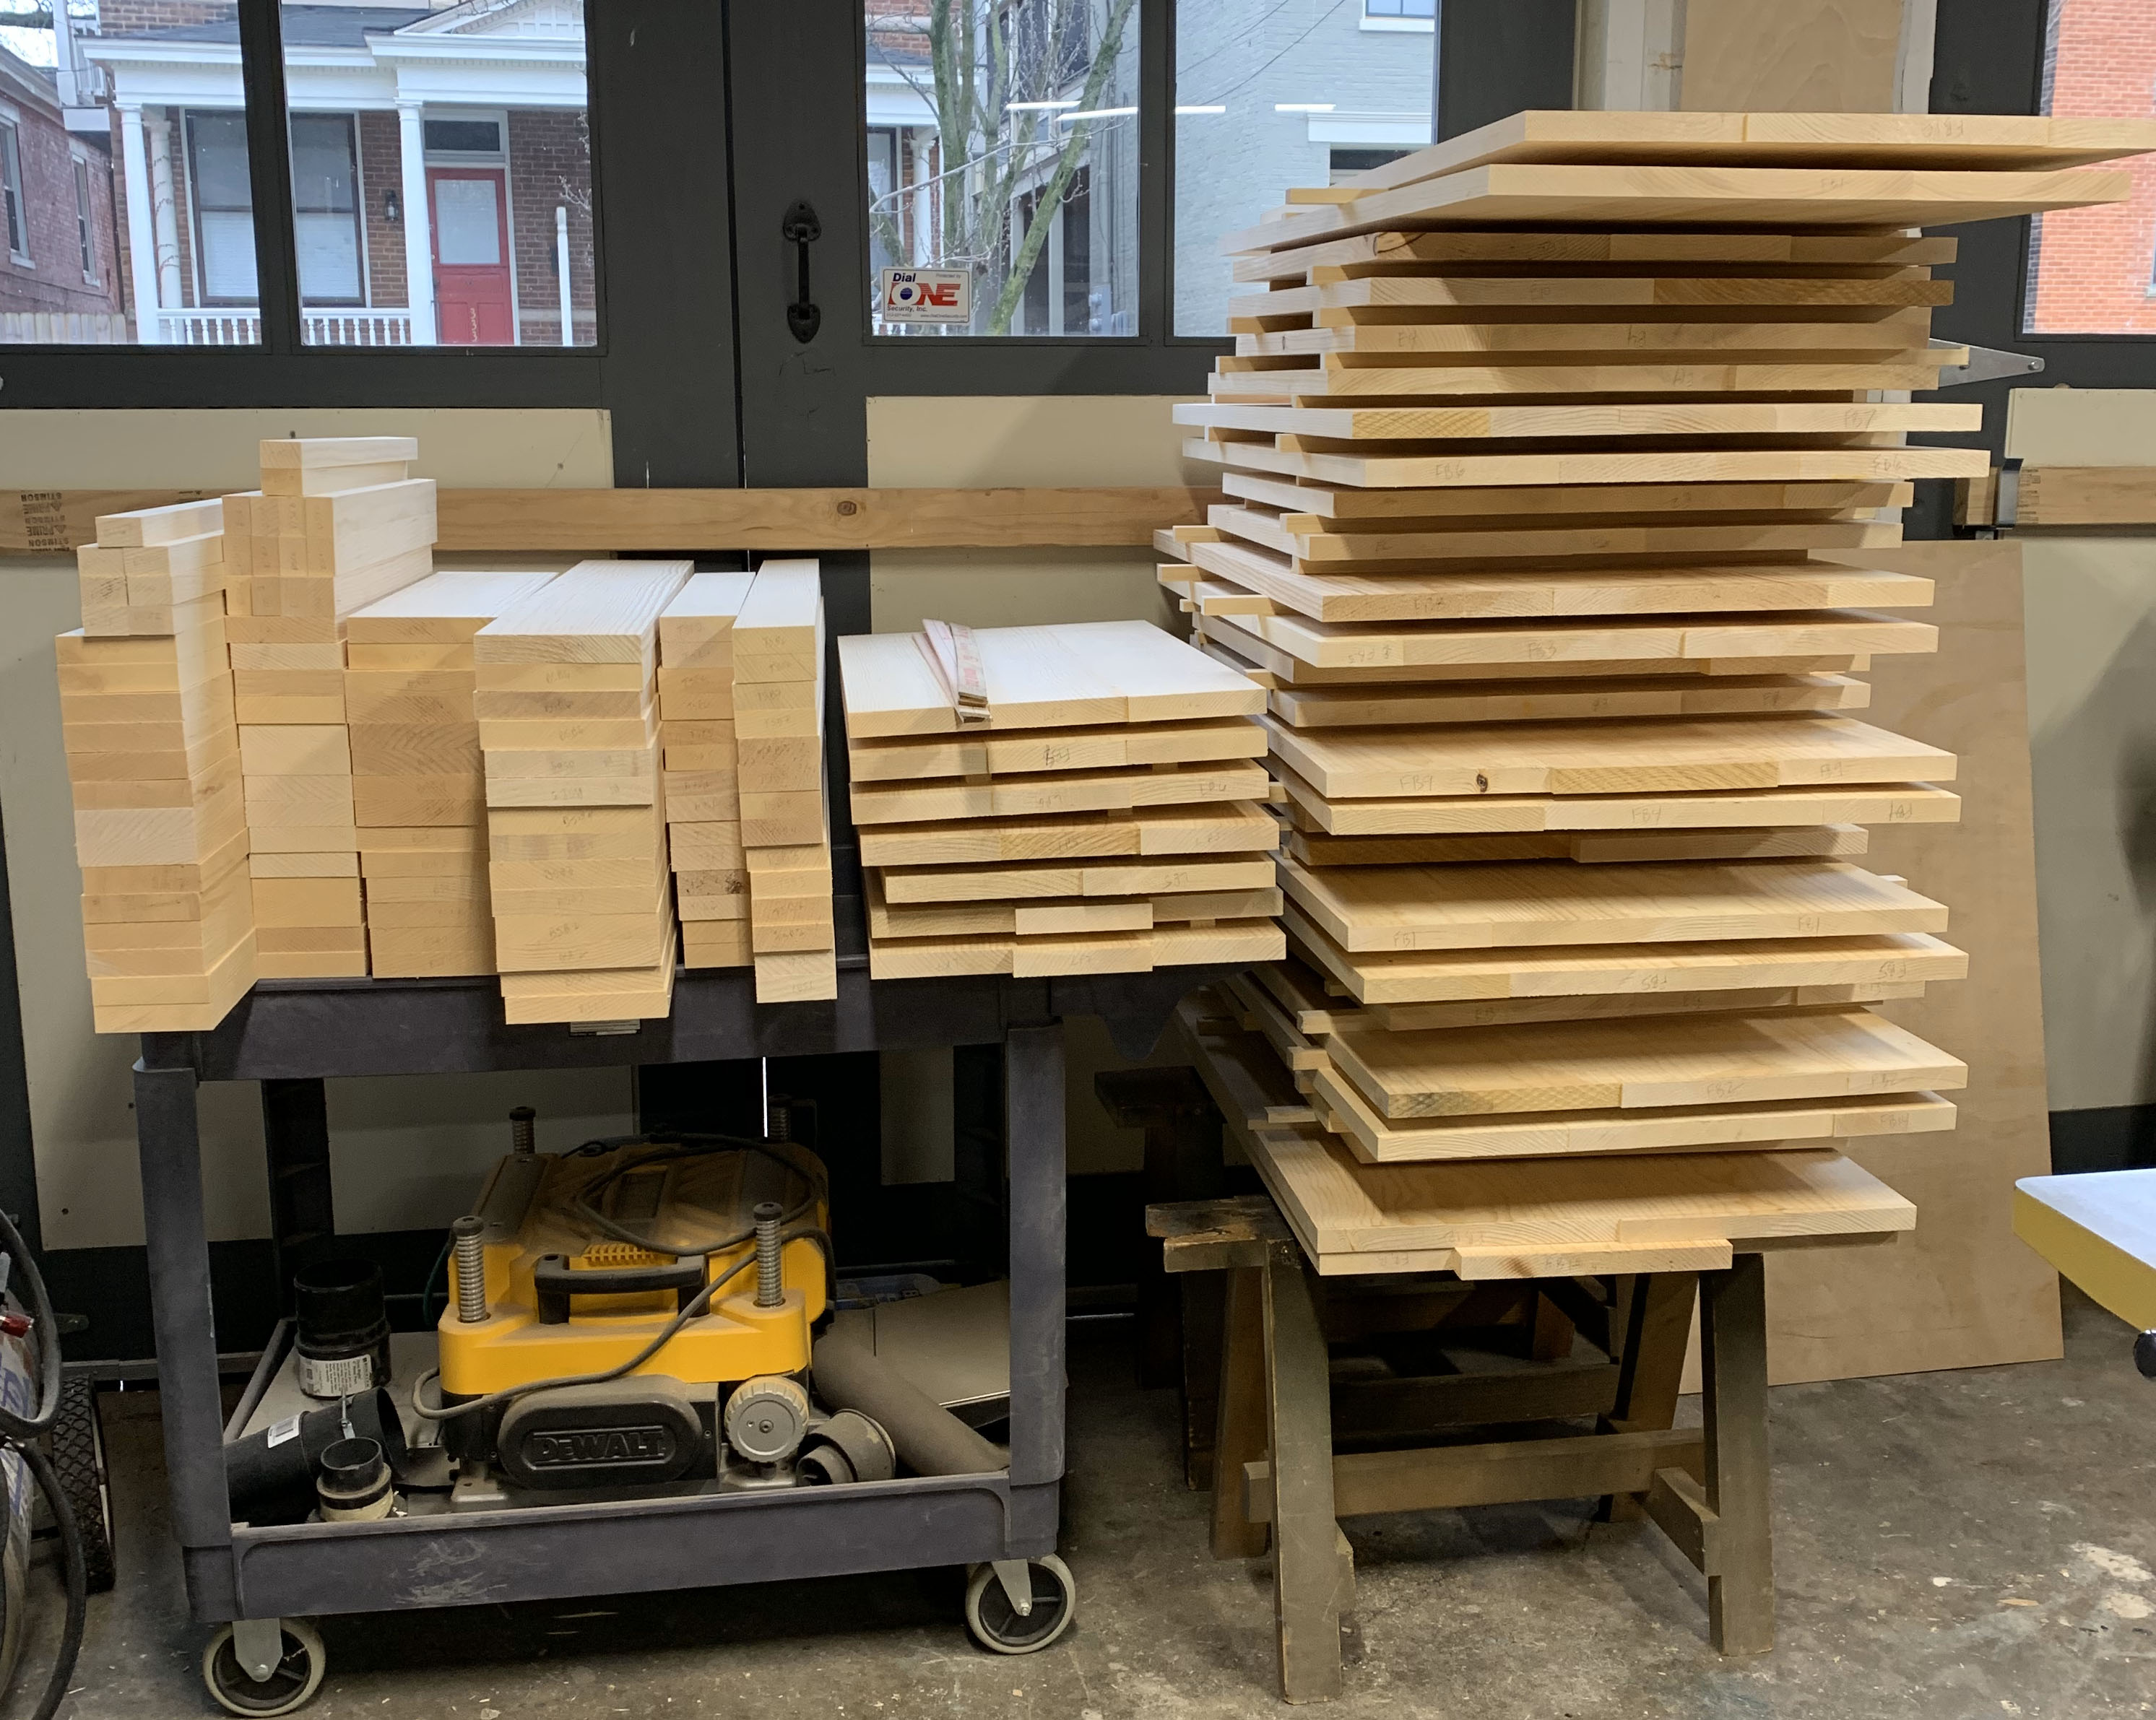
Above is all the wood in mid-prep for seven “Anarchist’s tool chests.” The lid panels and carcase front/back and ends still need to be cut to final width and length. I’m excited to soon be teaching again…but just looking at this picture makes me tired!
I don’t make many unequivocal statements, but here’s one: Some non-stringy species of white pine is the correct wood for a tool chest. And if you can get it, choose sugar pine or Eastern white pine. These are lightweight woods that are easy to work with hand tools, and they are typically less expensive in the U.S. than any hardwood, with the possible exception of poplar. And while poplar will work for a tool chest – as will any wood, really – it’s heavy and harder to dovetail than pine. And that will make your tool chest heavier than it needs to be.
Fully loaded, a sugar pine “Anarchist’s Tool Chest” weighs in the neighborhood of 200-225 lbs. (The hardware and choice of wood for tills and other interior bits will affect the weight, as, of course, will the specific tools inside.)
And while I’ve never weighed a pine Dutch tool chest fully loaded, I used to work out of a poplar one while teaching on the road, and I had a heck of a time lifting it in and out of my car. So I’m keeping one of the pine ones I’m building right now to make my peripatetic woodworking life just a little easier.
For the tool chest classes I teach here, I do my best to source beautiful, clear sugar pine, which is typically available in wide widths – the fewer pieces in panel glue-ups, the better. But every once in a while, someone will ask if they can prep their own wood for a class – and it’s usually for the anarchist’s tool chest class – the one for which the wood prep is the most demanding and most critical that it be good. I say sure…but you darn well better do a good job of it. A) I won’t have time during the class to fix any out-of-square edges for you and B) I won’t have on hand matching stock to replace a piece should something go terribly wrong. C) I don’t want to help lift your full-size oak or purpleheart tool chest into your car at the end of class.
But if you insist on bringing your own, below are the steps to follow (some of which are pretty basic…but you never know what people already know).
The flatter the wood, the easier it is to prep – and the more plain the grain, generally the easier it is to dovetail. I don’t want any points of cathedrals or bird’s eyes in my pins and tails (or knots, or course). So the first thing I do is to lay out rough cuts to avoid anything problematic. I start with the largest pieces (above, that’s the front and back of the ATC), and try my best to have all my glue-ups be only two pieces (you can see above that I typically have to use three pieces in at least some of the carcase and lid panels).
So first, I mark out all the pieces, and if they’re longer than 14″ or so, I rough cut them about 1″ overlong at the chop saw and about 1/2″ overwide at the band saw (or I joint one edge then cut them overwide at the table saw). For pieces that are shorter than 14″ (and therefore can’t safely go through the planer), I keep them attached to another piece until after the surfacing is done. You don’t, however, want to leave the pieces much longer than they need to be. The longer a board, the more likely it is to be twisted – the less of that you have to take out, the better. Because the more you have to remove from one surface to correct twist or a cup, the more will go into your dust collector.
In order to run the wood through the planer to get it flat (and all of it to the same thickness), you need one flat face; that face registers on the bed of the planer. If you’re good with a jointer plane, you may not need a jointer. If you’re decent with a jointer plane but have to prep wood for seven people and have three days to do it, you definitely want an electric jointer.
If you have a helical head on your jointer, you don’t have to worry much about grain direction, but run the stock in the correct direction anyway; it’s a good habit to adopt. The grain should be running downhill. And if there’s a crown in the board on one face, there’s probably a cup on the other. When you run the wood across the cutters, you want it supported as much as possible at the outside edges, so the cupped face should face down. If you’ve already arranged it with the grain running correctly but the cupped face up, simply flip the board end for end, before jointing it. (Odds are pretty good that the heart side will be facing up.)
With thick wood, you can get away with jointing it only enough to create flats at the outside edges to register on the planer bed. But the planer rollers will flatten thin wood…which will spring back after it exits the planer. So for 3/4″ (or thinner) stock, I always run the stock as many times as necessary across the jointer to flatten one face completely. And because I think it’s unsafe to have to push too hard, I’d rather make several light cuts than one deep cut; I usually have the cut set to no more than 1/16″
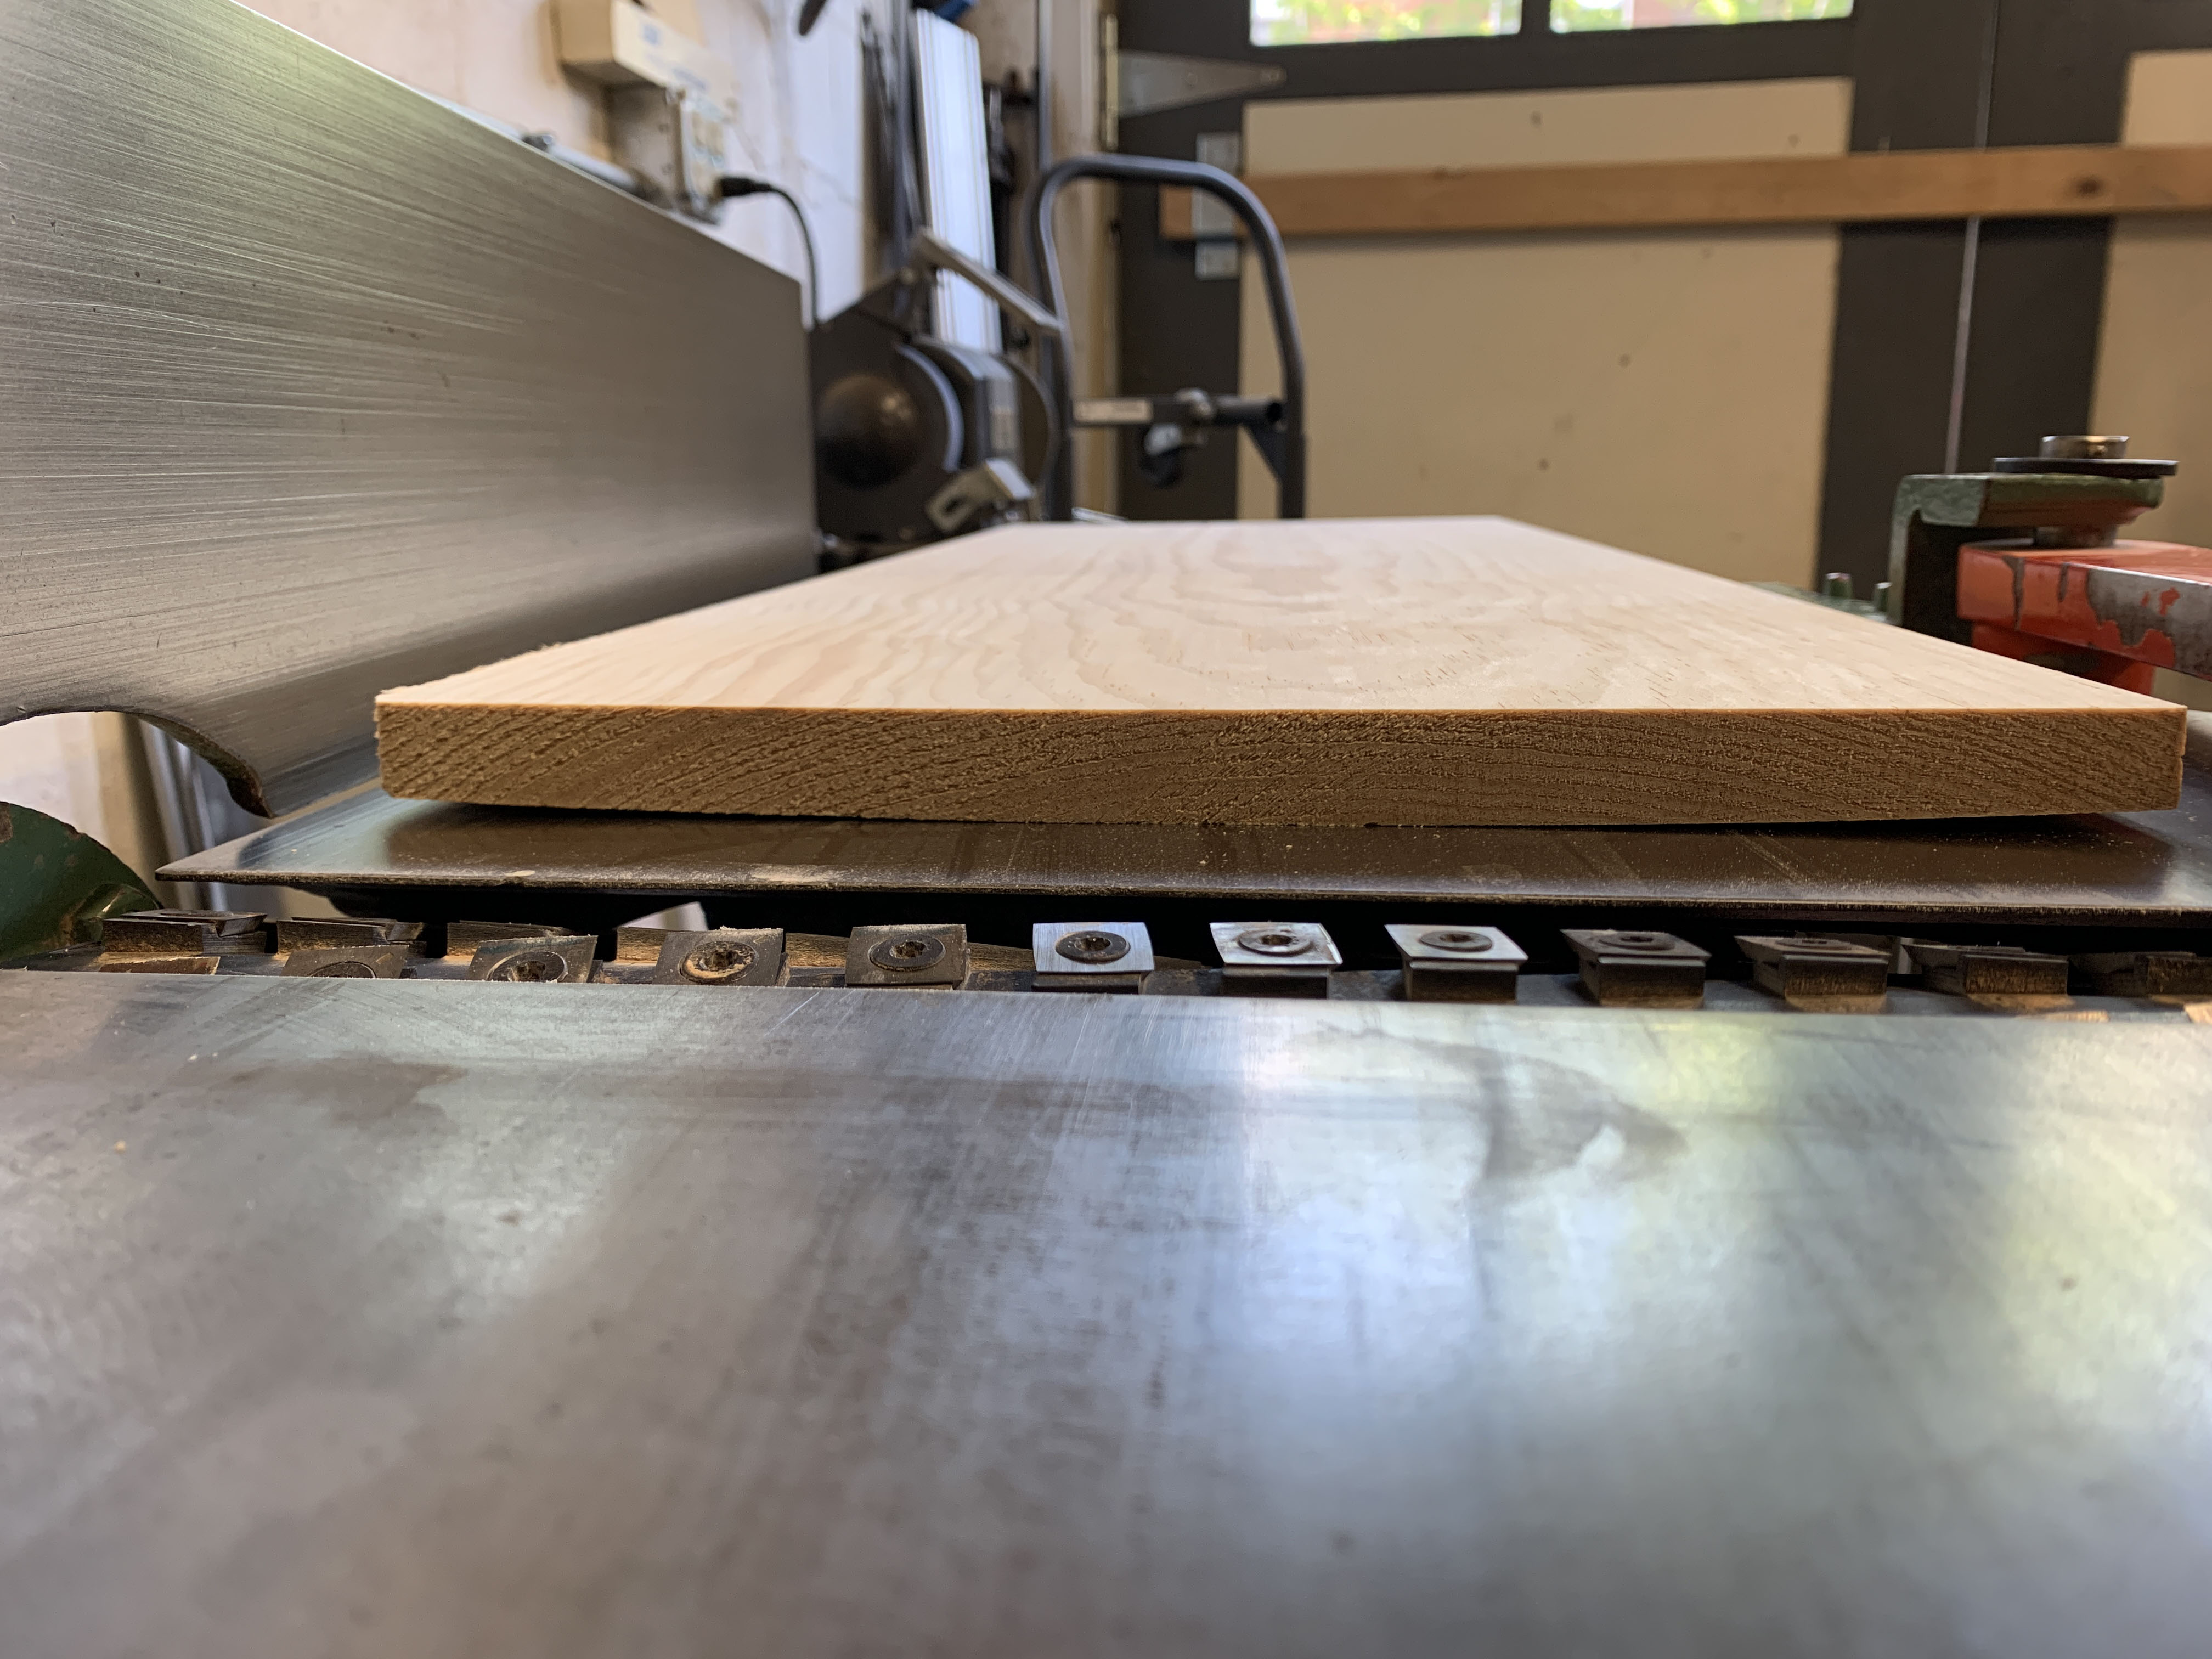
The knives are to the left of the wood; note how the grain is running “downhill” – when the cutters spin clockwise into the wood, they’re moving in the same direction as the grain is running out of the bottom of the wood. If you run the cutters against the grain, it can lift it up and tear it.
The crown of this board indicates that the other face need to go against the jointer bed. Were I to run it over the cutters like this, the board would rock.
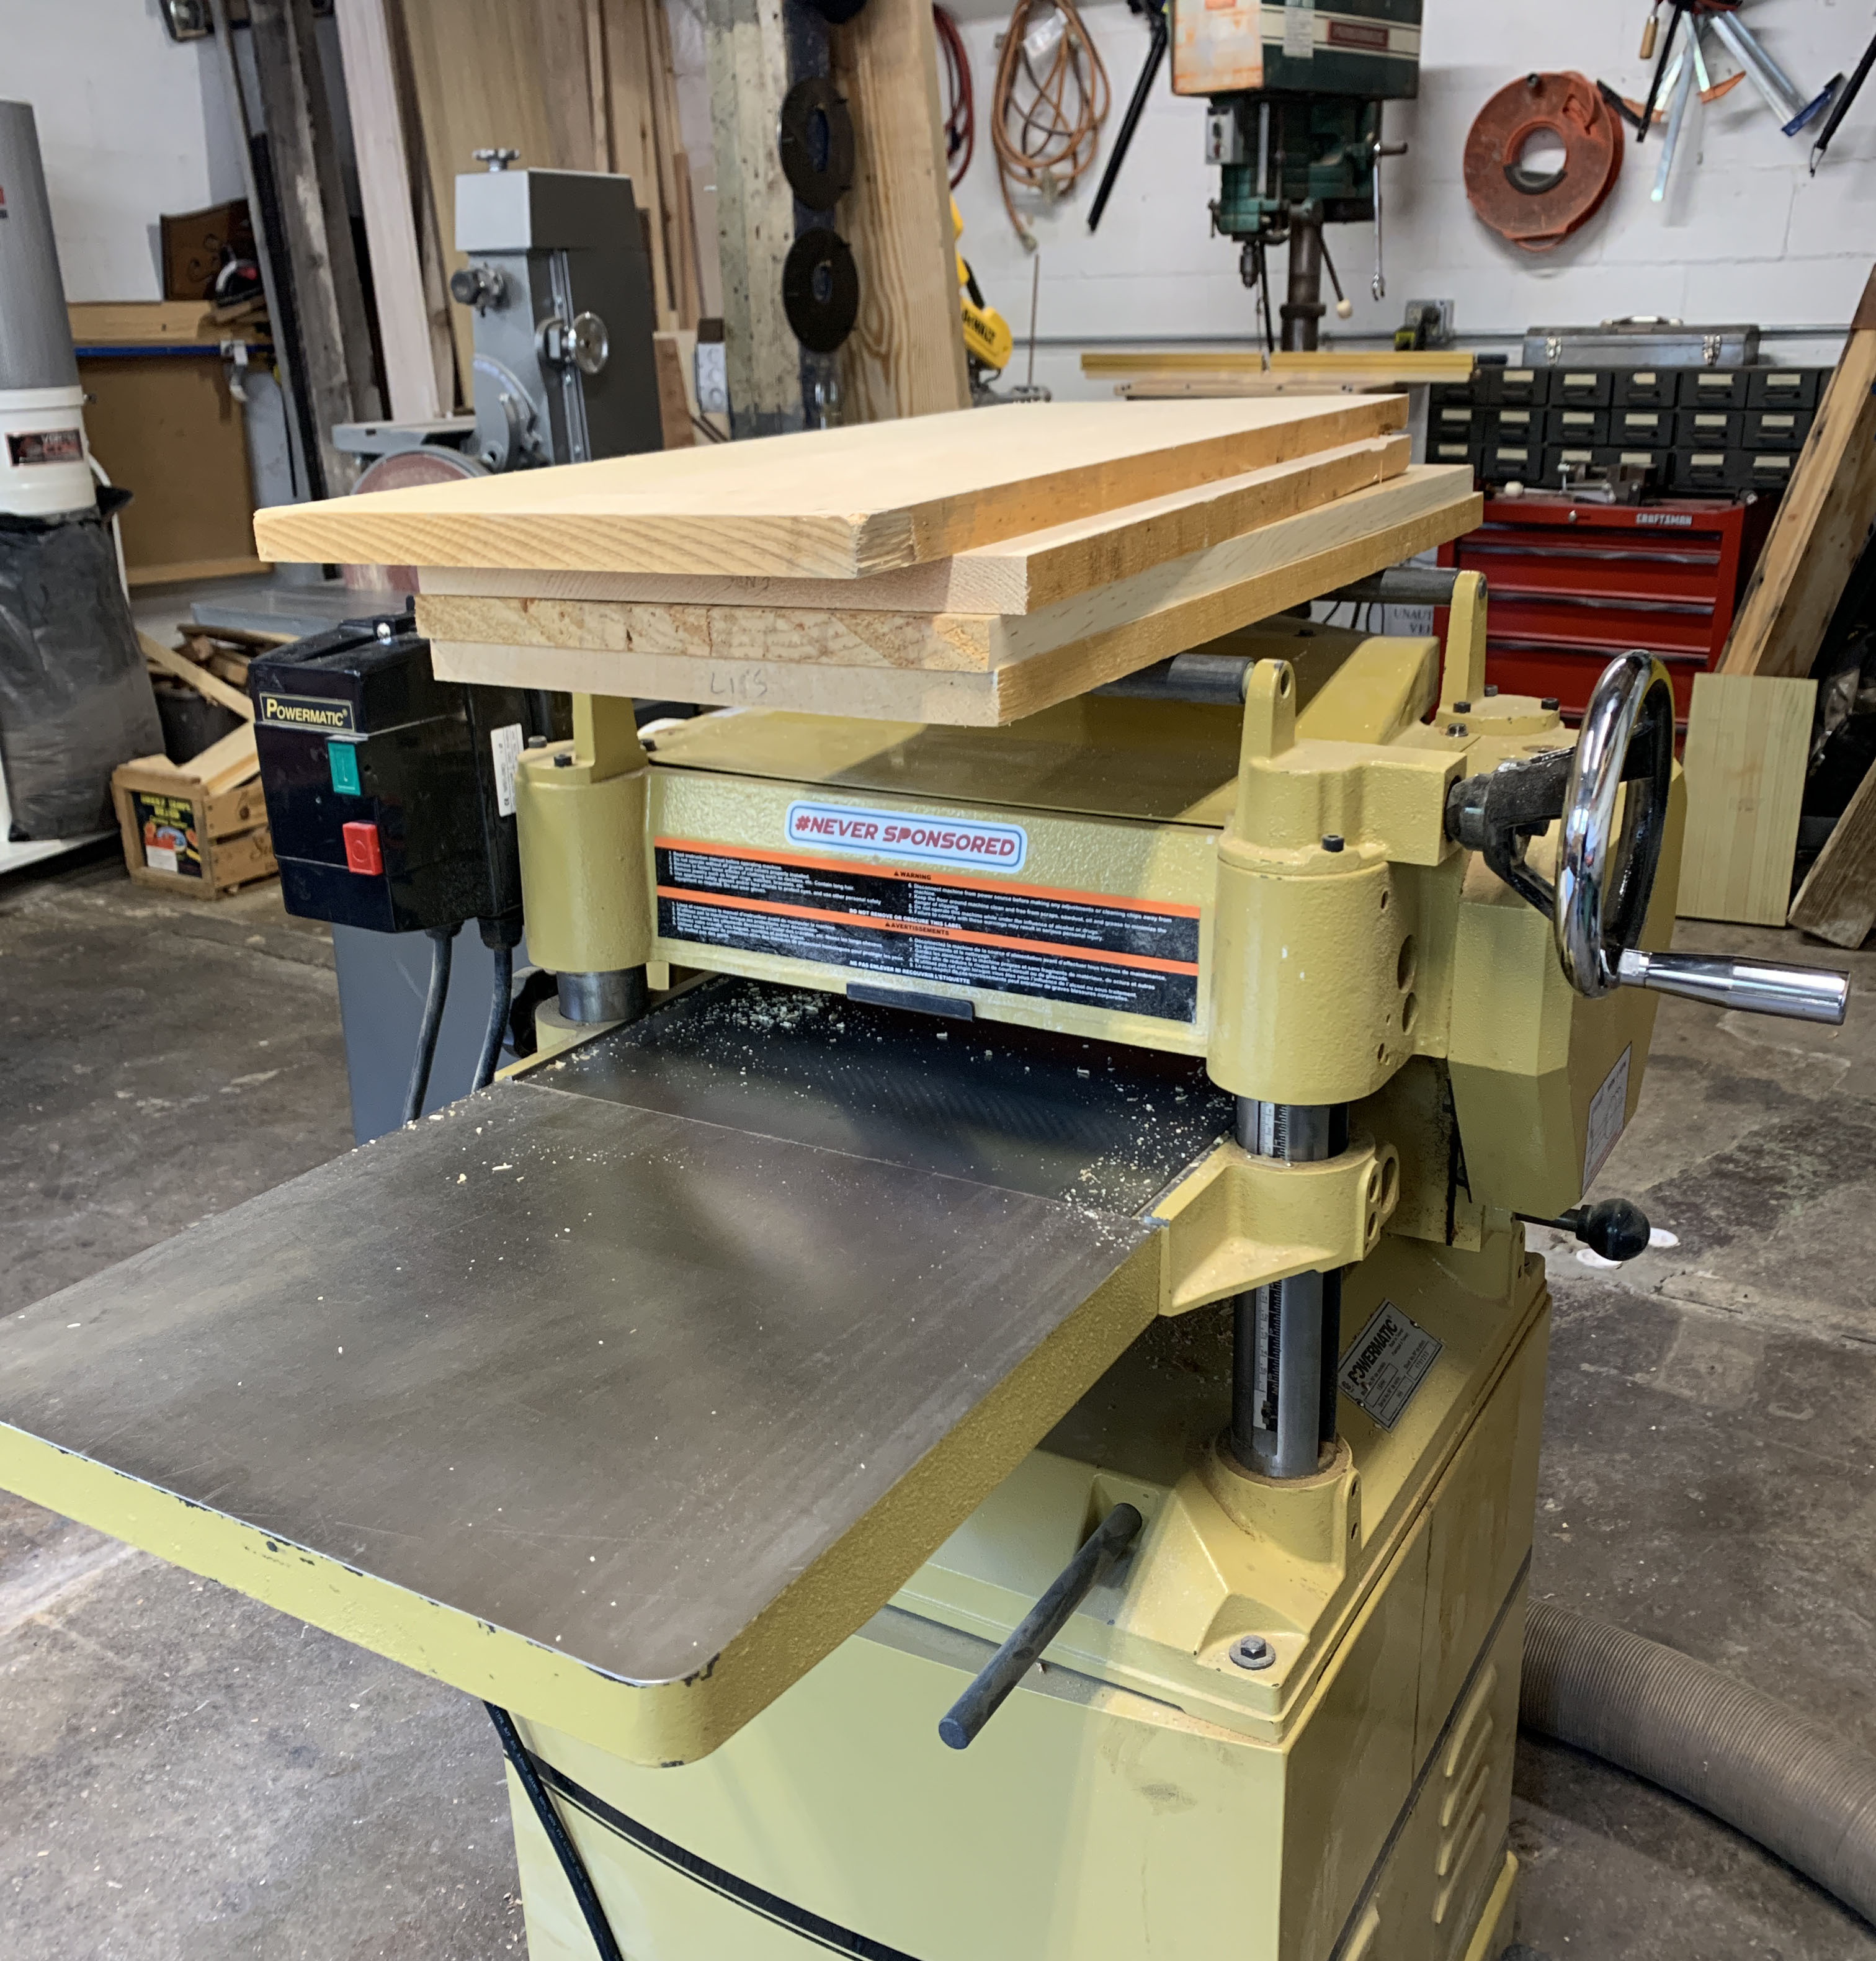
After the final jointer pass, I stack the boards atop the planer, flat face down, with the last end that went over the jointer facing toward the planer mouth – that’s the way they get fed in (last off jointer, first in planer). Though again, if you have a helical cutter, it’s not (usually) that critical.
Stacked and ready to feed, with the jointed faces down. As I pull a board toward me for the first pass, the end that needs to go in the planer is the end already facing in that direction.
I follow the same steps every time I use the planer; that way, I never get turned around. As I pull pieces off the far end, I stack them back in the exact same orientation as they were run through the machine. Then if I have to run them again to get to a certain thickness and the first face is flat, I flip them end for end as I feed them into the planer for the second pass. And repeat. That way, I’m removing wood from both faces, and hopefully equalizing the moisture exchange. (And if I have someone catching for me, I make sure they don’t flip the boards as they stack them.) Same steps for the operator every time. And if the first face isn’t flat after one pass, the board is in the right direction without flipping it to simply run it through again.
And here’s the critical part for classes when it comes to thicknessing: I run all the wood that has to be the same thickness at the same time. I would never run, say, the front and back of a through-dovetailed carcase then come back three days later and run the ends. In order to avoid problems, all the pieces must be the exact same thickness – your best shot at achieving that is to do it all at once. I don’t care if the pieces are a hair over or under 7/8″ – I just care that they’re all the same.
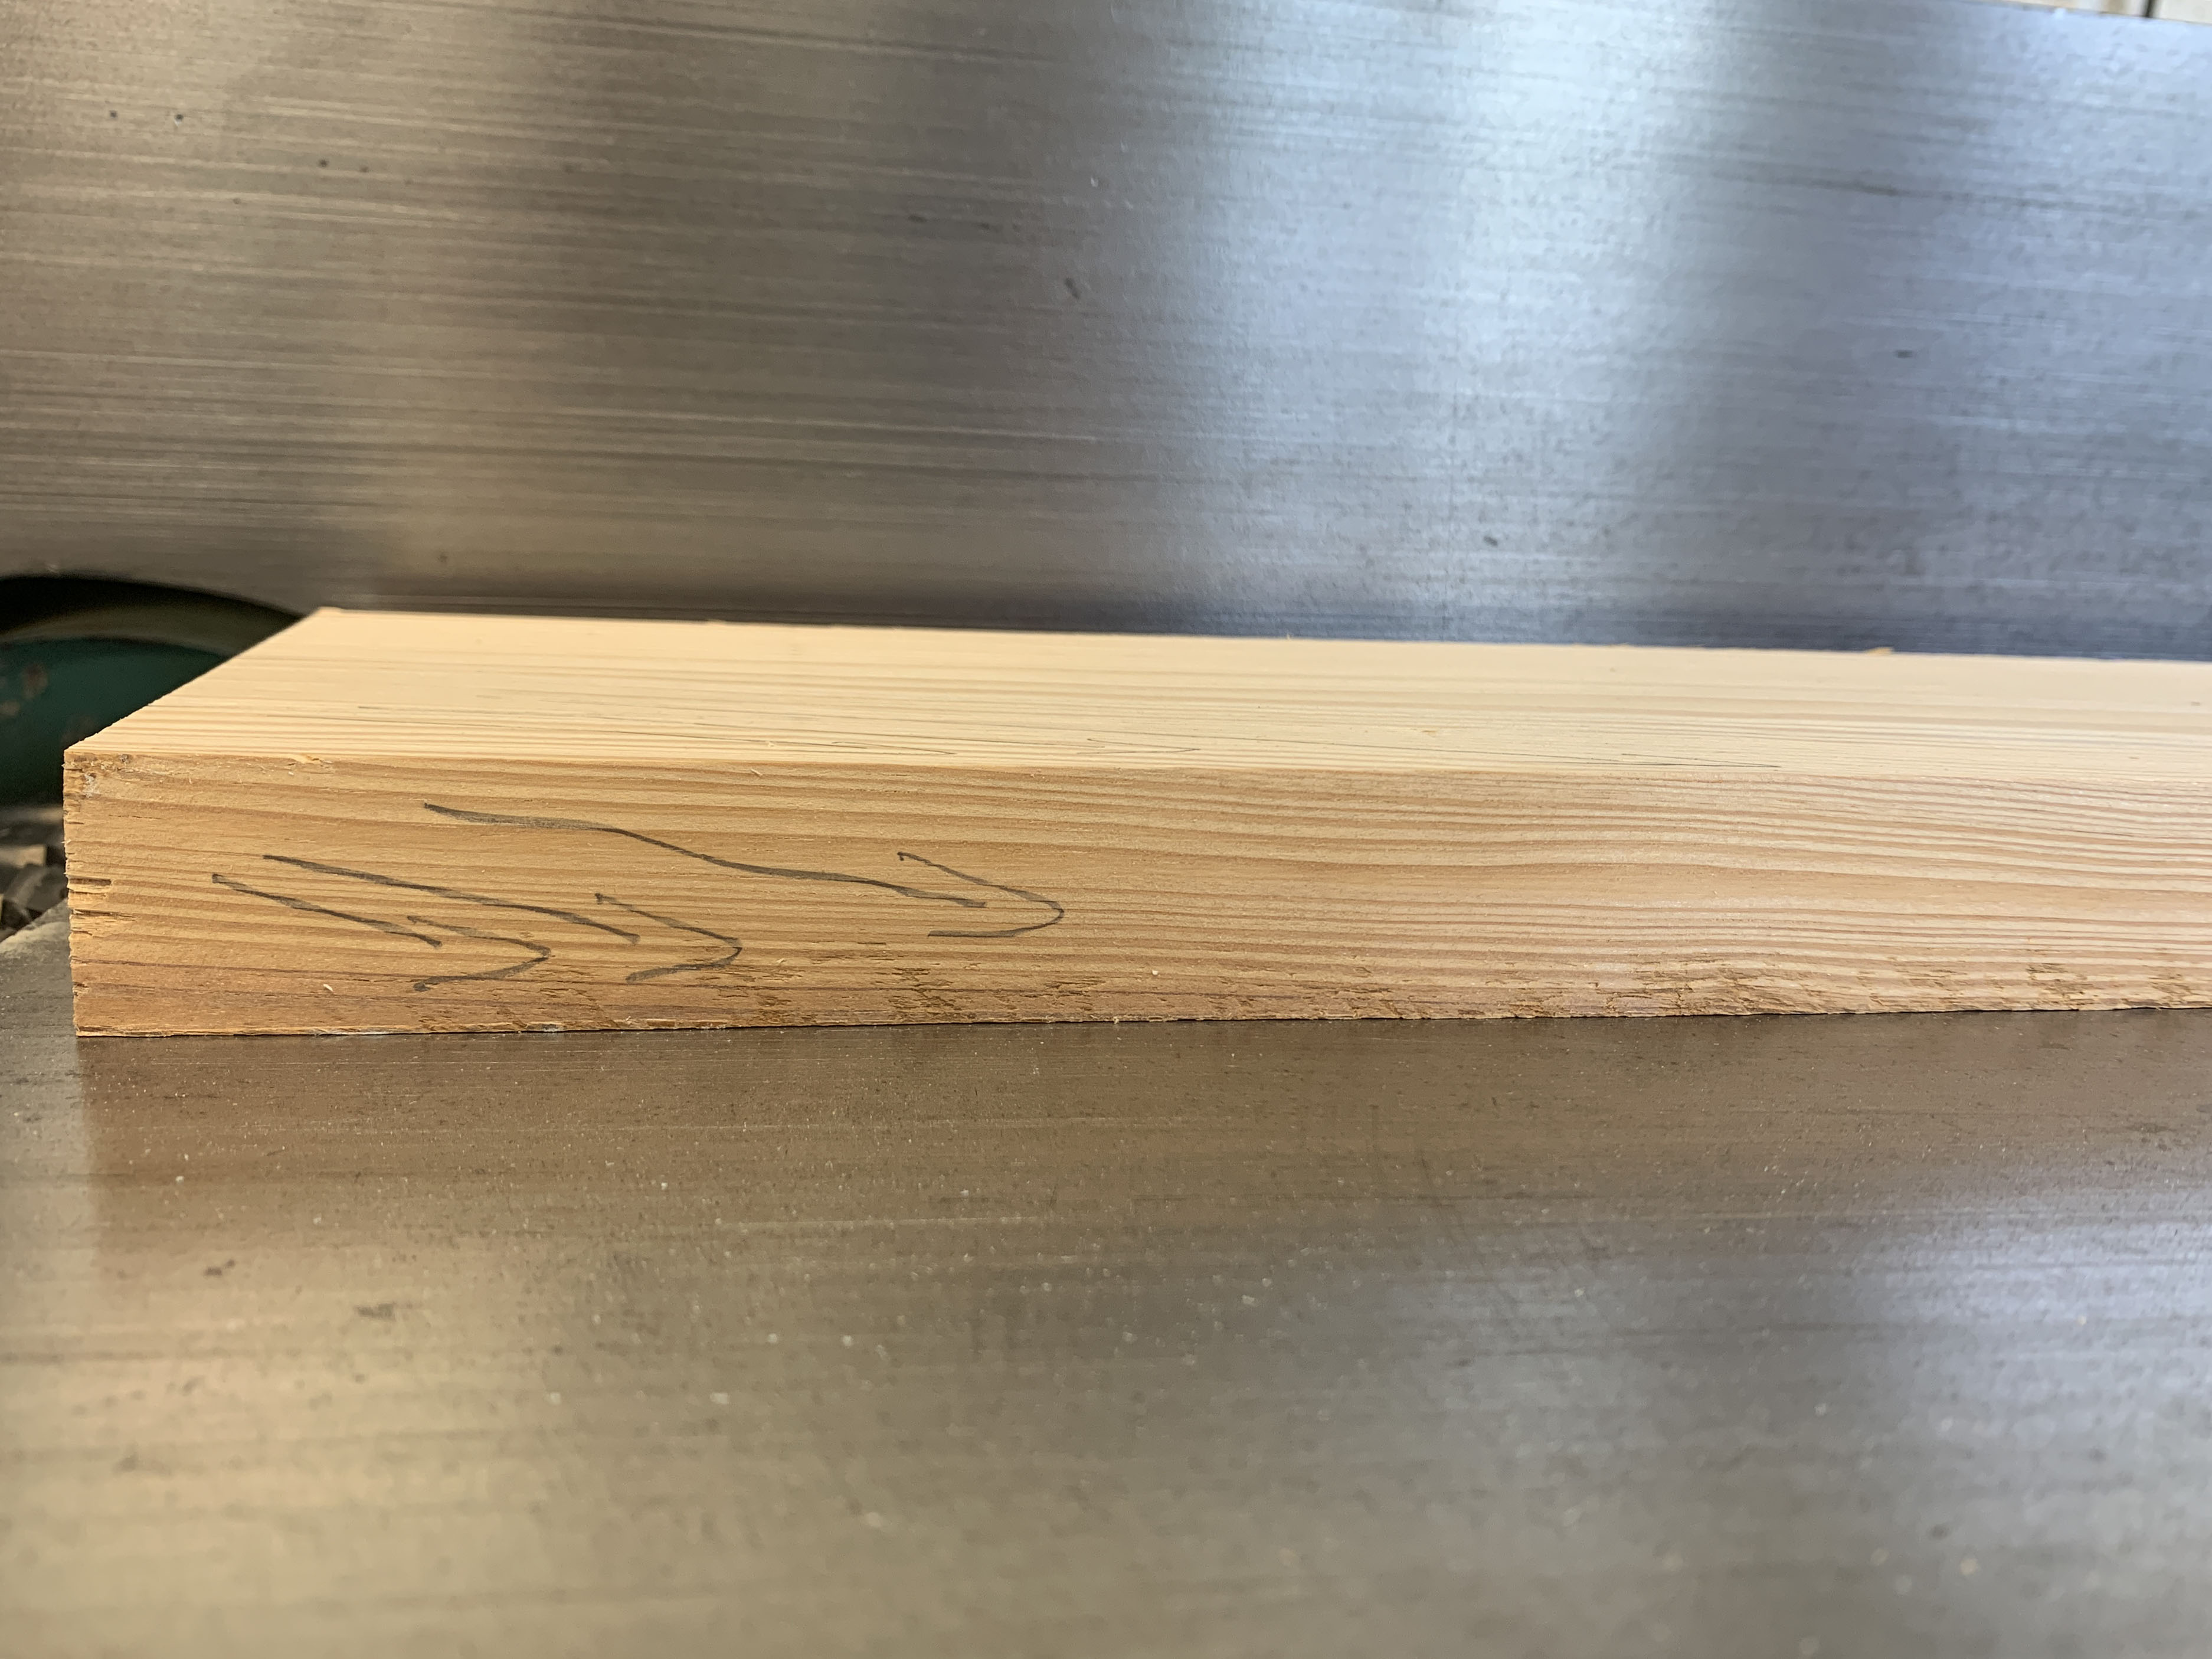
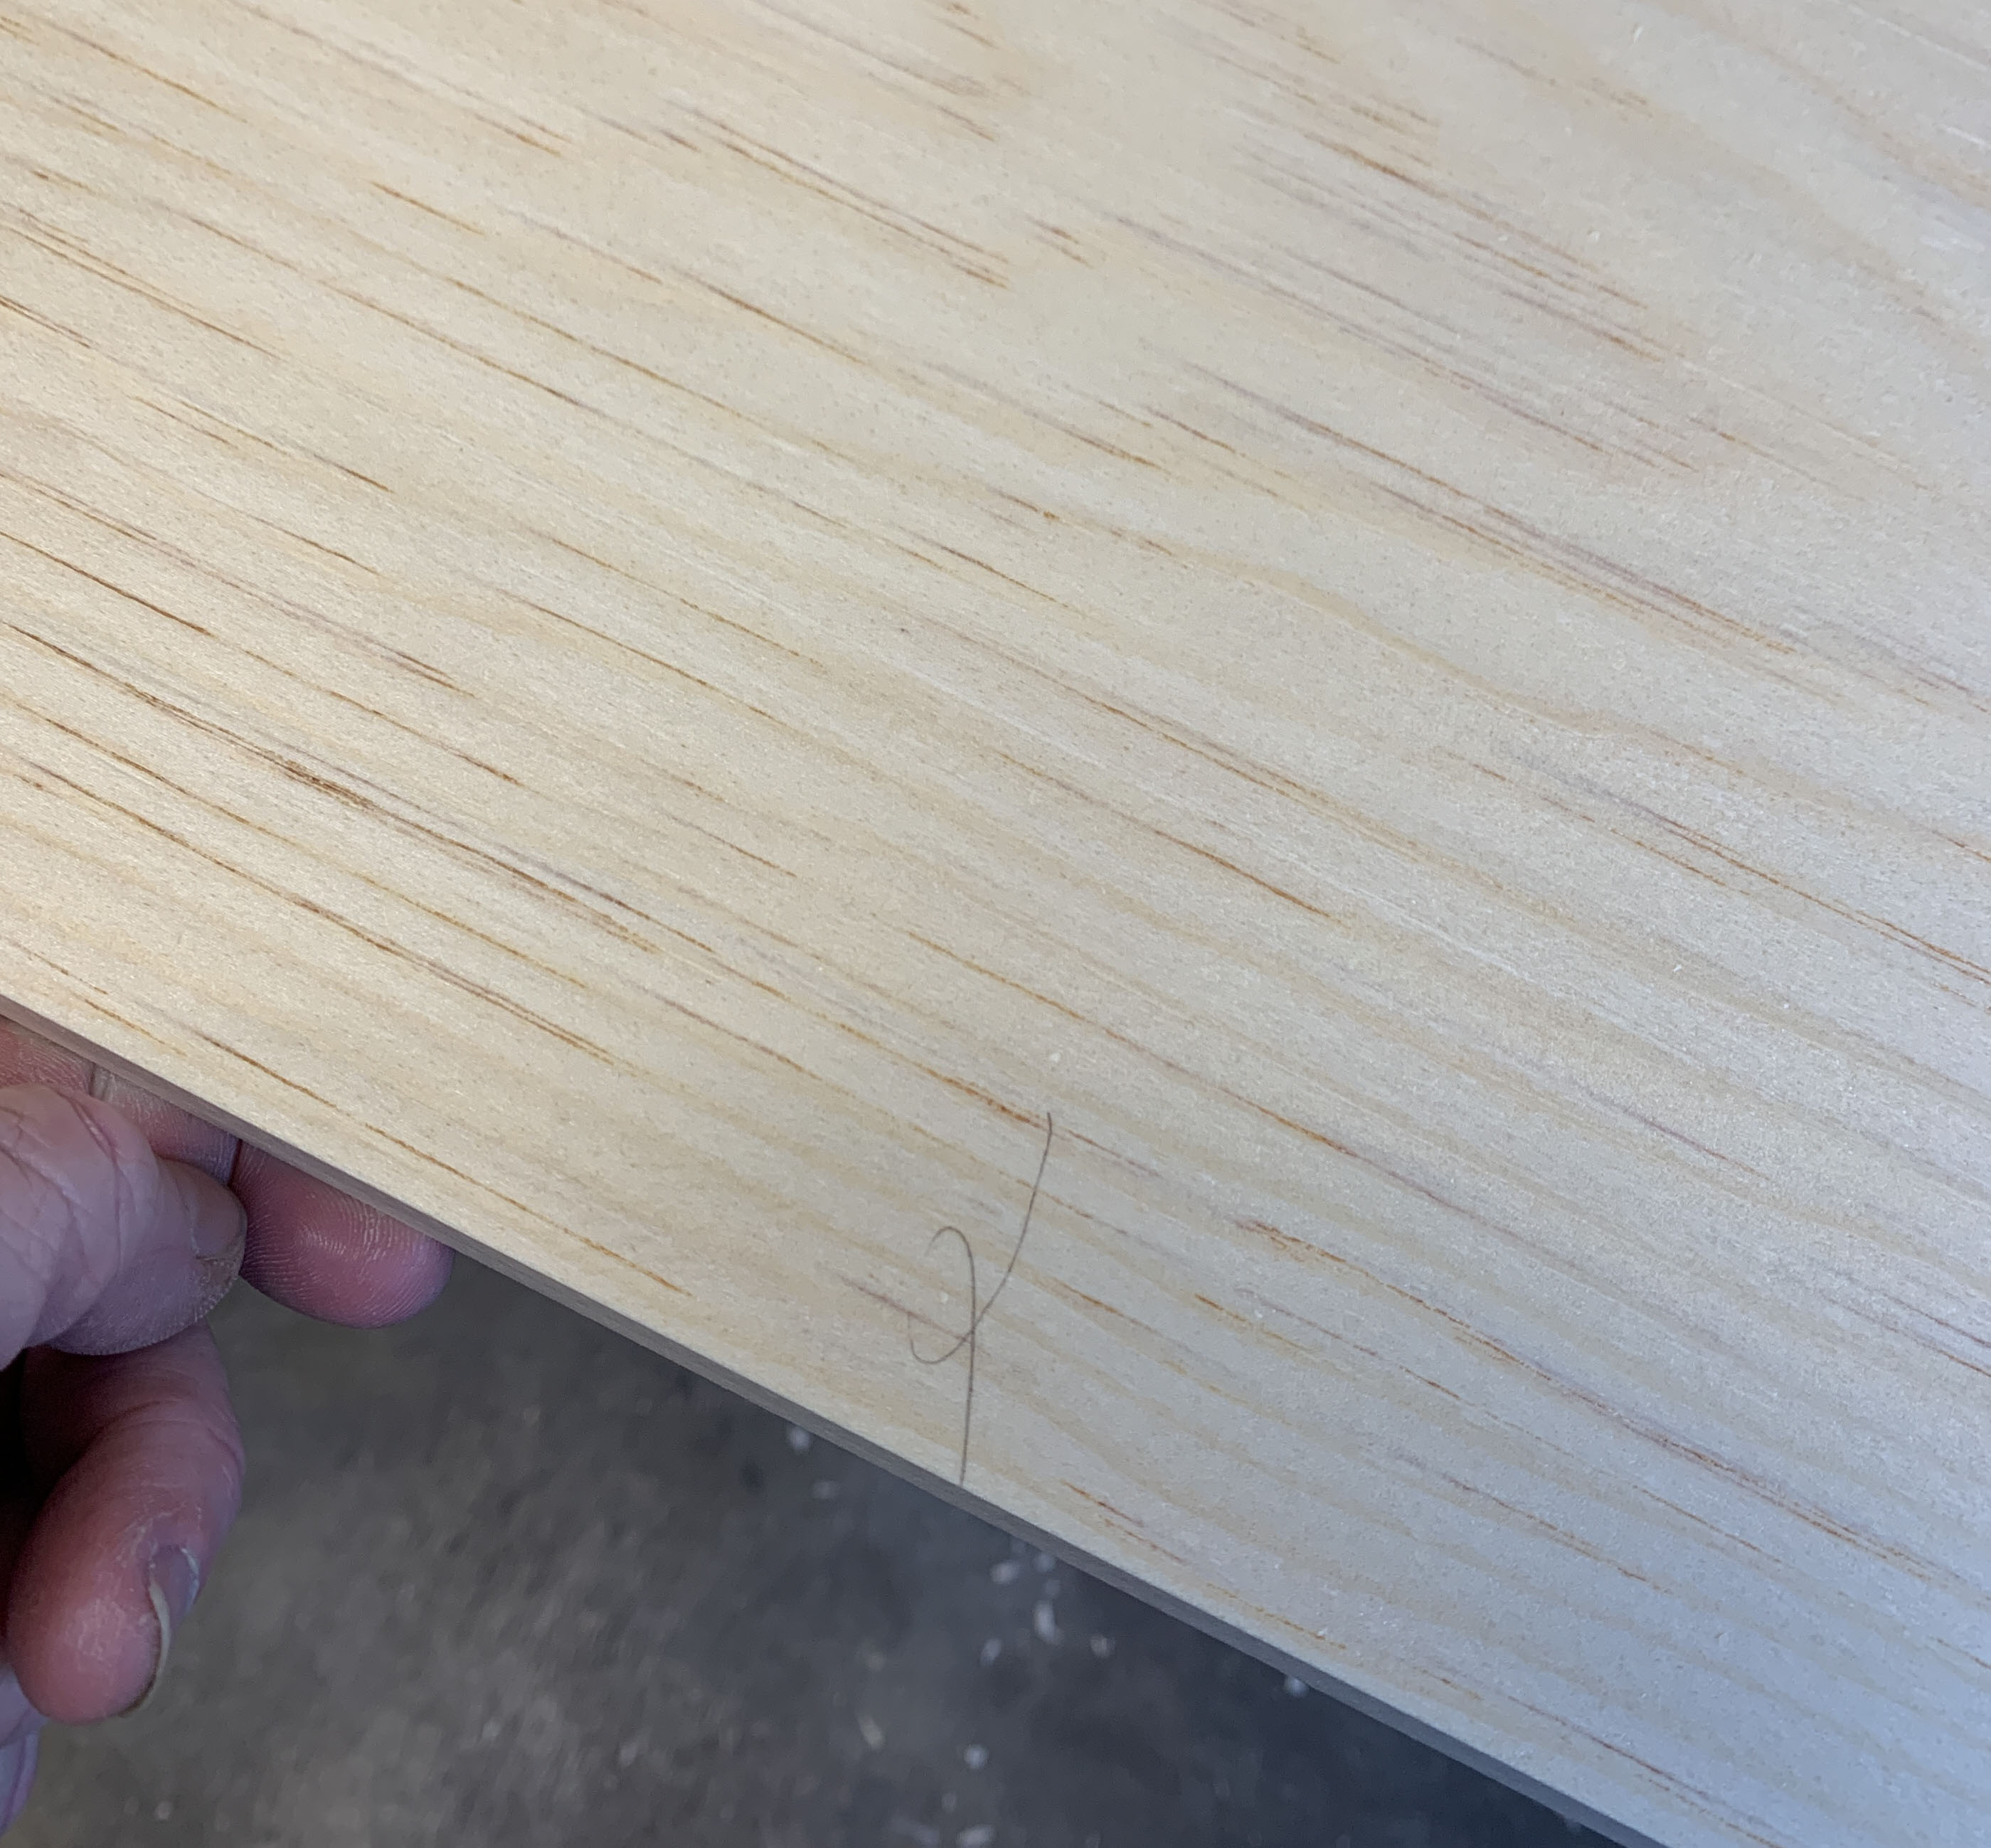
Once all the stock is flat and to thickness, I joint one edge in preparation for cutting it to final size (even if I’ve already jointed an edge to cut a piece to rough width, I do it again, in case it got bashed up), and mark the jointed edge; that edge will run against the table saw’s fence.
This curlicue mark on the jointed edge helps me quickly know which edge is straight and flat.
But it’s the table saw work that scares me the most in folks prepping their own stock; if the pieces aren’t square, the person’s class experience is doomed – and I don’t want that. But if I have to take the time to correct problems, the other students in the class suffer. So at least one person (in addition to me) is going to be unhappy.
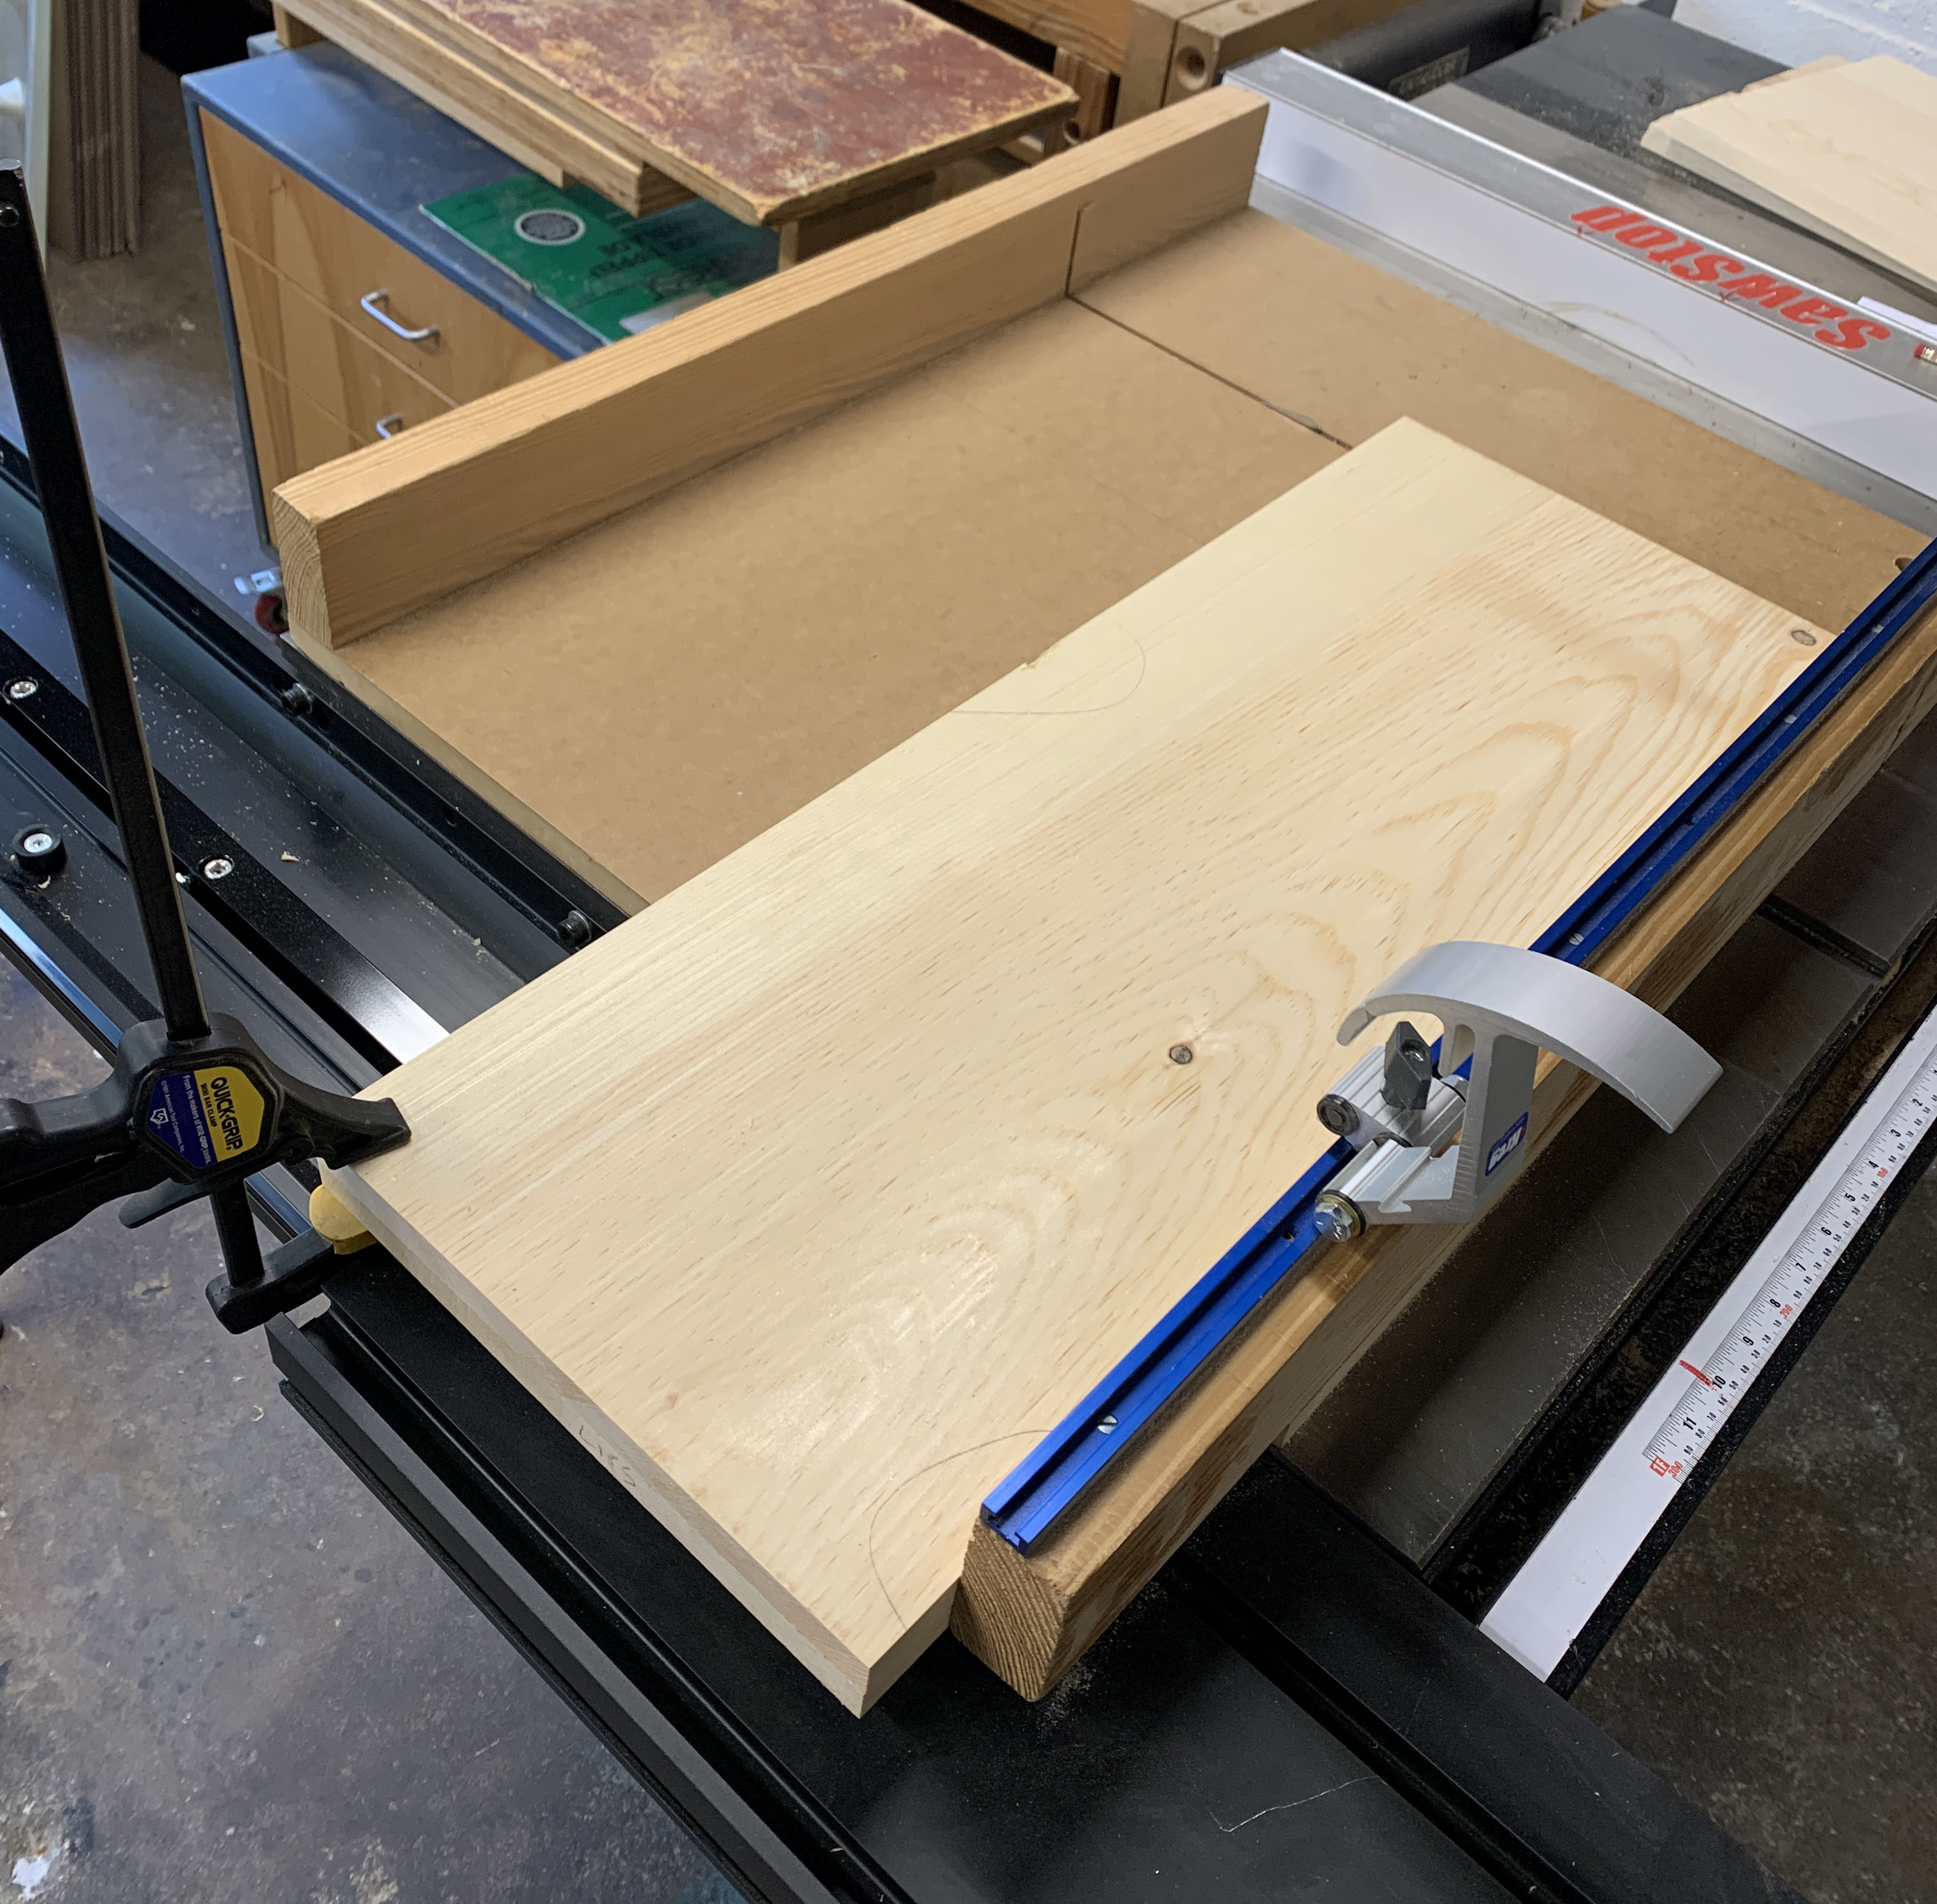
So I am ultra careful at the table saw to make sure my cuts are square. First, I rip the pieces to final width, making sure I keep the wood tight to the fence. Then I triple check that the crosscut fence is dead square to the blade, and before we got a reliable slider, I clamped like pieces together to make sure they were the exact same length. (Now I trust the stop on our slider. But I don’t trust the stop on your slider.)
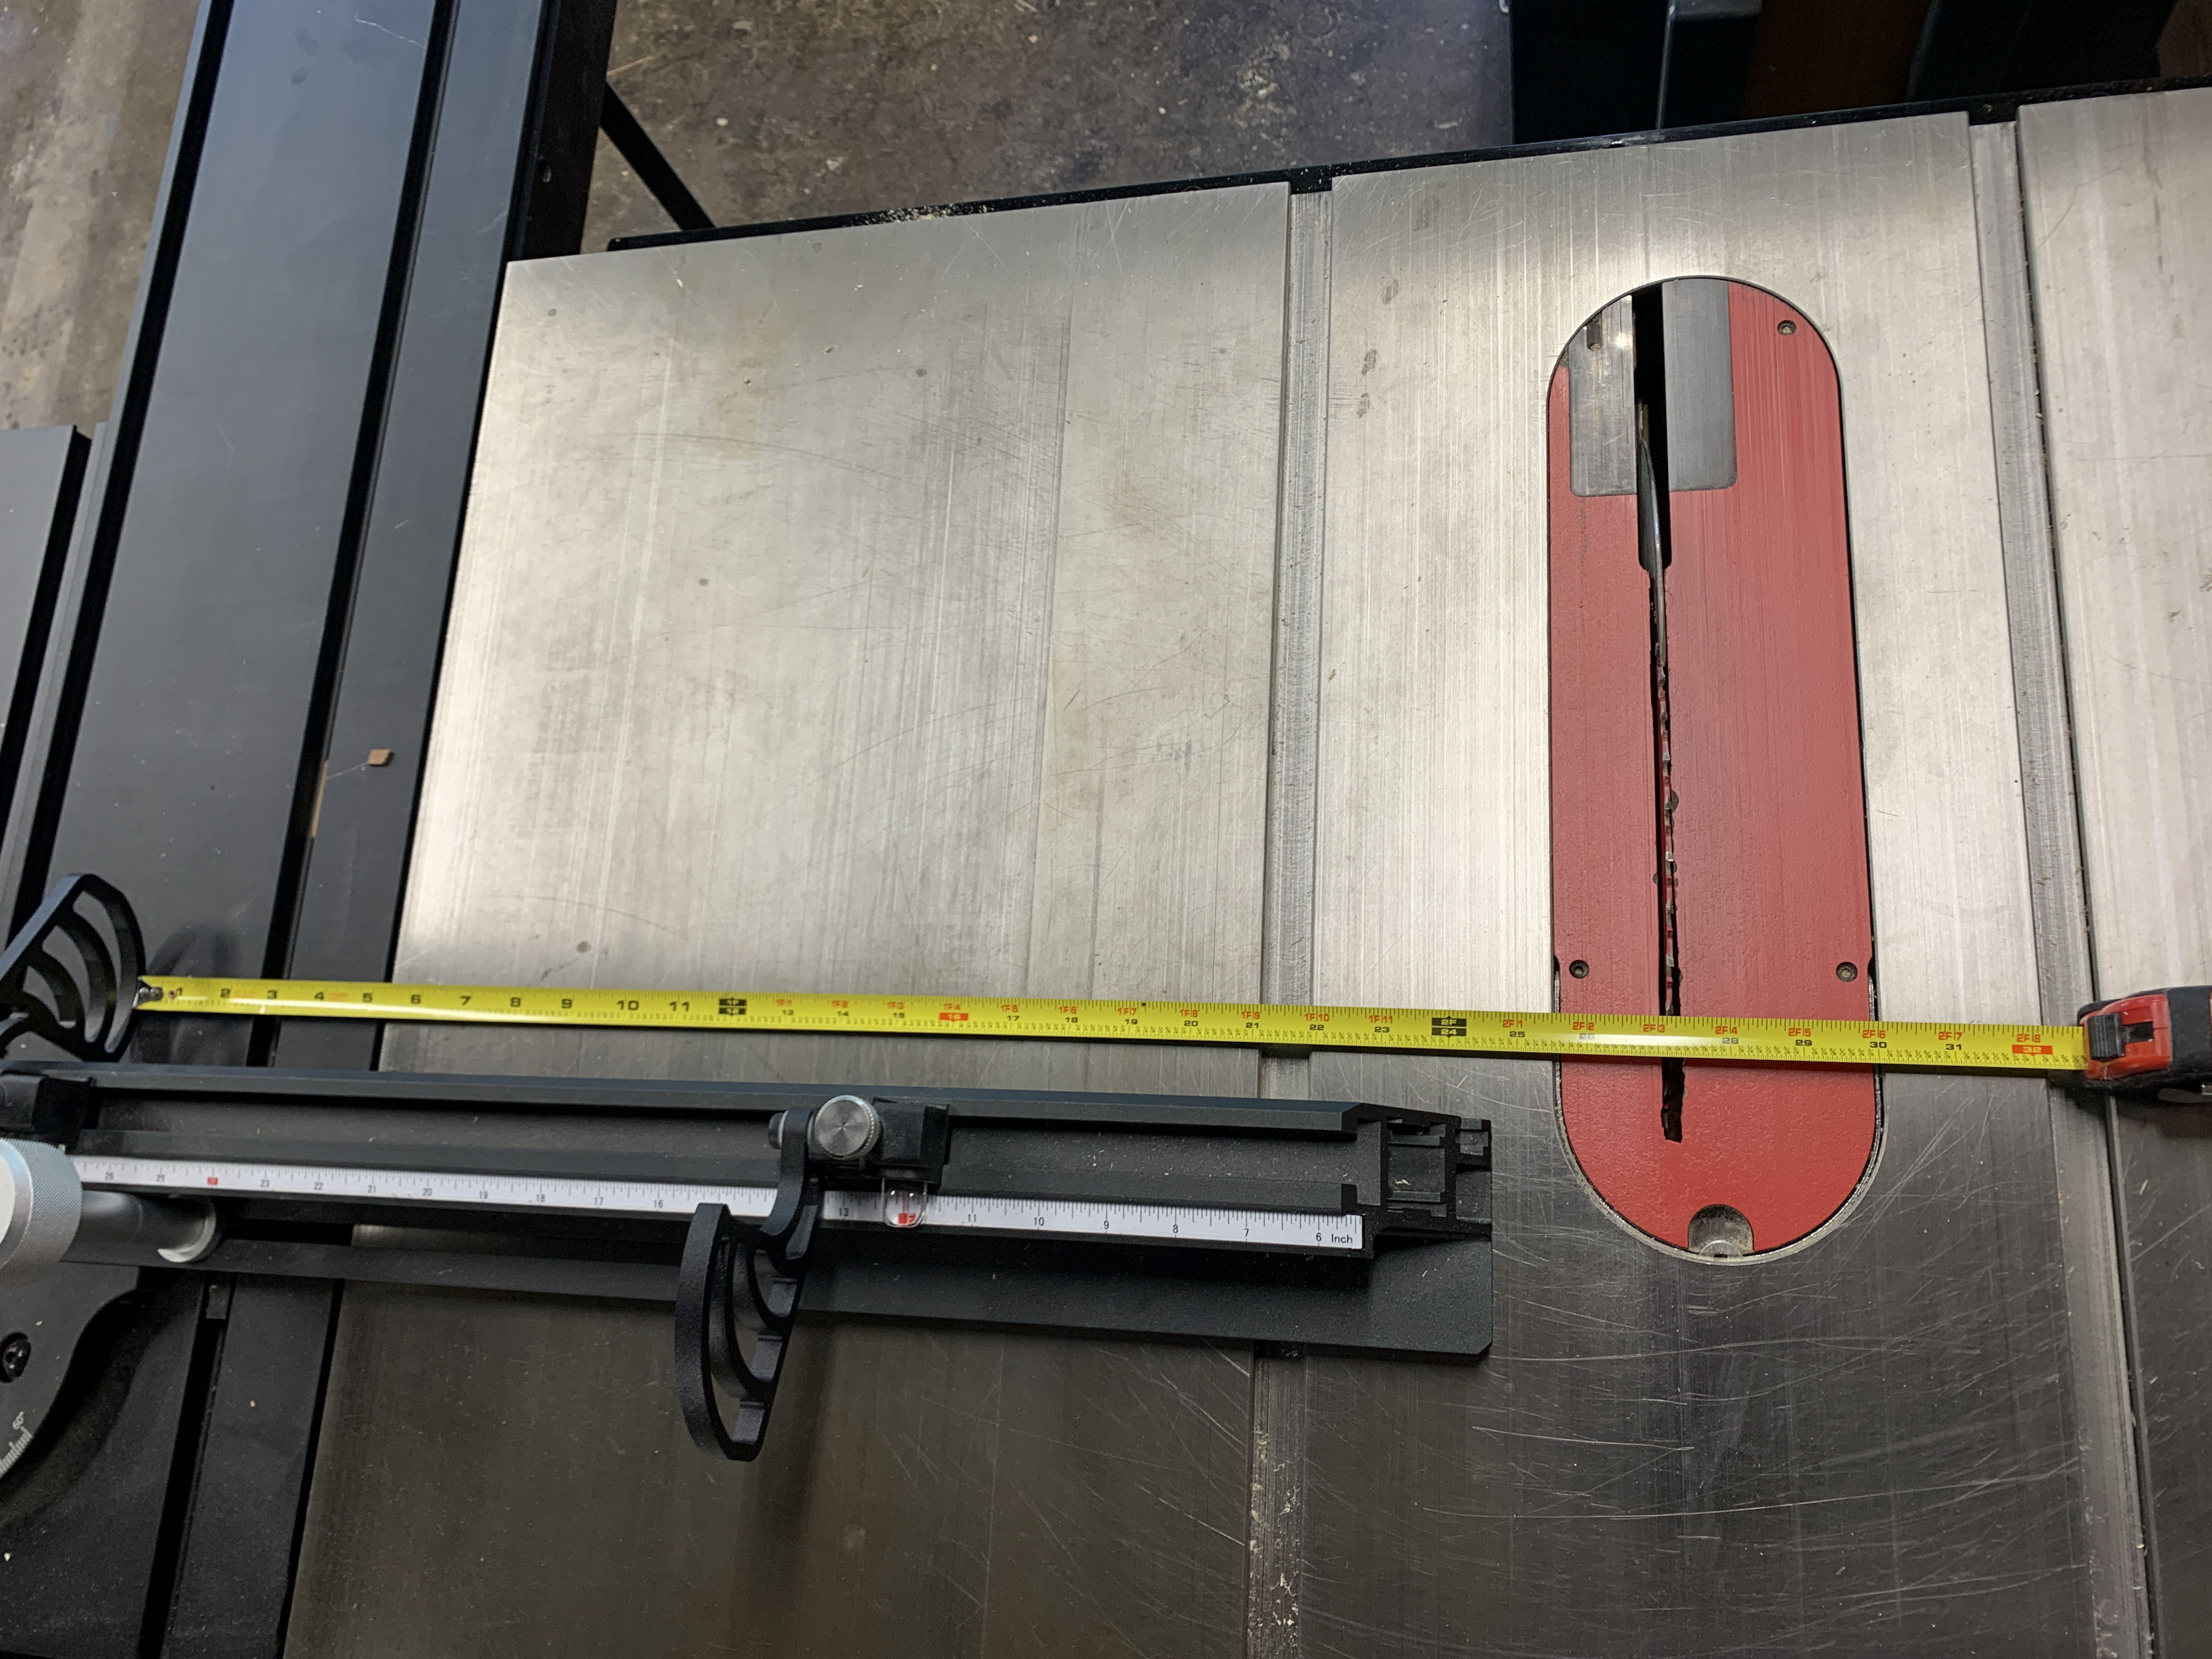
As long at I don’t jam the workpieces against the stop, I am confident that our slider will cut multiple pieces to equal length. (But as you can see from my tape measure, I don’t yet trust the tape on the fence!)
So after setting my stop I raise it, then crosscut one end square (with the jointed-edge mark against the fence), then drop the stop, flip the board and cut it to length. Boom – two square ends, and the right length. Repeat.
Once all the pieces of that length are cut, I reset the stop and cut the mating pieces. And so on with the rest of the stock.
Before we had a sliding crosscut fixture, I used this shop-made sled. If the pieces were longer than the sled, there was no way to set a stop. So I crosscut one end of each like pieces, then carefully…so carefully…clamped them together to cut the final length of both at the same time. It was the only way I felt confident that the pieces would exactly match. And I also had to then make sure each pair stayed together.
Note that all of the above assumes no glue-ups. Throw wide panels into the mix and you add glue-ups to the prep. I’ll write about those in a few days.
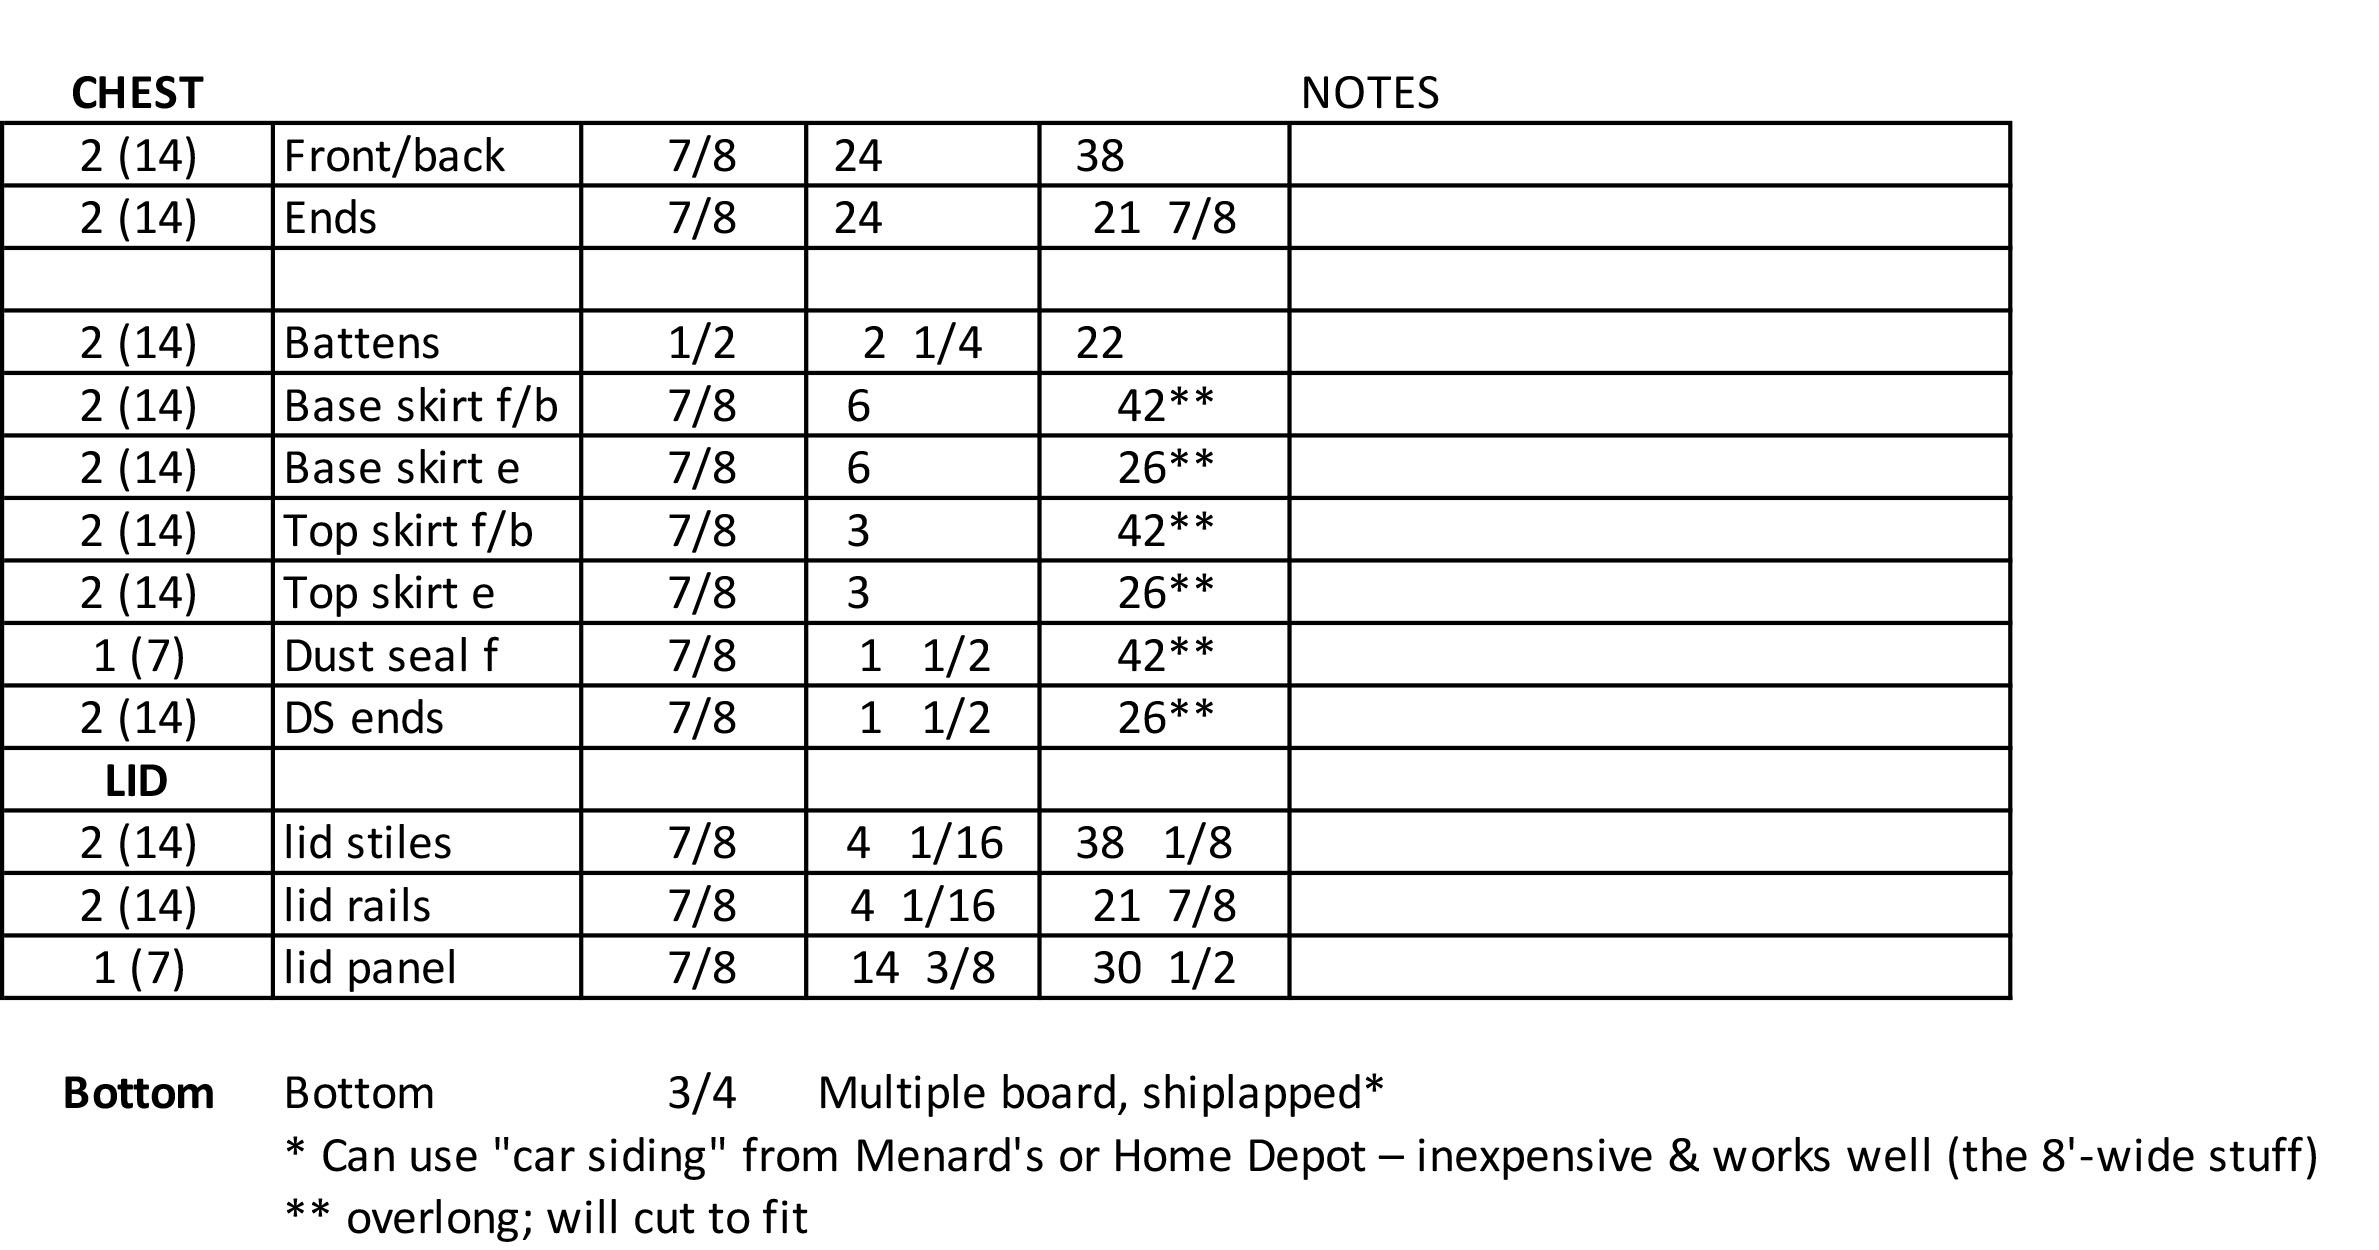
My class prep cutlist for the Anarchist’s Tool Chest.
Thanks to two industrious woodworkers, “The Anarchist’s Tool Chest” has become our first book to be translated into another language.
Titled “Die Werkzeugkiste des Anarchisten,” the book is published by HolzWerken and is now available for sale. It was translated by Andy Kevill and Martin Gerhards who spent a great deal of time trying to get the tone right, as well as the technical stuff.
I’m pleased also with the look of the book – the publisher took pains to capture the feel of the English edition. This is somewhat unusual. Many times translations become something else entirely. And sometimes it’s horrible.
Other publishers have approached us about translating some Lost Art Press titles into French, Korean and Chinese. So who knows what other culture will learn about tube tops and tool-shaped objects?