I’ll be in Omaha, Neb., on March 28-29, 2020, to build a Dutch tool chest for the Omaha Woodworkers Guild. I’ll be building the chest entirely by hand and discussing all the techniques in detail, from dovetails to dados to cut nails and tool set-up. Then, at the end of the presentation, the completed chest will be raffled off.
During the evenings, I’ll be offering two presentations to the members: one on the history and construction of vernacular stick chairs, and the second on the history of workbenches.
If you would like to attend the two-day seminar, you can get details from Patrick Brennan via email at pmjbrennan@cox.net.
I’m afraid I won’t be able to bring Lost Art Press books or Crucible tools to sell – my truck will be filled with all the materials and personal gear I need to complete the presentation. As always, I am happy to sign books (whether they’re mine or not) and babies (whether they’re mine or not).
Note: This video is being offered at the special introductory offer of $35 until Aug. 25. After that, the video will be $69.
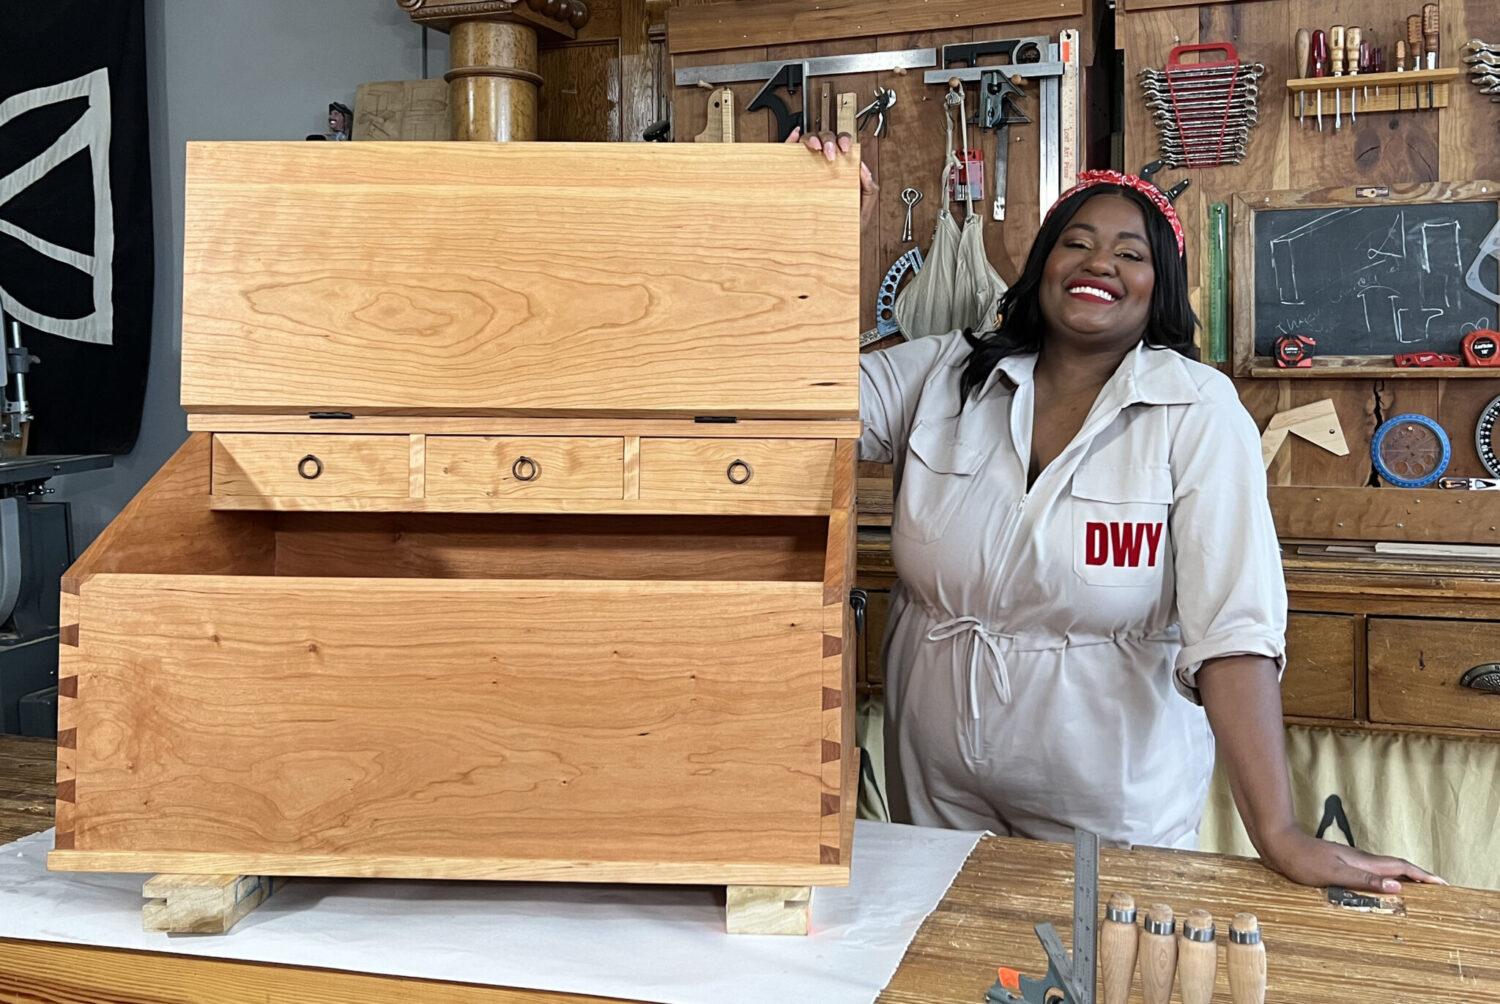
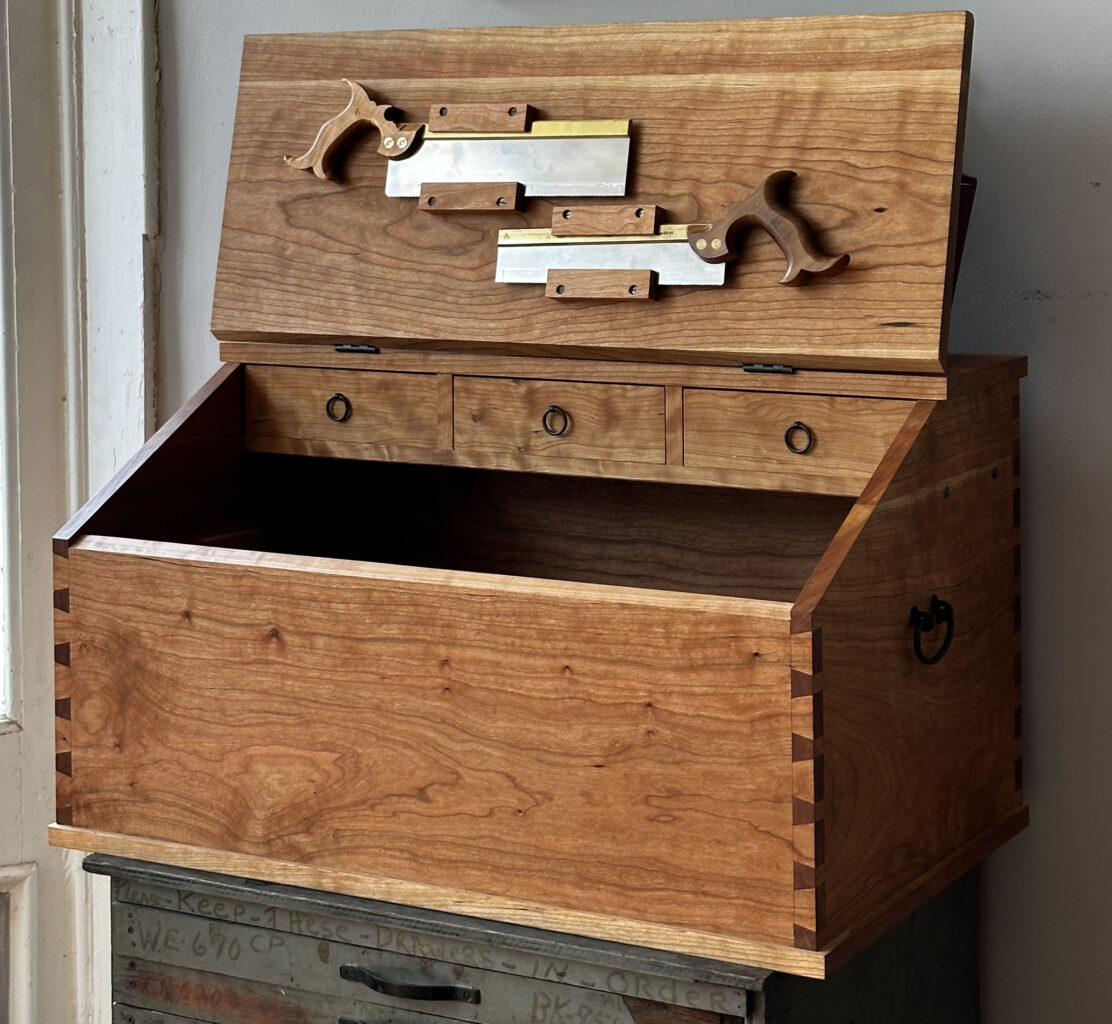
We’ve long been fascinated with the Swedish tool chest form. Roy Underhill had one at The Woodwright’s Shop, and Chris got a close look at one in Sweden that belongs to Johan Lyrfalk, and came down through his family. It’s similar to a Dutch chest with its slanting front lid, but the Swedish one is in some ways simpler. And it’s larger – at least our version is – it’s not a chest for travel.
The video – which stars and is edited by television professional and do-it-yourself maven Whitney Miller – shows you step by step how to build this Swedish chest – and her joy in making it comes through on screen. (Which is to say she a lot of fun to watch, beyond the woodworking instruction!)
The Swedish chest is assembled with through-dovetails at the corners. The top and bottom are screwed to the carcase. The interior of the chest is fairly open and offers plenty of room for planes and larger tools on the floor. There are three drawers, assembled with rabbets and nails, that will hold your smaller tools and shop sundries. The drawer frame and dividers are assembled with screws, then nailed in place through the outside of the chest, as in our inspiration piece.
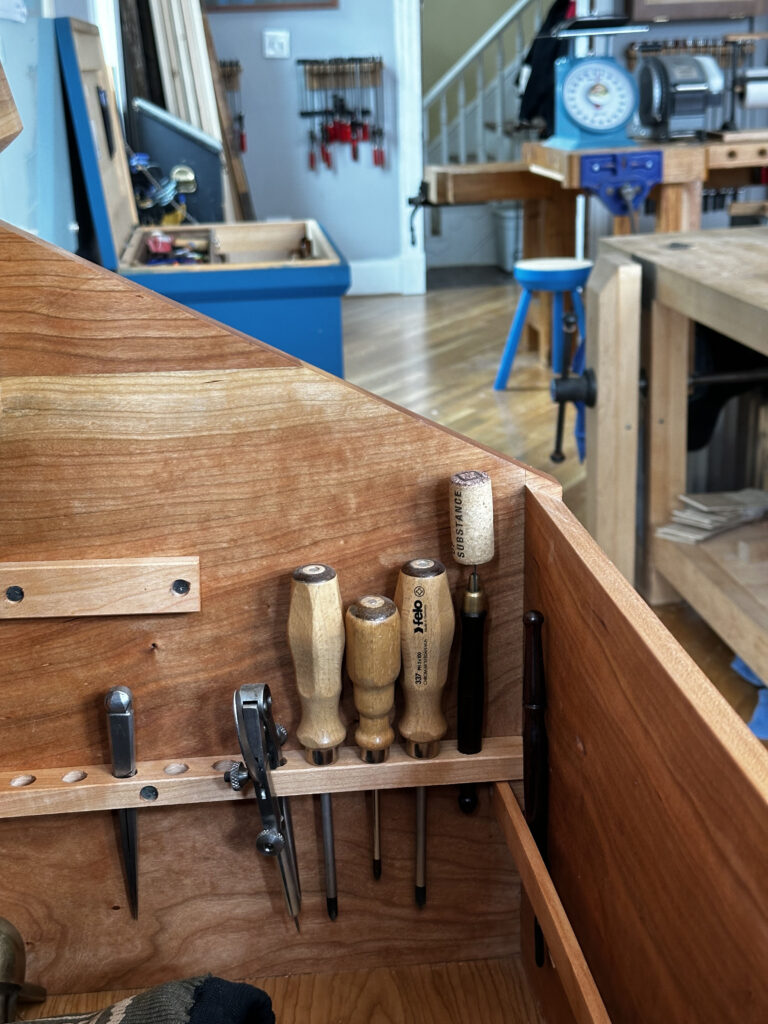
The interior walls of the chest are lined with tool racks, and there are saw racks on the lid. The rack layout is easy to adjust to suit your own storage needs.
We built it in cherry, because we couldn’t resist the call of the wide cherry boards at the lumberyard that day. The inspiration chest was painted, and probably made from pine.
The build is an excellent primer on through-dovetails and simple drawer construction – and when you’re done, you’ll have a handsome chest in which to store your tools.
Dimensions are: 32-1/2” wide, 18-1/2” high and 19-3/4” deep. The top is 8-1/2” wide, the drop lid is 13-1/2 wide. Most of the stock for the carcase is 7/8” thick.
The entire video is just more than an hour – tightly edited to be compact but filled with good information that’s fun to watch. It’s an excellent video for beginning woodworkers, with just the information you need.
You also get downloadable PDFs with plans and a cutlist, as well as information on using “marriage marks” for layout, and applying our favorite non-toxic soft-wax finish.
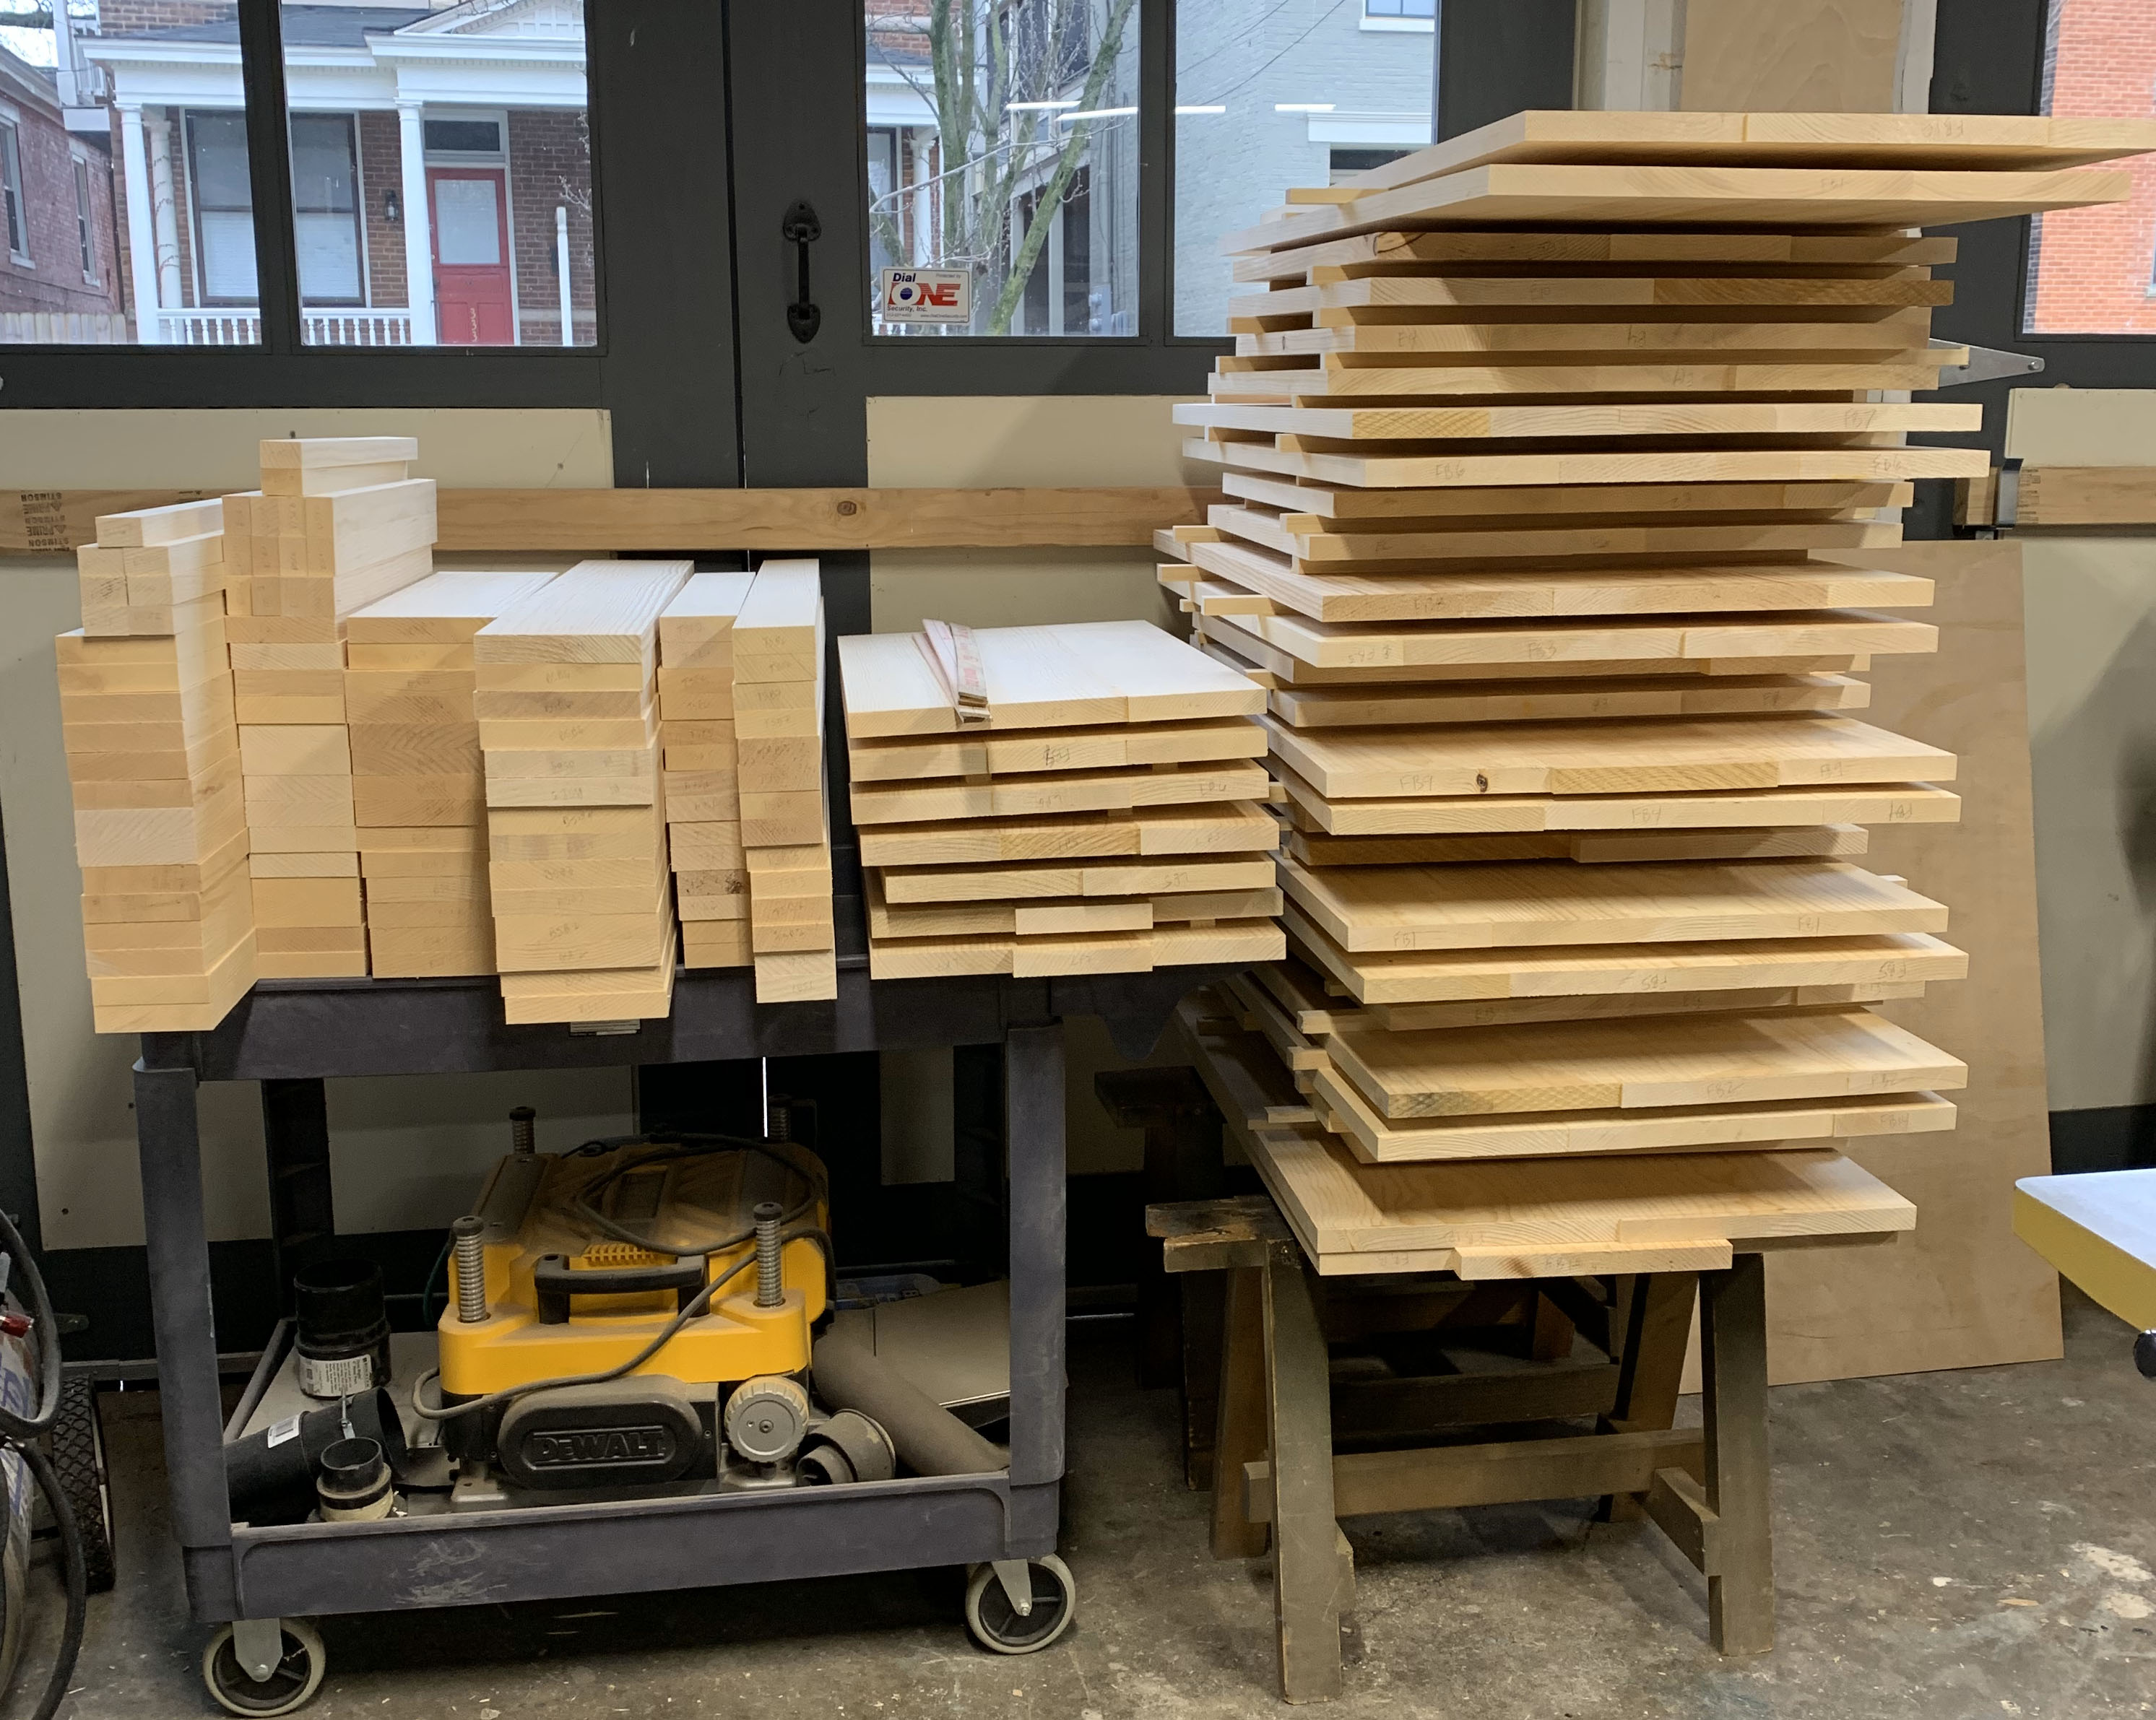
Above is all the wood in mid-prep for seven “Anarchist’s tool chests.” The lid panels and carcase front/back and ends still need to be cut to final width and length. I’m excited to soon be teaching again…but just looking at this picture makes me tired!
I don’t make many unequivocal statements, but here’s one: Some non-stringy species of white pine is the correct wood for a tool chest. And if you can get it, choose sugar pine or Eastern white pine. These are lightweight woods that are easy to work with hand tools, and they are typically less expensive in the U.S. than any hardwood, with the possible exception of poplar. And while poplar will work for a tool chest – as will any wood, really – it’s heavy and harder to dovetail than pine. And that will make your tool chest heavier than it needs to be.
Fully loaded, a sugar pine “Anarchist’s Tool Chest” weighs in the neighborhood of 200-225 lbs. (The hardware and choice of wood for tills and other interior bits will affect the weight, as, of course, will the specific tools inside.)
And while I’ve never weighed a pine Dutch tool chest fully loaded, I used to work out of a poplar one while teaching on the road, and I had a heck of a time lifting it in and out of my car. So I’m keeping one of the pine ones I’m building right now to make my peripatetic woodworking life just a little easier.
For the tool chest classes I teach here, I do my best to source beautiful, clear sugar pine, which is typically available in wide widths – the fewer pieces in panel glue-ups, the better. But every once in a while, someone will ask if they can prep their own wood for a class – and it’s usually for the anarchist’s tool chest class – the one for which the wood prep is the most demanding and most critical that it be good. I say sure…but you darn well better do a good job of it. A) I won’t have time during the class to fix any out-of-square edges for you and B) I won’t have on hand matching stock to replace a piece should something go terribly wrong. C) I don’t want to help lift your full-size oak or purpleheart tool chest into your car at the end of class.
But if you insist on bringing your own, below are the steps to follow (some of which are pretty basic…but you never know what people already know).
The flatter the wood, the easier it is to prep – and the more plain the grain, generally the easier it is to dovetail. I don’t want any points of cathedrals or bird’s eyes in my pins and tails (or knots, or course). So the first thing I do is to lay out rough cuts to avoid anything problematic. I start with the largest pieces (above, that’s the front and back of the ATC), and try my best to have all my glue-ups be only two pieces (you can see above that I typically have to use three pieces in at least some of the carcase and lid panels).
So first, I mark out all the pieces, and if they’re longer than 14″ or so, I rough cut them about 1″ overlong at the chop saw and about 1/2″ overwide at the band saw (or I joint one edge then cut them overwide at the table saw). For pieces that are shorter than 14″ (and therefore can’t safely go through the planer), I keep them attached to another piece until after the surfacing is done. You don’t, however, want to leave the pieces much longer than they need to be. The longer a board, the more likely it is to be twisted – the less of that you have to take out, the better. Because the more you have to remove from one surface to correct twist or a cup, the more will go into your dust collector.
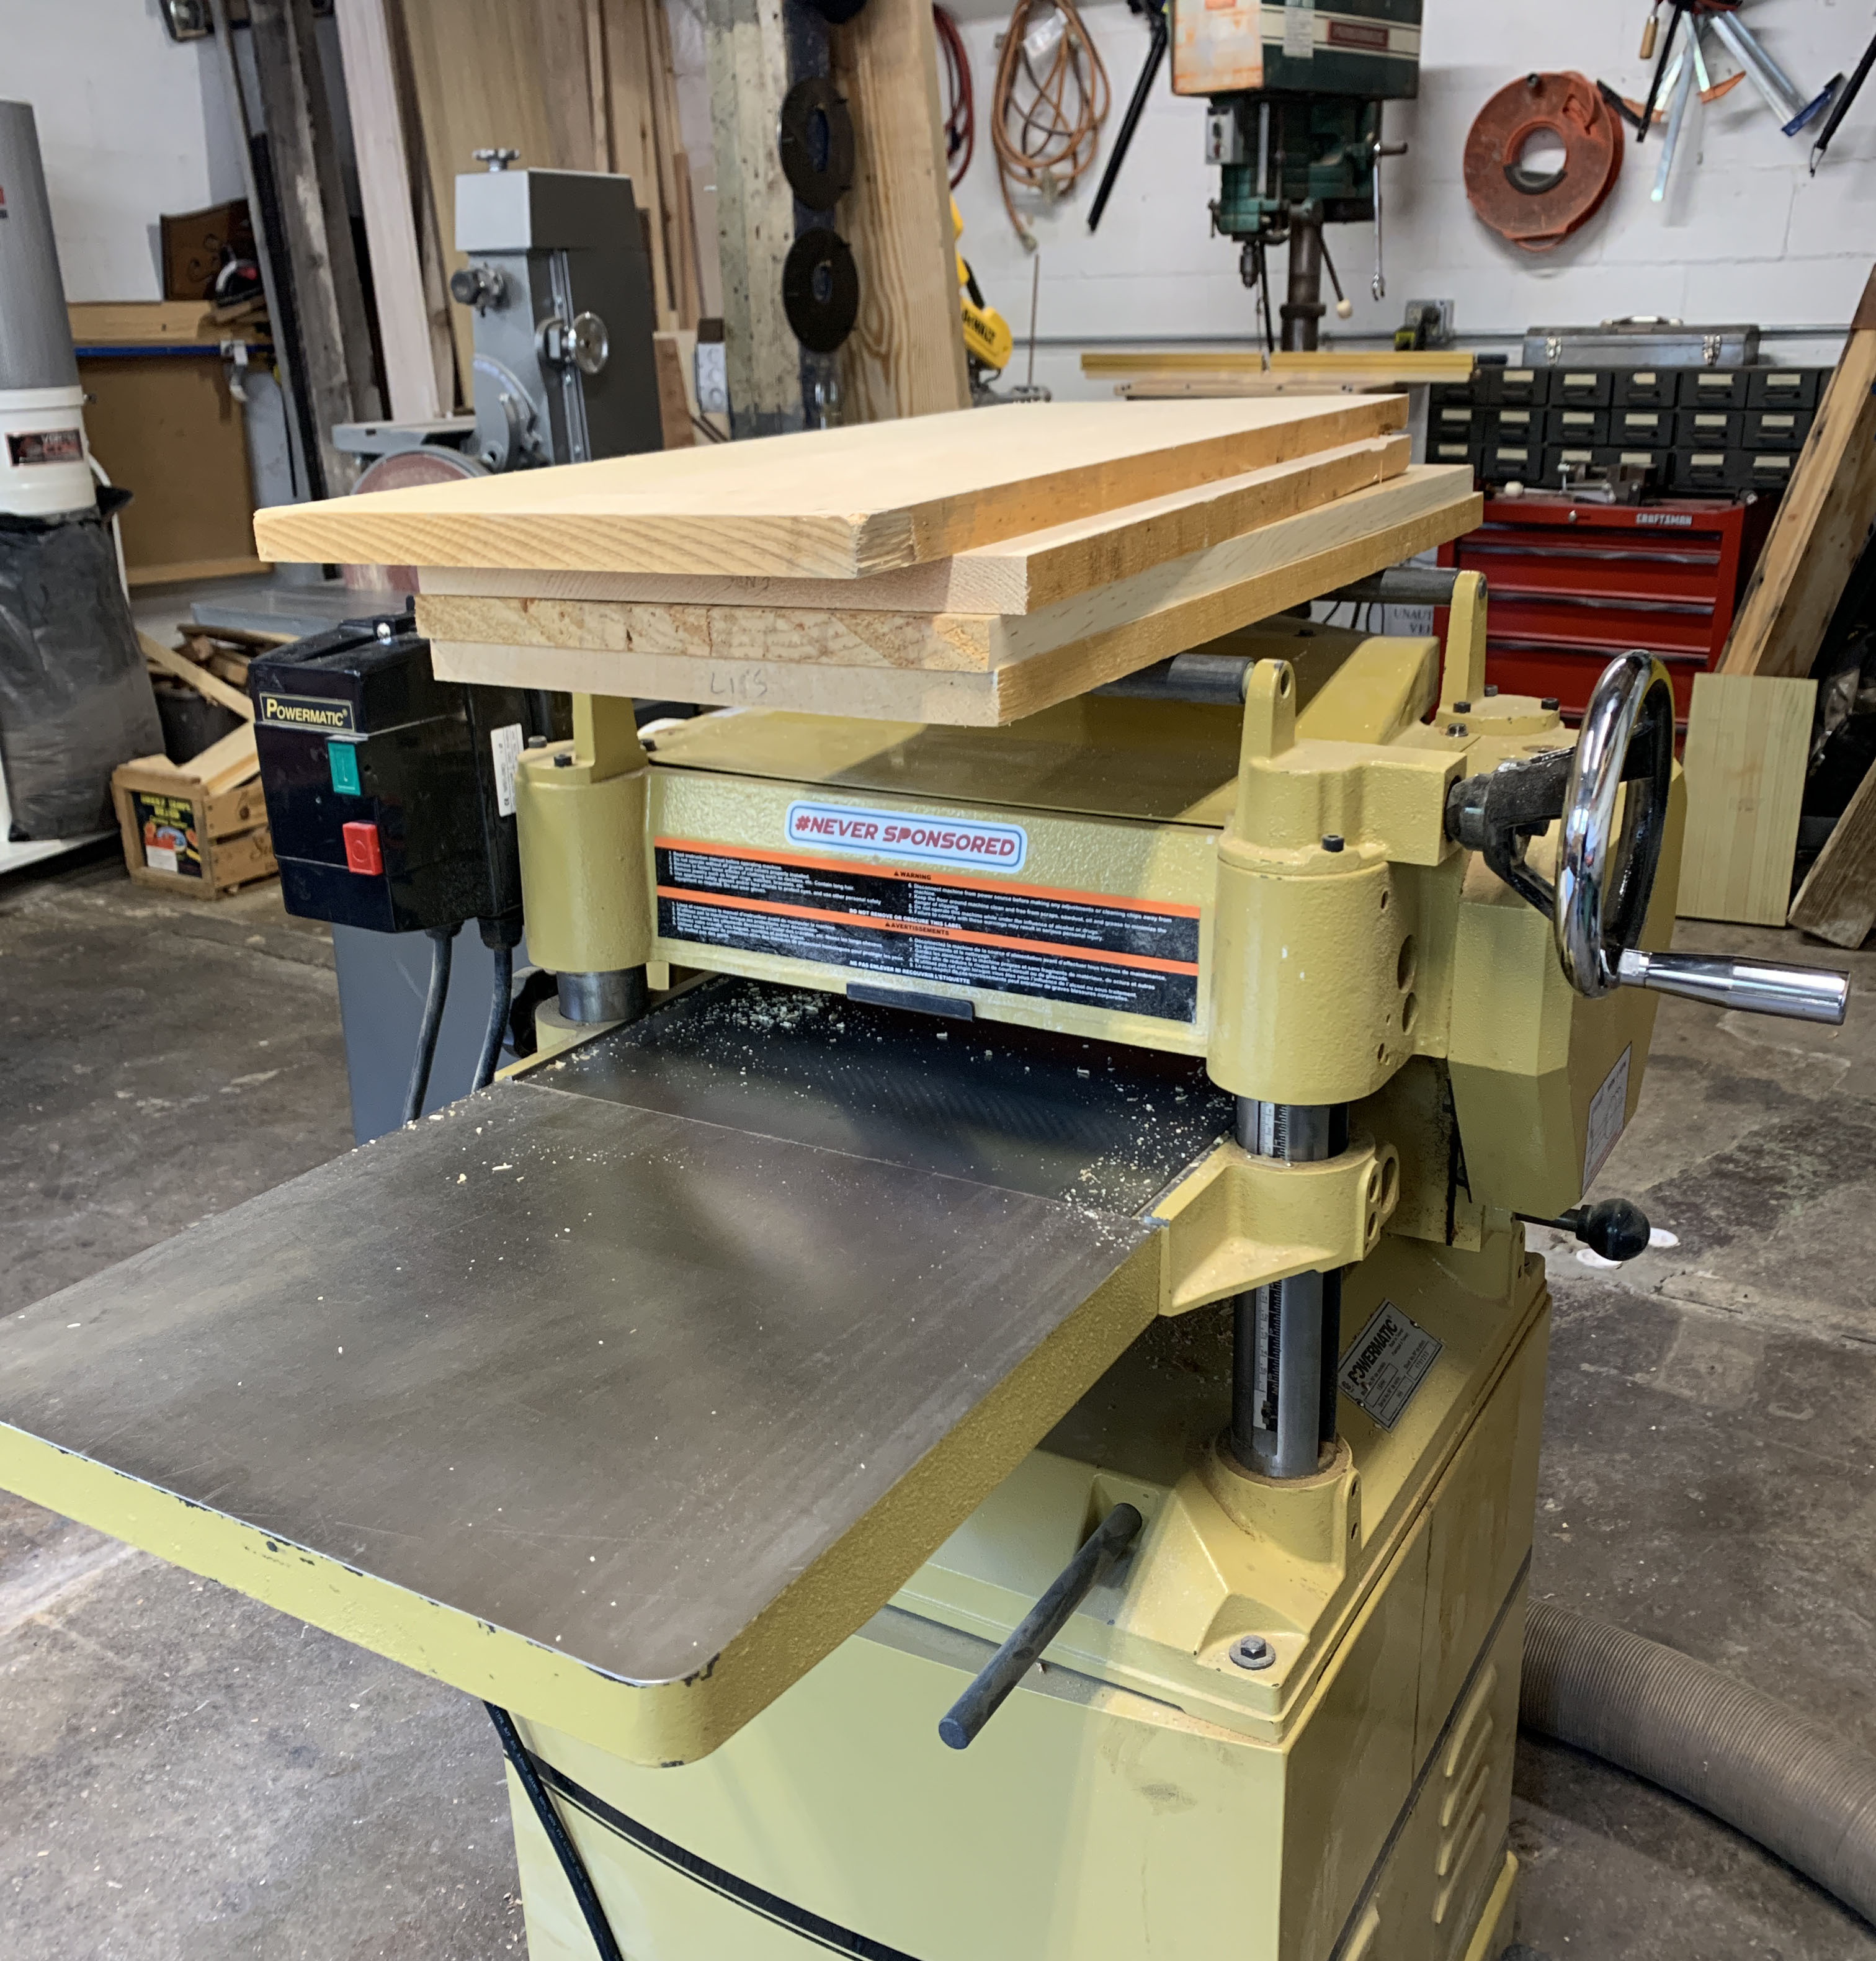
In order to run the wood through the planer to get it flat (and all of it to the same thickness), you need one flat face; that face registers on the bed of the planer. If you’re good with a jointer plane, you may not need a jointer. If you’re decent with a jointer plane but have to prep wood for seven people and have three days to do it, you definitely want an electric jointer.
If you have a helical head on your jointer, you don’t have to worry much about grain direction, but run the stock in the correct direction anyway; it’s a good habit to adopt. The grain should be running downhill. And if there’s a crown in the board on one face, there’s probably a cup on the other. When you run the wood across the cutters, you want it supported as much as possible at the outside edges, so the cupped face should face down. If you’ve already arranged it with the grain running correctly but the cupped face up, simply flip the board end for end, before jointing it. (Odds are pretty good that the heart side will be facing up.)
With thick wood, you can get away with jointing it only enough to create flats at the outside edges to register on the planer bed. But the planer rollers will flatten thin wood…which will spring back after it exits the planer. So for 3/4″ (or thinner) stock, I always run the stock as many times as necessary across the jointer to flatten one face completely. And because I think it’s unsafe to have to push too hard, I’d rather make several light cuts than one deep cut; I usually have the cut set to no more than 1/16″
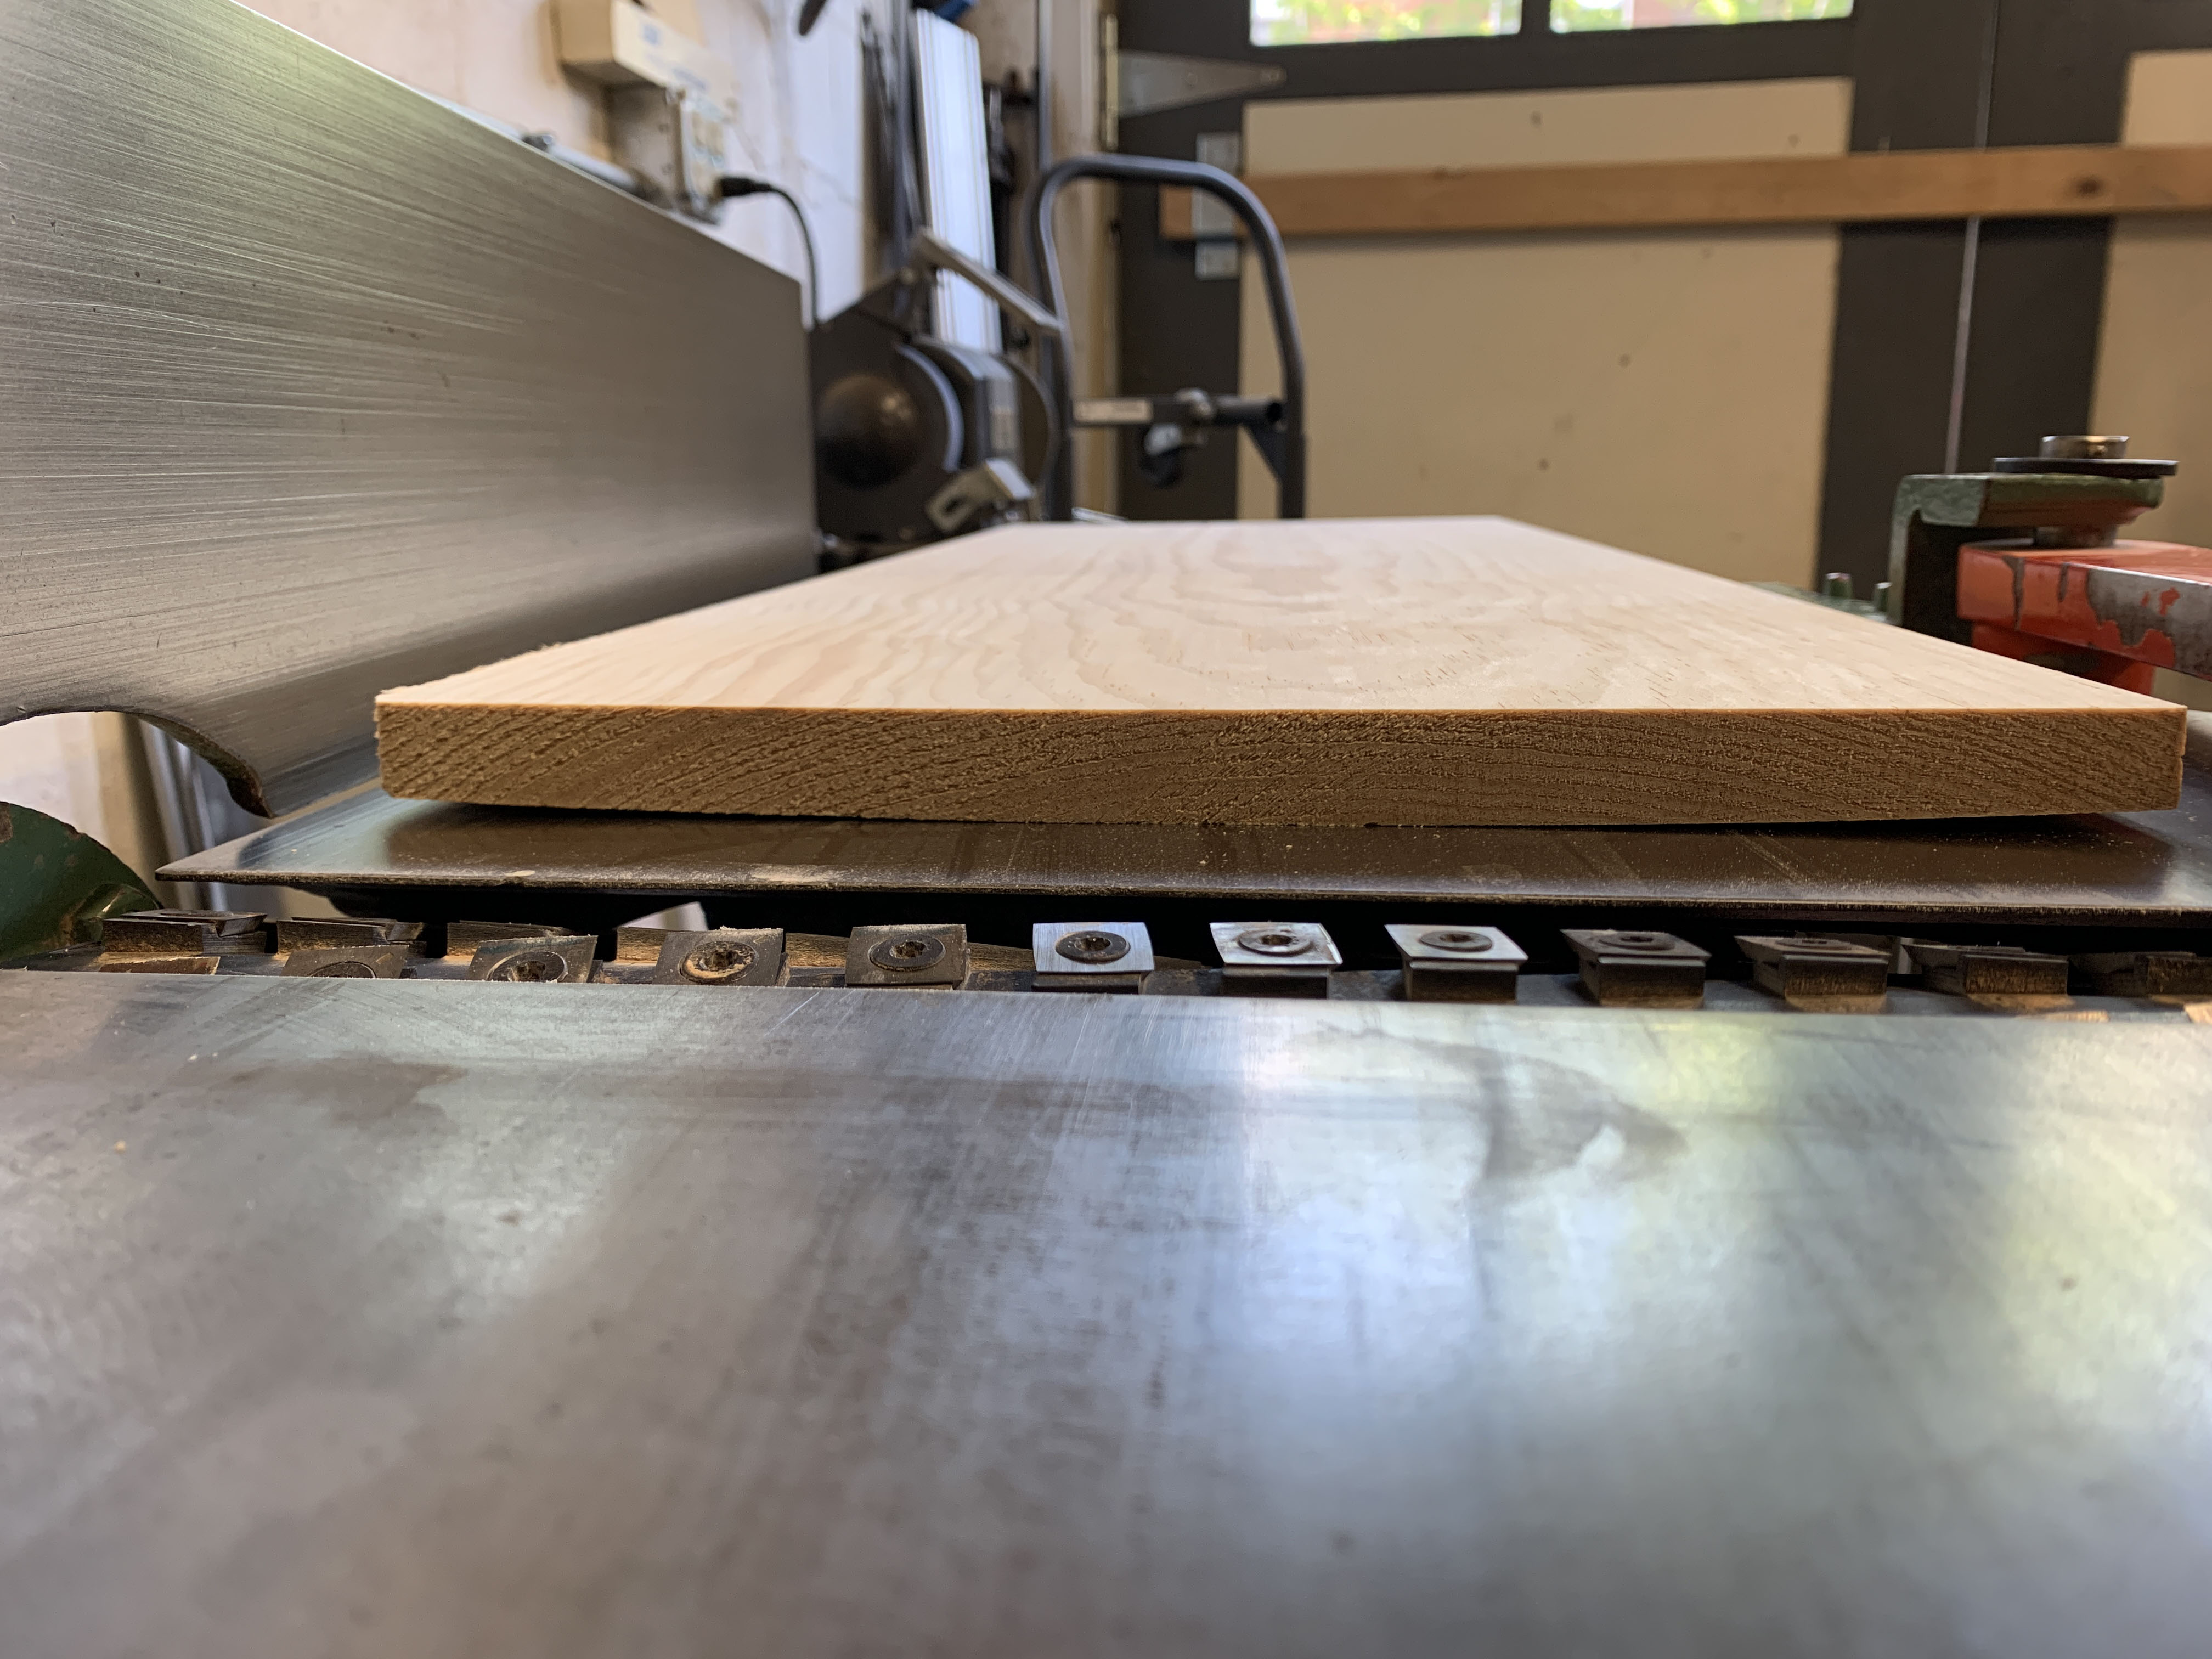
The knives are to the left of the wood; note how the grain is running “downhill” – when the cutters spin clockwise into the wood, they’re moving in the same direction as the grain is running out of the bottom of the wood. If you run the cutters against the grain, it can lift it up and tear it.
The crown of this board indicates that the other face need to go against the jointer bed. Were I to run it over the cutters like this, the board would rock.
After the final jointer pass, I stack the boards atop the planer, flat face down, with the last end that went over the jointer facing toward the planer mouth – that’s the way they get fed in (last off jointer, first in planer). Though again, if you have a helical cutter, it’s not (usually) that critical.
Stacked and ready to feed, with the jointed faces down. As I pull a board toward me for the first pass, the end that needs to go in the planer is the end already facing in that direction.
I follow the same steps every time I use the planer; that way, I never get turned around. As I pull pieces off the far end, I stack them back in the exact same orientation as they were run through the machine. Then if I have to run them again to get to a certain thickness and the first face is flat, I flip them end for end as I feed them into the planer for the second pass. And repeat. That way, I’m removing wood from both faces, and hopefully equalizing the moisture exchange. (And if I have someone catching for me, I make sure they don’t flip the boards as they stack them.) Same steps for the operator every time. And if the first face isn’t flat after one pass, the board is in the right direction without flipping it to simply run it through again.
And here’s the critical part for classes when it comes to thicknessing: I run all the wood that has to be the same thickness at the same time. I would never run, say, the front and back of a through-dovetailed carcase then come back three days later and run the ends. In order to avoid problems, all the pieces must be the exact same thickness – your best shot at achieving that is to do it all at once. I don’t care if the pieces are a hair over or under 7/8″ – I just care that they’re all the same.
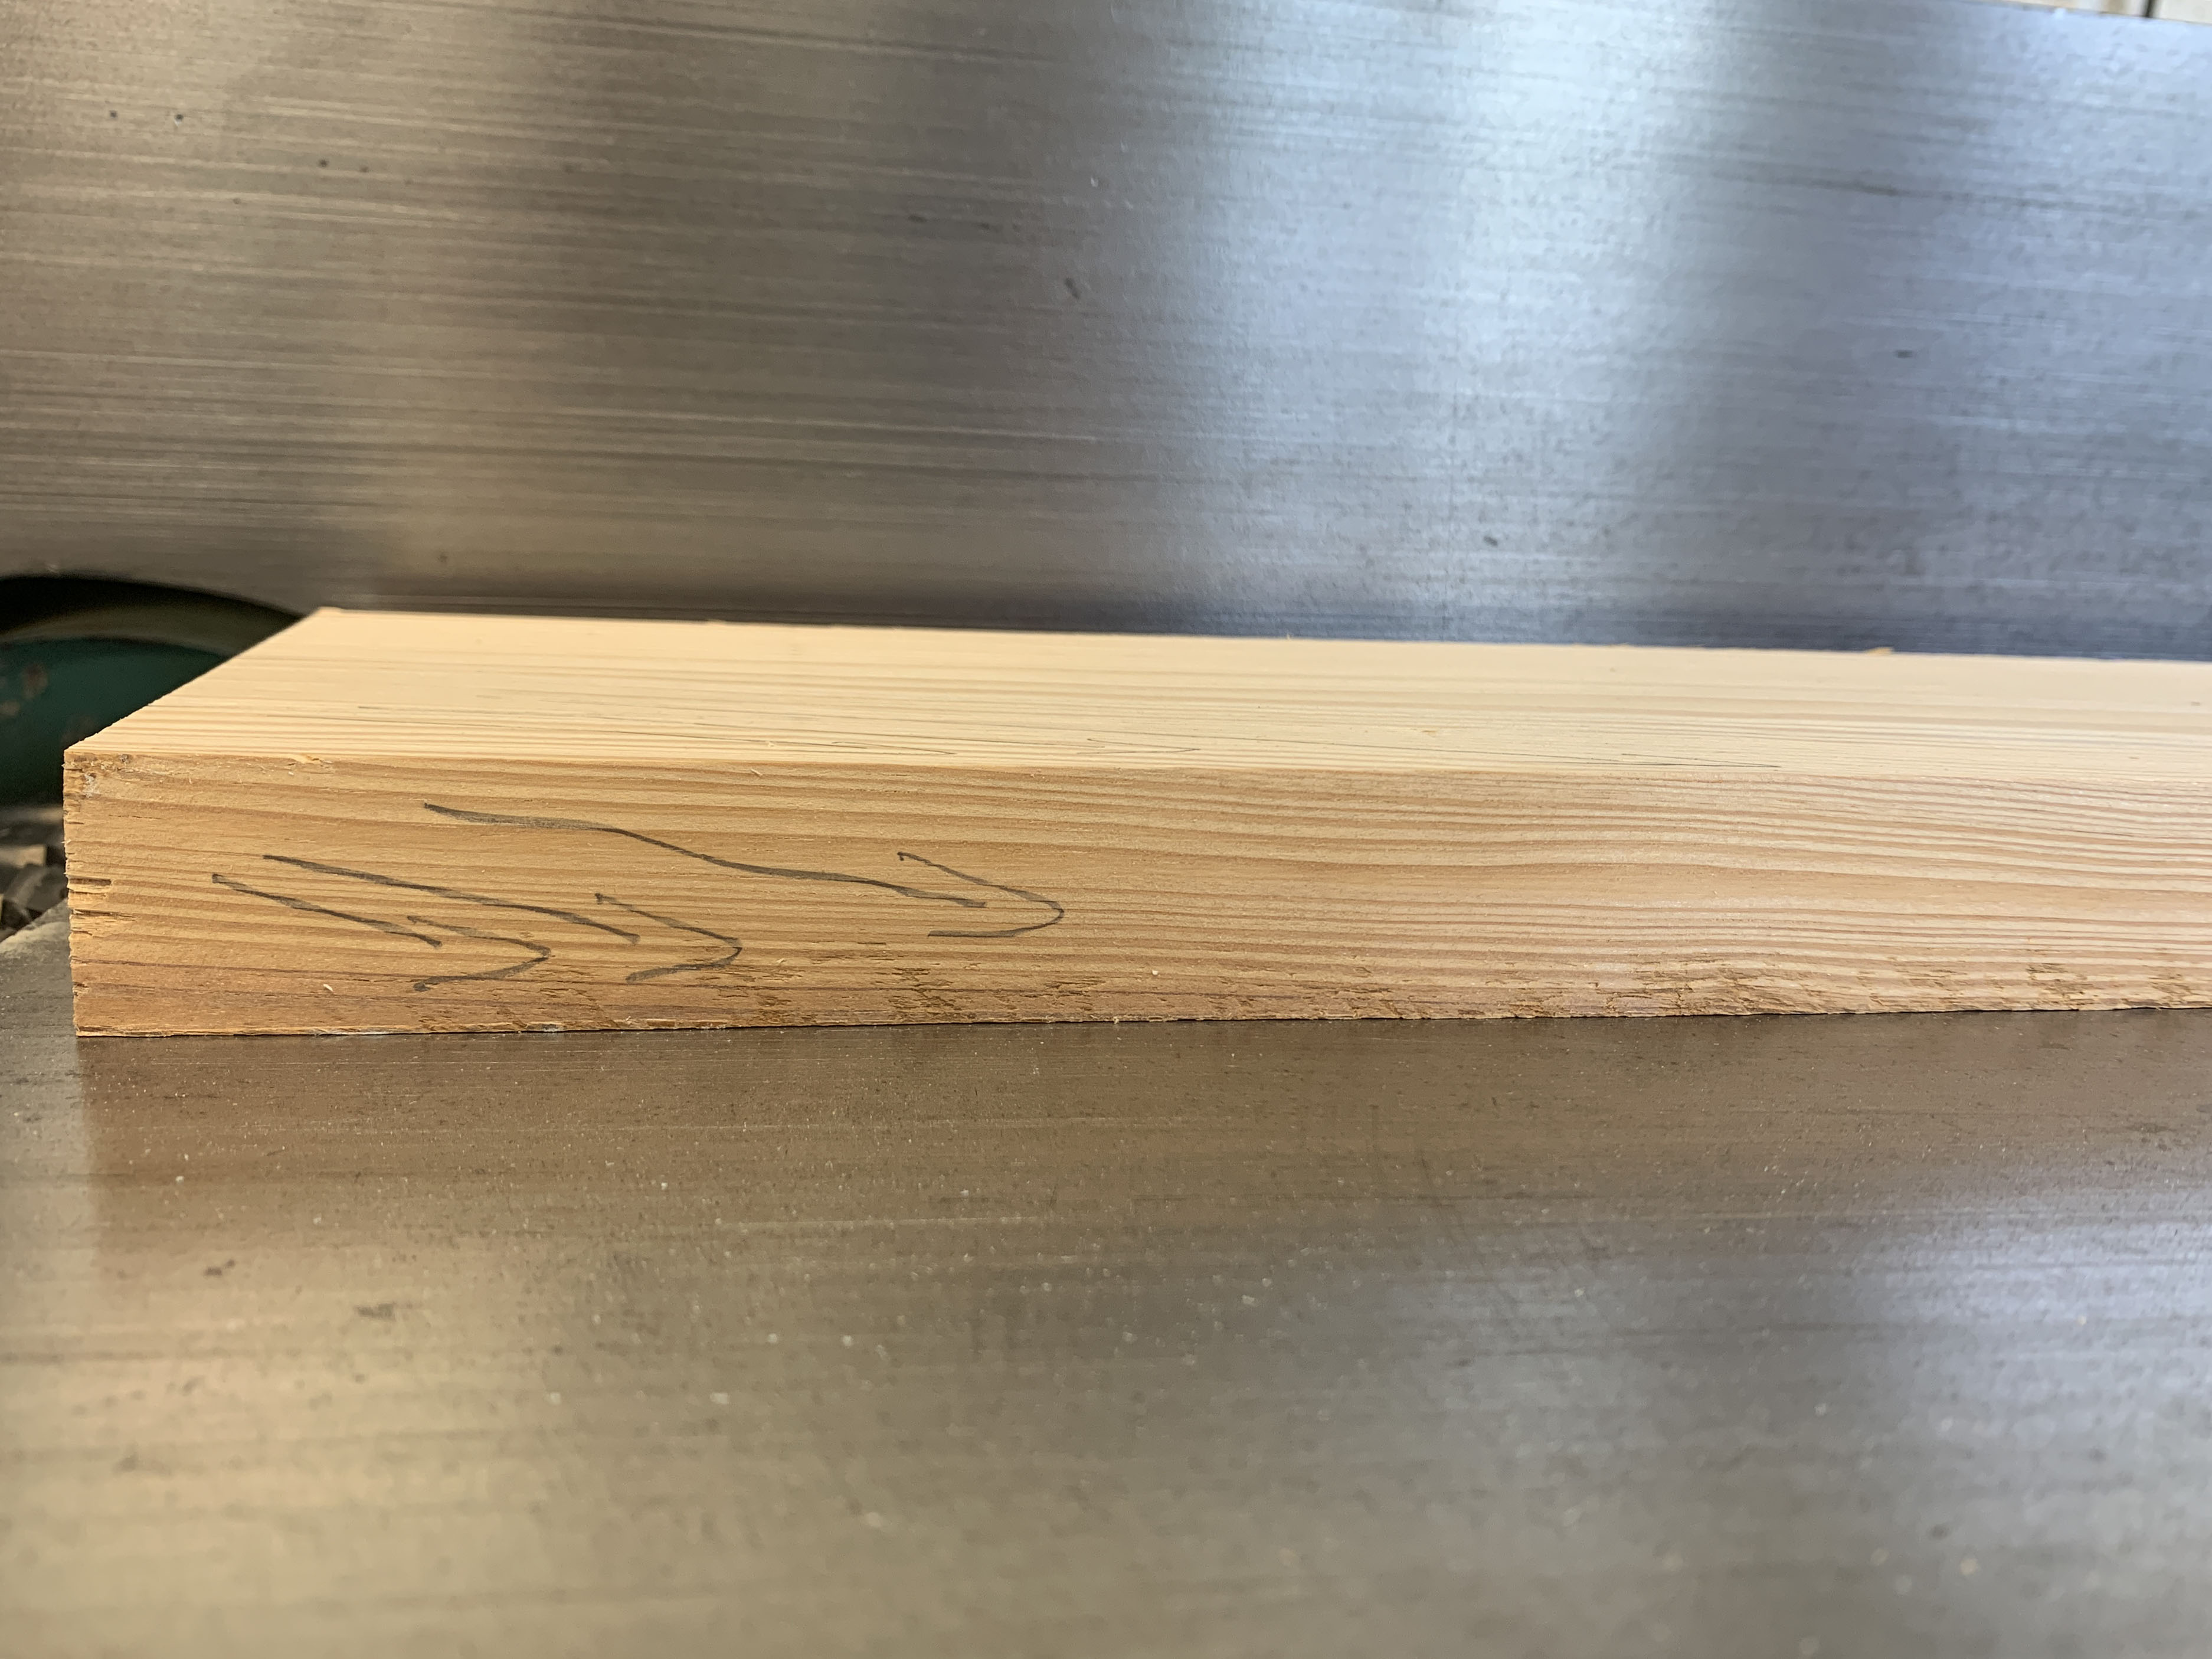
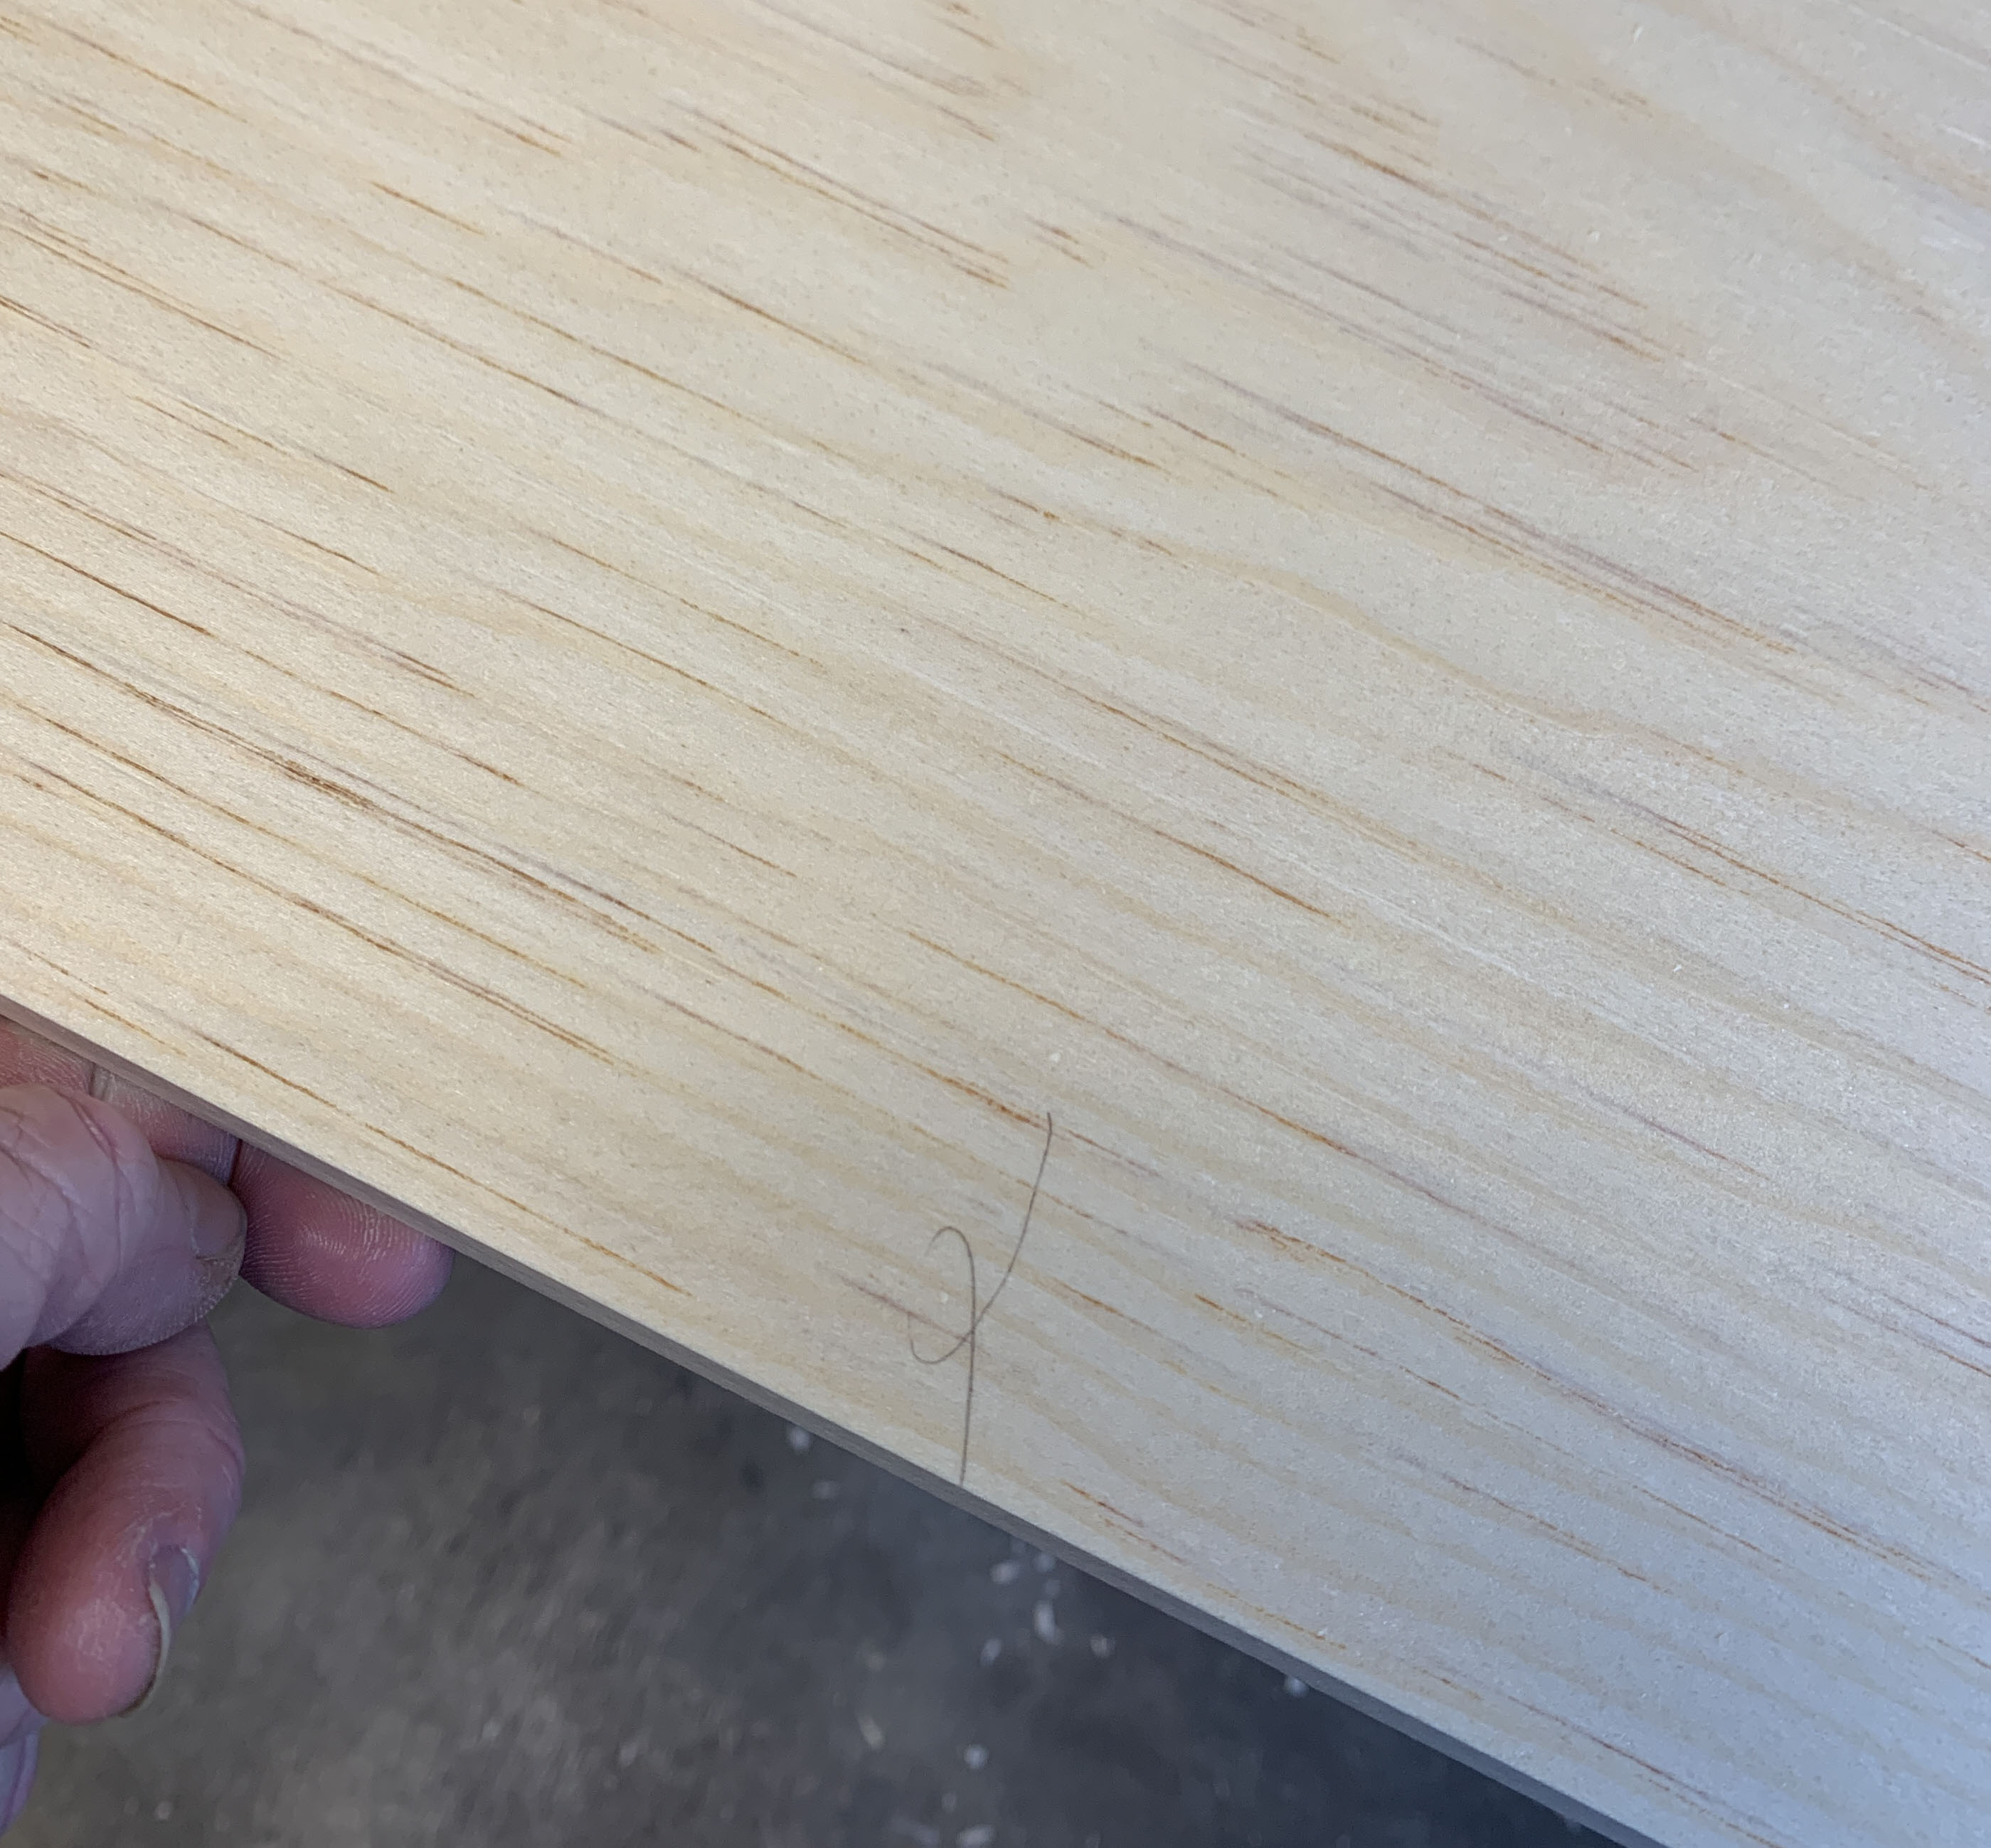
Once all the stock is flat and to thickness, I joint one edge in preparation for cutting it to final size (even if I’ve already jointed an edge to cut a piece to rough width, I do it again, in case it got bashed up), and mark the jointed edge; that edge will run against the table saw’s fence.
This curlicue mark on the jointed edge helps me quickly know which edge is straight and flat.
But it’s the table saw work that scares me the most in folks prepping their own stock; if the pieces aren’t square, the person’s class experience is doomed – and I don’t want that. But if I have to take the time to correct problems, the other students in the class suffer. So at least one person (in addition to me) is going to be unhappy.
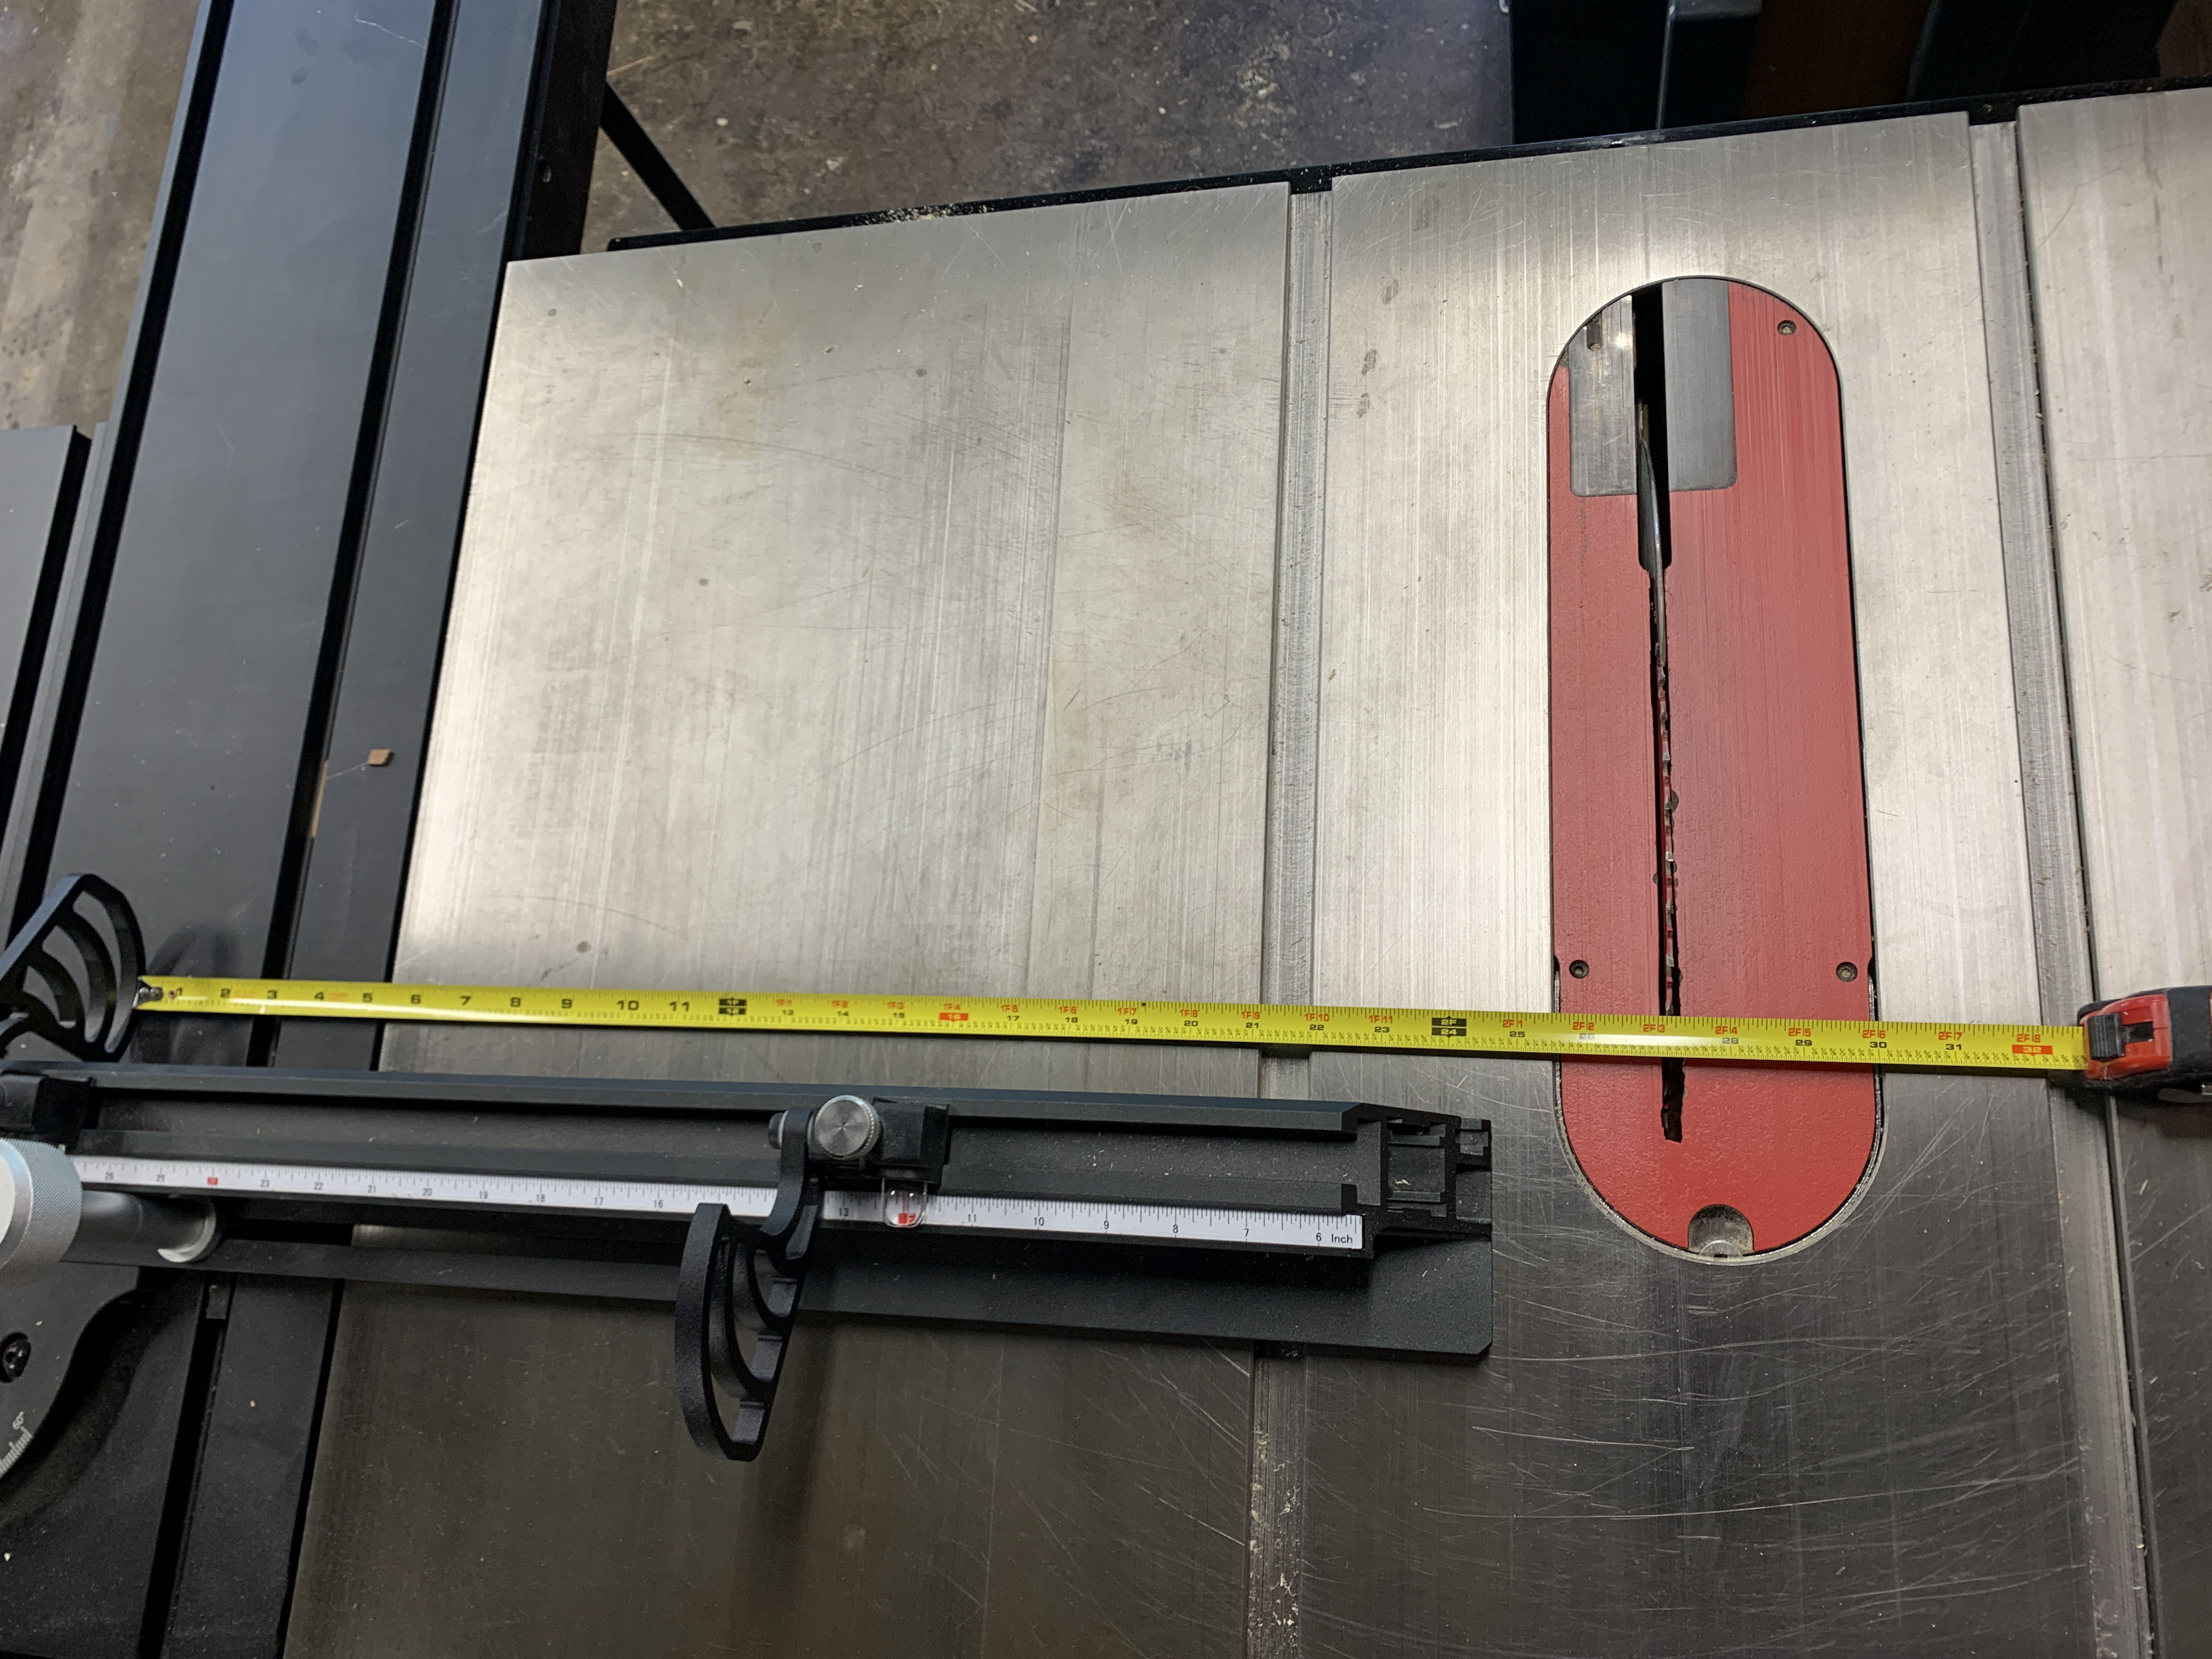
So I am ultra careful at the table saw to make sure my cuts are square. First, I rip the pieces to final width, making sure I keep the wood tight to the fence. Then I triple check that the crosscut fence is dead square to the blade, and before we got a reliable slider, I clamped like pieces together to make sure they were the exact same length. (Now I trust the stop on our slider. But I don’t trust the stop on your slider.)
As long at I don’t jam the workpieces against the stop, I am confident that our slider will cut multiple pieces to equal length. (But as you can see from my tape measure, I don’t yet trust the tape on the fence!)
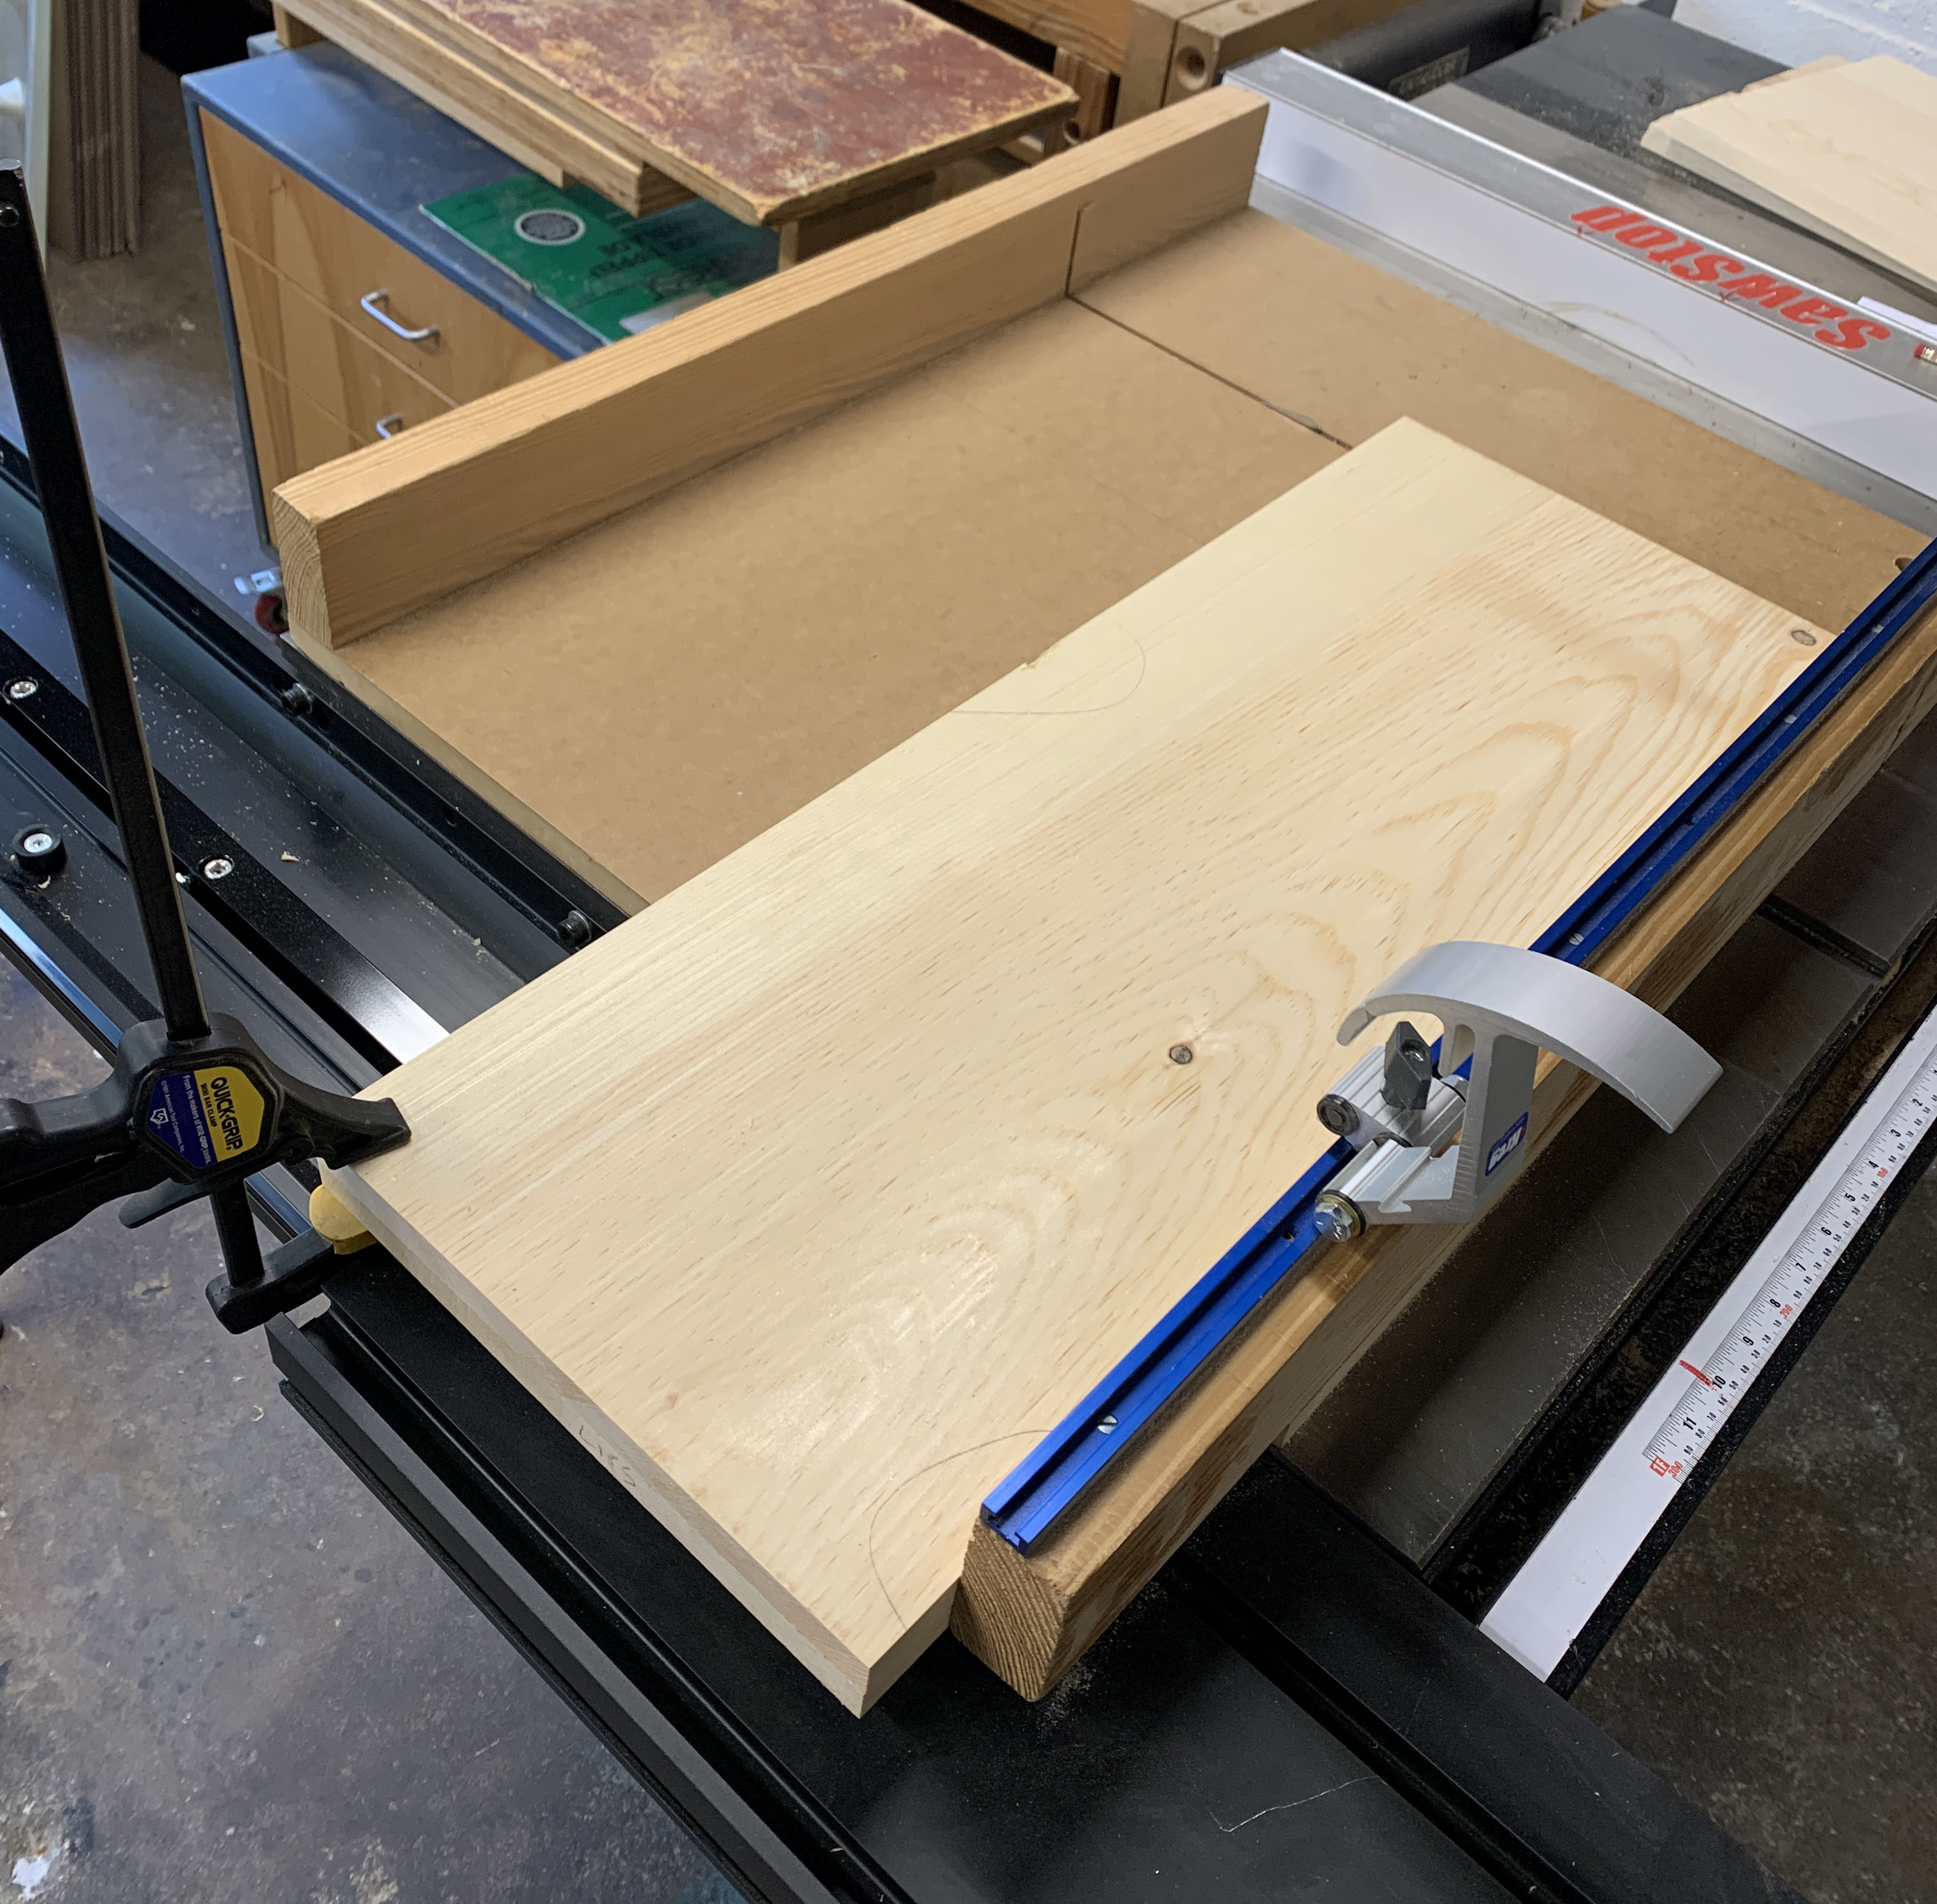
So after setting my stop I raise it, then crosscut one end square (with the jointed-edge mark against the fence), then drop the stop, flip the board and cut it to length. Boom – two square ends, and the right length. Repeat.
Once all the pieces of that length are cut, I reset the stop and cut the mating pieces. And so on with the rest of the stock.
Before we had a sliding crosscut fixture, I used this shop-made sled. If the pieces were longer than the sled, there was no way to set a stop. So I crosscut one end of each like pieces, then carefully…so carefully…clamped them together to cut the final length of both at the same time. It was the only way I felt confident that the pieces would exactly match. And I also had to then make sure each pair stayed together.
Note that all of the above assumes no glue-ups. Throw wide panels into the mix and you add glue-ups to the prep. I’ll write about those in a few days.
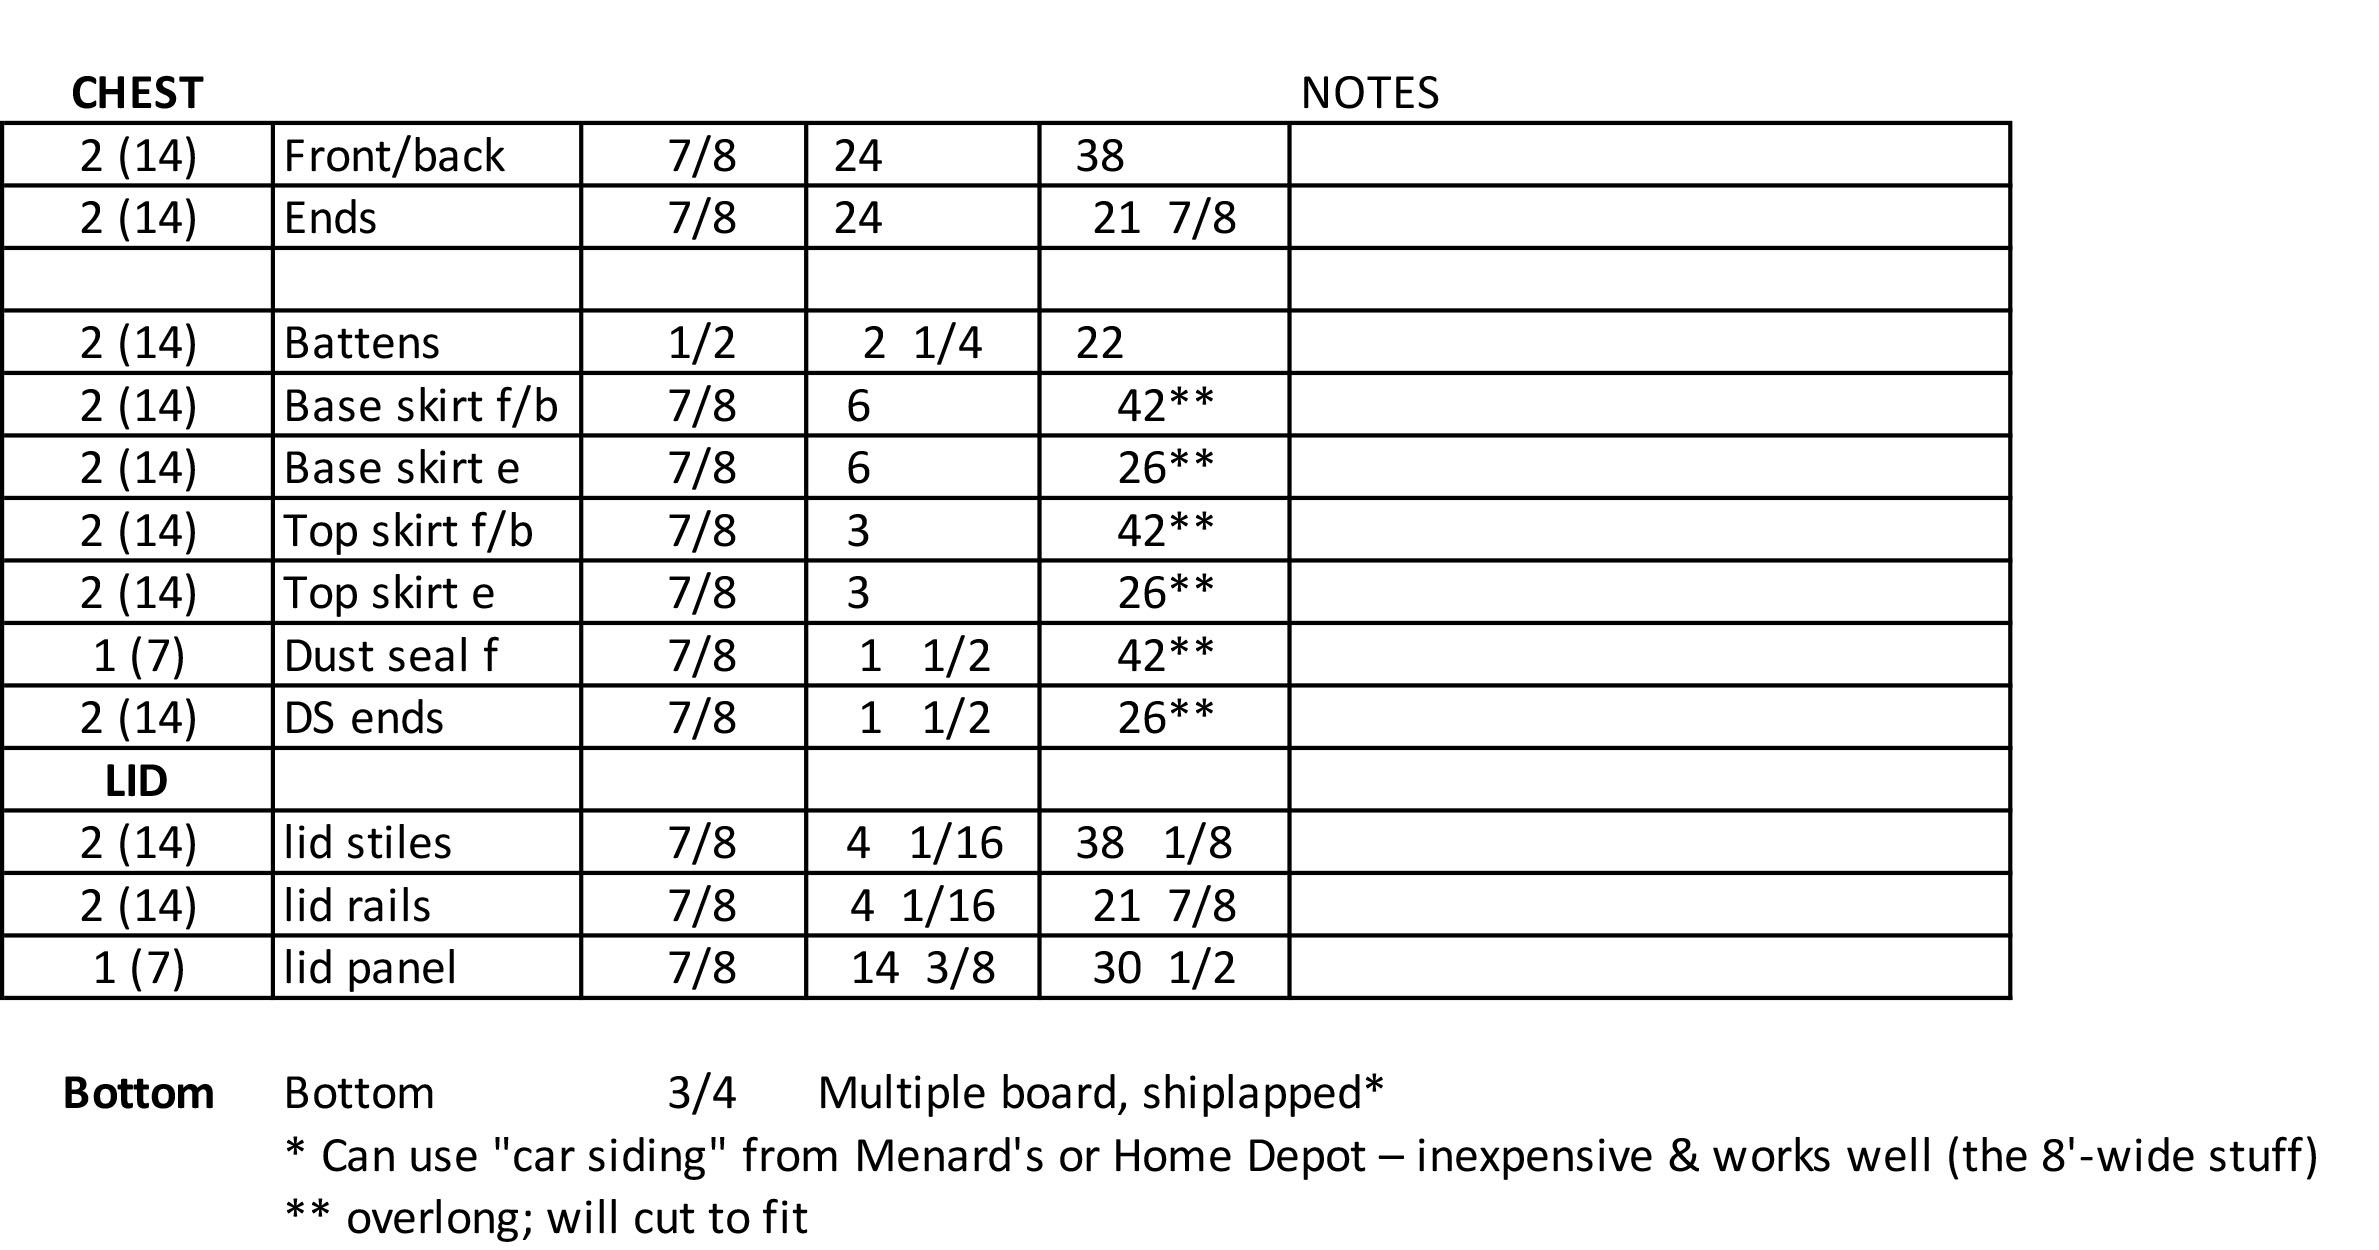
My class prep cutlist for the Anarchist’s Tool Chest.
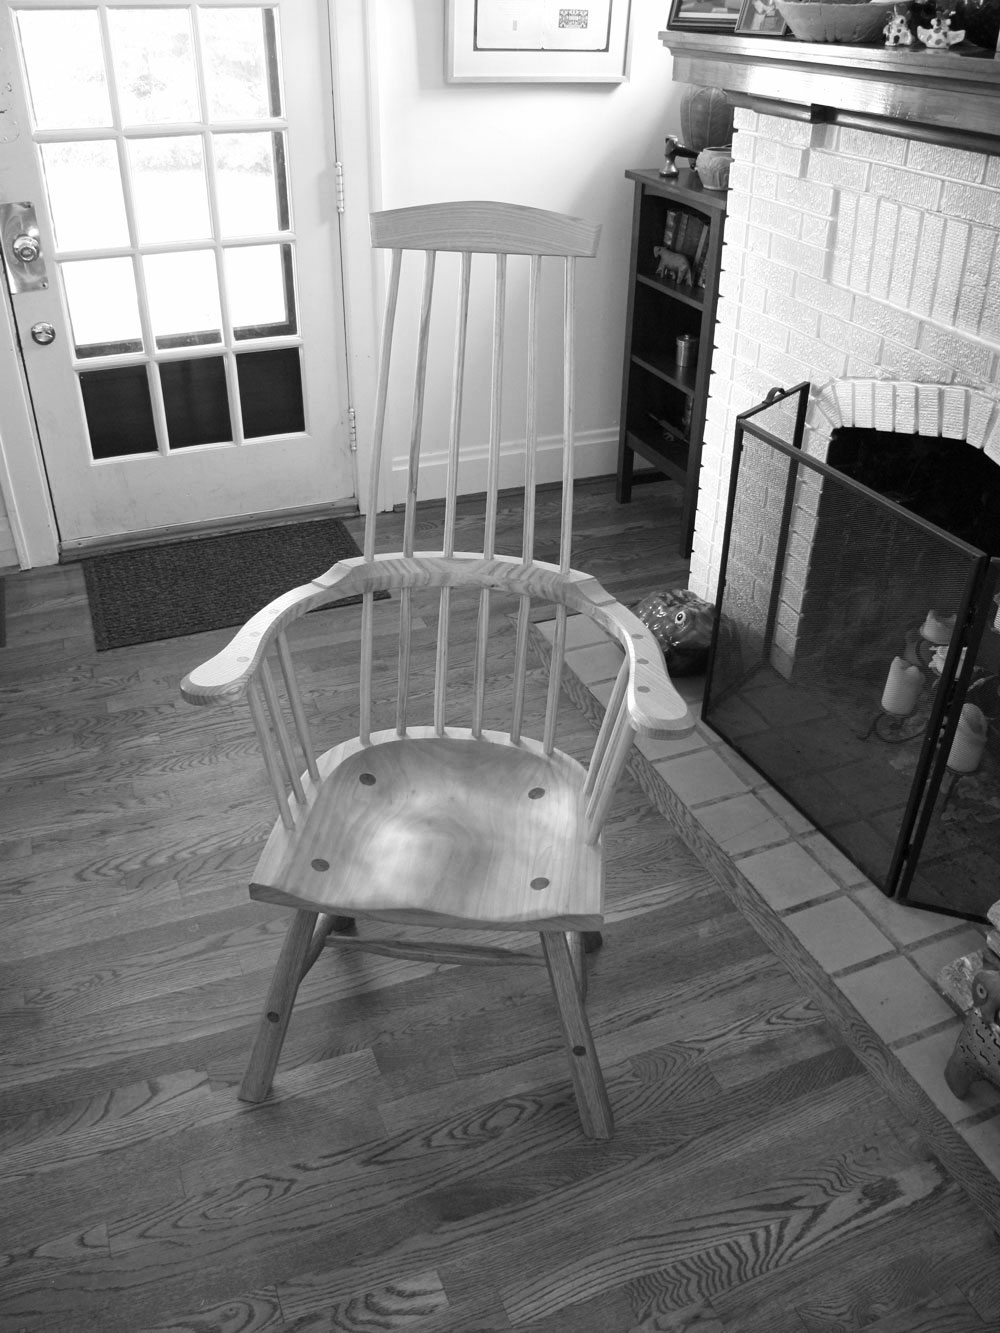
My second chair. Ugly but strong. And it was the key to my upcoming book.
Before I talk to an author about writing a book for Lost Art Press, I ask them to perform a short exercise beforehand. The exercise helps me understand the real thrust of their book idea.
This is important because we have received book proposals from authors that read “I’d like to write something about doors.”
Here is the exercise we send to potential authors:
Come up with a book title and (if necessary) a secondary title. Book titles should be short – usually no more than five words. And they must relate to the entire book. They should use simple and strong words – no -ing or -ly forms. We will help you with the final title, but it will help you think about your book if you can develop a working title. It helps set the tone for your work. A secondary title can help explain the main title. For example, the secondary title for “Cut & Dried” is “A Woodworker’s Guide to Timber Technology.” You might need a secondary title. You might not.
Write a “high concept.” The “high concept” is a 35-word (or so) pitch that explains the content of the book to someone who is not a woodworker and who has never heard of your work. I imagine it’s how I would explain a book at a dinner party to the person next to me. The “high concept” for “The Anarchist’s Tool Chest” was: “You can build almost anything with about 45 tools. This book shows you how to choose good tools, helps you build a chest to protect them and contends that furniture making is a radical act in today’s society.”
Create a table of contents (TOC). A good TOC is an outline for your book. It is the skeleton, and it charts your narrative arc (all good books tell a story). The more detail and thought you put into your TOC, the easier the writing will be. Also good to note: You might rip up a few TOCs before it’s over.
When I start in on a book, I also perform this exercise. But with the vernacular chair book, I wasn’t ready to answer these questions. I had to first figure out if I had an idea that was worth working on for two years.
So for the first half of 2020 I worked on other people’s books and “The Anarchist’s Workbench,” and I didn’t think much about chairs at all.
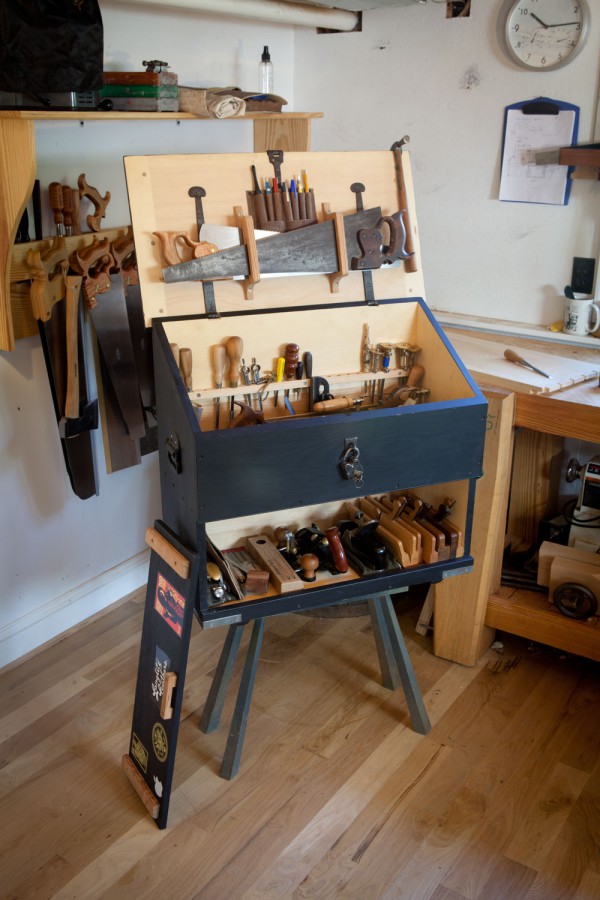
I did sign up a few new authors for future books, such as getting Megan Fitzpatrick to write a book on Dutch tool chests for a 2021 release. One day we talked about her upcoming book, and I asked how she planned to deal with the different possible construction strategies for the chest’s lid, back and interior.
She replied that she was going to use a “Choose Your Own Adventure” approach, where she would show all of the typical methods and let the reader pick.
And that was when my book on vernacular chairs snapped into focus.
Of all the books I’ve written, my favorites are the ones that I wish I’d had when I was 11 years old. If I’d had “The Anarchist’s Tool Chest” or “The Anarchist’s Design Book” when I was a kid, I would have been thrilled.
When I first contracted the chair-building disease in the 1990s – after encountering John Brown’s writing – I bought every book I could find on chairs, even the crappy ones. I read them all once, and most of them twice.
They all left me disheartened. Here’s why: Each author explained how he built his chairs. But they were (mostly) from the tradition that involved green wood, a froe, a shavehorse, a drawknife, a steambox and a bunch of specialty tapering and reaming tools.
Plus the geometry hurt my head.
I didn’t own any of those tools or easy access to green wood. After years of building furniture with dovetails, mortises and tenons, it seemed like few of my skills or tools carried over to chairmaking. That’s when I decided to take a class with David Fleming in Cobden, Ontario, to see if there was any hope for me as a chairmaker.
With Dave’s help I got through the construction of my first chair. Then I came home and – within days – began to build another chair so I wouldn’t forget what I’d learned. I decided that I would just use whatever wood and tools I had on hand and make it work. The chair would probably suck, fall apart or break. But that would be OK. It was just a flammable vessel to help me retain the geometry lessons and the hand skills.
The chair I made was damn ugly, but it didn’t fall apart.
After 20 years of studying vernacular chairs, I have concluded that “use what you have” is a valid way to make a good chair. It’s the strategy that’s been employed all over the world for centuries. You don’t need special tools or skills to make a chair. You just have to really want to build a dang chair.
Megan’s simple phrase, “Choose Your Own Adventure,” is the crux of my next book.
The working title: “The Stick Chair Book.”
The high concept: “Build chairs with the wood and tools around you. Learn to make all the components of a chair – legs, stretchers, arms, sticks, crest – with a wide variety of materials, tools and methods. Then combine these parts however you like into a pleasing, comfortable and sturdy chair.”
That’s 46 words and a little long. Oh well.
Then I vomited out the book’s TOC in less than an hour.
There are a dozen ways to make each chair component, from using a band saw down to a block plane. You don’t need riven wood. Straight grain is straight grain, no matter how you find it. You don’t need any special equipment to make a good chair. These disparate components can be combined in 1,000 ways to make 1,000 different chairs. And the geometry is easy once you realize that it’s the numbers and math that are holding you back.
I knew in a second that this book is something I’d gladly devote two years (or more) to. It’s the chair book I wish I’d owned in 1998.
— Christopher Schwarz
Read other posts from the “Making Book” series here.
Editor’s Note: Apologies if you received this post twice. We had some technical problems with this entry (our fault and not Nancy’s).
In her profile on the Brigham and Women’s residency alumni web page, Dr. Ouida Vincent had some fun with the pro forma question “DO YOU HAVE A FAVORITE MEMORY FROM RESIDENCY?”
“Spending the night out with co-residents at the ’70s disco,” she answered, punctuating her response with a single word: “Polyester.”
This disarming response will come as no surprise to those who know Ouida, whether in person or from Instagram, where her warmth, humor and sense of adventure are on regular display. “Headed to Handworks by way of MSP,” she wrote in May 2017. “Please say hello… I’ll be the BWWDL” – as she’d previously described herself, the “BLACK WOMAN WITH DREAD LOCKS” – because (let’s be real) how many Black women (or men) with dreads would you typically expect see at a gathering of hand-tool woodworkers in rural Iowa?
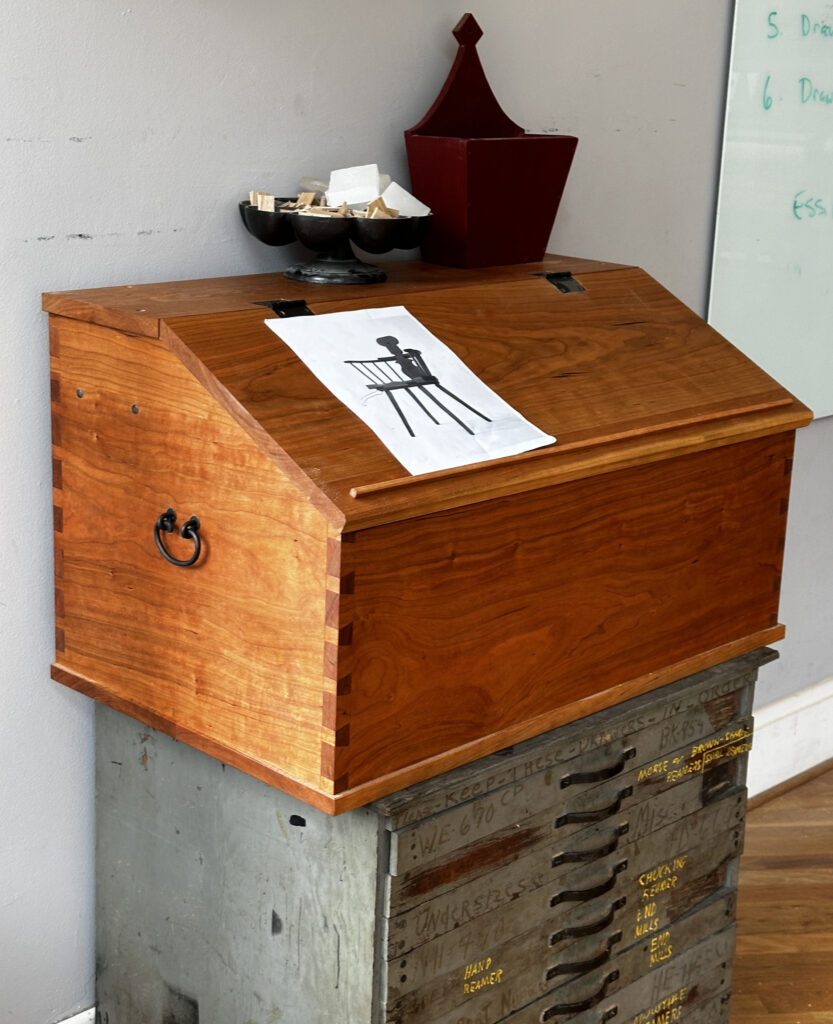
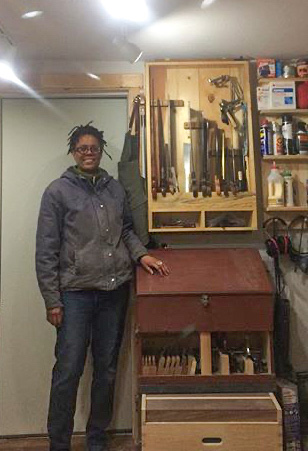
With her Dutch tool chest in her shop.
When we spoke, on a crisp Saturday morning this fall, she’d just returned from delivering sourdough cinnamon rolls to her mother. It was a short walk up the hill by her house; she was still in her pajamas, under a Carhartt jacket.
Along with thousands of others, Ouida (pronounced WEE-da) took up sourdough bread baking in April, when the pandemic prompted so many to plunge themselves into baking that stores could not keep yeast on the shelves. It wasn’t her first experience with baking; at Cornell she did a medical school rotation on the Navajo Reservation in 1989, staying with a family who baked wholewheat bread or cookies every day. Inspired by their example, she took up baking herself when she returned to med school. Although her first few loaves were “like hubcaps,” she kept at it and quickly improved. She baked every weekend until her professional work became too demanding.
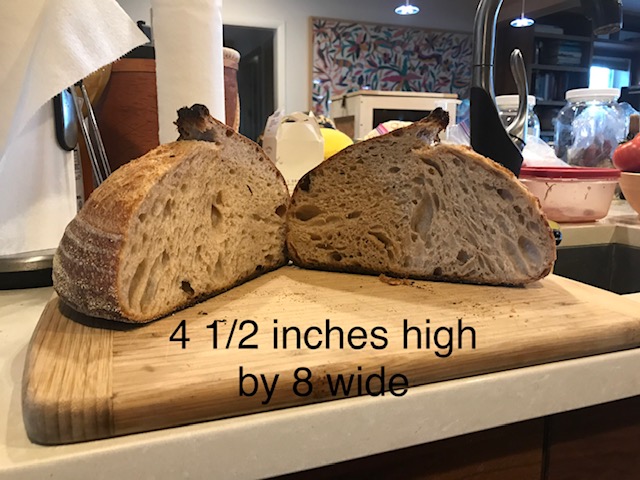
Ouida approaches sourdough baking with the analytical rigor of a scientist and the enthusiasm of one who bakes for love, not money. Her Instagram feed is full of boules and batards – some whole, some sliced in half to reveal herbs, olives or “crumb.” An early September entry that shows the kind of springy texture I can only dream of producing reads like notes on an undergraduate’s experiment:
“[W]hen I want to check oven spring, I look at how the holes are oriented and if the entire loaf from bottom to top was involved in ‘spring.’ You can get three patterns[:] no spring (dense loaf) that may or may not have risen any, spring primarily on the outside of the loaf with a dense (yet hopefully done) interior and spring that involves the whole loaf. The holes will be elongated in the direction of spring and will glisten.”
Note the measurements. Clearly the work of a scientist.
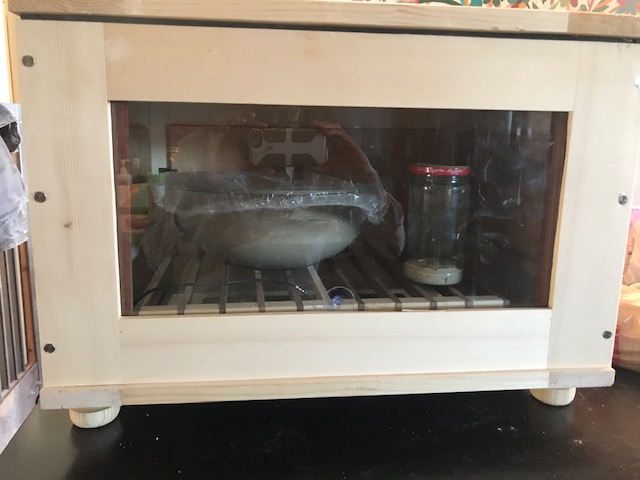
She brings the same studious curiosity to woodworking. Ouida sees a piece of furniture she likes and figures out how to build it. Her office and home are furnished with pieces of her own making. And when she decided a proofing box would be a boon to her sourdough baking, she puzzled out what it would take to fabricate one.
Ouida’s proofing box with a loaf in progress.
These days, Ouida, whose day job is clinical director of a hospital on the Navajo Reservation, is “in a mask 10 hours a day, five days a week.” Anyone who pays attention to national events will be aware that Native Americans have been affected terribly by Covid-19. Ouida adds, “Even when there is a vaccine, I will wear my mask (even after getting the vaccine). This is about public health.”
Ouida was born in Nashville, Tenn., the fourth of five children. When her mother and father married, her father brought three from a previous marriage and her mother brought her; they had one son together. Her name is common in the South. “My mother told me that she heard the name and wanted me to be remembered, so she gave me the name.” Then comes the zinger: “You can imagine what kids and substitute teachers did with [it].”
Ouida and her little brother.
She can’t remember a time when she wasn’t fascinated by making things and figuring out how to fix them. Her older brother David was “a real Mr. Fix It” from the start, Ouida says; she followed him around and learned from his example.
After her parents split when Ouida was 10, her mother moved Ouida and her younger brother from one place to another, wherever she could find work, usually in college financial aid offices. Ouida would have signed up for shop class in school, but as a girl born in 1963 she wasn’t allowed to. That changed when her family moved to Virginia Beach, Va., in 1976; she enrolled in shop class and small engine repair. She and her classmates learned to strip down and rebuild two-stroke and four-stroke engines, restoring them to working order; they also had to frame the corner of a house, complete with functioning plumbing and electrical service.
When they moved to Alabama in 1979, Ouida found herself barred from shop class once again. Undeterred, she decided to go ahead and build things on her own, though she found that was more easily said than done, with few tools and no shop. While working on a body for an electric guitar she asked the shop teacher at school if she could use the band saw. He asked her to prove she knew how – a challenge she met in short order. He gave her permission to use the shop facilities when classes weren’t in session. She’s been building ever since.
Given her facility for learning new skills and diagnosing problems, it’s not terribly surprising that Ouida, who excelled academically, found her way into medicine. She graduated from Cornell Medical College in 1990 at the age of 27, then did a residency at Brigham and Women’s in Boston. “My uncle was an Ob/Gyn. It was really the first medical career I was exposed to. I was briefly attracted to general surgery, but the general surgeons I was exposed to seemed not to have personal lives. I was ultimately attracted to the combination of surgery and diagnostic medicine that obstetrics and gynecology offers.”
She originally hoped to do a medical student rotation in Alaska, but when she inquired, she learned that all rotations there were filled – she would have had to apply at least a year in advance, rather than a few months ahead of the starting date. “When I walked in to talk with one of our deans, she was opening a letter from alumni who had taken jobs in Shiprock, N.M. They had space for students, so I went. The year was 1989. I fell in love with the medical community and knew I wanted to return,” though she adds “I didn’t plan on making a career out of it.”
In 1998 she moved to Gallup, N.M., and became Chief of Obstetrics and Gynecology. When her real estate agent heard about her interest in woodworking, she mentioned there were classes at the local branch of the University of New Mexico. Ouida signed up for a course in cabinetmaking. The college had a well-equipped machine shop, but no hand tools. As she deepened her experience of working with machines, she learned another valuable lesson – “the frustration of power tools!” Even though the college had a full-time staff person charged with repair and maintenance, “there was always a machine down.”
Ouida’s work responsibilities grew, leaving her with less time for classes, yet she continued to pack in as much woodworking as she could. One of her early projects was an 8’-high x 3’-wide media cabinet. Another was a hutch based on an article in Fine Woodworking; it’s in her office today.
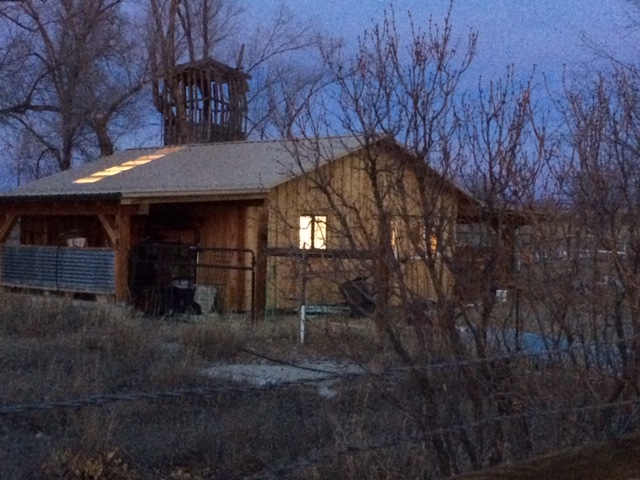
In 2006 she bought a property in Colorado, attracted in part by a dilapidated barn on the site. “This is my woodshop,” she remembers thinking when she first saw it. Termites and rain had done their worst; contractors she called for estimates to rehabilitate the structure said it wasn’t worth saving, that she should build something new. “But I wanted to work in a barn,” she says. Eventually she found a contractor who was willing to fix it up for her.
The barn shop at dusk.
Ouida slowly taught herself to use hand tools. She learned a lot from Chris Schwarz’s videos on hand tool basics and watched the Popular Woodworking series “I Can Do That.” She made a desk of ambrosia maple and cherry for a friend; the hand-cut dovetails were “so gappy that I made the gaps the same size and backfilled them with filler of a different color.” She persevered and improved. The same went for sharpening. “The first time I sharpened a plane blade it took six hours,” she says. But she found the more she worked in hardwoods, the greater her appreciation of the need for sharpening and the better at it she became. In the end, she says, “the wood became my best teacher.”
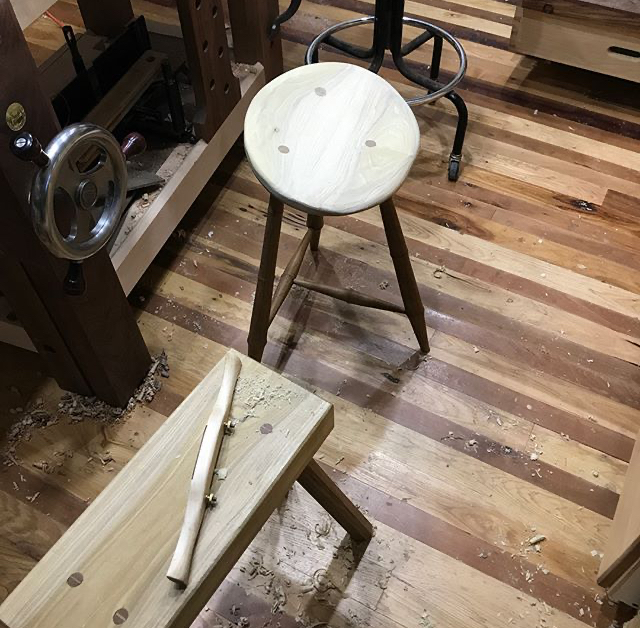
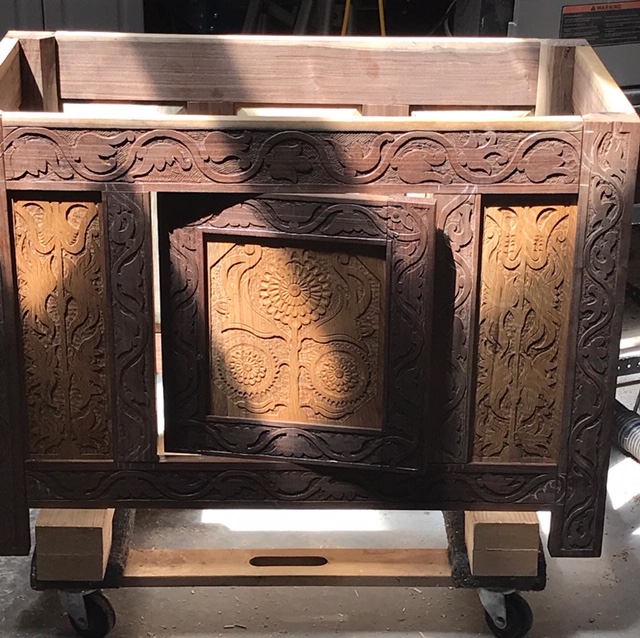
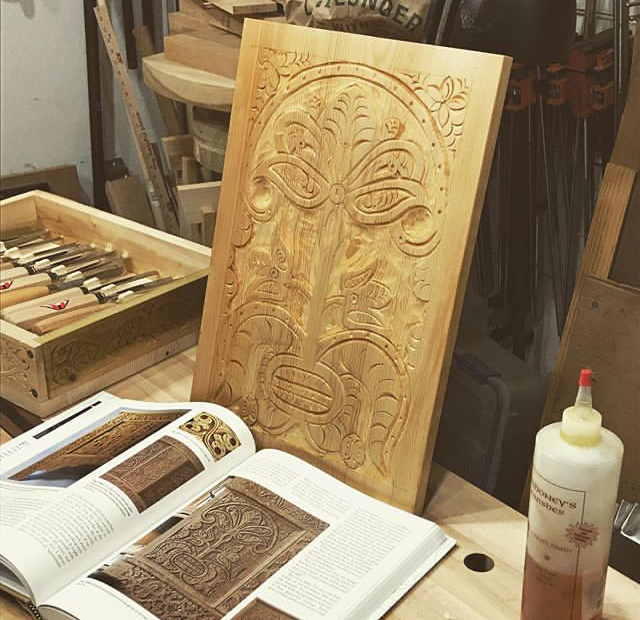
Around 2011 she made some shop stools based on a video by Mike Siemsen. When “The Anarchist’s Design Book” was published, she built one project after another from it – a boarded bookcase, staked desk (now in her office), six-board chest and staked chair. “I would have made more from that book,” she says, “had Peter Follansbee not published his book and completely derailed my life! I’ve literally done nothing but carve since 2019.”
Evidence of obsession.
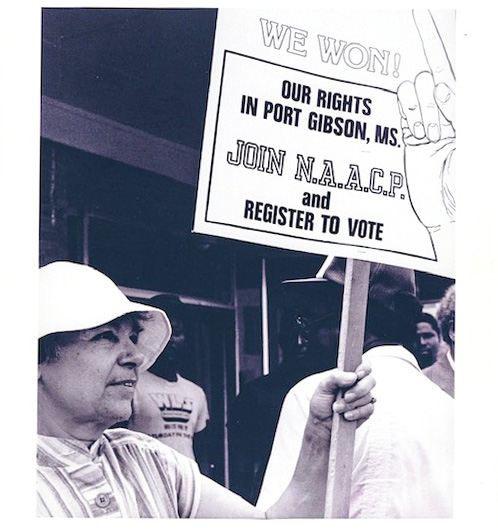
Ouida is well aware of the sacrifices her mother made as a single parent. She also deeply appreciates her maternal grandmother’s support, calling her “a constant figure in my life until she passed away in 2001.” She cites one incident in particular, which culminated in the United States Supreme Court case NAACP v. Claiborne Hardware, to illustrate the impression her grandmother Dolly made.
Dolly Thompson was from Mississippi and had a ninth-grade education. “It was in the Jim Crow South,” Ouida points out by way of context. Even though the population of Claiborne County, where they lived, was majority Black, all the political seats were held by White people. Her grandparents owned a funeral home and were solidly middle-class. But when they traveled cross-country to attend mortuary conventions, they always had to think about where they’d be allowed to stay at night.
It was common in that time and place for Black people to be called names (if their presence was even acknowledged) and forbidden to use public restrooms or sit at lunch counters. Tired of being treated as second-class citizens when they were upstanding members of the community, Ouida’s grandmother (her grandfather died in 1962) and many of her fellow community members, working with a local chapter of the National Association for the Advancement of Colored People (NAACP), decided to “talk with their dollars.” They organized a boycott of White-owned businesses, setting up a supply house of their own called Our Mart to keep fellow citizens supplied with hardware, food, clothes and other everyday needs. They funded the project by selling shares.
Ouida’s maternal grandmother, Dolly Thompson.
Several of the White-owned businesses joined forces and sued for damages – in a majority-Black county, their businesses couldn’t survive without the now-missing income. When the Mississippi Supreme Court ruled in the White businesses’ favor, Ouida’s grandmother and her fellow boycotters took the case all the way to the United States Supreme Court, which ruled in favor of the NAACP.
The whole thing, she notes, came about “simply because that group of people wanted better treatment.” Although this was her grandparents’ experience, Ouida understands it’s not that far removed from our own time — she belongs to the first generation to grow up outside of Jim Crow. And it’s easy to see how Ouida, with these determined and hardworking role models, became the kind of woodworker who doesn’t flinch at challenges, but sticks at a task until she has mastered it, having lots of fun along the way.
Summing up our conversation, she reflects that “the reason I’ve continued doing [woodworking] is the stimulation it provides.” She trained as a surgeon, but her work for the past several years has been in administration. She misses the contact with tools and materials. Bread making helps fill the gap; woodworking goes even further. “Now I get to hold instruments in my hand that use fine motor skills., similar to using a scalpel,” she adds. No wonder she can’t stop carving.