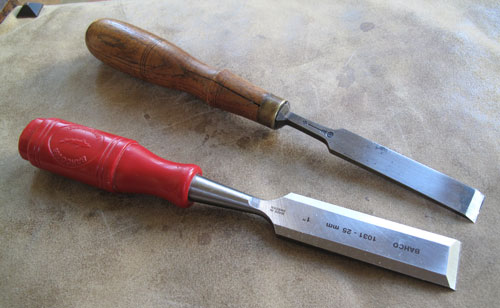
SOLD: Here are two good user chisels with two interesting stories. I’m only selling these as a pair. Sorry to be a pain.
The Butcher chisel is 5/8″ wide and is a tool that I have had forever. It is fully set up and ready to go — though the edge has a small nick out of it. Hone it before you use it.
What’s interesting about this tool is that it has been cryogenically treated. When cryo first came into vogue I sent this tool (and several others) to a cryo lab for a deep cryo treatment. The idea was to see if I could tell any difference in the durability. I got the tool back and have used it for many years. It is just as durable as it was when I sent it out.
The other chisel is a 1″ Swedish Bahco chisel with a red plastic handle. For years, people told me about the legendary properties of Bahco 956 chisel steel. It took me months of searching, but I finally acquired this chisel off eBay.
It’s a fantastic chisel. Holds a great edge. Comfortable handle. Why am I selling it? These chisels are too hard to find for mortals and I have plenty of chisels.
Price for the pair: $30 plus domestic shipping.
About Tool Sales on My Blog
Please read this if you are interested in buying a tool. Why am I selling these tools? Read this entry before you freak out. There is no “master list” of tools that I can send you. I am working through several piles of tools and will list them when I can.
Want to see only the tools that haven’t sold? Easy. I’ve created a category for that on this blog. Click here and bookmark that page. When you visit that link, you’ll see only the tools that haven’t been sold.
While you can ask me all the questions you like about the tool, the first person to send me an e-mail that says: “I’ll take it,” gets the tool. Simple. To buy a tool, please send me an e-mail at christopher.schwarz@fuse.net.
Payment: I can accept PayPal or a personal check. As soon as the funds arrive, I’ll ship the tool using USPS. If you want insurance, let me know. I’m afraid I can only ship tools in the United States. Shipping internationally is very time-consuming and paperwork-heavy. My apologies in advance on this point.
If you don’t like the tool when you get it, I’ll be happy to refund your money if you return the tool. But postage is on you.
— Christopher Schwarz

