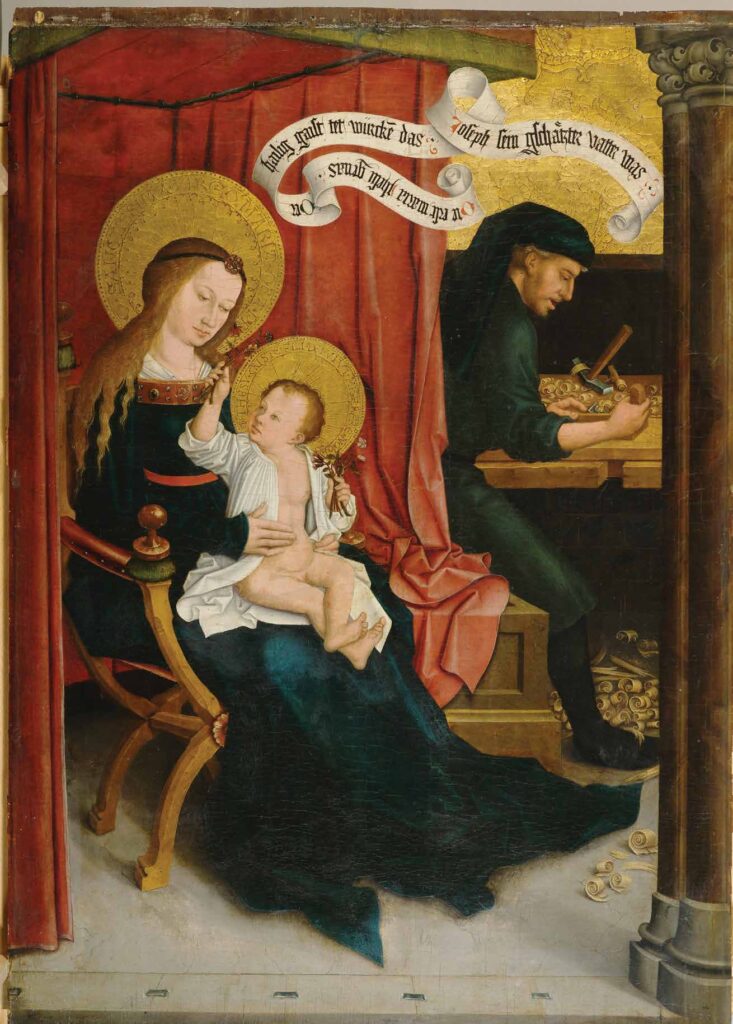
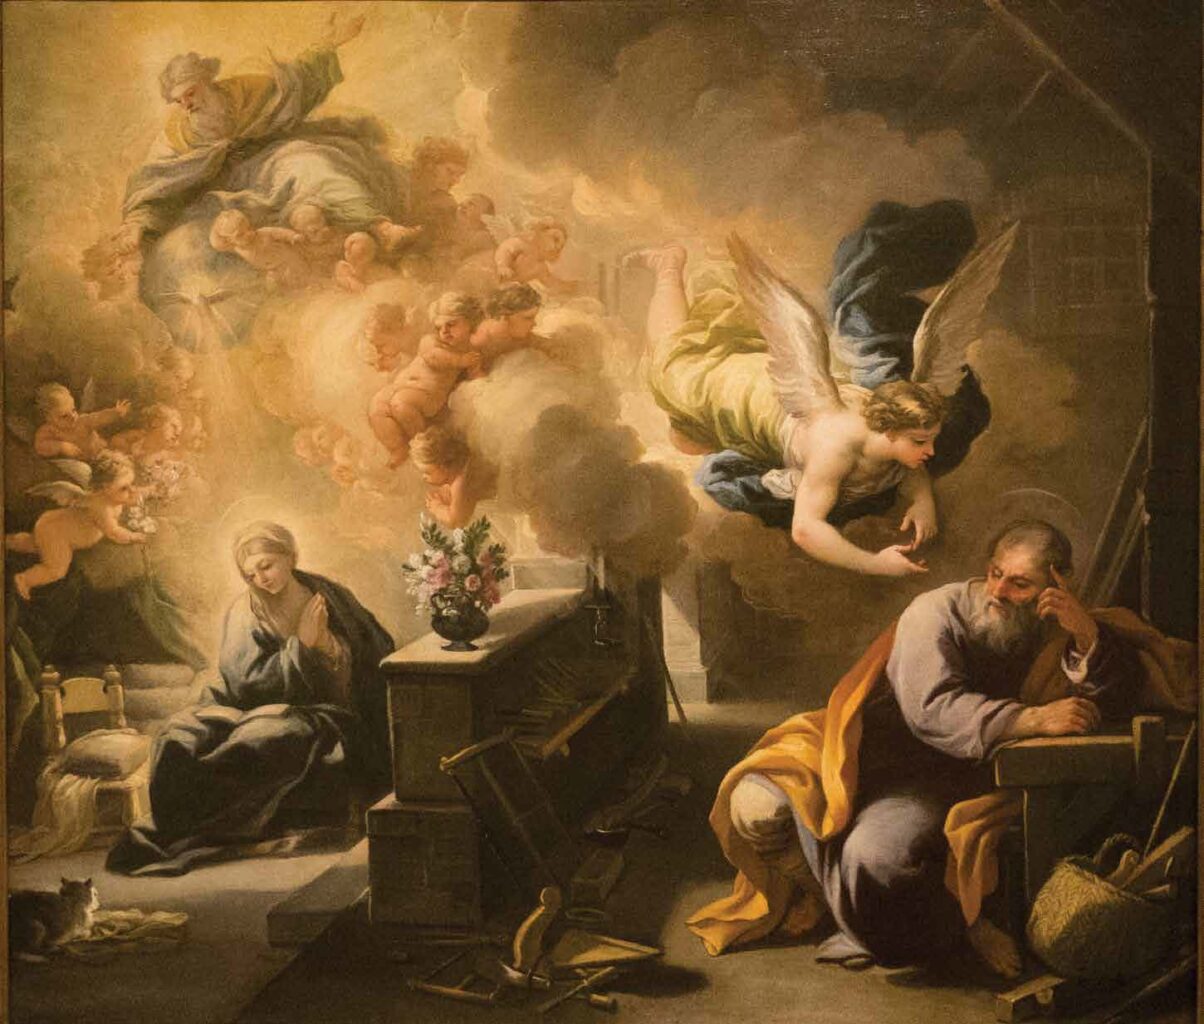
the benchtop that could be used for cutting tenons or sawing out fretwork. This
illustration is from about 1505 in Nuremburg. The painting is the “Holy
Family,” part of a 10-panel work by Bernhard Strigel.
PAINTING: GERMANISCHES NATIONALMUSEUM,
NÜRNBERG (LEIHGABE DER BAYERISCHEN STAATSGEMÄLDESAMMLUNG)
The following is excerpted from “Ingenious Mechanicks,” by Christopher Schwarz. This book is a journey into the past. It takes the reader from Pompeii, which features the oldest image of a Western bench, to a Roman fort in Germany to inspect the oldest surviving workbench, and finally to Christopher’s shop in Covington, where he recreated three historical workbenches and dozens of early jigs. This specific excerpt is by Suzanne Ellison who is a regular poster for Lost Art Press and did historical research for the book.
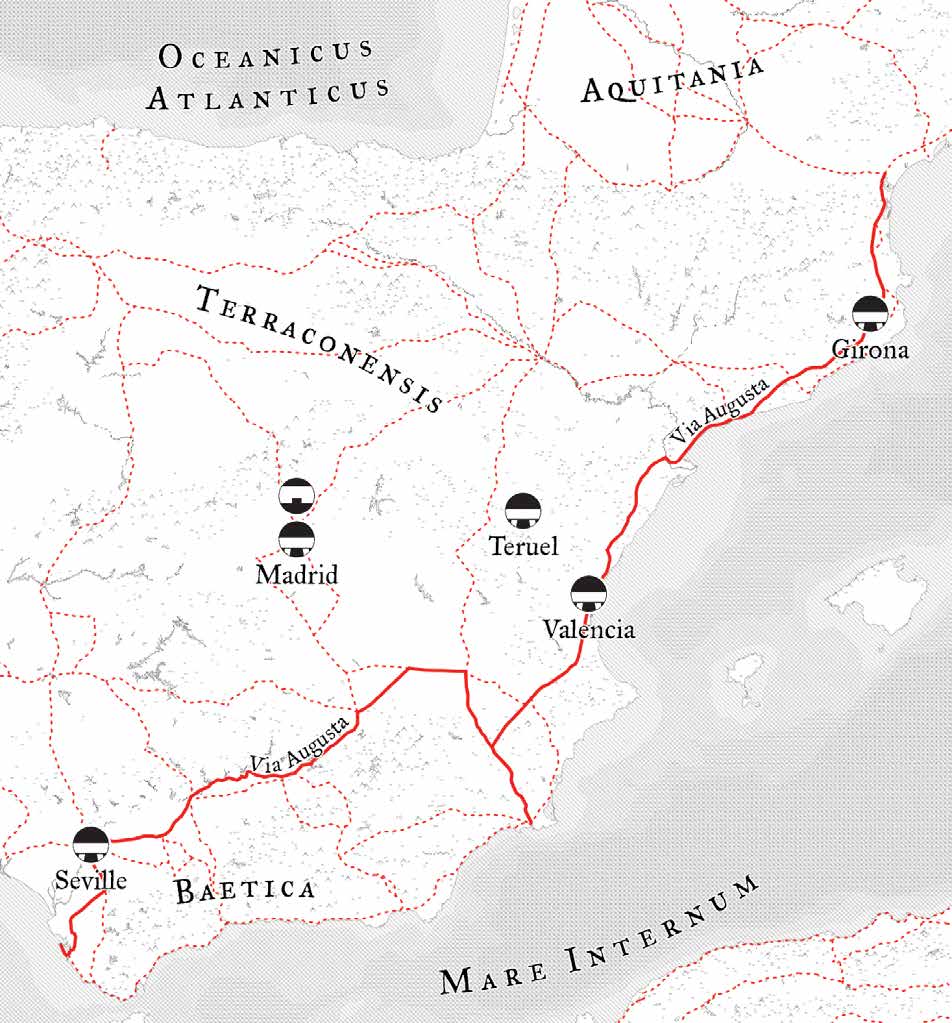
It is not surprising to see low Roman workbenches in Italy or any of the former Roman provinces. By mapping our bench discoveries, we found a strong relationship to locations along the Roman roads and trade routes that continued into the early decades of the 18th century.
After mapping the Spanish workbenches, I put an overlay of the Roman roads of Hispania and found, with a few exceptions, the plot points fell along or very near the Via Augusta (formerly the Via Herculea). Via Augusta, one of the major commercial Roman roads, ran along the Mediterranean coast from the Pyrenees in the northeast, through Valencia, diverted inland to Seville and ended back on the coast at Cadiz. Eight workbenches fall along the Via Augusta, with six benches from Valencia and Seville.
Of the 38 low, Roman-type workbenches we espied, we found 21 benches (or 55 percent) that date from the first decade of the 16th century to the end of the 18th century. You can thank St. Joseph for that. Thirteen benches were in paintings from Italy and eight from Spain. But wait, the Kingdom of Naples was part of the Spanish Empire for most of the 1442 to 1714 time period. We have cross-pollination! For instance, Jose de Ribera, a major artist from Valencia, completed his mature work in Naples. Luca Giordano, from Naples, spent a decade in Madrid as court painter for Charles II. Adjusting the numbers results in almost a 50-50 split, with 10 benches for Italy and 11 for Spain.
Some features of the low Italian and Spanish workbenches are a massive top with or without a face vise, a twin-screw vise, an early crochet (possibly the earliest depiction so far) and unusual planing stops. Oh yes, two benches with squared-off notches on the bench ends also turned up in our searches. One of the benches would help solve those mysterious notches on the 2nd-century Roman workbench from Saalburg.
The Mystery of the Notches
Beginning with the extant Saalburg workbench, we found seven benches with notches on the side or end of the benchtop. The Saalburg bench and three 16th-century benches have a fairly close regional distribution, while the examples with a notch in the bench ends are from Italy and Spain. The seventh bench has a side notch and originates from the New Kingdom of Granada in present-day Colombia.
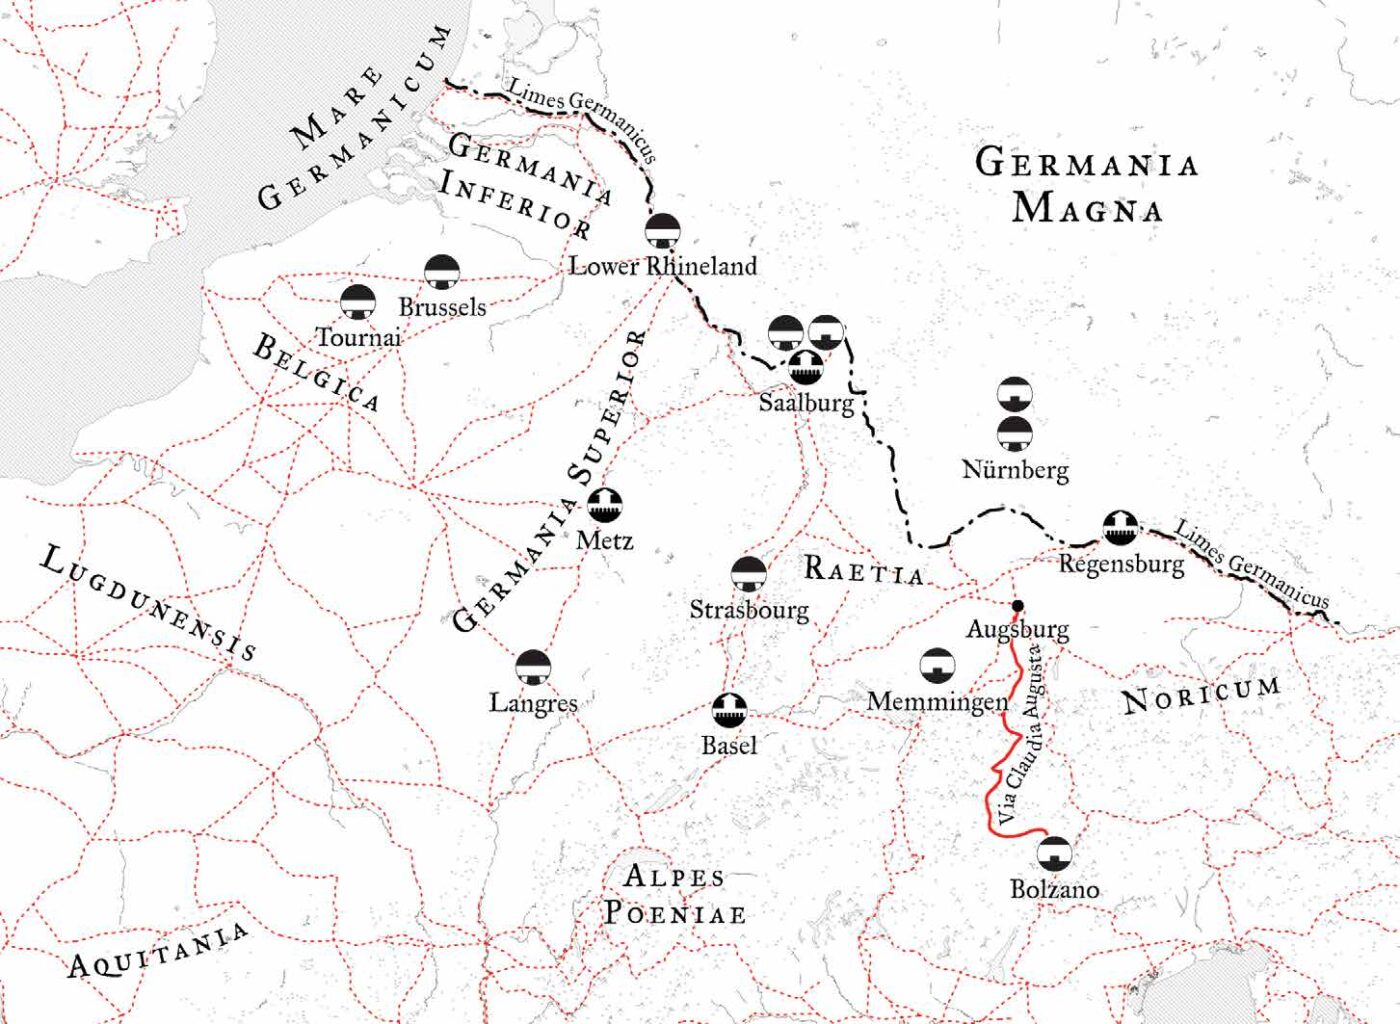
The three 16th-century notched benches are from Memmingen (“Holy Family” by Bernhard Strigel), Nürnberg (Löffelholz bench) in southwest Germany and Bolzano (the Hans Kipferle panel) in northern Italy. The German benches are both dated 1505 and the Italian bench is dated 1561. When these benches are mapped along with the Saalburg bench, possible connections start to emerge. The Via Claudia Augusta, the Roman road that connected the Po River valley with the Raetia province (southern Germany), ran through Bolzano and across the Alps (it is a different road than Via Augusta). The road terminated at the capital of Raetia, Augusta Vindelicorum (present-day Augsburg). A branch off Via Claudia Augusta leads to the Roman city that became Kempten, just south of Memmingen.
Through the Middle Ages, the two main routes to cross the Alps converged in Bolzano and led to Augsburg: the Via Claudia Augusta through the Reschenpass and the Brenner route through the Brenner Pass. East-west Roman roads through Augsburg later also became important trade routes, turning the city into a commercial center. Similarly, Nürnberg benefited from the northsouth trade route it shared with Augsburg. The route was a portion of the Amber Road that linked southern Italy with the north and Baltic Seas. Trade routes were also information routes for cultures and technology. In the 15th and 16th centuries, this part of the former Roman Empire (and later Holy Roman Empire) experienced a cultural flowering. Considering the lengthy Roman presence in this region and the continued use of the trade routes, it is possible the side-notch feature survived and was in use on woodworking benches until at least the mid-16th century.
The two end notches were in paintings from Ravenna, Italy, and Madrid, Spain. The Madrid painting, “Dream of Saint Joseph,” by Luca Giordano, shows a wedge in the notch and was a key to solving the “Saalburg mystery.” I found the image in mid-July and sent it with a few dozen other images to Chris. About a month later while verifying dates, titles, artists and locations of all the paintings I gave “The Dream” a closer look. St. Joseph’s side of the painting has an appealing composition with tremendous detail. One tremendous detail struck me in particular and that evening I emailed Chris asking if he had seen this detail before. The next morning he answered, and you can read about how the notches and wedges work in Chapter 5.
The last bench is from the New World when Colombia was a Spanish colony. The notch is sharply defined and dovetail-shaped. The email I sent to Chris with the image was titled, “Oh Look! What is that Notch in the Bench?” and two minutes later Chris’ response was a joyful expletive.