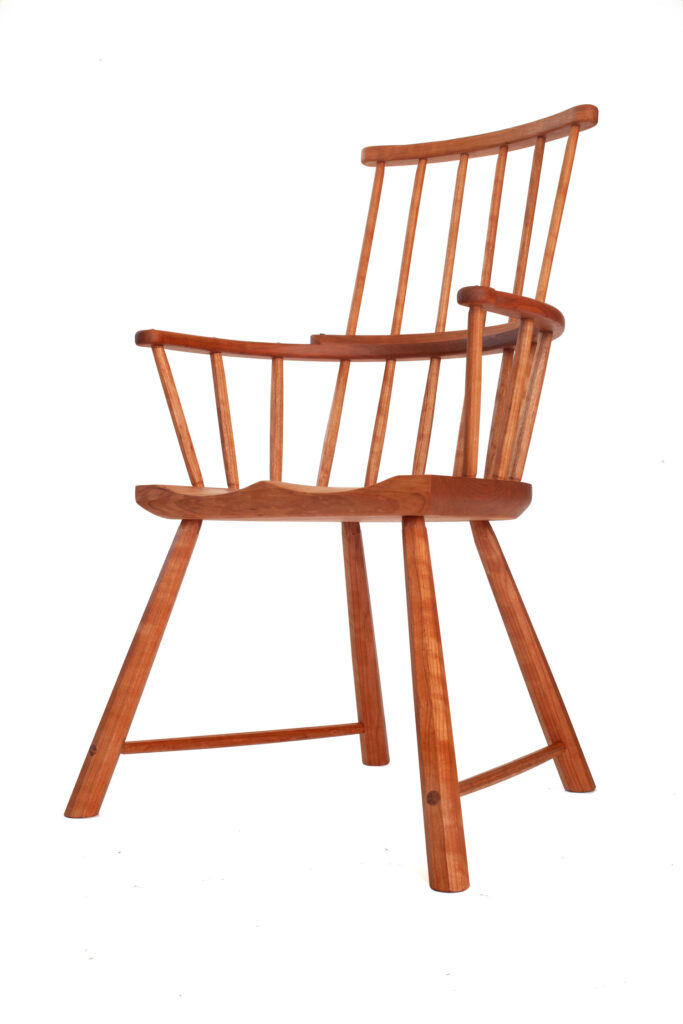
During the last few months I have pushed my work back into the realm of the old-style stick chairs that caught my attention in the 1990s. This latest example explores what I love about the early lightweight chairs, which were built with whatever materials (Branches? Curved sticks?) were available.
This chair is built using black cherry from the Ohio River Valley. It is assembled using hide glue, so the joints are reversible should it ever need repairs (in 100 years or so). Like many early chairs, all the components are shaped by hand, and so this chair has a lot of texture.
Editor’s note: When I first encountered this book in the 1990s, I read it reluctantly. I wasn’t much interested in making wooden planes, but I was still in the “I’ll read anything about woodworking” phase. About 10 pages into the book, I was hooked. This isn’t just a book about making planes, this is a book about setting up tools and machines to a very high level so you can do truly excellent work (such as making planes). I read and re-read the book several times, loaned it to friends and eventually wore it out.
When the book went out of print, we were thrilled to bring it back with David’s help. The Lost Art Press hardback edition is made in the United States with pages that are stitched, glued and taped. I seriously doubt you could wear it out. But feel free to try.
David is still an active woodworker (and nice guy) and focuses on violins now. Check out his work here.
These wooden planes are associated closely with James Krenov (who wrote the book’s foreword). We published the definitive biography of Krenov by Brendan Gaffney: “James Krenov: Leave Fingerprints.”
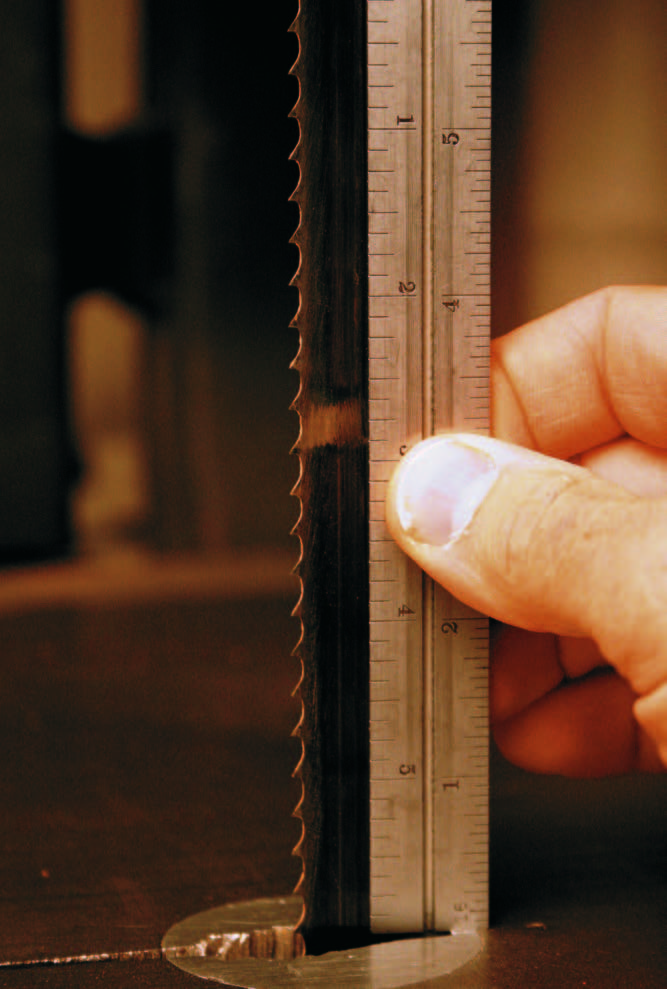
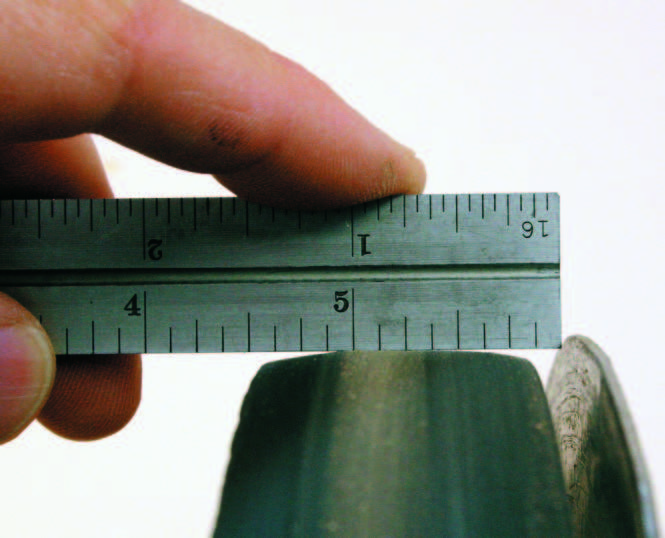
Use sharp 1/2-inch-wide, 4 teeth-per-inch (TPI) wood-cutting blades. Hook-tooth blades cut faster and rougher, and skip-tooth blades cut smoother and more slowly. Skip/hook-tooth blades (sometimes called “furniture bands”) are a hybrid that I prefer, combining adequate speed with a smooth cut (1–13).
Critically examine the blade weld. The sides should be smooth and free of lumps. Check that the blade was properly aligned when welded by gauging the back edge of the blade with a six-inch straightedge; it should present a straight line (1–13). Faulty welds are fairly common and seriously undermine the performance of the saw. The blade may bump and shudder each time it contacts the thrust guide. A lump in the weld may prevent the side-mounted guides from being spaced closely enough to support the blade adequately. Keep blades and tires free of gummy deposits and sawdust. Scrub them off with the metal bristles of a file card at the first sign of buildup.
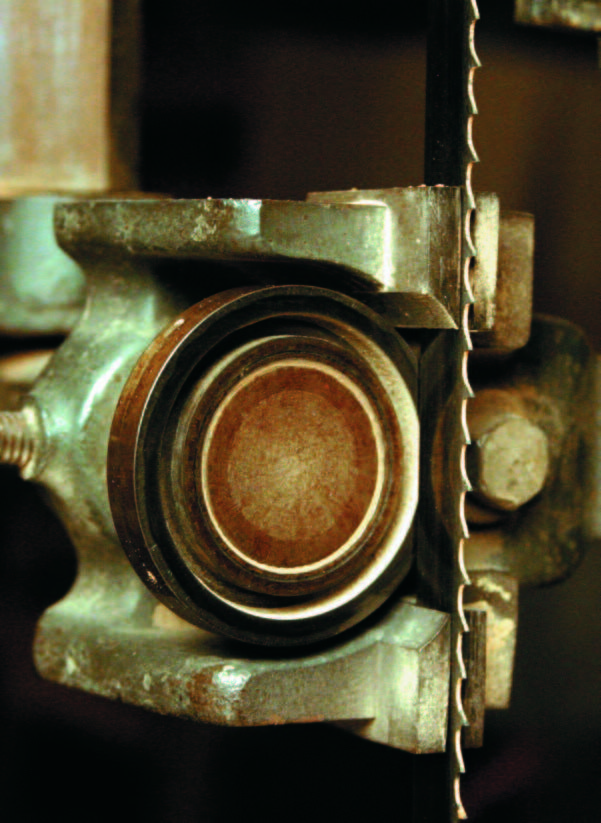
Set the upper and lower saw guides precisely. Arrange them as close as possible to the blade without rubbing it. The side-mounted guides are positioned just behind the gullets (the arcing gaps separating each tooth) of the blade (1–14). The guides on the back of the band saw, the thrust guides, contact the blade as soon as sawing commences.
1–14. Properly adjusted guides on a band saw.
Tensioning the blade correctly dramatically improves the quality of cut. Unplug the saw and remove the upper wheel cover. Tension the blade while slowly rotating the wheel by hand to stretch the blade evenly. Occasionally twang the free section of the blade (the portion unencumbered by guides) and note the increase in pitch. It goes from a rattle to a very low but discernible tone and proceeds to climb in pitch with increases in tension. Best results usually come with the blade tensioned to a clear, musical tone. Spin the wheel a turn or two to see if the blade is tracking in the center of the tire, adjust the blade if necessary, and reinstall the wheel cover.
If the wheels have been trued and crowned and the saw is running smoothly, the tension can be fine-tuned with the saw running. Bring the upper guide post down low to the table to provide maximum protection from the blade. Loosen the upper and lower guides so that they are well away from the blade. Turn on the saw and observe the blade, assisted by bright lighting and a white background. If the tension is correct, the blade will appear sharply in focus with no trace of flutter. The blade looks blurry if it’s vibrating.
Try altering the blade tension in very small increments while the saw is running. Be careful! Keep well away from the blade while making the adjustments and pay attention to where the blade is tracking. As the tension is increased, the blade creeps forward on the tire, and as it is decreased, the blade creeps back. Carefully alter the tracking adjustment while tensioning the blade to keep it in the center of the tire. Scrutinize the blade after each adjustment.
When the flutter is gone, stop the saw, note the position of the pointer on the tension scale (if the saw has one) for future reference, and twang the blade once again to get an idea of the amount of tension on the blade. If the saw is less than an industrial-quality machine, consider relieving the blade tension when it is not in use to save wear on the bearings and castings. As a pertinent aside, remember, when a blade breaks or hops off the wheel, a loud bang ensues from the release of spring tension on the upper wheel (provided by the blade and the spring on the upper wheel assembly). When this happens, cut the power immediately. Then step back and wait for both wheels to coast to a stop.
BAND-SAW CHECKUP Properly trued and crowned tires and a saw free from excessive vibration critically impact the saw’s performance. These points are easy to check, as described below. Corrective measures are not difficult, but go beyond the scope of this book. For more information on tuning band saws, refer to Mark Duginske’s Band Saw Handbook.
Trueness and Crown Every point where the blade contacts the perimeter of the tires must be the same distance from the axis of the wheels. If not, the tire is “out of true” and the blade will undergo changes in tension, resulting in potentially excessive vibration.
“Crown” is the convex arc across the width of the tire. Lacking sufficient crown, the blade will not track properly, wandering on the face of the tire, even hopping off completely.
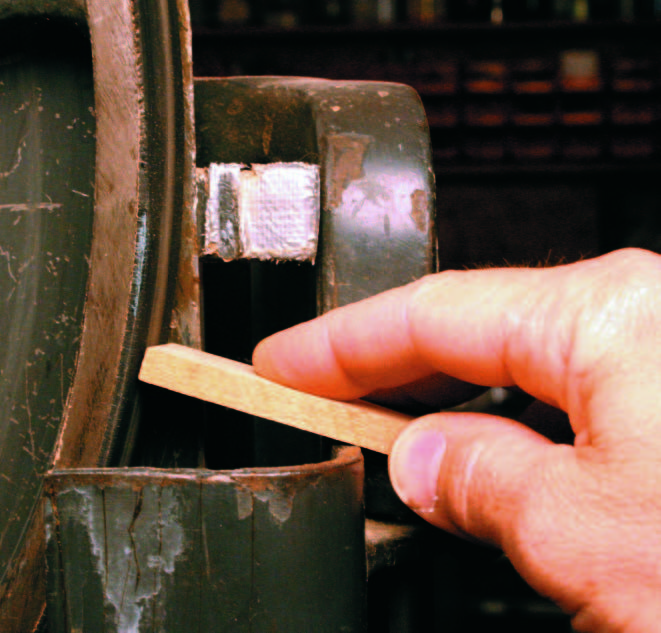
Checking Tire Trueness Unplug the saw and remove the wheel covers and the blade. Use the guide post, the table, or some other convenient part of the saw to steady a stick, and hold its end about 1/32 inch from the surface of the tire, where the blade would normally ride. Spin the wheel slowly by hand and observe the gap between the tire and stick (1–15). If the width of the gap holds steady, the wheel is true; if it fluctuates, the tire is out of true. Check both tires.
1–15. Checking the circumference of a band-saw tire for trueness.
Checking Tire Crown Place a six-inch ruler on edge, across the width of the tire. Rocking the ruler end to end should reveal a nicely rounded arc. With the ruler centered on the high point of this arc, there should be about 1/16 inch of space between the edges of the tire and the edge of the ruler (1–16).
1–16. Evaluating the amount of tire crown.
VIBRATION Excessive vibration results in rough and wandering cuts. To check for vibration, with the saw running, lay a small wrench near the edge of the table. It should remain there quietly without moving. Any rattling or motion betrays excessive vibration. By systematically isolating portions of the drive system, vibration sources can be isolated and rectified.
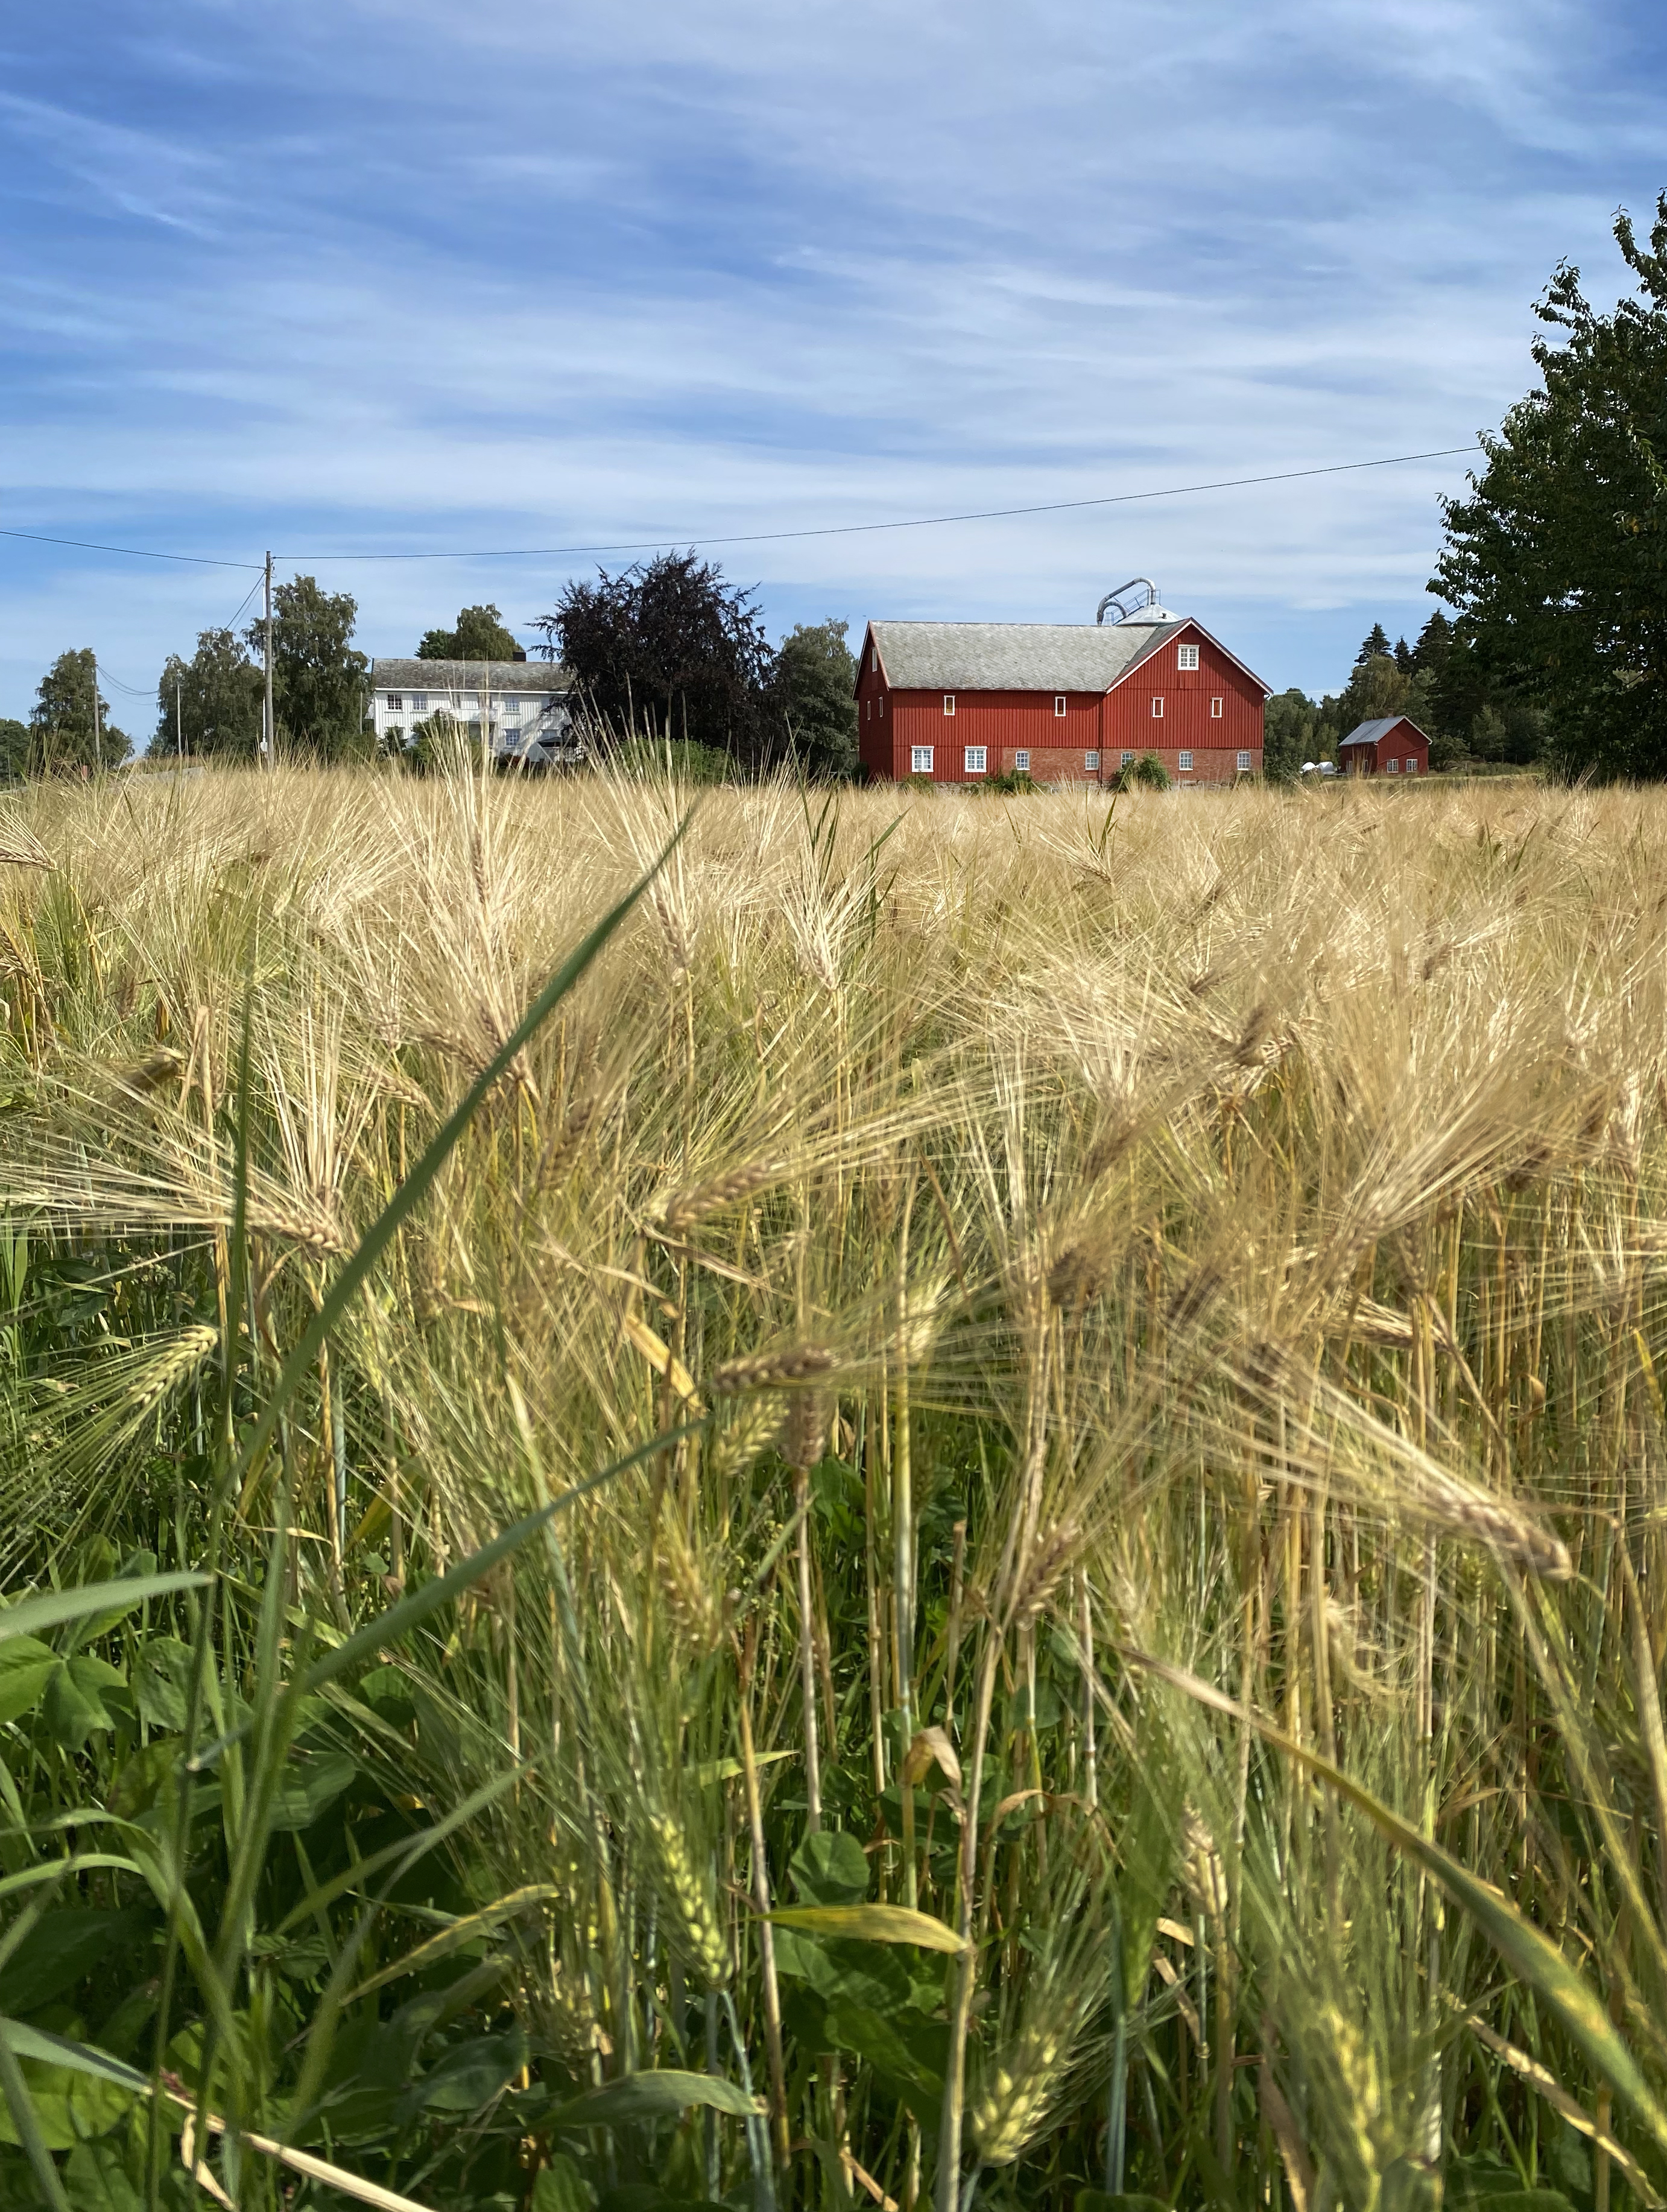
My wife loves to go to the family cabin in the summers.
Never mind it doesn’t have drinking water. And never mind that the stove is from 1957 and takes 120 minutes to boil an egg. And who cares that the property is surrounded by a particularly aggressive breed of cows and their particularly stinky manure? Not us! That’s after all just part of the off-grid charm that we urban Norwegians dream about.
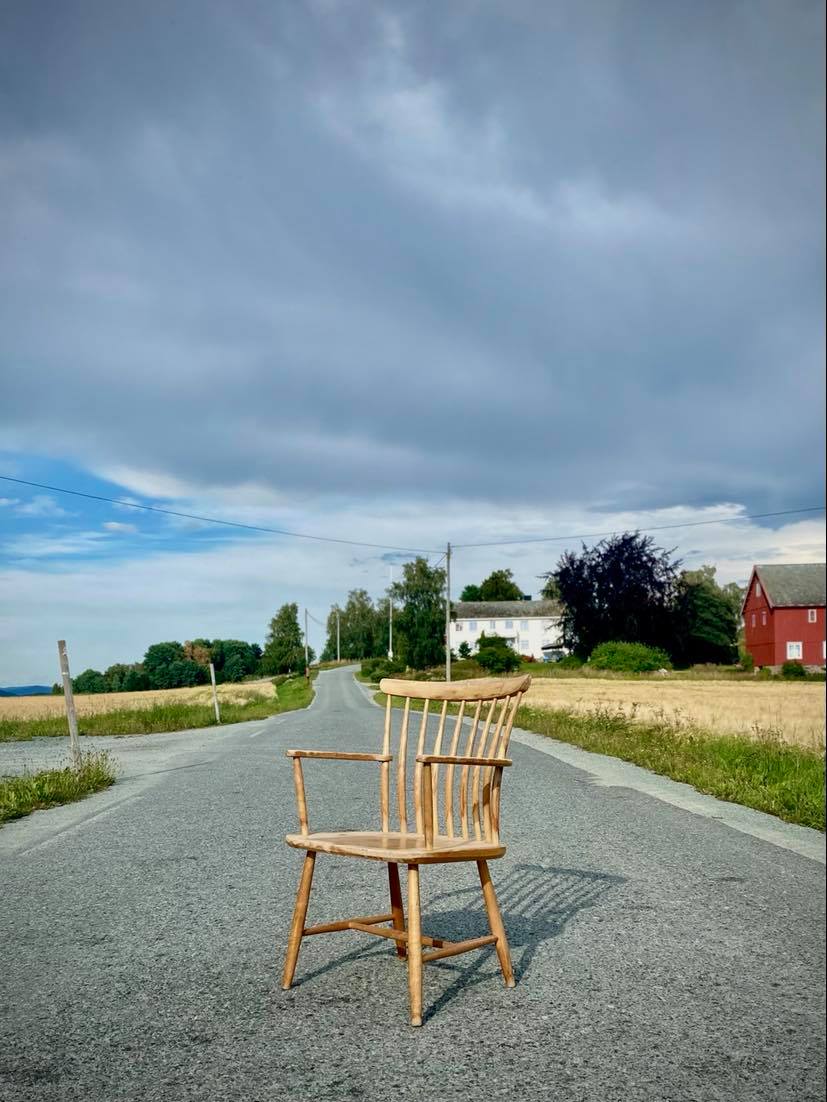
What I did worry about was driving there and back again – 620 miles with our three kids in the back seat seemed like an evil experiment. So, I had to be convinced. And, as I explained in Part 1 of this series, that was elegantly done by my wife by promising that we could stop anywhere along the route to let me look for interesting chairs in the wild. And here are some of the ones I encountered:
546 Miles from Home: The Village of Hovin, Horg Museum of Cultural History
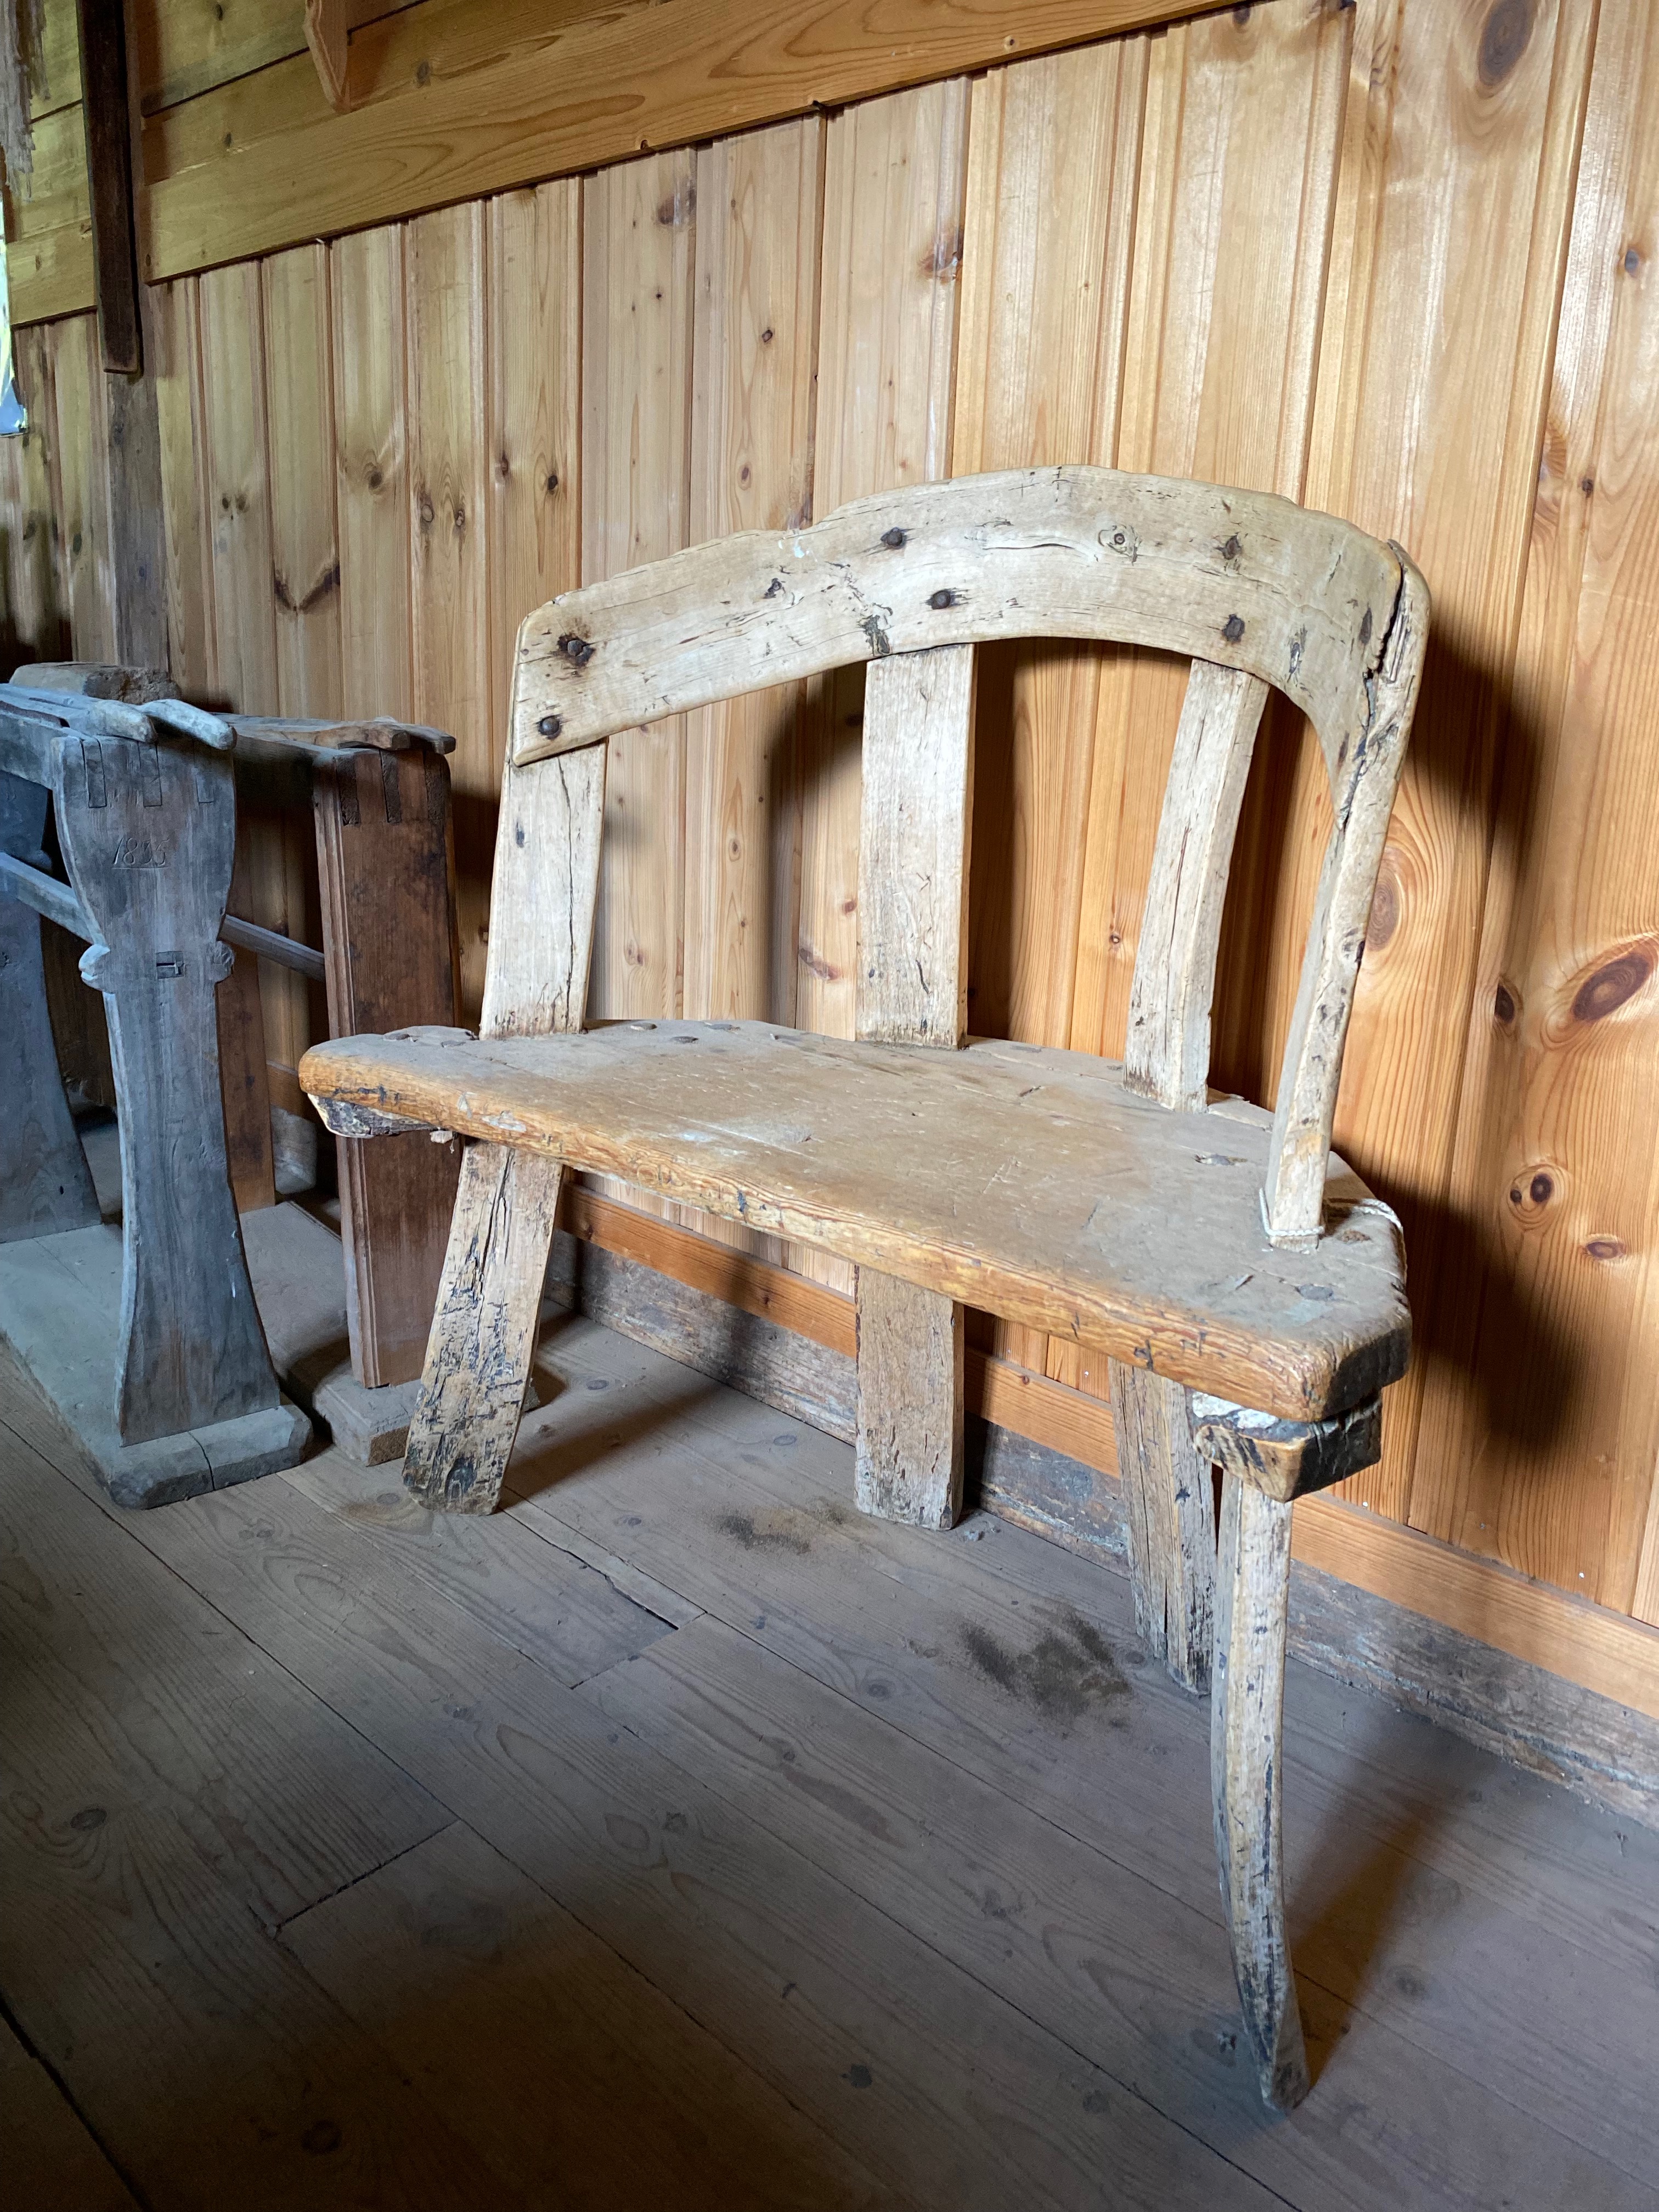
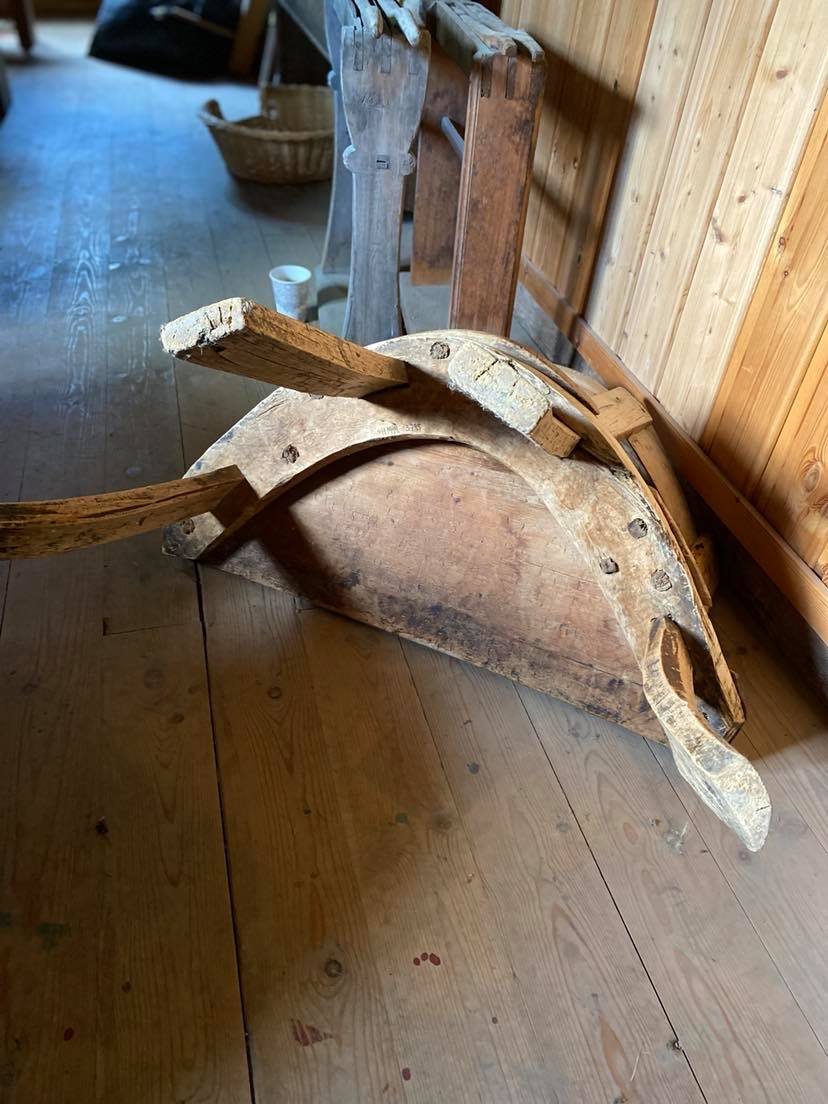
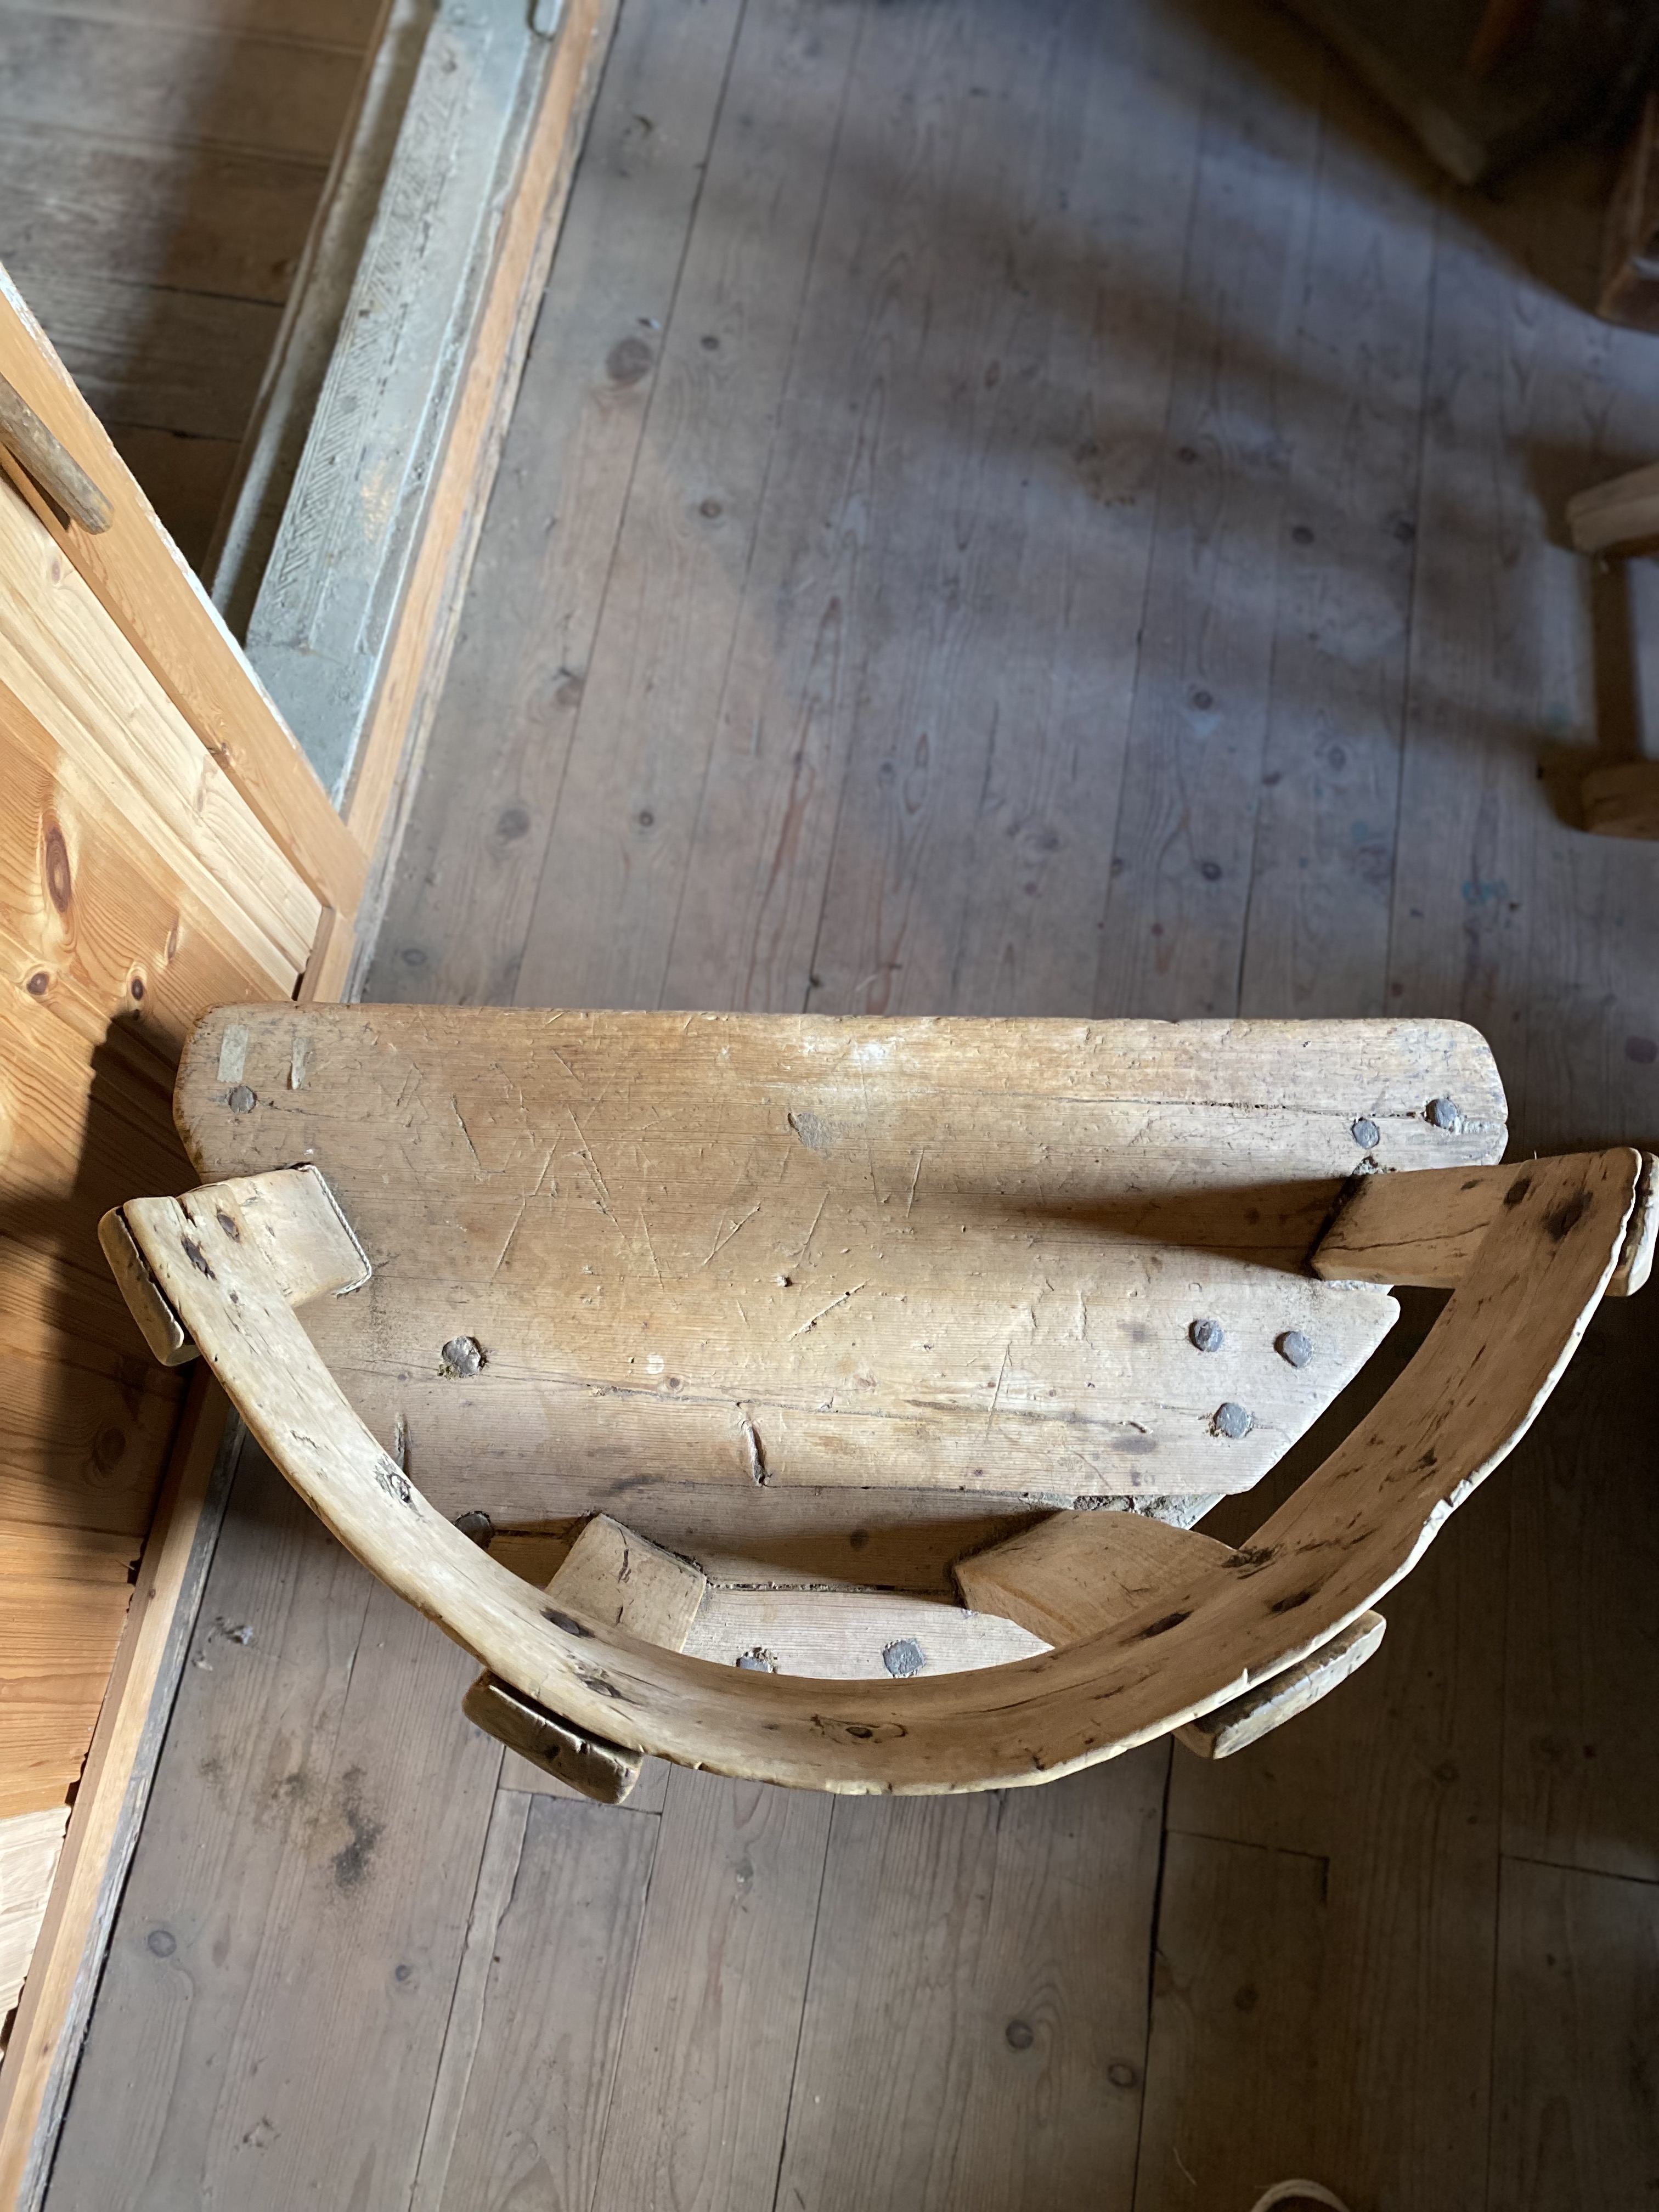
The first chair that caught my eye here was this freak of nature. In all its primitiveness, the construction is actually quite strong and clever. It’s also a prime example of so-called furniture of necessity.
Primitive commonplace furniture like this was often made by the farmer himself, a local wheelwright or the village carpenter. The chair was destined to fill a very specific need: Someone needed a place to sit. Tools and materials at hand dictated everything.
Thus, primitive chairs have real life carved into them. Common needs created honest and functional furniture. And while a modern and more engineered chair can be beautiful and impressive, I find it much easier to connect both intellectually and emotionally with the primitive ones.
As with many primitive stick chairs, a naturally bent branch or root is often used as the armbow or back. In this case however, a natural crook is used as a base for the seat. I haven’t seen this very often in chairs, but for Norwegian farm stools it’s a quite common technique. Even though the chair may look crude, the method of construction is well-thought through and the wood used is carefully selected.
620 Miles: Ytterøy Island.
After more driving and a 30-minute ferry ride we reached our destination, an island about halfway into the Trondheim fjord. My first site for chairspotting was at the beautiful farm of Erling and Gunhild, who kindly let me rummage around their barn loft.
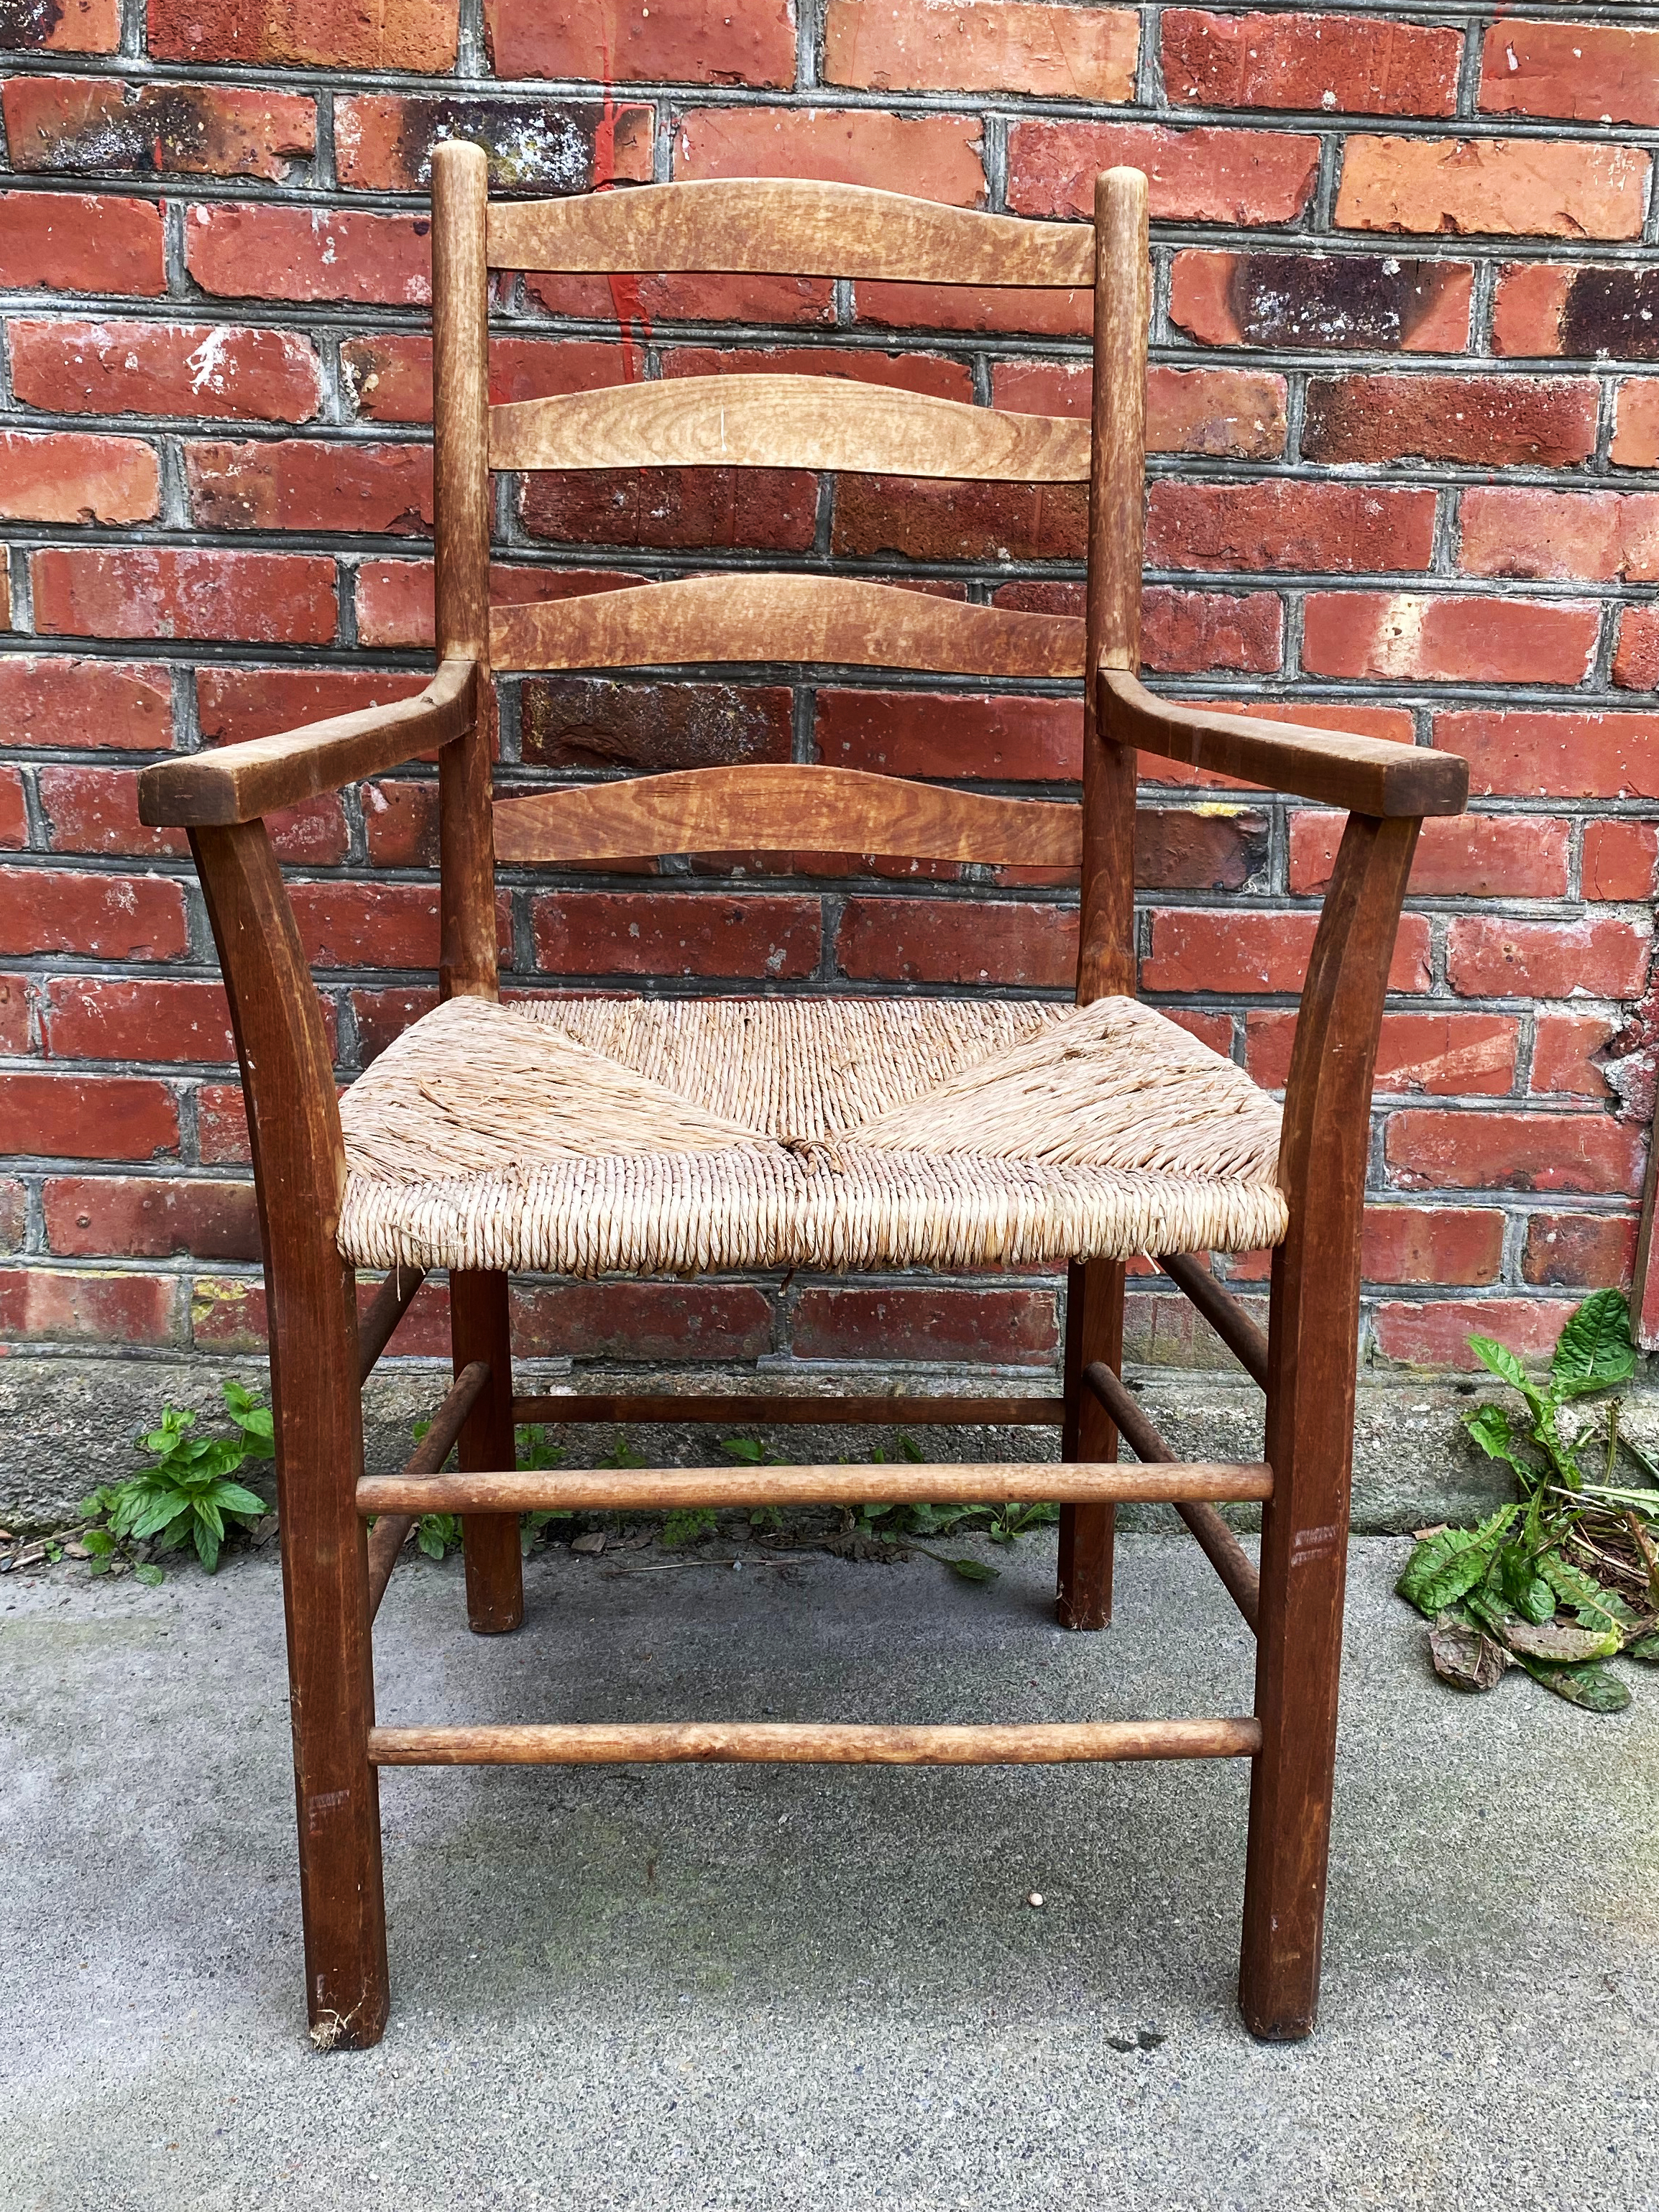
Barn Find 1: Rush-seated Ladderback chair
The first chair I pulled out of the barn was this outstanding ladderback chair. There is a long tradition of making ladderbacks chairs in Norway, but mainly in the southern parts of the country. Which means that this particular one probably has traveled a bit to end up on this island in mid-Norway.
The similarity to a Shaker ladderback chair is of course striking. Ladderback chairs like this one have been produced commercially in Norway since 1850, mainly in two villages. No one really knows where this style of chairs came to Norway. However, considering that more than 800,000 half-starved Norwegians migrated to America between 1830 to and 1920, there’s a reasonable chance that some chairs also made trans-Atlantic travels one way or the other.
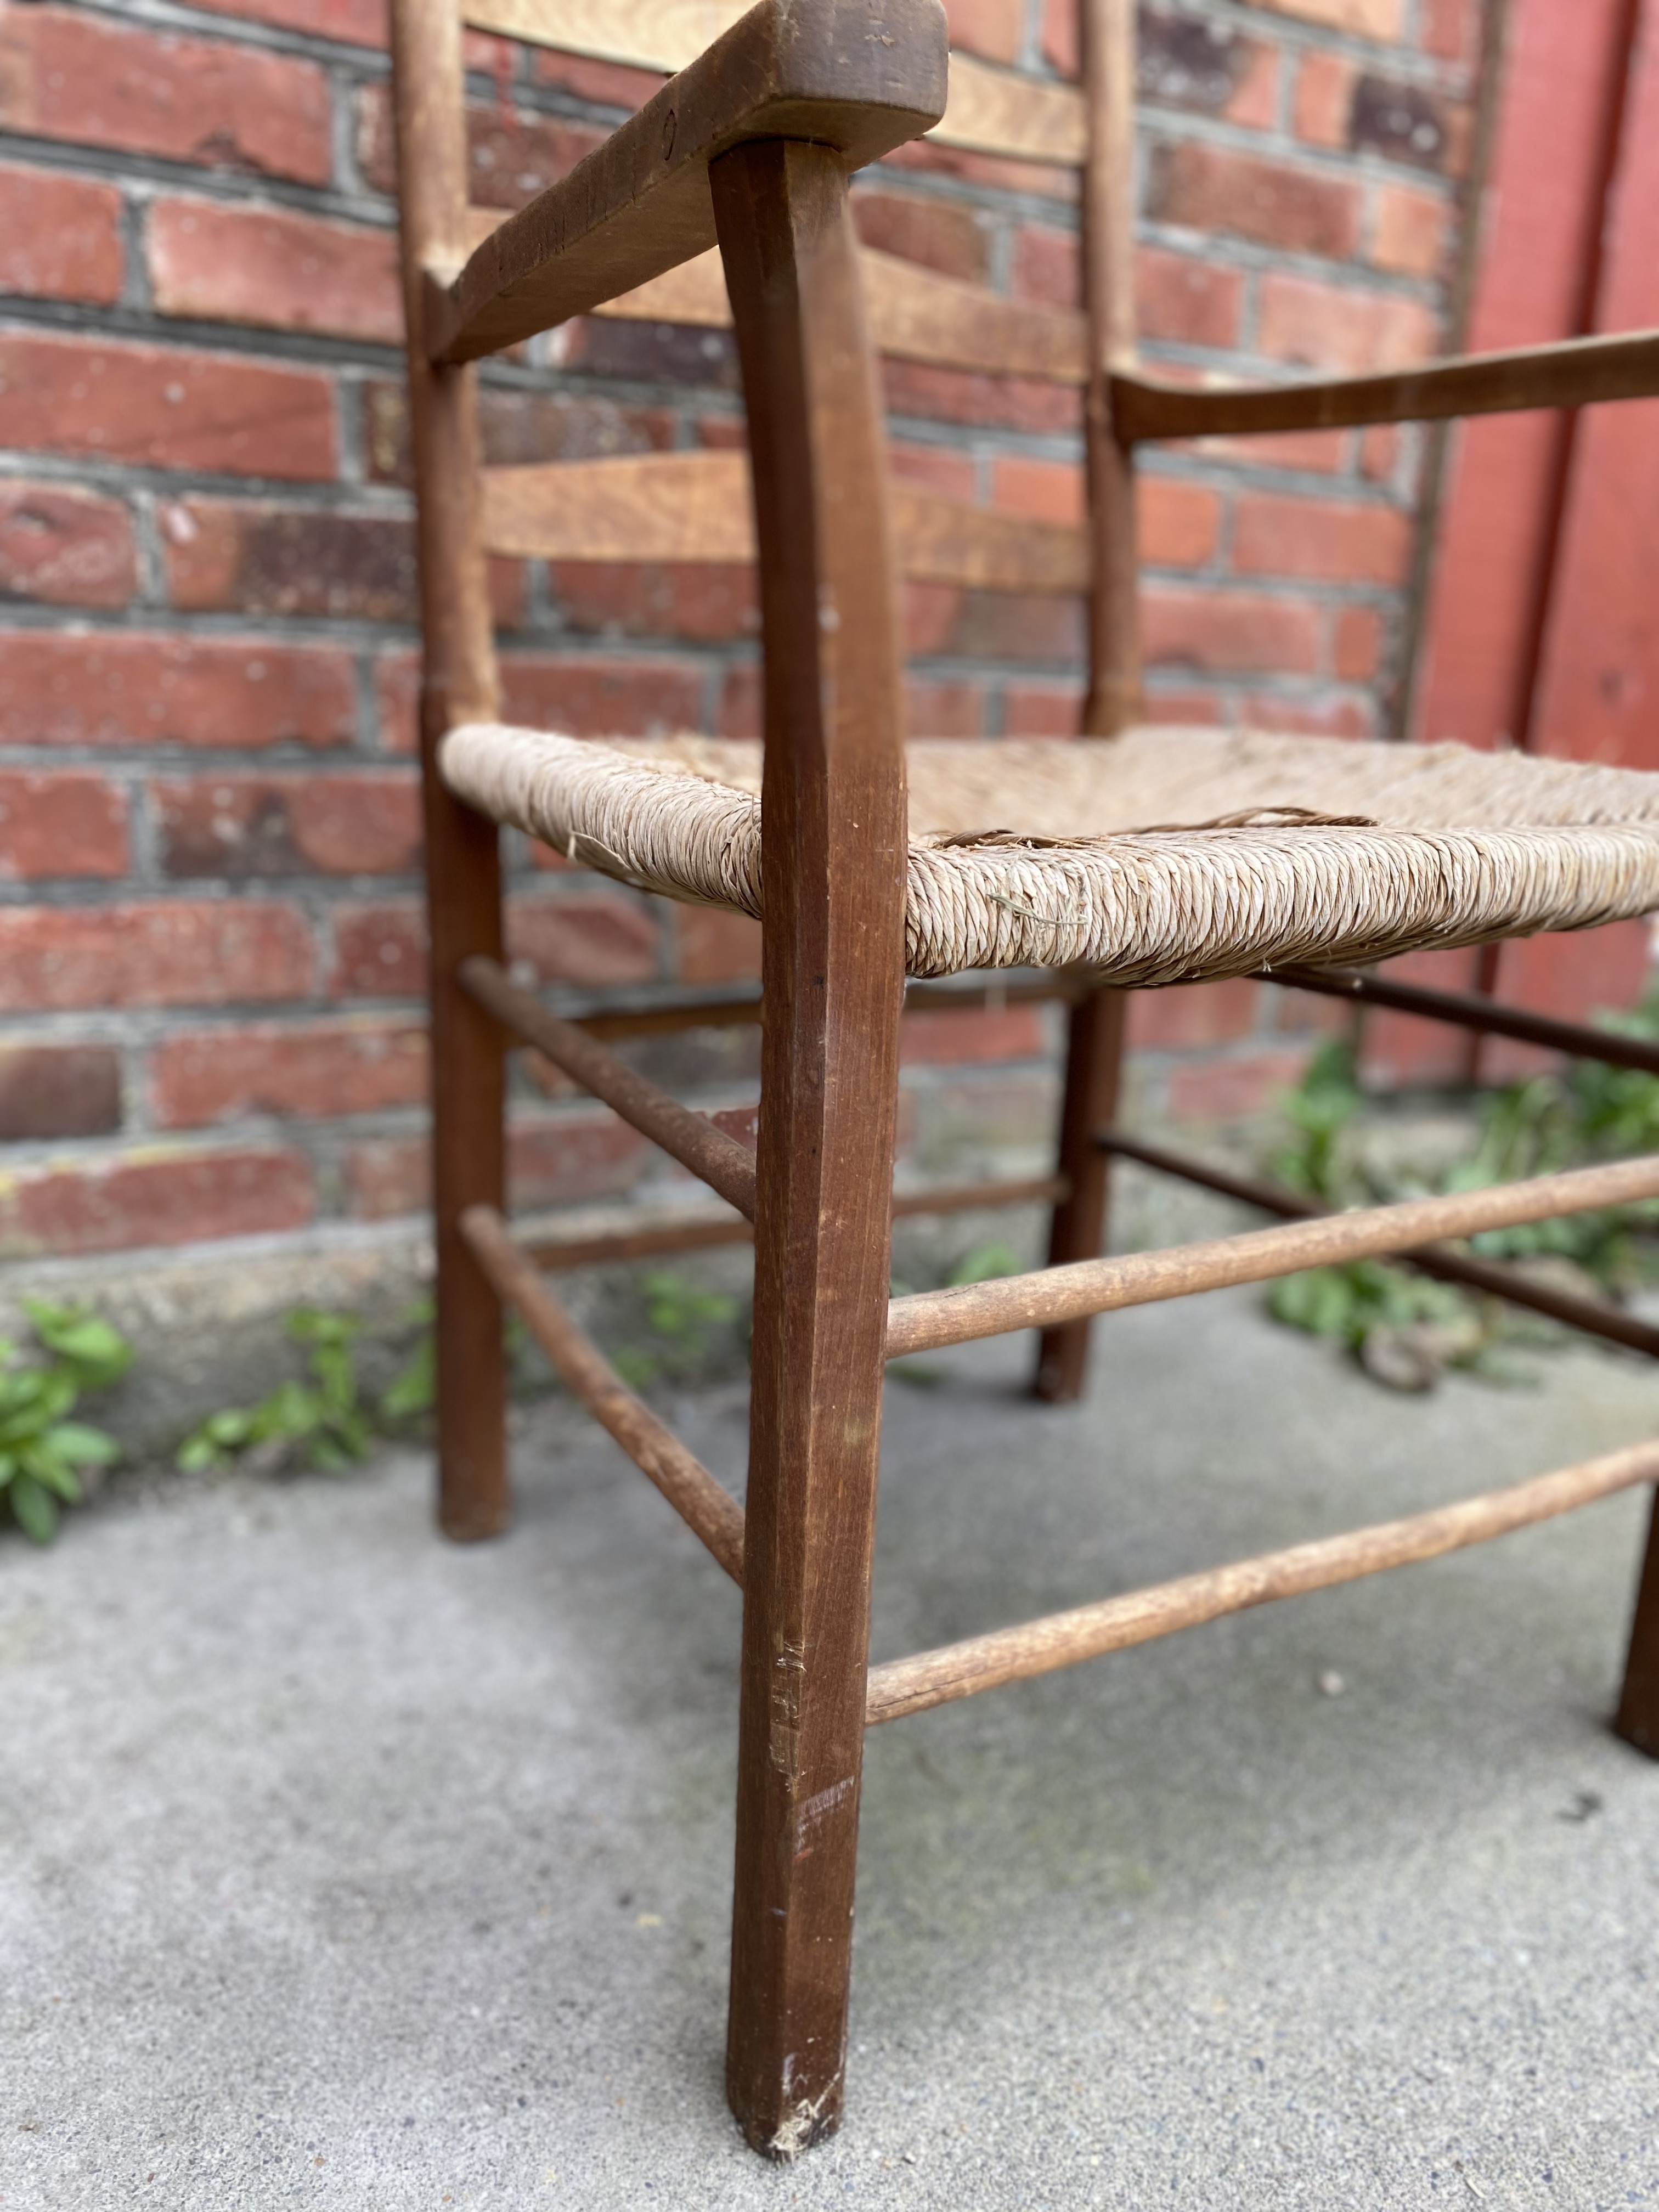
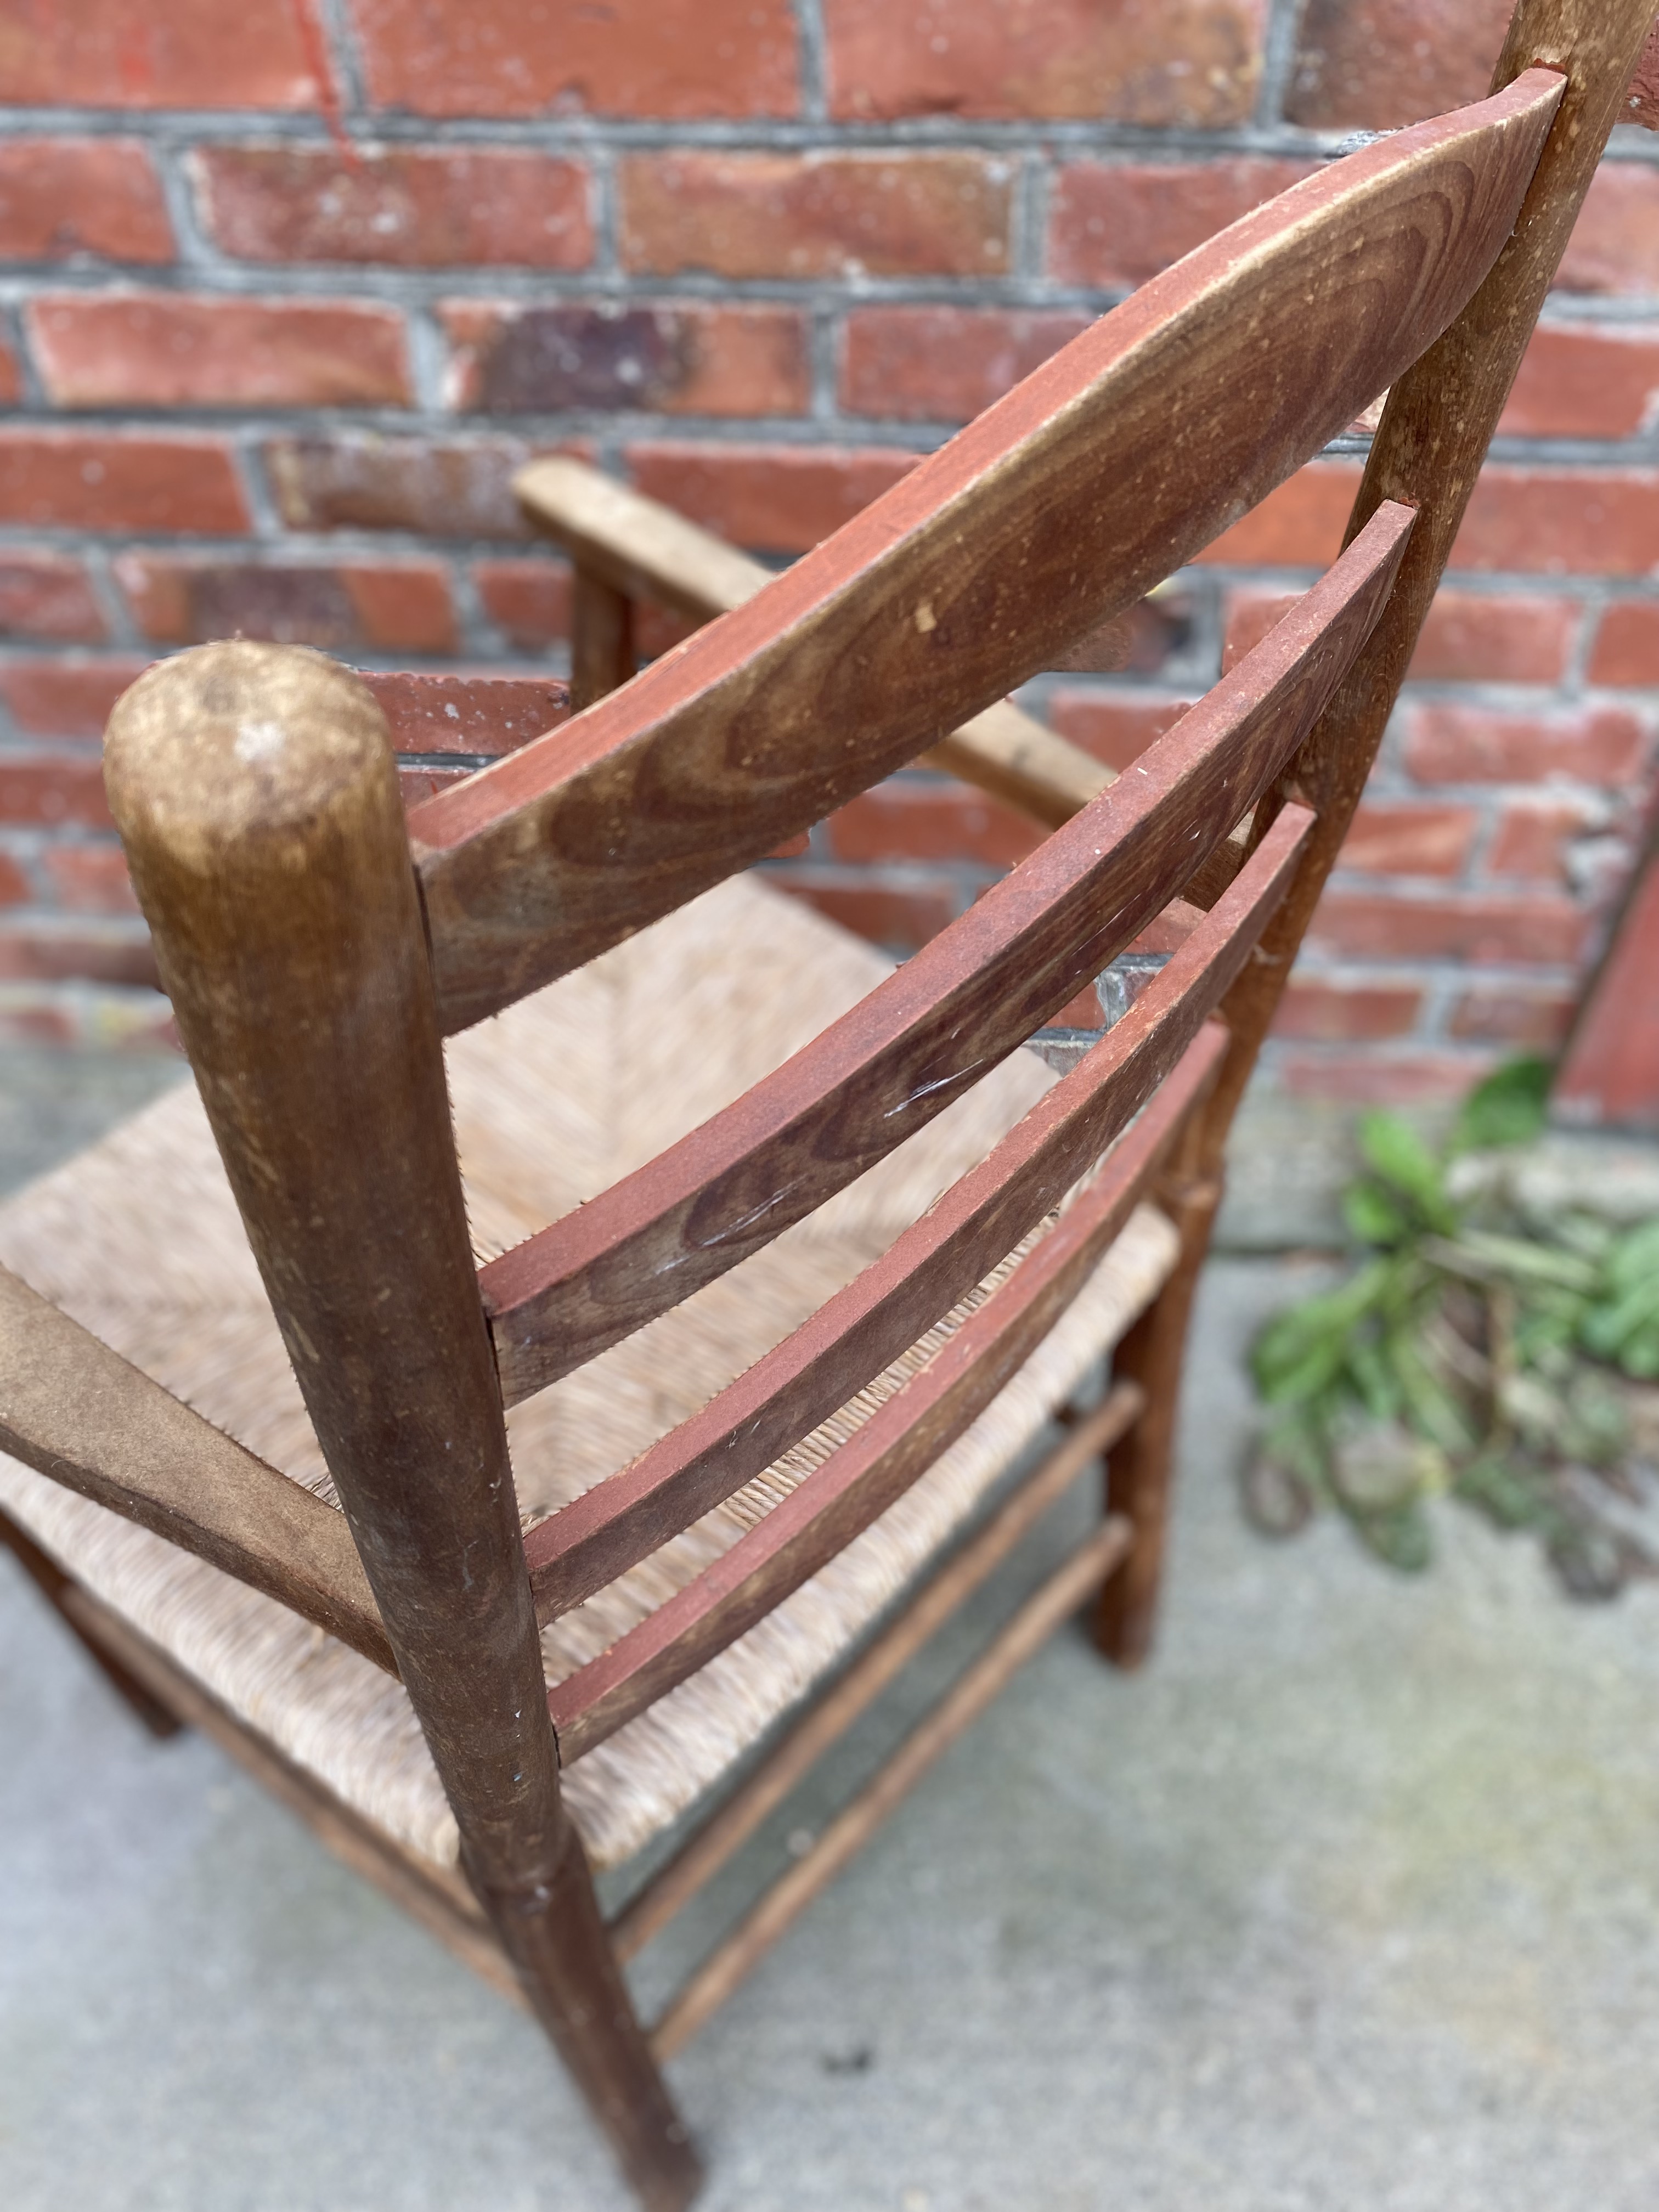
The rush seating is typical for these chairs. While hickory bark is common in American traditions, Norwegian chairmakers mostly used seaweed. Overall the construction here is typical for the genre. Notice the slight shape irregularities of the rungs, indicating that this chair is handmade and not a factory product. Painted and stained furniture is very common in Norway. Here, only the edges of each back slat are painted red, which is a nice detail.
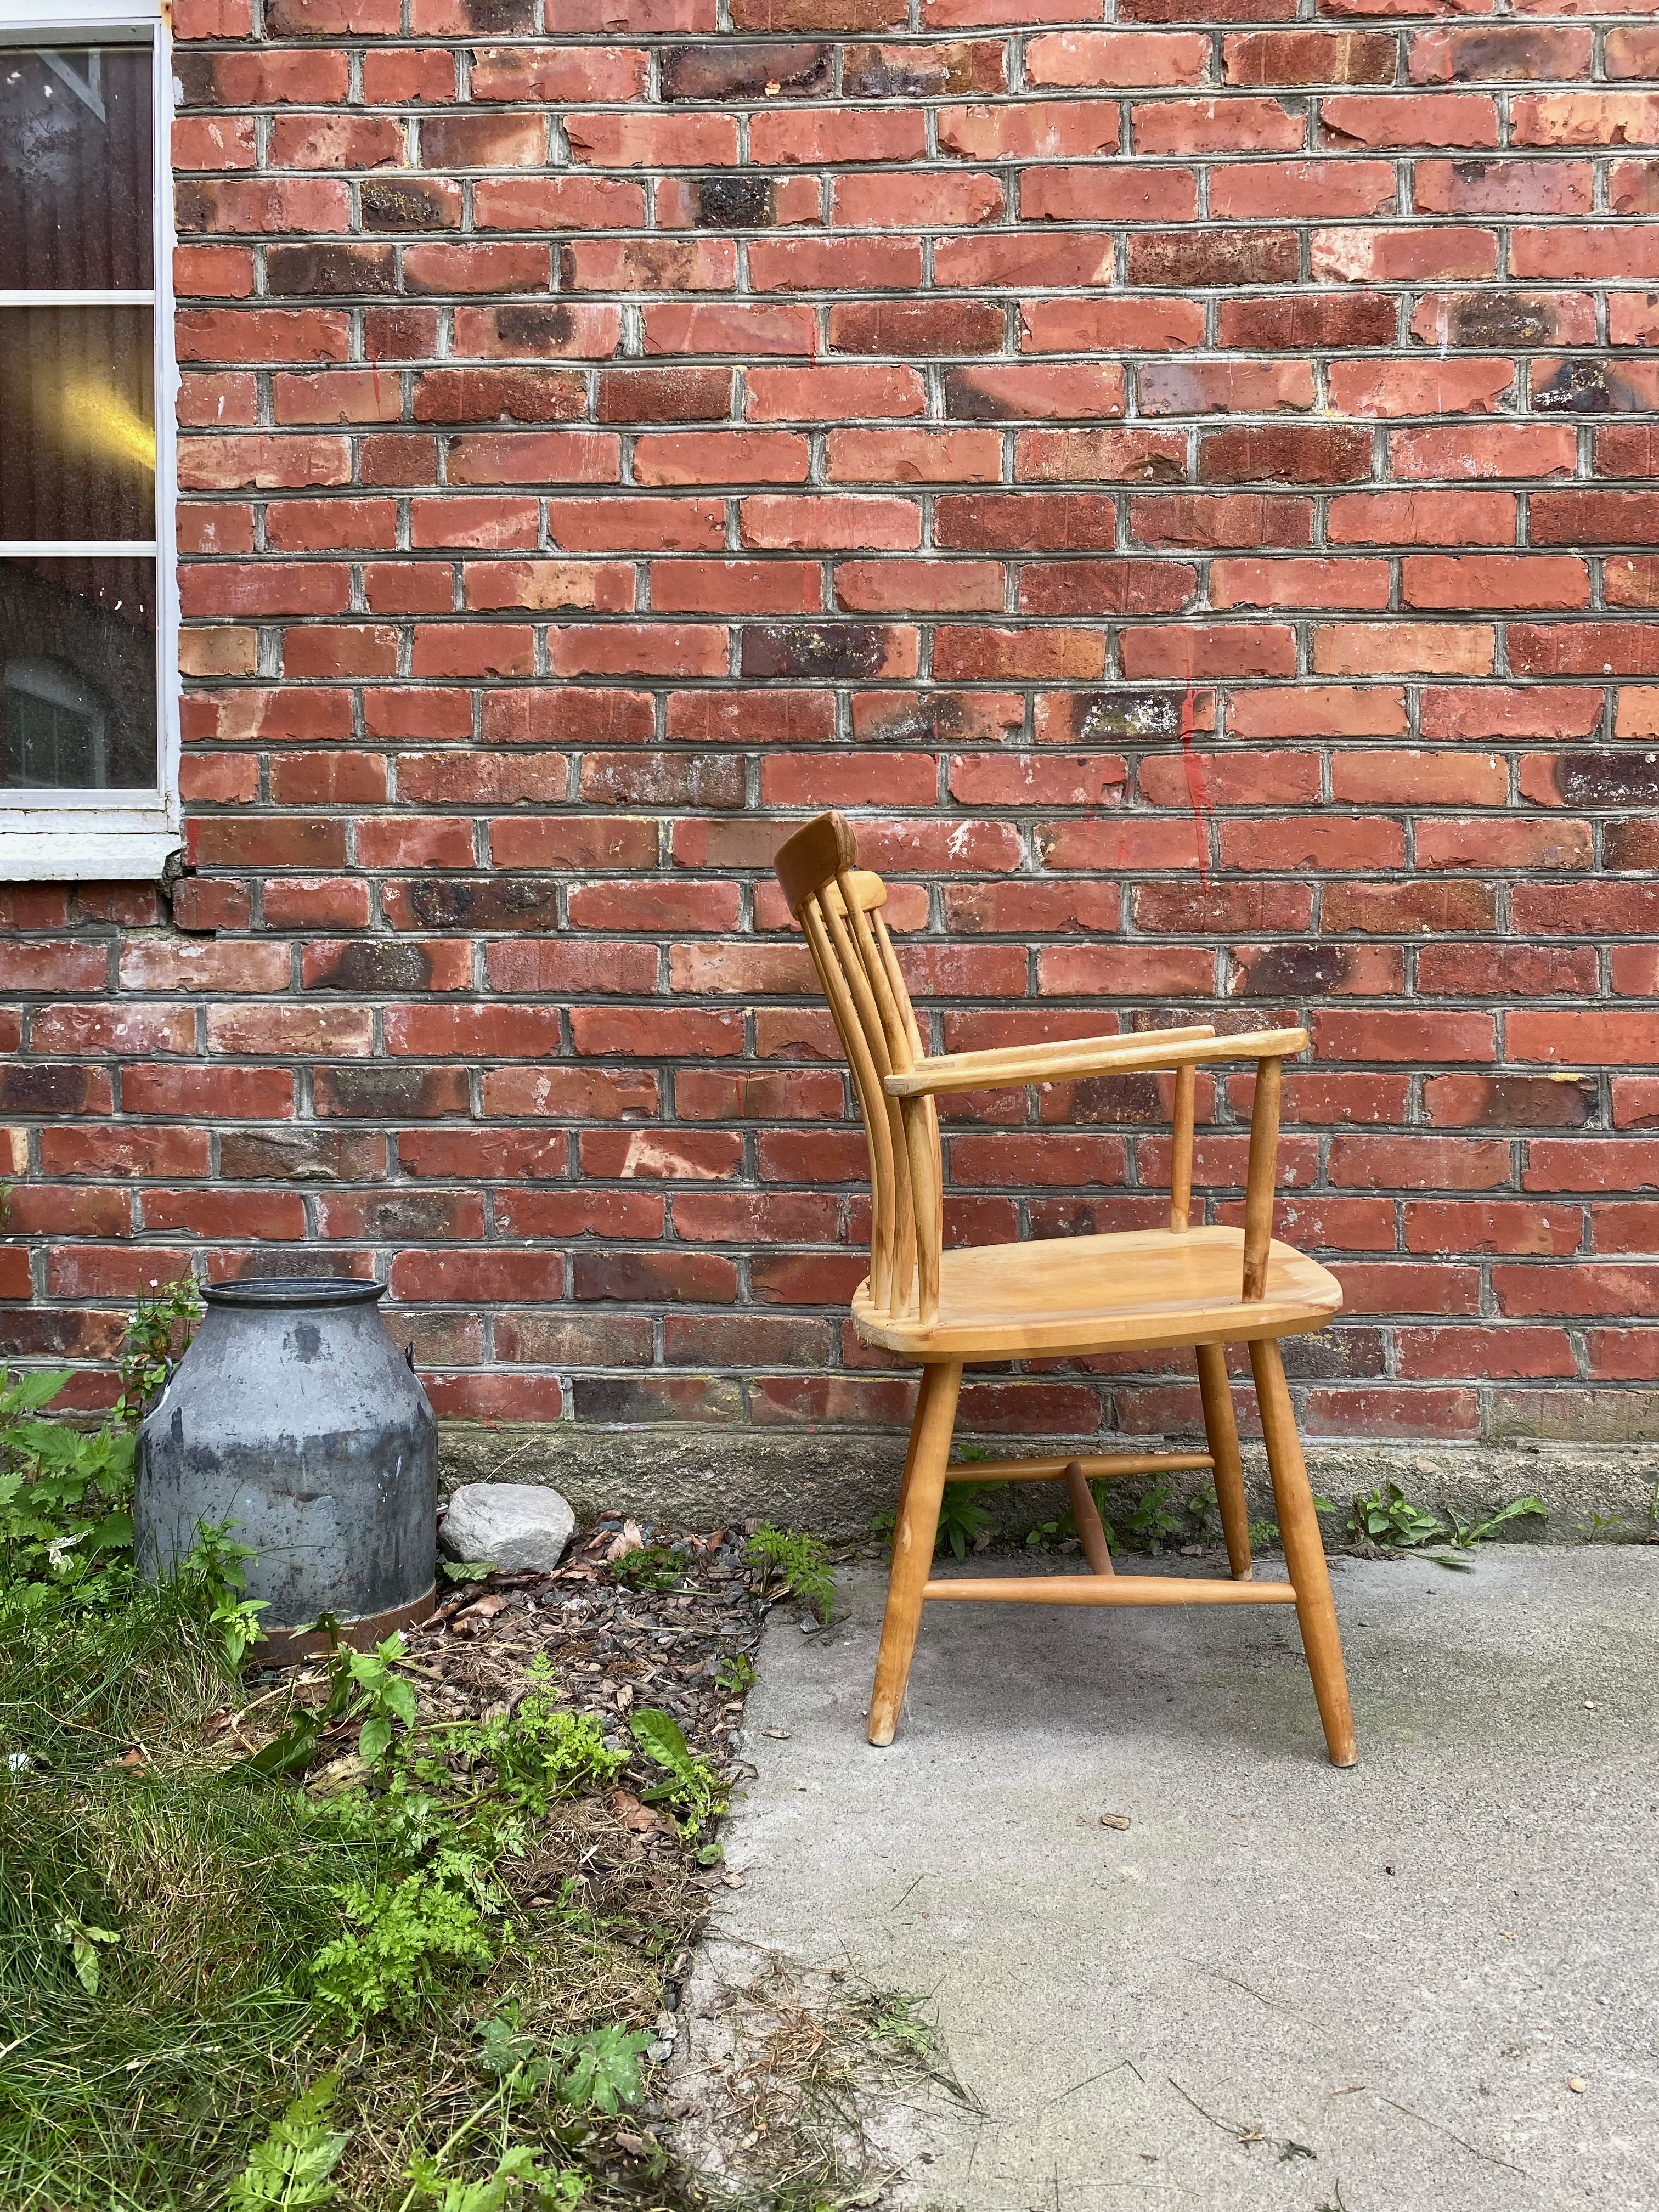
Barn Find 2: The Åkerblom Chair
In a dim-lighted part of the barn loft, stowed away behind a large chest of drawers, another stick chair was begging for fresh air. Say hello to a Swedish classic – the Åkerblom Chair.
The Åkerblom Chair was produced about 1950 by the Swedish chair factory Nässjö Stolfabrik. This chair factory produced stick chairs from 1870 and all the way up to 1992! The Åkerblom Chair is considered a classic and was the result of two bright minds. These were the hospital surgeon Bengt Åkerblom and his friend Gunnar Eklöf, an architect and furniture designer. Their ingenious approach to designing a chair is a story worth telling on its own. Which I will hopefully do later. Short version: Medical science met chairmaking and they had a baby.
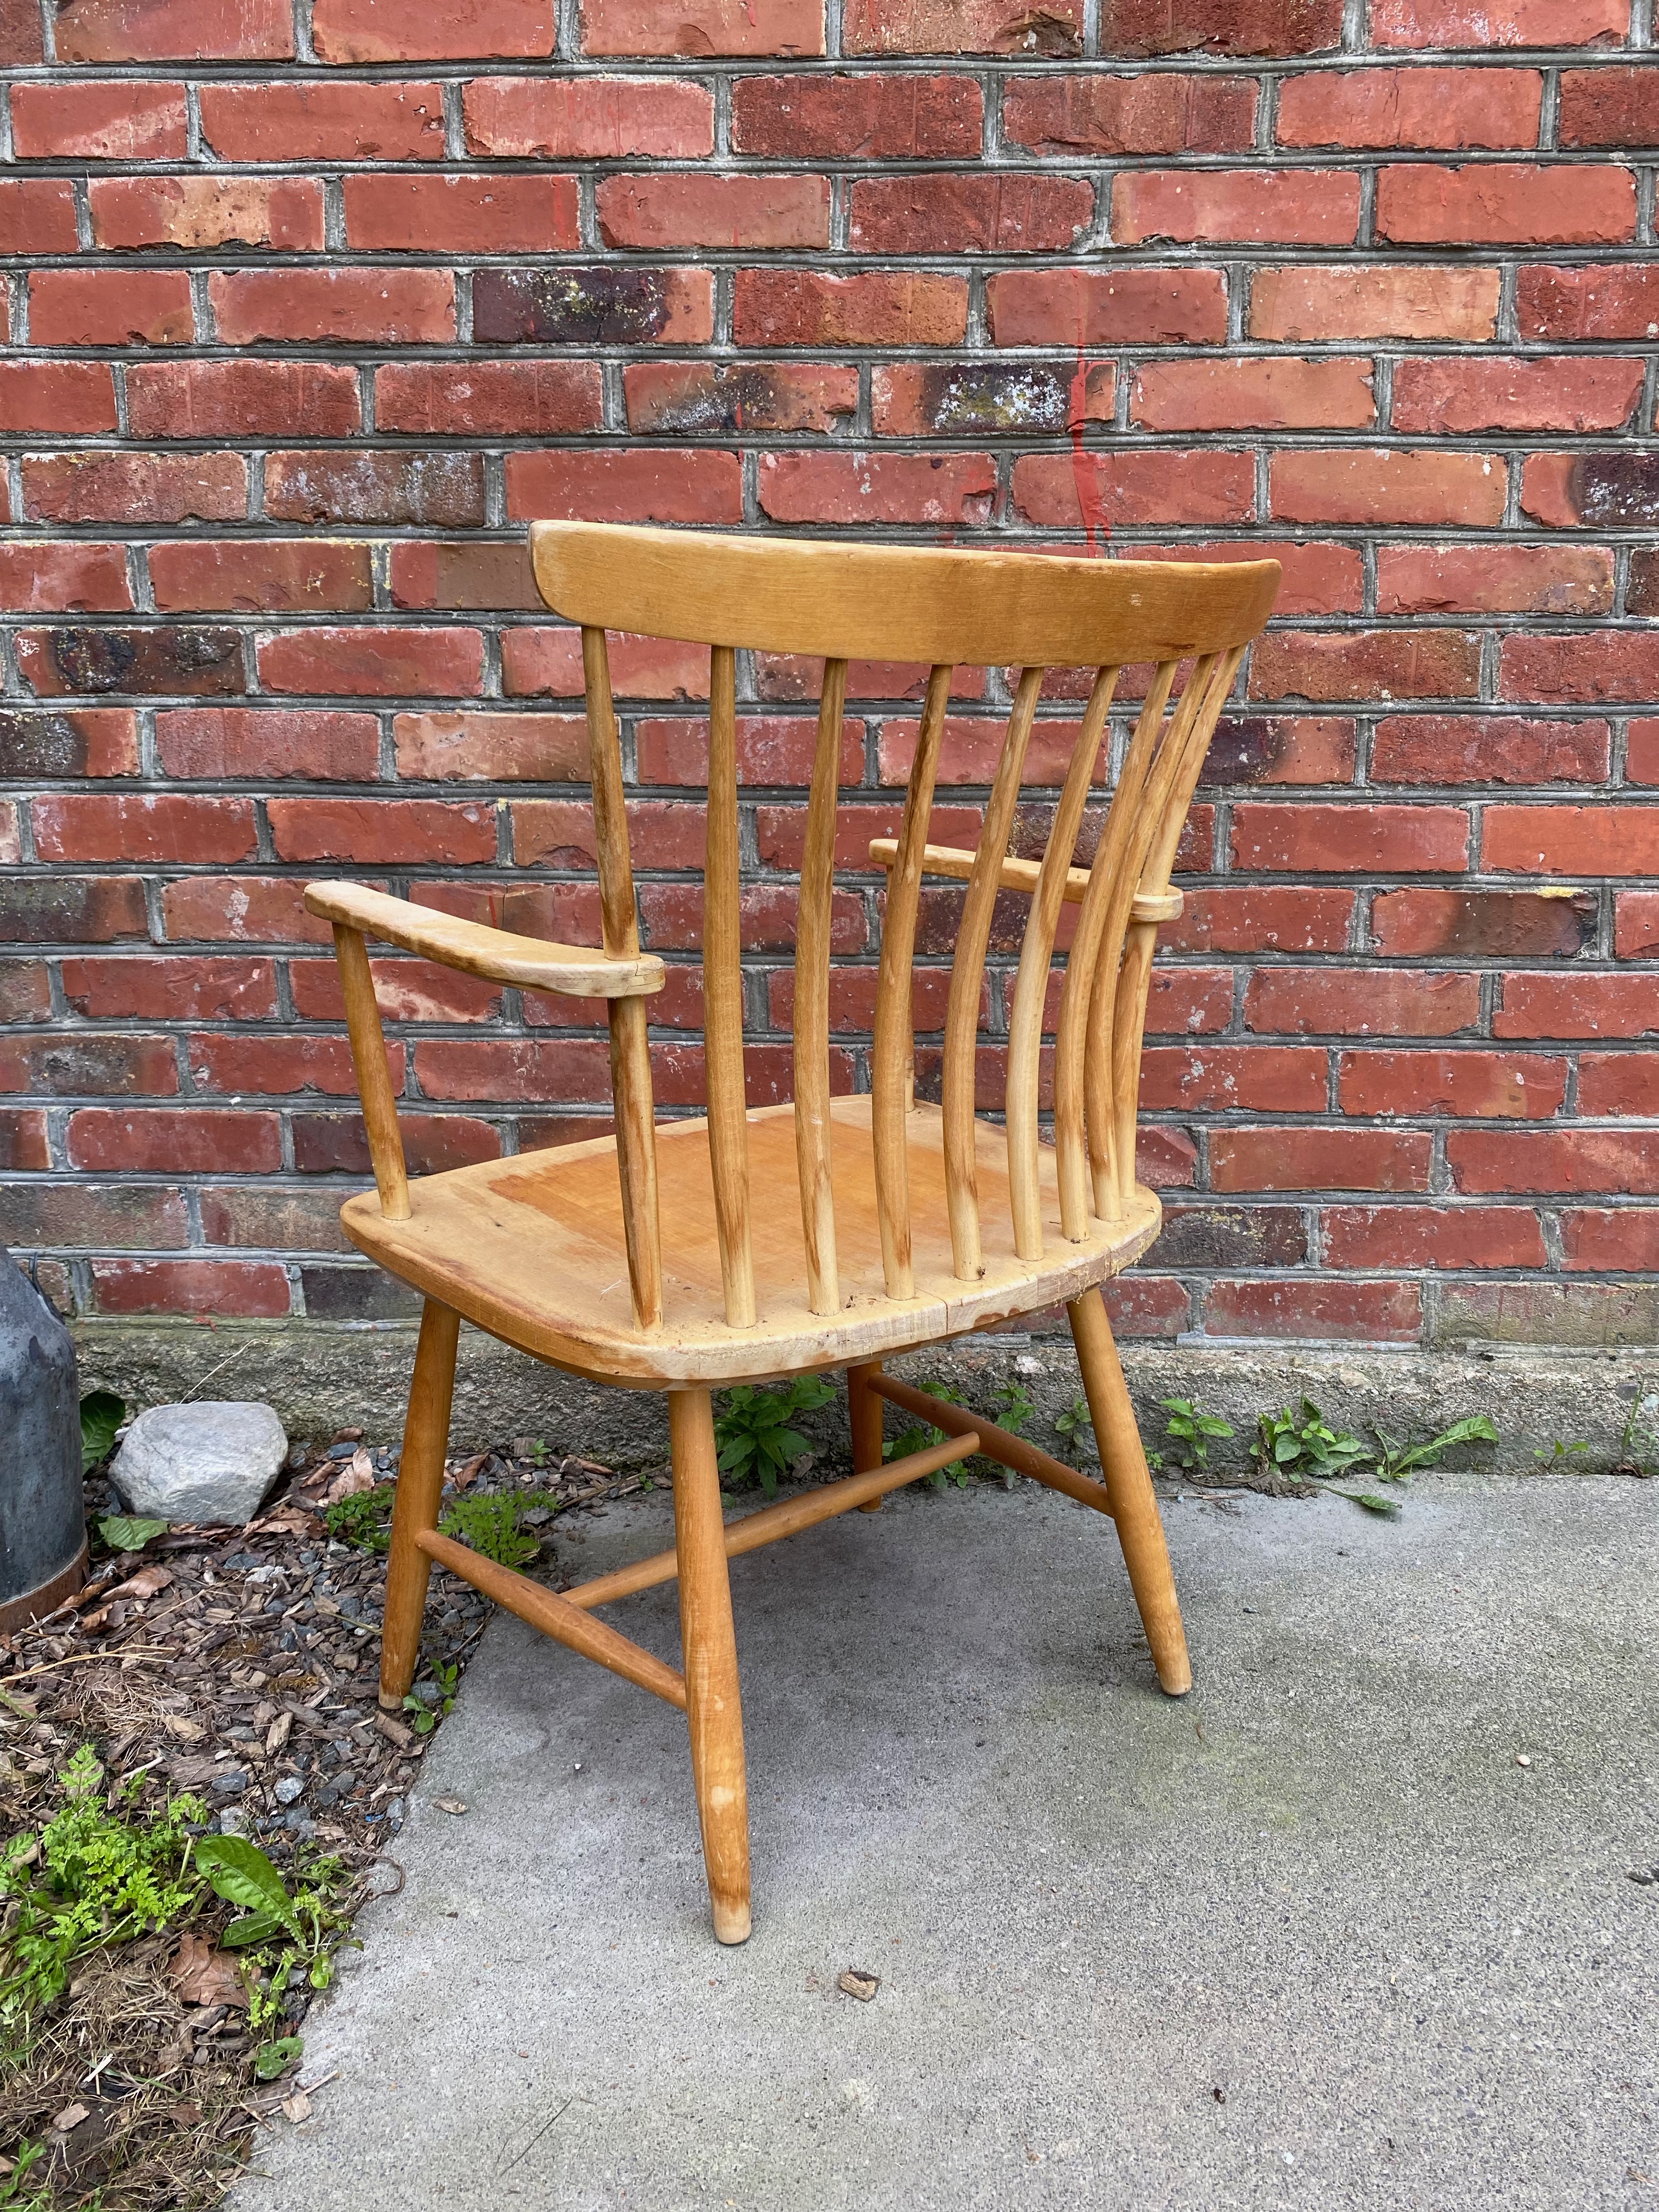
The chair is made from solid Swedish birch, with a lacquer finish. The back sticks are all steam-bent over the same form, each of them pivoted in their mortises toward each side. This is a key feature of this design. The bend provides a little push into the lumbar region of the sitter, while still letting the shoulders fall a bit back. In combination this increases comfort drastically compared to a straight back.
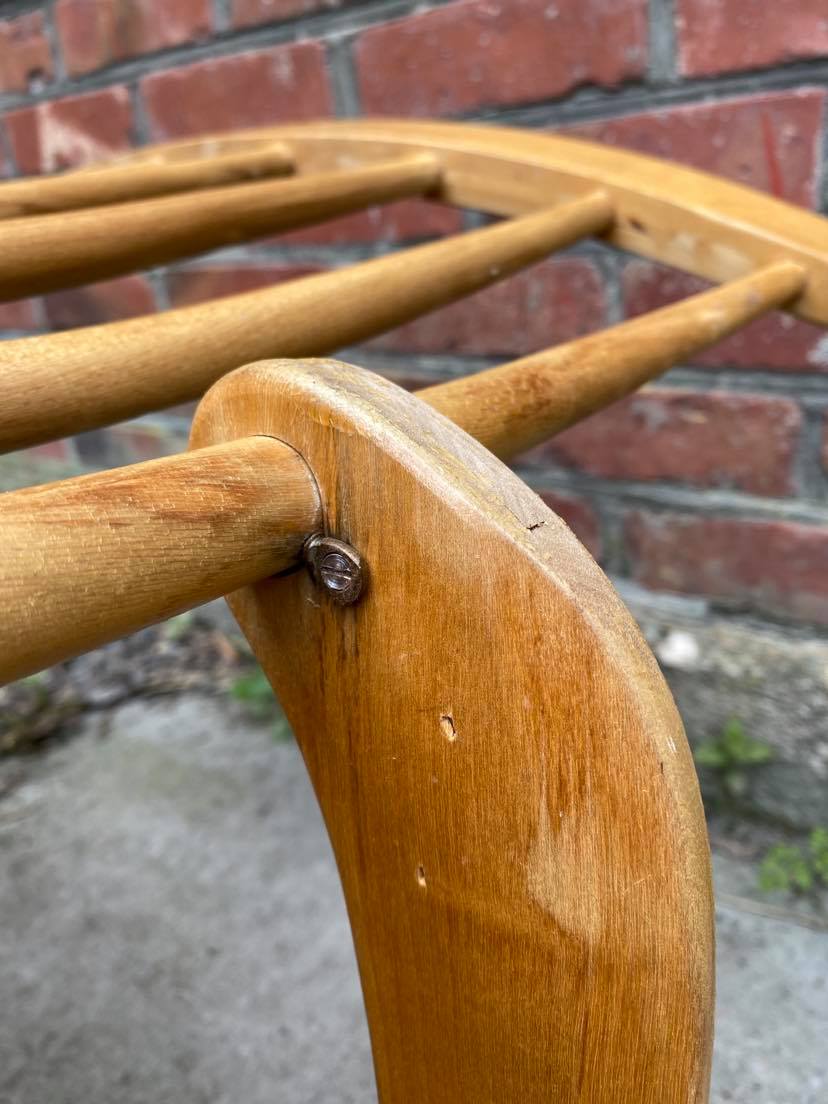
The rest of the construction is quite typical, but the so-called captured arms are worth noticing. This method of joining the arms to the back is commonly seen in Irish stick chairs. But not that often in Scandinavian chairs. Traditionally the arm mortise is wedged onto the tapered back stick. This is done by carefully shaving and adjusting. Obviously not a time-and-money-saving procedure for a factory. Instead, they invented their own little thingy that holds the arm in place.
Life on the road ain’t that bad after all. If you would like to see more of chair encounters, follow me on my Instagram @stick_chair_encounters. I’m also a chairmaker and you can see my personal chairs at @klaus_skrudland
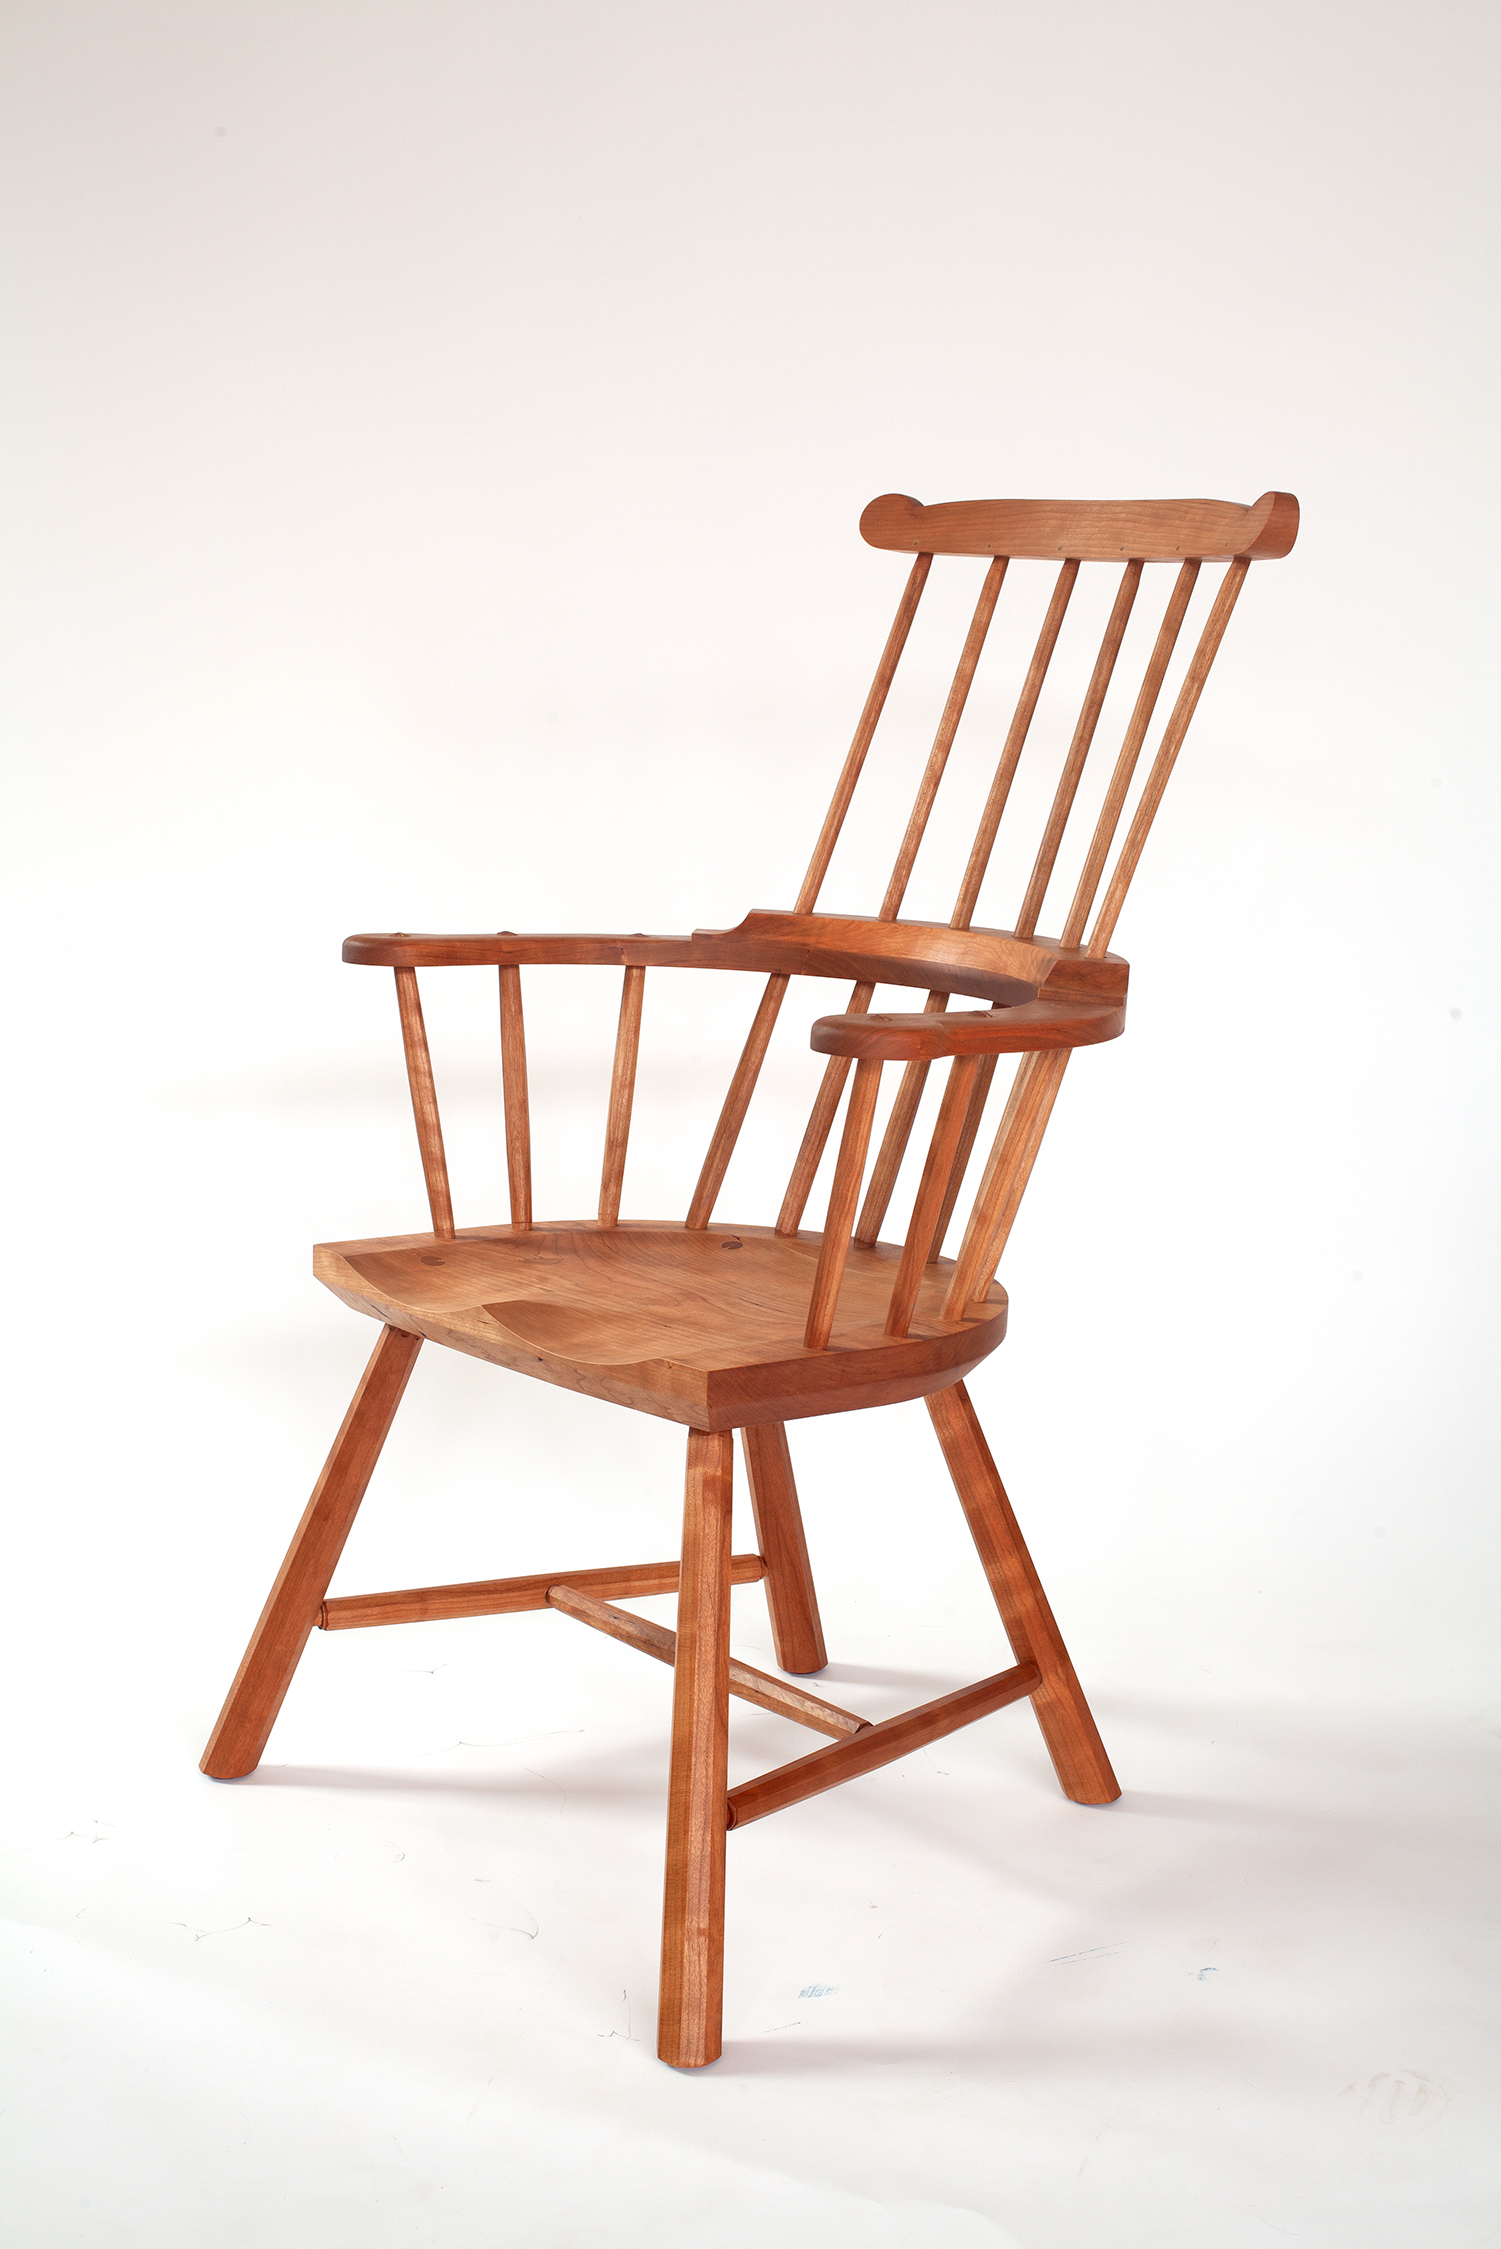
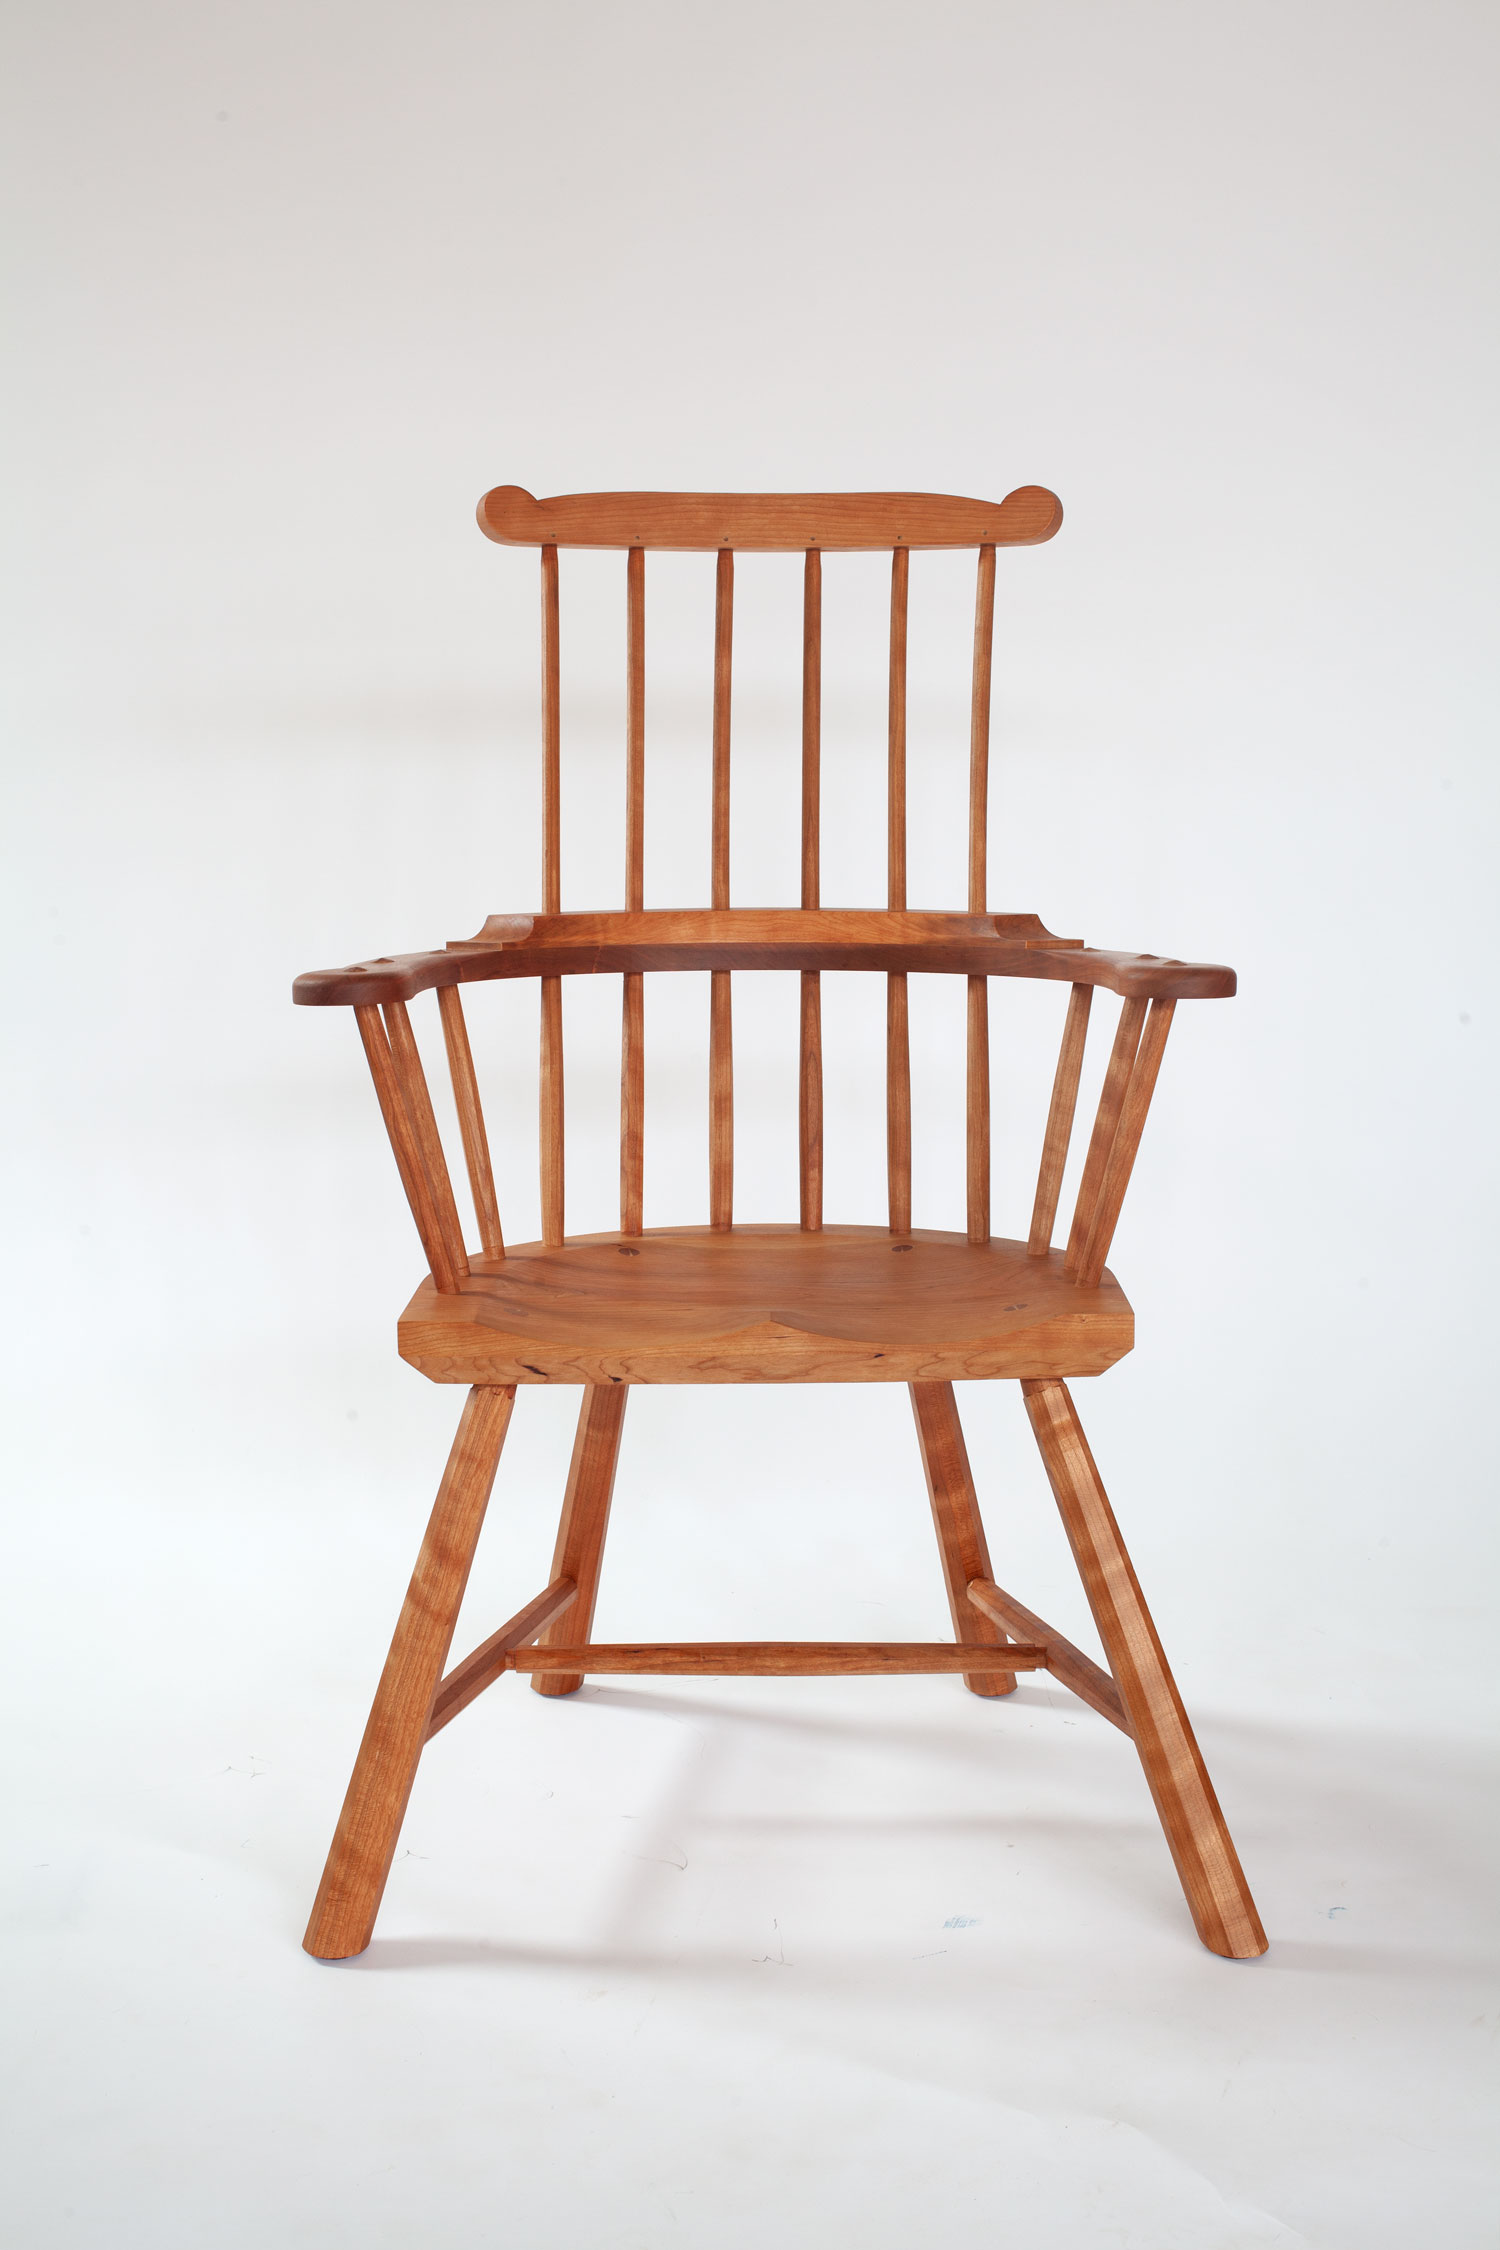
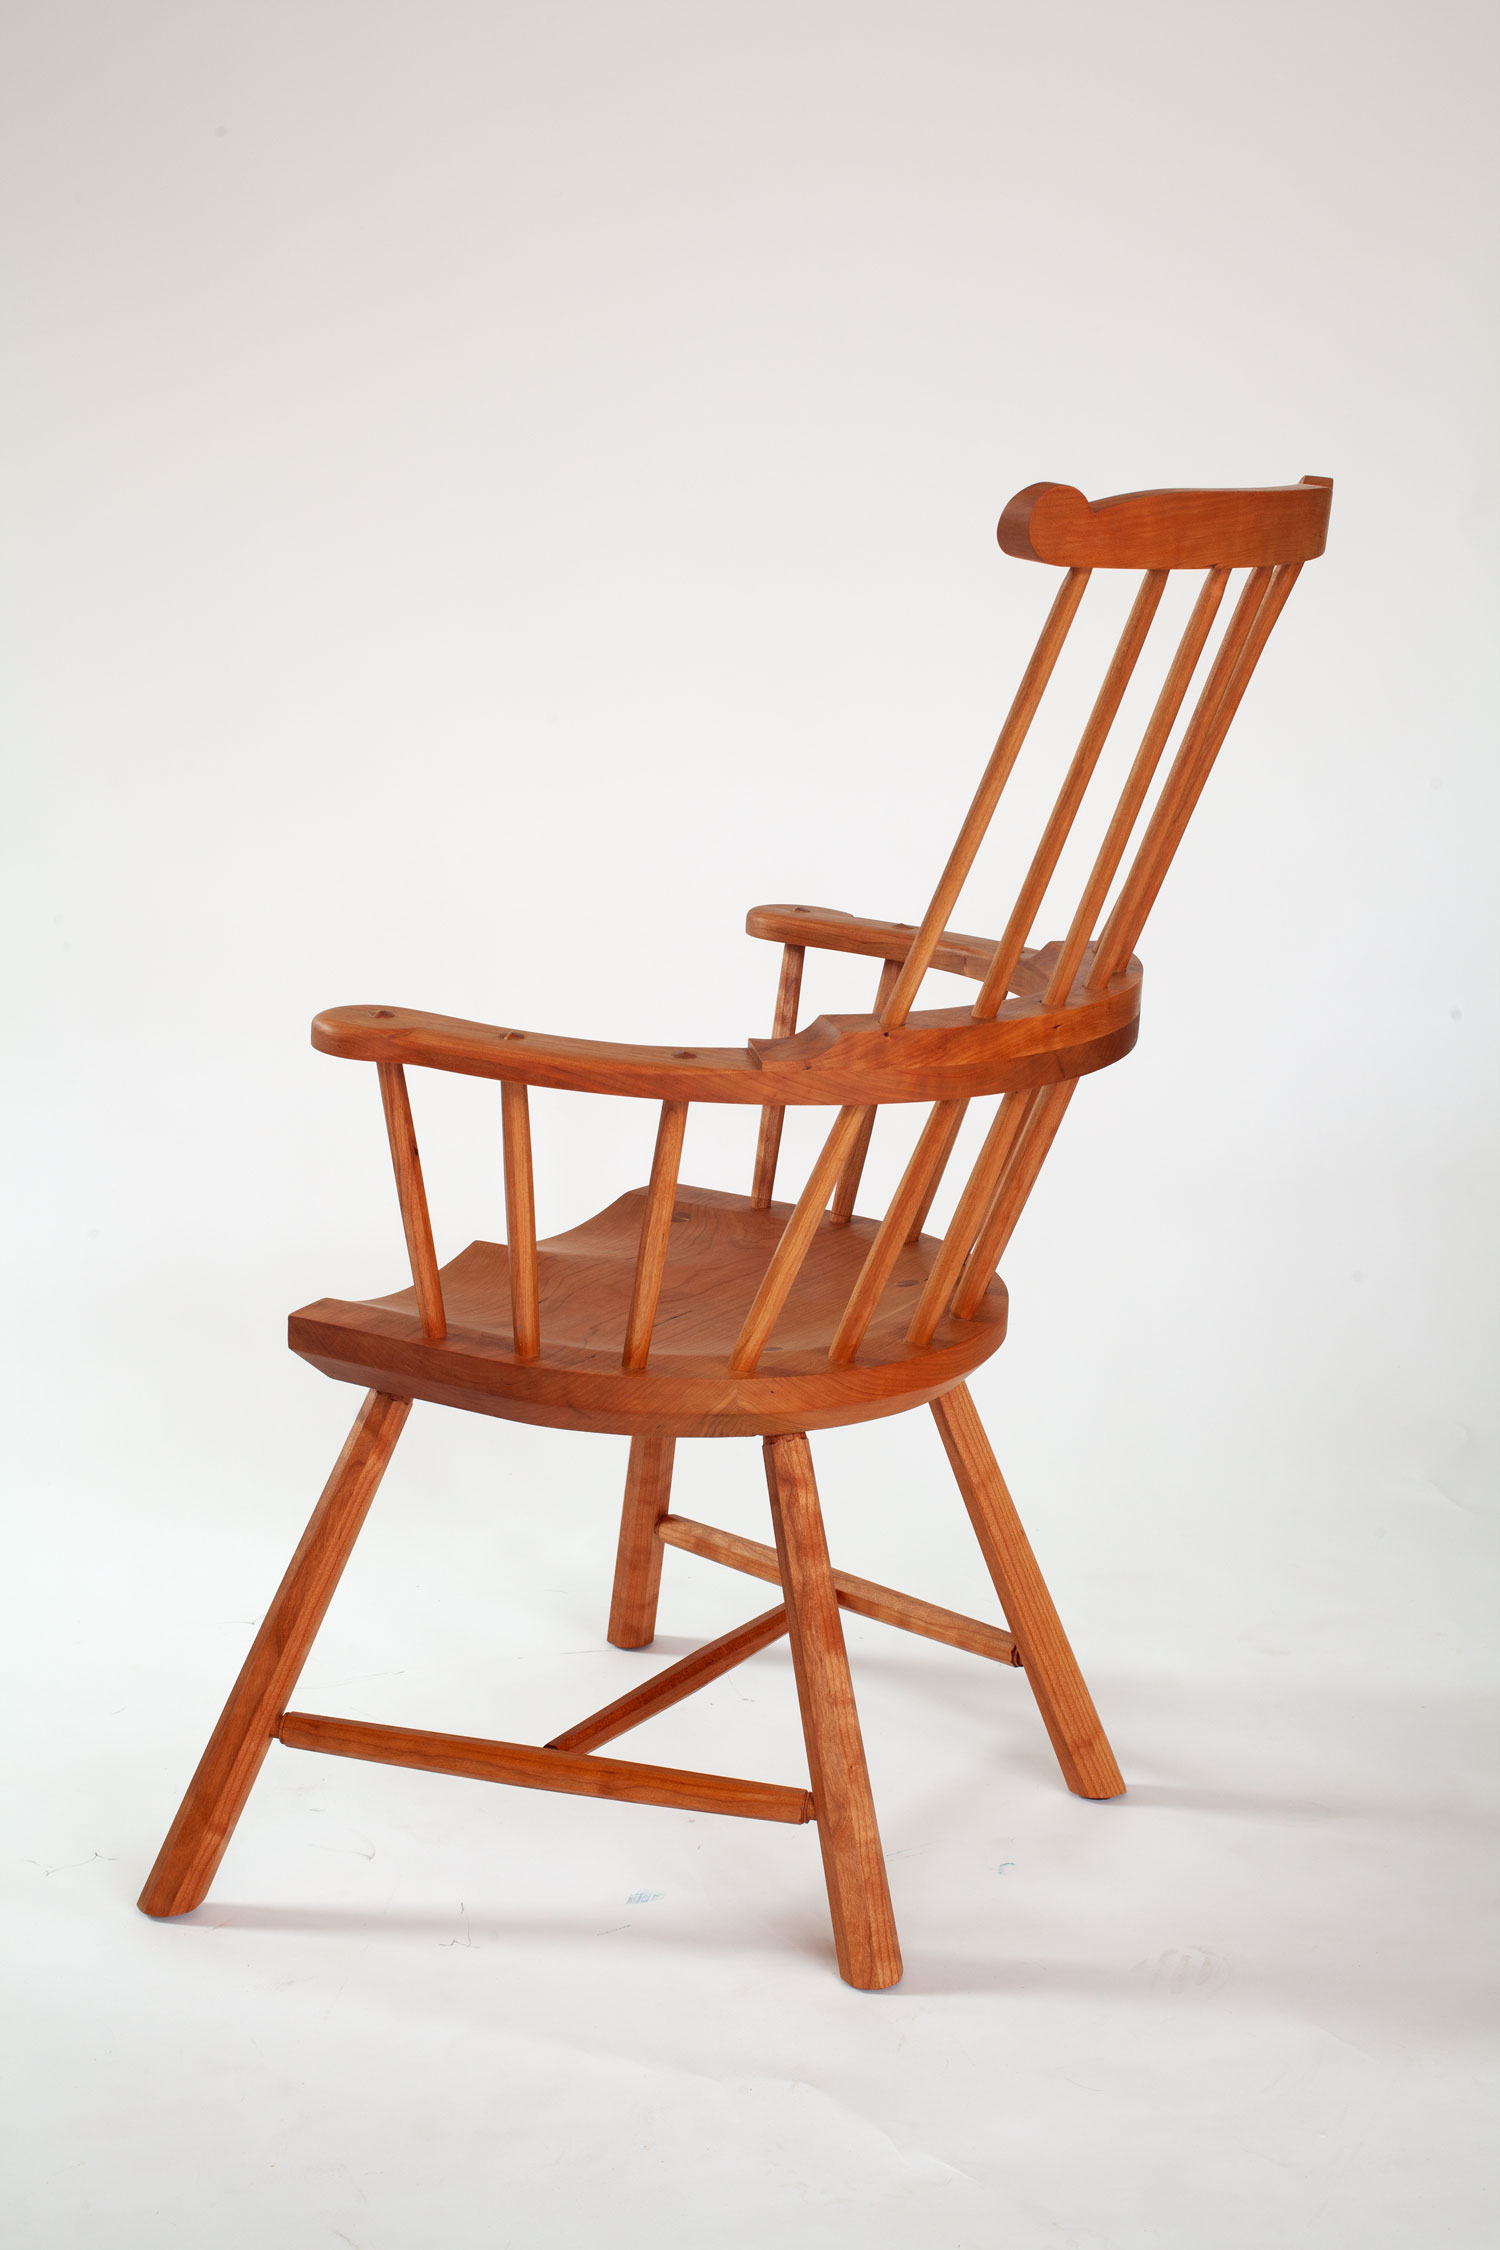
I’ve just completed this comb-back stick chair with some old-school details in black cherry sourced from the Ohio River Valley.
This chair is definitely designed for lounging by a fire or window with a good book, a coffee or a beer. The back is pitched at 20° off the seat, and the seat is pitched to slide your body toward the armbow and the back sticks. If you like lumbar support, this chair has a good deal of it.
Yes, you could use this chair at the dining table. The chair that my wife, Lucy, uses is pitched similarly. She sits up straight while eating and then settles back into the chair as we mull over the day’s business.
The seat height is 17”, which is about as high as I’ll make a chair seat. (If you want it lower I’ll be happy to cut down the legs before shipment.) The chair is constructed with hide glue, so the joints can easily be repaired a few generations down the road. And the finish is an organic linseed oil/beeswax blend. This finish is designed to age and patinate. It doesn’t provide a lot of protection, but it is easy to repair and looks better and better each year.
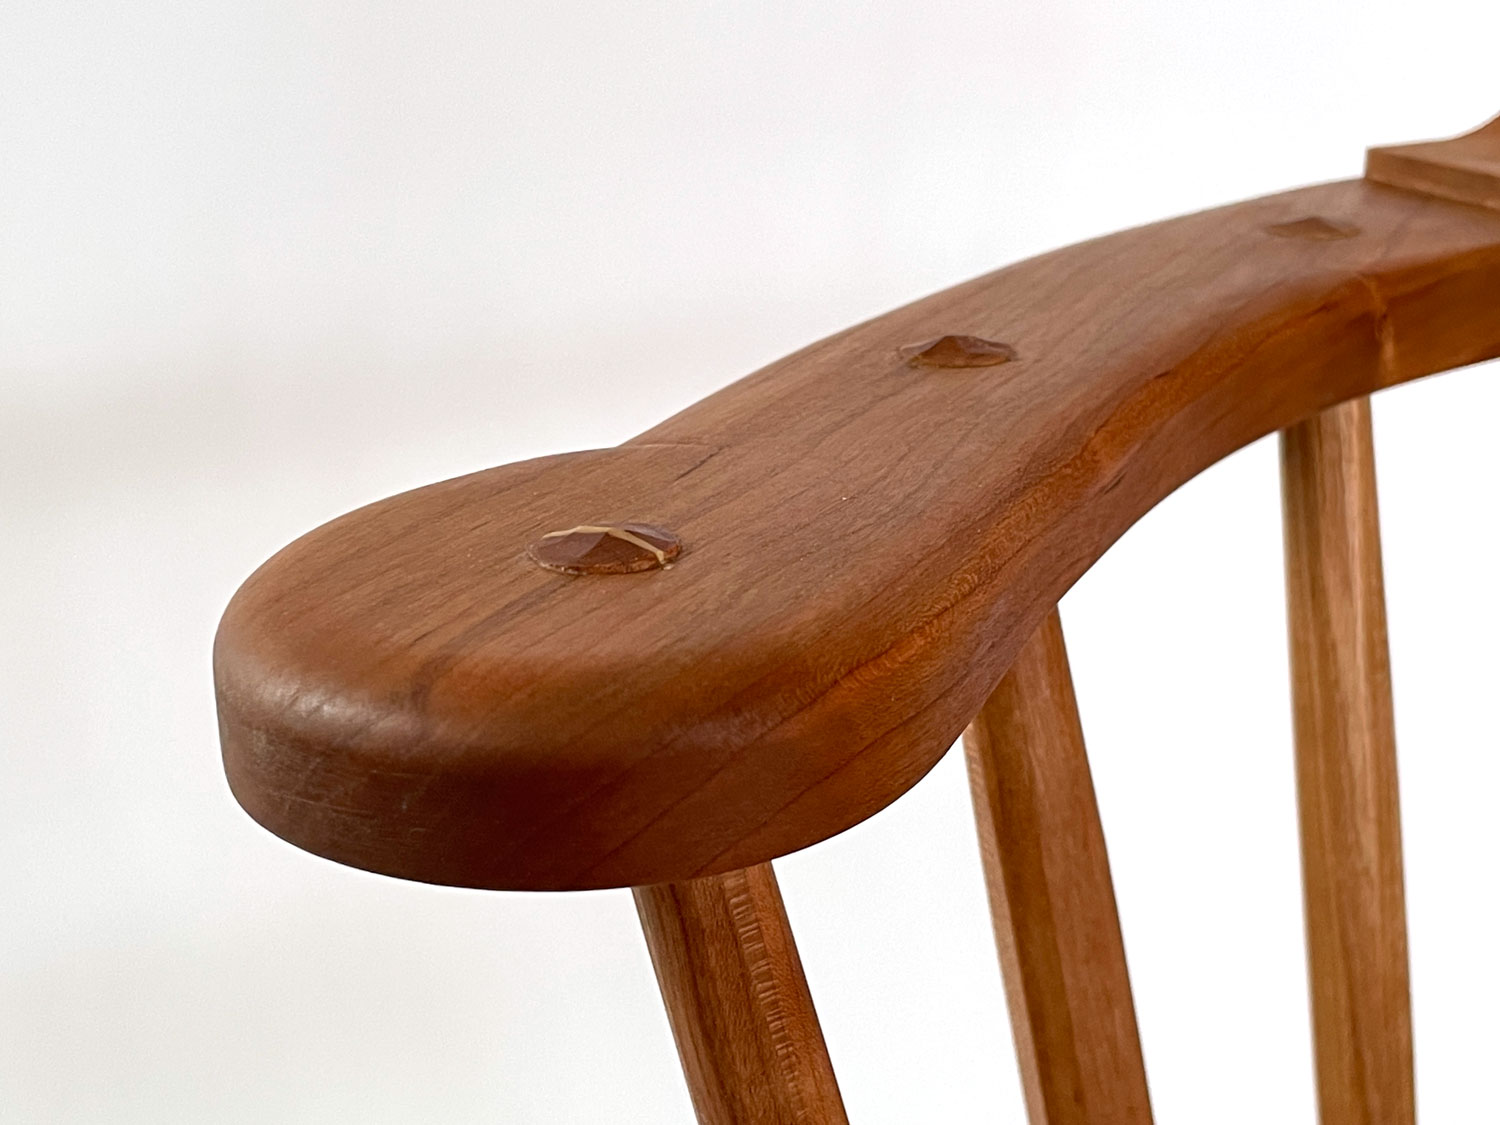
Stylistically, this chair uses many details found on old stick chairs in Wales and Ireland. Both the comb and the hands of the chair have a shape that’s best described as a circle intersecting an arc. This shape is found over and again in old chairs and gives the chair an organic look.
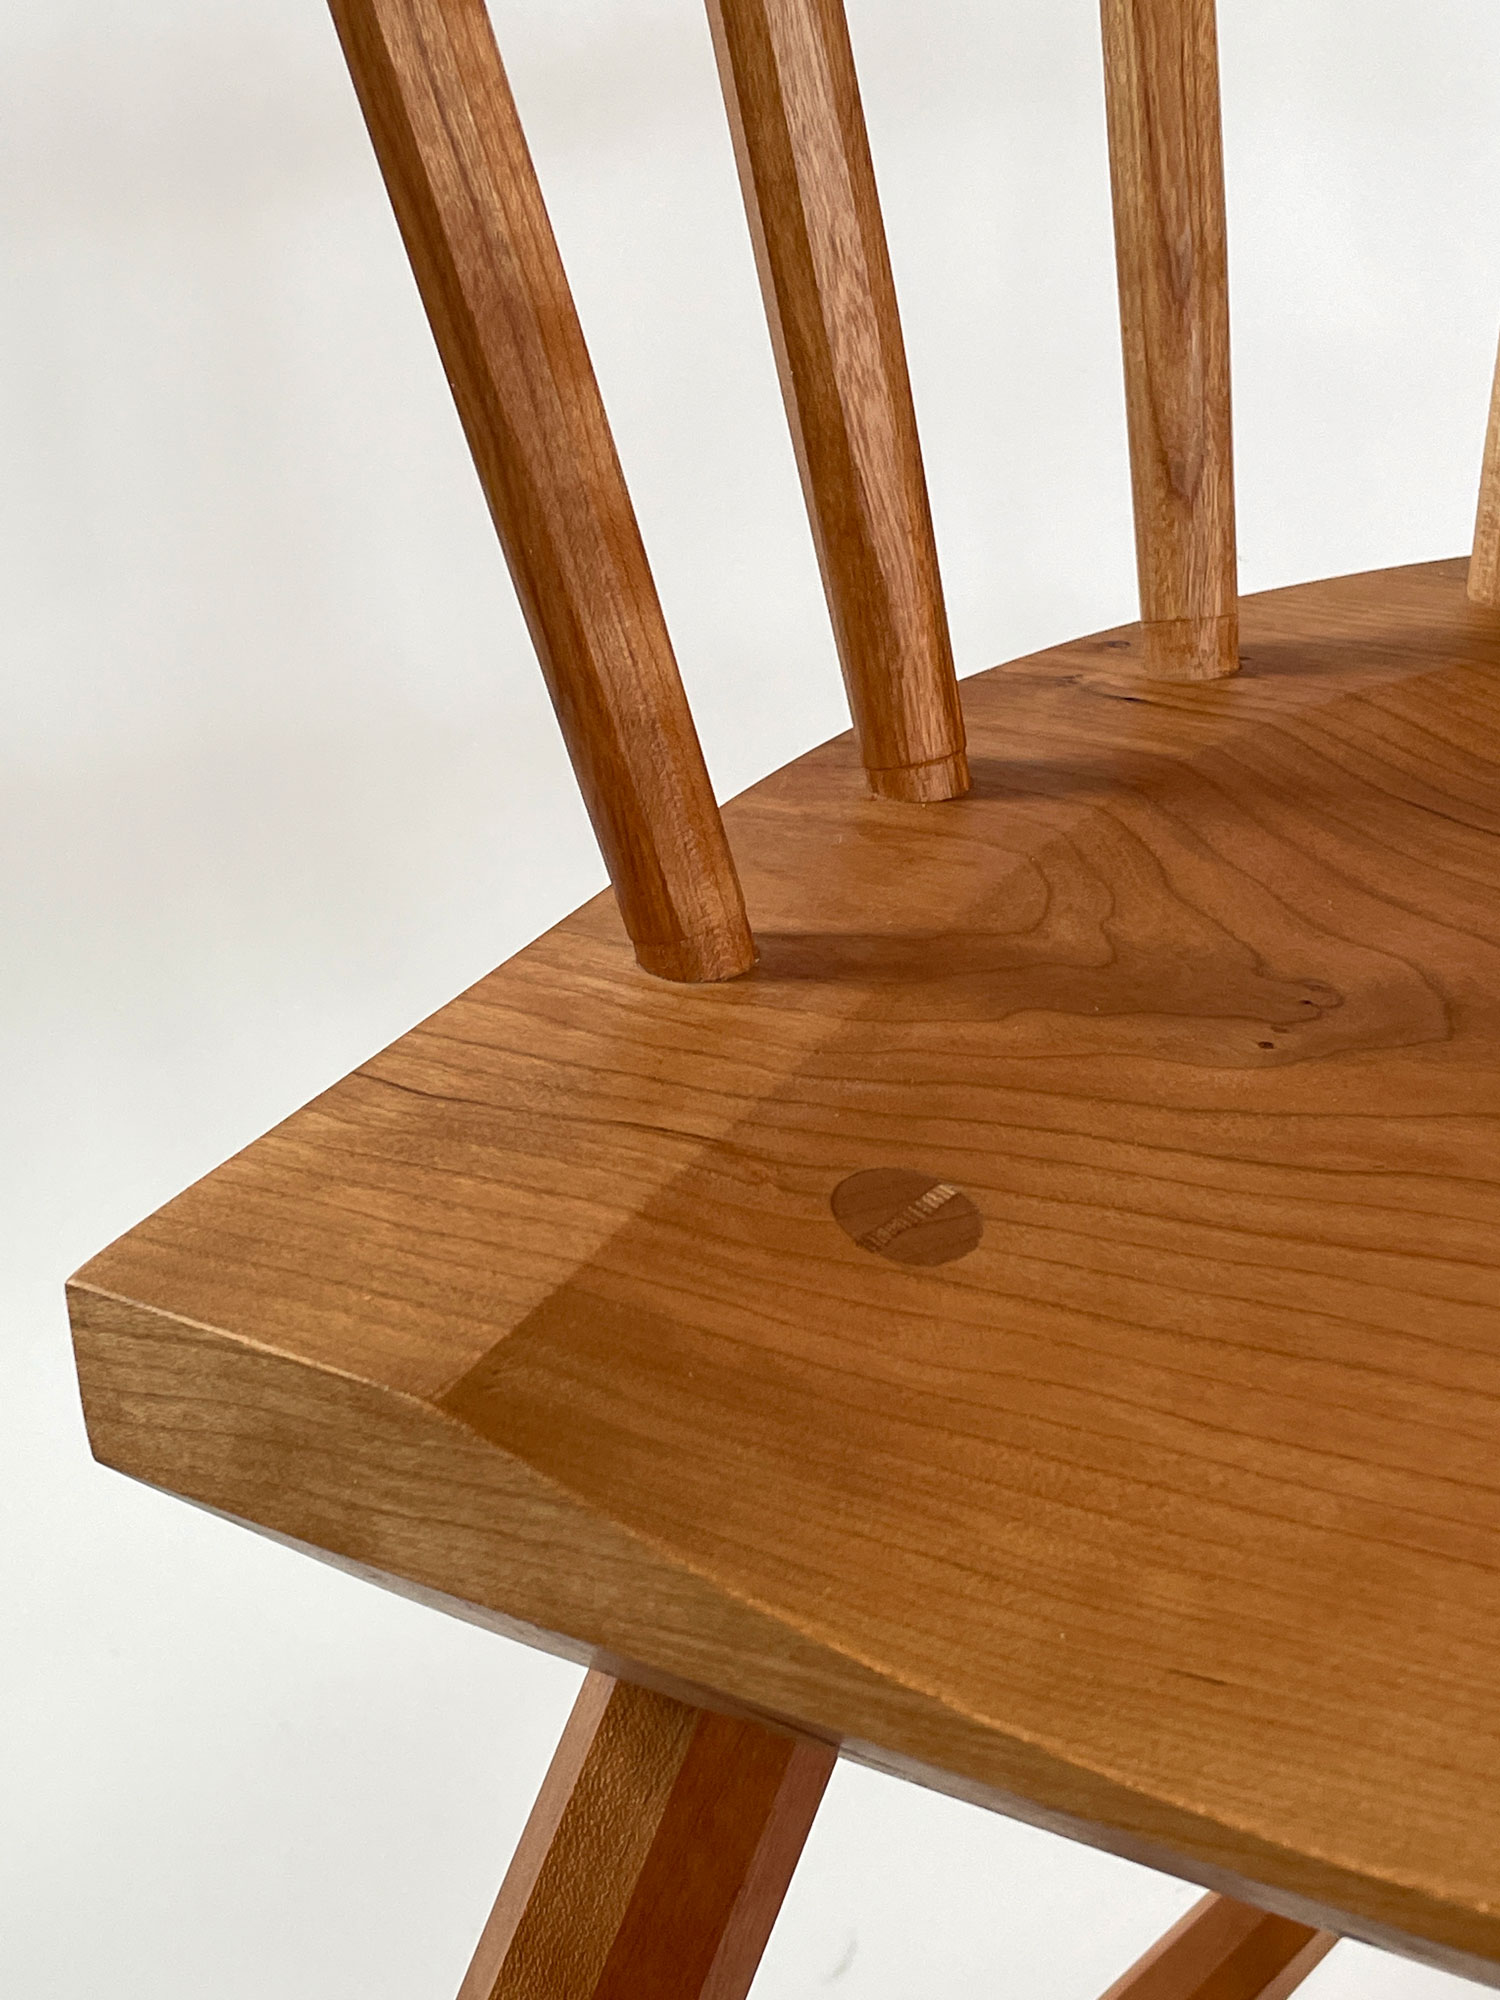
I’ve also allowed the sticks through the arms to remain proud and have faceted them. They do not interfere with the comfort of the chair, but they are a delight to touch. All surfaces on the chair were shaped with rasps and scrapers, so you will find texture on all surfaces, from the hands to the faceted sticks.
Look for more old-school chairs from me in the coming weeks.
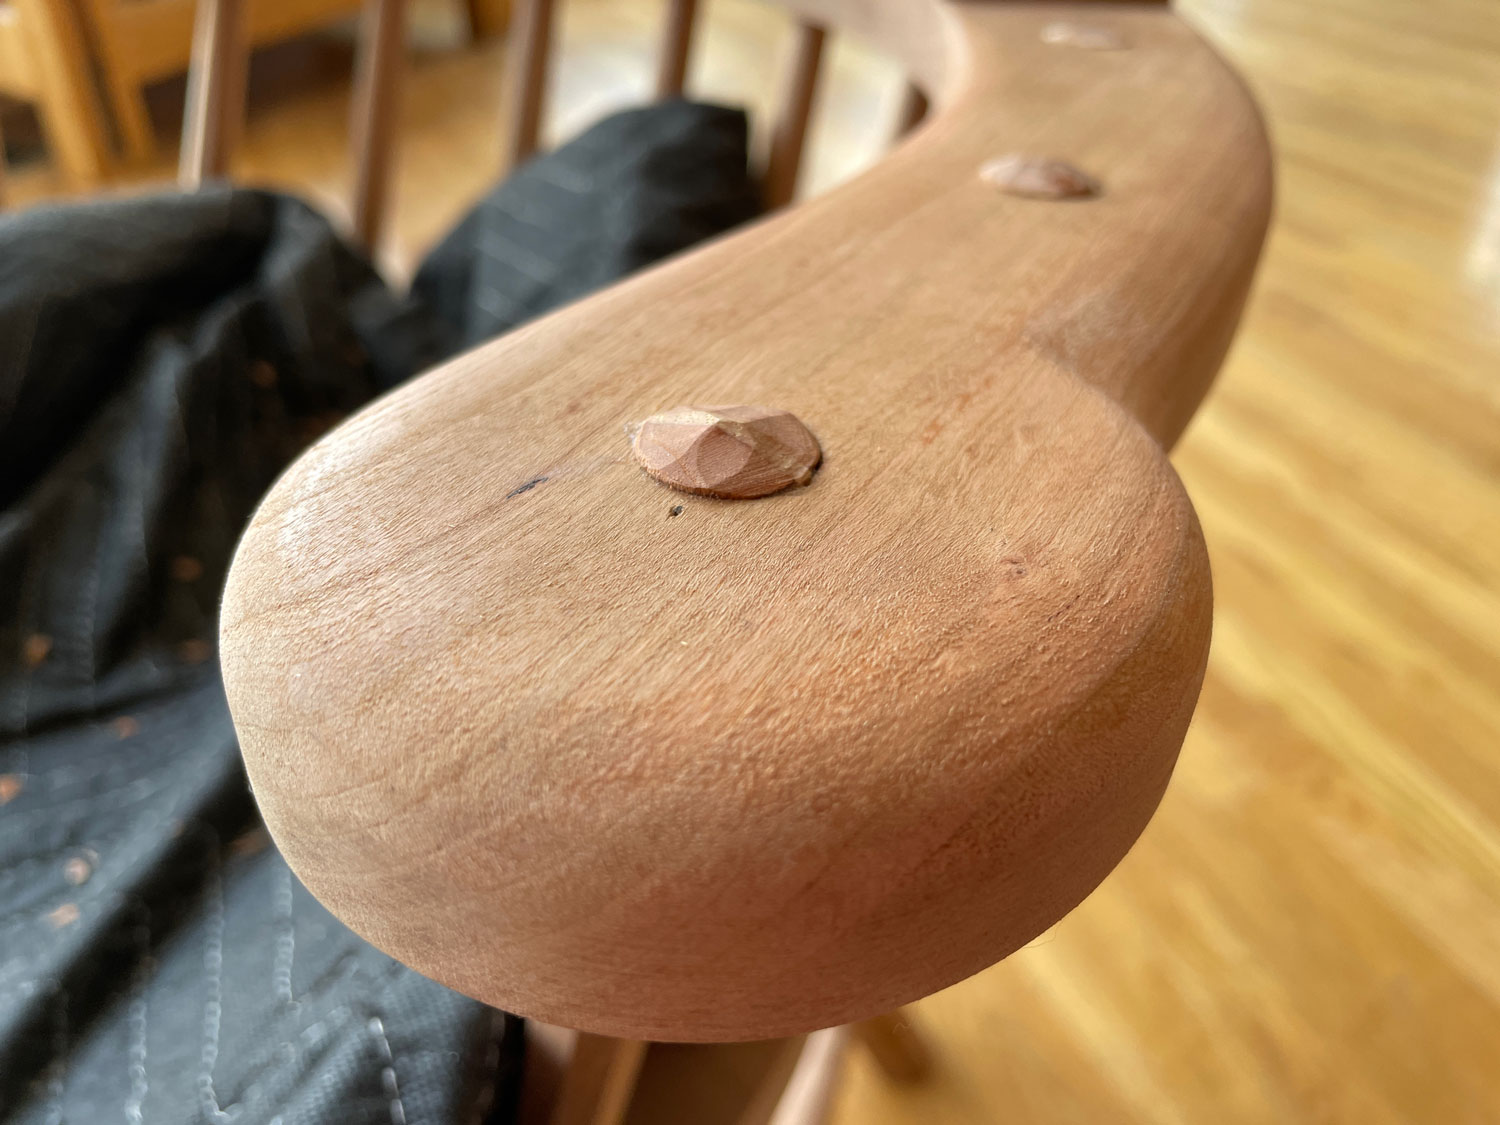
When I make chairs with an old-school feel, it’s nice to leave the through-tenons on both the arms and seat a little proud. Lots of old chairs have proud tenons, which is likely a result of things shrinking and getting worn.
For years, I shaped my proud tenons with a shallow gouge (or a chisel) and a mallet. It worked, but if I struck the mallet too hard there were times that the grain would get torn up and the tenon would be ugly-ish.
Years ago I changed my technique to what is shown here. I think it’s easier and produces better results, but I’m not the best woodworker in Covington.
Step 1: Seal the Surrounding Surface
When I use proud tenons on a chair with a clear finish, I first seal the surrounding surface with two coats of shellac to prevent glue from fouling the arm or seat. It’s a quick process. I rag two thin coats of shellac on the unassembled arm or seat.
After the shellac is dry, I assemble the chair as usual, wedge the tenons and remove any excess glue with hot water and a toothbrush.
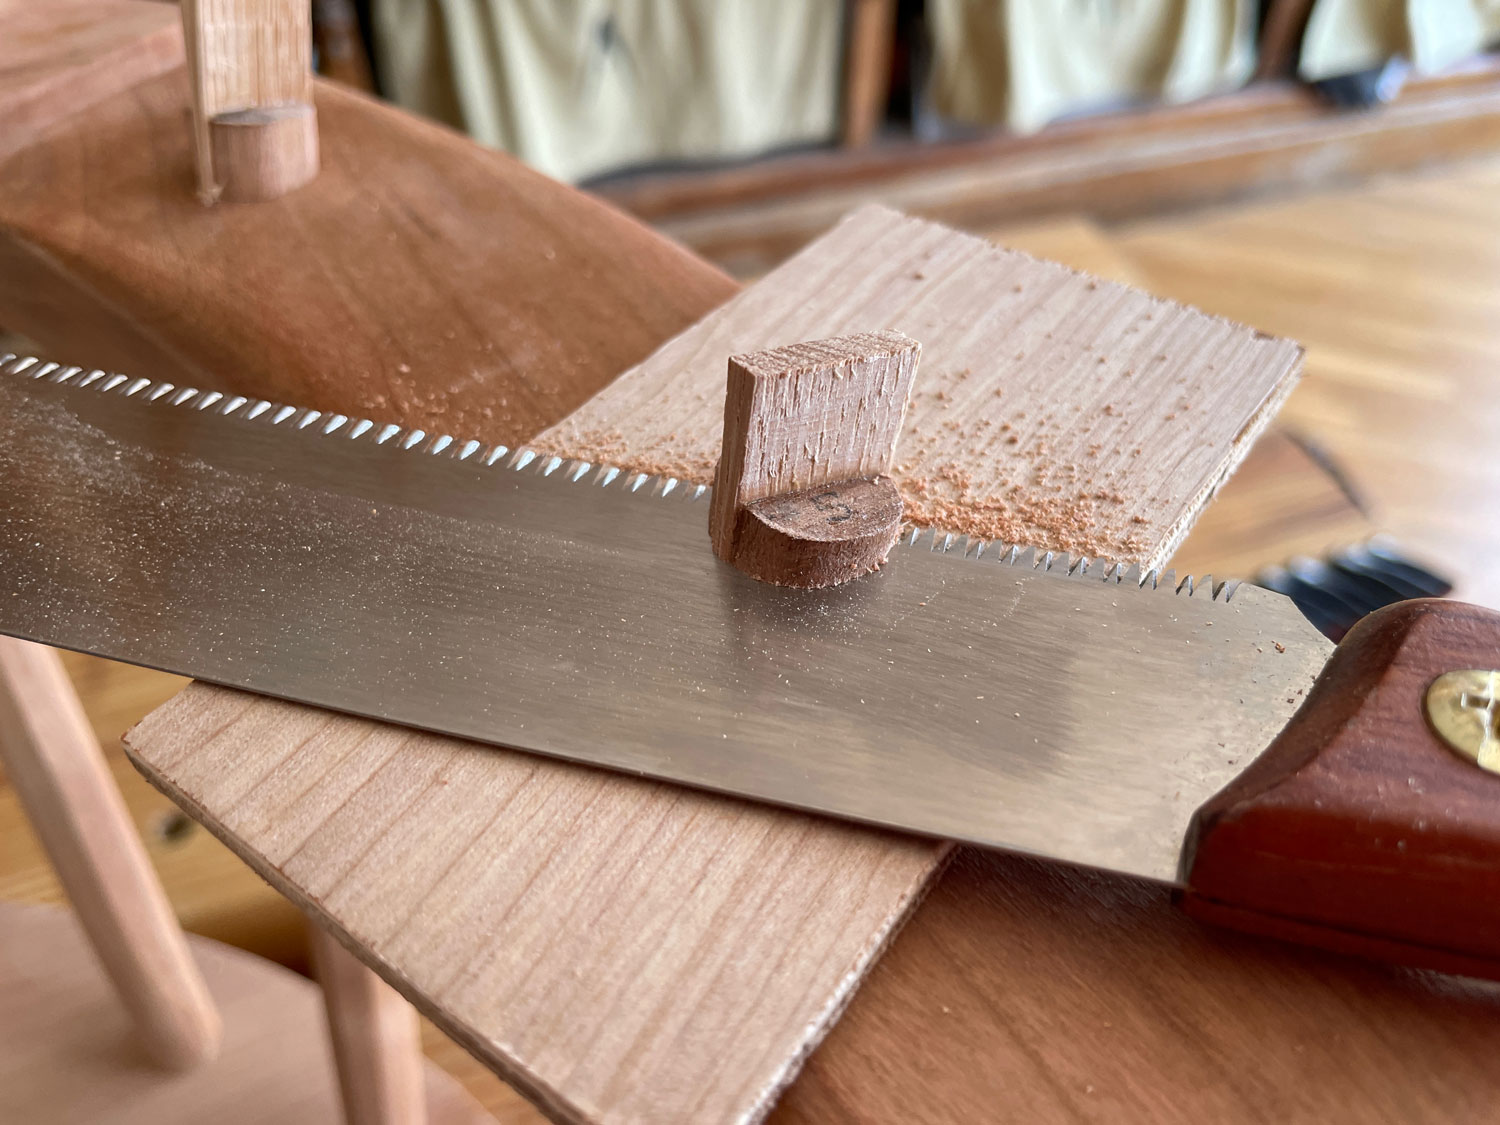
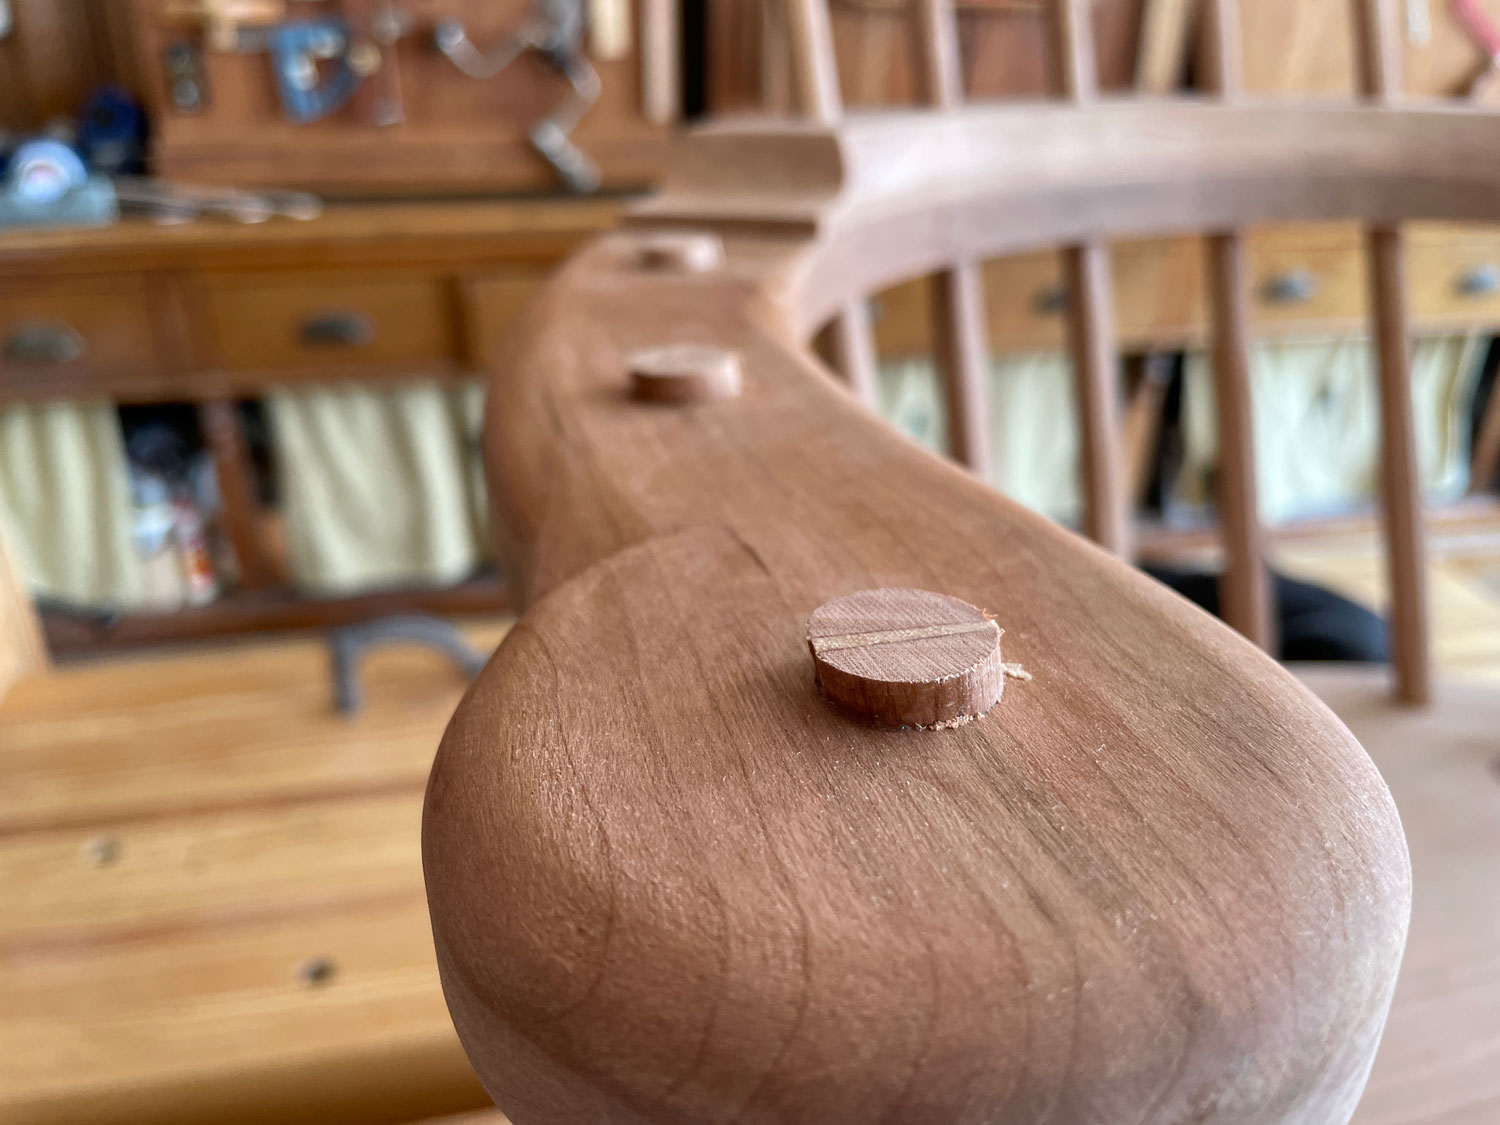
Step 2: Saw the Tenons
After the chair is assembled, I saw the tenons so they are all 3/16” (about 5mm) proud of the arm or seat. On the seat, I just eyeball it with a saw. On the arms, I take a scrap of crap 5mm plywood and drill a 3/4” hole through the center. Place the scrap over the wedged tenon and saw it flush to the scrap.
Step 3: Shape the Tenons
Now the fun part. I tape around the tenon. The tape prevents the surface from getting dented. Then I chip away at the tenon with my scorp. I press the scorp’s cutting edge against the tenon and lever the handles up, removing a chip. I work all around the tenon until it looks like I want it to.
Then I pull up the mass of tape with care and place it over the next tenon.
When all the tenons are shaped, I decide if I need to remove the shellac. If I am adding a film finish (such as shellac or lacquer) then I leave the shellac as-is. If I am finishing the chair with an oil/wax blend, I need to remove the shellac. This is easily done by flooding the surface with alcohol and wiping it up with a rag. I do this a couple of times, then lightly sand around the tenons.