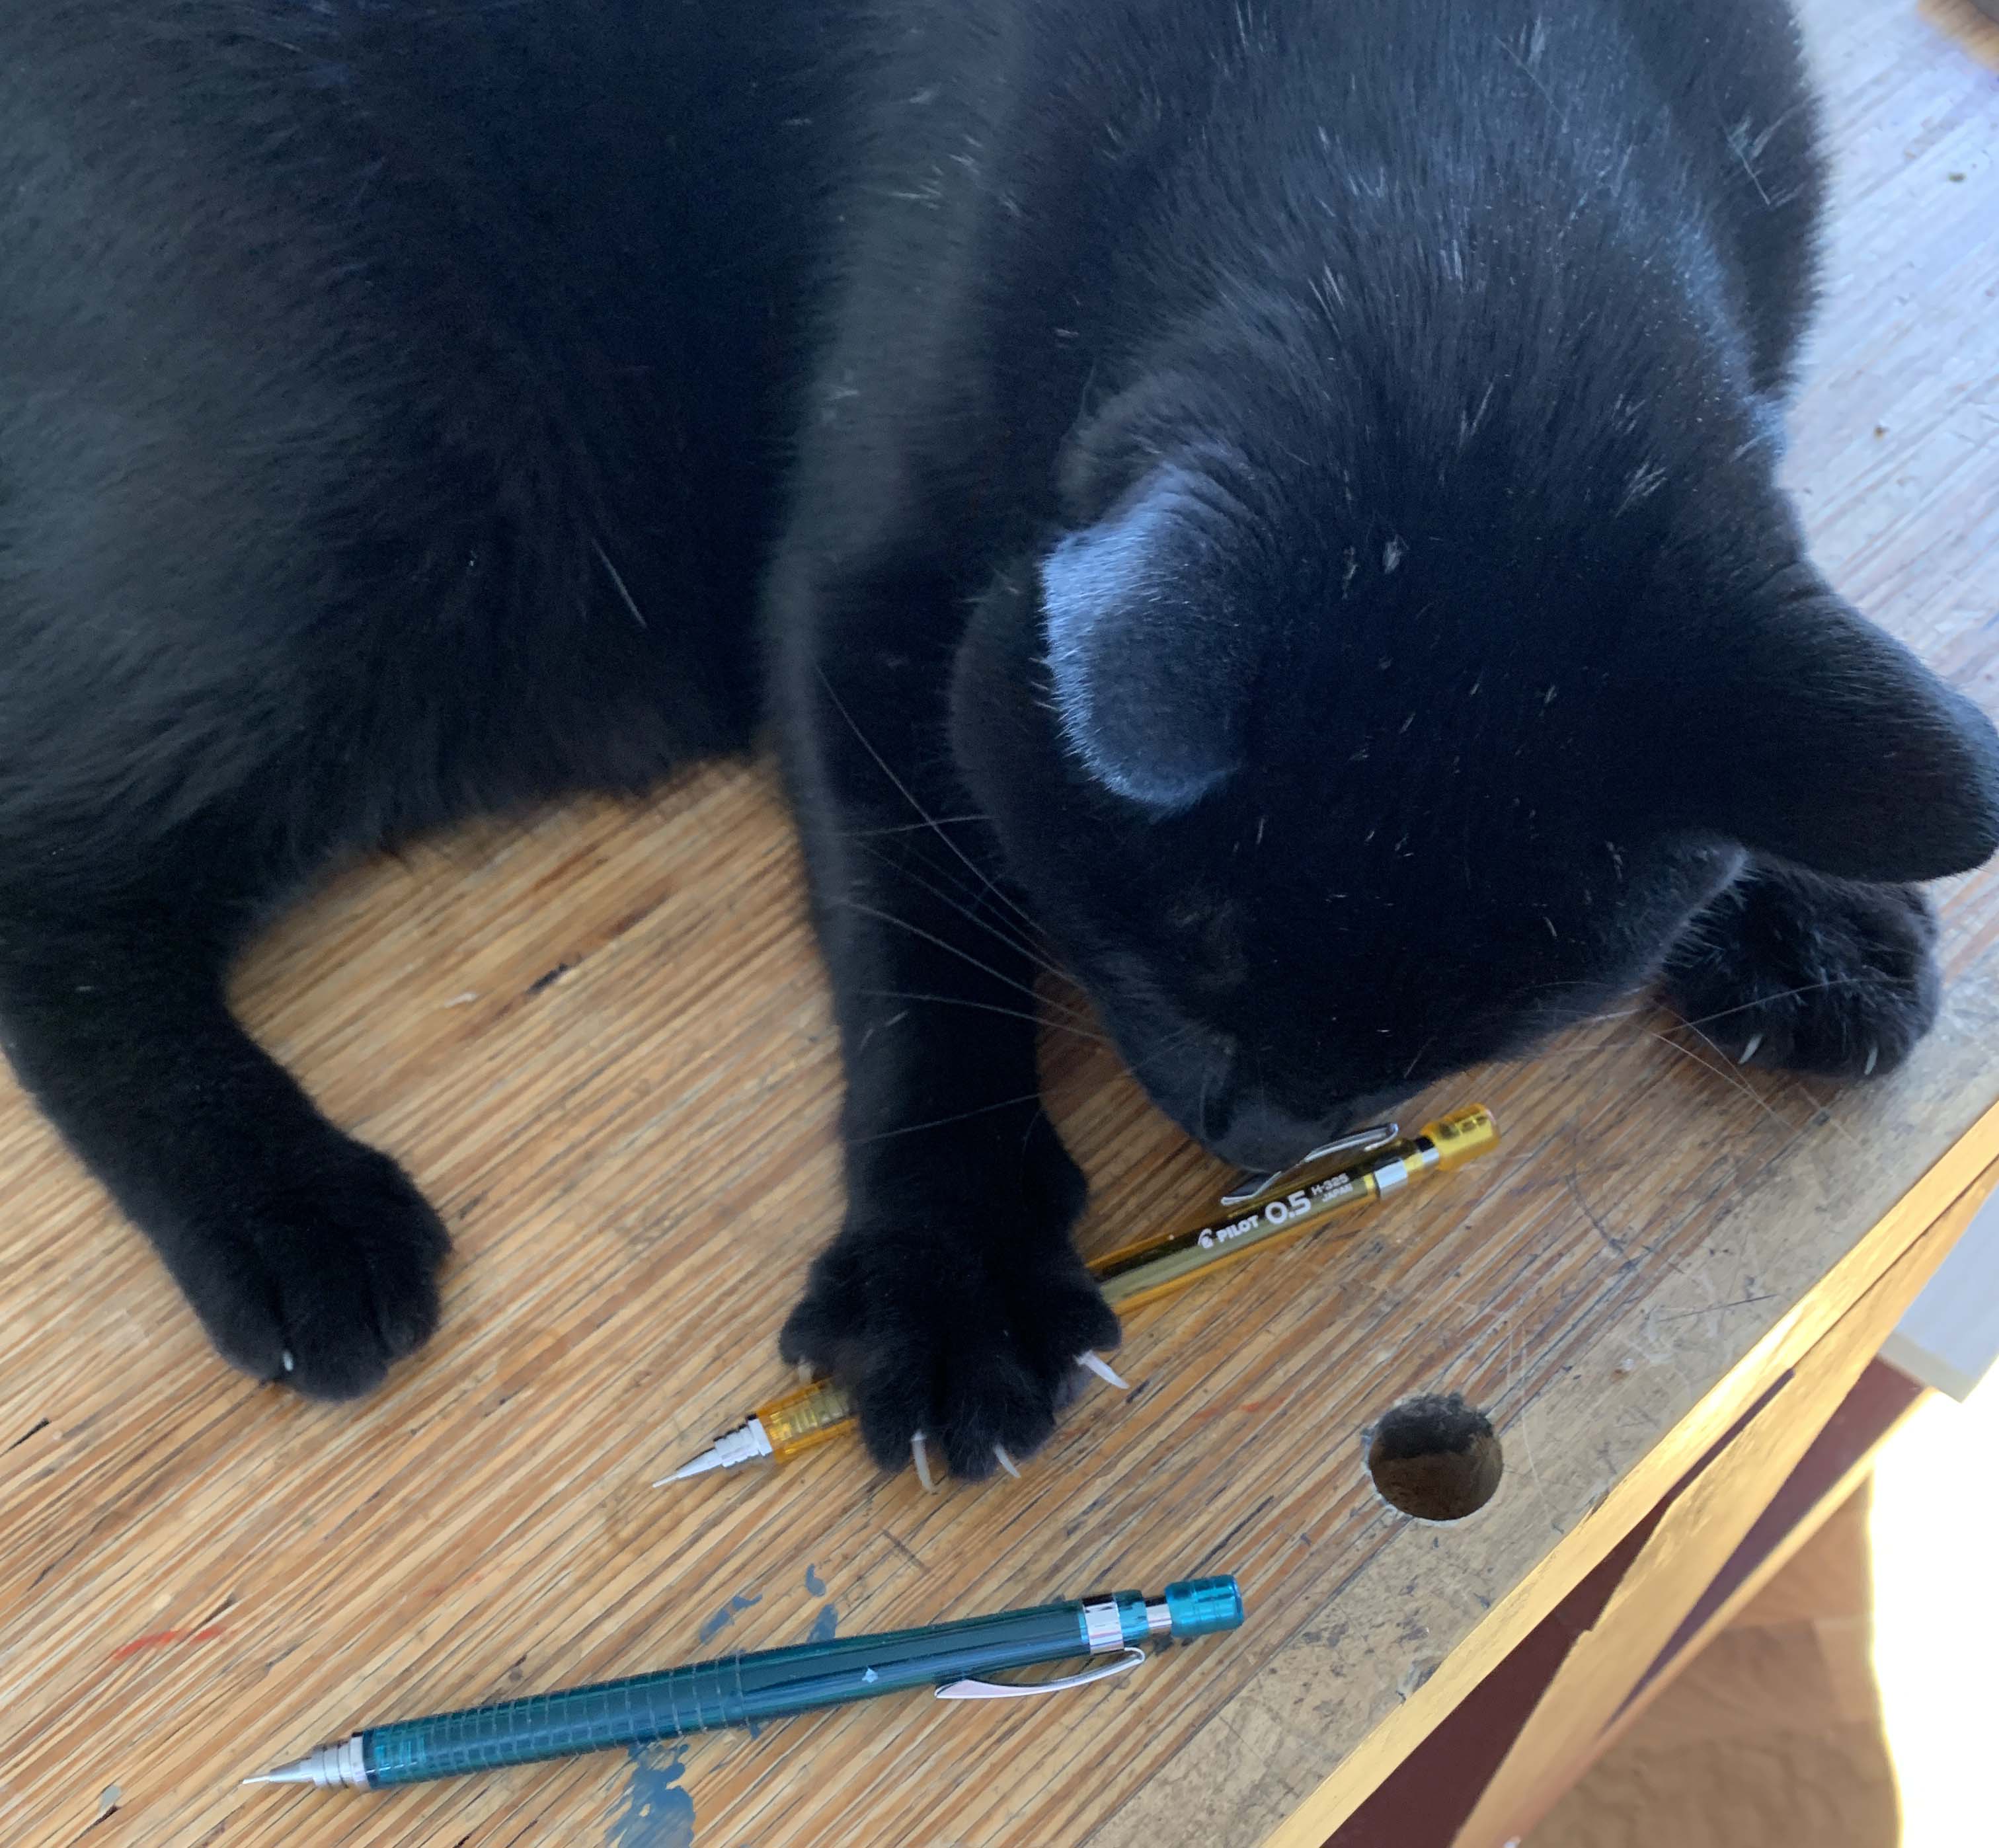
Although purchased for dovetailing, these pencils also make good cat toys.
Anyone who’s taken a class with me in the last five years knows how I feel about .5mm mechanical pencils. When students’ dovetails are too loose or too tight, my first question is, “What pencil did you use to darken your knifeline?” If a dado is too loose (or too tight), my first question is, “What pencil did you use to mark the cutline?”
I find a .5mm mechanical pencil has the ideal lead diameter. The line it marks on a flat surface is exactly thin enough that you don’t have to decide where across its width to cut; you just cut the line. And if you drop a .5mm lead line into a knifed line, the lead catches on both sides of the line, leaving an unmarked trench between (which is where I instruct students to saw when cutting their pins).
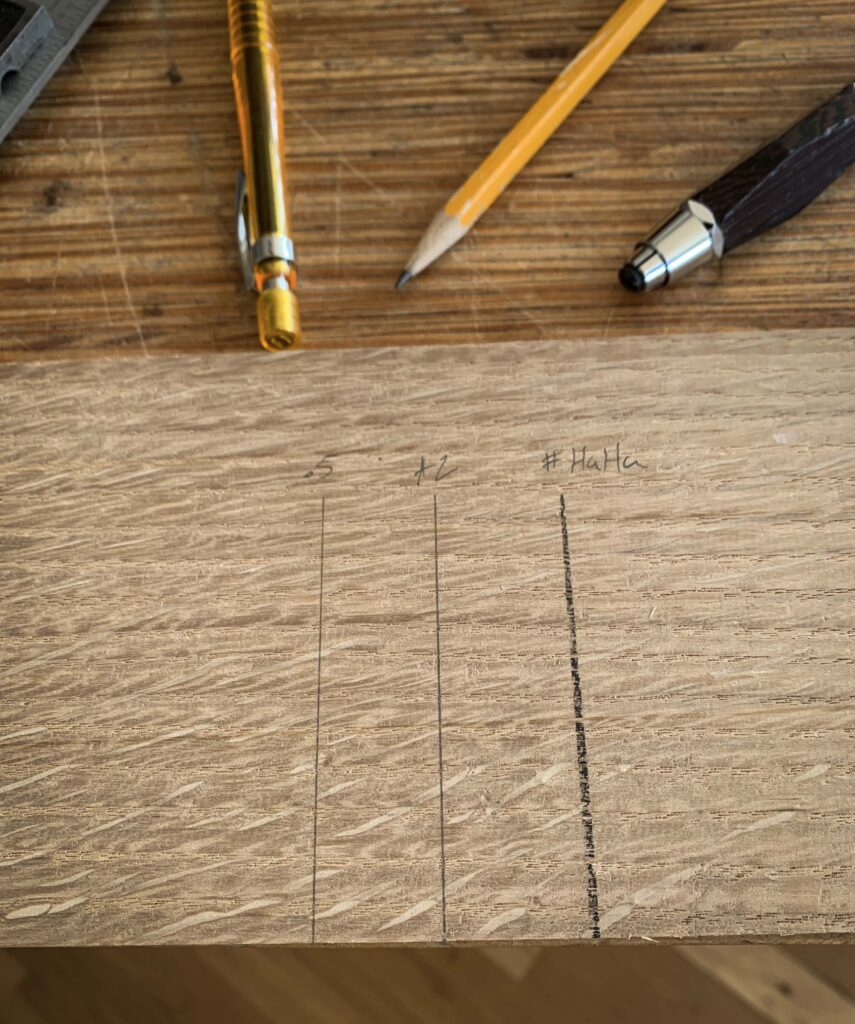
From left, lines from a .5mm, #2, and lumber pencils.
I don’t really have a favorite .5mm pencil in terms of the results, but because I tend to lose them a lot (especially while teaching, because I loan them out constantly), I buy inexpensive ones – whatever is available for less than $20 in a multi-pack at any office supply store, large grocery or drugstore.
And if you ever take a class with me, you’ll see a .5mm on the tool list. I mean it (few students seem to believe me!).
As I was writing this, I looked for photos of my dad woodworking. I couldn’t find any. That was frustrating at first, but then I realized that it just underlines the story I’m about to tell. However I would like you to meet him, so here’s a recent photo of him eating breakfast.
Ruby (right) has her own chair at the breakfast table.
My dad didn’t really teach me woodworking. He taught me something even better. Without ever putting it into words.
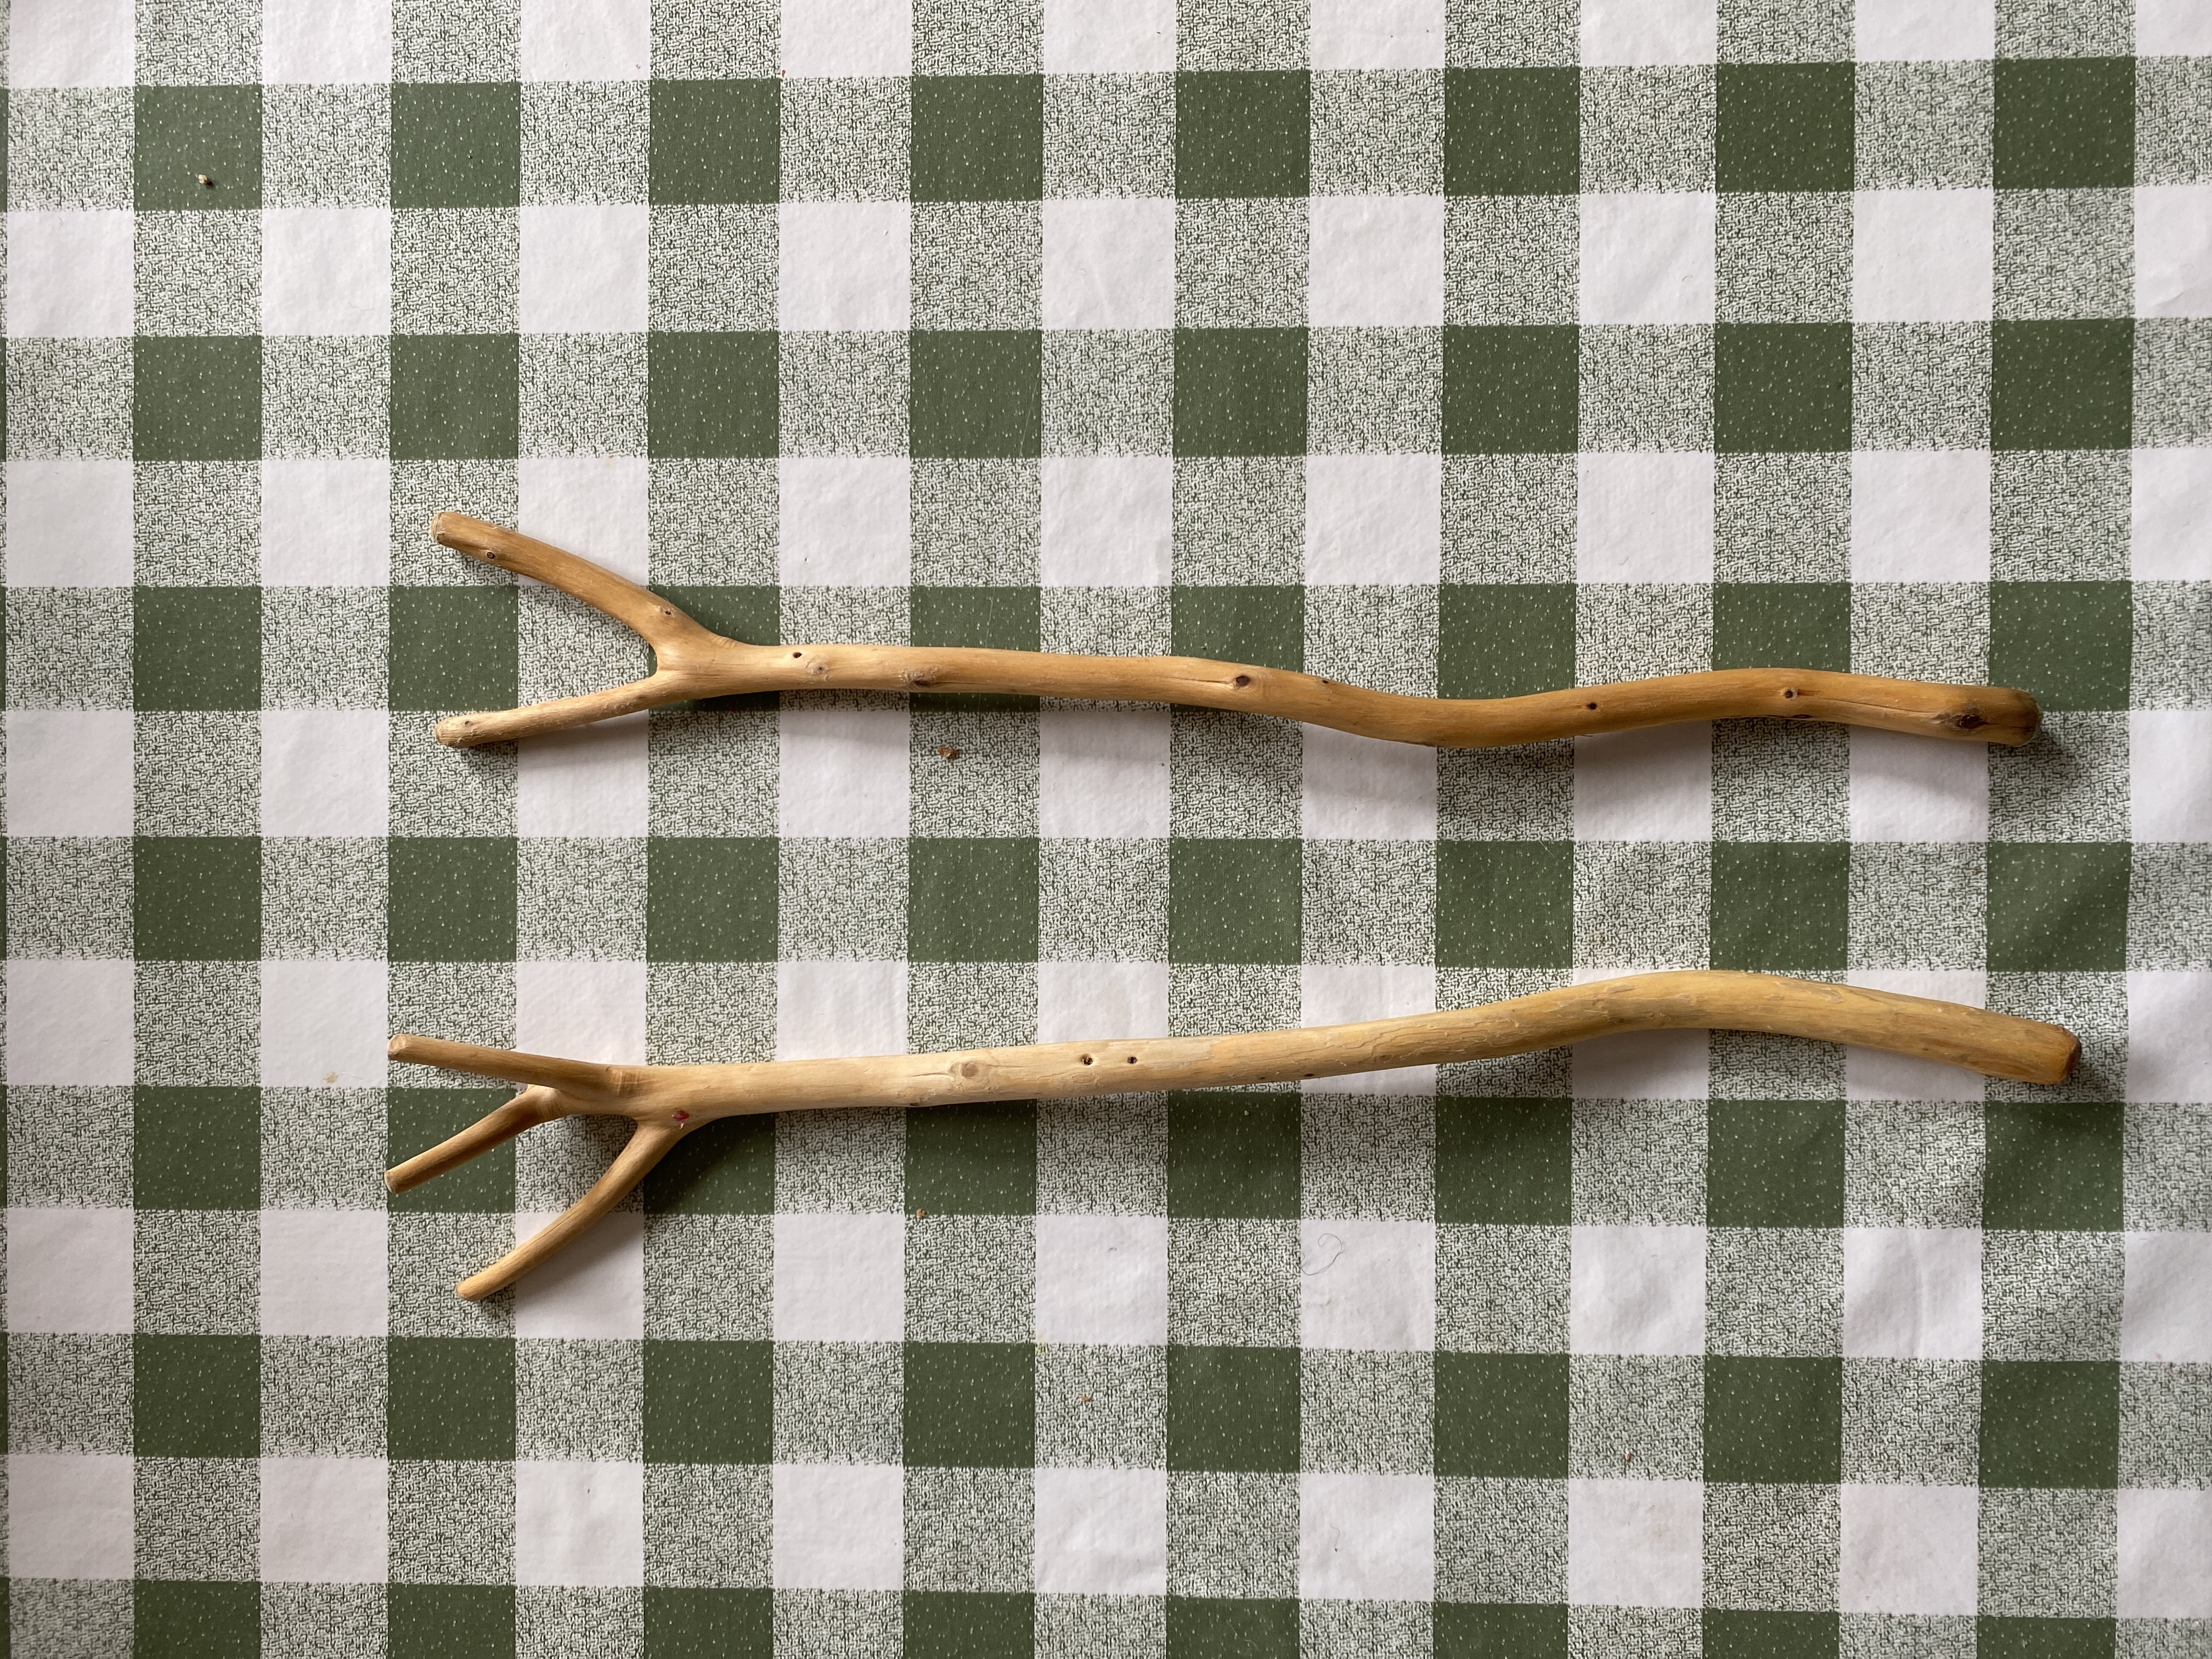
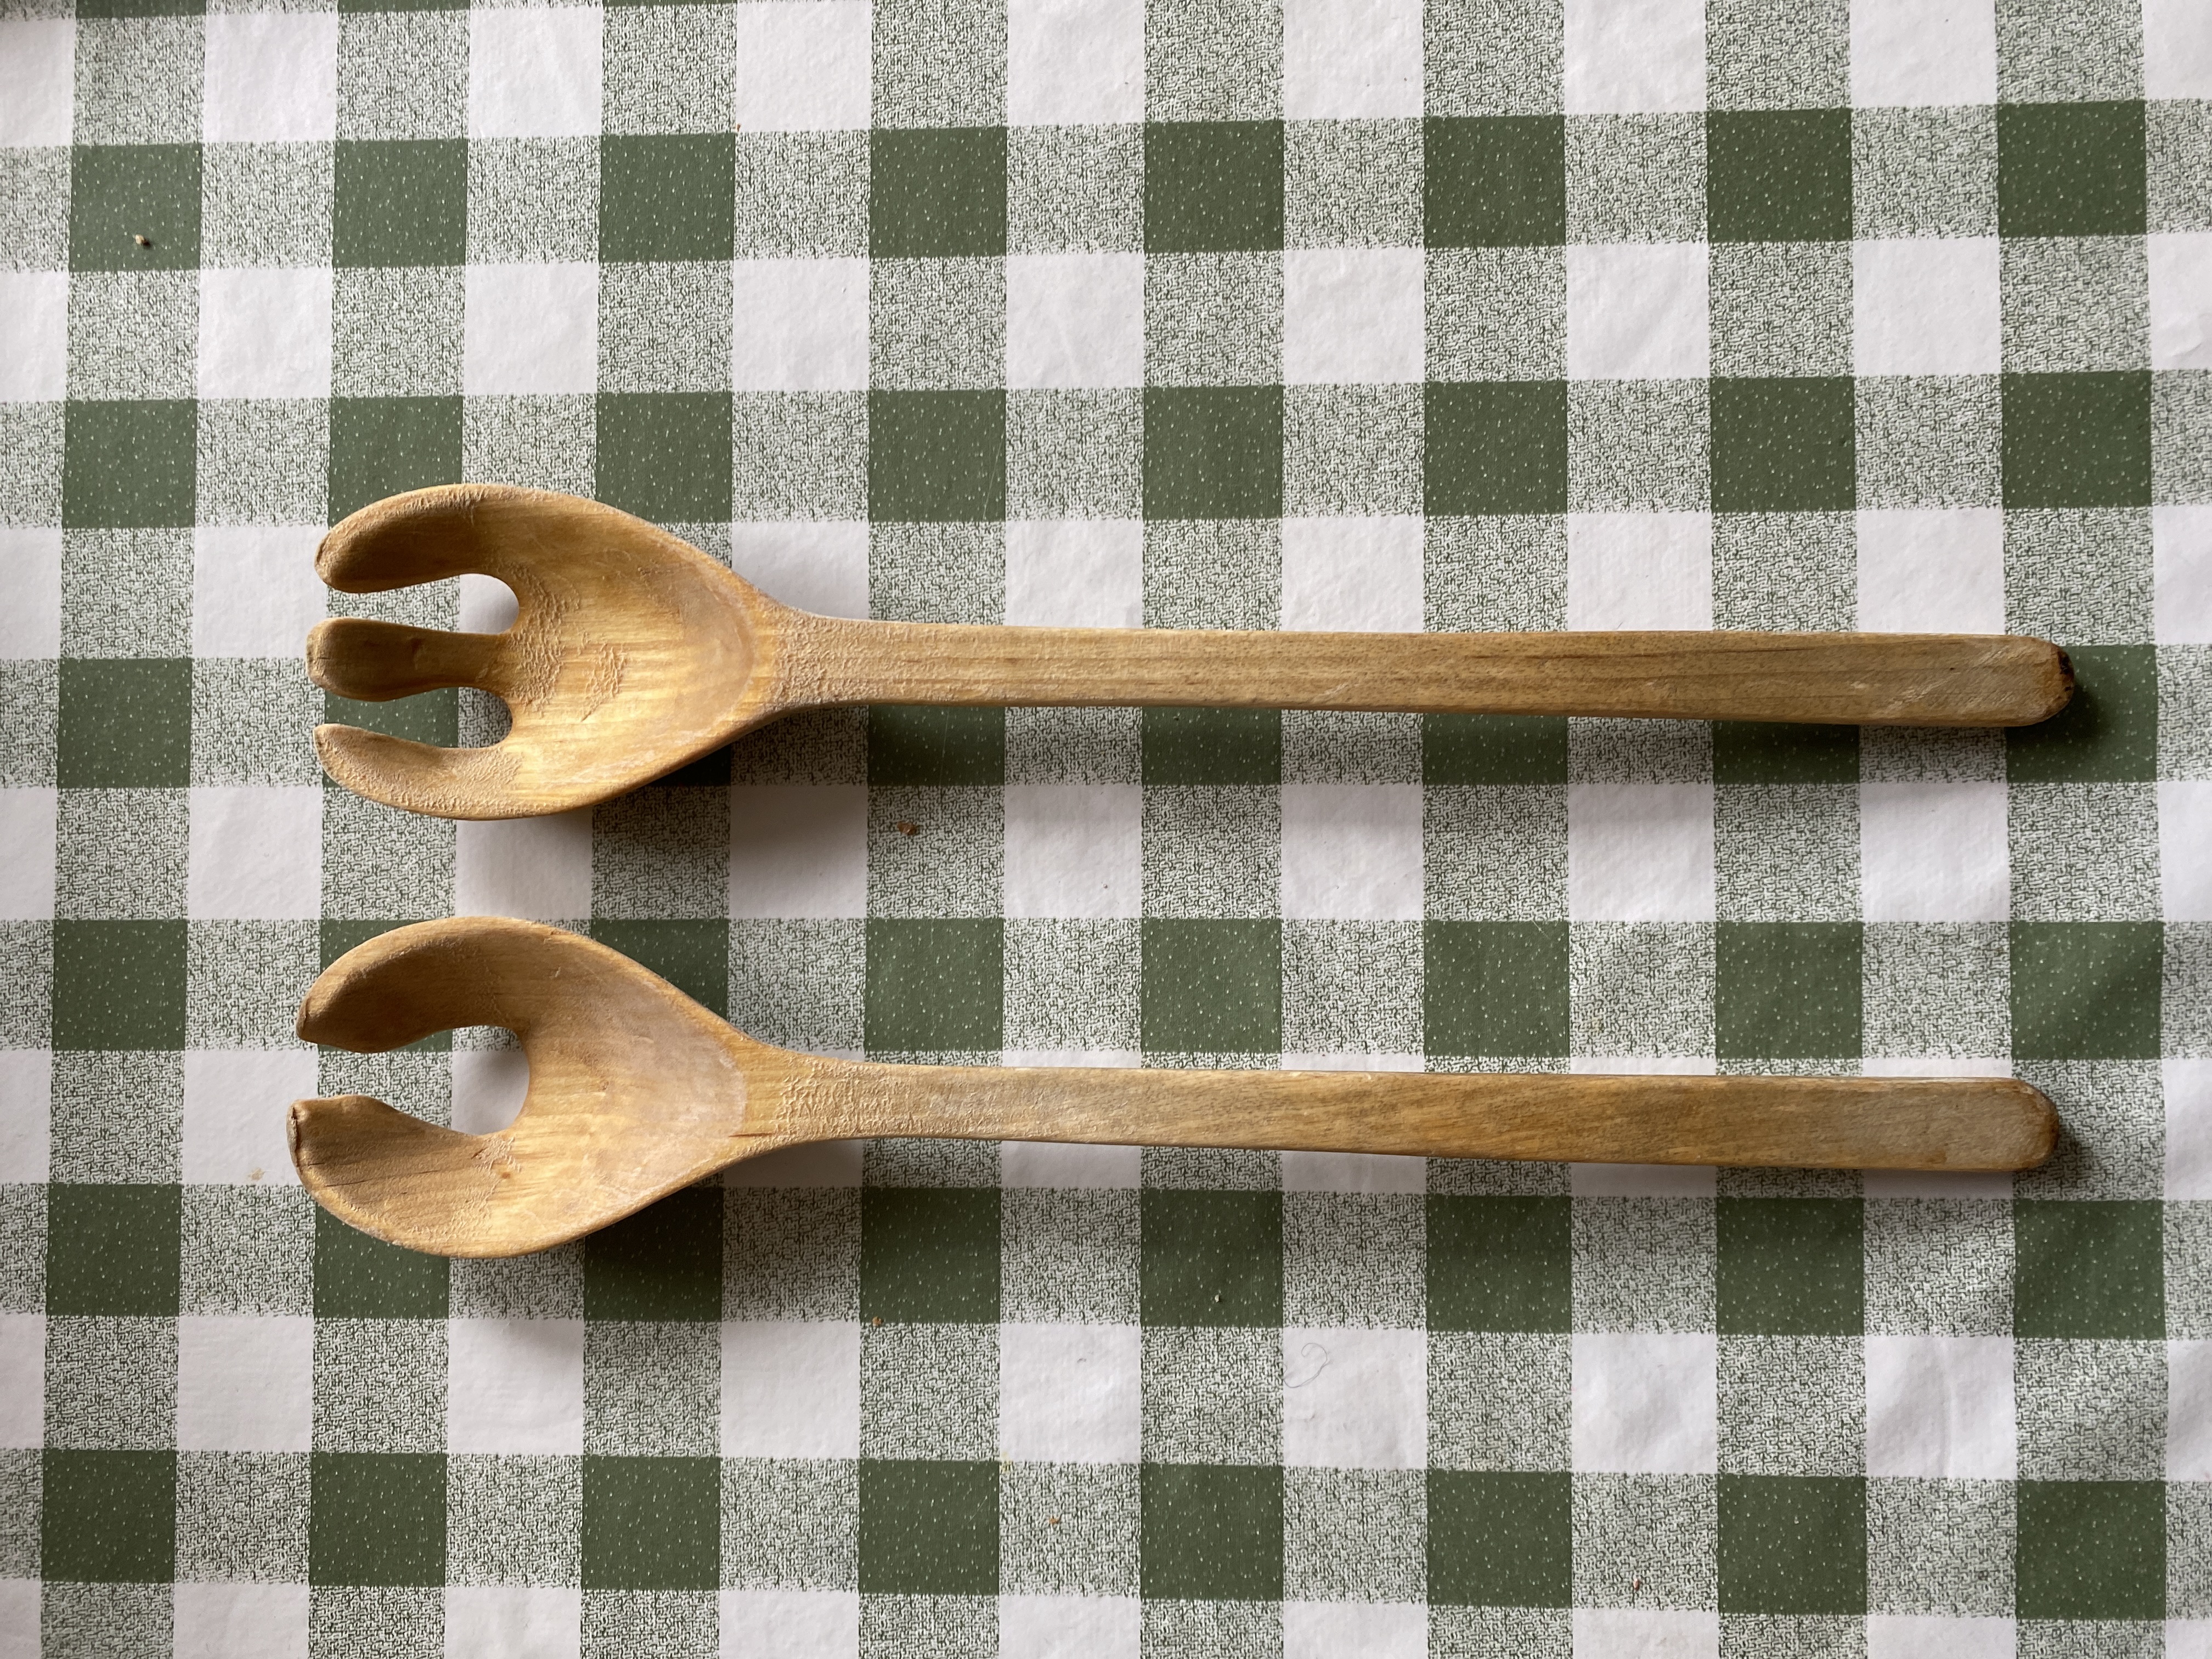
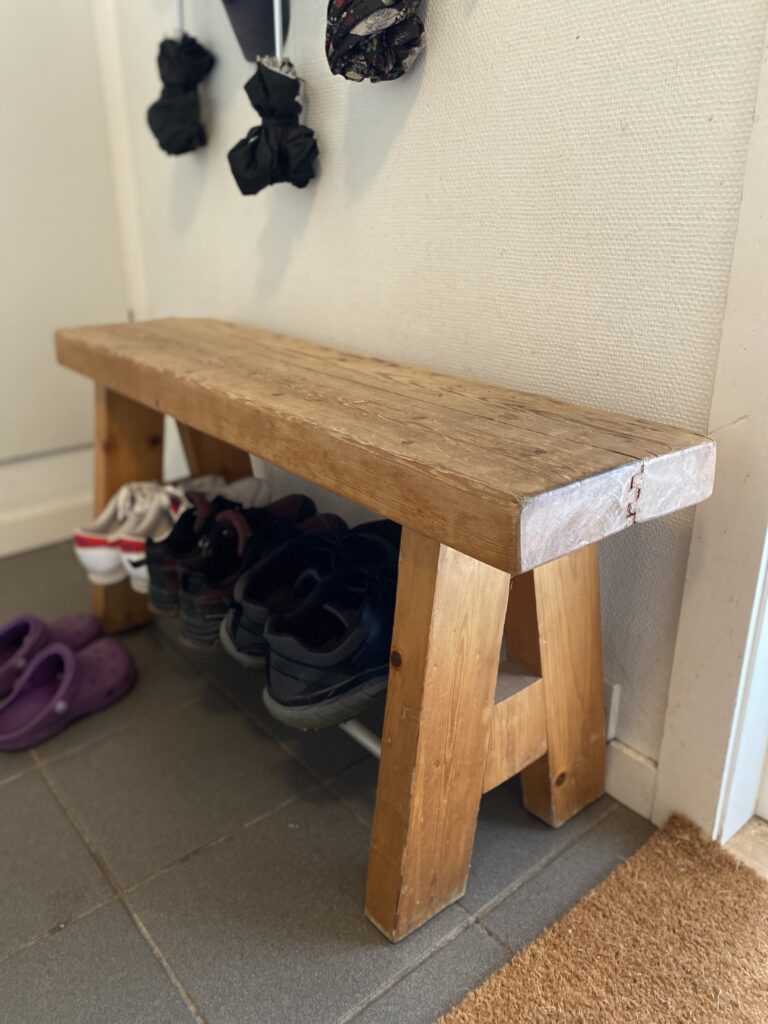
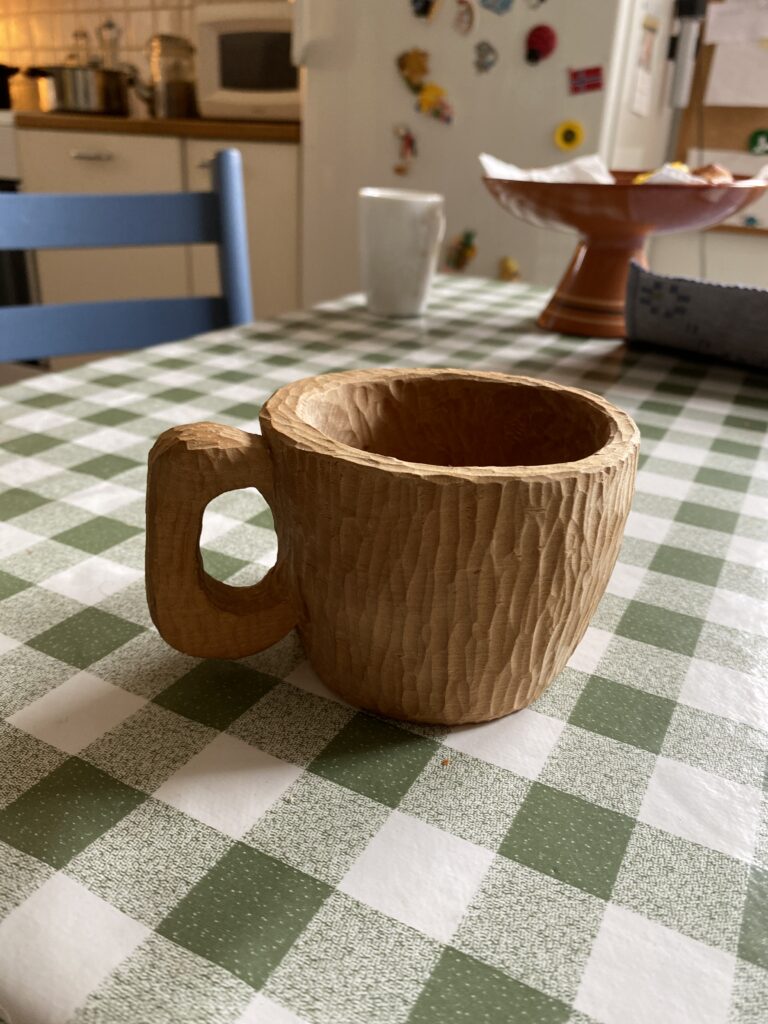
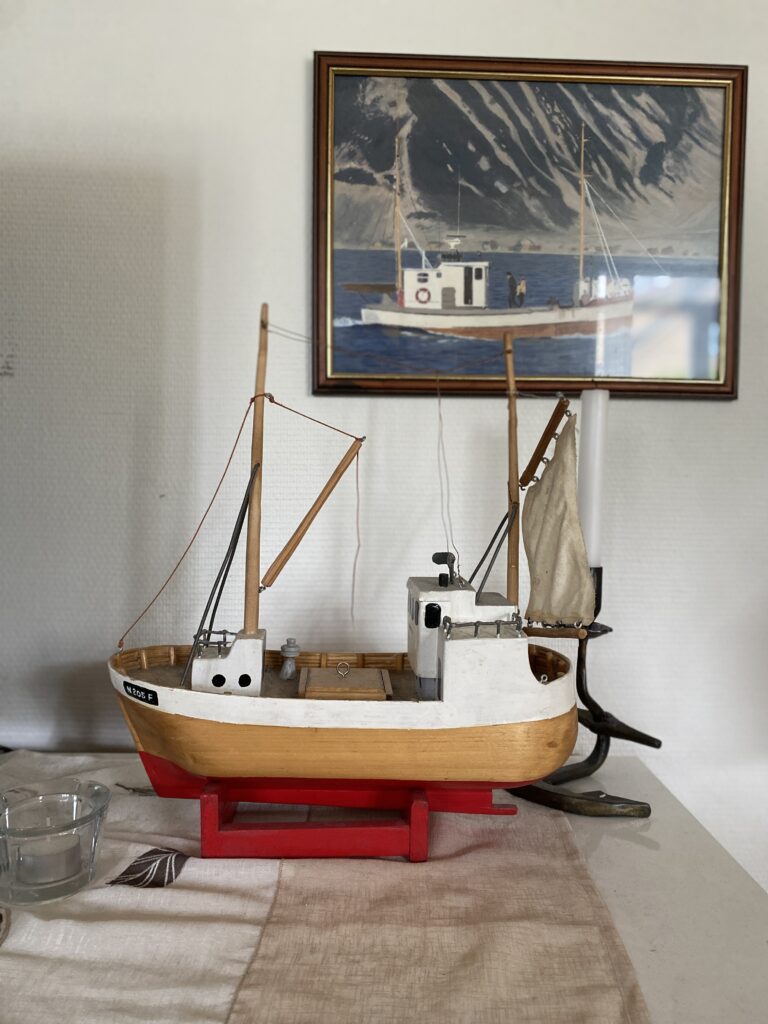
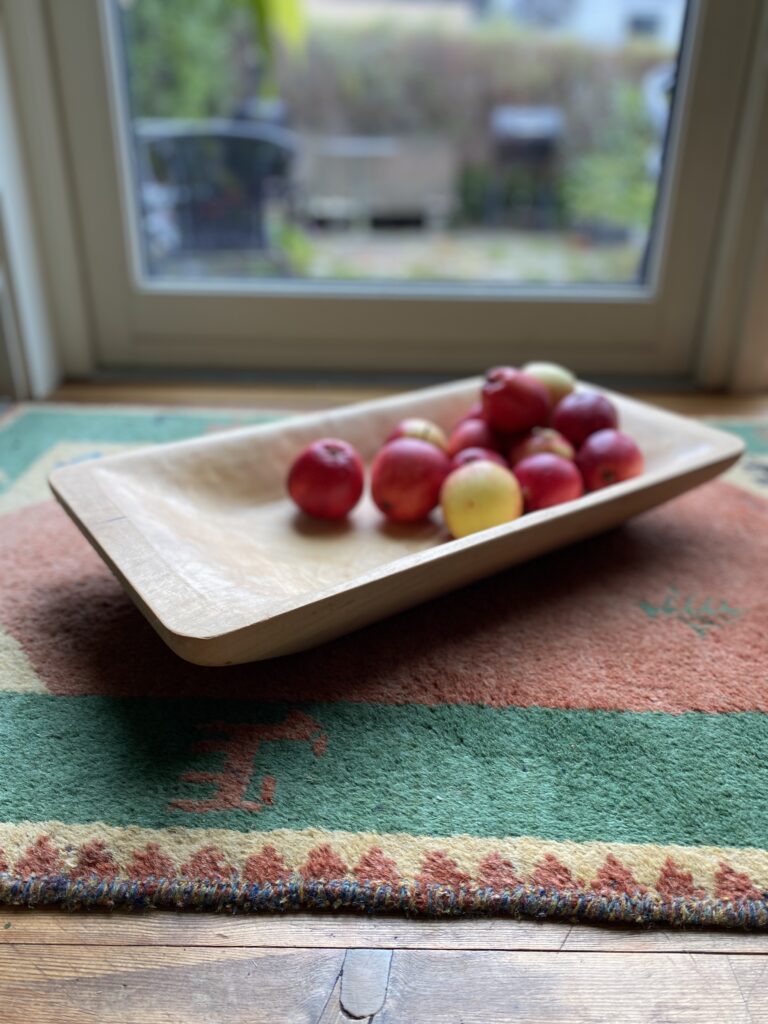
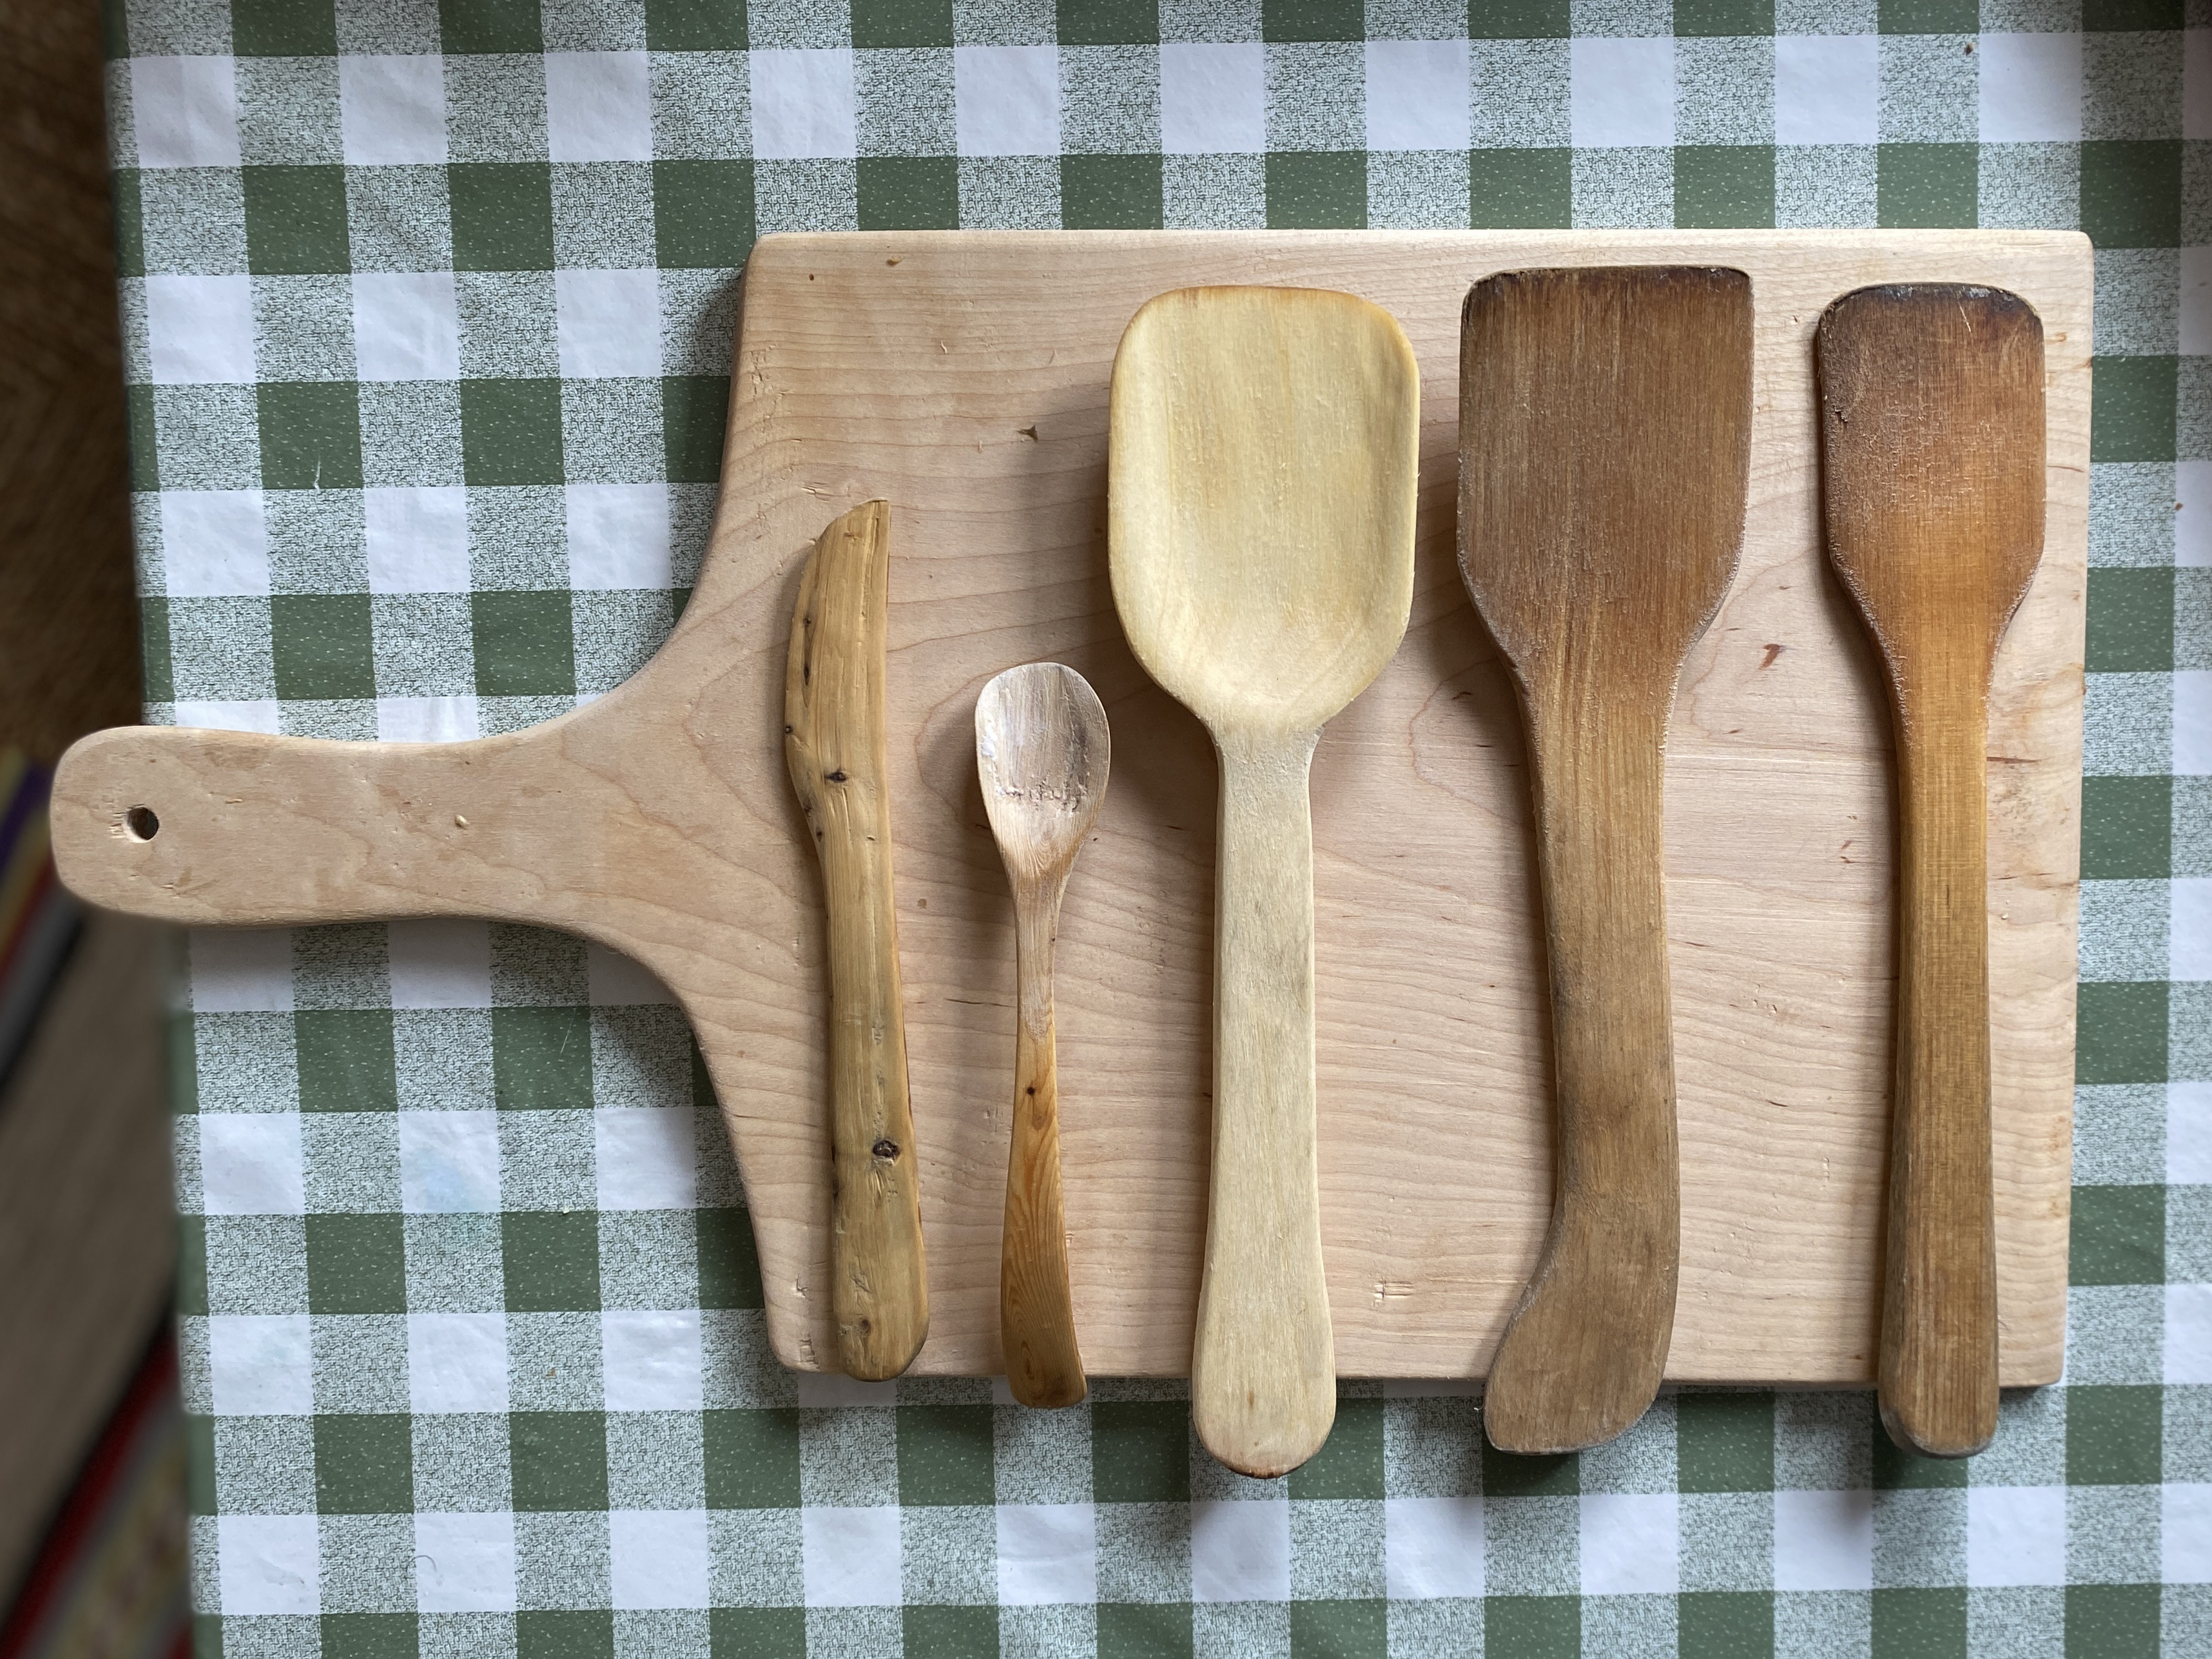
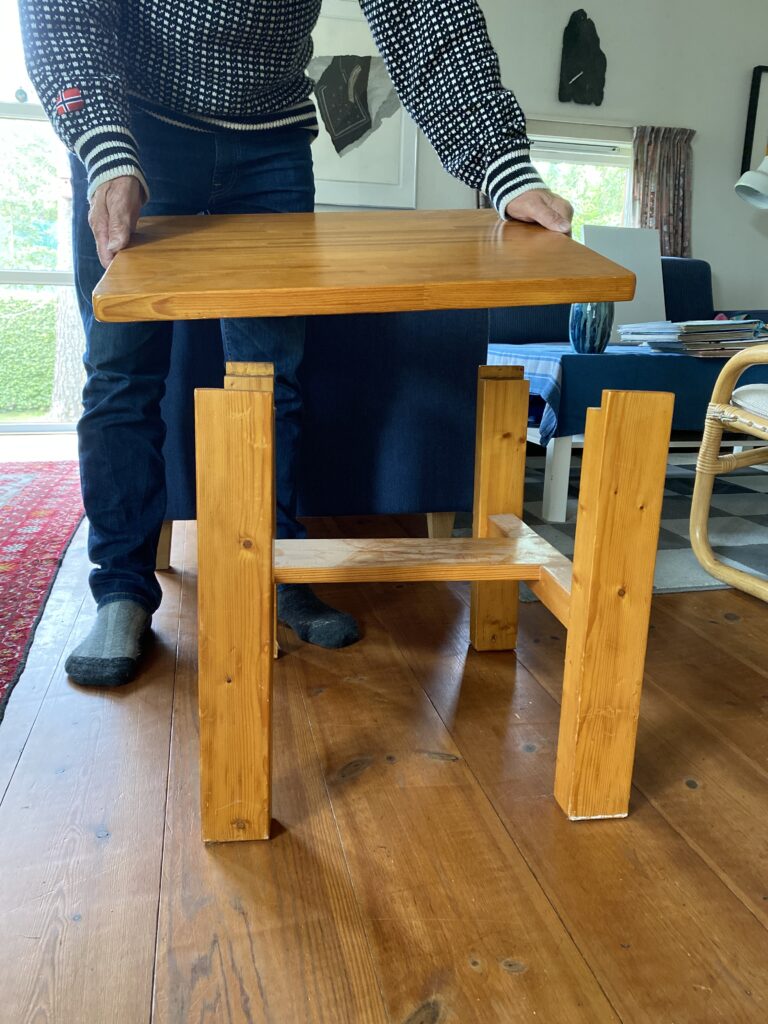
He’s been making things out of wood as long as I can remember. However, he never considered himself a woodworker. He makes things when he needs them, using tools and materials available. This usually means scrap construction lumber or some wonky log hauled out from the woods. His workbench is small and wobbly and tools are scarce and simple.
There’s no “statement” here.
No concept or a “minimalist woodworker project” behind it. On the contrary, his generation carries an unworded and inherited mentality toward making things instead of buying them. This mindset stems from previous generations – back to the days when woodworking wasn’t a pastime, but a necessary skill of survival.
I’m writing this because I’m afraid his generation might be the last one to naturally and effortlessly affiliate with this tradition. My generation barely knows how to sharpen a pencil. Let alone make or repair things out of wood.
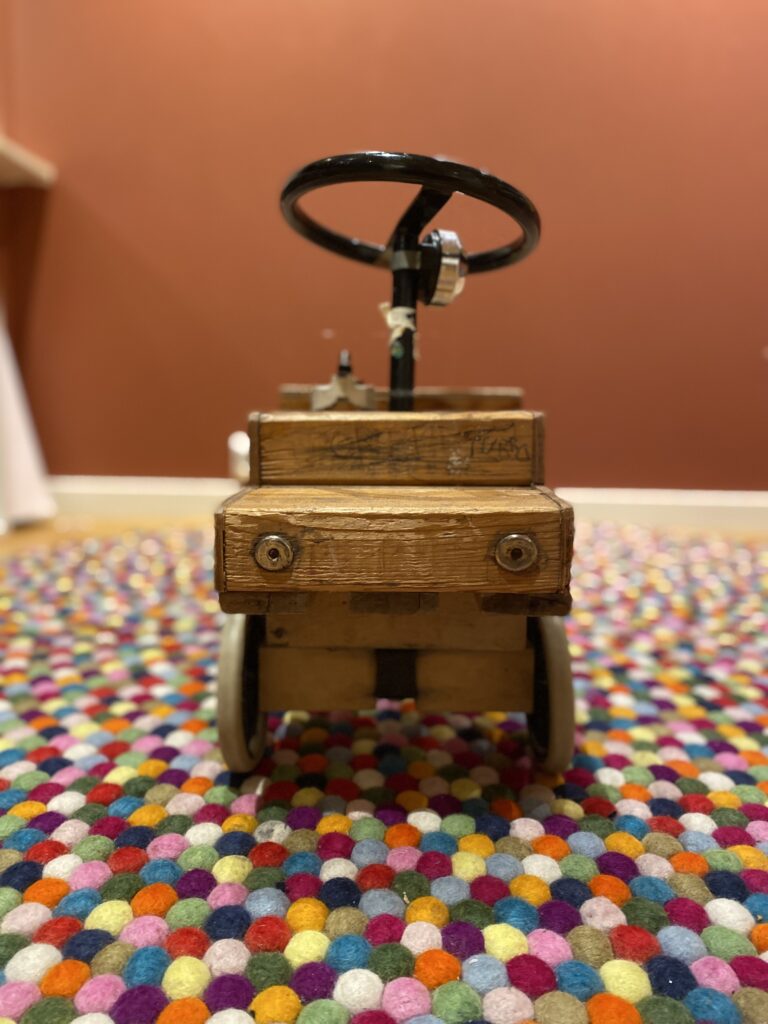
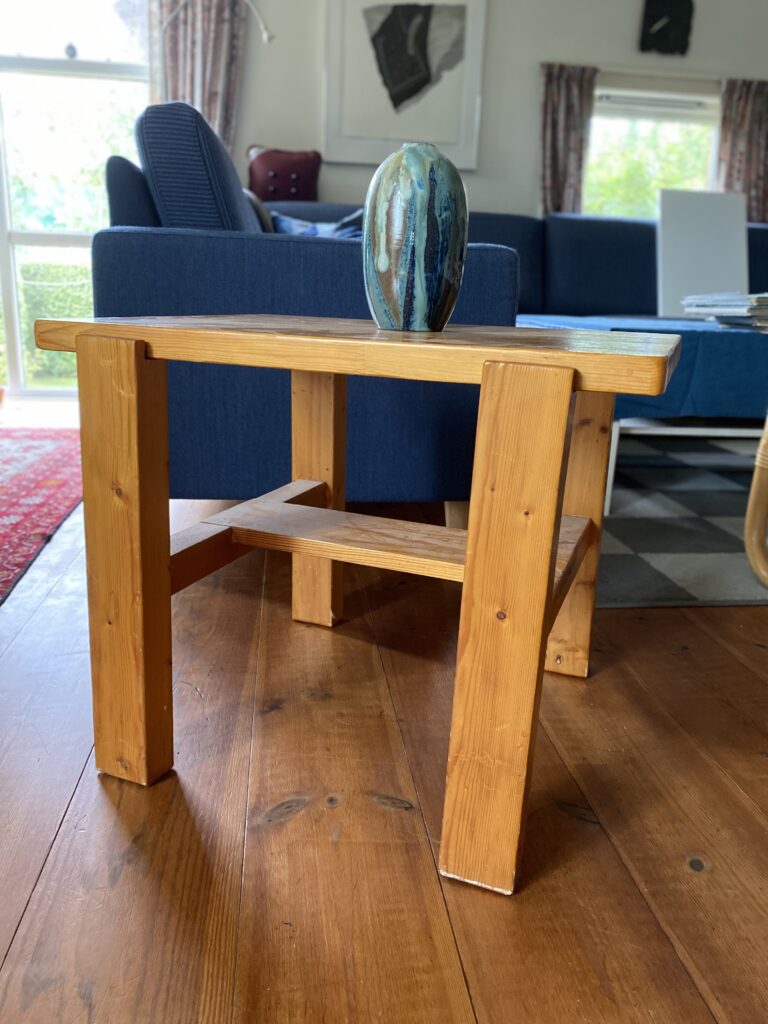
My dad never talked much about woodworking. It was something he just did. And just like a Zen Koan, he taught me everything without teaching me anything. And so I’m writing this as a tribute to the uncomplicated, anti-fancy, somewhat crude, but honest woodworking that has always been there. Long before the hashtags and the woodworking blogs. Here’s a selection of things he’s made. I think they’re great. They keep me grounded and humble and help me keep my own woodworking clean and simple.
The different Compositions of Dyes appropriate for dyeing Woods, and how to use them
The tinting [dyeing or staining] of woods is of great importance for cabinetmakers, because it is with its help that one can give to woods the different colors, which are necessary for representing all sorts of objects, such as fruits, flowers, animals, etc. However, cabinetmakers always make a great secret of the composition of their dyes in order to preserve exclusivity, and not to increase the number of workers in their trade. From that circumstance comes the fact that most of the compositions that the ancient cabinetmakers used have not been passed on to us, or are presently badly imitated. Those being used presently are defective, or even if they are good, cannot be perfected given that those who possess them hide the process. They keep this information secret not only from their colleagues but even from those for whom the theory could be useful in perfecting the composition of their dyes. This would be much more advantageous than the enjoyment of maintaining a secret, which is not a big thing, but which, even when it is perfectly well known to us, leaves us still to regret the loss of the method of Jean de Veronne, who tinted woods with boiling dyes and oils that penetrated them. This would be a very helpful thing to know, the research of which would be a worthy undertaking for some of our scholars. It is highly wished that one could find the means to use the chemicals having a good tint in the dyeing of woods, because their colors would be more durable. Sadly, the colored parts of most of these chemicals are too thick to penetrate the interior of woods, which is absolutely necessary, so that when working with tinted woods they are all found to be of uniform color throughout their entire thickness and the surface.
That is why in the description of the woods, without the means to which I would like to know the procedure to accomplish the perfect tint, I will explain only ordinary procedures to cabinetmakers, to which I will add some of my own experiences, which is still a long ways from attaining the perfection of which this part can be capable.
The five primitive colors are, as I said above, blue, yellow, red, taupe [brown] and black. Each of these colors is given by different chemicals, which, when mixed together, give the second or composite colors.
The blue appropriate for tinting woods is made with indigo, diluted in oil of vitriol [also known as sulfuric acid], and then put in a sufficient quantity of water.
Yellow is made with barberry, yellow earth and saffron mixed together, or even simply from gaude [this plant, Reseda luteola, is known as weld].
Red is made from the boiling of wool, or even a concoction of Brasilwood mixed with alum.
Taupe is made with walnut husk.
Black is made with the wood of the Indies, the gall nuts and iron sulfate.
Before entering into the detail of the composition of different stains, I am going to give a general idea of the chemicals of which they are composed, so that the cabinetmakers may be less subject to being fooled when they buy them.
Indigo is a type of ash of a deep blue, provided by the leaves of a plant that grows in the Americas and Indostan, and which they sell in little pieces. For it to be good, it must be medium-hard, so that it floats on water, so it is inflammable and of a beautiful blue or deep violet color. Its interior should be strewn with little silver-colored spangles, and appear reddish when rubbed with a fingernail. Indigo is preferred over all other chemicals for staining woods because it is a powder of extremely fine and granular pieces, which are easily introduced into the pores of the woods.
Oil of vitriol or sulfuric acid is the final spirit that one gets from vitriol. This acidic liquor should be very concentrated and be absolutely free of all aqueous parts to be of a beautiful blue color, as I will speak more of later.
Barberry is a little bush of which the fruits, and the bark of the roots are stained in yellow. That from Candie [island off the coast of Crete] has a very yellow wood, and passes for the best.
Woad [this cannot be woad that produces a blue dye] is a rather common plant in France. One boils it in water to extract a yellow liquid, which mixed with a bit of alum, tints very well. Dyers prefer that one, which is the most spare [meaning thinnest] and of a rosy color.
One also dyes in yellow with the yellow wood of which I spoke above page 777. Yellow earth is nothing other than yellow ochre, used by painters.
Saffron is a plant that grows in France, especially in Gatinois [western part of France]. It is the pistil of the saffron flower, which gives these little reddish filaments, or better said, orange, which they sell under the name of saffron, which gives a dye of a golden yellow. For saffron to be good, it should be fresh, of a pungent odor, of a brilliant color and when touched it should seem oily and should stick to the hands.
Alum is a fossil salt and mineral, which is used much in dyeing, whether to set up the materials to be stained or whether for fixing the colors [as a mordant], which it retains all the particles by its astrin-gent quality. The best is that of Rome, which is white in color, and is transparent, a bit like crystal.
Liquor decanted from boiled wool is sold by the wool merchants. In boiling this wool, one gets a decoction of the color rose, which is more or less deep, according to how much water is used to scour the wool, proportional with its quantity.
I spoke up above of Brasilwood, page 771. I will content myself to say here that the decoction of this wood gives off a clear red color, tending toward the orange, and that one deepens its color by adding a bit of alum. Brasilwood from Fernambouc is the best, and they sell it all chopped up at the spice merchants, who sell it by the pound.
The husk of walnuts is nothing more than the first wrapping of these nuts, which one takes off before they are perfectly mature, and which one boils in water to extract a brownish or taupey tint.
Indian Wood, of which I spoke on page 777, gives off a concoction of a deep red, which one stains in black, and when one mixes with alum it stains in violet.
Nut gall is a type of excretion that is found on the tender shoots of a type of oak named “Rouvre.” The most highly esteemed nut gall comes from the Levant [the name given to the countries on the eastern coast of the Mediterranean]. The best ones are those that are the heaviest, and where the surface is thorny. There are both green and black ones, both of which work equally to stain in black.
Ferrous sulfate is a type of vitriol that is found in copper mines. It is the most powerful of the acids, it corrodes iron and copper, and it etches the soft parts with an infinite number of small holes, into which the dye is introduced. Ferrous sulfate is also named Roman vitriol or English vitriol, according to whether it comes from one or the other countries. We make some in France that is, they say, as good as the others. The color of ferrous sulfate [known also as green vitriol] is of a light green: it should be neat and shiny.
Verdigris also works well as a wood dye. It is the green rust scraped from copper sheets. For it to be good, it should be dry, pure, of a deep green and filled with white spots.
There you have a bit of a description of the ingredients commonly used for staining/dyeing woods. All that remains is to give the manner of making use of them.
The Way of Staining Wood Blue
The preparation of blue with indigo and oil of vitriol [sulfuric acid] is done in two ways, namely, hot and cold. Blue for wood is prepared cold in the following manner:
you take 4 ounces of oil of vitriol of the best quality, that is to say, that it is deprived of all aqueous parts, which you pour into a pint-size bottle, with 1 ounce of indigo reduced to a very fine powder. Then you fill the bottle with water, at least nearly so, and you bottle it very carefully, and you seal the cork with wax. you let it infuse for five to six weeks, at the end of which you can use this stain that will be more or less strong, by putting in as much water as you judge appropriate, always ob-serving to add a bit of oil of vitriol, so the dye will be fixed better. When the dye is to the degree of strength that you need, you put it in a stoneware or glazed earthenware vessel, and you soak the wood in it until it is totally penetrated, which sometimes requires 15 days and even one month of time, according to the hardness and thickness of the wood. The wood can hardly have a thickness of more than one line [1/12″].
Cabinetmakers ordinarily use a stoneware butter pot for putting the wood into the dye, which is very convenient because the shape of this vase enables one to put in rather large pieces, without the need of having a very great quantity of dye.
It is very easy to know when the interior of the wood is penetrated, given that you only have to cut a small piece of the wood about 2 to 3 lines from its end. When the pieces that you want to dye cannot be cut like this, you put with them another piece of the same quality, with which you test the degree of penetration of the other pieces.
The Way of Dyeing in Yellow
Cabinetmakers tint in yellow with barberry, with yellow earth and with saffron, which they boil together. This being done, they soak the wood pieces until they are totally stained. The proportion of these chemicals is 2 liters [in this case the French word refers to “litron,” which is about 79 percent of a modern liter, so 2 modern liters is a much larger quantity] of barberry, 6 “sols” [a French penny] of yellow earth, and 4 “sols” of saffron.
A concoction of woad gives a very beautiful yellow of a good tint, and you soak the wood as normal. When this concoction is added to a bit of verdigris, you have a sulfurous yellow color. Saffron infused in grain alcohol gives a very beautiful golden yellow.
The Way to Dye in Red
Red is normally made with brasilwood, which one boils with 6 sols of alum for each pound of wood. This red is a false tint because it is more orange than red. you can substitute the boiling-liqueur from wool, which gives a very beautiful red, leaning toward rose, which one makes deeper by passing the pieces that you have stained into the liqueur of the mixture of Brasilwood mixed with alum. This makes a very beautiful red, more or less deep, depending on whether you leave the pieces of wood more or less a long time in the dye bath of Brasilwood.
Dyeing with decanting liqueur is done very easily. One only needs to boil some wool dyed to this effect, just until it makes a beautiful red concoction. Avoid boiling too much, because the wool will take back the color that it discharged at first.
The proportion of the liquor of wool to be decanted is 1 pound to 4 pints of water for the first decanting, to which one can add a second, even a third, until the wool renders no more color. The concoction of Brasilwood without alum gives a yellowish red, which is sometimes attractive, and is named “Capucine.”
The concoction of Indian Wood is very red, but it makes a blackish stain, which makes a very beautiful violet when mixed with alum from Rome, as I will speak of it later.
How to Dye Taupe [Brown], Black and Grey
Taupe dye is made with a concoction of walnut husk, which can be more or less strong, as you judge appropriate, always adding to it a bit of alum.
An attractive black is made by staining the wood first in a concoction of wood of India (or Campeachy, which is the same thing). When this first application is dry, you dip the wood in a concoction of gall nut in which you have put some ferrous sulfate, or vitriol of Rome. Sometimes one only makes a single dye of these various ingredients, of which the proportion should be 1 part nut gall, 1 part vitriol and 6 parts of Campeachy, all boiled together, into which you dip the wood until it is penetrated.
A grey tint is made with a concoction of nut gall, into which you dissolve some green vitriol [ferrous sulfate] in smaller quantity than for the black stain. The more ferrous sulfate-cuprous there is, the deeper grey it will be. The normal proportion is one part of ferrous sulfate for two parts of nut gall.
The Way to Tint Composite Colors
The ordinary green stain of cabinetmakers is made with the same ingredients as for the blue, to which is added the barberry in more or less quantity, according to whether the green should be more or less deep.
One can make a very beautiful apple green in staining first the wood in ordinary blue, and then dipping it in a concoction of woad, and that with more or less time according to whether one wants to have a green more or less strong.
Violet is made with a concoction of Campeachy, to which one has mixed some alum from Rome. One can have violet more or less deep by staining first the woods in rose and then in the blue, which will give a clear violet.
If, on the contrary, one wishes to have a brown-red leaning toward violet, one stains the wood first in the concoction of Brasilwood, then in that of the Campeachy.
One can obtain composite dye of all nuances imaginable by tinting the wood in a primary color then in another one more or less dark, so that the stain that results from these two colors reflects more or less of each other. This is very possible to do because one is the master to strengthen or weaken the primary colors as one judges appropriate, whether by reason of what the form of the object re-quires, or even by reason of the different quality of wood, which takes the dye more or less well, or strengthens or weakens the color. This has to be highly considered, and it requires much attention and experience on the part of cabinetmakers.
In general, all the dyes of which I just spoke are applied in cold baths. It is not that many of them cannot be used hot, but it is that because it takes a considerable amount of time for the same dye to penetrate into the interior of wood, it is not possible to use them hot. What’s more, cold dyed wood has much more vibrancy than when used with a hot bath.
There it is, a bit of the details of staining [dyeing] wood, at least those that most cabinetmakers use, or which I myself have employed in the attempts that I have made. These have succeeded rather well, but they have not been followed by a long enough time to be assured of the success of my at-tempts. It would be highly wished that those who are currently making use of these dyes, or who will be using them later, apply themselves to perfect them which, I believe, is not absolutely impossible. Having done this, they would be rather good citizens to not make a mystery of their discoveries, but only succeed by rendering them public.
Cabinetmakers dye not only their woods for veneer to use them in the place of the natural color of the woods. They also use these same dyes to accentuate various parts of their works while they are being worked. As such, these dyes, like the red of Brasilwood, the violet of the Campeachy, the black, etc., are used hot, which is very easy to do because it is sufficient for only the exterior of the woods being dyed. Other than these dyes, woodworkers in furniture sometimes use a type of yellow color for bedsteads, which is composed of yellow ochre and common varnish, or of this same ochre and the very clear English glue, sometimes they even put it in only water, which is of little use.
Before finishing the dyeing of wood, I believe I ought to give a least-costly method of dyeing white wood red, which is done in the following manner:
you take some horse dung, which you put in a bucket of which the bottom is pierced with many holes, and you place it above another bucket, into which falls the water from the dung, as it gradually rots. When it does not rot fast enough, you water it from time to time with some horse urine, which helps a lot and at the same time gives a red water, which not only stains the surface of the wood, but penetrates the interior 3 to 4 lines deep. In staining the wood with this dye, one must take care that all the pieces be of the same species, and about equal in density if one wishes that they be of equal color throughout. This observation is general for all water-based stains, which have no palpable thickness nor even appearance [they leave no residue or any evident change in appearance], which requires the cabinetmaker to make a choice of wood of equal color and a density as I mentioned before. This demands a lot of experience and attention on the part of the cabinetmakers. And with the exception of the way to compose and use dyes, it is hardly possible to give theoretical rules on this part, for which success is not often due to anything but experience, which is not acquired except with a lot of time, attention and work.
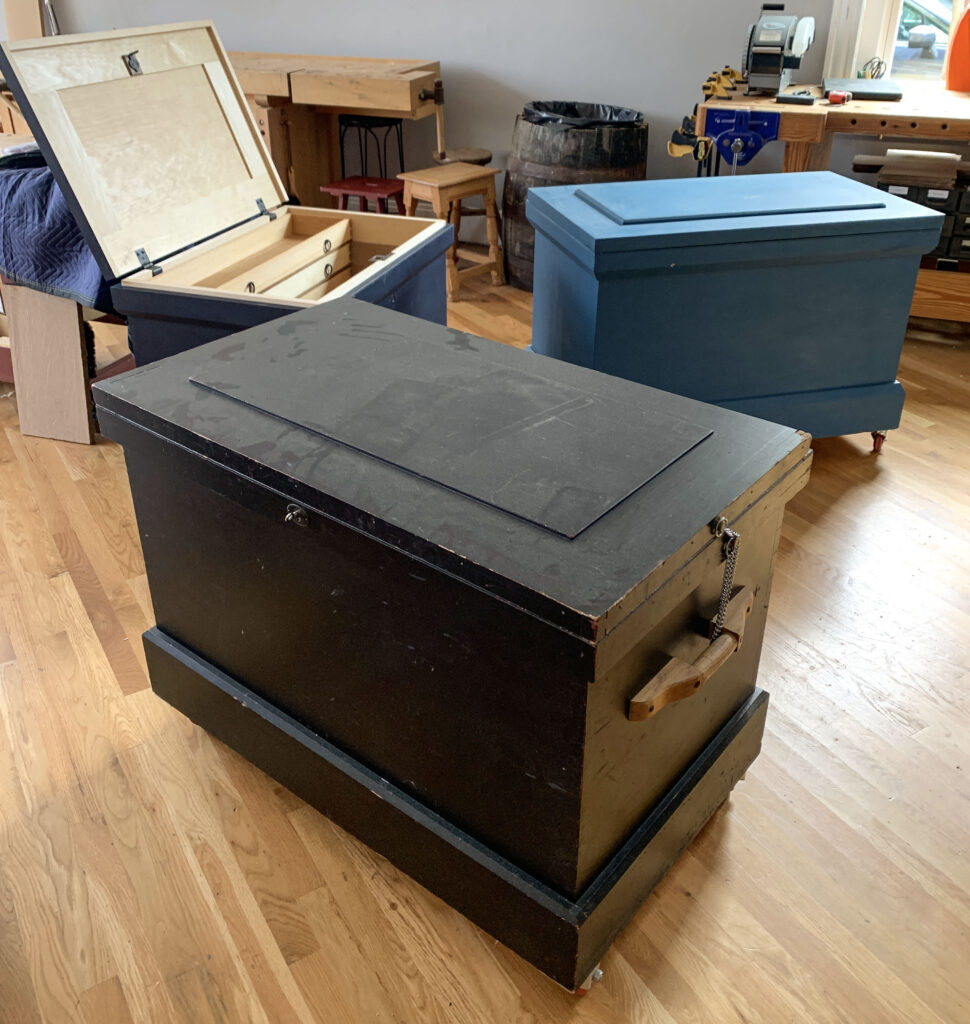
The OG Anarchist’s Tool Chest in front of a few of its spawn.
It sounds like hyperbole, but “The Anarchist’s Tool Chest” (ATC) has changed my life twice – not as much as it changed Christopher Schwarz’s and John Hoffman’s – but it has been integral to my discovering what I love to do, and allowing me to (bonus!) make a living from it.
I vividly recall copy editing ATC before it was first released. I was managing editor of Popular Woodworking Magazine at the time, and it was during a Lie-Nielsen Hand Tool Event at our office and shop, April 16-17, 2011, two days before the book had to go to the printer. I did a shit job of copy editing. There were tons of people around and it was loud – plus I was either interrupted every 10 minutes or so, or I got up to check out a handplane, saw, marking knife, marking gauge …. If you have that wheat-colored first edition, please accept my apologies for the many missed items (thankfully, Chris has long forgiven me). On the other hand, congrats: You have a collector’s item; the book is now in its 13th printing, and celebrated its 10th anniversary this summer.
It’s the book that allowed Chris – less than two months later – to announce he was leaving his job as editor of Popular Woodworking Magazine (PWM); Lost Art Press would become his full-time job (along with teaching as many as three classes every month, writing for PWM as a contributing editor, building furniture on commission…it exhausts me to look at his summer 2011 schedule).
So the first way ATC changed my life was that I was no longer working every day with a guy I greatly admired, and who had taught me most of what I knew about hand-tool woodworking. I lost my lunch buddy – a guy who made me love woodworking enough to rethink my long-term goal to teach college-level Shakespeare. It wasn’t as much fun without him. And it turned into a lot less fun when I got his former job in December of 2012, and no longer had much time for woodworking thanks to employee reviews, EBITDA discussions, management meetings, etc. It was certainly rewarding and I’m honored to have had that job for five years. But fun? Not so much.
When I got let go in December 2017, undergirding my fear was massive relief. I was too fearful to ever quit a corporate job with a steady paycheck and health insurance, no matter how many headaches I had by the end. My first call was to Chris, who took me to lunch and gave me a hangover. The day after, I started moving my stuff into his shop, and scheduled some woodworking classes – among them, “Build The Anarchist’s Tool Chest” (I’m awfully glad Chris was tired of teaching it!). Chris’s success with that book (and others) afforded me a soft place to land, and saved me from ever again attending a corporate meeting that doesn’t occur with either a drink or fried chicken (or both) in hand. Thank you, Chris.
But even if it doesn’t get you a plate full of fried chicken, ATC is the book you should have if you’re interested in hand-tool woodworking, why we make things, or need a tool chest (or all three).
– Fitz
“‘The Anarchist’s Tool Chest’ is divided into three sections:
“1. A deep discussion of the 48 core tools that will help readers select a tool that is well-made – regardless of brand name or if it’s vintage or new. This book doesn’t deal with brands of tools. Instead it teaches you to evaluate a well-made tool, no matter when or where it was manufactured. There also is a list of the 24 “good-to-have” tools you can add to your kit once you have your core working set.
“2. A thorough discussion of tool chests, plus plans and step-by-step instructions for building one. The book shows you how to design a chest around your tools and how to perform all the common operations for building it. Plus, there are complete construction drawings for the chest I built for myself.
“3. There also is a brief dip into the philosophy of craft, and I gently make the case that all woodworkers are “aesthetic anarchists.” — Christopher Schwarz
Below is an excerpt from Chapter 1.
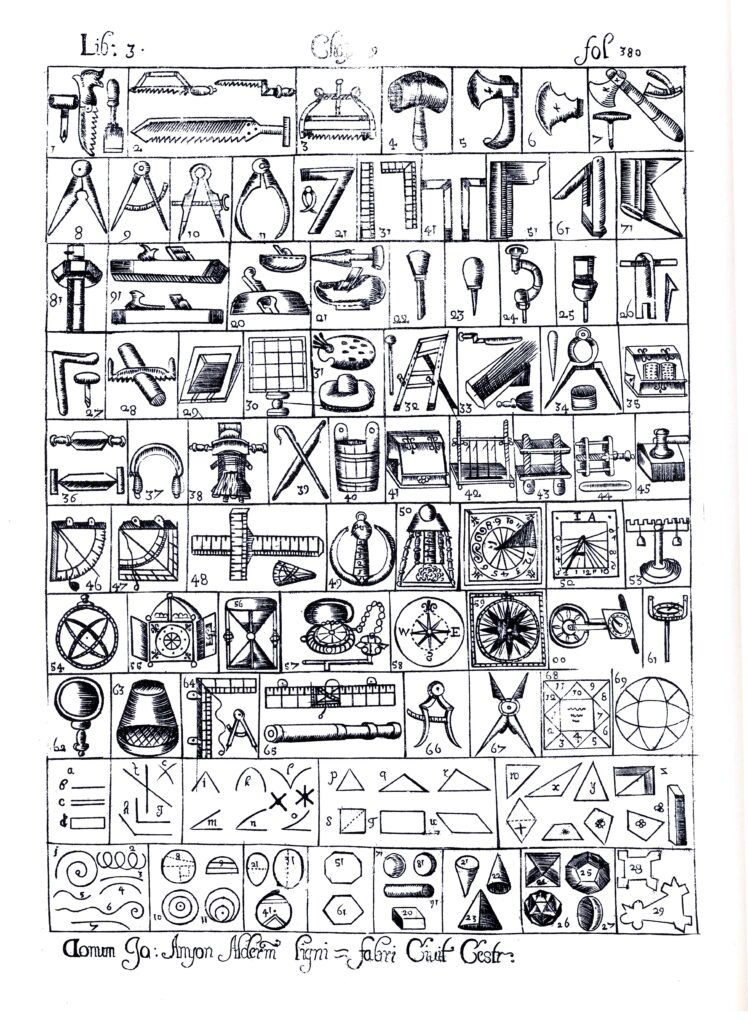
Academy of Sanity. Randle Holme’s 1688 book outlined a small tool kit that could be used for building lots of furniture forms.
The Good Books
The funny thing is that it was my mad obsession with acquiring woodworking stuff that helped me find a balanced approach to the craft. You see, I became as obsessed with acquiring woodworking books as I was with the tools. I’ve always been a voracious reader, so consuming books on woodworking and tools was natural. (And add to that the fact that I was freelancing at the time as a contributing editor for the WoodWorkers’ Book Club newsletter. That job was a five-year-long force-fed diet of woodworking writing.)
Read enough modern woodworking books, and you might just want to gouge out your eyes with a melon baller. They are all so similar and shallow and filled with idiosyncratic information. I can’t tell you how many times I read the following phrase: “This might not be the right way to do this, but it works for me.”
Something inside my head made me wonder about that “right way” the author rejected. It just so happened that at about that same time I had a short phone conversation with Graham Blackburn, one of my woodworking heroes. I had a few of Blackburn’s books from the 1970s, and I knew he had a command of woodworking history. So I interviewed him about the origin of the word “jack” in “jack plane” for a short piece I was writing for the magazine.
We then started talking about saws.
During the conversation, Blackburn said I could find the answer to one of my questions in the book “Grimshaw on Saws.”
Huh? I replied.
I’ll never forget what he said next: “You don’t have a copy of Grimshaw, and you’re an editor at a woodworking magazine? Hmmm.”
I was ashamed. So ashamed that I went down to Cincinnati’s public library that weekend to check out Robert Grimshaw’s 1882 treatise on saws. It was sitting on the shelf next to a bunch of other old woodworking books I’d never heard of. I wondered which of those books were also “required reading” in Blackburn’s world. I checked out as many of those cloth-bound books as the library would let me. I went home. I started reading, and I haven’t stopped.
The things I learned from the old books were different than what I expected to learn. I actually expected the shop practices to be different – you know, they had different ways of cutting a mortise, a tenon and a dovetail. But really, not much has changed in the way that steel (usually) defeats wood.
While there are a wide variety of ways to perform every standard operation, the pre-Industrial craftsman didn’t seem to have secret tricks as much as he had lots of opportunities to practice and become swift. Instead, what surprised me was the small set of tools that were prescribed for a person who wanted to become a joiner or a cabinetmaker.
Joseph Moxon, the earliest English chronicler of woodworking, describes 44 kinds of tools necessary for joinery in “Mechanick Exercises” (1678). For some of these tools, you’d need several in different sizes (such as chisels), but for many of the tools that he described, a joiner would need only one (a workbench, axe, fore plane etc.).
Randle Holme’s “Academie of Armory” (Book III, 1688) has approximately 46 different joinery tools explained in his encyclopedia. An exact number is hard to pin down because some of the tools are discussed twice (for example, mallets, smoothing planes and hatchets) and some tools seem shared with the carpentry trade.
If we jump forward more than 150 years, not too much has changed. The list of tools required by the rural joiner in “The Joiner and Cabinet Maker” (1839) isn’t all that much different from the tool list described by Moxon and Holme. “The Joiner and Cabinet Maker” gives a significant description to about 40 tools used by a young apprentice during his climb to journeyman.
As the Industrial Revolution begins to crank out mass-manufactured tools, the basic list of tools recommended for basic joinery starts to expand. There are more kinds of boring bits available, new kinds of metallic planes (such as blocks, shoulders and routers), plus some new saws, including the coping saw.
By the 20th century, the basic list of tools for joiners stands at about 63, according to books by Charles Hayward, the traditionally trained dean of workshop writers. Still, when I looked at Hayward’s list it seemed rather paltry compared to what was in my shop. (See this book’s appendix for a comparison of these tool lists.)
At first, I attributed these short lists of essential tools to three things: • Everything in the pre-Industrial age would have been more expensive because it was made by hand. • The general level of economic prosperity was lower. • Technological innovation had yet to produce the fantastic new tools shown in the modern catalogs.
But all that was just denial kicking in.
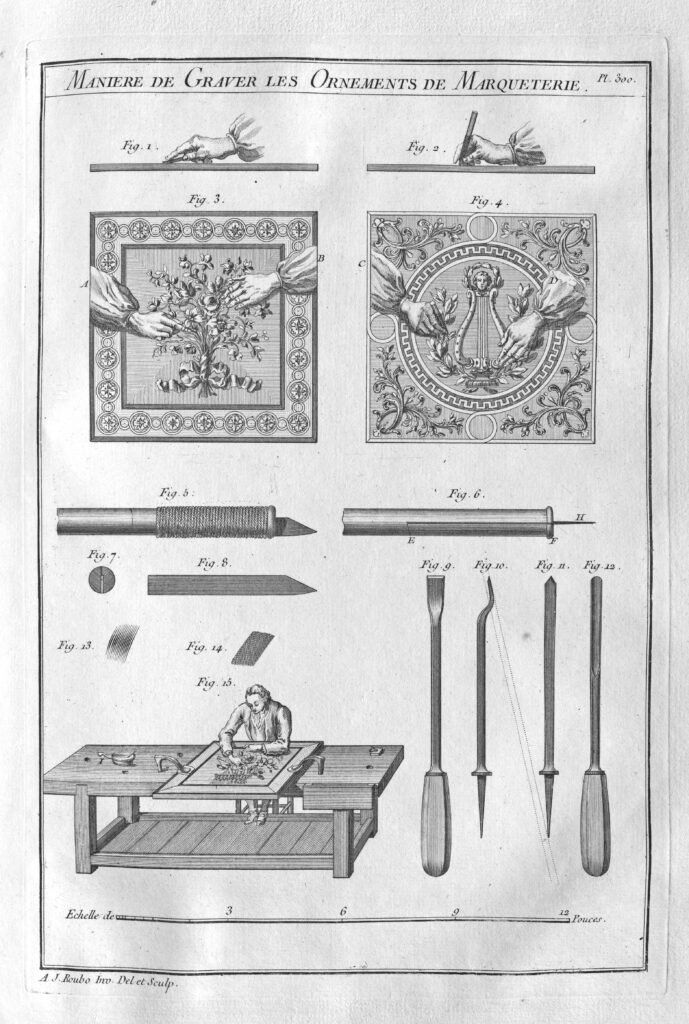
Judging from the descriptions of the nature of work before mass production ruled the earth, there were two things going on that were related, but that are easy for moderns to miss. One, artisans didn’t require as many tools because the basic skill level was higher. Descriptions of hand work support this fully. (Don’t believe me? Read Moxon’s description of making an eight-sided frame in section 19. Try to build one yourself that way – I did – then let’s chat. If that doesn’t convince you, then read André Roubo’s descriptions of Boulle work – then go back to making woven stretchy potholders.)
Also, the structure of the economy in the 17th, 18th and early 19th centuries was different – it was still basically a pre-Capitalist culture. Large portions of the population were self-employed. Modern consumerism – for better or for worse – had yet to take hold.
To be sure, there were early craftsmen with huge tool sets. There are always going to be a few tool whores in the guild. (I’m looking at you, Duncan Phyfe.) But tool inventories and other published accounts indicate that the pre-Industrial woodworker could use fewer tools to make furniture that was equal to or better than what we make today.
But here’s the other thing that’s important: Their tools were different. To the uneducated eye, the tools of the 17th and 18th centuries look crude. But have you ever examined an 18th-century moulding plane that wasn’t dogmeat? I have. They are refined to a level that exceeds many modern tools. Everything extraneous has been taken away. Everything necessary is right where you need it and is easy to manipulate.
I have a few early tools, including one particular strapped hammer for the upholstery trade, and I simply cannot imagine how any aspect of the tool could be improved. It is utter simplicity, yet it has a graphic beauty that surpasses everything I’ve seen from the Victorians.
After reading enough accounts of early tool sets, it began to sink in that I didn’t need as many tools to build the furniture on my long to-do list. But then I found out that you can’t buy a chili dog without the bun.
Once the idea of a smaller tool set took hold in my brain, the logic and beauty of its surrounding pre-Industrial economy became as beautiful as my early strapped hammer.
Tell someone you’re working on a children’s book, and you can anticipate a few common responses – expressions of delight, followed by a short list of favorite titles and hope-filled questions such as “Will there be pictures?” People generally assume that books intended for children will be simple affairs, often with some type of moral instruction on the importance of kindness, taking responsibility when things go wrong, or learning about such hard-to-face topics as pimples and poop. Odds are, you won’t get a lot of questions about research.
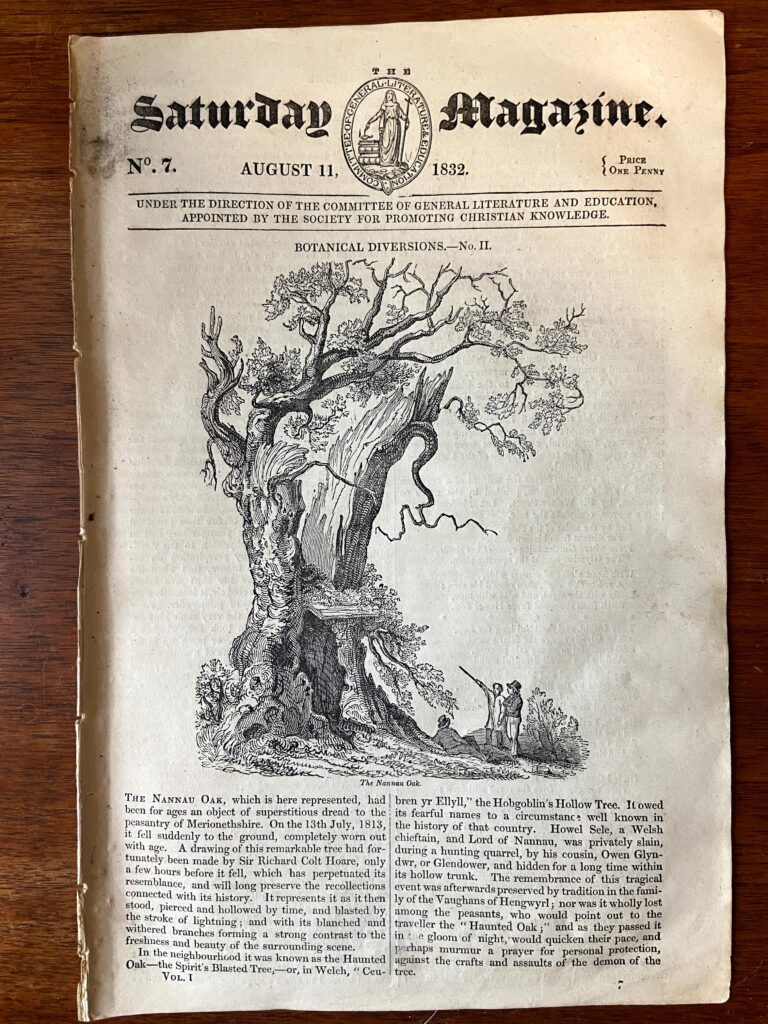
But when author and editor Kara Gebhart Uhl sent me a PDF of her forthcoming book as a personal preview, the most compelling questions I wanted to ask concerned the research that underlay the work. How had she come up with the topic, a tale centered around an ancient tree in Wales, a place that Kara herself has not (yet) even visited? How had she found an illustrator whose work may well make this book a contender for a Caldecott Medal? And is it OK to have scary stuff in a book meant for kids?
Perfect for this spooky time of year
Let’s start with the last question, which struck me as I was reading the part of the book about witch trials that took place beneath the tree:
“Witch hunters strapped suspected witches to an oak armchair and dunked it into the water,” reads the story a few pages in. “If the woman survived, she was deemed a witch and executed.”
“And if she was innocent?” asks Cadi, the story’s young protagonist.
“She drowned.”
It’s one thing to terrorize kids with images of cackling, bony-fingered witches in pointy hats (even though most of us beyond the age of, say, 5, recognize those depictions as cartoon stereotypes). Far more disturbing is the historical reality of witch trials, in which women suspected of practicing sorcery were “tried” by what we today would call torture. If they were innocent, they died, thereby proving that they lacked a witch’s superpowers; if guilty, they lived, only to be put to death. I can think of few things more disturbing than the absolute injustice of being damned whether you’re innocent or guilty. And at 62, I’m far from a child.
Knowing Kara as I do, I felt confident that she’d done the necessary research.
“As I think back to the stories I connected to as a child, there was some deepness to them,” she began in response. “I think of ‘Charlotte’s Web.’ I remember when Sophie [Kara’s 13-year-old daughter] was reading it…she was getting to the end and she started crying. And yet she loved the book, and I loved the book. But it is sad. But also not, in many ways!” Sounds like life to me – endlessly faceted, with meanings that shift according to your perspective. How is this not a valuable lesson for children?
It’s also helpful to note that Kara plans to pitch this book to “older children” – say, age 8 and above, though Kara hesitates even to state an age range, aware that the tolerance for sad or scary content varies from one child to another. She sent a list of articles and essays she’d consulted on the advisability of telling kids sad and scary stories:
She’d done the research. As Cadi’s grandmother says, echoing one of DiCamillo’s points, “There will always be sad stories. Scary stories. Heavy stories you wish had never happened. Sometimes the only way to lighten the load is to share them.”
Kara also sent more than a page of information about other aspects of the book, with illustrative references. Some of this material makes for an intriguing read in its own right. Take this excerpt, for example, which is full of references to idiosyncratic features of Welsh culture:
“Detailed images and descriptions of the plasterwork scene(and the restaurant) can be found in this Standing Building Report commissioned by the Snowdonia National Park Authority here and also in an article here. Legend states that frieze depicts the Nannau oak and even features actual branches, but this is almost certainly not true. It is likely the armorial was constructed as late as the 19th century, perhaps when it was used by the Dolgellau Cricket and Reading Club, and the tree was constructed as part of the 1758 restoration of the hall, as the subject’s clothing matches that time period. Y Sospan is still an operating restaurant located in Dolgellau – pictures can be found on their Facebook page here. Breaded chicken goujons [are] on the children’s menu.
“A gaol is a jail. According to the Standing Building Report this building was first built in 1606 as Shire Hall with House of Corrections (gaol) below. Images of a ducking (sometimes called cucking) stool.”
Why the Nannau Oak?
Kara was thrilled to find a copy of this original magazine from 1832.
For years, Kara had wanted to write a children’s book. Like many of us, she started writing long before she got a contract, coming up with ideas, and then developing them as she could make time around the edges of her regular work. Most readers will know her as a managing editor at Lost Art Press, but she freelance writes and edits for other clients, including magazines, universities, ad agencies and companies. A wife and mother of three kids – her twin sons, Owen and James, are 11 – she shares the diverse demands of family with her husband, Andy, and has little time for personal creative endeavors. As she points out, “It’s hard to find the time for something you’re not getting paid for unless it ends up happening.” You have to go out on a limb, balancing your passion and determination to see a project through against the energy required to honor the responsibilities and opportunities of everyday life. Even with a contract, there’s no guarantee that your project will become anything more than a bunch of words in an electronic file, perhaps to be printed out and read to your own family someday. (In fact, many – perhaps most – publishing contracts state that the contract does not guarantee the piece of writing will be published, though most of the time that is what happens.)
But Kara kept writing. At one point she had a literary agent. These days you pretty much have to have an agent to break into the world of big-time publishing, and just finding an experienced agent willing to represent you can be its own challenge. Kara’s agent got the manuscript for one of her books all the way to the acquisitions department with HarperCollins, but the finance department said no.
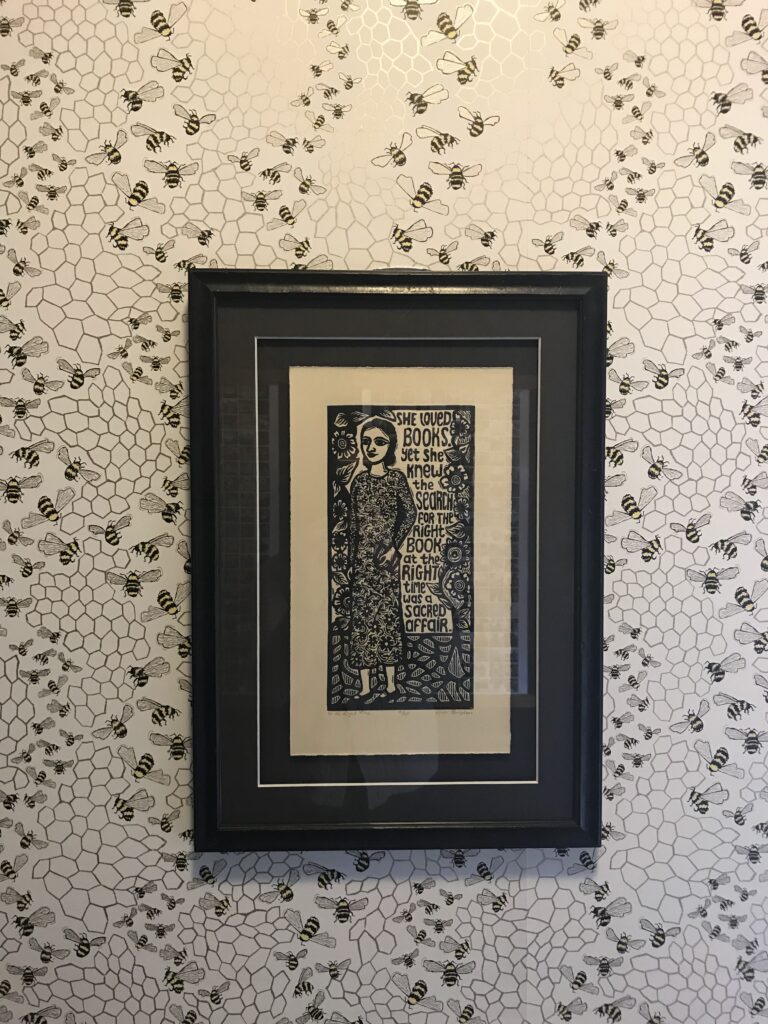
“You get rejections,” she acknowledges. And how. “Agents and others are so overworked. Rejections come at all times.” She recalls one particular occasion, when Sophie was having a piano lesson. In came the email. Kara ran to the bathroom, where she stuck her face in a towel and cried. Then she went downstairs and “carried on mothering.”
Kara’s parents gave her this linocut print by Nicola Barsaleau after her rejection by HarperCollins.It reads “She loved books, yet she knew the search for the right book at the right time was a sacred affair.”
The idea for “The Curse of the Nannau Oak” grew out of Kara’s work on “Honest Labour,” a collection of essays by Charles Hayward published in TheWoodworker magazine, which Hayward edited from 1936 to 1966. She looked through every page of every issue, collecting the “enticing tidbits” that Hayward scattered around the pages – fun information related to woodworking, such as “The Diary” that took her into deep, fanciful rabbit holes. “In one of them he talked about the Nannau Oak, the story of it being haunted,” she said. “I immediately thought, that could make a really cool children’s book.” She made a note and started doing research whenever she could make the time. After six months she mustered the nerve to pitch the idea to Christopher Schwarz by email. She was relieved when he responded, “Hell yes this is cool.”
They set up a meeting, several weeks later. By the end of the discussion they agreed that the germ of the tale would require elaboration. She dug back in with research and writing for another five months.
Once she had a rough draft, she got a contract.
She says she “broke about every single rule” when it comes to writing a picture book for children. As the former managing editor for Writer’s Digest magazine (and currently a contributing editor), she’s familiar with publishers’ expectations. The book publishing industry generally prefers picture books for children to be no longer than 1,000 words, with around 500 words being preferred, which translates roughly to one full page of single-spaced text on a standard sheet of 8-1/2” x 11” paper. (By comparison, a manuscript for a nonfiction work aimed at adults is typically a minimum of 60,000 words.) At the end of her rough draft, she was at 2,000 words. Another publisher would likely have turned it down, or told her to take a buzz saw to it. Not Chris Schwarz. Instead, he told her, “Don’t be afraid to flesh this out,” based on readers’ responses to “Grandpa’s Workshop.” “He doesn’t care what the traditional publishing world thinks,” Kara says. Instead, he told her, “We should make this what it needs to be.” By the time Kara’s manuscript was finished, it came in at around 4,000 words.
The unusual subject brought with it other challenges. Children’s books are usually written to be read aloud, typically by a parent to a child. But so many of the words in “The Curse of the Nannau Oak” are Welsh, which Kara doesn’t speak. There would have to be a glossary. (Those working on the book are hoping to add a guide to pronunciation.)
As she got deeper into the writing and received feedback from others – she specifically cites the value of constructive criticism from researcher Suzanne Ellison – the story became more complex and layered. Storytelling itself, which is integral to Welsh culture, became part of the story. Her original draft hadn’t even mentioned “The Mabinogion,” a classic of Welsh literature that popularized mythical tales such as those about King Arthur and Merlin. “I think it was while in the process of fleshing the story out, I decided to dive deeper into one of the central themes of the book which is the concept of ‘story,’ given that storytelling is so important to Welsh culture. And over and again I kept going back to ‘The Mabinogion’ in my research, or it would pop up on its own. While complex in nature, I felt like it was an important piece to include.”
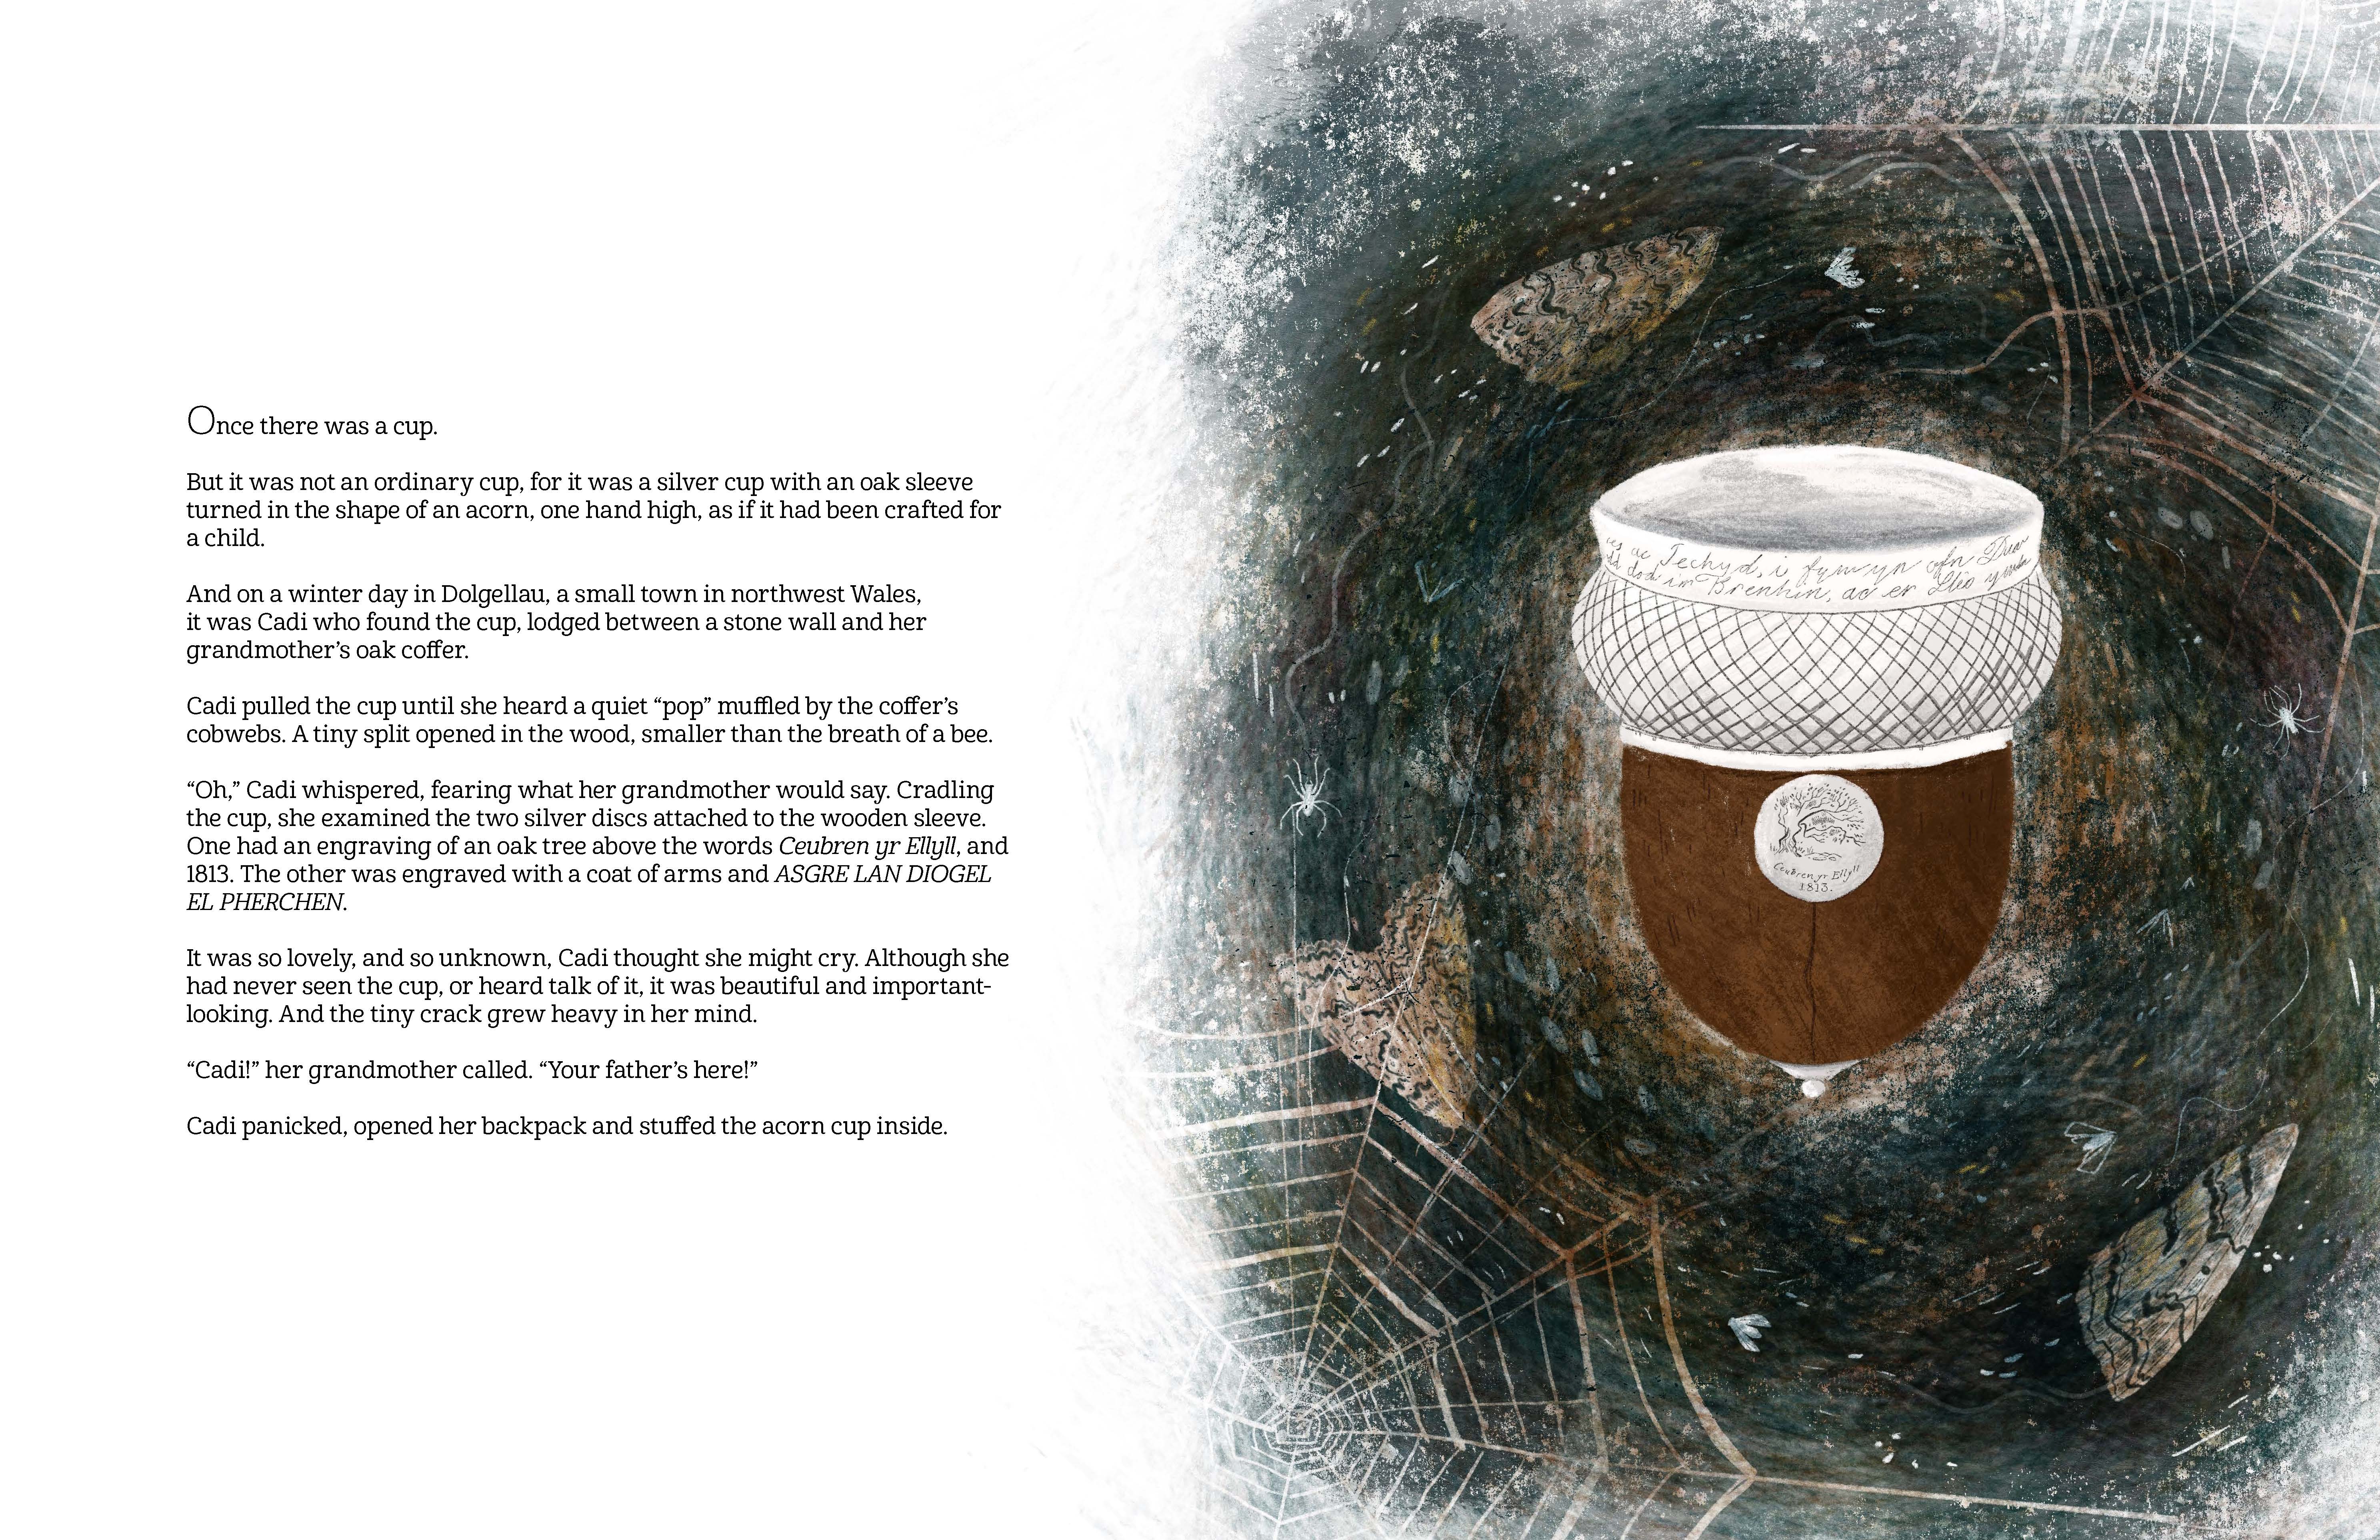
The illustrations
It’s common knowledge that children’s books are among the most gorgeously illustrated literary genres, and this book is no exception. The illustrations by Elin Manon Cooper are fluid and lush, with layered detail. Nothing here is dumbed down for kids. Rather, the illustrations pull you in, inviting you to explore. Not only is this dimension of the book appropriate for adult readers whose children are long gone from home (or who never had them in the first place); it also expresses a respect for children’s potential to sense vastly more complexity and nuance than adults sometimes give them credit for, in addition to elevating the standard of what we think of as “child-appropriate artwork.”
Finding an illustrator proved more difficult than Kara anticipated. “It was important to me that my partner in this be Welsh,” she says. Even though Wales is a small country, she spent a lot of time searching online for an artist who would be a good fit. Instagram proved helpful; she searched hashtags such as #welshart, #welshillustrator and #welshfolkart. Adding to the challenge, she found that hashtag searches in Welsh turned up many more hits, so she tried a few of those as well. She contacted a few artists, among them Elin Manon Cooper. “Elin seemed so perfect for the book, with her fondness for trees and folktales,” Kara explains. “She even worked at St Fagans,” Wales’s National Museum of History. And she speaks Welsh. Things looked promising until Google published Elin’s Google Doodle commemorating St. David’s Day on March 1, 2021, prompting Kara to worry that Elin would be beyond the reach of a publisher such as Lost Art Press. Google Doodles don’t just happen; the internet search engine giant commissions them well in advance, and they’re seen by millions across the globe who use Google to search for anything on a given day, from paper clips to insulin syringes, translation tools from English to Latvian or what to do if you find a deer in your car. (For real.) “Oh my goodness, she’s going to be too popular!” Kara thought. “She’ll never say yes!” They talked about schedules, which initially posed a challenge. So Kara was extra-thrilled when Elin signed a contract in May to illustrate the book. “She’s worked so quickly,” Kara adds. “She thought she could finish the illustrations by the end of October and she’s well on her way.”
In the meantime, Elin has sent her illustrations-in-progress to Chris, who is designing the book. He takes each set and flows the text onto the pages, hugging the illustrations’ contours, then sends Elin and Kara an updated PDF.
The sophistication of Elin’s work is all the more striking considering that she’s just 23. (Then again, she is Welsh, and the Welsh are known to have special powers.)
Although this is Kara’s first book, it’s worth mentioning that “A Lesson I Hold Dear,” “This I Believe,” was published in the book by the same name. Kara graduated with a B.S. in magazine journalism from the Ohio University. After starting out in environmental pre-law and taking a variety of courses, she found she loved to write. She eventually switched majors to magazine journalism. She wrote a personal essay column for the college paper and has been writing ever since.
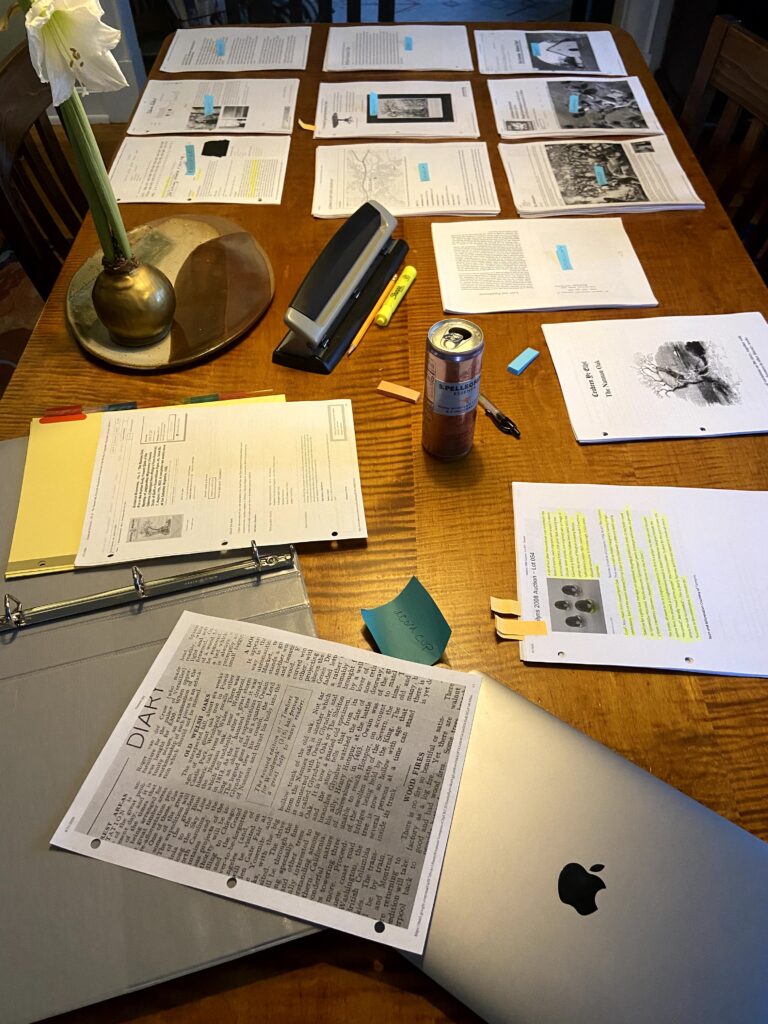
Kara’s dining room table, January 16 2021. Research materials for “The Curse of the Nannau Oak.”(By the way, nice figure!)
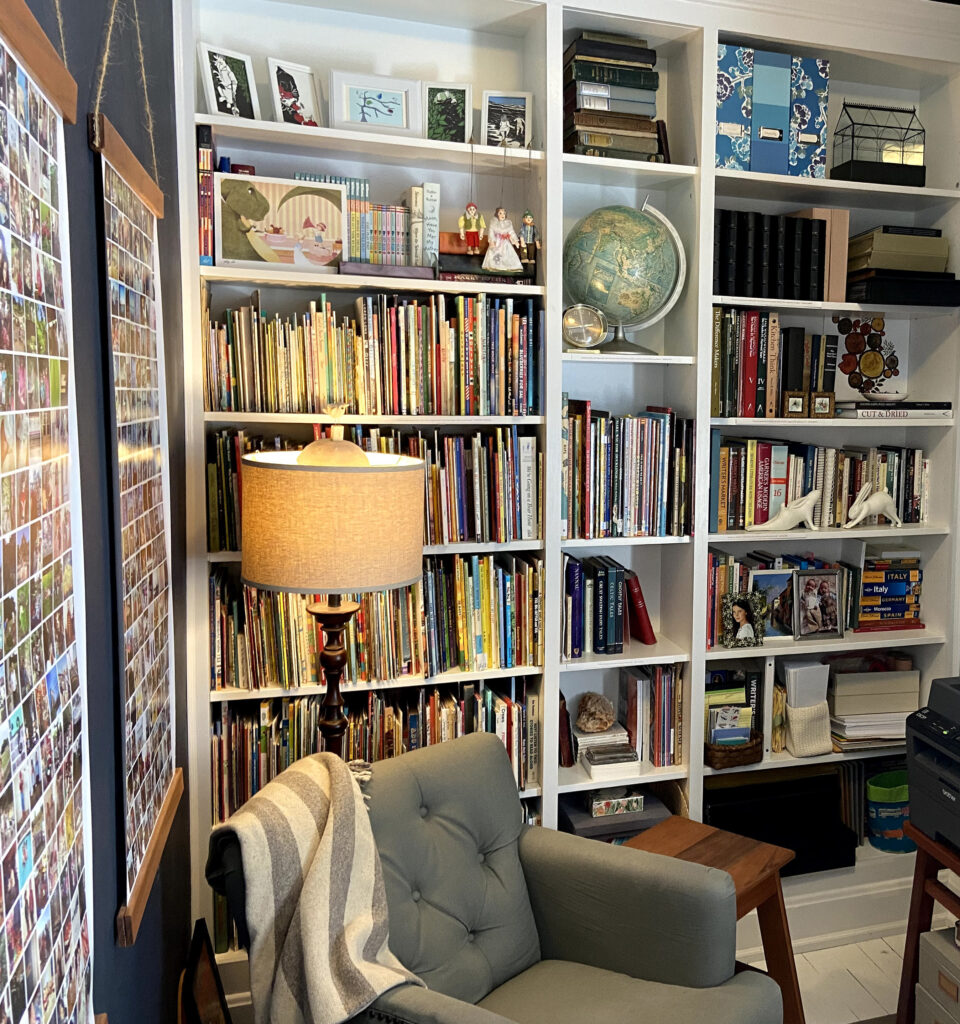
The shelves in Kara’s home office hold lots of illustrated books, along with books published by Lost Art Press. To this day, she says, she’ll come into the room after being away for a while “and there will be picture books scattered around. I don’t yell at [the kids] for not putting them away, because I’m intrigued by the ones they chose. It gives me insight into what’s going on in their world.”
A place to get lost for days. When Kara says she has a lot of illustrated books for children, she means it.
It’s easy to imagine young readers returning time and again to “The Curse of the Nannau Oak” for reassurance that trees, which provide us and our fellow creatures with so much – from oxygen and shade to edible nuts and fruits, not to mention the primary material for woodworking – can live a very long time. During its long life, a tree may witness tragic events and terrible acts; sometimes the tree itself may even be used in those acts’ commission. But the same world that visits pain and injustice on so many holds hope for something kinder, better and more lovely, a truth that young Cadi shares through her own story, which forms the book’s conclusion.