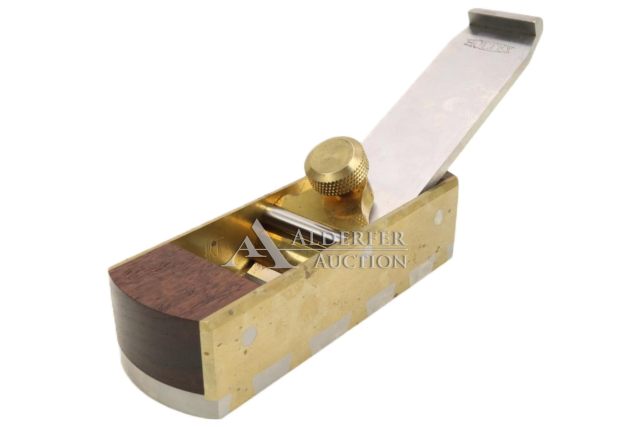
A Wayne Anderson miter plane commissioned by Fred West. Blackwood, damascus steel finish, marked and dated 2011, 11″ sole.
Fred West was a modern-day Medici when it came to hand tools – a true patron of the fine arts, and a driving force behind the hand-tool renaissance of the last two decades. If you were into hand tools before 2014 and attended any woodworking shows, you likely knew Fred – or at least heard him exclaiming over the inherent beauty of a fine tool, or talking about tools with his legion of friends. And if you were a maker of fine hand tools, well, you likely had Fred to thank for helping to keep you in business.
Fred loved using good tools – but he also loved supporting their makers and other users. He’d often buy multiples of new tools (and sometimes commission custom designs), then send them anonymously to woodworkers – mostly to those who couldn’t otherwise afford them – who he thought would appreciate working with them. His only request was that the tools be used.
William Marples Ultimatum Framed Brace, ebony wood and brass, marked, Sheffield, England.
I have two things that remind me of Fred every time I pick them up: a Vesper Tools sliding bevel (which he insisted I accept despite my vehement protestations – I’m terrible at accepting kindnesses), and the Deborah Harkness book “Shadow of Night” – he sent me his copy as soon as he’d finished reading it. (I might have liked talking popular fiction with Fred even more than discussing tools!)
Fred was one of the most gregarious and relentlessly positive people I’ve ever had the good fortune to know. Even when struggling with multiple health problems, he’d travel to hand tool conferences and events to talk tools and support toolmakers, and to hang out with his many friends. I feel lucky to have counted myself among them.
Japanese chisel/nomi 15 piece set, wood handles, marked and labeled, some wear, original box.
But what I didn’t quite realize was the sheer number of tools (both old and new) that Fred acquired in his all-too-short lifetime as a tool user and collector. A few weeks ago, I spoke with Susan, Fred’s former wife and mother of his daughter Eleanor, who has helped to organize an auction of Fred’s large collection. The family, she said, has realized it is time to let some things go, and to honor Fred’s work of getting tools into the hands of those who will use them. I got a preview of the auction catalog as it was in progress, and while I knew Fred bought a lot of tools, well…it turns out I had no idea quite how vast and diverse his collection was. I’m pretty sure there’s something in the collection for just about everyone – as Fred would have wished.
You can see the catalog for Day 1, November 8, here, and place bids online until the morning of November 8. From Alderfer Auction: “Auction is open for pre-bidding until Tuesday, November 8th at 10:00 AM, at which time pre-bidding will cease and the auction will go live online only at the auction center. When the auction goes live, lots will be sold one at a time, in numerical order, by a live auctioneer who will be taking bids from multiple online bidding platforms, absentee and phone bids. During pre-bidding you are able to submit a max (maximum) bid. The bidding platform or our auction staff will bid on your behalf up to the maximum bid that you have entered. Once the auction goes live if you wish to increase your bid you will have to wait until that lot opens for bidding and enter any additional bids manually.”
For more on how the auction works, and to register to bid, visit the Alderfer Auction site.
The catalog for Day 2 will be posted late this week or early next. We’ll announce it here, but you might also want to keep at eye on the site. I got a look at just some of what will be in the second catalog; you won’t want to miss it.
The following is excerpted from “With All the Precision Possible: Roubo on Furniture,” by André-Jacob Roubo, translated by Don Williams, Michele Pietryka-Pagán and Philippe Lafargue. In addition to the translated text and images from the original 18th-centry masterpiece, “With All the Precision Possible: Roubo on Furniture” also includes five contemporary essays on Roubo’s writing by craftsmen Christopher Schwarz, Don Williams, Michael Mascelli, Philippe Lafargue and Jonathan Thornton.
After you have determined the measurements of the work that you wish to make, you draw it on a straight and uniform board. This is what woodworkers call marking the work on the plan. In general, they call the plan all the cuts of the work both in height and width, which represent the shapes [profiles] of all the parts that make it up, or to speak more intelligibly, represent the shape of the wood, its thickness and its width. [It is essentially a layout and cutting list.]
Before beginning to draw the work on the plan, one must determine the width of the sides, the thickness of the wood, the width and the form of the contours, which you do on paper so as to master all the changes or other additions that you judge appropriate. [The implication is clearly that at least some portion of the drawing is at full scale.] This is much better than designing the shapes [profiles] on the plan, because not only are they never as good as on the paper, but because it is lost time that you use to draw the shapes [profiles] at all the places where they are found on this same plan. When the work is of a certain prominence, it is good to make a design of it on paper before laying it out, because you can better make an account of the forms and of the harmony all the parts have with each other.
When the work is particularly considerable, both for its richness as for its size, you must not be content with one design. It is necessary to draw it life-size on the walls of the room in which it will be installed so that you can judge the effect of the entire composition, including both joinery and Carving.
When the nature of the work is out of the ordinary you should make small models of it so as to neglect nothing in making it perfect.
I will not deny that all these precautions are costly, but they accelerate the execution of the work by removing all the difficulties that could be encountered. What’s more, they [the added precautions] respond with success. Whatever experience you have, it often happens that during the execution some difficulties arise that you never thought of. That is why they say to never be too enamored with your theory by avoiding your drawings and models. What’s more, what I recommend here is nothing new, since the greatest Artists of all kinds never execute anything they have not drawn and modeled previously.
The work thus designed or modeled according to the occasion, you draw on the board, which is ordinarily of pine and dressed [trimmed and whitewashed evenly] so as to be able to draw the work neatly. That is why we prefer this wood to all others for this use because when it is of a good quality it is extremely soft and [of] an even hardness throughout.
We use black or red stone, which we call sanguine [reddish drawing chalk], for drawing the work. However, it is good to begin to draw it with chalk because it erases more easily than black or red stone, which you should not use except when you have it all drawn with chalk.
You should not draw the shapes [profiles], as I said above, you must [instead] only do a chamfer/bevel [that is] the width of the moulding, but you must make one edge of the mouldings square while the other is contoured. However, as joinery can be simple, either with moulding part of the frame or moulding exceeding the thickness of the frame, it is good to draw the bulk of the shape [profile] of each type in a different manner, so the worker who makes the work cannot be deceived.
Simple profiles are designed with a single chamfer, like that of side g, Fig. 4. Those where the moulding is part of the thickness of the frame have a small framework [next to] a chamfer similar to the first one, with the exception that it is notched/squared by about a line down from the face corner, like that of side h.
For those of a large framework where the moulding exceeds the thickness of the frame, you make a chamfer in the front, and at the rear you mark their projection on the edges, noting to mark the grooves. When the frameworks have a moulding at the rear, you make a little chamfer to indicate this. Look at profile, side i, which represents a shape [profile] of a moulding projecting on one side, and level with the frame on the other. Side l represents a tongue-and-groove framework where the side enters by tongue and groove into a door frame.
In general, you must take care to draw the work precisely so that whoever makes it can do it more easily and can even trace on [top of] the plan without making other divisions.(4) [In order to design a space’s accouterments such as paneling, windows and doors en toto, one has to divide the expanse of the room into sections to lay out correctly and harmoniously the paneling including the frame work. As the portions of design are assembled into a compiled whole, the risk of compounding any error is substantial. In this passage, Roubo is sternly warning against sloppy layout. When the assembled plan is correct you can then project the same layout onto the wall and cut all your pieces. If the craftsmen doubt the accuracy of the drawing or note an error, they must restart with each portion or restart the layout to fit the wall correctly.] That is why one must trace with a sharpened point all the widths of the frames and the mouldings, which is more accurate than tracing with white stone. One must also take care to mark precisely all the grooves and rabbets, as well as tongues and grooves, the middles as well as the angles, that one must number, so that you can see in a single glance all the parts which go with the others.
The door frames are also marked in bulk, noting only to mark exactly the place of the grooves and the depth of the rabbet. Look at Fig. 5, which represents some paneling marked both in width and height.
The profiles of casements are also marked in bulk. Their little wooden pieces are marked squarely according to their width and thickness. When they are little uprights, you mark them with a cross, which passes the four angles, which indicates their cut with a diamond point. You also draw the rabbet of the frame with glass, as well as the shape of the profile of the imposts [fan lights], those of the door handle/hardware, and of the hand rail, see Fig. 6.
It is good before drawing the work, especially when you have not drawn anything, to calculate all the width of the wood so as to see right away the size of the panels or pilasters that you want to mark, so as to decrease or increase their number.
This way is the surest and easiest, not only because you make mistakes less easily, but also because it shortens the time that you are often required to spend making divisions and erasing them.
Joiners also draw the elevation of their works, especially when it is curved or ornamented with carving. These elevations are made with a sharp point without any shadow, if you omit the ornaments. But the latter are not the work of joiners. These elevations are called plans, in workmen’s terms, and are marked on large panels of pine. As it happens that there are lines which are only for construction, that is to say, to design some joints or some assemblies, you make them of another color than those of the elevation, so as to distinguish them. That is to say, that if the elevation is marked in black, the construction lines are made in red. Sometimes these lines are marked only by a point, especially when it is absolutely necessary that they be perfectly straight.
(4) While I say here that you must draw the work exactly on the plan so that you can trace on top of it, it is good that the workers take the pain to verify if the sections are made correctly when they start to trace so as to avoid following mistakes which may be on the plan, supposing there are any. What’s more, the divisions are always subject to some errors. That is why it is good to re-draw them on the work itself, in spite of the exactness of the plan [replicating the layout on the workpiece].
Almost 2,000 years ago, Hero described how large wooden screws were cut in Greece. The same saw-and-chisel technique was demonstrated by Louis E. Bergeron (pseudonym for L.G. Salivet) in this detail from his Manual du Tourneur (Paris, 1792).
The following is excerpted from “The Workshop Book,” by Scott Landis. First published in 1991, it remains the most complete book about every woodworker’s favorite place: the workshop.
“The Workshop Book” is a richly illustrated guided tour of some of the world’s most inspiring workshops — from garage to basement shops, from mobile to purpose-built shops.
The author traveled all over North America to discover the workshops featured in this book. The result is an intriguing and illuminating look at multiple successful approaches to shop layout.
Without threaded wood or metal screws, the modern woodworking vise wouldn’t exist. Richard Starr, a woodworking teacher and writer in Vermont, has long been fascinated by wooden threads. Here he examines their history and how they’re made.
The first person to make a screw probably did it by hand the way the Eskimos did. Historical photographs suggest the Eskimo’s technique: holding a piece of antler, bone or wood in one hand, they’d twist it past a knife grasped in the other. With the blade at an angle to the shaft, the knife would scribe a helical mark (a spiral) on the material, resulting usually in a left-hand thread because most people are right-handed (try it!). Then, whittling toward the incision, they produced a buttress-shaped thread that could hold a spear tip to its shaft.
That this isolated aboriginal society had threads is a glitch in the history of technology, since most researchers believe every screw on earth had direct ancestors in ancient Greece. Though helices appear in nature and in decorative arts worldwide, we know of no practical application of the shape until the first century B.C. in the land of Plato and Aristotle. The pyramid building Egyptians never thought of it; Chinese machinery did without screws until the 17th century. So if the Eskimos did come up with the idea on their own, they share the pride of invention with a rather sophisticated culture.
By the first century A.D., screws of wood and metal were common in Hellenistic technology. A press for flattening cloth has survived at Herculaneum (covered by Mount Vesuvius’s eruption in 79 A.D. ), its wooden screw in fine condition. At the surgeon’s house in neighboring Pompeii were found dilating instruments (specula) operated by metal screws, as are modern ones. A twin-screw press appears in a wall painting in that doomed city.
How were screws manufactured in antiquity? Fortunately, we had a reporter on the scene: Hero of Alexandria, who lived during the first century A.D. He created several tools of fundamental value, including a basic surveying instrument, but he is best remembered for his simple steam turbine, which was only a toy. An early engineer who wrote broadly about the mechanical technology of his time, Hero described the evolutionary improvement of screw presses used to produce olive oil. Machines identical to the ones he knew survived into the 19th century. He also explained how screws were made in both wood and metal.
Until quite recently, historically speaking, large wooden screws, up to 12 in. or more in diameter, were cut the way Hero described. After laying out a helix on the surface of the cylinder (he used a metal template) you would saw a notch along the mark to the depth of the threads. Then you’d chisel the V shape into the sawkerf. I’ve tried this; it’s easy.
Making the nut was a problem. The earliest method was to use a bare hole with one or more dowels intruding into it to engage the threads. This worked, but lacked strength. Another method was to carve the nut in two halves, then fasten the halves together. This was stronger than the dowel method, but its strength was limited by the integrity of the fastenings, which might have been glue, rivets or bindings of some sort. Besides, fitting the female thread to the male was incredibly tedious. Despite these shortcomings, the practice survives today, as shown in the photo [below].
To carve the female threads, the ancient Greeks commonly cut the nut in half. Robert Yorgey, a Pennsylvania farmer, makes screws for his vises the same way. Yorgey fits the threads by using lampblack on the crests, the way a dentist locates a raised filling with carbon paper. Photo by Richard Starr.
Finally, Hero described (and possibly invented) a mechanical tap that etched a thread in a hole, working a little like a modern machine lathe. This gadget, shown in the drawing below, remained in use for almost 2,000 years until hydraulic presses made the wooden machinery obsolete.
In Hero’s time, if you needed a small-diameter metal screw, you’d probably cut it with a file and use the dowel-in-the hole method for the nut. It was also possible to cast a nut around an accurately filed screw. The worm drive, where a male screw engages a gear rather than a nut, is said to have been developed by Archimedes in the third century B.C.
Blacksmiths had a technique where inside and outside threads were made at the same time. First the smith would forge a ribbon of iron, square in section, and fold it back on itself, then he would wrap the doubled strip around a metal rod. Sliding the rod out, he’d separate the pair of helices, then solder one to the rod, the other inside a hole. Large screws for presses or vises were made this way and jewelers could use the method on tiny work.
Threading taps for metal and wood, similar to the design common today, were described by da Vinci in the 16th century and probably were in use much earlier. Usually these amounted to notches filed on the corners of a square rod, very simple to make but capable of cutting a decent thread.
Note: Hero described this thread-cutting screw box in the first century A.D. Male screw threads are hand-cut on one end of a shaft. These run in a temporary nut, above left, formed by pointed dowels inserted in drilled holes. At the other end of the shaft, above right, an iron cutter is wedged in a slot. The cutter is propelled forward when the screw in the temporary nut is turned.
Dies, the female-threaded devices designed to cut male screws, are probably as old as the metal-cutting tap needed to make one. Screw boxes, the wood-cutting equivalents of the die, used a V-gouge cutter positioned against a nut. I imagine this tool to be very old, although I doubt they existed in antiquity or Hero would have described them. Da Vinci sketched a tool that may or may not be a screw box; if it is, it’s the earliest representation I’ve been able to find. The 18th-century screw box and tap are almost identical to those available today. Several devices are now available that use a router to cut screws in wood very neatly.
After Hero’s wood-threading tap it was probably twelve or fourteen hundred years before people resumed the search for new methods of cutting screws quickly and accurately. Most methods were adaptions of the lathe, a tool that had been in worldwide use for thousands of years. The challenge of threading and, later, of turning screw-like ornamental shapes, stretched mankind’s ingenuity and eventually evolved into the machine-tool industry upon which our modern technology is based. As woodworkers we owe a nod to the early inventors who made possible our labor-saving machinery. And when we cut a screw in wood for a child’s toy or a workbench vise we are a lot closer to our roots than we may think.
Peter Galbert (far left) along with (from left to right) Kelly Harris, Aspen Golann, Audi Culver, Lacy Carnahan and Sarah Watlington.
Peter Galbert is proof that risk-taking pays off. Author of “Chairmaker’s Notebook,” Peter is a teacher, chairmaker and experimentalist. He was also one of the first Meet the Author profiles for Lost Art Press. And with his boundary-pushing research and a second book on the way (“Chairmaker’s Notebook Vol. 2,” slated for publication in the spring 2025), Pete is still working to create a world with fewer stopping points.
Like a lot of creatives, Pete struggled to make sense of his role in a seemingly complete world.
“The world that was built up around me seemed really weirdly impenetrable, growing up,” he says. “Everything seemed so already completed. When we got to the end of the 20th century, I thought ‘What are we supposed to add to this? Somebody already figured out how to make the covers for taillights, for God’s sake. What is my place in all this, as someone who is interested in making things? How does it all work?’”
This kind of early introspection and natural curiosity led Pete to move from his home in suburban Atlanta to see what else was out there. He wasn’t very enamored with the world of high school, disillusioned by a seemingly unshakeable awkwardness.
“But who isn’t awkward in high school?” he asks. “I’m still waiting to grow out of it. I plan for next year; I’ve got high hopes,” he adds, laughing.
Peter left the South behind and adjusted to the shock of Chicago winters (and seasonal affective disorder). The transition opened up the world for him, going forward. He says it was a very productive time, and formative.
“I’ve always been pretty comfortable making stupid moves,” he says. “Giving in to impulse, in the end, serves me well.”
That impulse sent him speeding past the School of the Art Institute of Chicago and he embarked for a year on the road. He drove across the United States and started working with his hands – renovations, gallery jobs, apprenticeships. He settled at the University of Illinois Urbana-Champaign where he studied photography.
His interests in photography are tied to sparking curiosity and credibility of truth.
“In any sort of making, you’re always alluding to things,” Pete says. “You’re always referencing something, through history, narratives or associations. Bringing people along through that familiarity, you can push them into a new area, where they weren’t expecting to end up.”
Variations on the classical, or subverting an audience’s assumptions are common themes in Pete’s work. Today, he breaks down traditional forms in chairmaking, but their familiarity is retained.
A settee by Peter Galbert (front view).
When moved to New York City at age 26, it was a bloom time of activity. Pete worked with furniture makers and cabinetmakers and built sculptures for artists.
“It was a very informative period,” he says. “I saw doors close, and doors open. I thought, I’m not cut out for the art world. I saw the writing on the wall, the closer I got to it. I’m just not that person.”
From the back.
While in New York, Pete got interested in woodworking. But at the time, the hand tool green wood revolution hadn’t started yet. He was making his own handplanes, experimenting with new tools and techniques.
“I was into learning hand tool techniques,” he says. “But I was nearly laughed out of every shop I was in, almost while I was doing it. They were like, ‘You’re just never going to see that make money. We need to just cut plywood and get on with it.’ And to some degree they were right. But as time has gone on, it’s been really interesting and fun to see how much interest has bloomed on that side of it from enthusiasts and makers now.”
Then, one day, Pete noticed a “for rent” sign while walking the streets of Manhattan. Inside was a 20’ x 12’ storefront workshop, partly occupied by a guitar maker, Justin Gunn.
“He was capable of building a whole guitar on a benchtop with hand tools and I was so impressed with how organic the process was. He took wood and transformed it into something that could be appreciated for more than just its structural integrity or its surface appearance, the tonal quality was like magic. I was super jealous of what Justin made and how he made it. I wanted something like that.”
Pete paid $400 a month to share the space with Justin (who later moved to Holland with his Dutch girlfriend and became a musician). Given that Pete only had room enough to use hand tools, and his desire to build something both beautiful and functional, he set out to make a chair. This pivotal turn in his life happened, in part, because he felt adventurous and – having just finished a project – he decided to break from routine and walk down a different street that day in Manhattan.
“You know, it’s funny because I see myself as rather insular,” he says. “I’m a bit of a homebody. I do my routines. My dog and I basically operate on the same schedule. Although I tend to be pretty provincial in many ways, I’m not that risk averse when it comes to embracing possibilities. If I see something happening, I jump right on it.” In Gunn’s workshop, Pete became a chairmaker.
Finding Community & Creativity in an Old Mill
“Woodworkers are notoriously a romantic lot,” Pete says. “They pour their heart and soul into it and get pennies out. It’s a very tough, tough business.”
By 2000, the low-rent-in-Manhattan gig was up. Pete was faced with a choice: rent another workshop way out in Brooklyn and continue to struggle with the lack of materials (trees) or move to the country. Two hours north he found a farmhouse with 50 acres that he could rent for the same amount of money he would have spent on workshop space in Brooklyn.
At first, Pete lived the country life only part-time. He and his wife at the time commuted back and forth each weekend. But when his then-wife became fed up with corporate life in New York City, and they recognized the fact that they were never very happy on the return drive each Sunday, they took it as a sign and moved to upstate New York for good.
In 2010 Pete moved to central Massachusetts, lived there a couple years, divorced, and lived there for a couple more years. He then moved to Boston. Despite the city living, Pete had a small yard with a separate garage. He worked in a 20’ x 20’ workshop, located close to North Bennet Street School, where he also taught.
Georgia
In our previous profile, Pete pined for the countryside. And he got there. Pete now lives in a small cabin on a friend’s sprawling New Hampshire property. In his free time, he enjoys the routine of walks through creeks and glens with his rescue dog, Georgia. Georgia started off very shy, and socializing with students took time. Now an integral part of Pete’s ecosystem, she can help students like they helped her. “Something I think is interesting about classes and teaching adults – adults are very good at their lives,” Peter says.” Whatever they’ve done in their lives, whatever has brought them to be able to afford a class and decide to do this, they’re good at it. So when they come into a place where they don’t know anything, or can’t do things, or have to learn things day in and day out, it’s stressful. Even though it’s exhilarating and they do it because they love it, they do need to pet a puppy every once in a while.”
Students at work, with Georgia’s company.
This is a shining example of Pete’s teaching philosophy. Accommodating and leveling with students is a cornerstone of his approach. “My students and I, I feel like we’re all on the same road,” he says. “We’re just at different places on it. We’re all the same person, we’re all walking into the workshop not knowing, and trying, and hoping for the next skill, next achievement. The process is very human. And I think the art of it is trying to remember that when you’re working with folks, you need to help them exactly where they are. A friend of mine, Kelly Harris, is amazing at this. I’ve watched her teach and it’s jaw-dropping seeing how comfortable she is understanding where the person starts. She just sees it from their eyes so beautifully. That’s something I think is vital. It’s one thing to have the chops, but to be able to break it down and communicate it and transmit it is as much a skill as the skills themselves. When you see it done right, it is profound. It’s really wonderful, and sharing that is a lot of fun.”
The Mills at Salmon Falls, Rollinsford, New Hampshire.
The interior of Pete’s current shop.
Pete has workshop space in The Mills at Salmon Falls in Rollinsford, New Hampshire. The five-story mill, built in 1848, has been converted to accommodate more than 100 artists, including 30-something woodworkers.
“There was space available, and it was reasonable,” he says. “I was being very practical, but I also saw the potential for a community. Since I’ve come up here, a community has grown. A number of people have come to work with me, or peripherally their partners who are creatives. Now we’ve got a little gravity going now, people are starting to show up to be a part of it.”
Pete in front of one of his classes.
Pete’s orbit is undeniable. And the mill seems miles away from any art world exclusivity. Teaching is an important part of his work, but his approach is quite different from the years he spent traveling to share his knowledge. Today, Pete only teaches at the North Bennett Street School or at his shop. Pete is also giving classes to and hosting the next generation of woodworking teachers. A big part of these classes, he says, is career advising. One thing he likes to share with his students is the breakdown between the trade and the craft.
“This notion that you’re going to be a rock star who just makes stuff at the edge of your ability all the time. That’s just not the life it really is,” he says. “You have to think of creative ways to continue to allow yourself to stay on the edge of your interests.”
‘The Love of Learning is What Binds Us‘
Pete has surrounded himself with inspired and motivated makers. And in his design process, you can see a man on the edge of his creative ability.
A contemporary Windsor.
“You can’t see around corners, so you have to start with one interest, march to the end of it, and see where that takes you and be open to where it might go,” he says. “There are just a lot of different places you can push a chair, which is one of the reasons I still see it as a Wild West. There’s so much untrodden territory. It’s kind of like writing. Everything has been said, but you can still write a really profound book, poem, or anything. Even though it’s just 26 letters and everything has been said. Chairs offer so many frontiers, comfort, aesthetics, structures, materials. So I go at it like, ‘Wow, if I can move this forward, what can that open up in the other categories?”’
“I’m very comfortable ruining things,” Pete says. “That’s been a running theme in my life. I leave a long trail of broken crap behind me.”
Temple Chair.
Along with Charlie Ryland, who works and teaches along side him at the Mill, Pete has been working to develop technology using kiln-dried wood in place of green wood. His motive behind the technology? Accessibility.
“One of the biggest things that has compelled me recently is the lack of resources so many of my students have faced over the years,” he says. “I knew there were issues with sawn and dried woods to be dealt with, but I thought, ‘Why don’t we beat our heads against this and see if we can get it to budge?”’
He and Charlie worked tirelessly – soaking, shaving and playing with sawn and dried ash until it very closely resembled green wood.
“You can split it, shave it, carve it, bend it,” he says. “It has the strength, all the working properties of green wood.”
This technological feat is part of the focus of Pete’s upcoming book with Lost Art Press.
Pete comes from a background of collaboration and toolmaking. Now, he’s working with The Chairmaker’s Toolbox on tool design and consulting.
“This is where my tool-making interest is right now, which I’m always fascinated by,” he says. “It kind of goes back to that notion of when you’ve made a tool, the world becomes so much more malleable to you. Give me a problem that I don’t know the answer to and I am just giddy.”
Problem solving is less of a trench, and more a long walk to the ice cream store, explains Pete. In terms of experimental work, Pete is at a sweet spot. “Now I’ve done it enough to know that we’re going to get there and it’s just wonderful,” he says. “Early on I used to be insecure and I would get really dejected. But now I know where it’s headed. We’ll figure it out, me and whoever I’m working with.”
Rocking Chair.
Rocking chair detail.
Ahead of a class he will be teaching for other woodworking teachers, Pete has been thinking about his design process for chairmaking. He poses these questions as a starting point: “Am I interested in a different use of the materials, the tools, a different geometry for the body, a different aesthetic? Or just a general different process that I haven’t engaged in or want to develop?”
Pete says the flow state he often finds himself in while experimenting connects his constant quest for exploration and joy of teaching.
“When I get into that state where I have an idea or concept I am trying to realize or communicate, that is the delicious part of it,” he says. “To explain something is every bit as lovely to me as to make it.”
Pete describes what he thinks about his future in woodworking, and plans to foster a community of his own. He talks about Lance Patterson at North Bennett Street School (“that old wizard there,” Pete says) and being a useful part of an ecosystem like that. From splitting his time between the busy mill and a workshop full of students, it’s no surprise that Pete’s vision is milling with passionate makers.
“Honestly, as I’ve gotten older, I don’t always have the same energy to walk into a dark, quiet shop, turn on the lights, and make everything happen on my own,” Pete confesses.
So for now, he’s making magic alongside other woodworkers (with the help of a centuries-old renovated mill perhaps contributing).
Pete’s risk-taking has many different forms. The risk of embarrassment, of admitting fallibility, is one of them.
“When you’re in the shop, hoping nobody walks in while you fix one of your mistakes, that’s you attempting a level of control, knowing full well that what you’re doing is communicating. And you do not want to communicate that you screwed up. Or that you’re incompetent or incapable or didn’t know. Sometimes, those are very humanizing moments for the viewer. People don’t want to see you as careless, but they love to see the humanity. My students always love it when I screw up. Then they love watching me fix it.”
Ladle.
By taking risks, in myriad forms and ways, Pete now understands that his view of the world as a child was, in part, wrong: The world is not complete. It’s penetrable, and actually, quite malleable. And there is always room for growth. Case in point: Pete just started a new Instagram page for the art he makes, including sculpture, ink drawings and watercolor studies.
“The love of learning is really what binds us,” he says. “Not even the love of the object, or the love of the actual process. Just having your brain turned on is exhilarating.”
Crest detail.
With “Chairmaker’s Toolbox Vol. 2,” readers will be treated to Pete’s brain turned up to max volume, all thanks to his experimentation and exploration, not being afraid of failure, and surrounding himself with a community that, as he says, “kicks my butt, opens new doors, and inspires me. I’m lucky that way. I’m really fortunate to have those connections. I’ve got a good peer group.”
Will the patient live? Dedicating a day to improving the details on a chair always pays off in the end. A moving blanket protects the chair from further damage as you move it around.
The following is excerpted from “The Stick Chair Book,” by Christopher Schwarz. (His “make pretty” process applies to all of his projects, not just chairs.)
“The Stick Chair Book” explores the craft of “hedge carpenters” or dabblers who built chairs for the everyday home. The chairs they made weren’t designed to impress the neighbors – they were designed to be comfortable, stout and (if you have a good eye) nice to look at.
After 18 years of building vernacular stick chairs and studying historical examples in the U.K., Europe and North America, Schwarz has figured out how anyone can design and build these chairs without a lot of gear.
Here are the things you don’t need to build a stick chair: a shavehorse, drawknife, steambox, green wood, axe or even a passing knowledge of geometry.
Instead, most of the work is done with saws (a band saw speeds things up), a drill or brace, a jack plane and maybe a couple specialty tools if you want to saddle the chair’s seat. You can use any kind of wood, even stuff from the home center.
At some point during my life as a woodworker I decided to add one more step to the construction process of every piece of furniture I build. Instead of stampeding from assembly into finishing, I added one day of work that I call: Make Pretty.
On this day I do nothing but try to bring every surface of a piece up a notch. I look over every inch – slowly – to find small defects that can be remedied, or details that can be made crisper. I look at bevels and mouldings to see if I can tweak their corners so they flow more smoothly. I look for tiny bits of glue or splinters (even on secondary surfaces) that I can pare away. I check curves and overhangs to see if they can be subtly altered to be more harmonious with the rest of the piece.
Make Pretty might sound like a drag. But I find it to be the most satisfying part of making a piece of furniture. For one whole day I get to look at a thing I’ve made before it heads off to a customer. So many times, I’ve looked at photos of my pieces that are now 1,000 miles away, and I can barely remember working on them.
Make Pretty is the conjugal visit before the great separation.
I have a set of tools that I use for every session of Make Pretty. Here’s the list: • A moving blanket/furniture pad. • A freshly sharpened cabinet scraper. • A handful of flat sticks that are covered with #100-, #180- and #220-grit sandpaper (basically shop-made emery boards). The wood backing makes crisper lines than hand-held sandpaper. • A sharp 1/2″ chisel. • A cork sanding block and #220-grit abrasive. • A small UV flashlight (which highlights smears of hide glue). • Hot water and a toothbrush (for removing the smears of hide glue). • My shop’s two logo stamps.
Sanding sticks. These bits of oak are about 3/8″ x 3/4″ x 5″ and have different grits adhered to their broad faces, but not their edges. This configuration allows me to sand one surface without touching an adjacent one.
For me, Make Pretty begins with the smallest details. I put the chair on a moving blanket and look at every joint in the piece. I ask: Can I do anything to make this better? In a case piece, this might mean a little bit of glue and sanding dust to conceal a hairline gap. In a chair, it might require a sliver of a wedge to fill a void where a wedge shifted during assembly.
I look for stray splinters where tenons were driven hard into mortises. I look for tiny beads of glue that evaded my eye after assembly.
After looking at joinery, I look at individual components. I examine each stretcher to see if there are odd flats where the double-tapers meet. Is there any tear-out I can remove? Do the stretchers transition evenly into the tenons? Can they be evened up?
The same goes with the chair’s sticks. Mostly I look to see if there are small irregularities I can correct. Many times a stick’s tenon is slightly offset from the center of the stick. A little scraping on the heavy side of the stick can easily conceal this.
On legs I look for dents that occurred while moving the chair about. Can they be steamed or scraped away? On the arms and the shoe I look for tear-out, corners that aren’t crisp and bevels that don’t meet evenly.
This process continues over every single component.
Tiny bevels. On the most visible surfaces, I use my sanding sticks to make a small bevel, instead of breaking the edges with a piece of loose sandpaper. A beveled corner feels the same to the hand, but it looks tidier (to me, at least).
After that, I look at broad surfaces. Can I improve the line between the spindle deck and the saddle? Can I make the pommel crisper? Is the curve on the comb perfect, or can I eliminate small bumps or hollows with some sanding? Are the arms perfect to the touch? (Because they will be touched.)
I spend extra time looking at any end grain that shows in the piece. Because end grain is more difficult to work than face grain, it’s fairly common for the end grain to need some extra attention to remove scratches so it matches the finish level of the face grain.
Getting Ready for Finishing When I have corrected every error I can find, I turn to making the arrises of the piece ready for finishing. In most commercial work, all edges get “broken” by a quick rub with fine sandpaper. Breaking the edges makes the piece pleasant to touch – and can prevent sharp arrises from cutting flesh.
But I like to go one step further. On the most visible surfaces – the crest, the hands and the seat – I’ll sand a small bevel using my sticks that are coated with adhesive-backed sandpaper. This bevel is about 1/32″ across. And it takes time to do it right. When the bevels meet at corners they need to be the same size.
Has a customer ever noticed this and brought it to my attention? No. But I do it anyway. I love to see the consistent little bevel as it catches the light on the corner of the crest or the hands.
Even if you aren’t as crazy as I am, make sure you break all the edges of the piece before you add any finish.
Two Demerits. I made two careless errors on this chair that only I’ll notice. Perhaps the next chair will have only one small mark.
Once I complete the Make Pretty, I have to decide how I will mark the chair with my shop symbol – a pair of dividers. I have two shop marks. One large and one small. I first mark the underside of the seat with the large dividers. Then I add one mark with the small dividers for every error in the piece that nags at me. It might be one or two marks. But it is a reminder that I’m human and I acknowledge my mistakes. (And perhaps some day I’ll make a piece that doesn’t have any small marks.) I’ve never told my customers this, so keep your trap shut, OK?
Lastly, I write the month and the year below my shop mark in permanent marker. I don’t try to imitate old work, but I’d hate for some idiot to represent it to some moron as an antique.