Editor’s note: This week’s Chair Chat with Rudy and Klaus tells the tale about how an imperfect chair with a displaced leg, a split seat and some crude repairs stands out as perfect in our eyes.
Also, Chris talks about Cincinnati Chili, how it looks like barf and how yummy it tastes. If you’re faint at heart and gets easily put off by three legged-chairs or food that looks like it’s been regurgitated, then please watch this to feel better.
As always: We don’t authenticate chairs – we just talk about what we like and don’t like.
We don’t know much about this chair. Its age, if the maker cried when he discovered that he messed up the splay or he had eaten a barf-like dinner before making the crest. It’s all unknown. What we do know is that the seller says this:
Editor’s note: I have three young children. To help pass time while self-isolating we have hung several bird feeders around our yard and the kids are responsible for keeping the feeders filled. The kids like to sift through our Sibley Backyard Birding Flashcards and when they spot a bird, they prop its card on our windowsill, next to their grandpa’s binoculars. More than once I’ve thought about this 1962 column from “Honest Labour: The Charles H. Hayward Years” while watching my kids watch our backyard birds. I think about my own charmed circles and whether I’m living to full capacity or simply continuing to exist, particularly in my artists pursuits, particularly right now. Familiarity can be a great comfort, but with a small wingspan. I know myself and the importance of fledging, even when, especially when, it’s difficult. As Hayward writes, “The biggest, best resource is in ourselves.”
— Kara Gebhart Uhl
During the early summer months my garden became a battleground. For at least the past 20 years blackbirds had nested in the thorn hedge, but this year a pair of thrushes coveted the spot, and the battle was on. My sympathies, I may say, were entirely with the blackbirds who had probably been born in that hedge and were a friendly, trusting and beautiful young couple. Young Bossy, the male, was a fine, imperious fellow, his orange beak and the orange orbits of his eyes vivid flashes of colour against the glossy black of his plumage. Mabel, as we called his young bride, a sleek, lovely creature, would follow one round the border as tame as any robin. Meet her unexpectedly and she would show no fear but simply stop short with a polite “after you” inclination of the head. It always made me feel I had been waved on by a duchess.
They were building their first nest when calamity came. There were fights, skirmishes, every kind of hostile manoeuvrings as day after day Bossy fought to defend his home and territory. He became more and more battered in the process and in the end the enemy’s persistence wore him down.
But not without a final flash of his old spirit. After a particularly savage fight, he was sitting on top of the fence by the thorn hedge, a bundle of sheer exhaustion, barely able to utter an occasional croak of defiance, when the female thrush sidled up to him with an unmistakable air of “You’ve had it chum.”
The weary head turned like lightning and he gave her a vicious peck. With a shriek of rage the lady flew down into the flower border and let out a shrill stream of all the bad language she knew. Making a prodigious effort, Bossy stood up, flicked his tail with a faint return of his old, imperious manner and croaked out a few bars of song, repeating them several times in hoarse but manifest glee, before subsiding once more into his misery. But that had done him a power of good.
Nevertheless, the happy days were over. Neither side won decisively. Nests were begun and abandoned as the fortunes of war swayed. In the end the thorn hedge became deserted and the garden a kind of “no man’s land” into which neither party could enter without provoking a hostile reaction.
It seems that even creatures with wings must have their one small plot of earth, regardless of their hardier brethren who go winging their ways over the wide spaces of the world when the call comes to them. It makes up their pattern of life and they will fight to preserve it as men fight, wanting the known thing, the familiar thing, leaving the wide spaces of earth and air to those others. It is the way routine closes in on us, circumstances enmesh us, and who can say that for most men, too, it does not make a charmed circle? It can have very narrow confines, it can be deadly and deadening; only it need not. There can be wings in it, too, the wings of the mind, and men, who are creatures of conscious thought and endeavour, betray themselves if they do not learn to fledge them.
Because the issues are stupendous, they make all the difference between living to full capacity and simply continuing to exist. Living to full capacity means working where our true abilities lie and working to develop and extend them. The man of his hands works all the better for bringing his mind to it: the first-class craftsman’s work is intelligent work in which skill is enhanced and developed by the living interest he brings to it. The best work may become instinctive and intuitive through years of experience: it never becomes dull. Truly creative work never is dull. It calls to some deep thing in us, answers to some need of our nature. Brings new growth, new harmony into our lives.
Nowadays, in spite of all the resources that are becoming so readily available to the ordinary man, life can be very empty. Whatever our material resources, it is still we ourselves who have to make our lives and we can only do this by using our own creative energies. The biggest, best resource is in ourselves. When we are working with all the skill it is in us to give, we are ploughing a furrow that will enfold living seed and bring good work to fruition. We are preparing a harvest for our later years that will have in it the good things we have found by the way, the living interests that have nourished us, the challenges accepted, the defeats surmounted and turned into triumphs. And if these things lead to more good work, leisured good work full of enjoyment, they will round out and complete that maturity of personality which enables a man to stand sturdily on his own feet and lead his own life still.
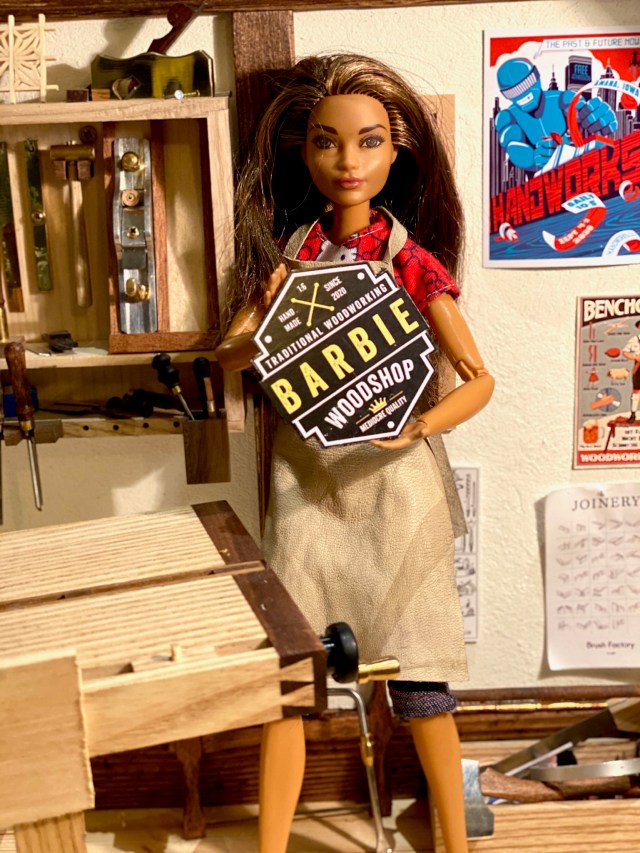
Editor’s note: I was recently intrigued to discover the Instagram feed of a young woman who is blazing an inspiring trail for others. Barbie, of Barbie Woodshop, is fearless in the face of new joinery challenges; while always ready to acknowledge the difficulty of new things, she jumps right in, understanding that the most important key to mastery is practice. She is strategic about collecting high-quality hand tools and other equipment, has a supportive partner and manages to combine genuine niceness with razor-sharp wit. I recently requested permission to publish a Q&A interview for the blog, confident that readers would be delighted and enlightened by Barbie’s thoughts on woodworking and other topics.
NH: Barbie, thank you for agreeing to this interview. Let me start by asking what got you into woodworking. How old were you? What kind of shop space did you start with? (I ask because my first shop set-up was in what should have been the dining room of the house I was renting.)
BW: Thank you for having me.
I’ve been crafting my whole life. All things you do with your hands support other types of hand working. I have small hands so I guess they excel in detailed working.
I started woodworking before I went to school. I spent my summers in my family’s summer house. I was always outdoors whittling and tinkering. I especially liked working with pine bark because it was soft and easy to work with, and I didn’t know how to sharpen my tools. Later I discovered power tools. At some point I thought a power router and a pocket screw jig were the most fantastic tools ever.
Before I moved in with Ken, I was first living with two of my friends in a shared flat. We had a shared kitchen and bathroom and we had our own small bedrooms. My room was always filled with tools and dust. I made all kinds of things using all kinds of materials – wood, MDF, aluminum, plaster, you name it. I worked on the floor because I didn’t have any kind of workbench or even a little table space. Luckily my friends were really easy-going. Sometimes in the morning they asked something like, were you sawing something at 2 am. And I was like, no… I was filing. I can’t stop when I get in the zone. I love how the momentum grabs you and doesn’t let go.
NH: How do you feel about being a role model for other girls and women?
BW: I don’t know about being a role model. I’d like for people to see me as a person woodworking, instead of a woman woodworking. Chromosomes have nothing to do with your abilities or potential in a woodshop. I believe many of my IG followers are kids or parents who show their kids what I’ve been working on. I hope to see more kids, both boys and girls, get into woodworking instead of only gaming and consuming social media. When you get into making things, you won’t ever feel bored in life.
At first I cleaned the shop before taking pictures but changed that pretty quickly as I felt it was the wrong approach. It’s the easy way out, to make things look a bit better than they actually are, on social media. A real role model wouldn’t do that. So, I stopped cleaning. It’s like an American ninja warrior track in there but with sharp objects.
NH: In one of your posts, Ken was delivering dinner to you in your workshop (or perhaps it was lunch?). You said it was because he knew better than to disturb you when you were working. He seems extraordinarily supportive! Can you tell us a bit more about how he encourages your work?
BW: It’s not like I eat all my meals in the woodshop, but from time to time Ken brings me lunch or dinner or a cup of coffee when I’m on a roll. I fed him once like a baby when he was working on his car and he was all covered in grease and filth.
What would you have thought if it was Ken who was working in the woodshop and I brought him dinner? Life should be a balance of give and take, wouldn’t you agree?
NH: How did you and Ken meet each other?
BW: Local hardware store, aisle 12, miscellaneous screws and fasteners section. We both reached for the last threaded insert. Our hands touched…
NH: Is woodworking your hobby or your profession?
BW: It’s a hobby. I wouldn’t want to do this for living. I’d starve.
I admire the makers who can support themselves woodworking, but I’m afraid only a handful of people can make a living out of handmade furniture and objects. The rest of us can enjoy it as a hobby. I’m not going to sell any of my creations, but I enjoy making gifts for friends and family. Money changing hands only creates stress.
Barbie with a few of her favorite tools and test joints
NH: You have some really nice tools, as well as a great workbench. Those things don’t come cheap. How do you prioritize spending?
BW: She who dies with the most tools wins! I love tools. The shinier the better. I’d rather spend my money on tools than traveling.
There’s no such thing as too many tools. If you feel like you need a bigger tool cabinet or a second tool chest, get one. I’ve read you don’t need all the tools in the world, but you shouldn’t believe everything you read.
My dad always says it’s better to buy one good tool instead of a thousand bad ones. It’s true, but sometimes it hurts too much to pay the price. But then it hurts every time you use a bad tool. Everybody knows that, but sometimes we forget. The first plane I bought was a new Stanley SB-4. Later on, I sold it to someone. Does that make me a bad person? The thought still haunts me at nights.
Experienced woodworkers say that you first need to learn how to sharpen your tools and the next thing you need is a good workbench. When you buy or make a good workbench it will last the rest of your life. I love my workbench. I haven’t regretted going “all in” on that purchase.
Ken criticizes me for buying new tools, but I keep telling him it’s the tool fairy that keeps bringing me new toys. He’s not buying it.
“I love tools,” Barbie says. “The shinier the better.”
NH: Fifty years ago, your forebears thought it was of the utmost importance to amass a vast wardrobe of stylish outfits – they had a special outfit for every occasion, whether playing tennis, horseback riding or going to the office. You seem to wear regular clothes in the workshop; I believe I even recall you working in a kilt one day. I think readers would find it interesting to hear your thoughts on this.
BW: It’s not like I choose to wear the clothes that I wear in the workshop. It just happens. A few weeks ago, we were having a night out and I thought I would just pop into the workshop for a quick visit before going to bed. I ended up applying some wood stain while wearing an evening dress. I don’t think I have any clothes that don’t have a little glue or paint here and there. My friends say it’s my trademark. I know I should wear an apron before I make a mess but I forget sometimes.
One of Barbie’s recent obsessions has been kumiko.
NH: Do you have a favorite style of furniture?
BW: I like anything I can make. Last year I stacked a few pallets together and called it a sofa. I was so proud of myself. I guess I’ve moved on from that now. Now I’m making my first kumiko. Maybe next year I’ll be making Louis XIV style furniture (not likely). I’m probably going to try my new dovetailing skills with a Dutch tool chest build. A greenwood chair is also high on my to-do list. What I don’t like is the look of mass-produced “perfect” furniture. That stuff lacks soul and character. And I can’t see myself ever making an epoxy river table.
Barbie swears by a sharp marking knife and blue tape.
NH: Do you find that men are intimidated by your woodworking skills?
BW: I hope not. The thing is that many people are scared of trying new things because of fear of failure. I boldly go where I have never gone before. I try to take my time with the first try. I’m using sharp, good-quality tools, and I’m being careful and patient. And I don’t use a pencil to mark critical cuts. A marking knife and the blue masking tape trick are the keys to my early success. If you approach the scribe lines patiently and don’t pass them, what can go wrong?
I always thought dovetails were impossible to make and only mythical creatures could make them. After watching a few YouTube videos, they didn’t seem so intimidating anymore. I must admit that before making the first attempt at dovetails I thought I needed to buy some sort of jig or sawing guide. Luckily my woodworking friend talked me out of that silly belief. I feel using a sawing guide is cheating on myself, but hey, that’s just me!
Barbie and her business sign, which is based on her logo
NH: On your logo, you describe the quality of your work as “mediocre,” but the joinery you show on your feed is exemplary. Do you plan to modify your logo soon, in light of your ever-increasing proficiency? It’s not that one needs to boast, but exaggerated modesty is arguably one of those traditionally feminine traits that are less than helpful to girls today.
BW: When I started to build up my woodshop, one of the first things I knew I had to make was a logo. I’ve been admiring maker logos on social media and I couldn’t resist designing a logo for my woodshop. Designing the logo was easy. I just downloaded an app and made it.
I designed the sign before I knew if I could make anything. I am happy about how my practice projects have turned out and the quality of the results have been delightful for me, too.
We can all benefit from a little humility and having a sense of humor about ourselves and the world can go a long way. I think the logo is funny and it draws attention. Just like it should.
Proper stance and not a hair out of place
NH: How has Instagram shaped your experience as a woodworker?
BW: I really like social media, but I’m not interested in seeing celebrity selfies or people showing off their imaginary wealth. I’m looking for inspiration and new skills. I’ve learned so much watching YouTube and Instagram content. If it wasn’t for the makers who share their knowledge or skills, I would never have found the joy of hand tool woodworking and I wouldn’t have any idea how to use them. I just want to chip in and share my story and show people that you can learn new skills if you just try. Doing beats mere intention, always.
I had no intention of posting anything to Instagram. My friends twisted my arm and so, I ended up setting up an Instagram account. I’m glad I started this. It has been a lot of fun. People are supportive, give me good advice and suggestions, which I’m more than happy to receive. Many people have offered to send me materials from their own stash. That’s really overwhelming. I really appreciate the positive vibe in the woodworking community. When I make something, I get a feeling of fulfillment when I behold the accomplishment. It’s even better when you can share the moment with the woodworking community.
Barbie’s homage to Megan Fitzpatrick’s sweater-girl-style cover for Popular Woodworking
This is the final tour in our series. I have one more workbench on site – the Loffelholz workbench – but it is upstairs and in use as part of a makeshift kitchen (we ripped out our kitchen on March 1 and then the project halted because of the pandemic). So someday I’ll post a tour of that bench after our kitchen is rebuilt.
The bench in this video is a personal experiment. I have worked on lightweight commercial benches such as this all over the world, including some schools. I always wondered if I could improve them to the point where I might say: Yeah, this is a good idea for a beginning woodworker.
I improved this bench with about $50 in additional materials (cheap plywood, lag screws, shelf brackets and carriage bolts). But it’s still not as good as a bench you build yourself. All told, this bench cost $270 once you add up the cost of the bench ($200), shipping ($20) and improvements ($50). For $270 I could build a lifetime bench that is heavy and functional. Here it is.
So why even show this video to you? Well, I know that some of you own these benches. You inherited them or bought them out of ignorance or in the throes of drunkenness. If you are in this situation, these are cheap improvements that will help. Also, any bench can benefit from more rigidity, and this video shows you two ways to do that.
Finally, and I say this in the video but it bears repeating: I am not picking on this particular manufacturer. There are loads of these benches on the market. And they are all about the same quality. This was the one I thought was the best of the featherweights.
I hope you’ve enjoyed the series. I apologize for the low-rent quality of the video and audio. But it was the fastest way to do 10 five-minute videos without hijacking our entire book-production process.
After looking at these videos over myself, you can rest assured I am not headed to YouTube anytime soon.
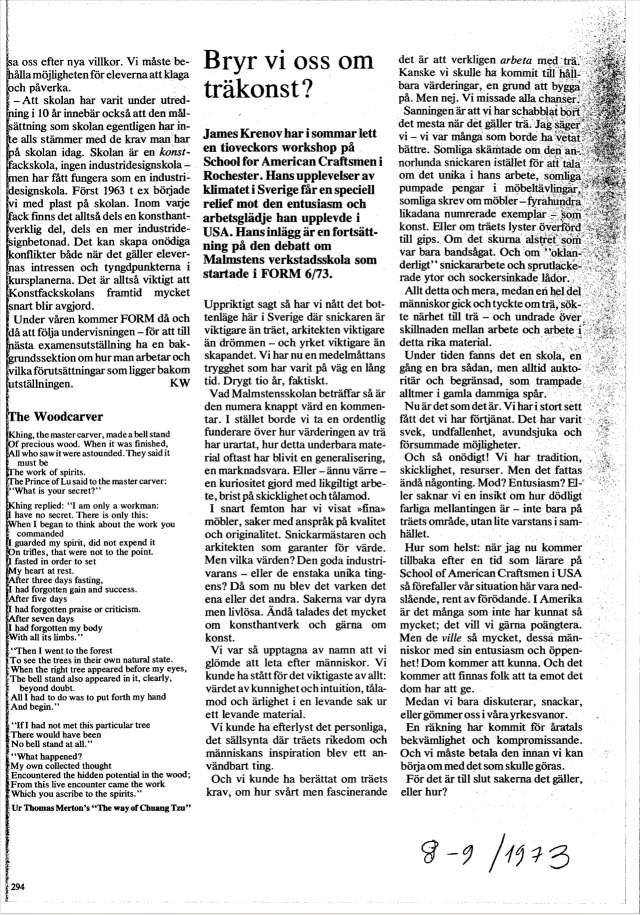
James Krenov digs through lumber in a Stockholm yard (but not the Forsberg brothers mentioned on page 8 of “Notebook”).
This post is a continuation from last week’s post, a “read-along” or book club of sorts. This week, I’ll be discussing the first section of “A Cabinetmaker’s Notebook” by James Krenov, up to page 23. Next week, we’ll be reading on from here up to page 51, and you can leave comments and questions about pages 23-51 in the comments section at the bottom of this post, which I’ll answer and incorporate into next week’s post.
Immediately upon opening, it’s clear that James Krenov’s first book, “A Cabinetmaker’s Notebook,” is not really a “how-to” in any sense. There’s no table of contents. The first writing past the acknowledgements is a poem by Chuang Tzu, a Taoist poet who wrote in the 4th and 3rd centuries B.C. The paragraphs are long and read like the spoken word. If you have the first edition, there’s an Old Testament quote on the copyright page, Sirach (or Ecclesiastes) 38:34.
Atypical though it was, this book was a huge success. Nancy Newman Green, Krenov’s editor at Van Nostrand Reinhold (with whom I had the pleasure of talking with recently), remembers that they had a saying around VNR about Krenov:
“If you hung up a sign in the middle of the woods that said ‘James Krenov will be here to speak at 3 o’clock,’ a few thousand people would be there to hear him talk.”
But I’m getting off track – suffice to say, the book was popular, and what made it popular were the words and philosophy Krenov detailed. So let’s get back to the text. The rest of all of this, the history, the lead-up, the legacy – for that, you can read my biography when it comes out.
One of the first things that strikes me about Jim’s writing is just how informal and stream-of-consciousness it is – in fact, you can practically hear Jim reading it out loud. If you haven’t heard Jim speak before, you’re missing out – say what you want about his philosophy, aesthetics or attitude, he was a remarkable lecturer, and he had a gift for elocution.
This book is, in fact, a collection of transcribed essays or lectures – in 1970, Einar and Kasja Telander (Einar is the silversmith for whom Jim built the veroola kitchen cabinet in 1976, which was photographed for “Worker in Wood”) gave him a voice recorder for his 50th birthday, and he took to it immediately, using it both for correspondence and for the dictation of his essays and books. He worked with both the tape recorder and his written notes at the workbench to write his books, bouncing between them to compose the writing.
The tapes for “A Cabinetmaker’s Notebook” were transcribed by Rochester Institute of Technology, as a favor to Jim – Craig McArt, the man responsible for recommending him as a teacher at RIT and the person who most encouraged him in the writing this first book, was by 1973 the chair of the Department of Industrial and Environmental Design at RIT. McArt had visited Jim in Stockholm back in 1966 and had carried back with him an essay written by Jim called “Wood: The Friendly Mystery,” which was published by Craft Horizons in 1967 (here’s a copy on the Craft Council’s archive website). If you’re interested, give that article a read and keep it in mind before you do next week’s reading.
So, once we know that the book was dictated, it puts the book in a different context – it might better be looked at as a series of lectures. Knowing that, let’s look more at the first passage, really just nine short pages, and pull a few important moments out.
Krenov in his workshop in Stockholm, with a few pieces on parade – in the background, you can see a few of Jim’s wall cabinets (and his tool cabinet at the back left), in the foreground is his “Writing table of Italian Walnut” made in 1977. You can see in the satin luster of the table’s surface that Jim didn’t heavily polish or build finishes on his work – he wanted to preserve the tactile impression of the wood, and even left a good many of his cabinets completely untreated.
The first half of the passage is, in effect, an ode to wood as a material. In the opening paragraph, ironically beginning with “It’s always a little difficult for me to begin talking about wood” right before he goes into a very eloquent missive about wood, he relates that he feels that wood, in his own way of thinking, really is alive. Krenov’s daughter remembers her father as being an animist of sorts, ascribing some kind of soul or inner life to the objects and plants around him – Krenov hints at the root of these beliefs in this essay, his childhood “in the North,” and in that context, the serious sensitivity and love he shows for wood as a medium only makes more sense.
The other thing that quickly becomes clear in the book is that it is not instructional – many of Jim’s visiting students, whom he hosted in his home workshop throughout the 1960s and 1970s, remember his advice as always being a bit vague, a trait that carries right through into his lectures from the 1990s and 2000s. Phrases such as “It is still possible to find a few good sources of wood” would, at time, frustrate his visiting students, but here in the book, they serve as anecdotes and a sort of fable about his life as a craftsperson, with their own morals and conclusions presented to the reader. He doesn’t give you a shopping list for the home center, but more of an idea of what has worked for him, and what could work for you, if you happen upon it or go in search of it.
There is a moment of Jim’s past that flashes across the page at one point. On page 13, Jim writes that “Expression in wood, if I may say so, is a bit heavy handed there [in the United States]; oversimplified. So often the emphasis in on form – as in sculpture.” This passage is certainly a reflection on Jim’s dissonant time in his first stint at RIT alongside Wendell Castle – they did not get along, and Jim would, for a number of years, relay his disappointment in the pursuit of furniture as sculpture and the indifference to wood as a medium he found in many of his colleague’s work. “A Cabinetmaker’s Notebook” largely stays out of the weeds of criticism, though, certainly in relation to the essay’s Jim wrote in Swedish magazines at the same time – articles with titles like “Is craftsmanship boring?” or “Do we care about wood art?” make it clear that Krenov was not always optimistic about the attitudes around him. When the language between the two different platforms is compared, it’s clear that this book is not aimed at the Swedish craft scene, or his colleagues and contemporaries (with whom he often had a strained relationship) – it’s aimed at a new generation, students or curious onlookers, and Jim often speaks using “we” rather than “I.”
Here’s a last selection to look at, before I get into a few questions and comments people posted from their own reading. I’m just going to pull a big quote, because it’s as close to a synoptic manifesto as you’ll get from Krenov.
“I think that what I would like to do before it is too late is to get this across to a few craftsmen-to-be who will work after me, and also to a public which will be there to receive them, because we are living in a time when, I believe, this is important. Fine things in wood are important, not only aesthetically, as oddities or rarities, but because we are becoming aware of the fact that much of our life is spent buying and discarding, and buying again, things that are not good. Some of us long to have at least something, somewhere, which will give us harmony and a sense of durability – I won’t say permanence, but durability– things that, through the years, become more and more beautiful, things we can leave our children. (page 15)
Krenov spent 11 years jumping between various educational institutions, and accepted at least three long-term teaching positions that he either quit within weeks of starting or was encouraged to leave after interpersonal difficulties arose with administrators or colleagues, often caused by his irascible and uncompromising attitude toward craft. This passage is his call for those students, a next generation of craftspeople that might be more sympathetic to his holistic and idealistic way of working, one that he hadn’t found academia or art schools to be sympathetic to. He also makes a form of plea to the public to change or be more aware of their attitudes to fine work (the main subject of his writing in Swedish magazines, though there he chose a decidedly less optimistic or charitable way of expressing it).
When he wrote this book, he wouldn’t have known it, but it was exactly the right step to take in the direction of the establishment of his own school, which would happen just a few years later in 1981.
On to a few comments and questions from the comments section on my post from last week, where I prompted you all to ask or comment away about this first passage. I responded to many comments directly, but there were a few I wanted to share and elaborate on in this post, in keeping with the idea that this might be more of a discussion or back-and-forth between you and me while we read through the book.
Ryan Stadt asked about the Chuang Tzu passage at the beginning of the book, translated by Thomas Merton. If you’ve got a minute, Merton is an amazing character to look into – he was a Christian mystic, and Ryan wondered if there was any deeper connection there.
In fact, I think the first time Jim encountered this quote was in Form magazine, the Swedish design magazine Jim wrote for a number of times in the 1960s and 1970s. The passage appears as interstitial material between a preceding article and Jim’s essay for Form in 1973, but it doesn’t appear to have been at Jim’s request nor is it relevant to the subject of his article. The text is shrunk and oddly formatted and, to my eye (I was a managing editor for, like, six months!), it looks like it was included to make the line and page breaks neat and without white space. But, obviously the poem is well-suited to Jim’s sensitivities – perhaps it was a moment of poetic chance, or was included at his direction? It’s a detail I can’t confirm, and so it doesn’t go in the book, but if it did occur that way then it’s a lovely moment of happenstance. Perhaps even mystical?
Larry Barrett, a good friend who taught me to make greenwood chairs a few years back, wondered what Jim might’ve thought about greenwoodworking, especially the appreciation of materials and the similar thrills of splitting open a log and sawing it open. In fact, Jim Krenov and John Alexander did meet at one point in California – the story isn’t much, but I know that Jim was aware of greenwoodworking as a method and of Alexander’s work. Krenov certainly split open his fair share of wood, being an avid hiker and self-sufficient backpacker in the north of Sweden, and he did often split up slabs that were too wide to fit in the basement or had already begun splitting at their pith. But, perhaps his interest in woods from abroad and the backyard left him more likely to stick with the sawn stuff – though, he did use an Alaskan chainsaw mill quite a bit, and we were still learning to use them at his school when I was there.
Larry also pointed out that the Welsh concept of the “square mile” that Chris Williams wrote about in his new book fits neatly with the mention of Wharton Esherick’s idea that one could work with only the wood in your own backyard. Krenov was quite aware of John Brown – in Krenov’s papers and effects there are a few articles written by John Brown that Jim had saved, with highlighted notes in the margins. There are also definite connections to Slöjd in Wood (Wille Sundqvist, Jogge’s father, also went to Carl Malmsten’s school, and Jim’s reverence for carved pulls and knife-work has some of its roots in his exposure to Swedish crafts). Really, a sensitivity to wood as a material is a common thread through much of the craft, and when you start reading the more philosophic threads of Jim’s writing, it does echo through a number of methods and traditions that were not his. It makes sense that wood and woodworking are intertwined, no matter how many people try to melt clown wigs and pour them into the space between two live-edge slabs – but, did you know, Greg Klassen, who popularized the “river” tables (and made them in a much more interesting and durable way than the epoxy knock-offs that followed, in my opinion), was a student at Krenov’s school?
I really enjoyed the comments and questions that you all sent along for this reading – so, please do it again! Next week, I’ll be writing about the next few passages, up to page 51 of the book, and if you want to join in and read along, please do, and use the comments section below to ask any questions, highlight a passage or make a comment on the next section of the book. Also, I’d encourage you to read the two-page article “Wood: the Friendly Mystery” as well – here’s a copy from the Craft Council’s archive. You’ll understand why once you do the reading!